

3 SUMMER 2023 COLOR GUIDE TABLE of CONTENTS 8.... 14.... 28.... 48.... 57.... 58.... 62.... Nature’s Palette: Unveiling the Perfect Complementary Colors Mix It Up with the People who Make our paint! Discover 8 Fun and Fresh Project Ideas Sun & Moon Tutorial Creator Highlight: Meet Faye! Outdoor Projects Unleashed: Expert Tips for Stunning Results Summer Palette Inspiration
OUR SUMMER COLOR HIGHLIGHTS:
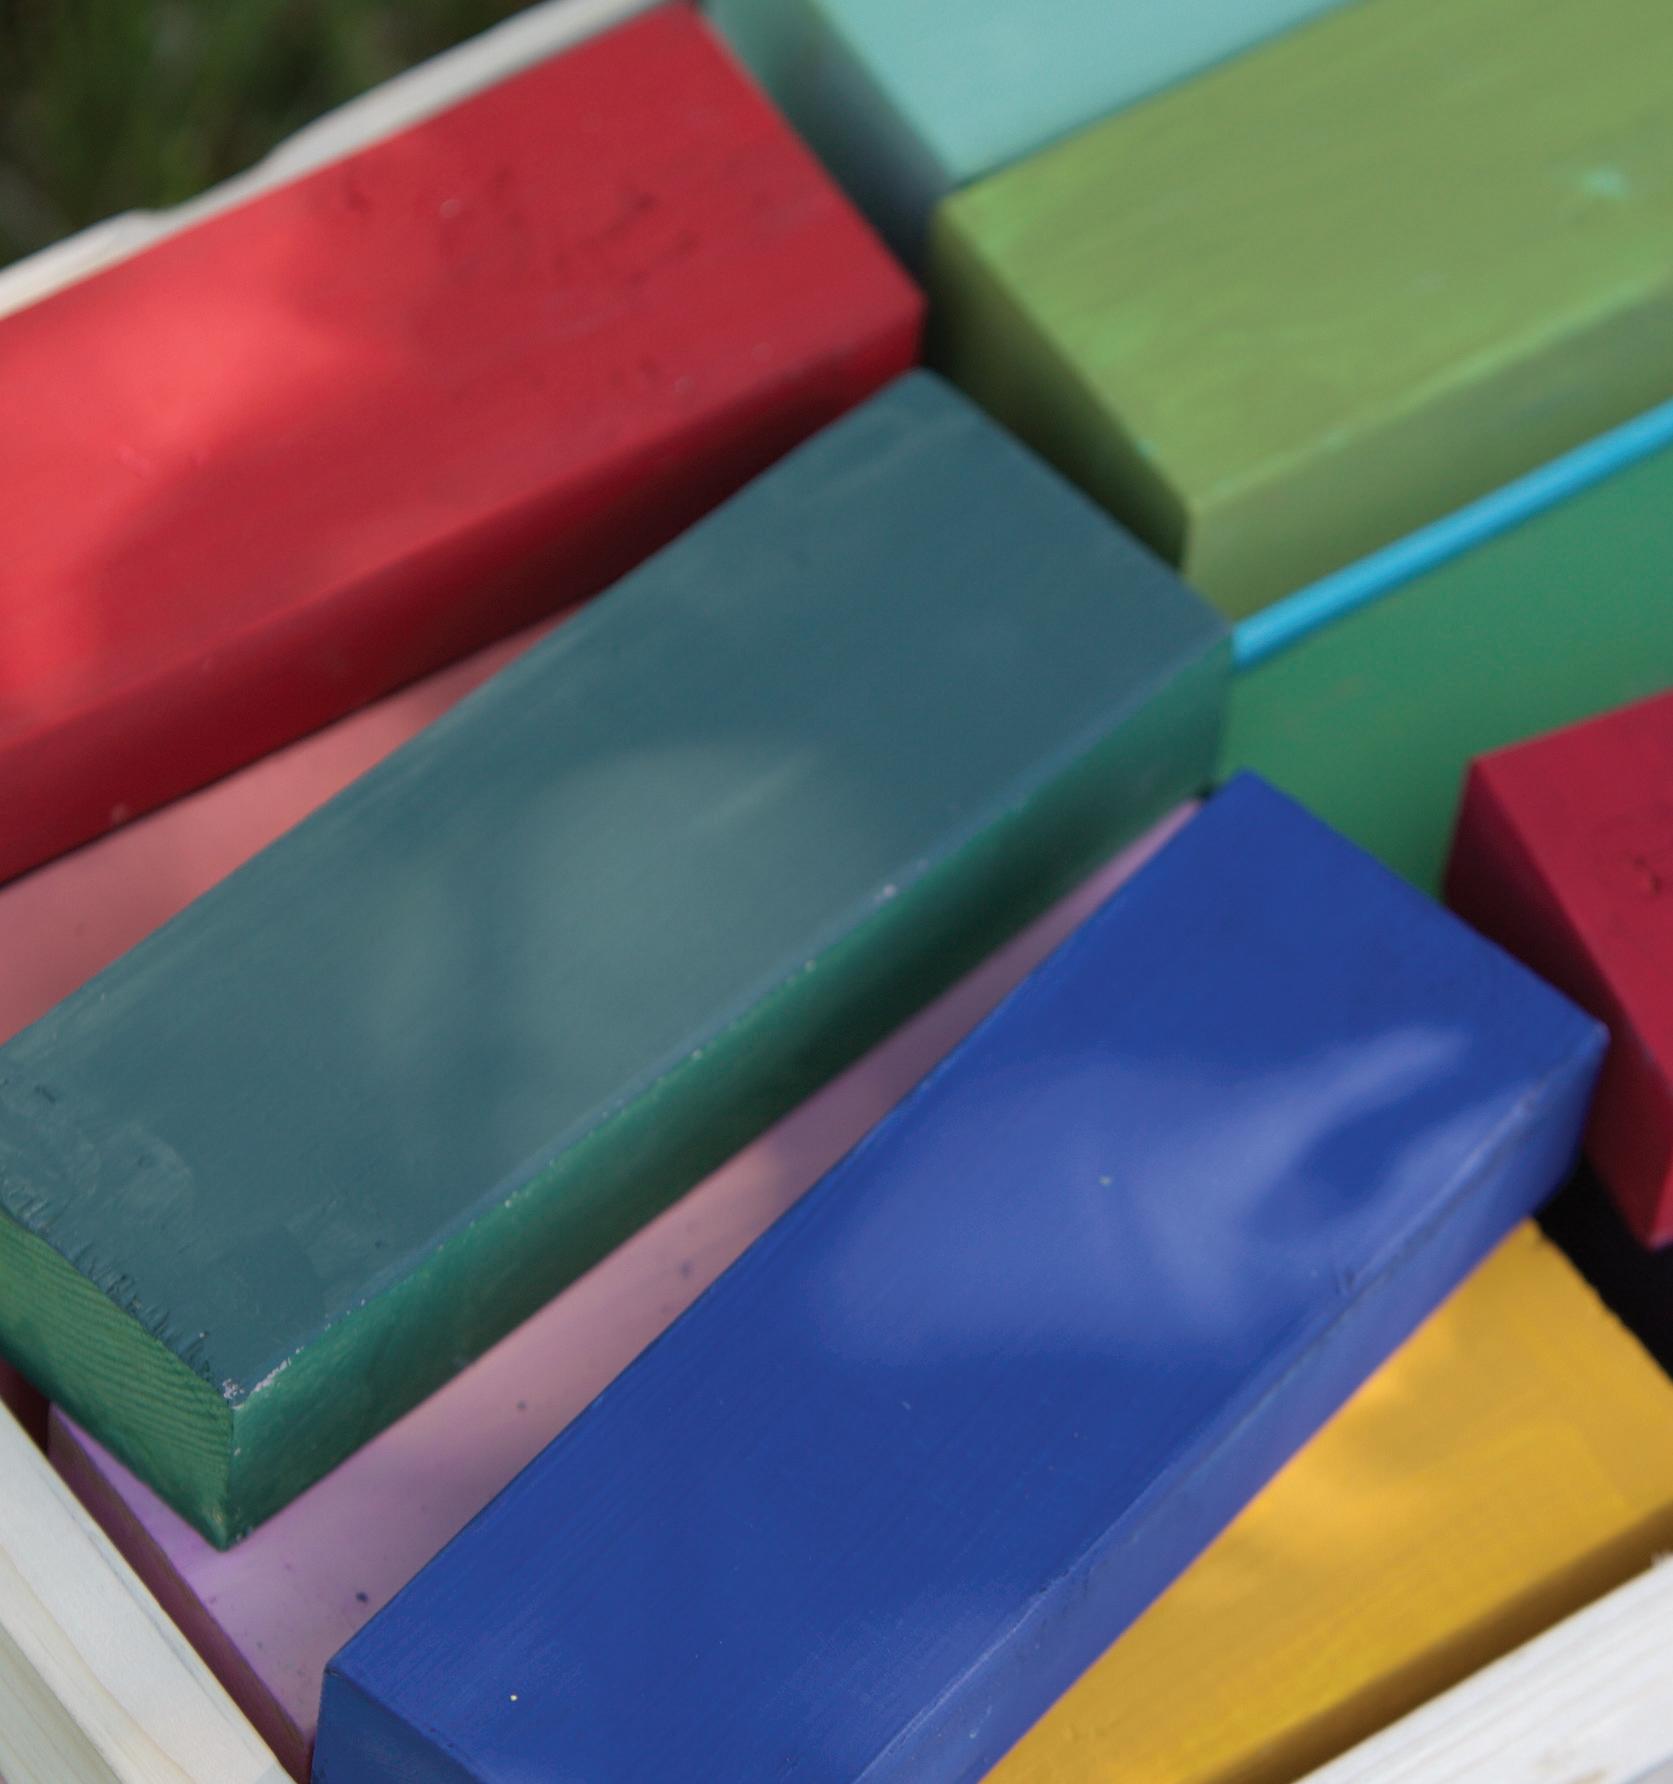
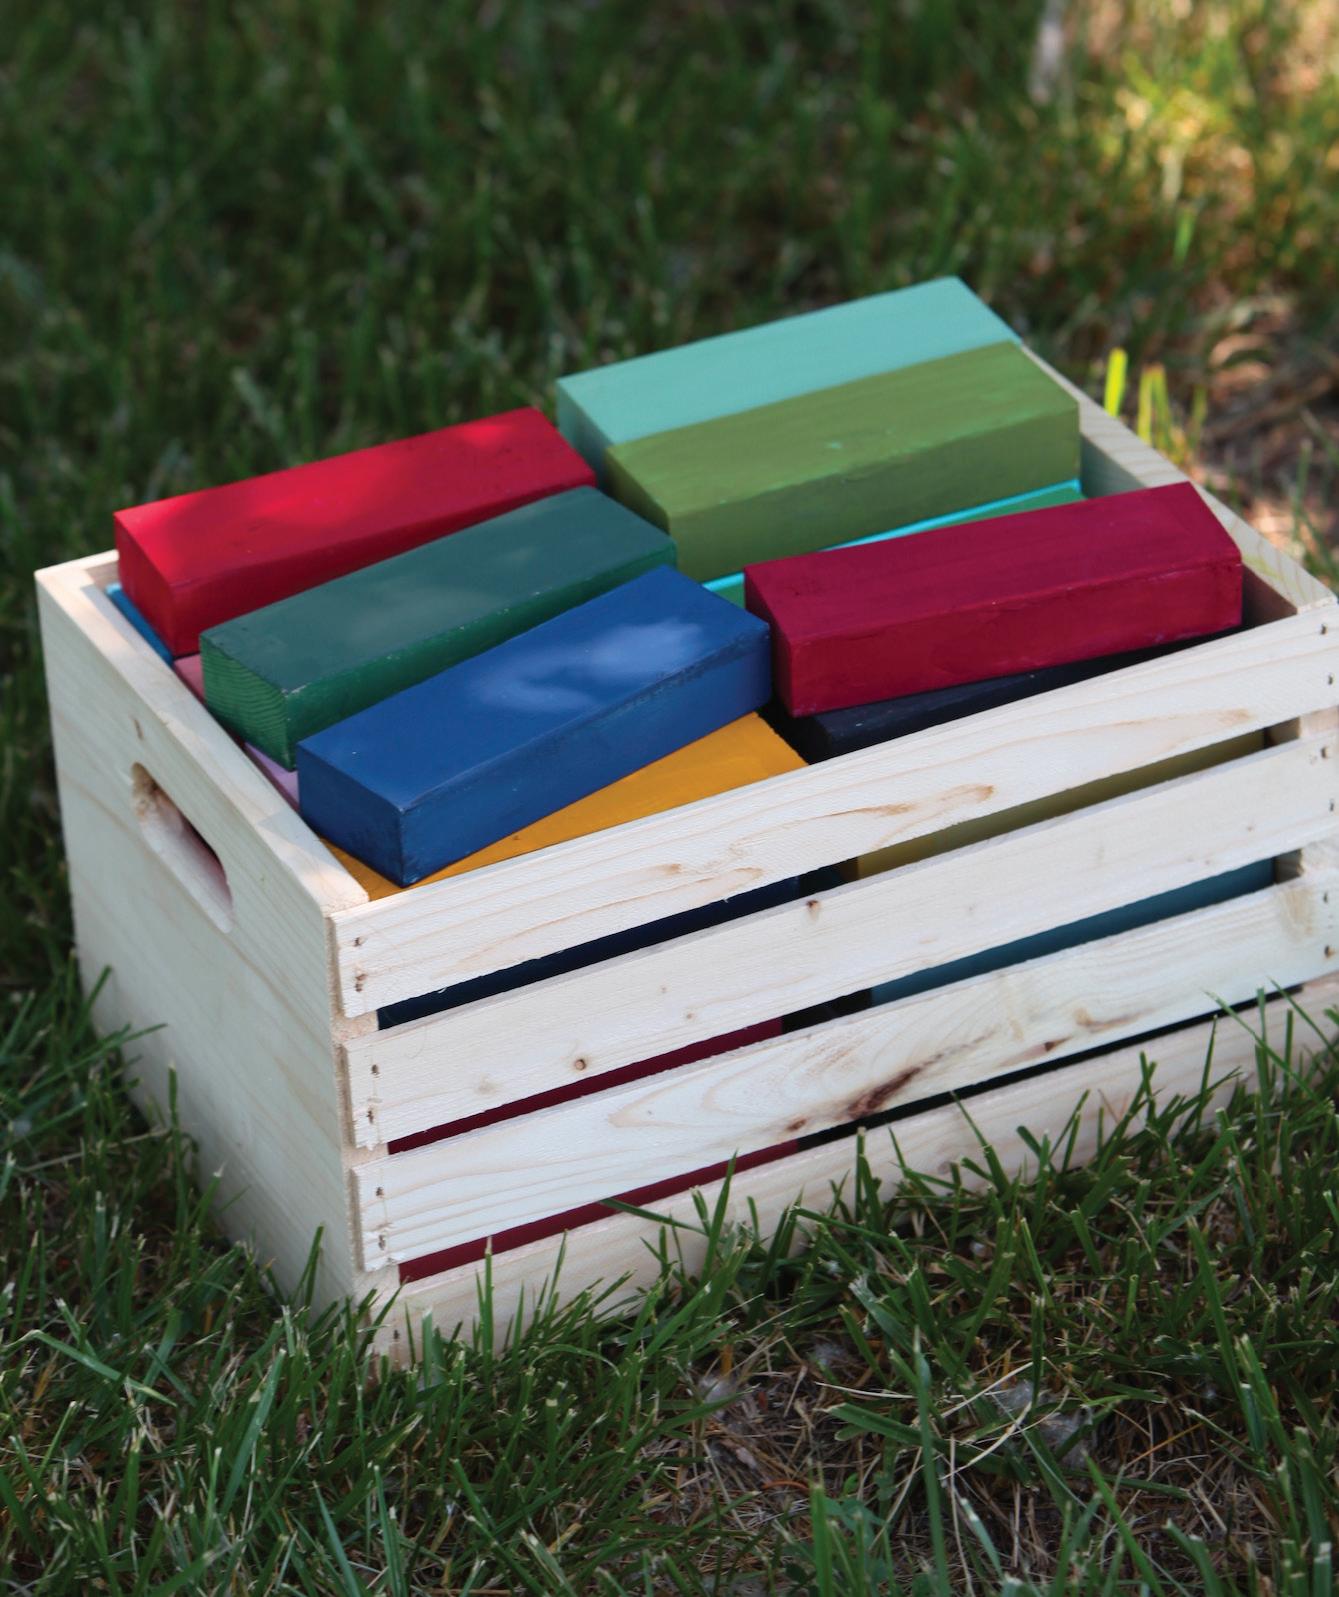
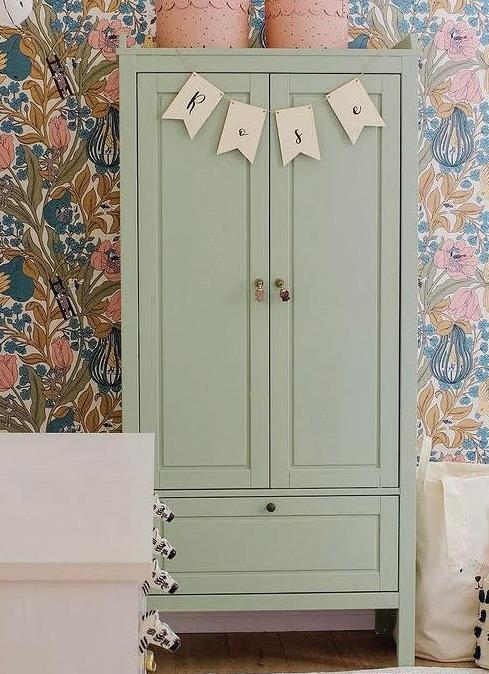
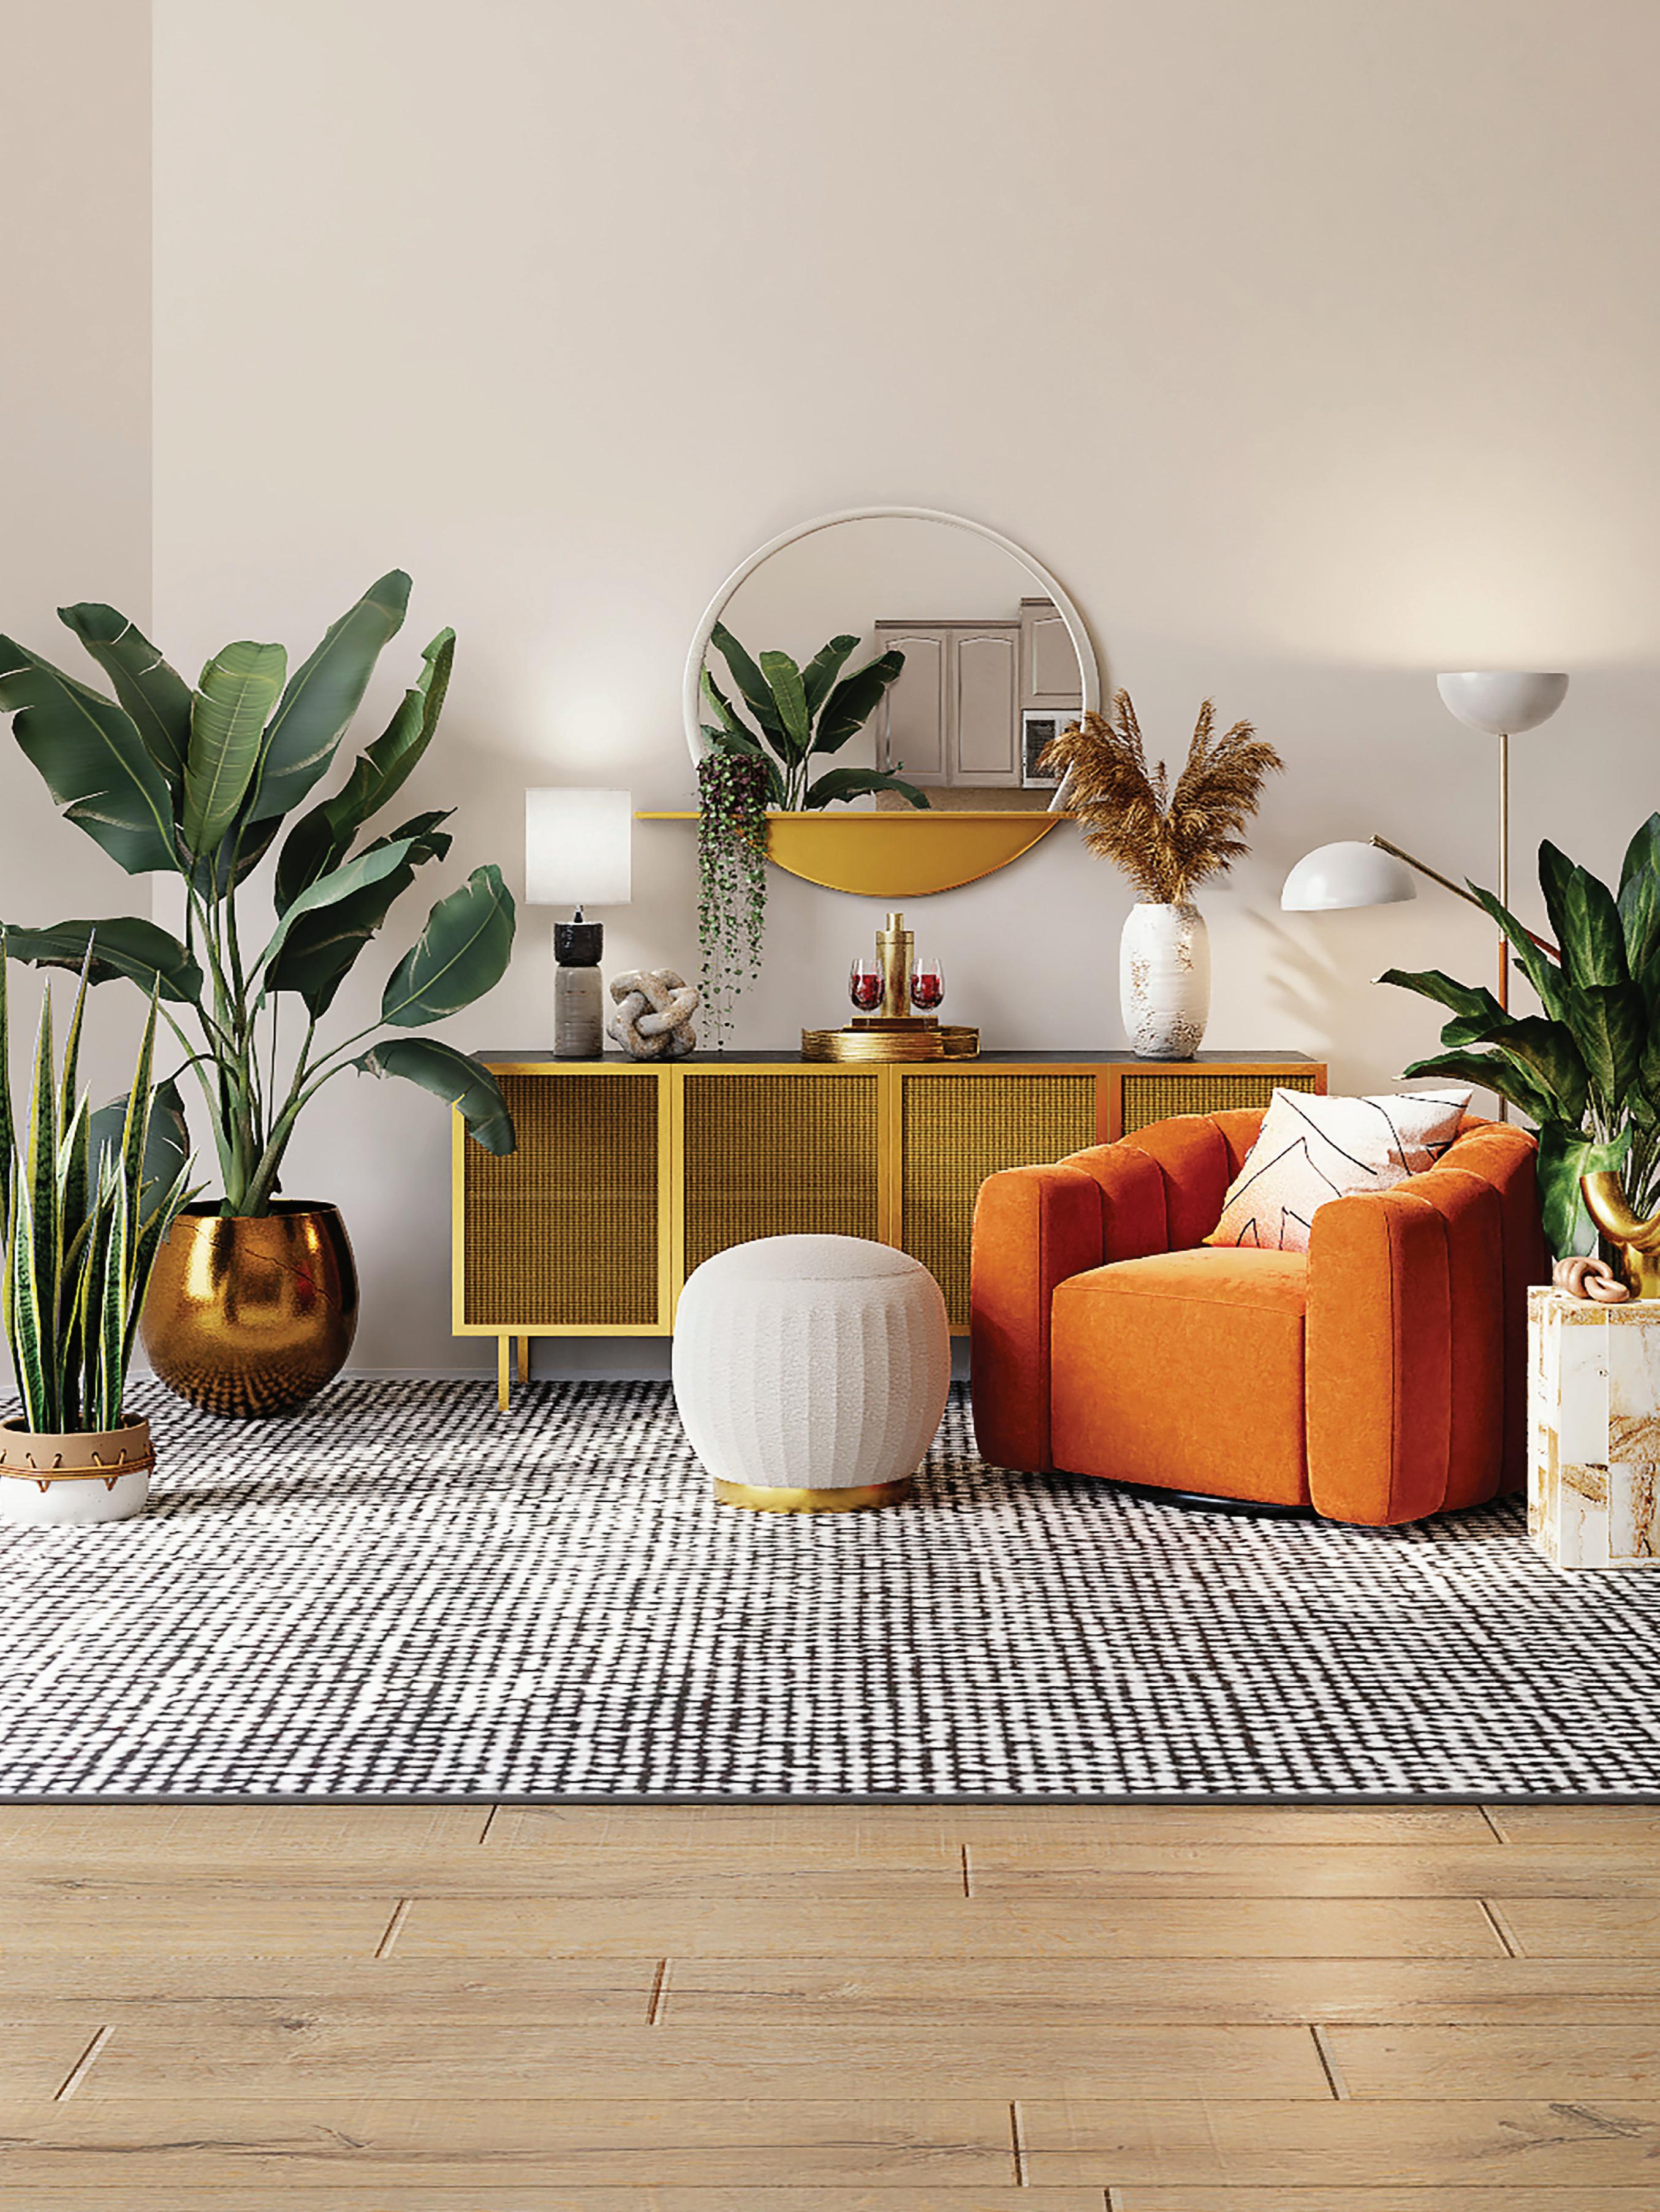
4 Bliss Darling Persimmon Poppy Raspberry Sorbet Sunset Glow Tropical Cocktail Secret Garden Lazy Linen Bling Bling Sage Advice Fresh Mustard
Embrace the Vibrant Hues of Summer: The Ultimate Summer Color Guide
As the sun-drenched days of summer approach, it’s the perfect time to unleash your creative spirit and embark on some exciting do-it-yourself projects! Whether you’re an avid crafter or a novice looking to explore your creative side, this guide is your gateway to a world of endless possibilities. From choosing the perfect plant-enhancing colors to creating DIY projects, we have so many ideas that we can’t wait to share with you!
Our creator feature focuses on the talented Faye Fossey from Farm Life Best Life. We think you’ll be inspired by her creative touch on furniture refinishing!
You will also get to meet our awesome warehouse crew as they showcase some fun new colors they have created using Country Chic Paint - we’ve shared their recipes with you, so you can follow their examples or create your own!

Keep an eye on our instagram as we will also be posting some behind-the-scenes videos and photos from this guide. We had so much fun and we hope that you will too!
#countrychicpaintsummerguide
5 SUMMER 2023 COLOR GUIDE
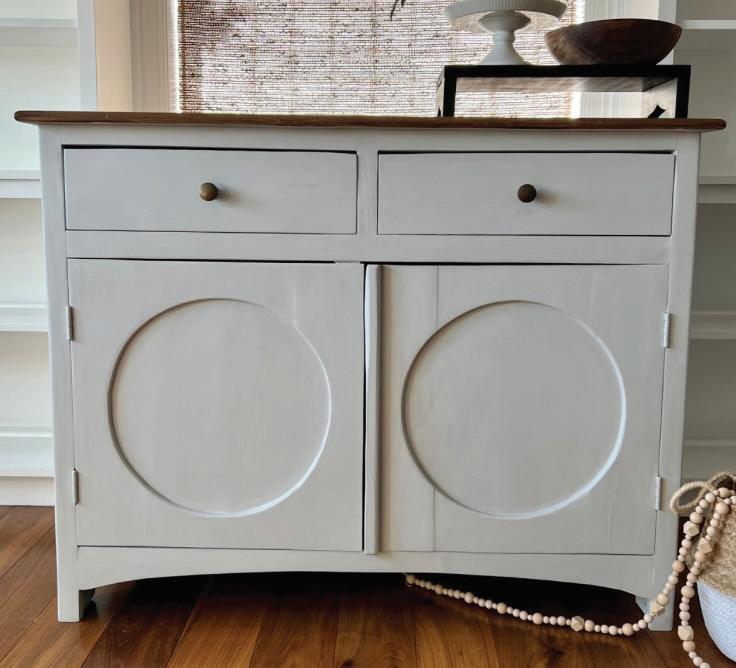
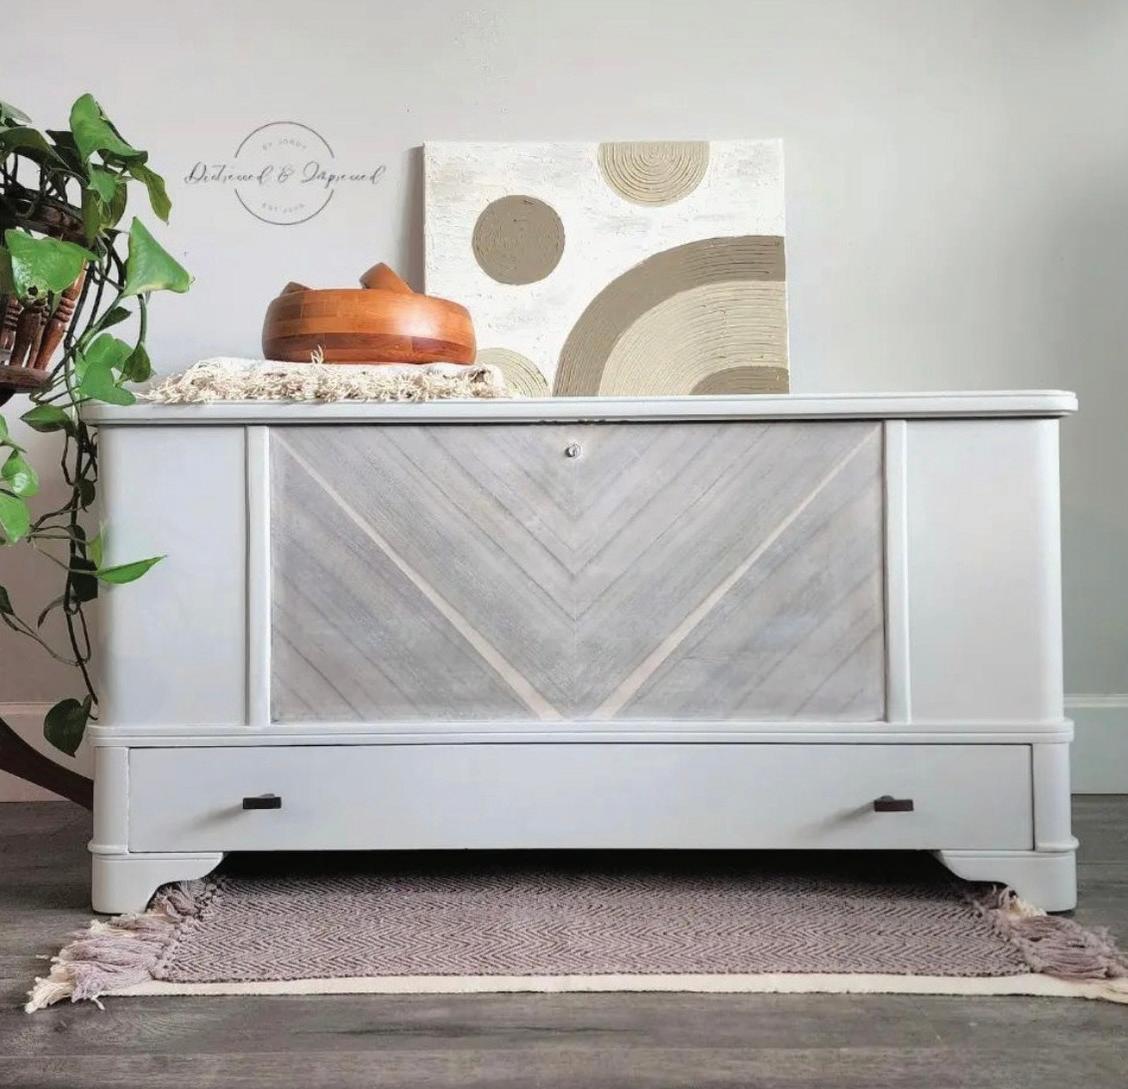
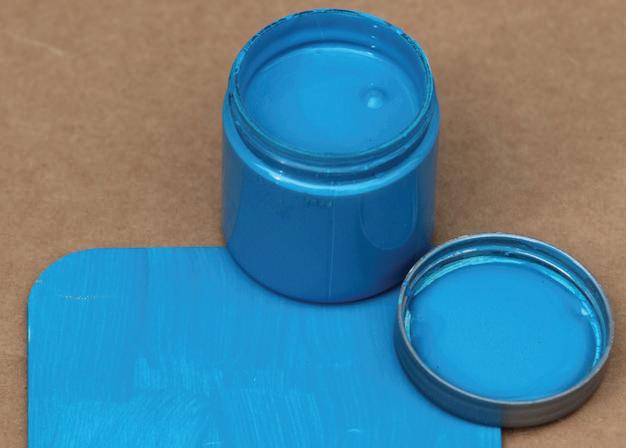
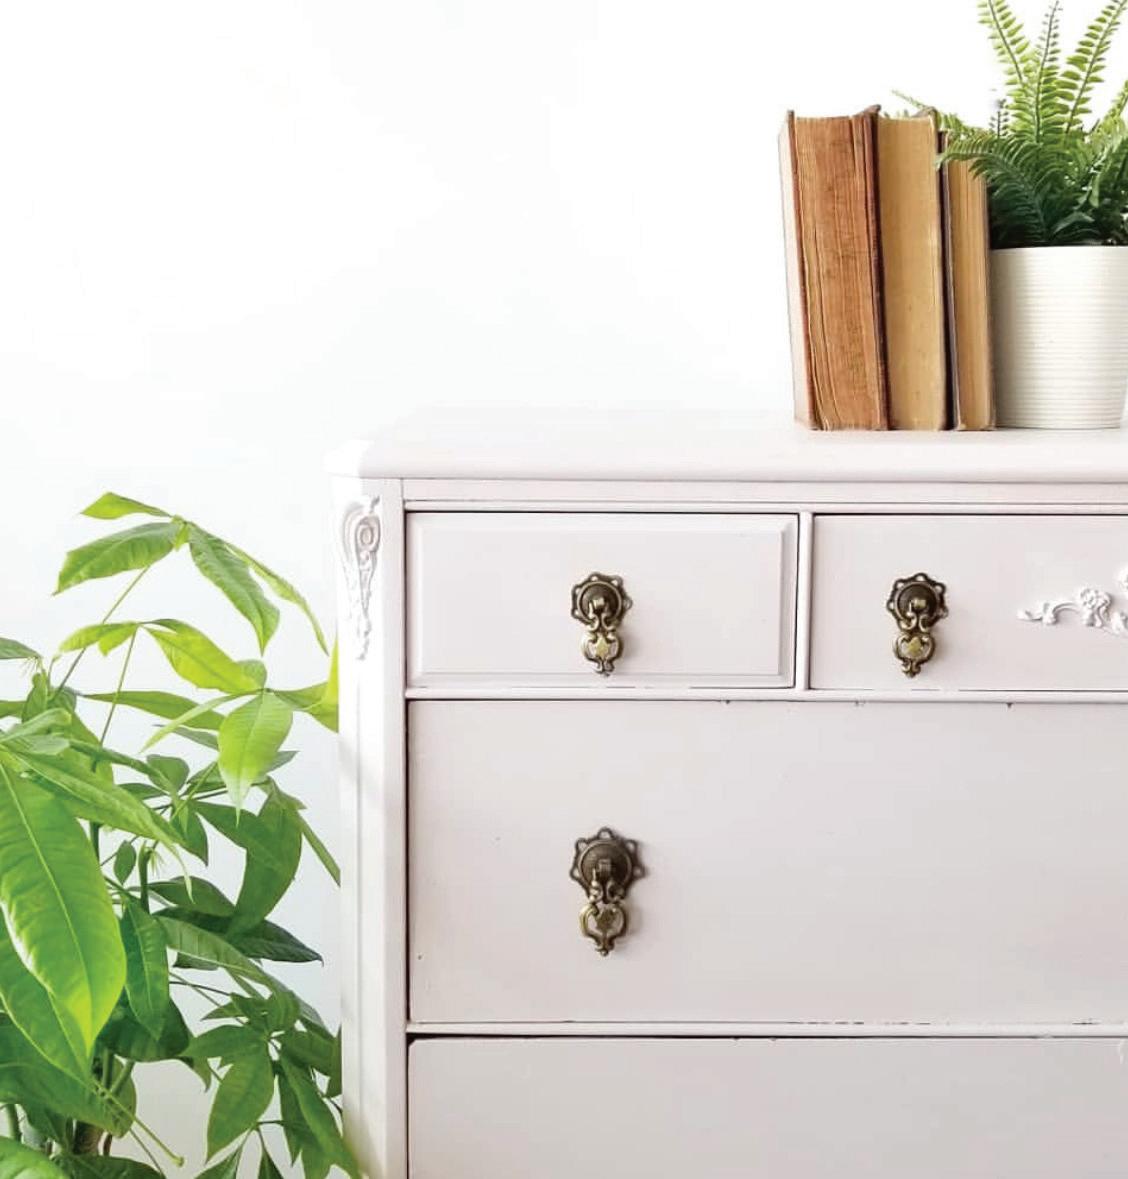
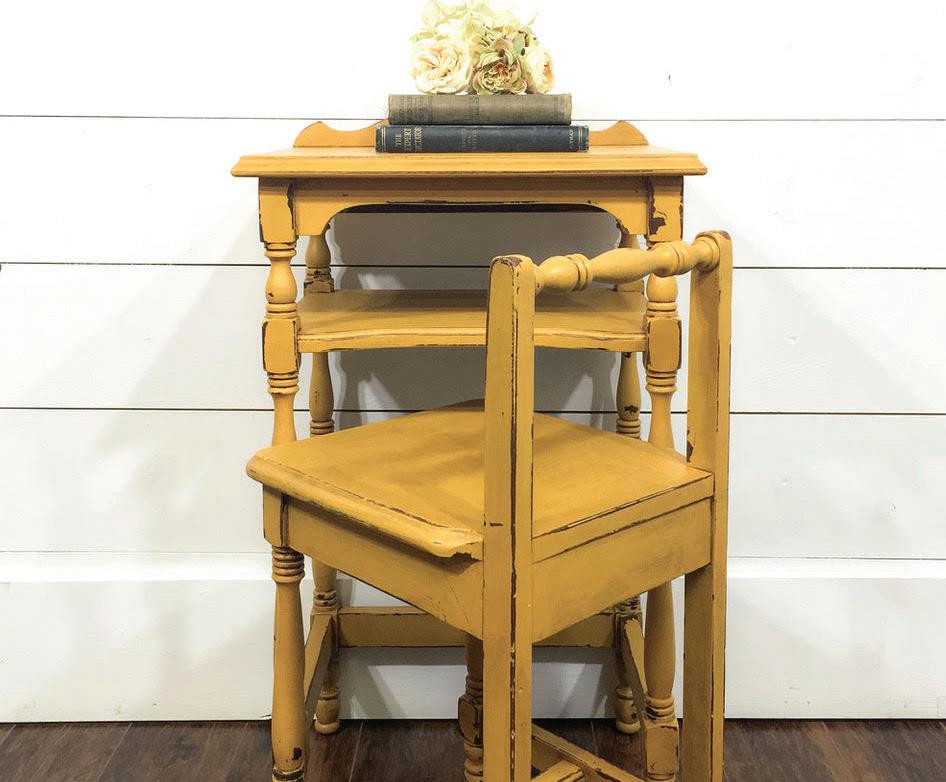
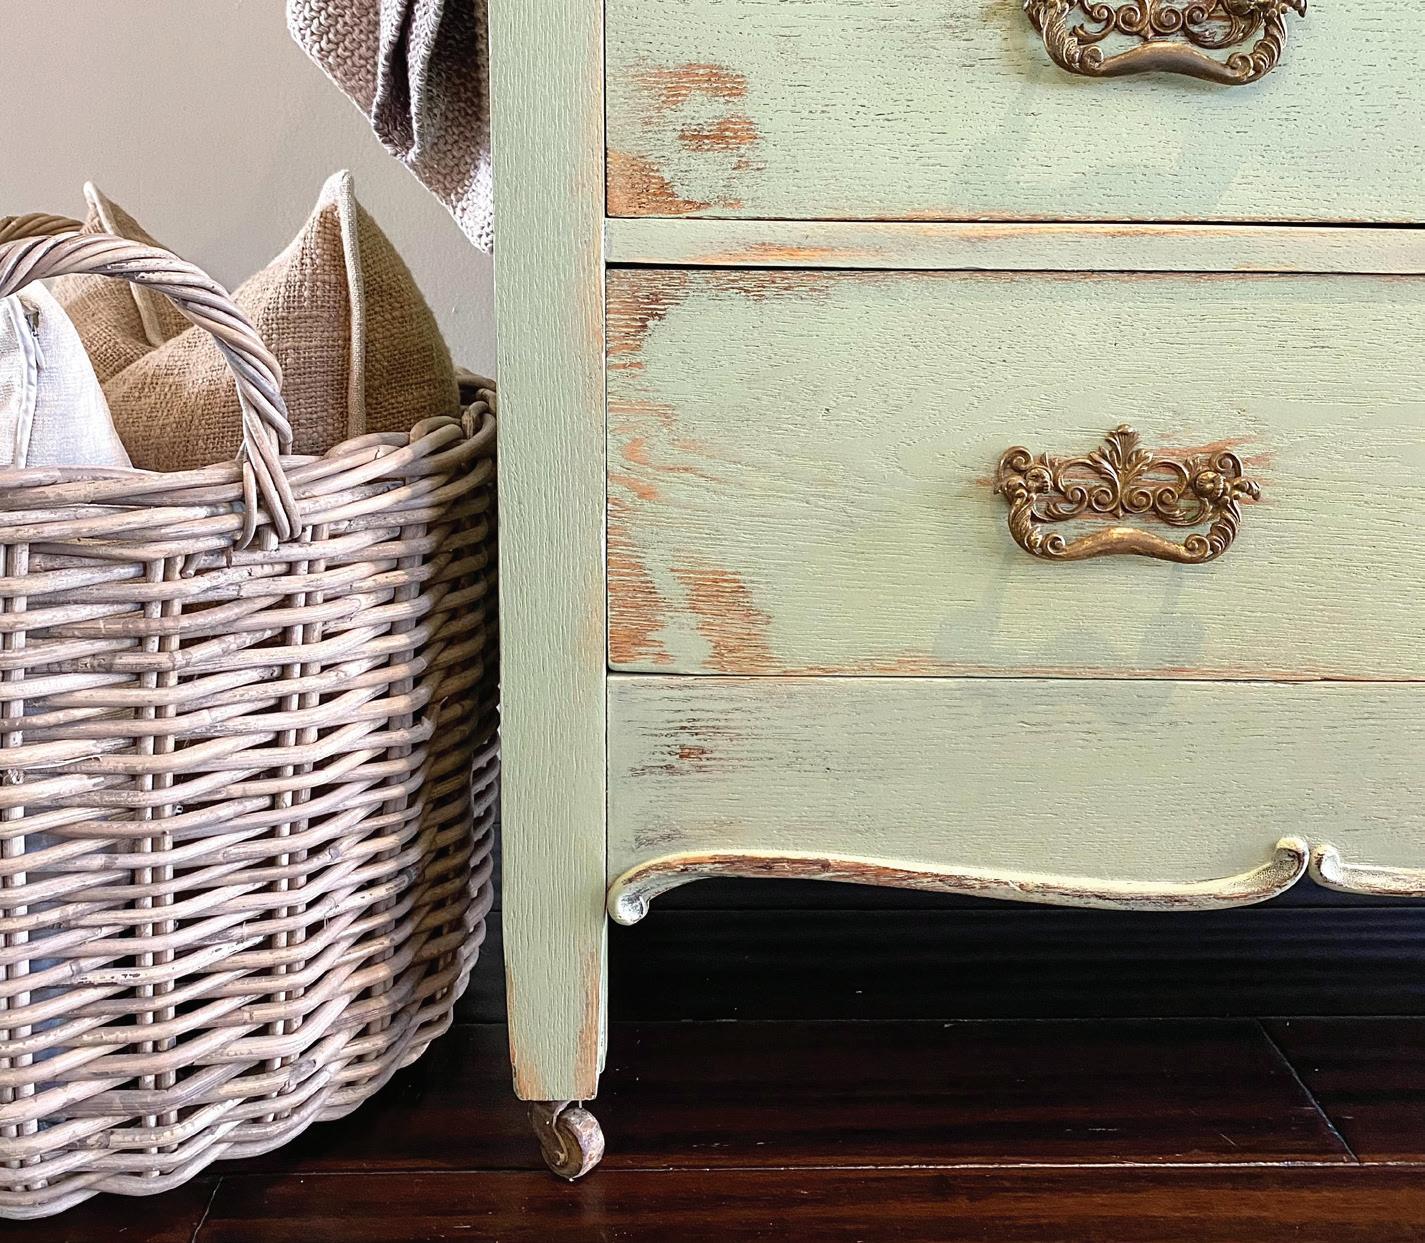
Lazy Linen
Lazy Linen is a beautiful and highly popular pale gray, known for its soft and soothing qualities. It works well with soft and muted hues, such as blues, and greens

Sage Advice and Secret Garden. This delicate color is a great choice for creating a calm and serene atmosphere in any space. As a versatile neutral color, Lazy Linen can complement a range of interior design styles, from modern to traditional.
Lazy Linen pairs well with a variety of finishes, including matte, satin, and glossy, and can be used to create a range of different moods and styles. #mutedhue
6
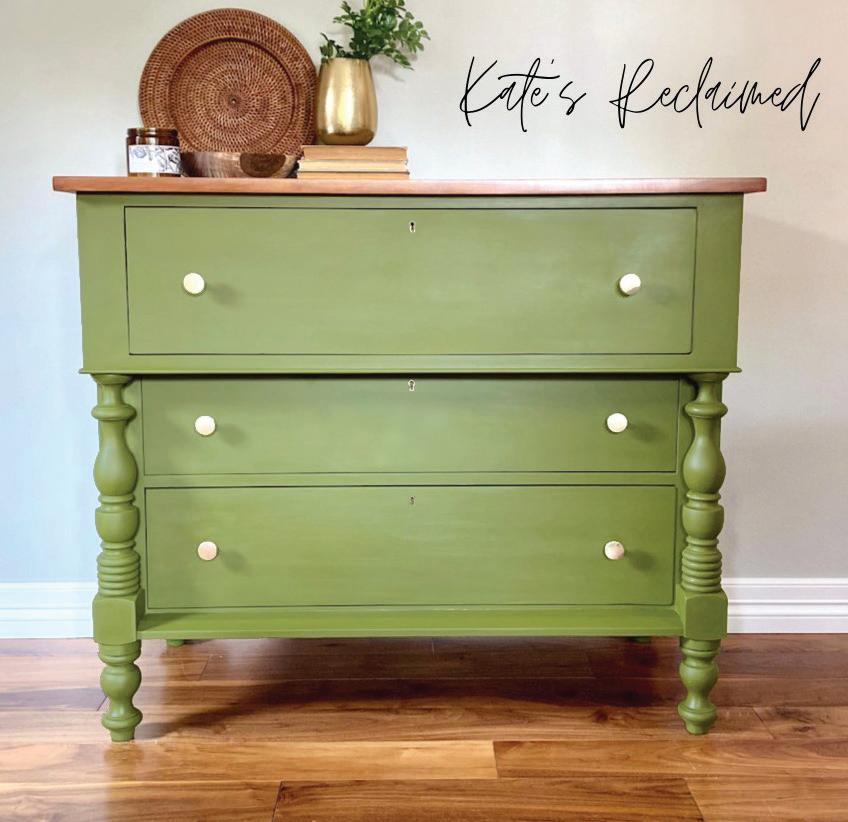
© Kate’s Reclaimed
© Distressed and Impressed
© Distressed and Impressed
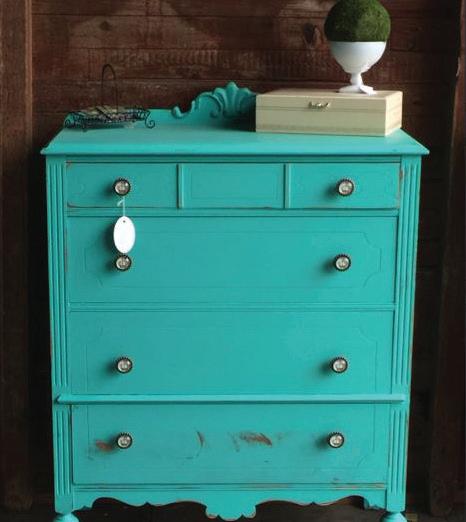
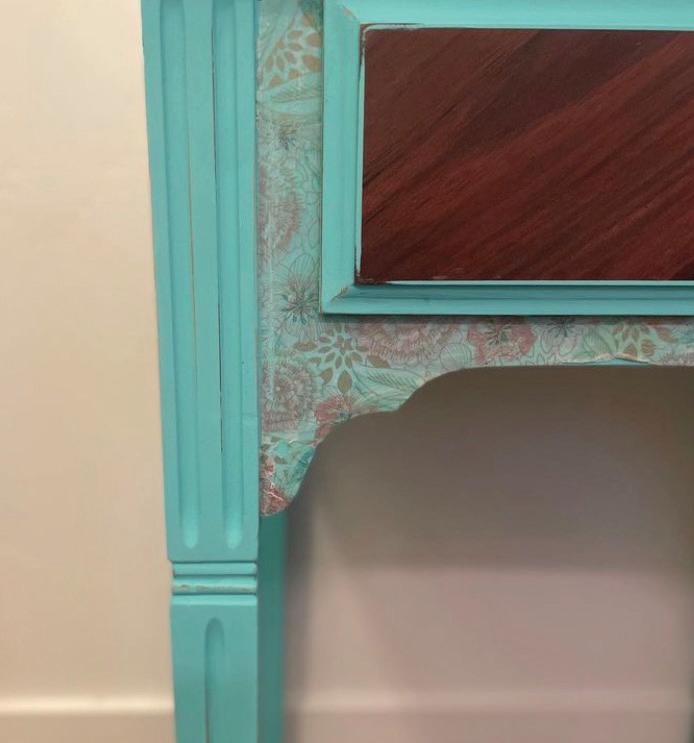
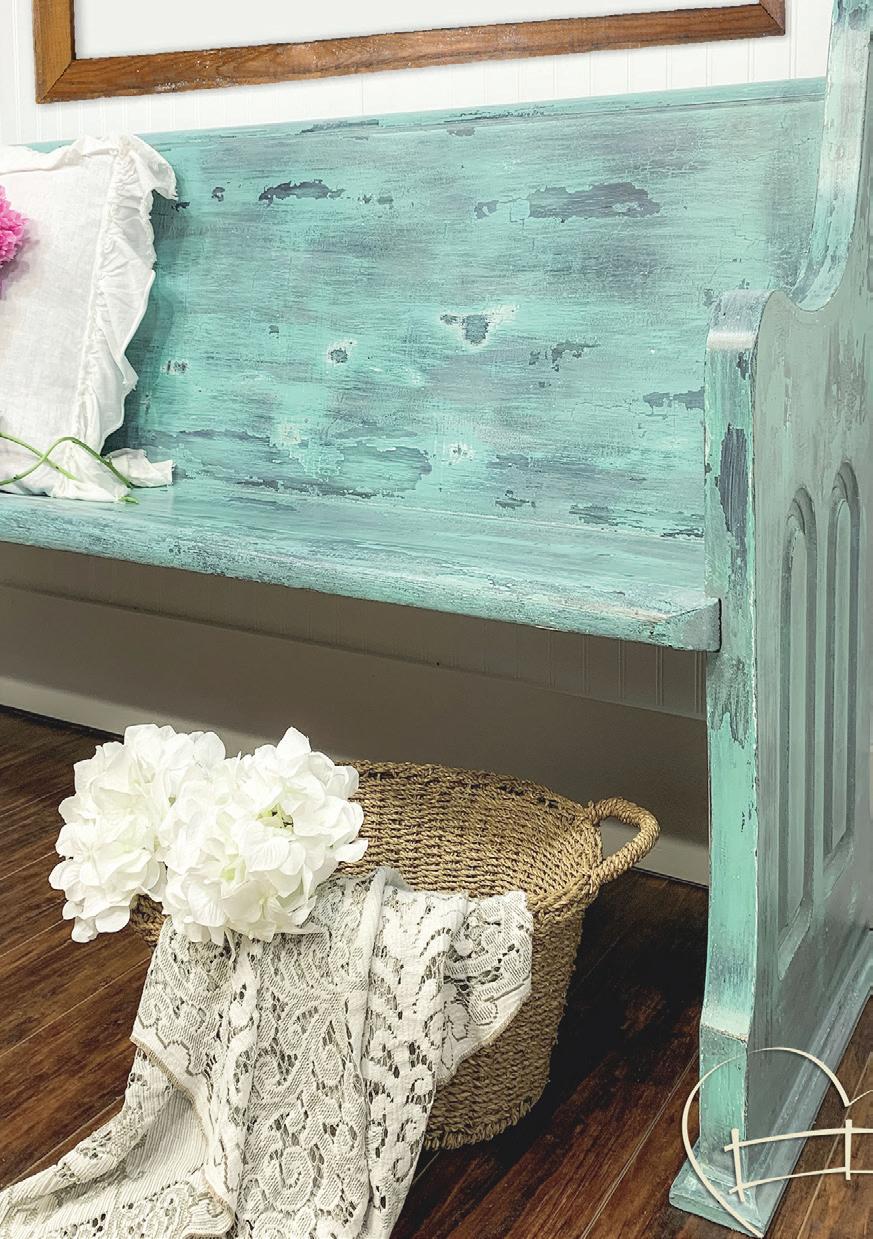
Bliss
Bliss is a versatile muted teal color. It’s greener than Tropical Cocktail, and not as vibrant as Whoop-de-do. As a muted teal, Bliss is a versatile color that can work well in a range of interior design styles. Bliss pairs well with a range of complementary colorsIt can be paired with neutrals like Lazy Linen, and darker grays like Rocky Mountain for a fresh and modern look. For a bolder look, pair Bliss with other jewel tones.
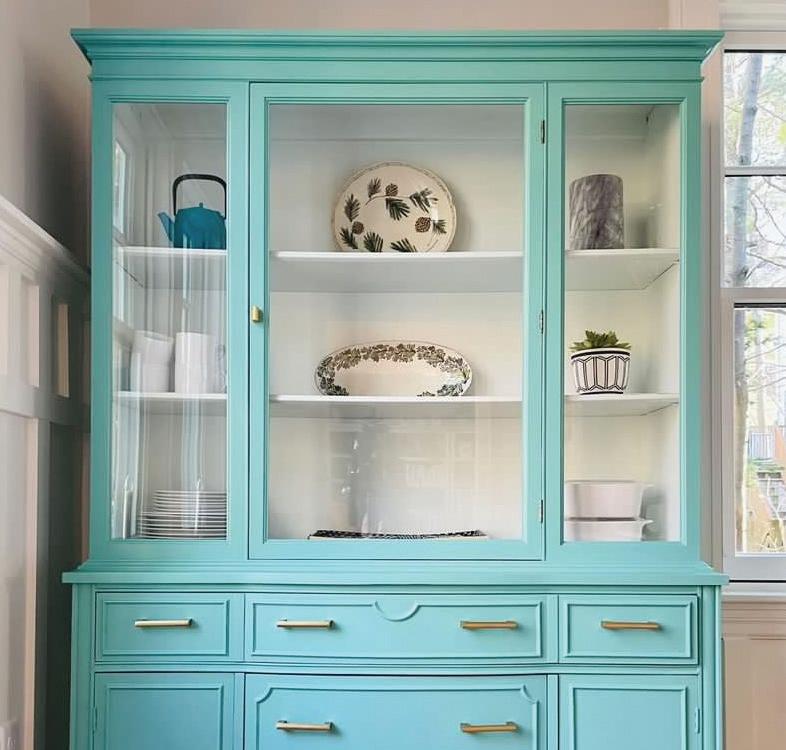
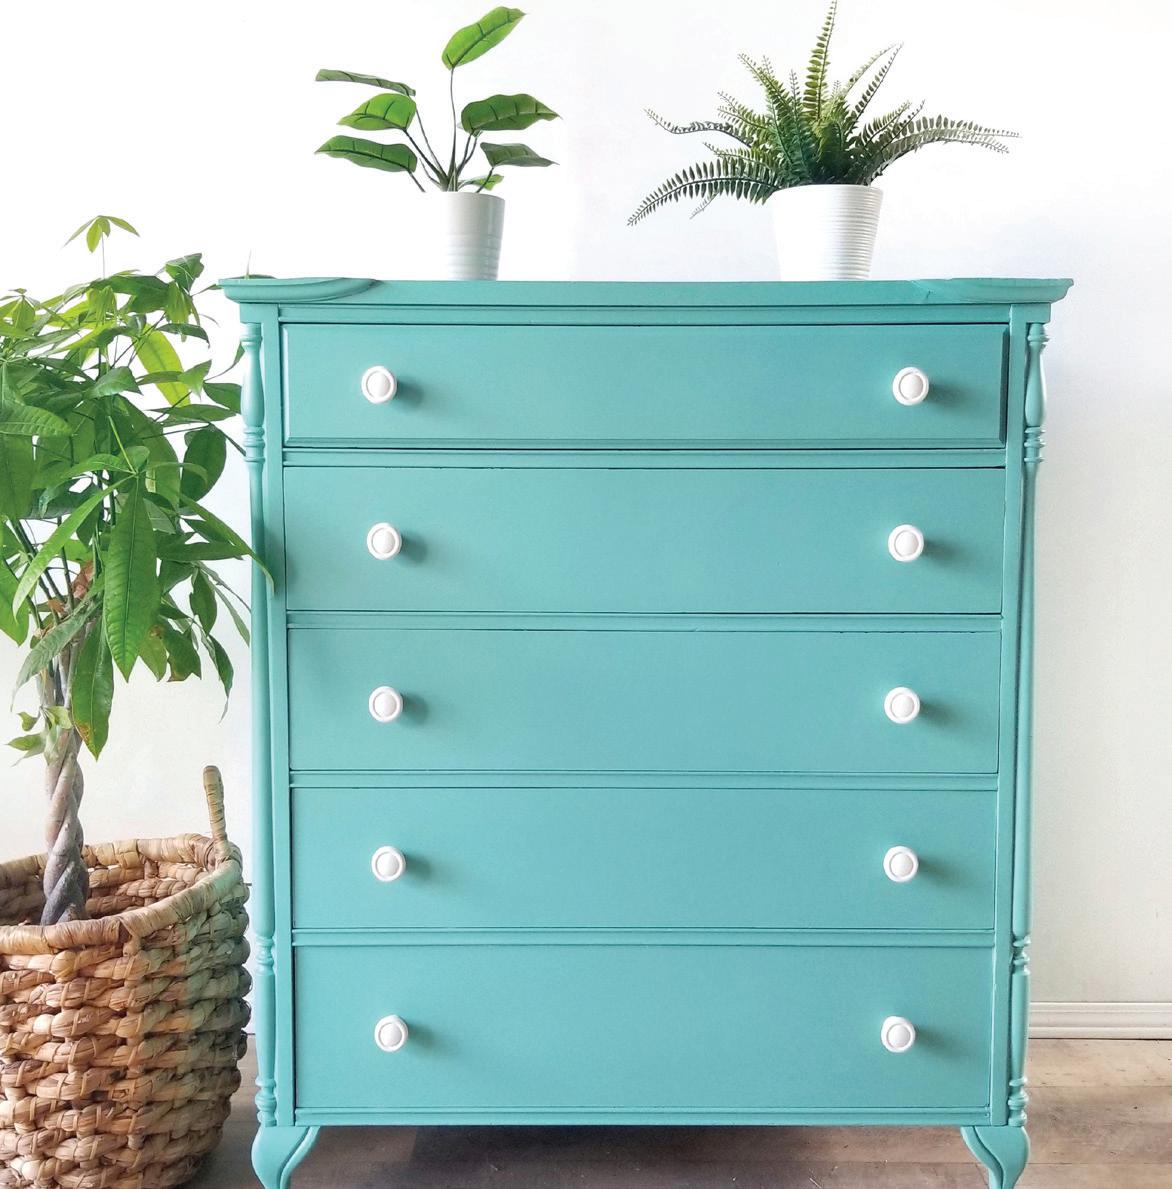
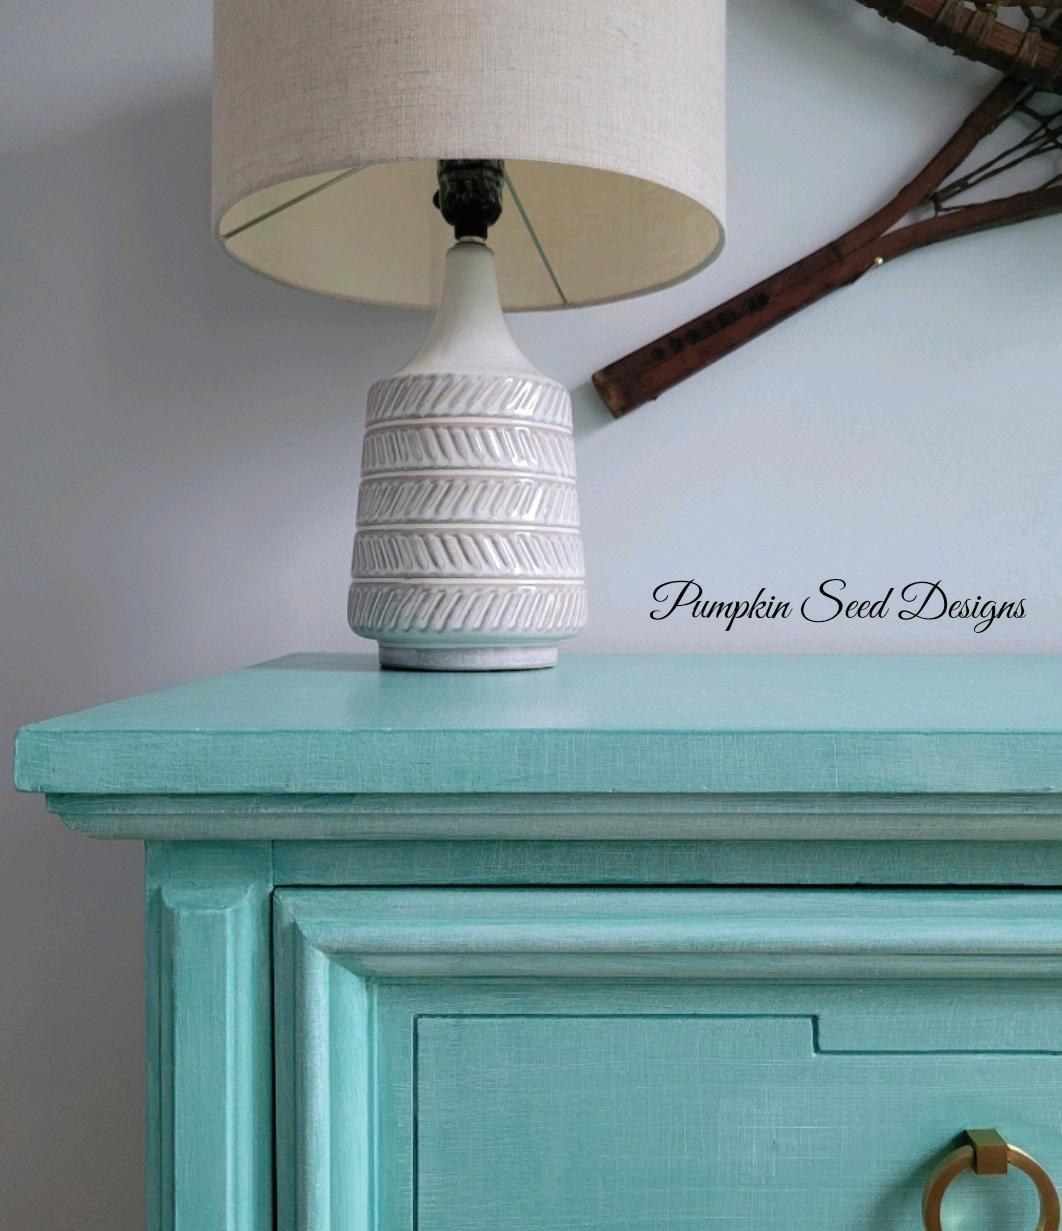
Bliss pairs well with metallic finishes such as brass or chrome, while for a more rustic feel, it can be combined with distressed or weathered finishes.
#versatileteal
7 SUMMER 2023 COLOR GUIDE
© Lubbly Jubbly
© Pumpkin Seed Designs
© Amy & Lyne Kasparian
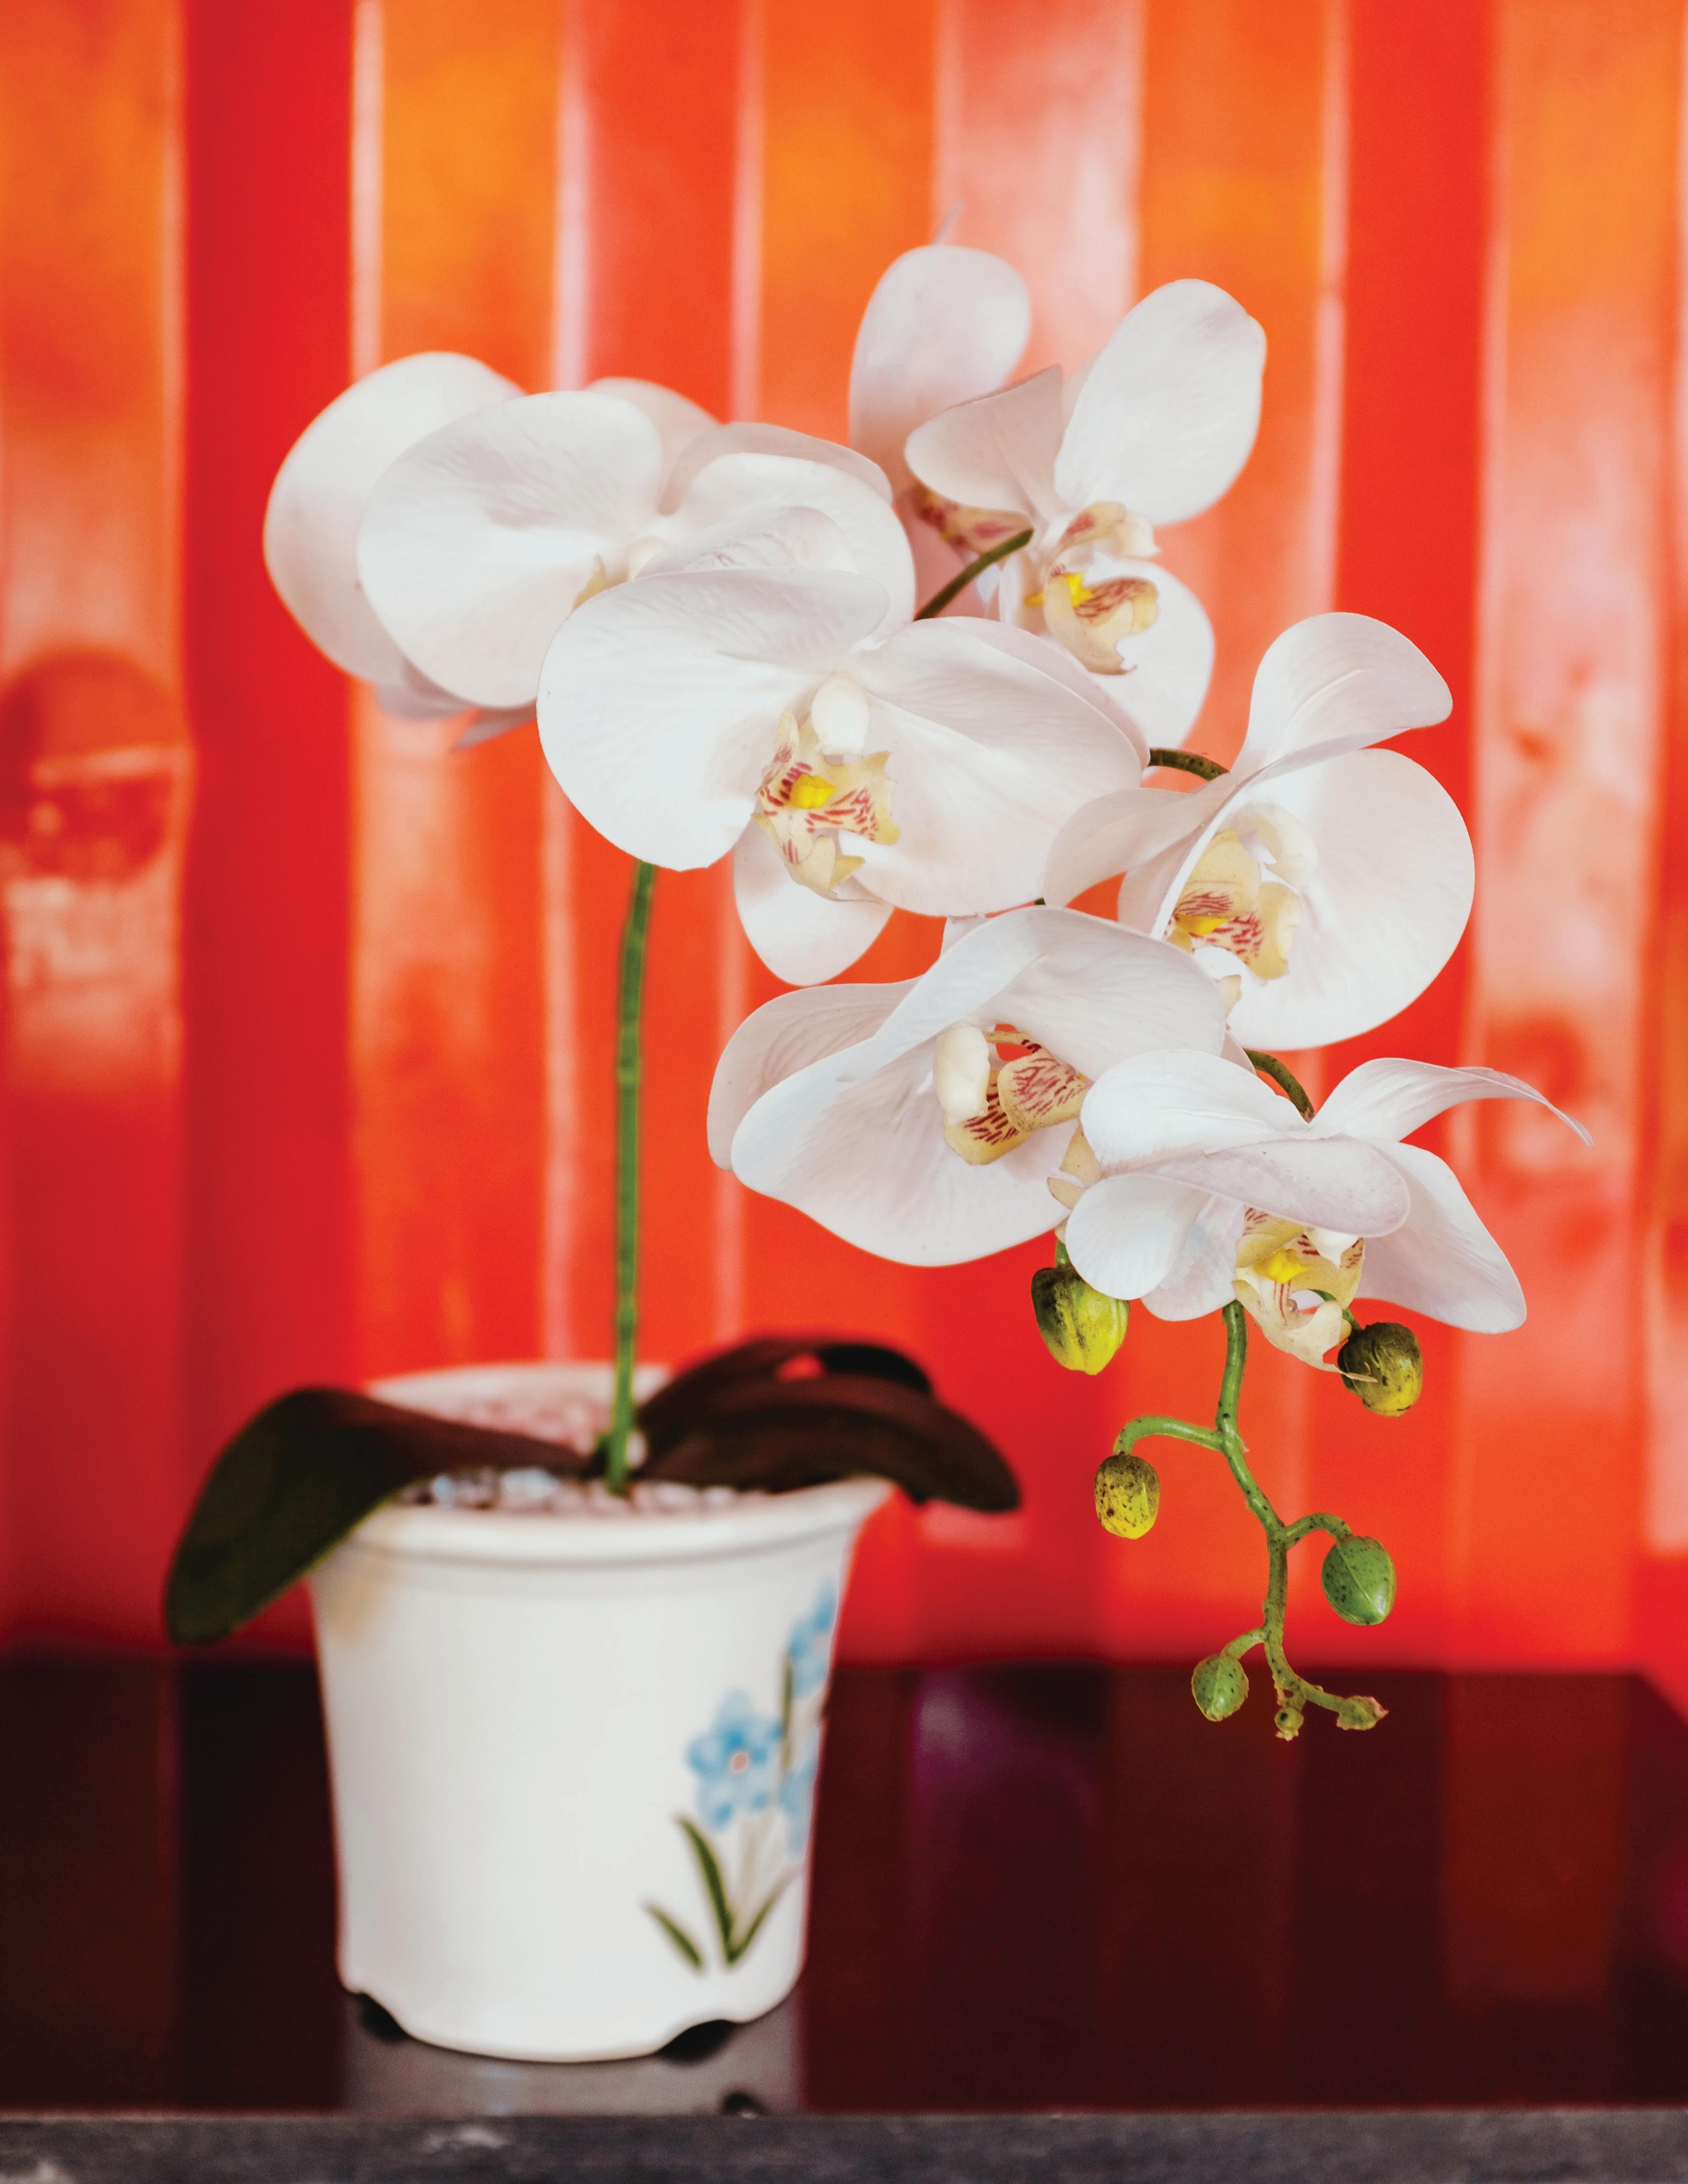
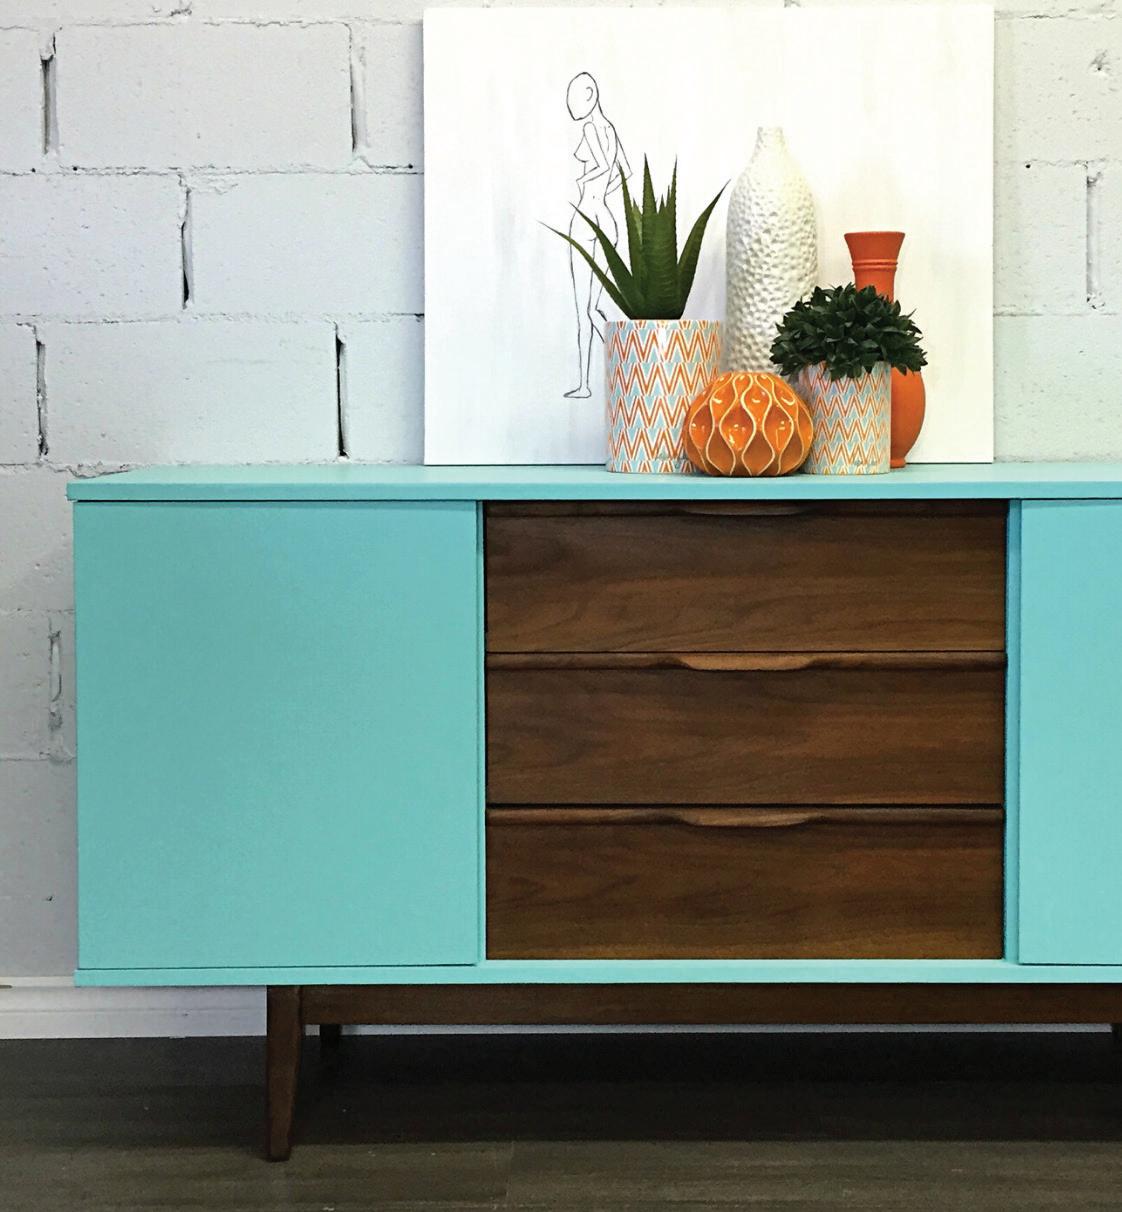
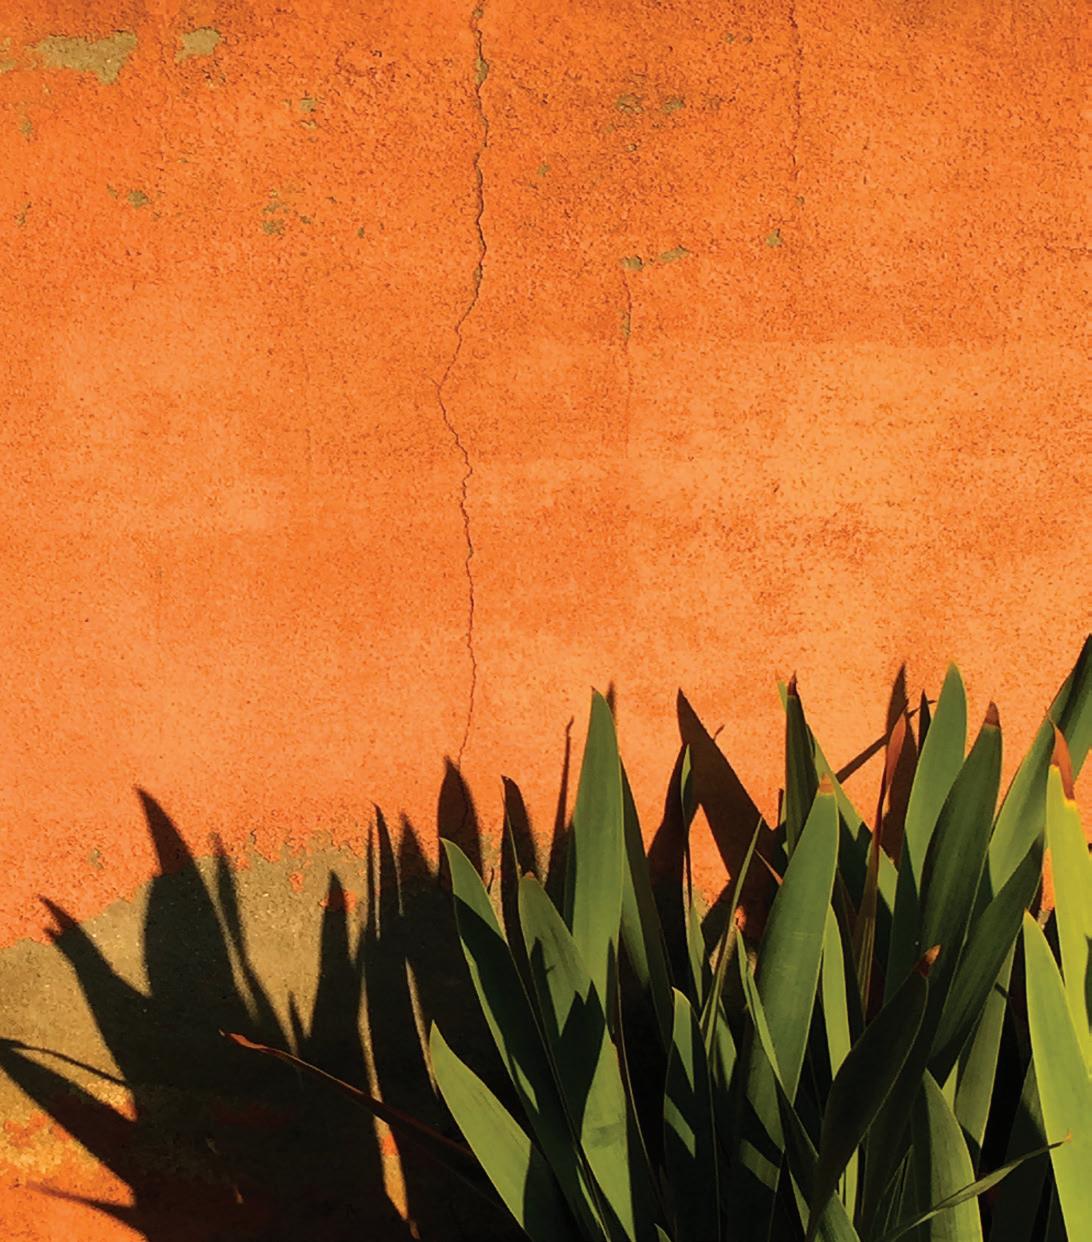
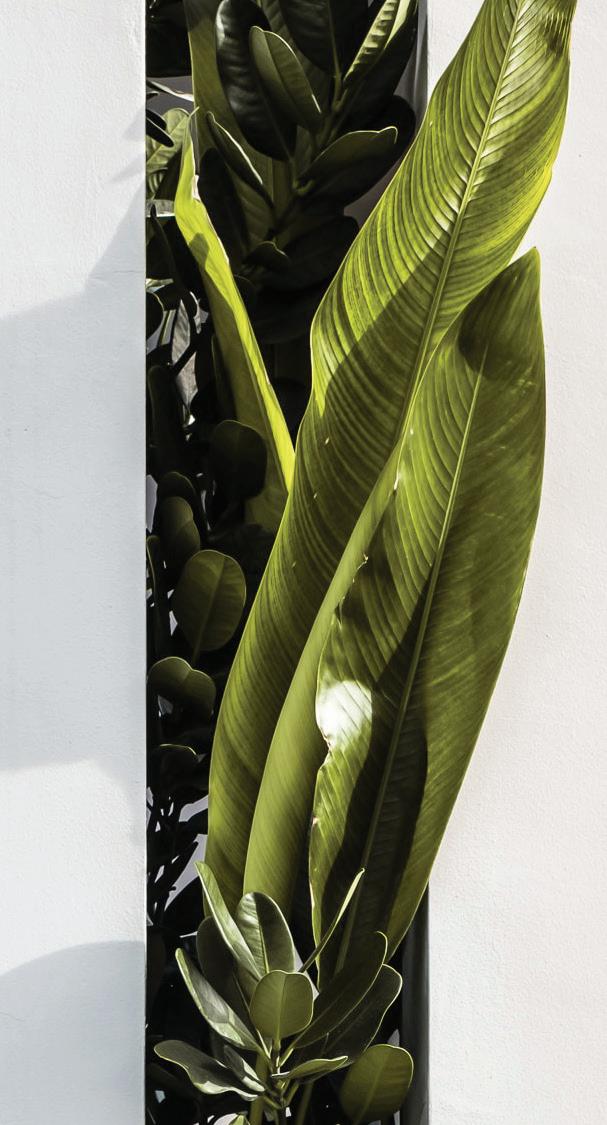
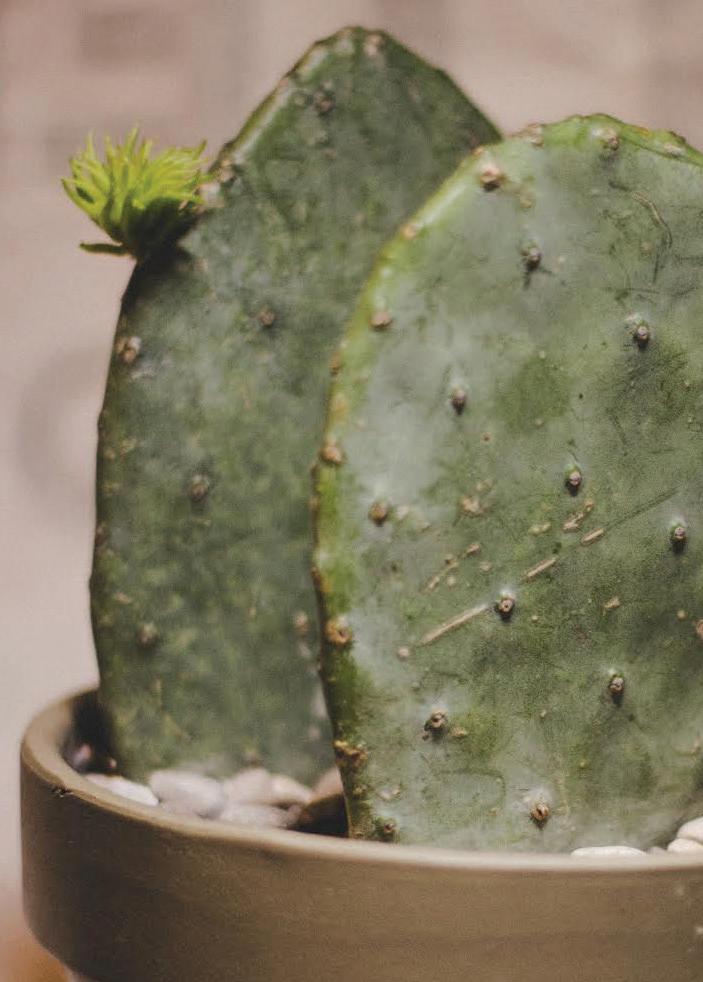
Nature’s Palette: Unveiling the Perfect Complementary Colors for Your Lush Indoor Garden
Integrating painted decor into spaces brimming with lush greenery can create a captivating and relaxing atmosphere. By carefully selecting the right paint colors, you can enhance the organic beauty of your plants.
Use Country Chic Paint to update your containers and pots; in most cases all you will need our Clear Bonding Primer and maybe a little bit of sanding to prep. Then, use our Clear Coat for extra durability.
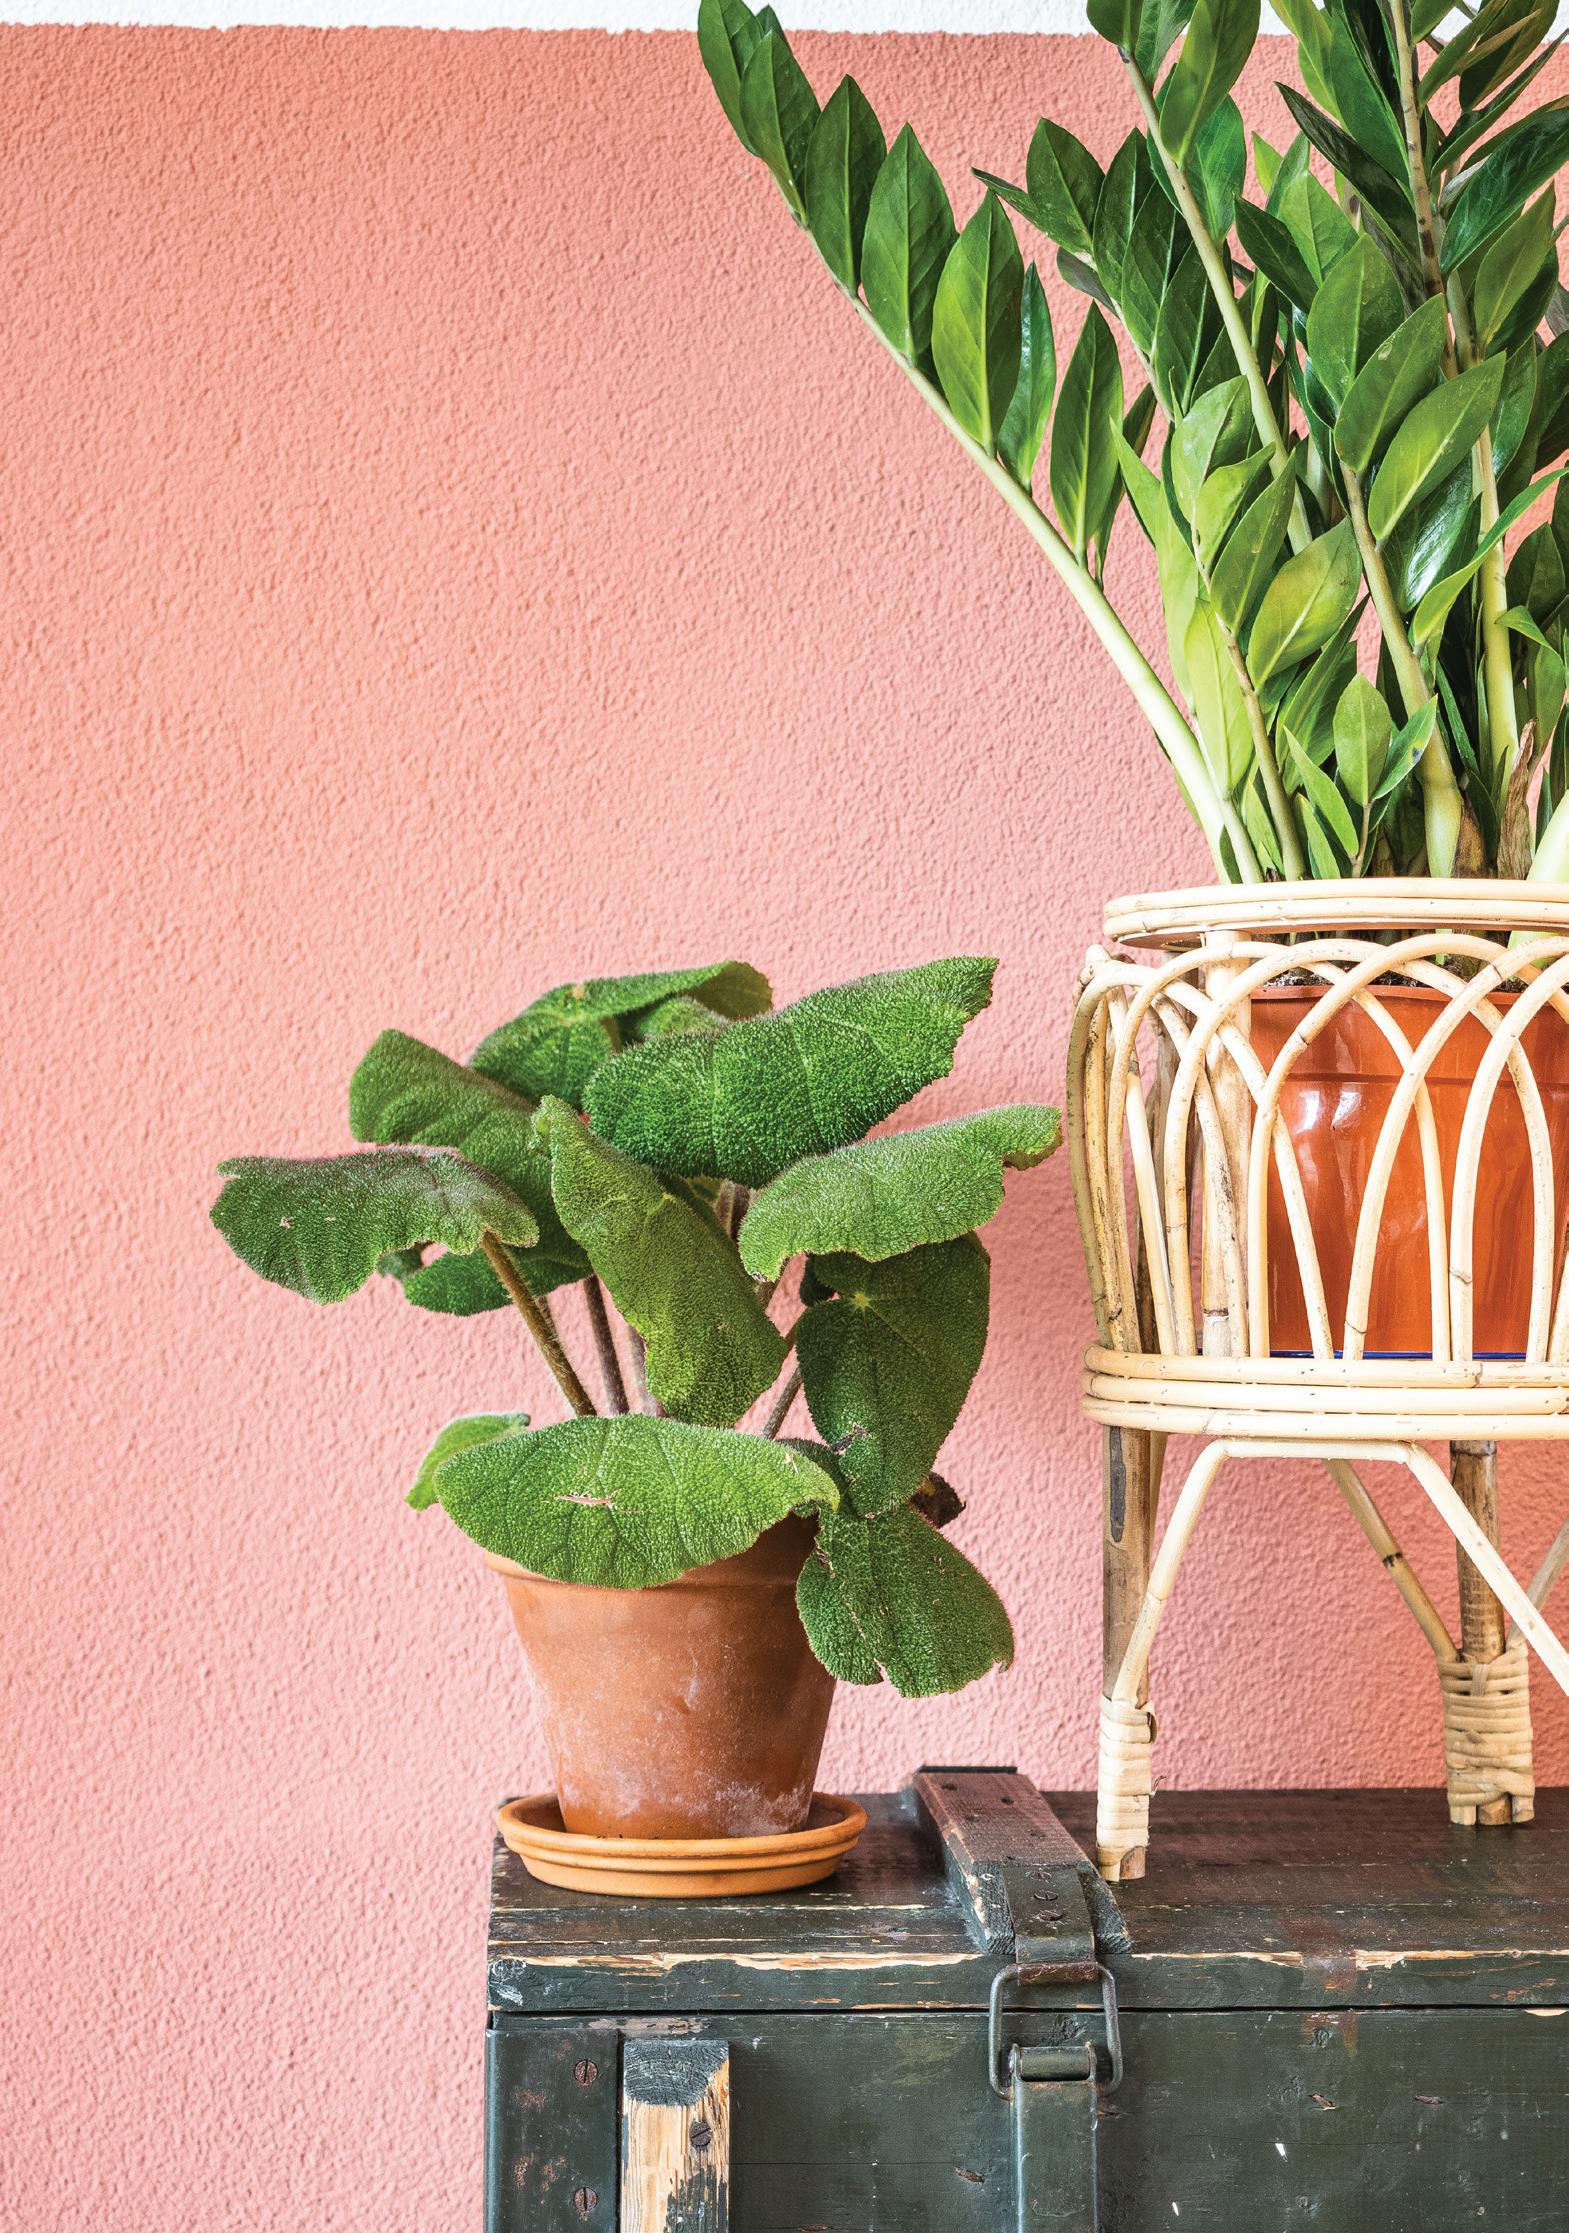
Earth Tones for an Organic Feel:
Incorporate earthy tones like Sunday Tea, Road Trip, Driftwood, Leather Bound, Rocky Mountain, and Cobblestone to enhance your plants in a subtle way.
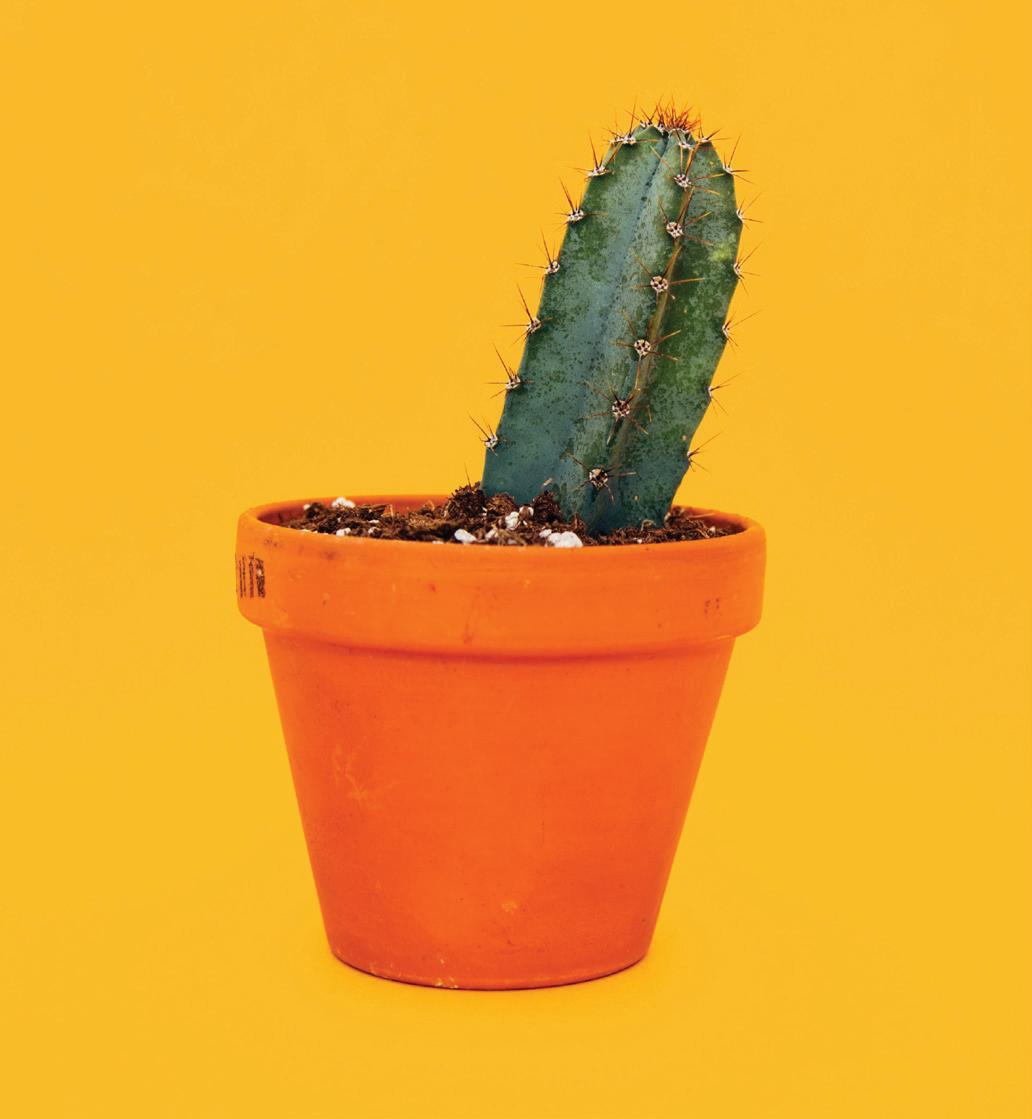
Bright Bursts
To add some cheer and a vibrant contrast, use bright colors like Fresh Mustard, Yellow Wellies, Tropical Cocktail, Whoop-de-do, Bling Bling, Poppy, Raspberry Sorbet, Sunset Glow, and Persimmon. These colors will really make your plants pop!
Great Greens
Using green tones can create a cohesive and organic connection between your decor and the surrounding greenery. Some Country Chic Paint’s greens to try: Bliss, Sage Advice, Secret Garden, Fireworks, and Hollow Hill.
Want to learn more about what colors we have? Shop online!
#countrychicpaintsummerguide
8
Want to get creative?
Consider using stencils, masking tape, or freehand techniques to create designs on your plant pots.


Mastering the Art of Color Palette Selection
Assessing Natural Lighting:
Evaluate the natural lighting in your space and how it interacts with your greenery. Take note of how different paint colors appear under various lighting conditions, ensuring they enhance the overall aesthetic.
Complementary Color Theory:
Explore the color wheel to find complementary colors that enhance the greenery in your space. For example, red and orange undertones can beautifully complement green hues.
Consider the Mood:
Think about the ambiance you want to create. Soft and muted tones evoke tranquility, while bolder and deeper hues can add energy and drama to the space. Choose colors that align with your desired mood.
Create a Sample Board:
Compile paint swatches, fabric samples, and images of your greenery to create a sample board. This will help you visualize how different colors and textures work together before committing to a specific palette.
Incorporating painted decor into your interior design space filled with greenery and indoor plants allows you to create an enchanting and inviting atmosphere. By selecting earthy neutrals, harmonizing greens, and complementary accents, you can achieve a seamless integration of rustic charm and contemporary style. Want some color suggestions to get you started on your next project? Take our Color Quiz!
#countrychicpaintsummerguide
11 SUMMER 2023 COLOR GUIDE
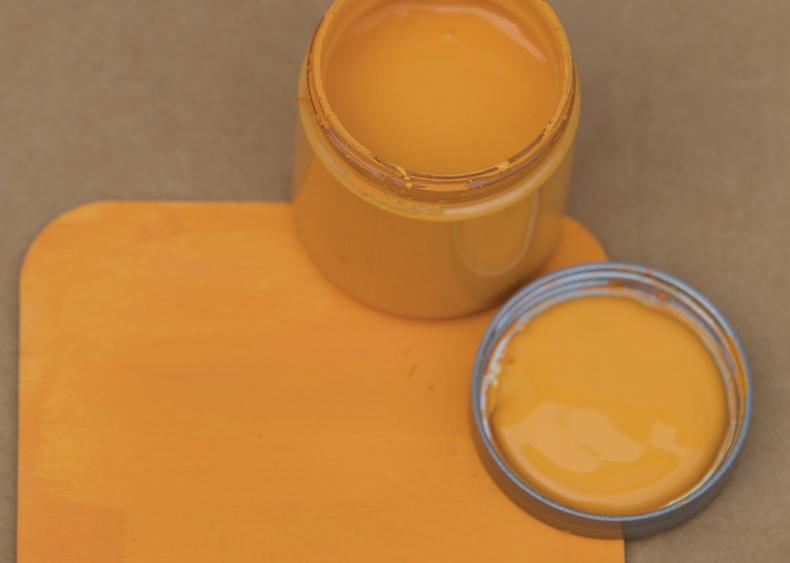
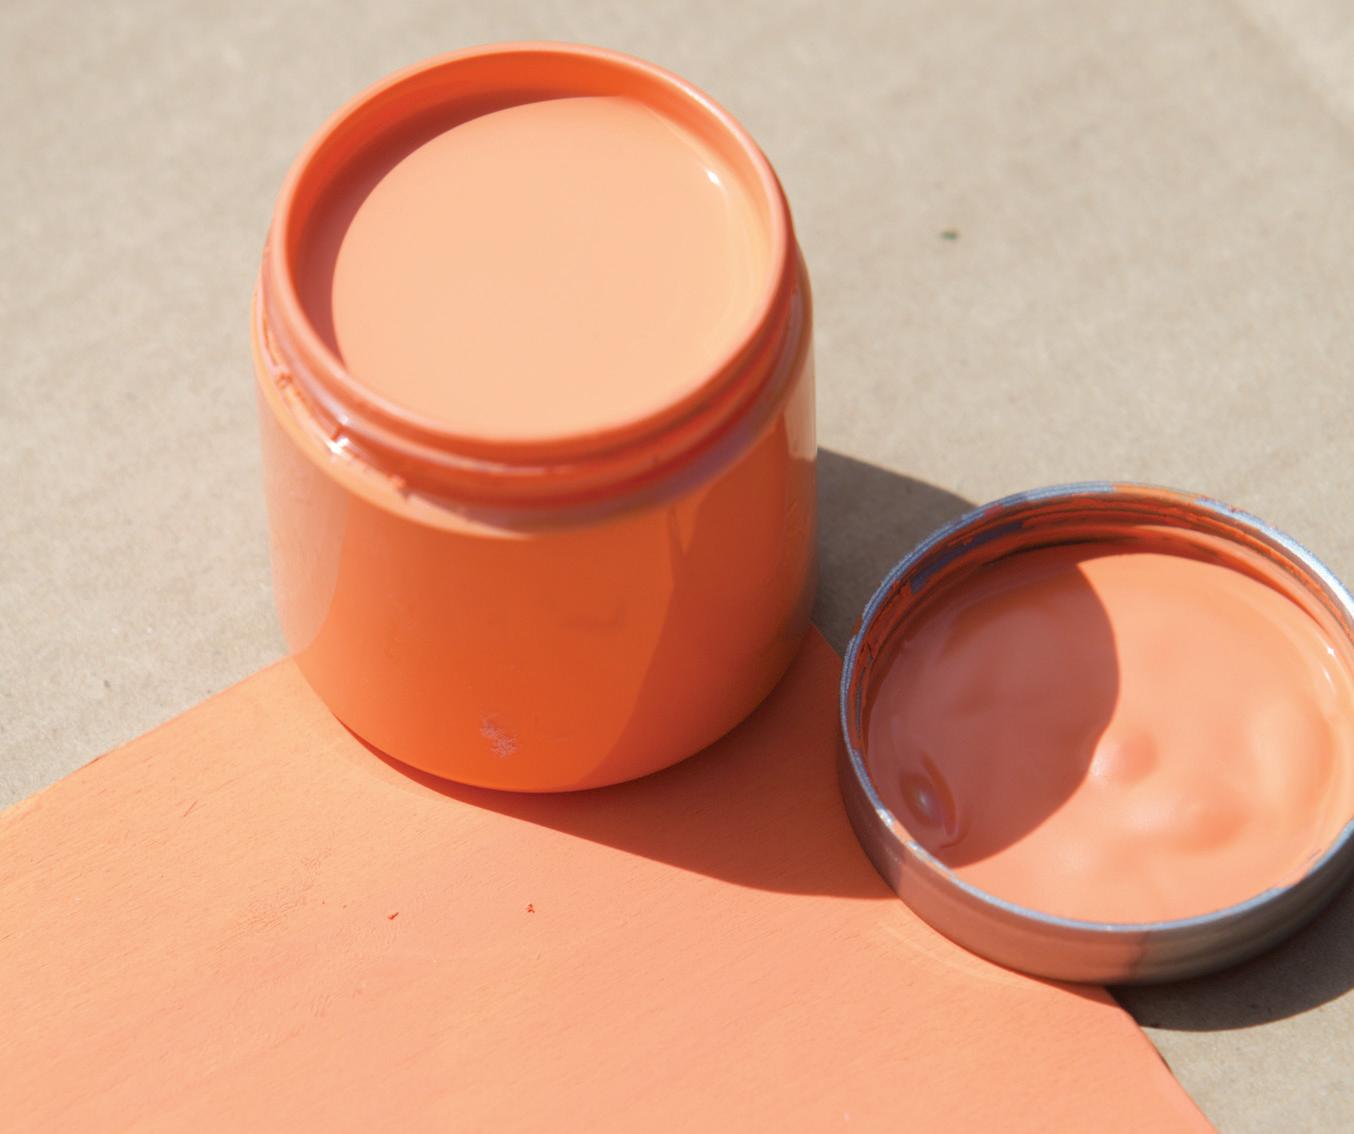
Persimmon
Persimmon is the perfect, bold, citrus orange. It’s an eye-catching color that makes us think of a refreshing glass of freshly squeezed orange juice. It pairs well with warm neutrals like Soiree as well as other bold colors like Peacoat for a complementary contrast. It also complements natural wood tones, such as oak or maple, and works well with metallic finishes like gold or brass. Persimmon is often used to add a touch of fun and playfulness to an otherwise neutral space.
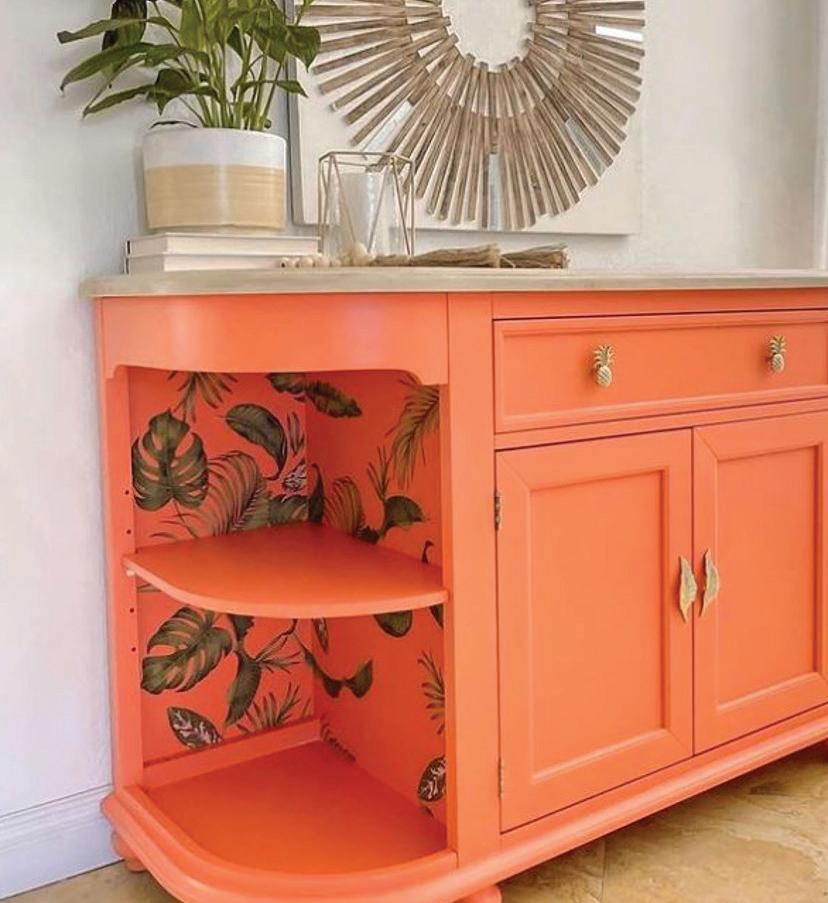
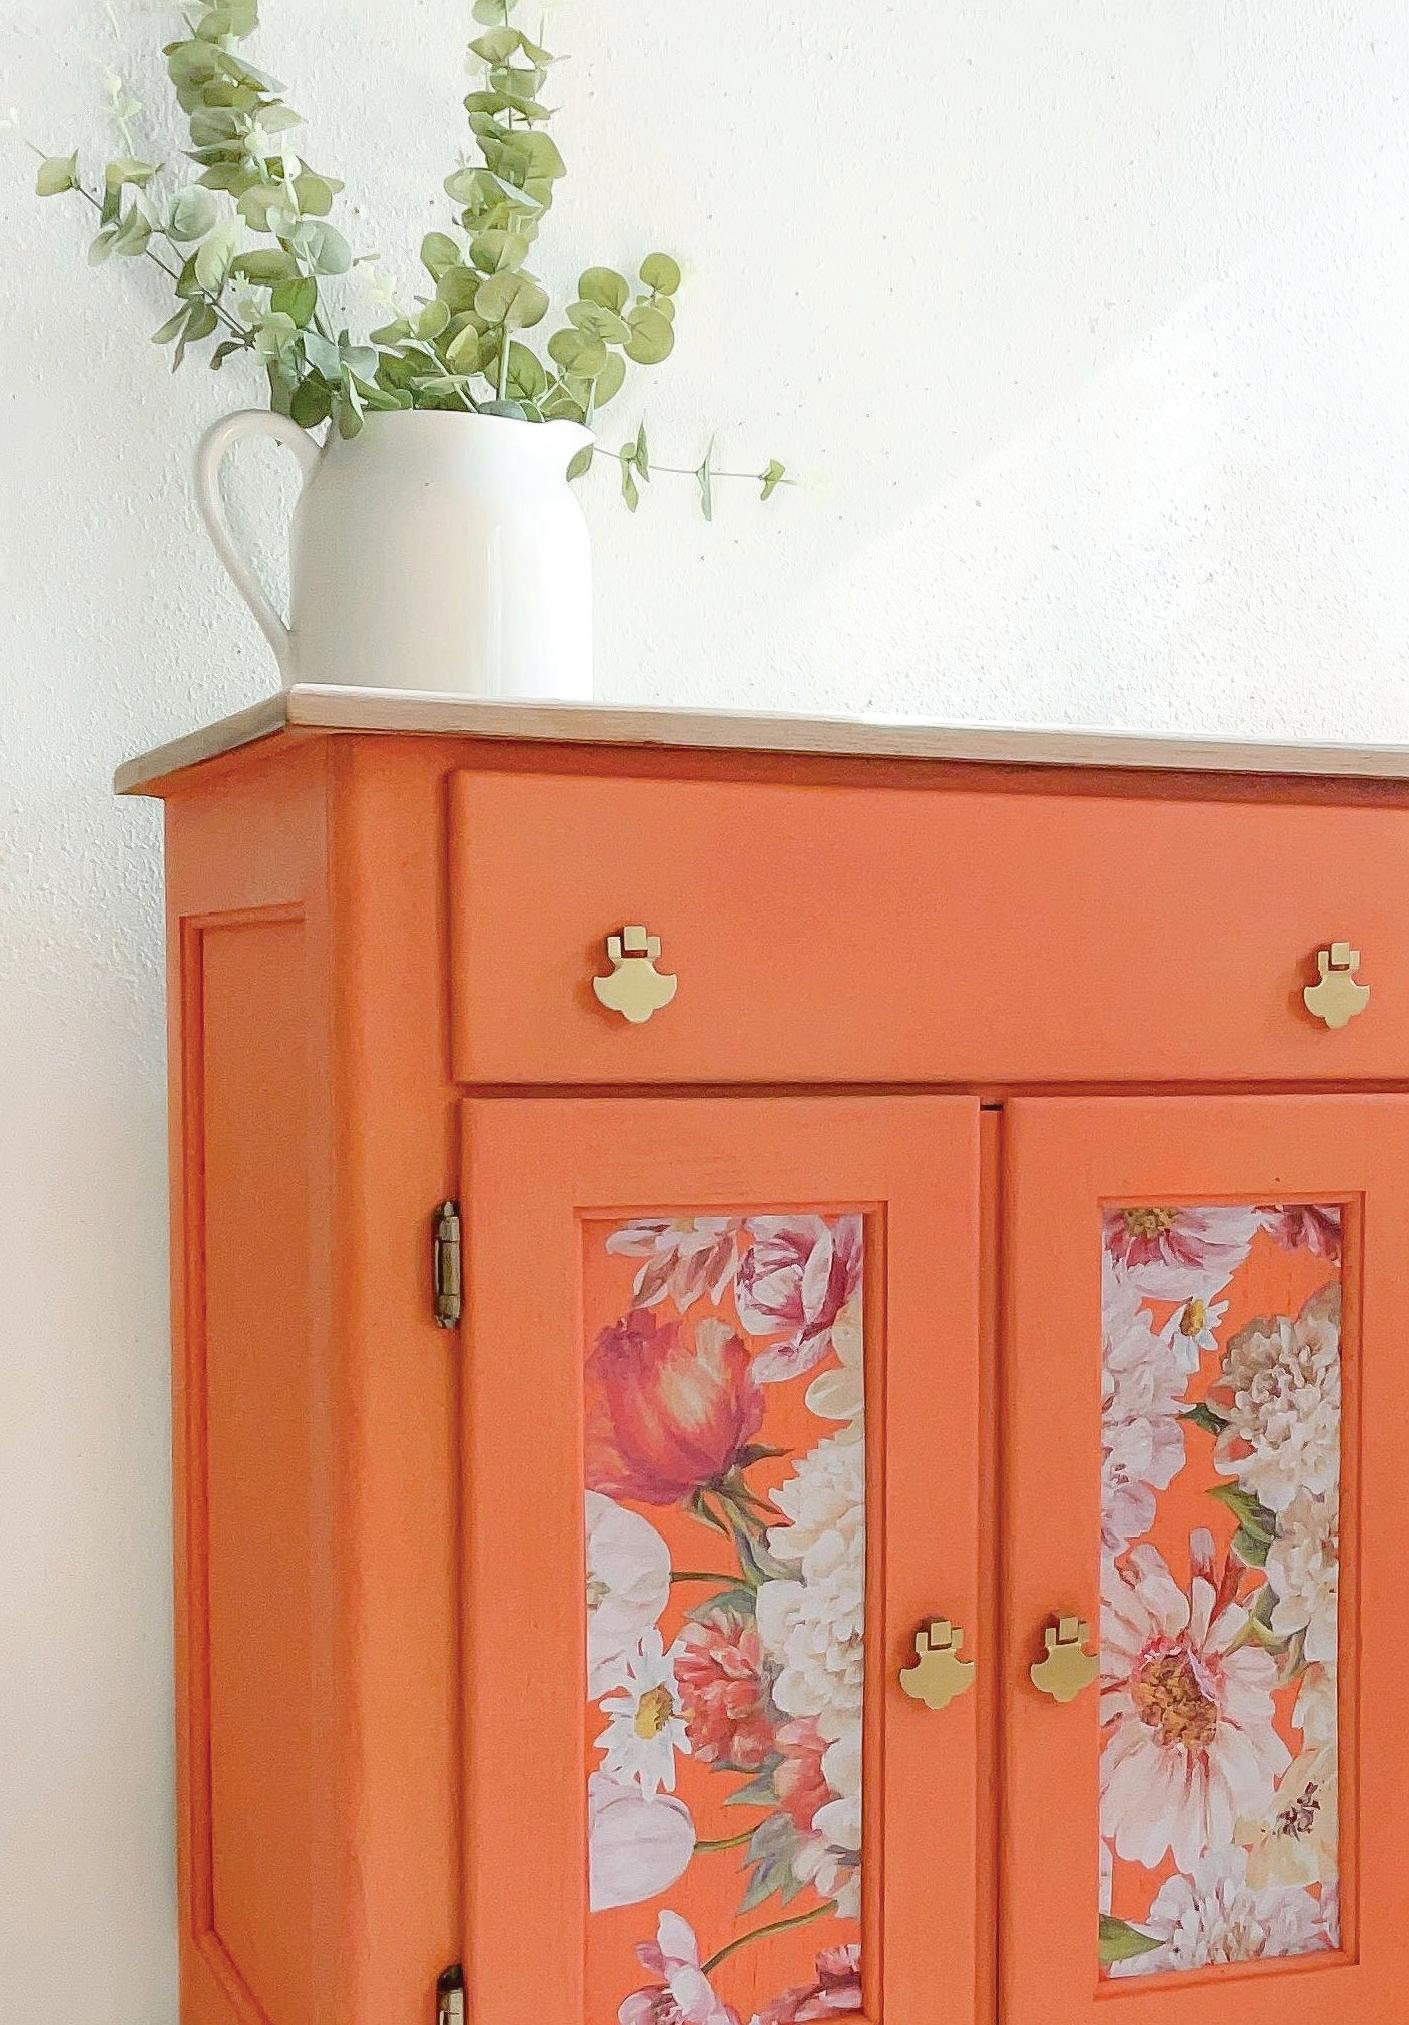
#freshlysqueezedorange
12
© Blush & Ivy
© Lucky Spaniel
© Blush & Ivy
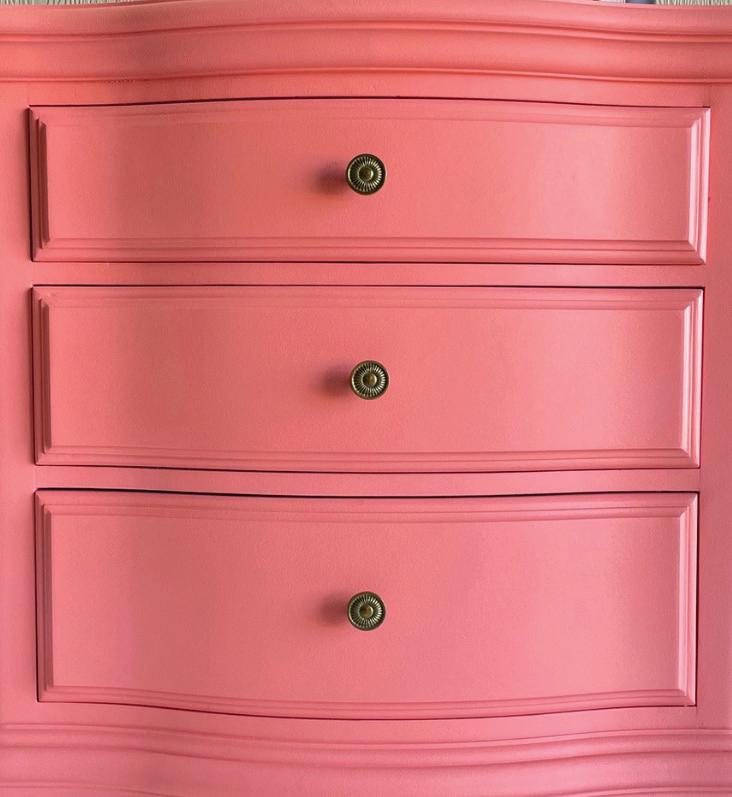
Sunset Glow
Sunset Glow is a captivating coral pink color that radiates warmth and vibrancy. Its inspiration comes from the magnificent hues of the sunset, with its warm, orange-pink tones that evoke a sense of calmness and tranquility. This color adds a touch of playfulness and elegance to any space, making it a perfect choice for accent furniture, or decor. Sunset Glow pairs beautifully with natural wood finishes, crisp whites like Simplicity, and dark cool tones like Peacoat.
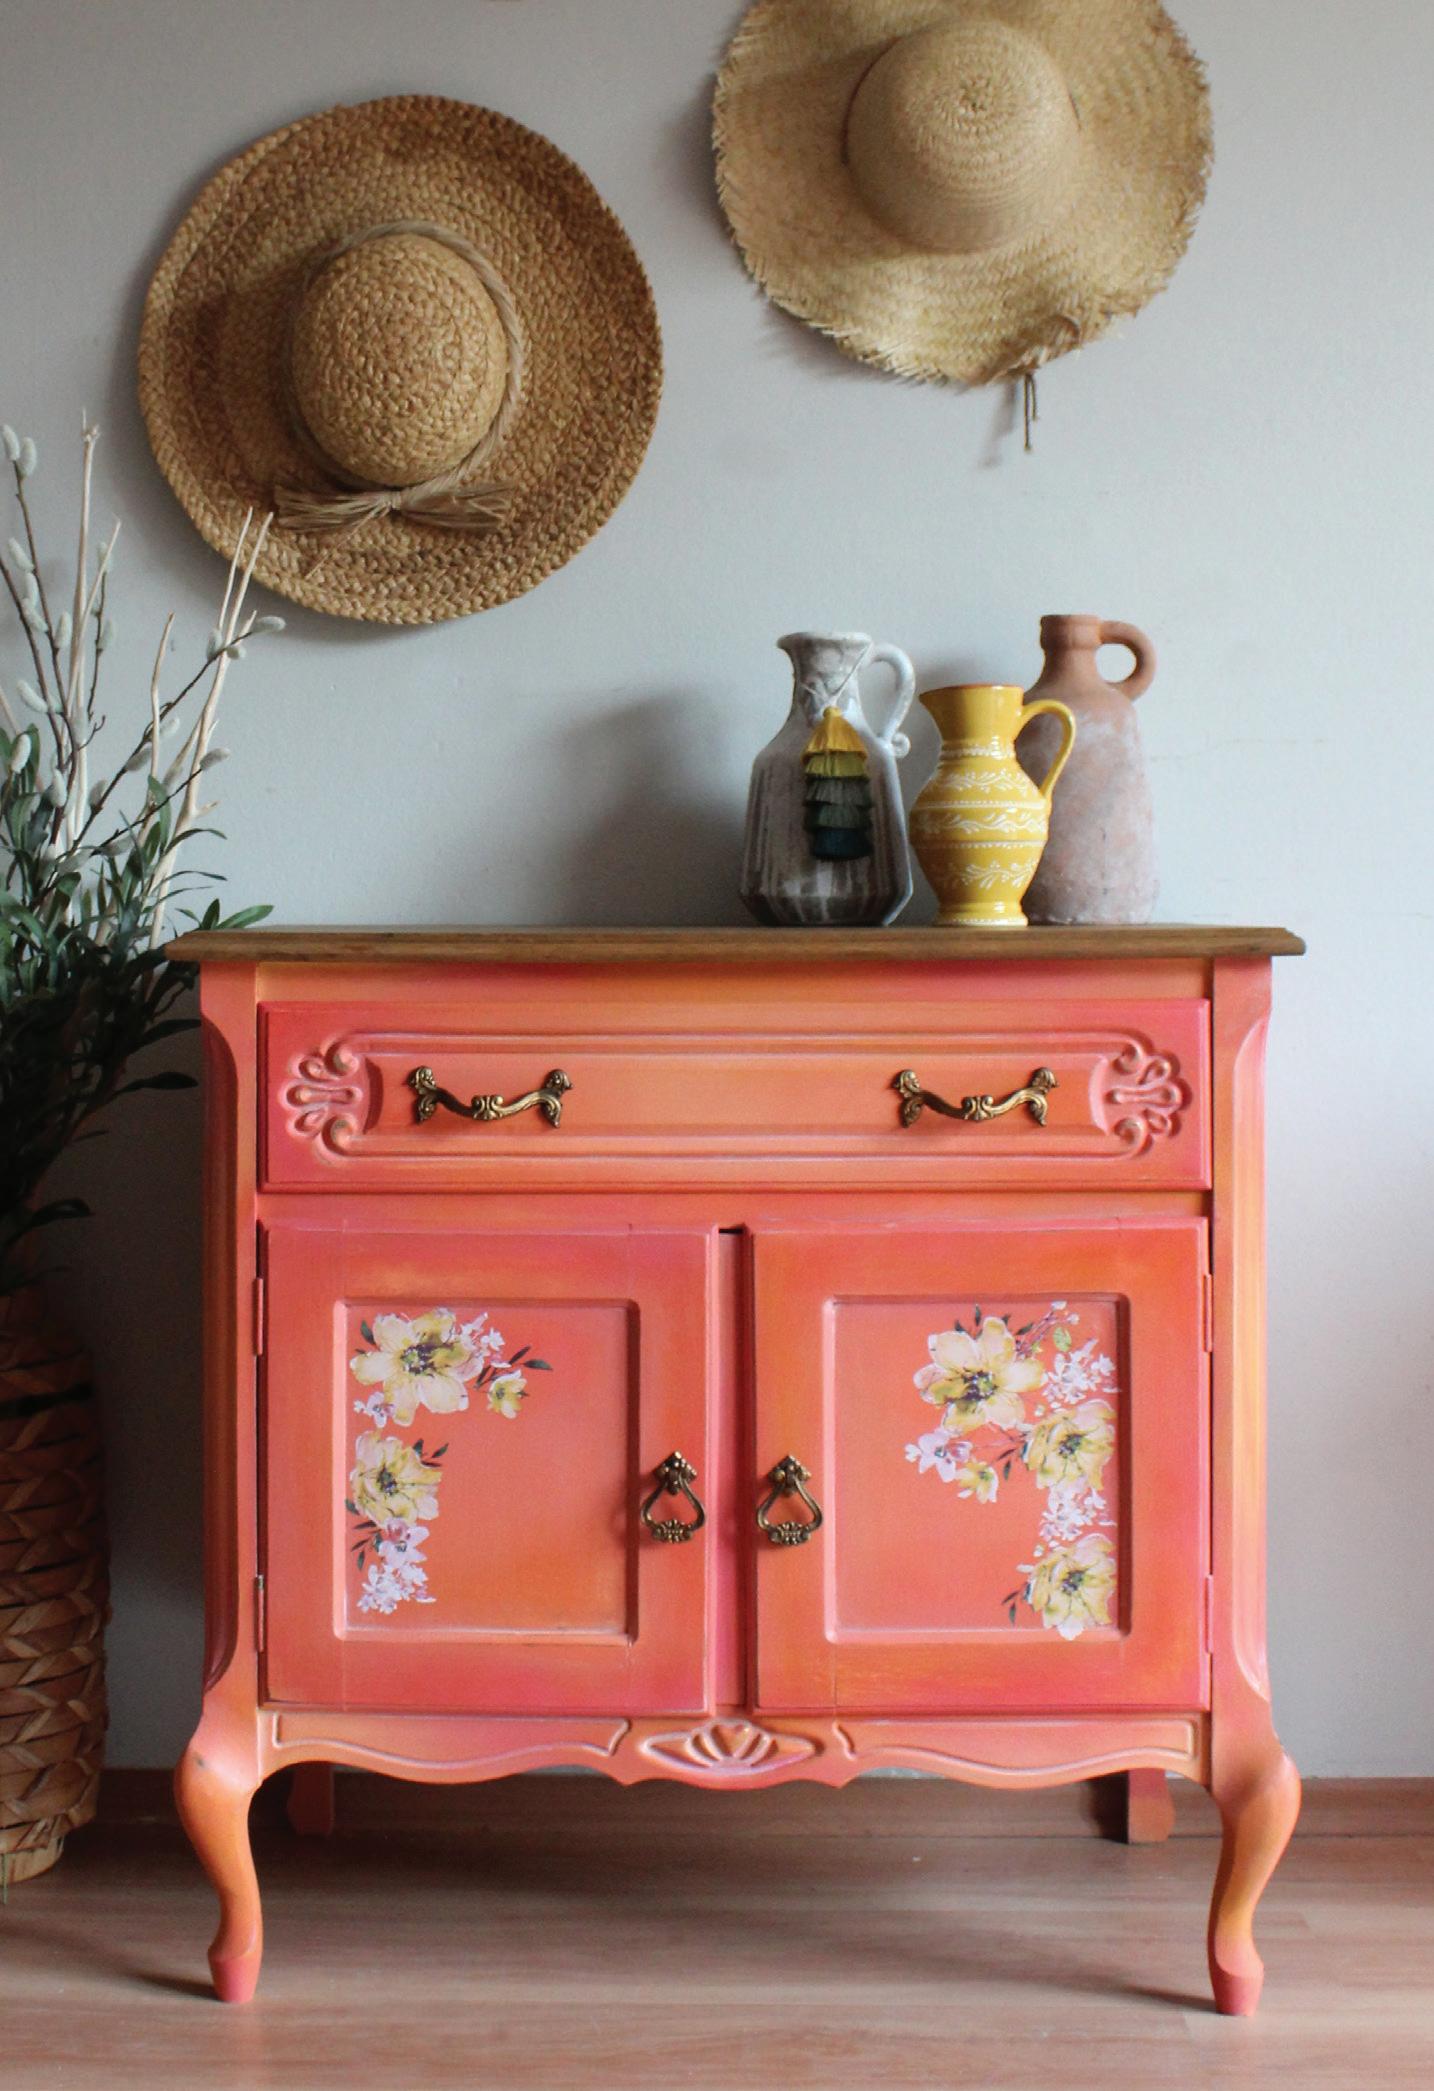
#captivatingcoral
13 SUMMER 2023 COLOR GUIDE
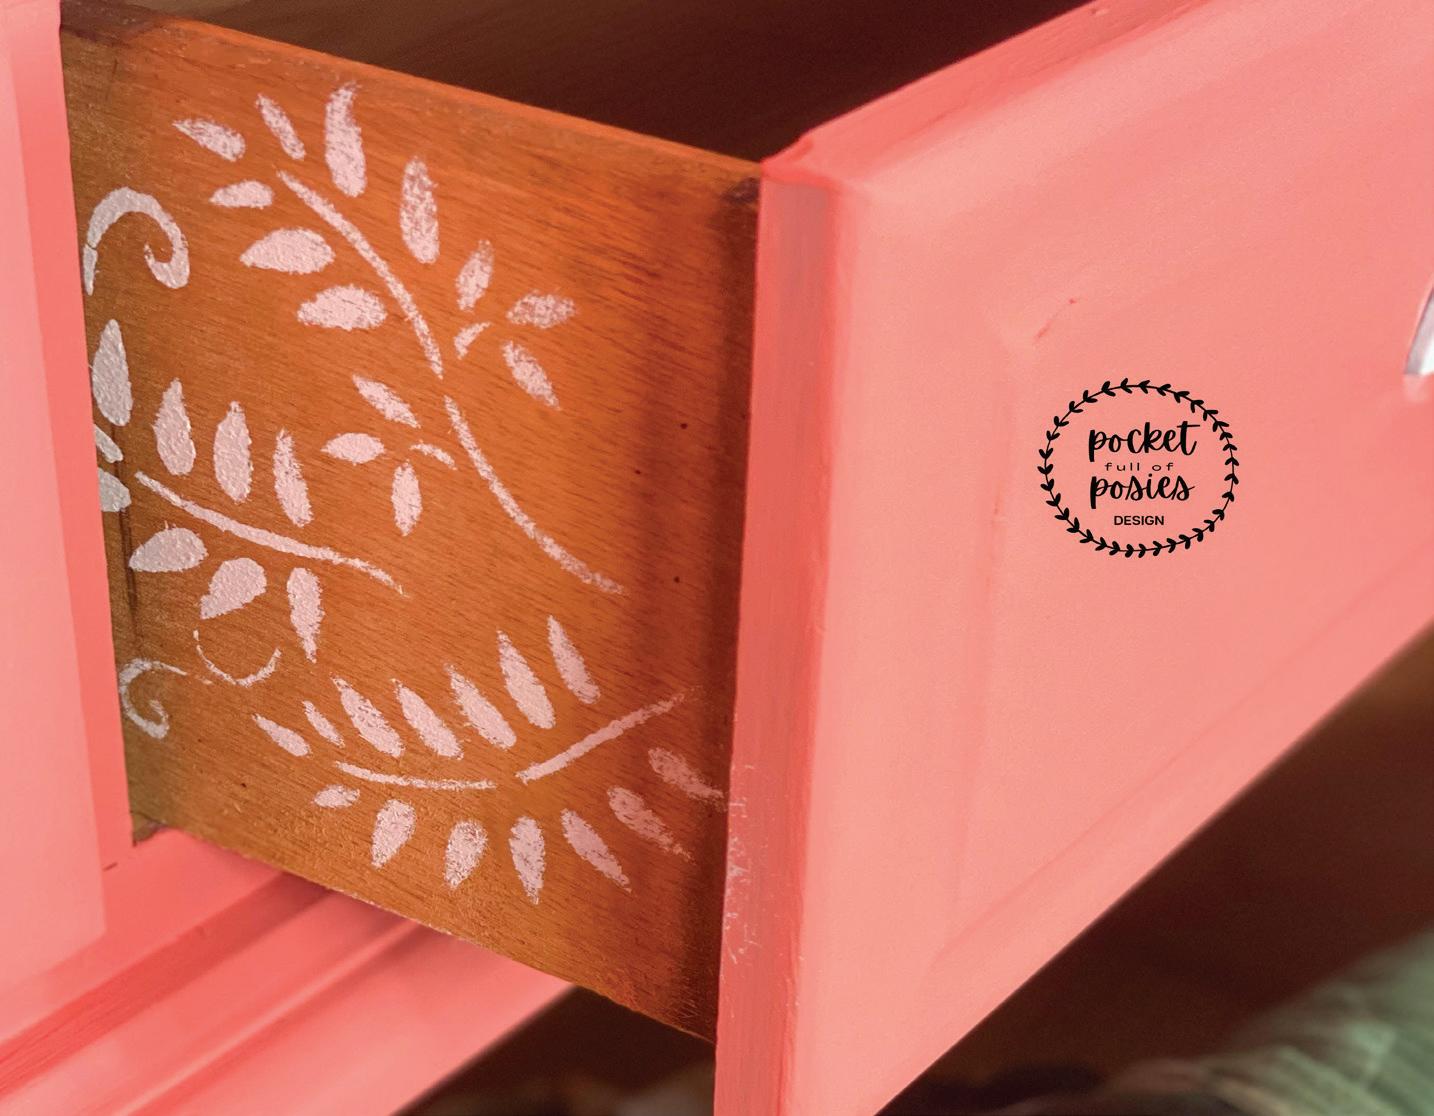
© Pocket Full of Posies
© Renovare
© Hanmade
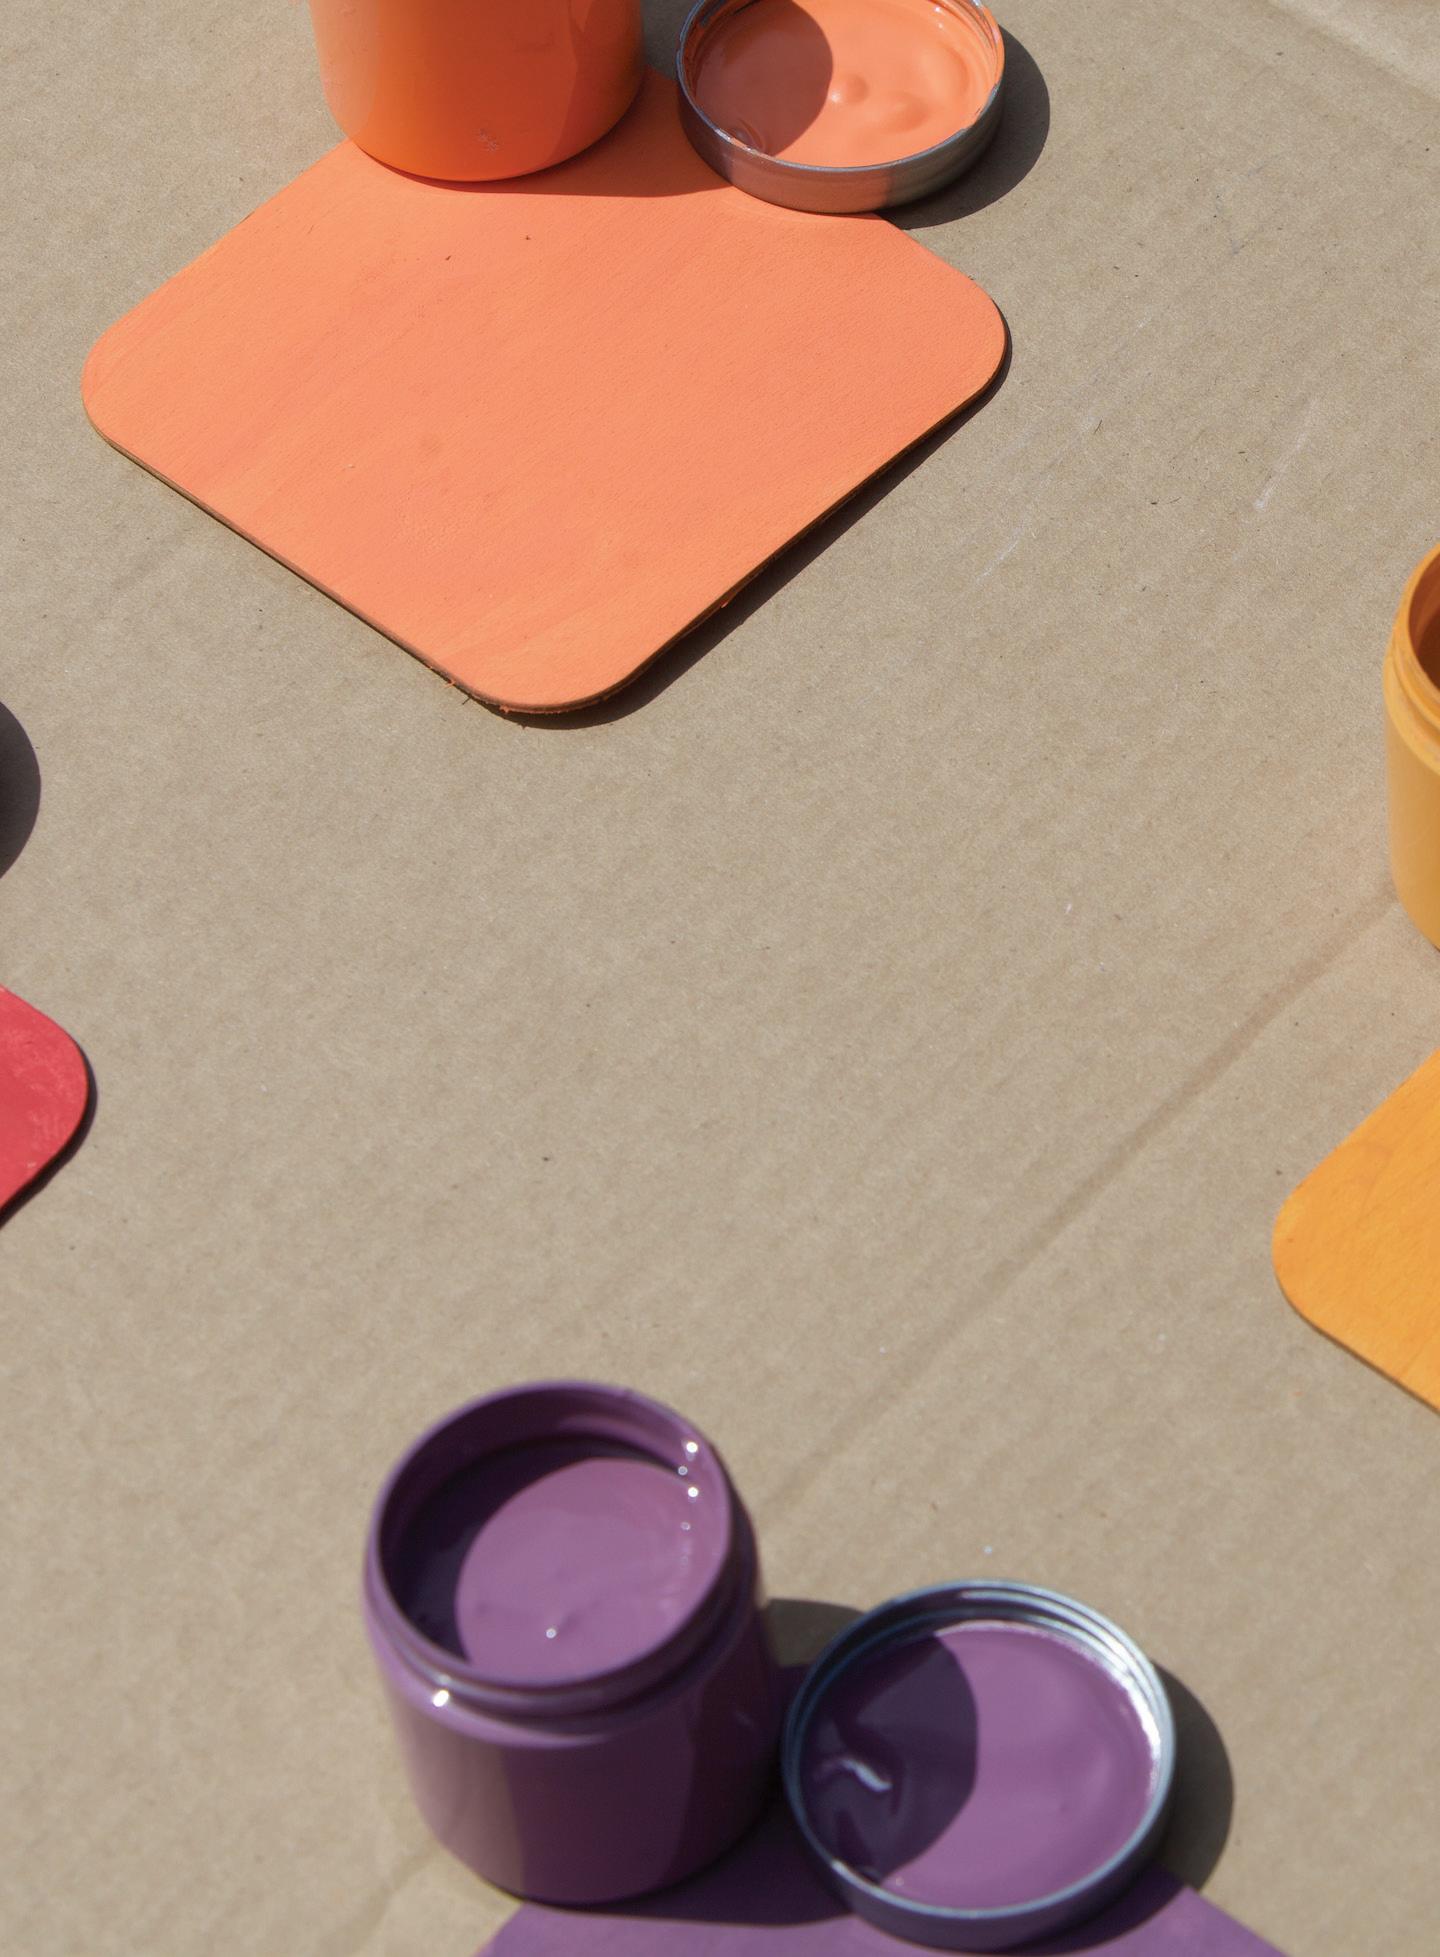
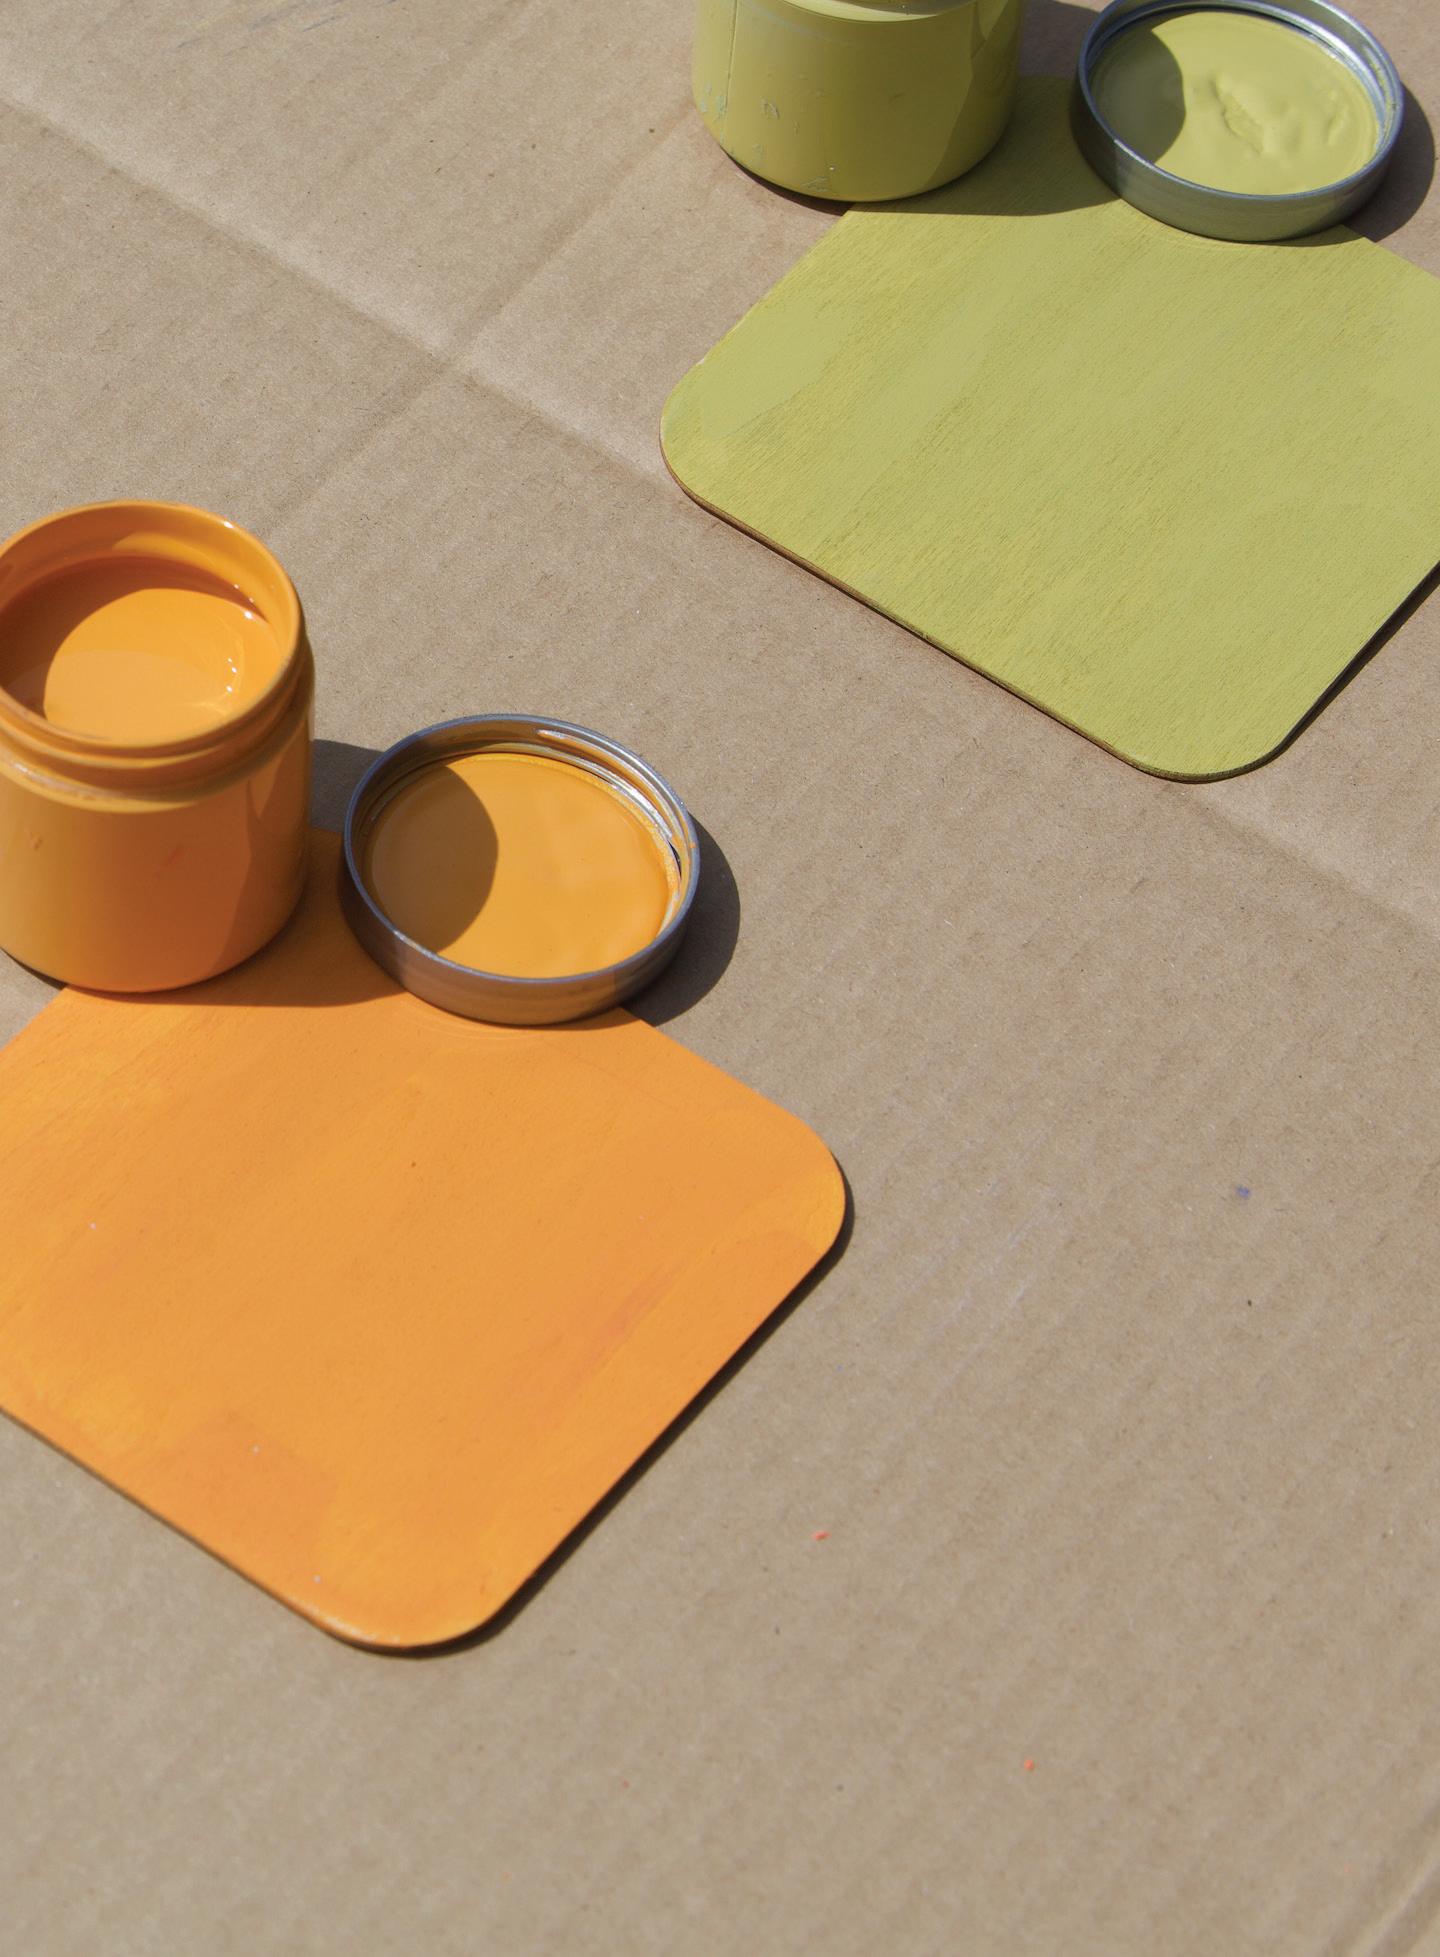
Make our paint! Meet our Makers:
Mix It Up with the People who
Country Chic Paint’s warehouse staff members have unleashed their creativity, designing a collection of vibrant DIY summer colors inspired by the colors we highlight in our Guide. Influenced by nature, beach scenes, and tropical landscapes, these innovative hues are perfect for infusing your home with the spirit of the season.
Want to create one of these colors yourself? Visit our Color Page for all of our Mixed Recipes!
What’s Up? I’m Hannah!
Meet Hannah, one of the expert paint makers behind Country Chic Paint. In her two years with the company, she has become a master of pouring pretty paint colors. While Fresh Mustard is her current favorite, Hannah’s love for colors changes weekly, always seeking new inspirations. With her infectious laughter and the sweet camaraderie of her coworkers, she brings joy to the workplace. Hannah’s artistic spirit and ever-evolving palette make her a true maestro of creativity.
See more Color Recipes!

16
1 Part Sage Advice + 1 Part Fresh Mustard 1 Part Sunset Glow + 2 Parts Fresh Mustard
17 SUMMER 2023 COLOR GUIDE Morning Mimosa
Parsley
Chopped
Fresh Mint
3
18
Amethyst
Parts Darling + 1 Part Bliss + 1 Part Sage Advice
2 Parts Poppy + 1 Part Bling Bling + 1 Part Lazy Linen
Howdy! I’m Graham!
Introducing Graham, the epitome of cool and calm at Country Chic Paint! With three years of dedicated service under his belt, Graham brings a sense of tranquility and expertise to the team. His favorite color, Hollow Hill, perfectly reflects his composed nature. With Graham around, there’s always an atmosphere that feels more like a family gathering than a workplace.
See more Color Recipes!

19 SUMMER 2023 COLOR GUIDE
How you doin’?
I’m Emelie!
Introducing our remarkable warehouse dynamo, Emelie! With an impressive 4.5 years of experience, she is a true powerhouse. Emelie’s favorite color, Opulence, reflects her passion for adding a touch of fun to her work. As a valuable member of the Country Chic Paint team, she embodies dedication, teamwork, creating a warehouse space where efficiency and friendship thrive.
See more Color Recipes!

20
Sultry Skies
2 Parts Persimmon + 1 Part Sunset Glow
Midsommar Dream
1 Part Raspberry Sorbet + 1 Part Whoop-de-do
21 SUMMER 2023 COLOR GUIDE
Clarity

Rendezrouge
22
1 Part Poppy + 1 Part Sunset Glow + 1 Part Raspberry Sorbet + 1 Part Persimmon
1 Part Bling Bling + 1 Part Lazy Linen + 1 Part Whoop-dedo + 1/2 Part Secret Garden
Aloha! I’m Kelly (& Arlo)
Meet Kelly, the ray of sunshine at Country Chic Paint who has been brightening our days for over 5 amazing years! Her current favorite color, Secret Garden, is just the tip of the iceberg when it comes to her love for new hues. Not only does she bring her skills of organization to the table, but she also brings her furry sidekick, Arlo, who adds an extra dose of cuteness to our workspace. At Country Chic Paint it’s not just about work, but about creating a thriving community of creativity, friendship, and wagging tails.
See more Color Recipes!

23 SUMMER 2023 COLOR GUIDE
Hello! I’m Gina
Introducing Gina, our bandana-wearing rockstar at Country Chic Paint! With three years of pure awesomeness under her belt, she’s a superstar of color. Her favorite hue, the elusive and discontinued Icicle, showcases her penchant for unique finds. Inspired by blend of blues and greens, Gina crafted summer-themed masterpieces that transport you to a world of sunny vibes. But it’s not just about the paint – Gina thrives on the connection she has with her coworkers. And let’s not forget her secret pleasure: indulging in the office fridge’s mouthwatering cheese delights.
See more Color Recipes!

24
25 SUMMER 2023 COLOR GUIDE Summer
Summertime Blues
1
Sprigs
1 Part Bling Bling + 1 Part Whoop-de-do 2 Parts Crinoline + 1 Part Fresh Mustard +
Part Bliss
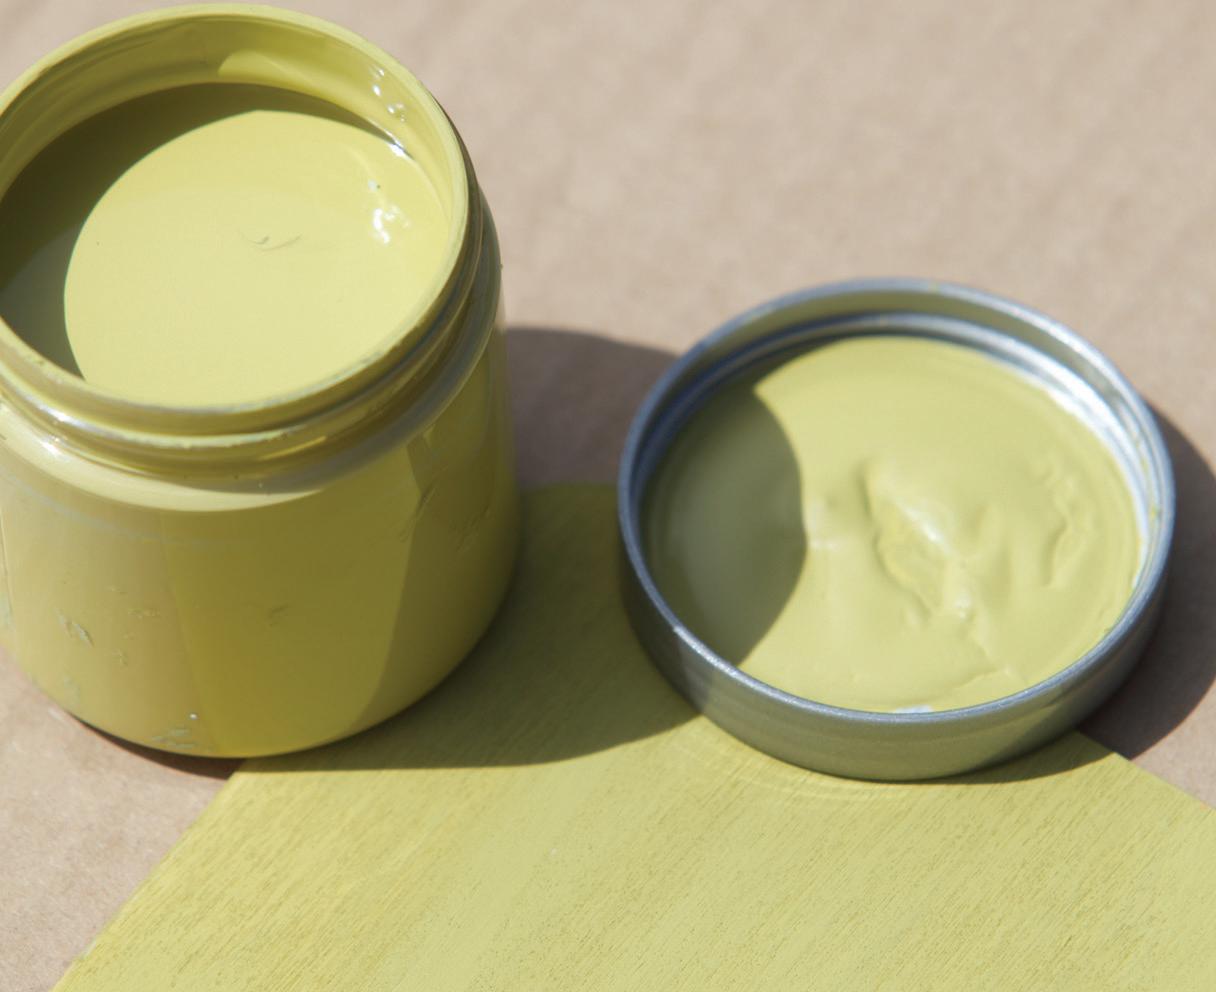
Fresh Mustard
Fresh Mustard is a striking and retro-inspired bold mustard yellow that adds a pop of color and personality to any space. Fresh Mustard works well with natural wood finishes, as well as dark colors like Liquorice and white accents like Simplicity for a bold contrast.
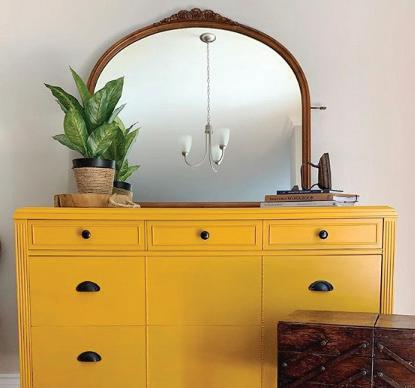
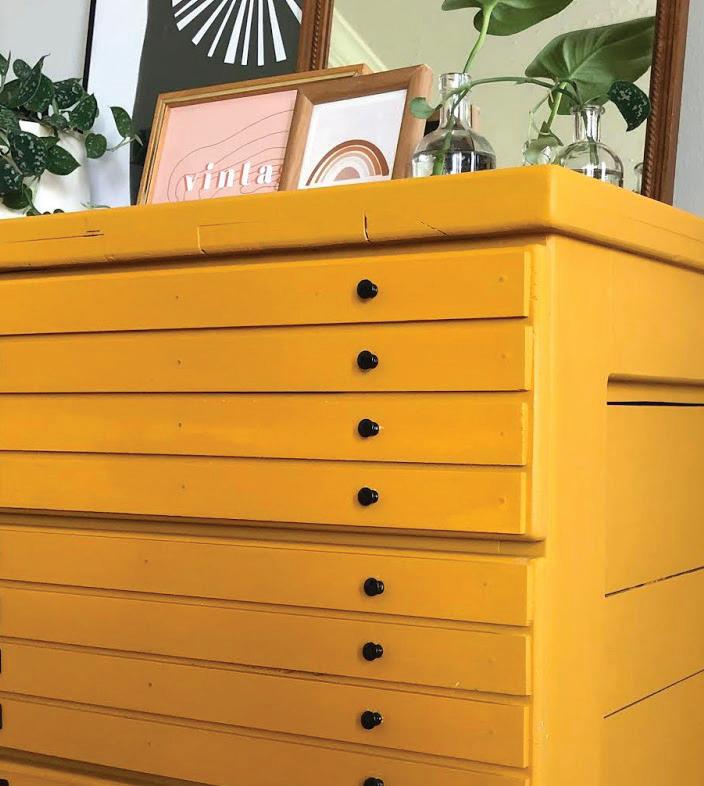
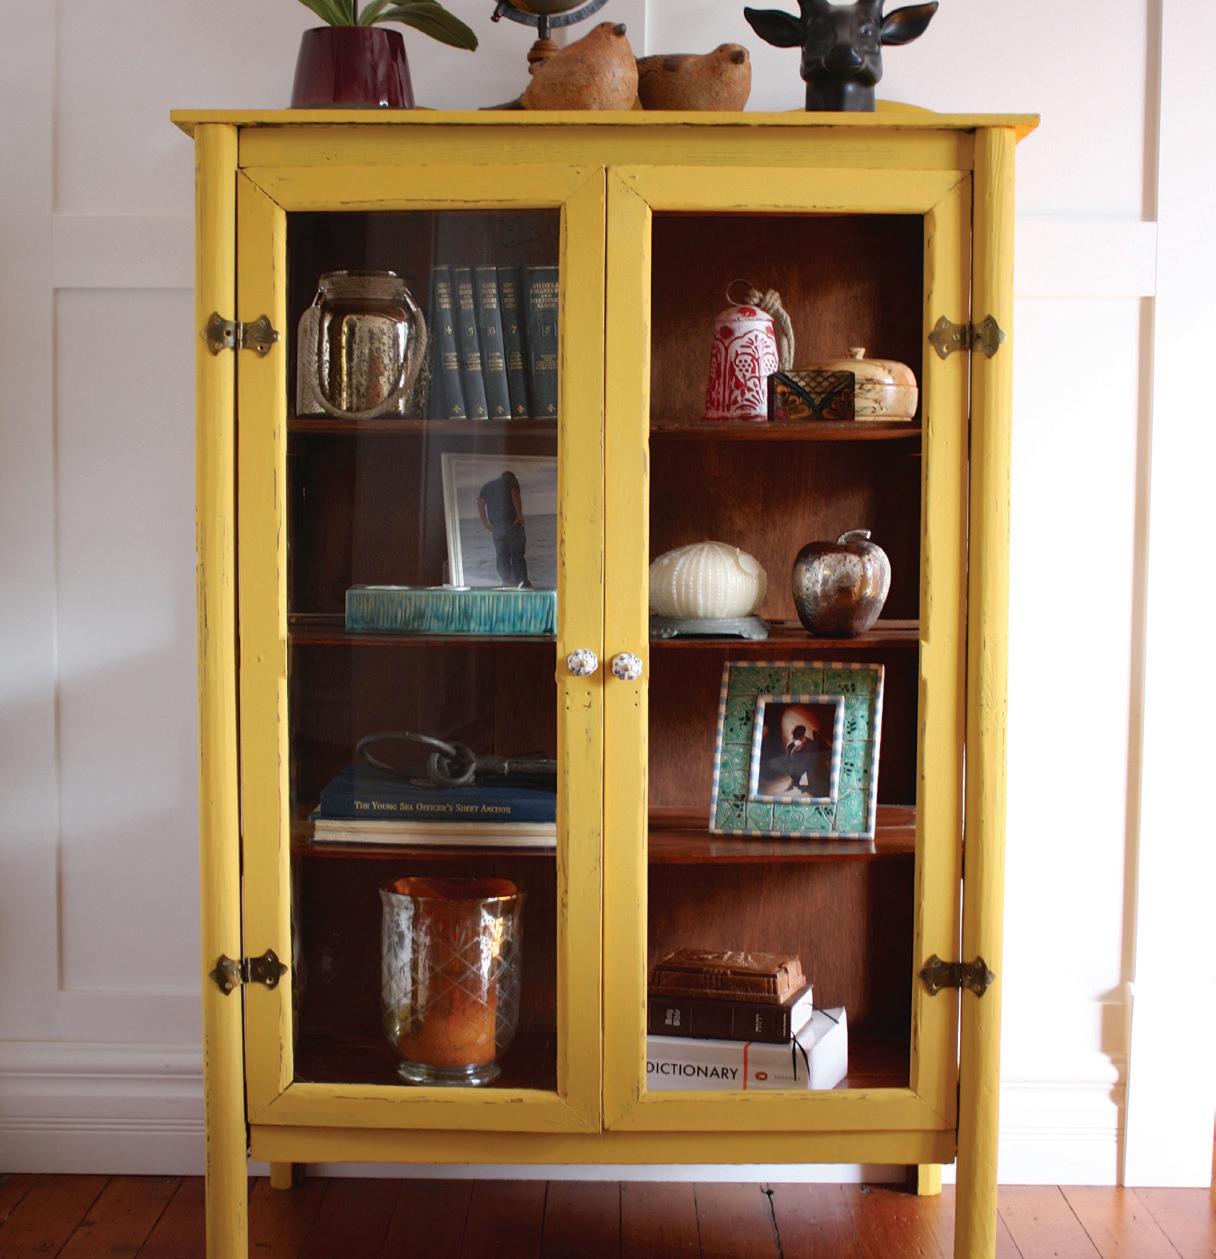
This vibrant shade is reminiscent of the iconic designs of the mid-century modern era and is an excellent choice for adding a touch of nostalgia and vintage charm.
#retroinspired
26
© Meg Brink
© Cait Miller
© Scribbles & Stitch
Darling is just that...Darling is a charming pastel pink with soft purple undertones that creates a serene atmosphere. It pairs well with light neutrals like Vanilla Frosting or darker shades like Liquorice or Opulence. Darling works well with shabby chic, cottage, and vintage-inspired decor and looks great with soft fabrics and textured finishes.


Use
27 SUMMER 2023 COLOR GUIDE
© Collee Flowers Corner
© Darling Vintage Refined
© Forever Pink
it on a vintage dresser
accent decor for a
#pastelpink
or
cozy and inviting ambiance.
Darling
Dive into Summer DIY:
Discover 8 Fun and Fresh Project Ideas

Get ready to dive headfirst into the realm of summer DIY as we unveil eight fun and fresh project ideas that will infuse your season with delight and leave you with tangible creations to cherish. From transforming your living space to adding personalized touches to your outdoor oasis, these projects are designed to spark your imagination and bring a touch of DIY magic into your summer.
So, gather your supplies, prepare to get your hands dirty, and let’s embark on this creative journey together, discovering the joy of summer DIY one project at a time.

Want to follow along? Visit our Blog for more detailed steps on each DIY we cover!


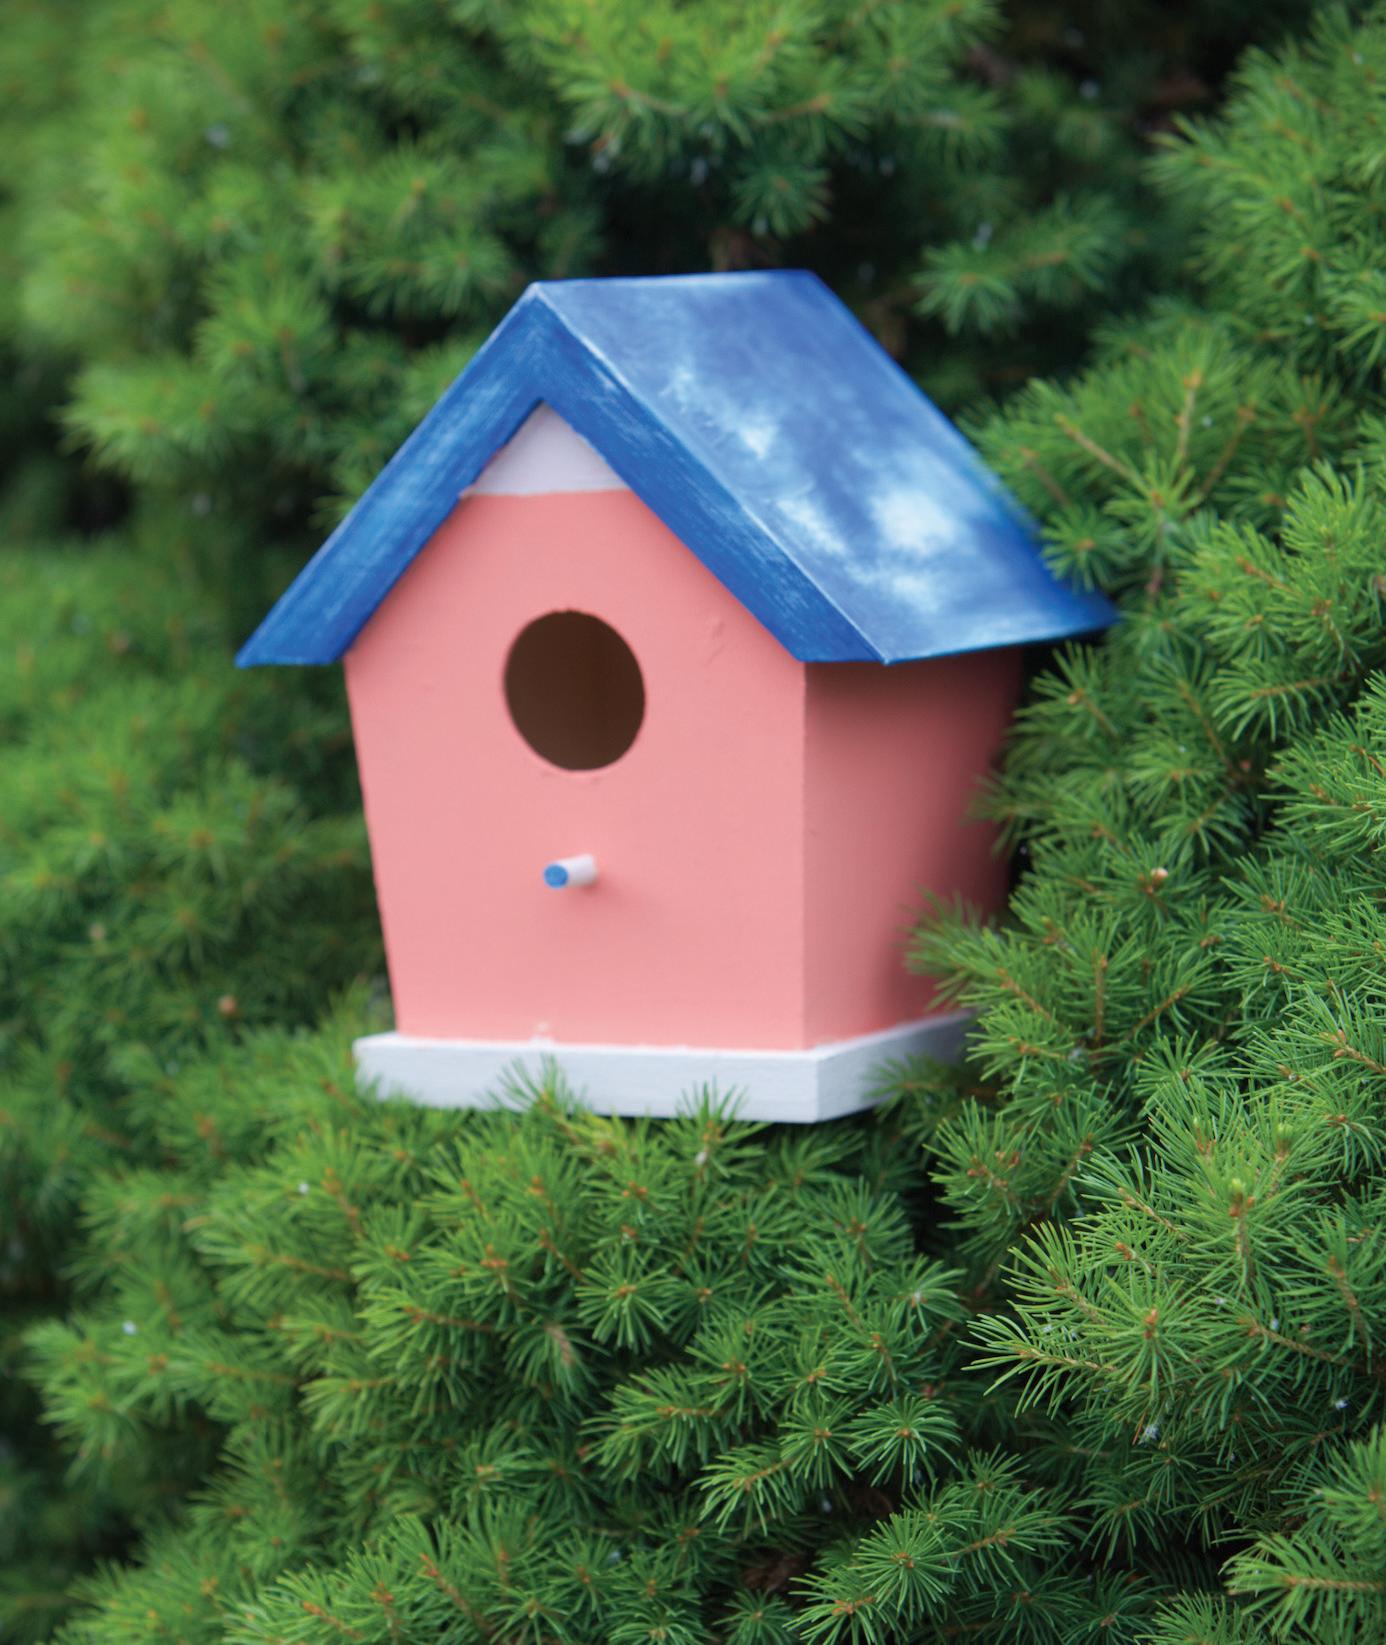
Transform a Simple Birdhouse into a Work of Art 1
30
Color Highlights: Sunset Glow, Lazy Linen & Bling Bling
Welcome to our tutorial on painting a birdhouse, where we will guide you through the process of transforming a simple wooden structure into a vibrant and eye-catching haven for your feathered friends.
Materials Needed:
Birdhouse, 2-3 Paint Different Paint Colors, Bucket of Water, Lint Free Rag & Clear Coat
Step 1: Paint the roof the color you want to show through the top coat
Step 2: Once the first layer has dried, add your second layer of paint in a contrasting color
Step 3: Wait about an hour until the paint feels dry to the touch
Step 4: Once your final paint coat is dry, get a bucket of water and a lint-free rag or scouring pad. Make sure that your cloth is nice and wet, but not so much that it drips. Use the wet rag to gently rub across the surface in a back & forth motion. You can choose to distress only the edges of your piece or to distress it on the flat surfaces as well.
Step 5: Now paint the body, bottom and perch of the birdhouse. You can go for a more subtle look, but with this DIY we decided to go with bright, contrasting colors.
Step 6: Once the paint has completely dried (24 hours) For extra protection from the elements, we suggest in finishing your bird house with our Clear Coat
Would you like a more visual Tutorial?
Check out our Blog post for a more detailed Tutorial with photos!
31 SUMMER 2023 COLOR GUIDE
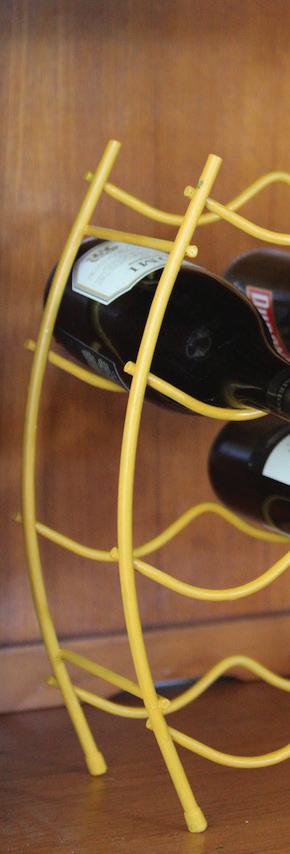
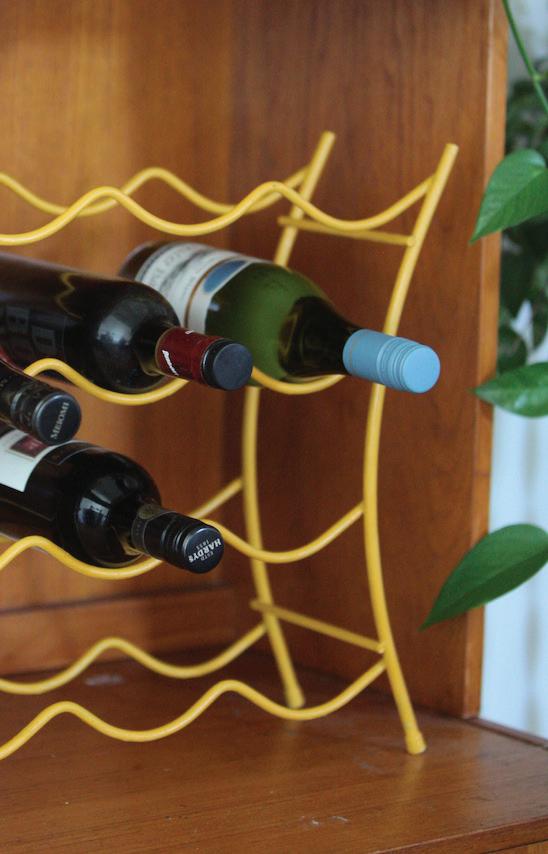
Wine Rack Revival: Transform Your Metal Wine Rack 2
Color Highlight: Fresh Mustard
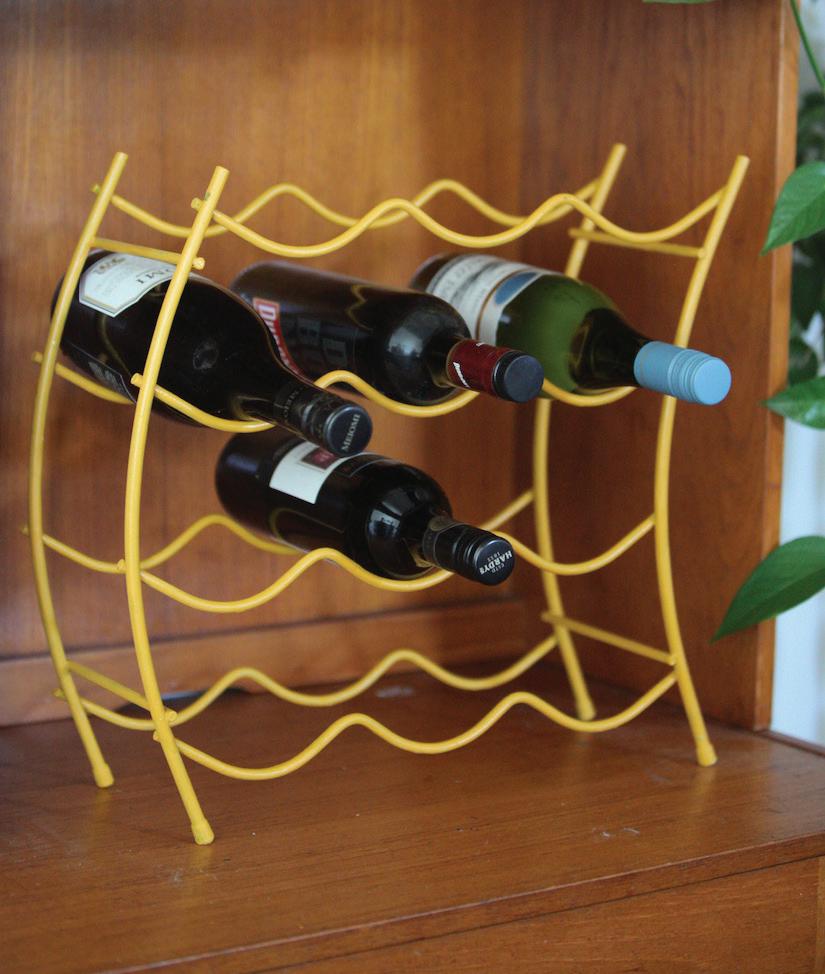
32
Welcome to our tutorial on painting a metal wine rack, where we will guide you through the process of giving new life to your wine storage in a fun and creative way. In this step-by-step guide, we will provide you with detailed instructions and valuable tips on how to prepare, paint, and finish your metal wine rack flawlessly.
Materials Needed: Metal Wine Rack, Clear Bonding Primer, Sand Paper, Paint & Clear Coat
Step 1: Begin by ensuring that the metal surface is clean and smooth
Step 2: Prime the surface with Clear Bonding Primer with a synthetic brush. Be sure to do the coats in thin layers to keep the surface as smooth as possible
Step 3: Scuff and sand your surface, this gives your piece a bit more texture for the paint to grip onto.
Step 4: Apply thin layers of paint until you have reacched full coverage. We used one of our Artist Brushes but a Painting Sponge would also do the trick!
Step 5: Wait 24 hours for the paint to completely dry before adding extra protection with Clear Coat - this will protect your paint from being chipped by the bottles and normal wear and tear.
Would you like a more visual Tutorial?
Check out our Blog post for a more detailed Tutorial with photos!
33 SUMMER 2023 COLOR GUIDE
DIY Jenga Joy: Step-by-Step Guide to Crafting Your Own Tower of Fun 3
34
Welcome to our exciting tutorial on transforming a classic Jenga set into a personalized masterpiece through the power of paint! Get ready to unleash your creativity and add a unique touch to this beloved game with your own custom designs.
Materials Needed:
54 uniformly shaped wooden blocks, pencil, saw, sandpaper & paint
Step 1: Purchase or obtain lumber boards. Ensure they are straight and free from major defects. Measure and mark 10.5-inch lengths on the boards using a measuring tape and pencil. You’ll need 54 blocks, so measure and mark accordingly
Step 2: Using a saw (circular saw or mitrexs saw), cut along the marked lines to create individual 10.5-inch blocks. Take care to wear the appropriate safety gear & make straight and precise cuts for consistent-sized blocks
Step 3: After cutting, sand the blocks to remove any rough edges or splinters. Start with medium-grit sandpaper and smooth all sides and corners. Then, use fine-grit sandpaper to achieve a smoother finish
Step 4: If you want to make your set extra fun, you can add some personalization to your Jenga set by staining or painting the blocks. Allow sufficient drying time before proceeding
Step 5: Once the blocks are completely dry, you’re ready to play! Begin by building a tower using three blocks placed side by side in one direction, then three more blocks placed perpendicularly on top. Continue this pattern until you have a tower of 18 levels with three blocks each. Make sure the blocks are stacked straight and stable
Step 6: Gather friends or family and take turns removing one block at a time from any level of the tower. Carefully slide out a block using only one hand, and then place it on top of the tower to create a new level. The game continues until the tower collapses, and the last player to successfully remove and place a block wins!
Remember to always prioritize safety while using tools and handling the wooden blocks. Have fun building and playing your giant Jenga set!
Would you like a more visual Tutorial?
Check out our Blog post for a more detailed Tutorial with photos!
35 SUMMER 2023 COLOR GUIDE
Playful Palette: Create a Unique Look by Color Blocking Your Wooden Chair 4
Color Highlights: Poppy & Raspberry Sorbet
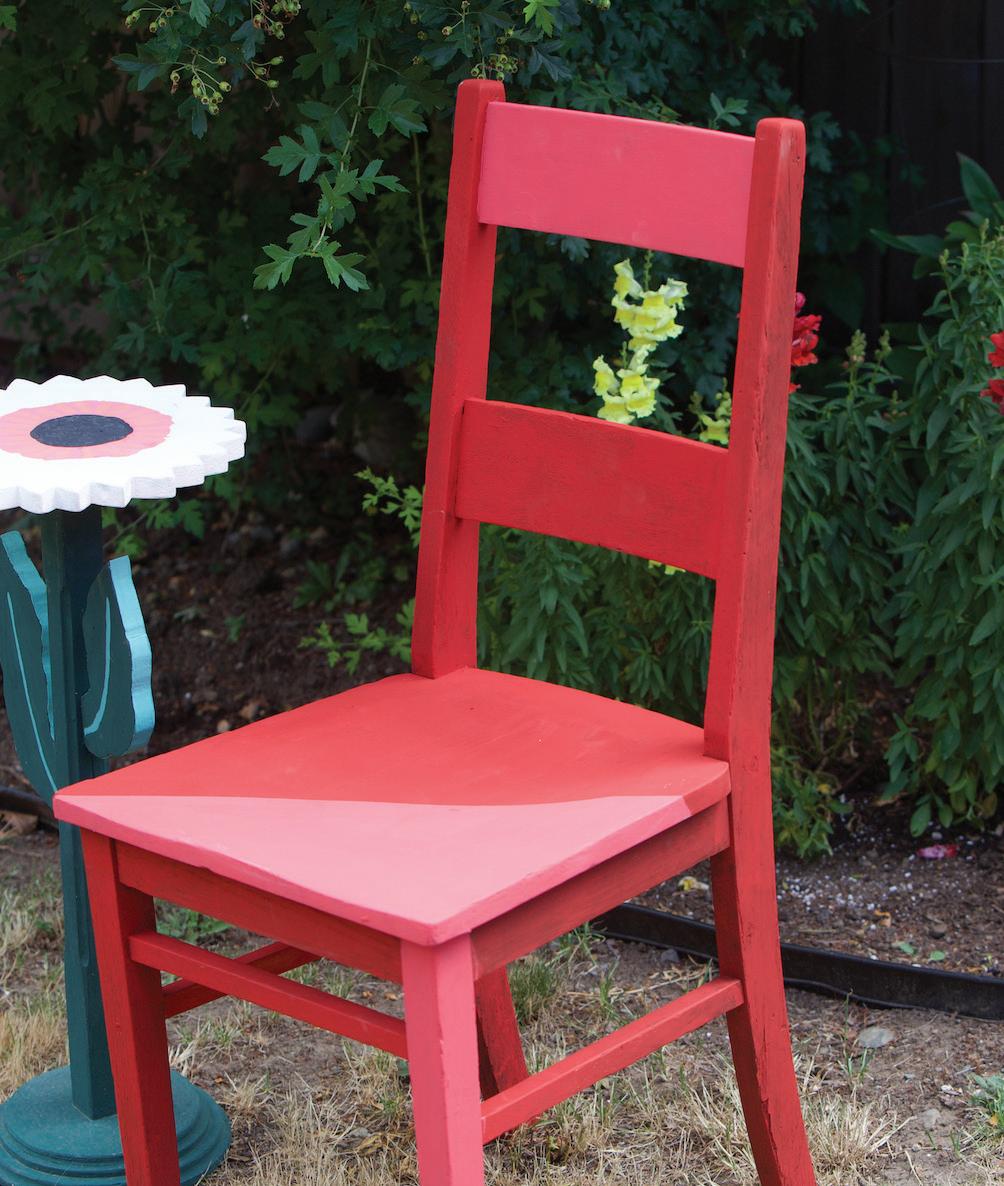
36
Welcome to our exciting DIY project on color blocking a wooden chair with paint, where we’ll show you how to transform a plain chair into a statement piece with vibrant and modern color combinations.
Materials Needed:
Wooden Chair, Sandpaper, Primer, Paintbrushes, Painter’s Tape, 2-4 Paint Colors, Drop Cloth
Step 1: Begin by ensuring that the wooden chair surface is clean and smooth. Use medium-grit sandpaper to lightly sand the chair, removing any rough patches or imperfections. Wipe away the sanding dust with a tack cloth or a damp cloth, ensuring a clean surface for the paint to adhere to.
Step 2: Visualize and plan the color blocking design for your chair. Consider the areas you want to paint in different colors and how they will complement each other. Use painter’s tape to mark off the boundaries of each color block.
Step 3: Using a paintbrush, apply an even layer of the base coat to the chair, following the wood grain. Allow the paint to dry completely before proceeding.
Step 4: Once the base coat is dry, it’s time to paint the color blocks. Start with the first color block, carefully applying the paint within the boundaries marked by the painter’s tape. Use a clean paintbrush for each color, ensuring no mixing of colors occurs. Apply multiple coats as needed, allowing each layer to dry before adding the next one. Repeat this process for each color block, ensuring clean lines and even coverage. Remove the painter’s tape while the paint is still slightly wet to achieve crisp edges.
Step 5: Once all the color blocks are painted and dry, you can choose to apply a clear protective finish to seal and protect the paint. After applying the protective finish, allow the chair to dry thoroughly before using or displaying it in (or outside!) your home.
Would you like a more visual Tutorial?
Check out our Blog post for a more detailed Tutorial with photos!
37 SUMMER 2023 COLOR GUIDE
Wearable Art: Unleash Your Creativity with a DIY Bucket Hat 5
Color Highlights: Fresh Mustard & Persimmon

38
Welcome to our delightful DIY bucket hat painting tutorial, where we’ll show you how to unleash your creativity and add a touch of personal style to your summer wardrobe that you can show off at the beach.
Materials Needed:
Hat, Pencil, Paint, Artist Brushes, Water, Paper Towels & Drop Cloth
Step 1: Ensure the cotton hat is clean and free of any dust or debris. If needed, gently wash and dry the hat according to the manufacturer’s instructions before starting the painting process. Place a protective covering on your work surface to prevent any accidental paint spills or stains.
Step 2: Use smaller brushes to add details, highlights, and shading to your design. This step allows you to add depth and dimension to your painted hat. Experiment with different brush strokes and techniques to create texture and visual interest.
Step 3: Allow 1-2 hours for the paint to dry completely This step ensures that the design sets properly on the cotton fabric.
Step 4: Wait 24 hours before brushing our Clear Coat on top of the painted details for extra protection.
Step 5: Wear it to the beach!
Would you like a more visual Tutorial?
Check out our Blog post for a more detailed Tutorial with photos!
39 SUMMER 2023 COLOR GUIDE
Walk on the Wild Side: Learn How to Make Succulent Shoes 6
Color Highlights: Poppy, Raspberry Sorbet, Tropical Cocktail & Bling Bling
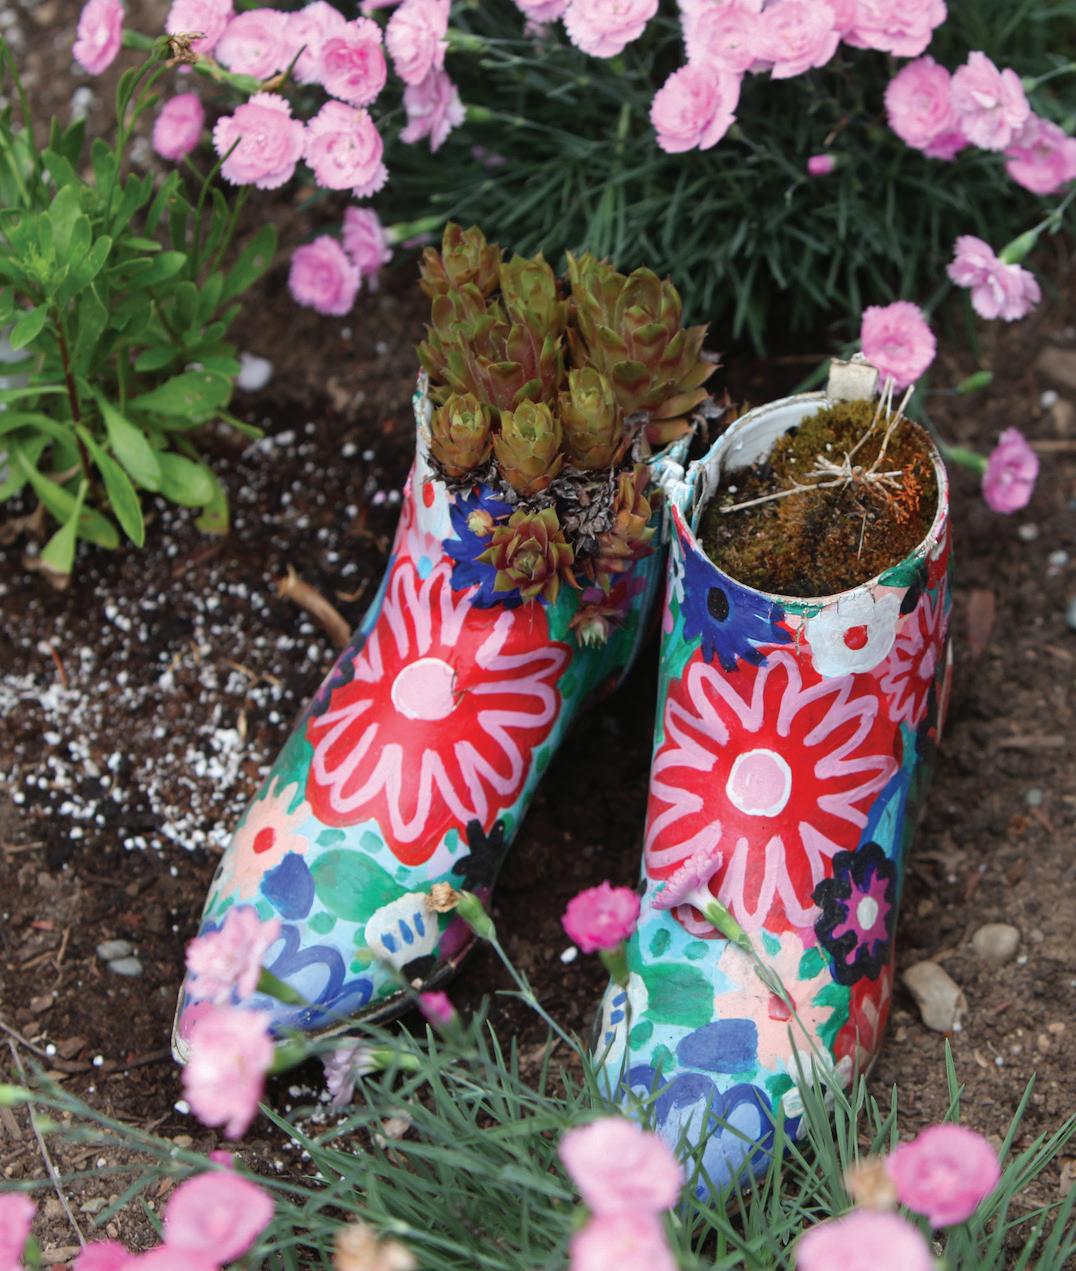
40
Welcome to our captivating tutorial on creating your own DIY succulent shoes, where fashion and nature intertwine in a stunning display of botanical style for your garden!
Materials Needed:
Old Shoes, Potting Soil, Succulent, Small Stones or Sand & Paint
Step 1: Choose a pair of old shoes that you no longer wear but are still in decent condition. Rubber rain boots, sneakers, or leather shoes work well for this project. Avoid shoes with large holes or extensive damage.
Step 2: Preparing the Shoes: Clean the shoes thoroughly, removing any dirt or debris both inside and outside. Allow them to dry completely before moving to the next step.
Step 3: Mark and cut openings using a pencil or marker, outline where you want the plant openings to be on the shoes. Consider the size and shape of the succulents you’ll be planting. Creating Drainage Holes To ensure proper drainage for the succulents, use the craft knife or a small drill to create a few drainage holes at the bottom of each shoe.
Step 4: Paint the patterns you’d like onto the shoe. Leave to dry for 24 hours and then add our Clear Coat for extra protection.
Step 5: Preparing the Shoes for Planting Place a layer of small stones or pebbles at the bottom of each shoe to aid in drainage. This will prevent the succulent roots from sitting in excess water.
Step 6: Carefully remove the succulents from their pots, loosening the root ball if necessary. Place them into the prepared openings in the shoes, pressing the soil gently around the roots to secure them.
Step 7: Find a suitable location in your garden that provides the right amount of sunlight for your succulents. Most succulents thrive in bright, indirect light.
Would you like a more visual Tutorial?
Check out our Blog post for a more detailed Tutorial with photos!
41 SUMMER 2023 COLOR GUIDE
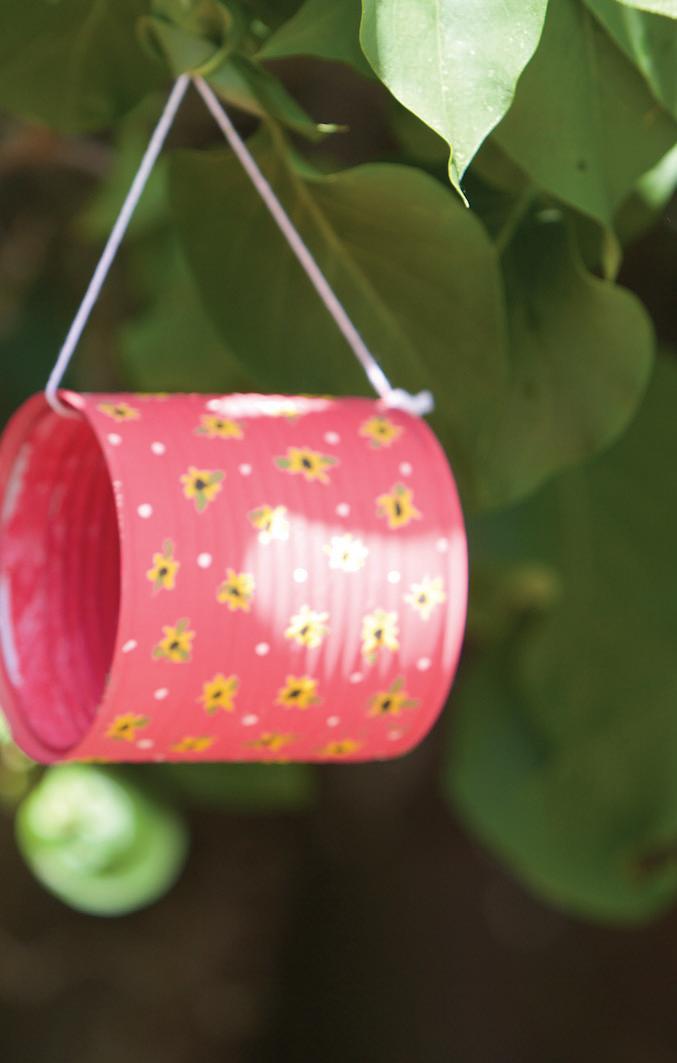
Upcycled Delights: Learn How to Make Bird Feeders from Soup Cans 7
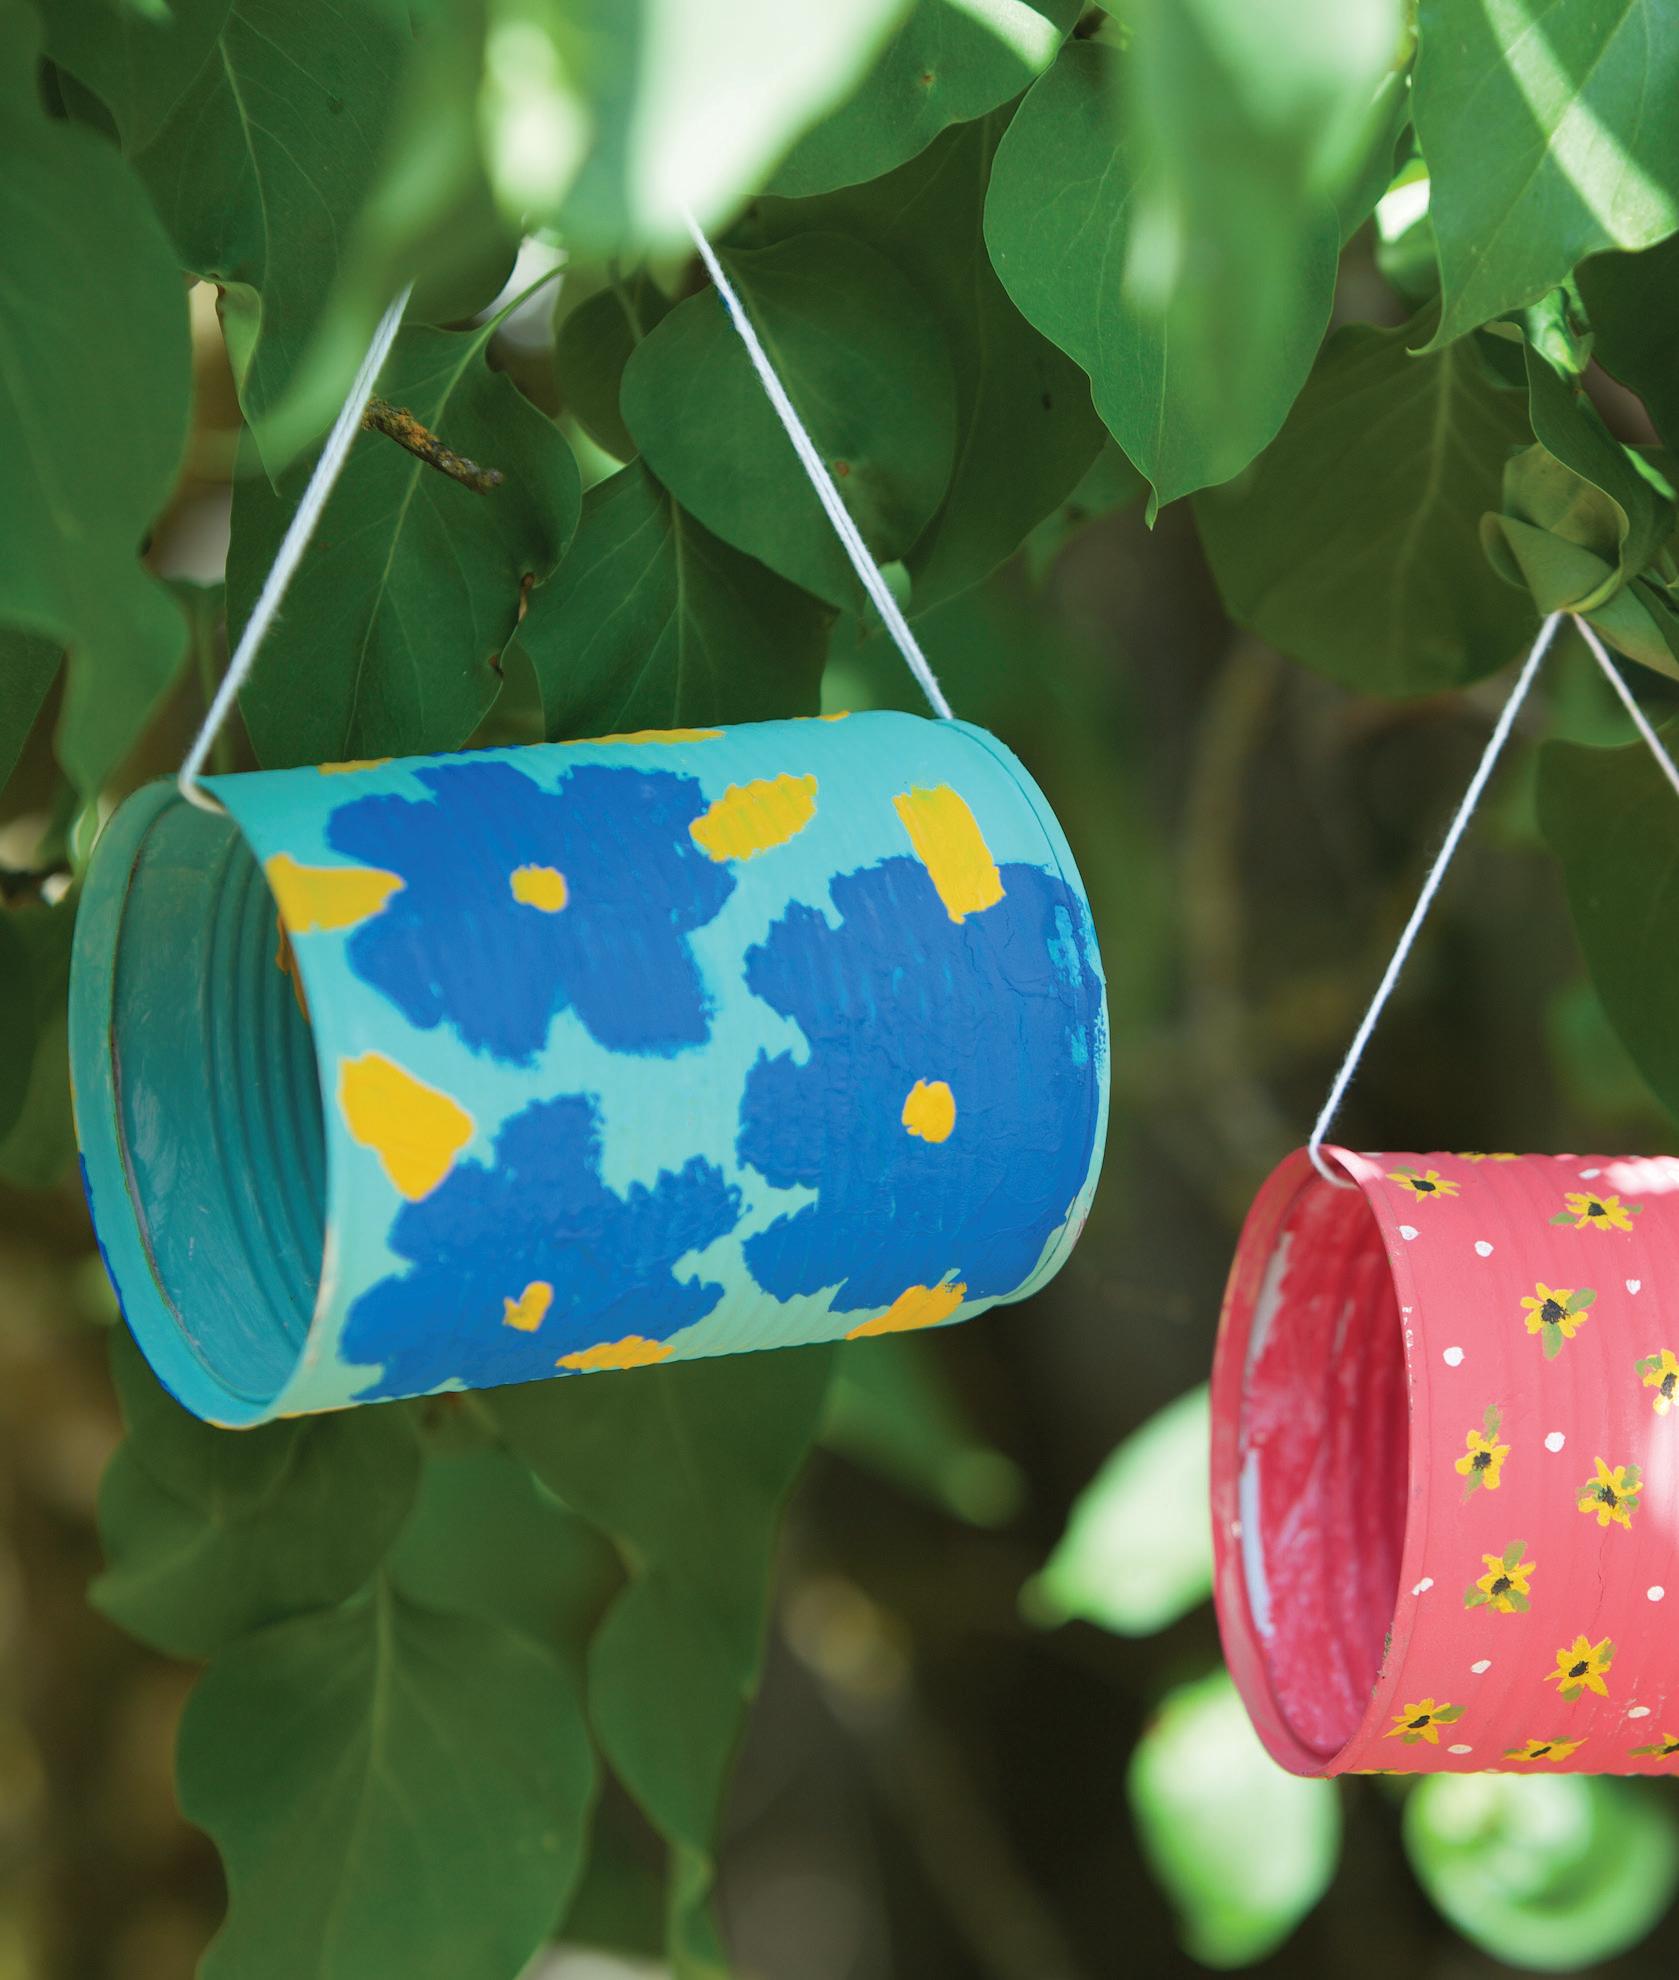
Color Highlights: Fresh Mustard, Raspberry Sorbet, Bling Bling & Tropical Cocktail
42
If you’re a nature enthusiast or bird lover looking to attract and nourish a variety of bird species, this step-by-step guide is perfect for you. Get ready to embark on a rewarding and eco-friendly project that will bring joy to your backyard while providing a vital food source for local birds.
Materials Needed:
Clean soup can(s), Paint, Paintbrushes, Clear Coat, Wire or String for Hanging, Birdseed
Step 1: Start by cleaning the soup can thoroughly, ensuring that it’s free of any food residue. Remove the label and adhesive from the can. Wash and dry it completely before moving on to the painting process.
Step 2: Plan your design for the bird feeder. You can opt for a simple pattern, abstract shapes, or even paint a landscape scene. Sketch the design lightly with a pencil on the surface of the can to serve as a guideline.
Step 3: Using our Paint, begin painting your design on the soup can. Start with the background color, applying an even coat with a paintbrush. Let it dry completely before moving on to the next step. Once the base coat is dry, add the details and colors to your design. Use our Artist Brushes to create intricate patterns or fine lines. Allow each color to dry before adding additional layers or details.
Step 4: After the cans have dried for 24 hours, protect your painted design from the elements, apply a coat of Clear Coat. This will help preserve the colors and make the bird feeder more durable for outdoor use.
Step 6: Attach a wire or string to the top of the soup can securely, ensuring it can withstand the weight of the bird feeder when filled with birdseed. Create a loop or knot to form a hanger. Choose a suitable location in your garden or yard to hang the bird feeder. Make sure it’s easily accessible for the birds while providing a safe and comfortable environment.
Step 7: Fill the soup can bird feeder with a birdseed mixture suitable for the birds in your area. Consider using a mix that attracts a variety of bird species. Regularly check and refill the bird feeder to ensure a continuous supply of food for the birds. Keep it clean and free of mold or spoiled seeds.
Would you like a more visual Tutorial?
Check out our Blog post for a more detailed Tutorial with photos!
43 SUMMER 2023 COLOR GUIDE
Bring the Desert Home: How to Make Rock Cactus Pots 8
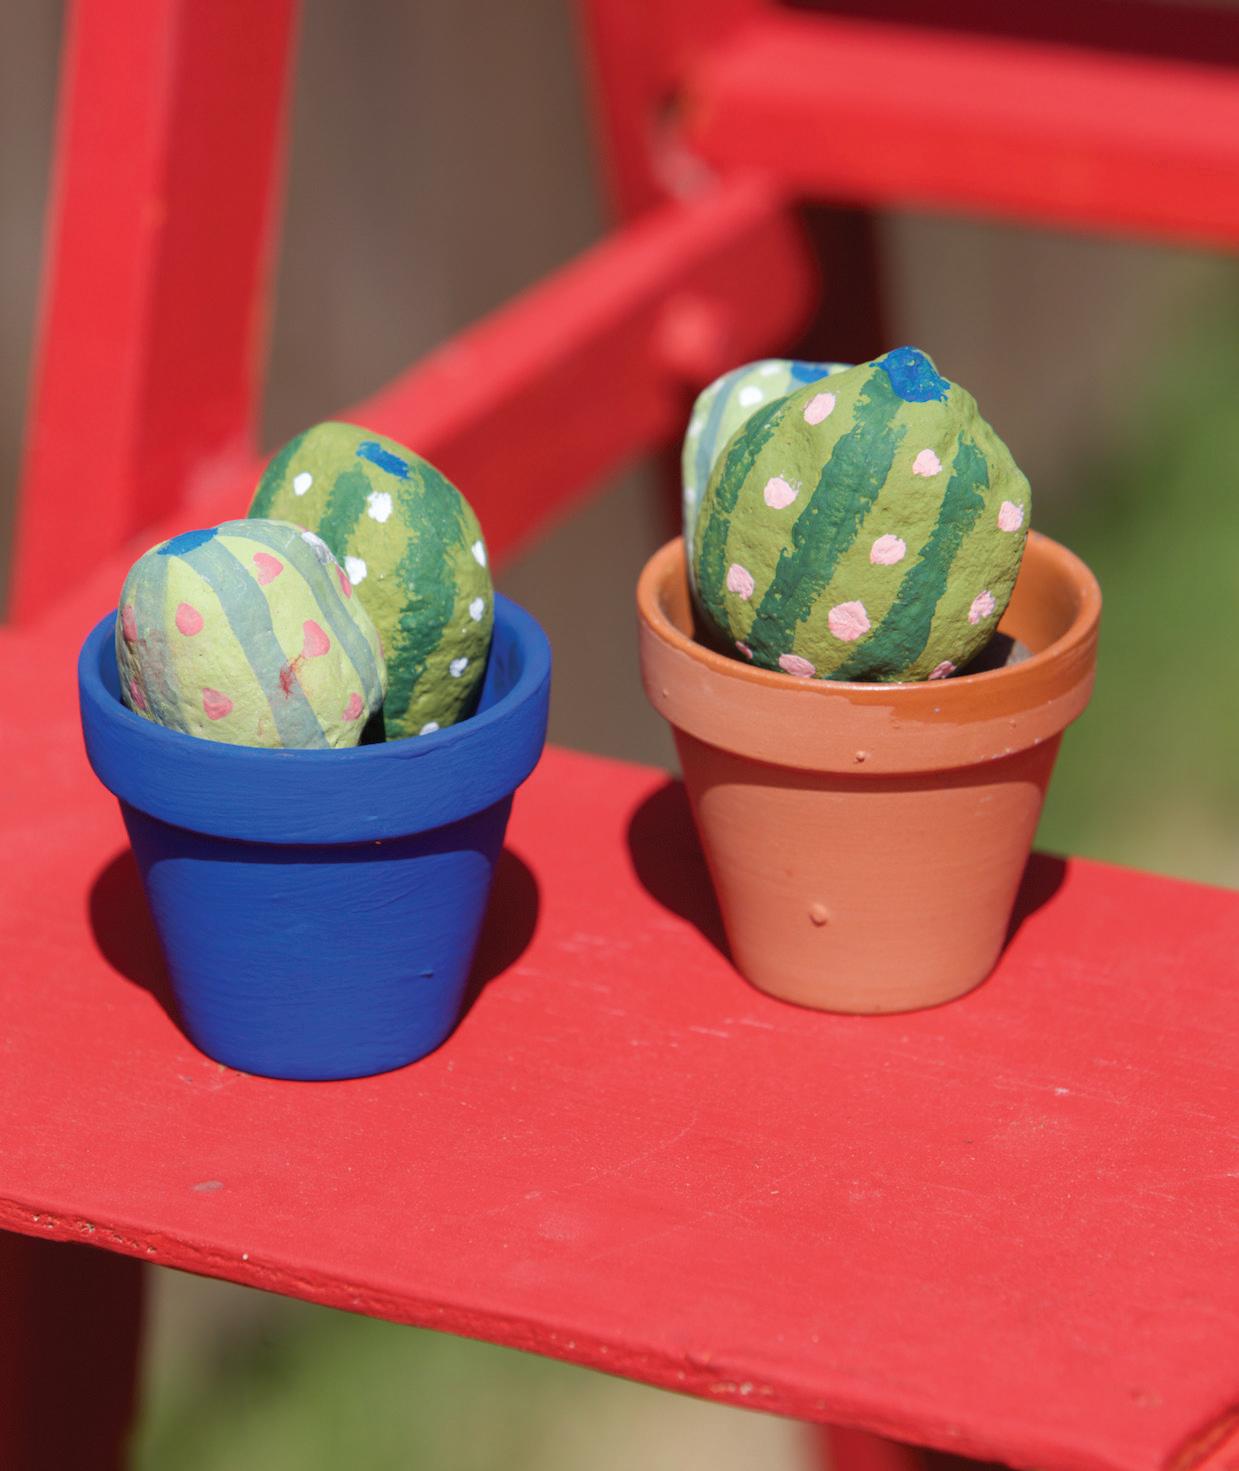
Color Highlights: Poppy, Bling Bling, Secret Garden & Fireworks
44
Welcome to our tutorial on creating cactus pots made of painted rocks, where imagination and nature come together to craft adorable and low-maintenance homes for your prickly plants. If you’re a fan of succulents and love adding a touch of whimsy to your space, this step-by-step guide is perfect for you.
Materials Needed: Paint, Paintbrushes, Clear Coat, Wire or String for Hanging, Smooth Rocks of Various Sizes and Shapes, Sand, Small Plant Pots or Containers
Step 1: Gather smooth rocks of different shapes and sizes to resemble cacti.
Step 2: Start by applying a base coat of green (We used Secret Garden) paint to each rock. Let the paint dry completely.
Step 4: Wait about an hour until the paint feels dry to the touch. Add details like cactus spikes or patterns. You can also add white dots or lines to mimic thorns or blooms.
Step 5: Arrange your painted rocks in the pots, gently pressing them into place.
Step 6: If you are going to keep your Rock Cactus outside, make sure to wait 24 hours for the paint to dry and then protect with Clear Coat
Step 7: Find a suitable spot to display your mini cactus plants. They can be placed on shelves, windowsills, or as a centerpiece on a table
Would you like a more visual Tutorial? Check out our Blog post for a more detailed Tutorial with photos!
45 SUMMER 2023 COLOR GUIDE
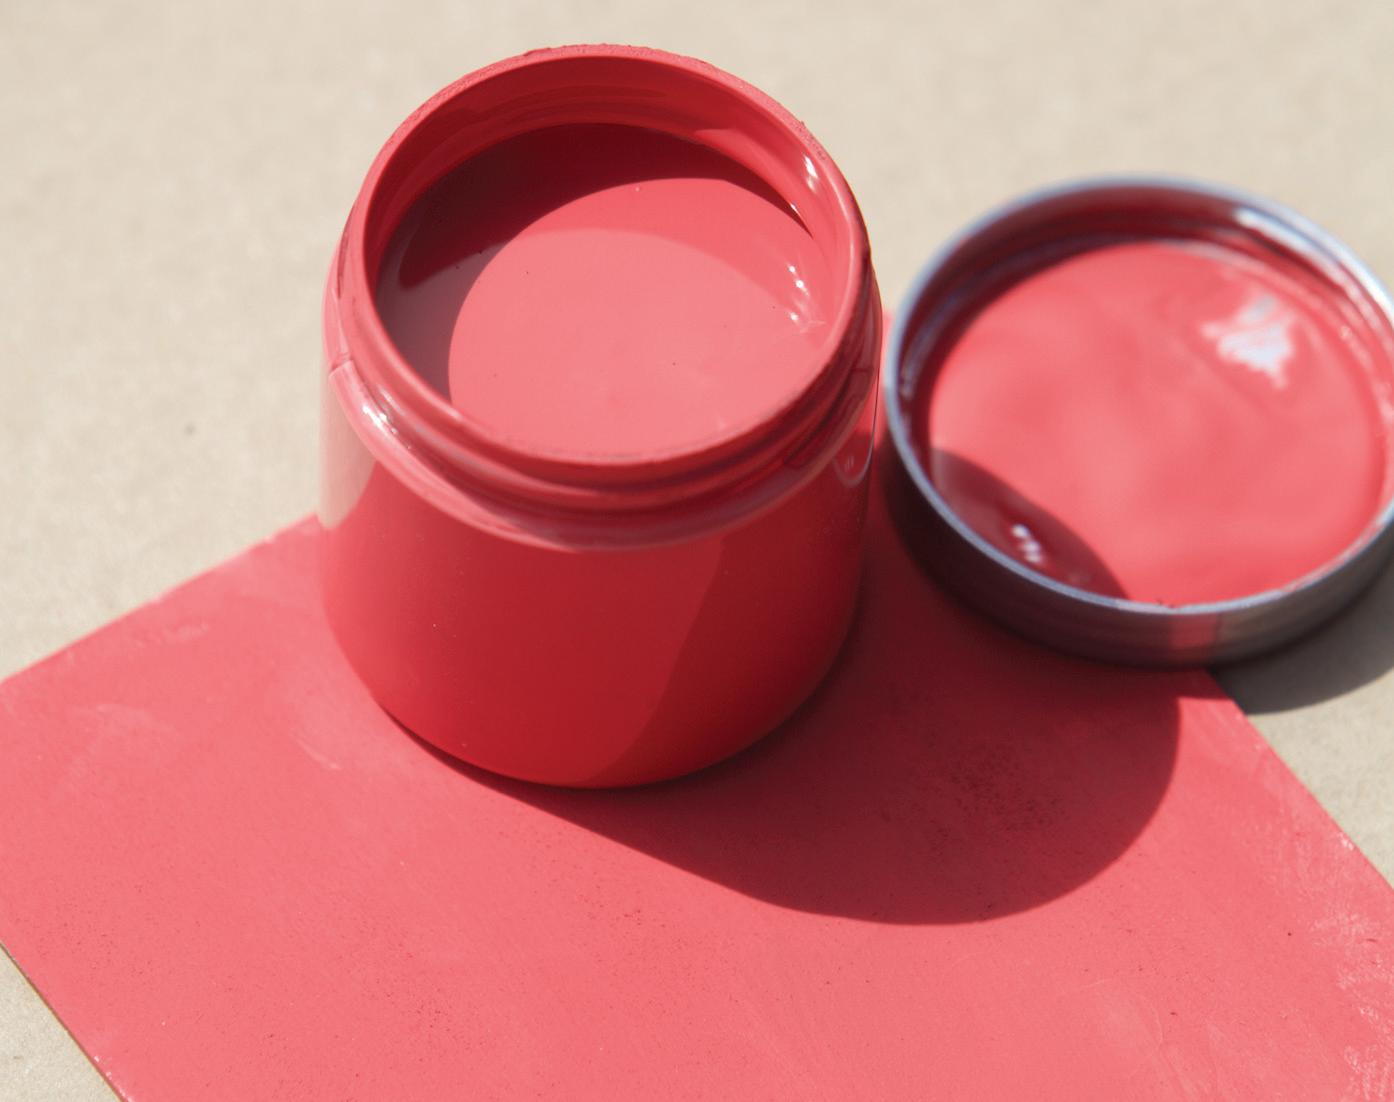
Raspberry Sorbet
Raspberry Sorbet is a striking and modern deep pink color that brings an air of sophistication and playfulness to any space. Its vibrant and vivacious hue was inspired by the refreshing taste of raspberry sorbet on a hot summer day. This bold color pairs beautifully with rich brown tones like Leather Bound, adding warmth and depth to the space. Additionally, it complements other bright and bold colors such as Bling Bling or Whoop-de-do, creating a playful and energetic atmosphere.
#moderndeeppink

46
© Coreena
© Sarah Bezanson Interiors
© Painted Home Goods
Poppy
Poppy is a stunning and lively red color that draws inspiration from the vibrant fields of poppy flowers. It’s the boldest and brightest red in our collection, radiating energy and passion with its warm and inviting tone. Poppy is a statement color that can bring life and personality to any space. This bold hue pairs beautifully with cool, muted tones such as Happy Hour and Vanilla
Frosting. To enhance its beauty, try pairing Poppy with accents of gold and incorporating plants for a complementary pop of nature
#livelyred
47 SUMMER 2023 COLOR GUIDE
© Black Lab Furniture Revivals
© Black Lab Furniture Revivals
© Fig & Poppy
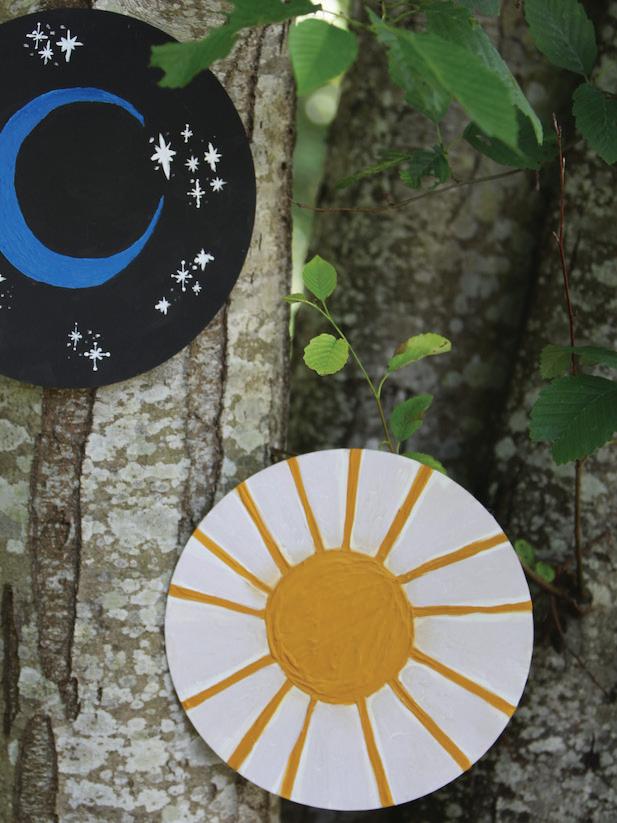
Illuminate Your Space with a DIY Hanging Sun

and Moon
As the sun shines brighter and the moon graces the night sky, there’s something enchanting about incorporating these celestial symbols into our surroundings.
By embarking on this DIY adventure, you’ll not only infuse your space with a whimsical ambiance but also indulge your creative spirit. Using paint as your artistic medium and exploring the possibilities of specialty products, you’ll learn how to create stunning hanging sun and moon decor that adds a captivating focal point to any setting.
Whether you’re looking to spruce up your patio, adorn your garden, or add a celestial touch to your living room, these hanging sun and moon decorations are versatile and adaptable to various spaces.
48
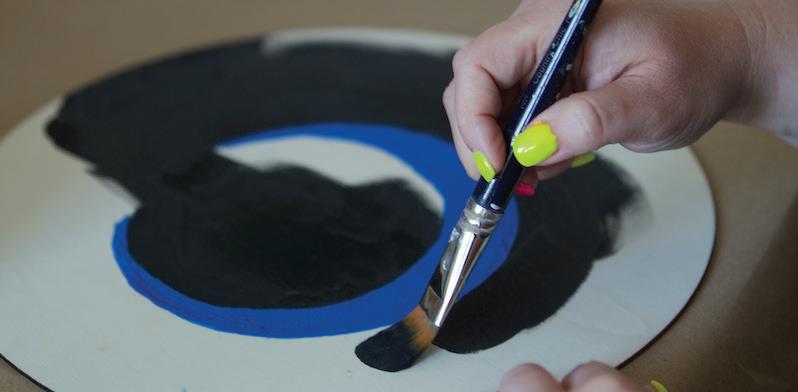
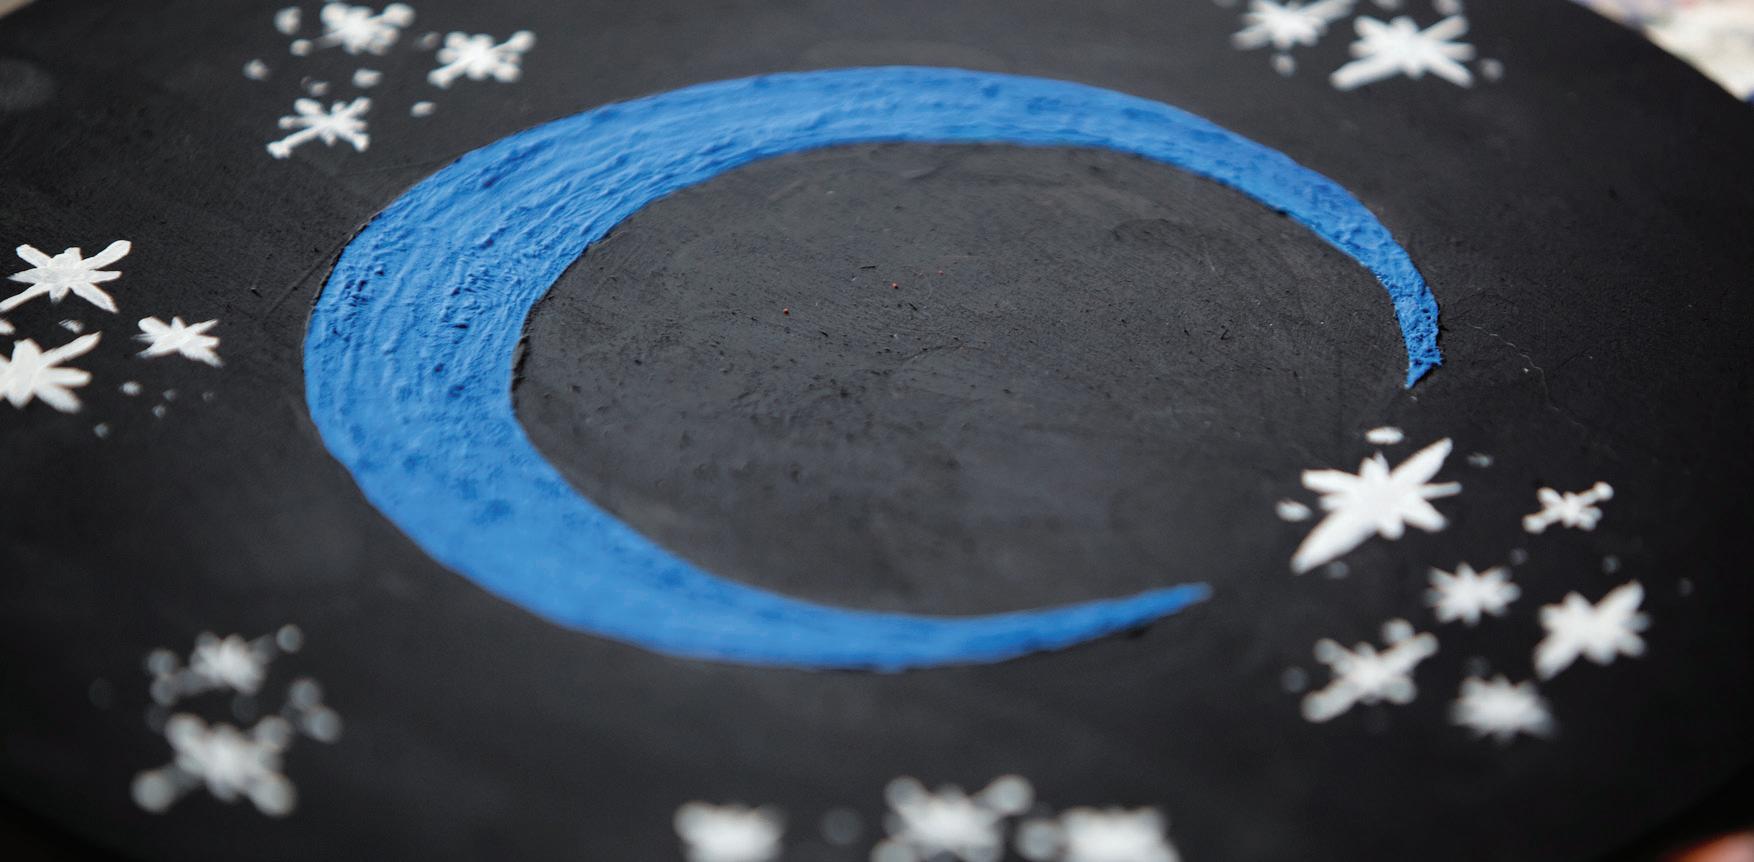
Guided by Moonlight: Create Your Own Magical Moon Wall Hanging
Step 1: Prepare the Surface Ensure that your wooden moon cutout is clean and free from any dust or debris.
Step 2: Apply the Base Coat Using a paintbrush, apply a base coat of your chosen Country Chic Paint color to the wooden moon cutout. Allow it to dry completely before proceeding to the next step.
Step 3: Mix & Apply Texture Powder
In a small container, mix the Texture Powder with the paint color you would like to use. We recommend you start with with a 1:1 ratio, however, you can always add some extra paint or extra powder is your mixture is too thick or thin for your liking. Stir well until the mixture becomes smooth and creamy. Let it sit for 10-15 minutes and then apply the texture mixture to the surface of the moon cutout using a paintbrush or putty knife, creating desired patterns or texture. Let it dry for at least 12 hours before moving onto the next step.
Step 4: Add Details - If desired, you can add additional details to enhance the design of your moon decor piece. This can include painting stars, adding metallic accents, or using painter’s tape to create crisp lines or patterns. Let your creativity shine!
Step 5: Seal and Protect To protect your painted moon decor piece and add durability, you can apply our Clear Coat This step is optional but recommended, especially if your decor piece will be exposed to frequent handling or outdoor elements.
Step 6: Attach Hanging Mechanism Once your painted moon decor piece is completely dry and sealed, attach a string or wire to the backside of the moon cutout for hanging. Make sure it is securely fastened.
Step 7: Hang and Enjoy! Find a suitable spot to hang your beautiful painted moon decor piece and admire your handiwork. It can be displayed on a wall, door, or even in a window to add a touch of celestial charm to your space.
Remember to have fun, experiment with colors and techniques, and let your creativity soar!
For more tips on working with Texture Powder, Wax or Getting Started or visit our Blog page for more Tips, Tricks & Tutorials.
50

51 SUMMER 2023 COLOR GUIDE
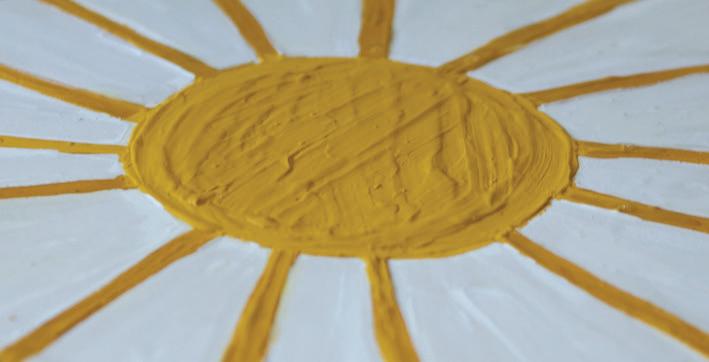
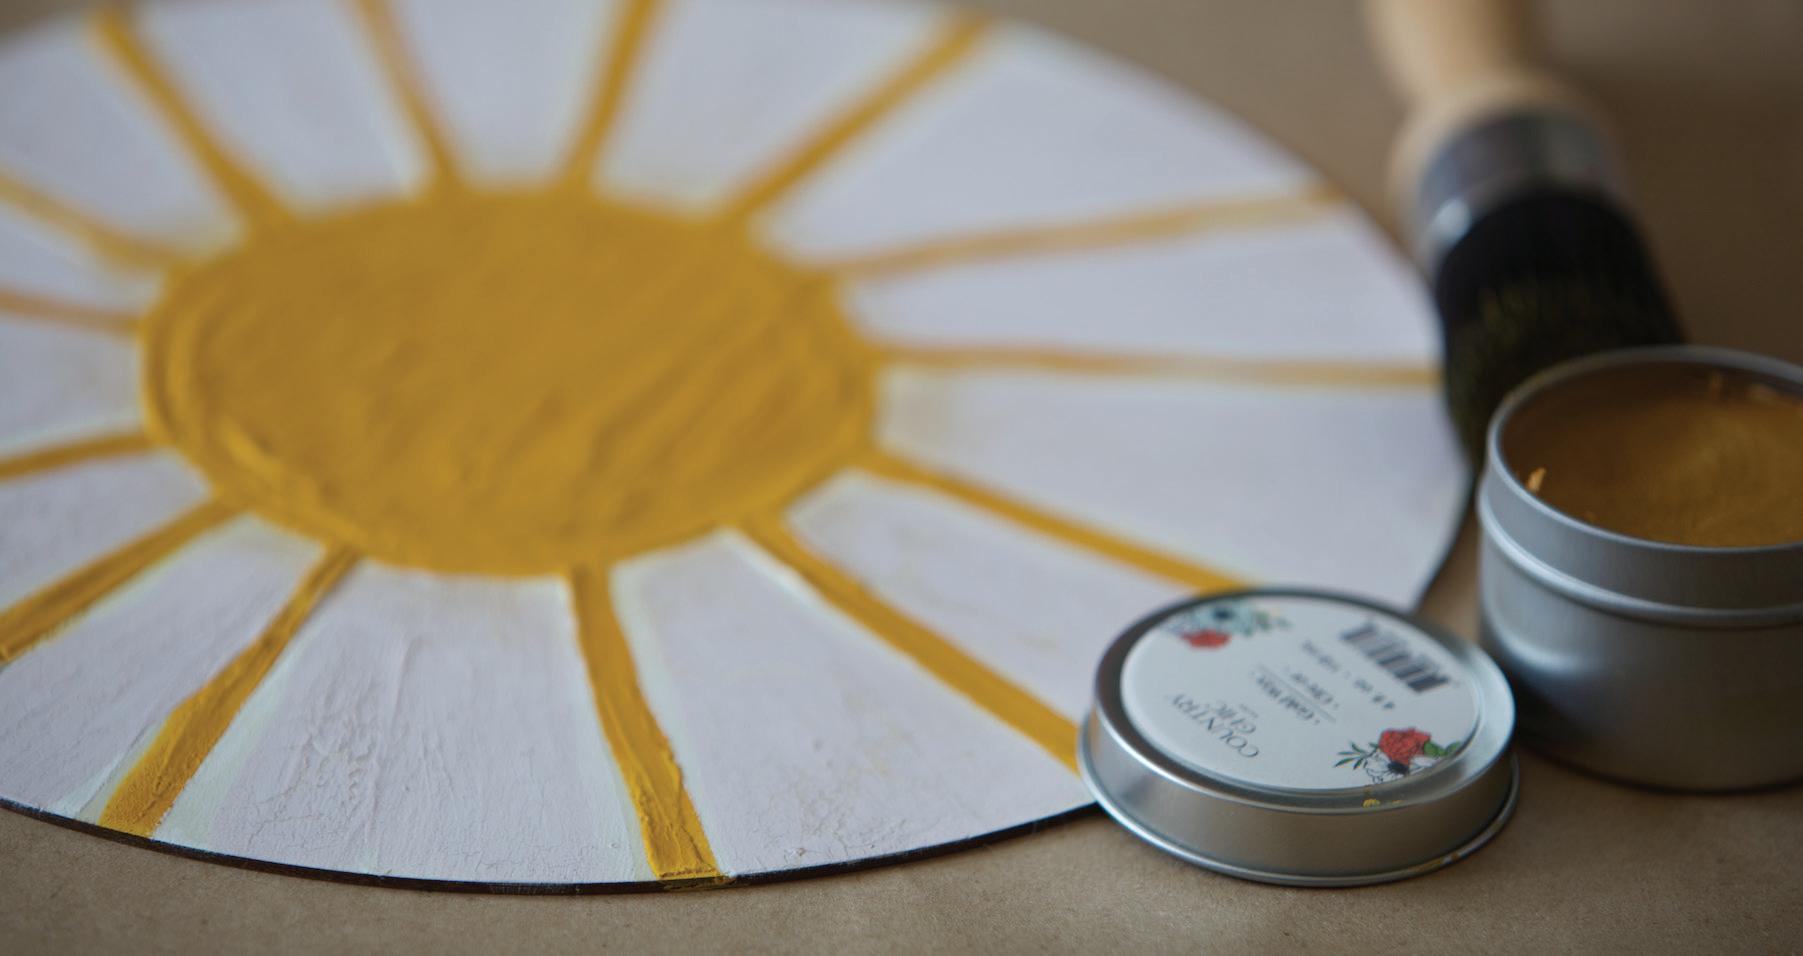
Radiate Sunshine: Craft Your Own Captivating Sun Hanging Decor
Step 1: Prepare the Surface Ensure that your wooden sun cutout is clean and free from any dust or debris.
Step 2: Apply the Base Coat Using a paintbrush, apply a base coat of your chosen color to the wooden sun cutout. This will be the color that shows through the cracks. Allow it to dry completely before proceeding to the next step.
Step 3: Apply Crackle Medium Using a separate paintbrush, apply a layer of crackle medium evenly over the contrast coat. Allow the crackle medium to dry for about 1 hour before applying the contrasting coat.
Step 4: Apply the Contrast Coat Using a clean paintbrush, apply a contrast coat of a different color in a paralell direction over the base coat. This will be the color that appears in the cracks. The paint should be tacky but not fully dry.
Step 5: Crackle Effect As the crackle medium dries, it will cause the top coat to crackle, revealing the base coat underneath. The size and pattern of the cracks will depend on the thickness of the crackle medium. Allow the crackle effect to fully develop and dry.
Step 6: Wax Application To protect and enhance the crackled surface, apply a thin layer of wax over the entire sun cutout. Use a clean
cloth or Wax Brush to apply the wax, making sure to reach all the crackled areas. Work in small sections and remove any excess wax.
Step 7: Buff and Finish Once the wax has soaked in, use a lint-free clean cloth or buffing brush to gently buff the surface of the sun cutout. This will help to enhance the shine and smoothness of the waxed surface. Continue buffing until you achieve the desired level of sheen and finish.
Step 8: Attach Hanging Mechanism Once your sun decor piece is completely dry and the wax has been buffed, attach a string or wire to the backside of the sun cutout for hanging. Make sure it is securely fastened.
Step 9: Hang and Enjoy! Find a suitable spot to hang your beautiful sun decor piece and enjoy the unique crackle effect and waxed finish. It can be displayed on a wall, door, or even in a window, adding a touch of radiant charm to your space.
Remember to have fun, experiment with colors and textures, and let your creativity shine!
For more tips on working with Texture Powder, Crackle Medium, Wax or Getting Started or visit our Blog page for more Tips, Tricks & Tutorials.
52

53 SUMMER 2023 COLOR GUIDE
Tropical Cocktail
Tropical Cocktail is a bold and vibrant turquoise blue that captures the essence of a tropical paradise. It’s a stunning color that brings energy and life to any space. This hue is perfect for those who want to create a fun and playful atmosphere in their home. As our truest turquoise color, Tropical Cocktail pairs well with a variety of complementary colors like Simplicity and Fancy Frock. For a bolder look, it can be paired with other bright colors like Raspberry Sorbet Pairing it with natural wood finishes, crisp whites, or sandy beige tones can help balance out its boldness and create a harmonious ambiance.
#tropicalparadise
54
© Amy Adilman
© Maria Roberts
© Ugly Ducking Upcycle
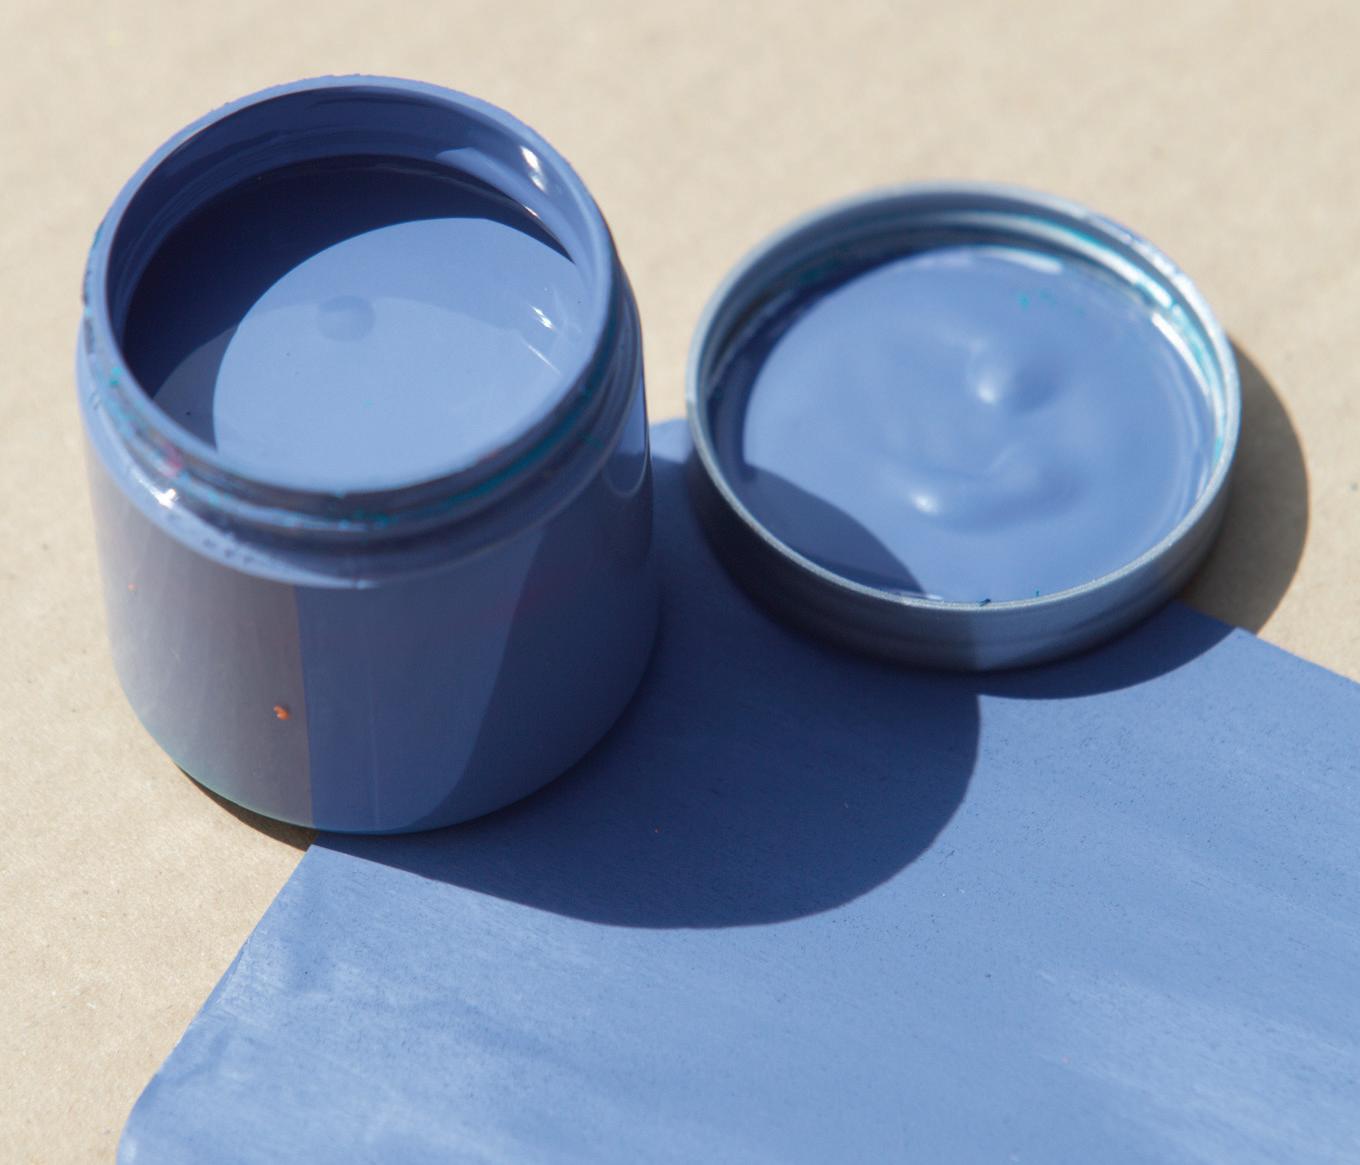
Bling Bling
Bling Bling is a daring, vibrant blue that catches the eye with its electric intensity. This shade is reminiscent of both cobalt and ultramarine, but with a unique twist that sets it apart from traditional primary blues. Bling Bling pairs well with crisp whites like Simplicity & yellows like Bee’s Knees and other shades of blue for a refreshing and modern look. It also works well with metallic finishes such as gold or silver to add a touch of glamor and sophistication.
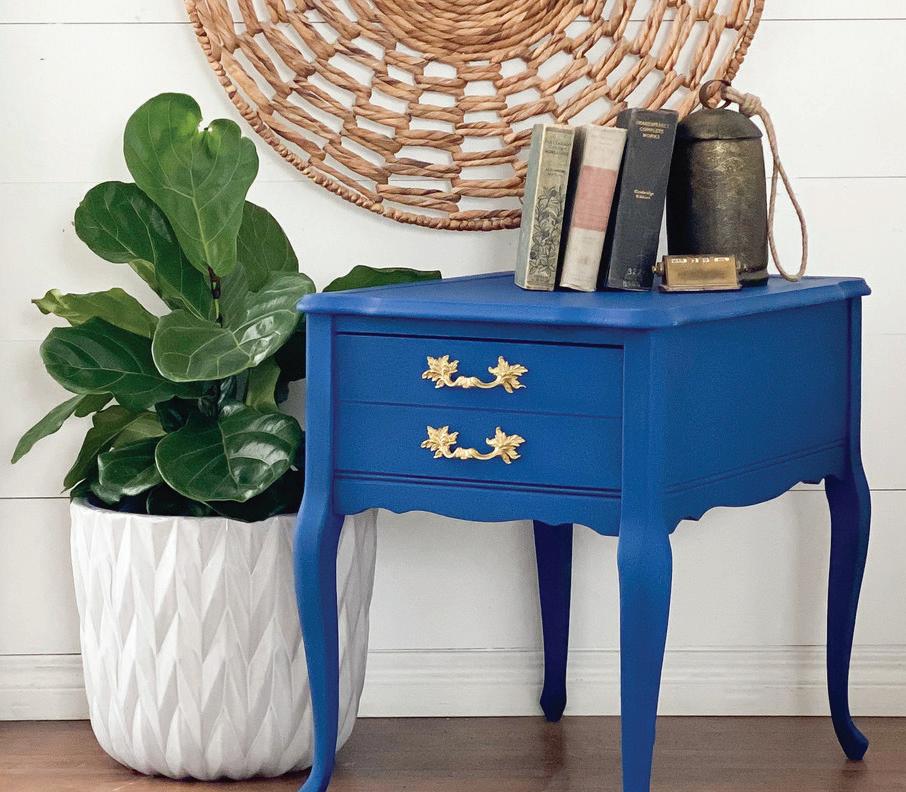
#darkandvibrant
55 SUMMER 2023 COLOR GUIDE
© FP Table
© Dustbin Revival
© Katie Scott
So easily distressed, and buttery smooth… an absolute delight to work with.
Creator Highlight: Meet Faye!
Meet Faye Fossey from Farm Life, Best Life, our featured creator this edition! A true “prairie girl” at heart, Faye has a farm in Manitoba, Canada, where she enjoys refinishing furniture and collecting farmhouse sinks! Prior to her entrepreneurial endeavors, Faye worked for a professional services firm. According to this fan of farmhouse chic, it’s all about the creative process and embracing curiosity. Let’s get to know Faye!
Tell us a little bit about your business!
You know it’s pretty nifty how some things just fall into your lap without you ever knowing or even imagining that they’re coming! Things that you could very much benefit from in the sweetest of ways! I most certainly never thought that I’d one day be painting furniture as a side hustle! In early 2017, I was scrolling online and came across a friend’s post where she said “Is anyone in the city today? If so, can you PLEASE pick me up a jar of Country Chic Paint in the colour Cheesecake?!” For whatever reason this post caught my curiosity. I asked my friend what CCP was all about, and she was like “Oh Faye! It’s an absolute dream! You just gotta try it!” And so I did… and haven’t put my brush down since! I was instantly addicted. So easily distressed, and buttery smooth… an absolute delight to work with. At first I was just painting pieces from our own home, then I started buying a few small pieces to play with. Next thing I knew, folks were asking me if I sell any of my painted pieces. The rest is a blissful history! Not only my side hustle that helps put food on our table, it’s my therapeutic outlet that I needed more than I ever knew I did!
How did you get started refinishing furniture and how long have you been doing it?
— As mentioned, I painted my first piece with Country Chic Paint in early 2017. My Grandma’s vintage china cabinet was adorned with 3
coats of the colour Cheesecake, and sealed with Natural Wax! I still remember my hubby walking in the house while I was sand distressing it… and he was like “Oh wow. That actually looks really really good!” AND I literally couldn’t contain my excitement over the product!
What are the most useful tools or supplies to have on hand?
— Oh geez! There’s quite a few that I’ve acquired over the years. Off-hand: my top goto’s would be: Orbital Sander, ShopSmith Sander Sheets, Clamps, Tri-Dolly Casters, Furniture Sliders, Jig Saw, Rubber Mallet, Zinsser BIN Shellac Primer, Varathane Diamond Wood Finish, Minwax Products.
What are your favourite Country Chic paint colours? Are there any of our finishes that you like the best?
— So many to mention! If I were to choose my top fav colours, they’d be: Liquorice, Dune Grass, Sunday Tea, Vanilla Frosting and Peacoat! My favourite Country Chic Paint finish is most definitely their Wax, and Hemp Oil is most def my 2nd fav!
Where do you find inspiration from?
— Instagram! Facebook! Pinterest! Google Images! Etsy! My Own Dreams!
57 SUMMER 2023 COLOR GUIDE
Summer Palette Inspiration

Welcome to our Summer Project Inspiration Board! Embrace the warmth and energy of the summer season as you embark on your exciting projects. Whether you’re refreshing your outdoor spaces, revamping your patio, or creating a backyard oasis, let this vibrant and invigorating color palette ignite your creativity.
This palette draws inspiration from the mesmerizing hues of a summer sunset, capturing the magical moments of long evenings and golden sunsets. Imagine the warm glow that envelops everything as the sun sets, casting a captivating spell.
Visit our Inspiration Page to get more great ideas!
FRESH MUSTARD


SECRET GARDEN
59 SUMMER 2023 COLOR GUIDE
PERSIMMON
RASPBERRY SORBET


60 POPPY
DARLING LAZY LINEN
SUNSET GLOW


61 SUMMER 2023 COLOR GUIDE
ADVICE
BLING
TROPICAL COCKTAIL SAGE
BLISS BLING
Outdoor Projects Unleashed: Expert Tips for Stunning Results
Embarking on an outdoor project is a thrilling adventure, where you can unleash your creativity and transform your surroundings. Whether you’re revitalizing your deck, giving your garden furniture a fresh look, or adding a pop of color to your outdoor decor, proper paint application and protection are vital for achieving remarkable results. In this article, we’ll equip you with essential tips and tricks to ensure your paint application thrives in the right conditions, taking into account factors such as weather, surface materials, and proper protection. From understanding ideal painting conditions to selecting the right paints and finishes for different materials, we’ll guide you through the process, enabling you to breathe new life into your outdoor spaces with confidence.
Consider the material: Before you dive into painting your piece, take a moment to consider its material. Different materials react differently to paint, and understanding the characteristics of the surface you’re working with can make a significant impact on the final result of your project.
Consistent painting direction: When applying paint, try to maintain a consistent painting direction, such as

Protect glass surfaces: If your outdoor furniture has glass elements, such as tabletops or cabinet doors, use painter’s tape or a protective film to cover the glass surfaces before painting. This will prevent accidental paint splatters or drips.
Allow for proper drying and curing: Ensure that each coat of paint has sufficient time to dry and cure before exposing the furniture to outdoor conditions. Be sure to not paint in too hot of weather - it can effect the smoothness of paint application.
Consider distressing for a vintage look: If you desire a vintage or weathered look for your outdoor furniture, consider distressing the paint after it has dried. Use sandpaper lightly scrape away some of the paint in areas that would naturally wear over time.
Apply multiple thin coats for durability: Rather than applying one thick coat, it’s better to apply several thin coats of paint for outdoor furniture. Thin coats dry faster, are less prone to drips, and provide better long-term durability against the elements.
Choose a Color
Your options are virtually endless when it comes to choosing a paint color. One easy way to choose a color is to go with something that compliments your home’s exterior. If you’re unsure about paint color combinations, take our Color Quiz!
Apply paint in the right conditions: Choose a day with mild temperatures and low humidity for painting outdoor furniture. Avoid painting in direct sunlight to prevent the paint from drying too quickly and causing unevenness or blistering.
Protect fabric cushions: If your outdoor furniture has fabric cushions, remove them before painting. It’s best to clean them separately according to the manufacturer’s instructions and ensure they are completely dry before placing them back on the furniture.

Protect against rust: If you’re painting metal furniture, ensure that the surface is rust-free. Remove any existing rust using a wire brush or sandpaper, then apply a rust-inhibiting primer to prevent future rust formation.
63
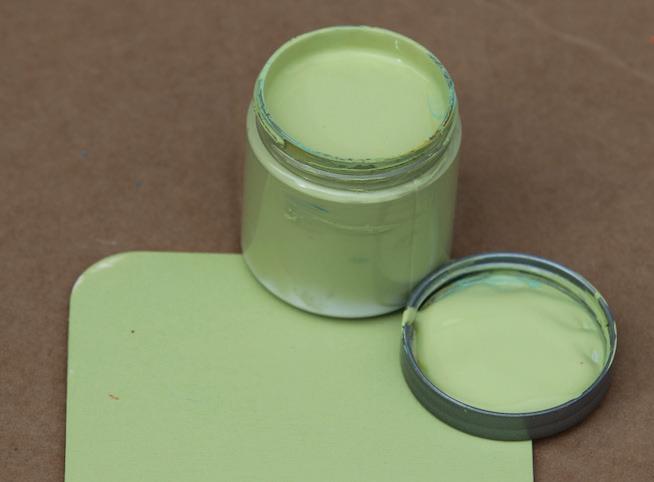
Secret Garden
Secret Garden is a luxurious and lush leafy green color that brings to mind the vibrant and enchanting qualities of a hidden garden. This rich and sophisticated shade features subtle yellow undertones that add warmth and depth, making it a great choice for adding a touch of natural elegance to any space. Secret Garden pairs well with earthy tones, such as Lazy Linen and Happy Hour. It also works for a variety of wood finishes, including light oak, dark walnut, or even white washed or distressed wood for a shabby-chic vibe.
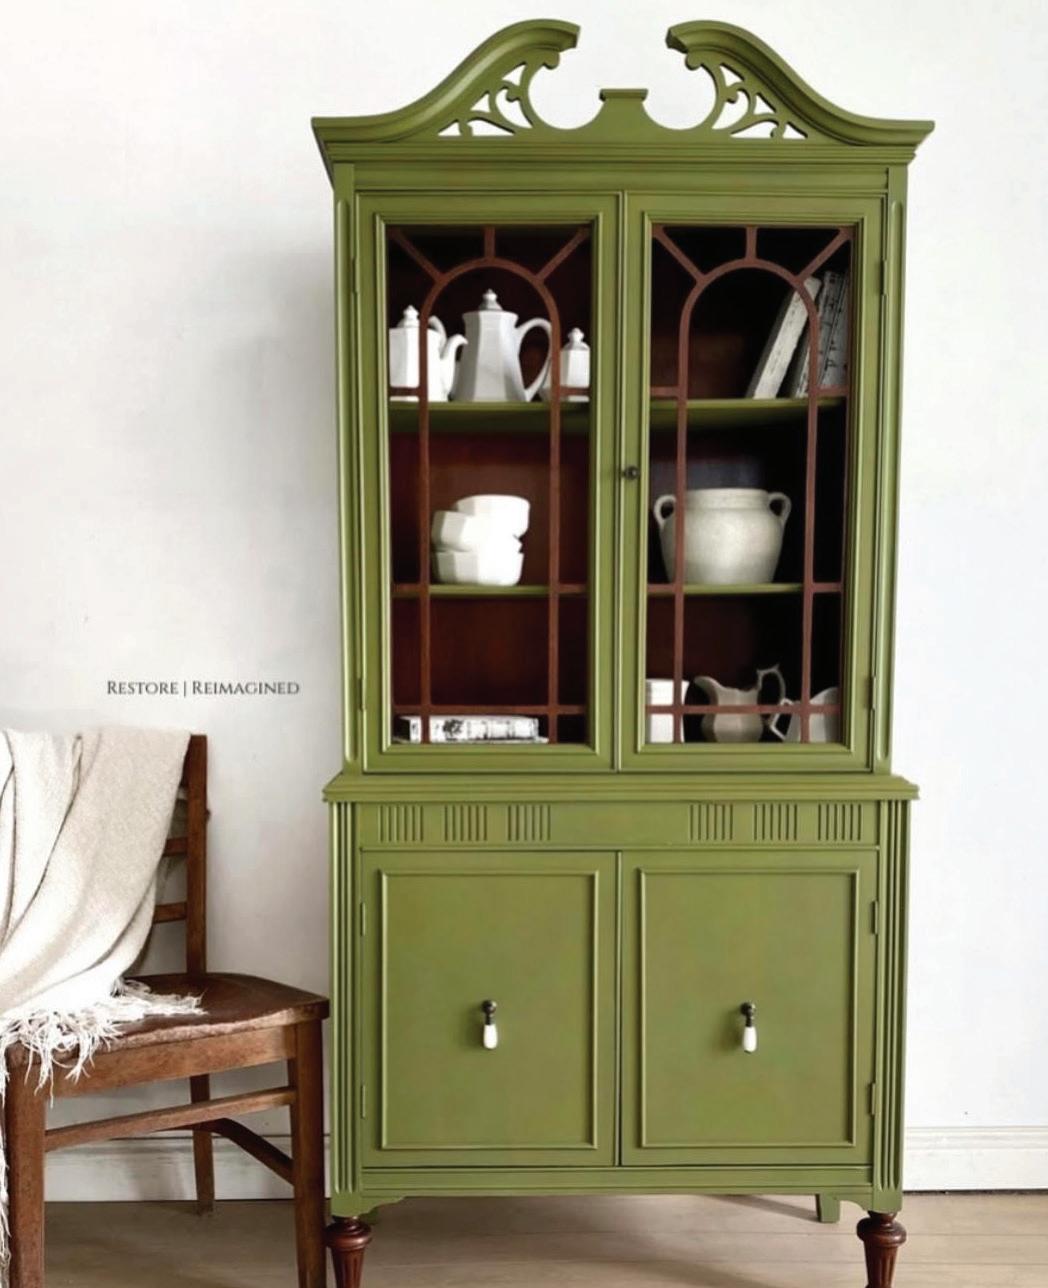
#leafygreen
64
© Restore | Reimagined
© Brushed by Maddie
© Kate’s Reclaimed
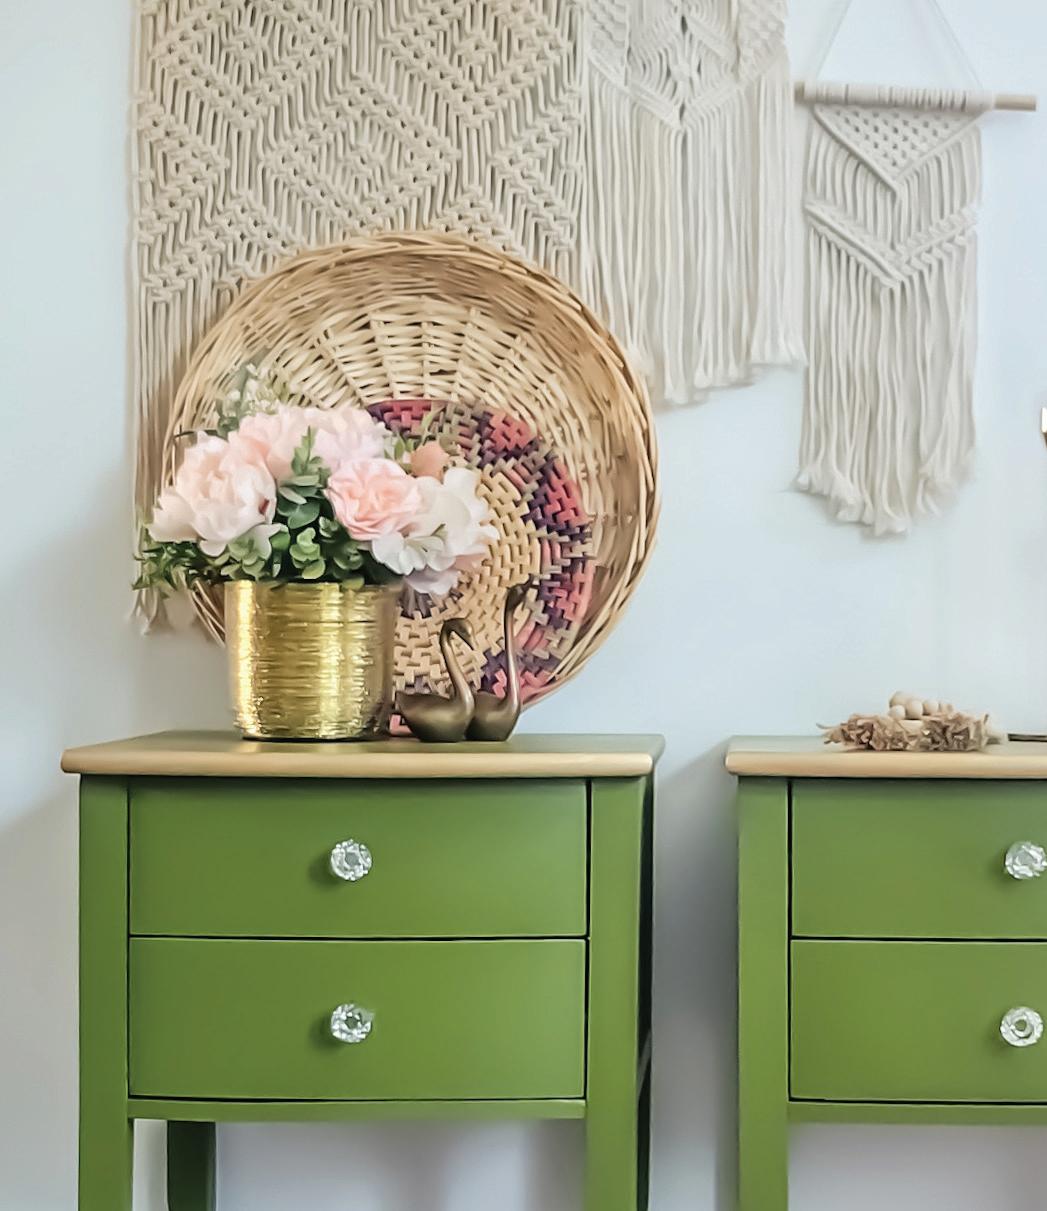
Sage Advice
Sage Advice is a serene and charming sage green color that captures the essence of a cozy cottage style. This soft and inviting hue is perfect for creating a warm and welcoming atmosphere in any space. Sage Advice works best with neutral and earthy tones, such as Vanilla Frosting, which can enhance its natural beauty and create a harmonious and cohesive look. Sage Advice works well with a variety of wood finishes, including light or dark stained woods. For a cohesive and harmonious look, consider pairing Sage Advice with natural wood finishes, which will bring out the warm, natural tones.
#essenceofcozy
65 SUMMER 2023 COLOR GUIDE
© Refined Furniture
© Joanna Anastasia
© The Unconventional Flip
Throughout this guide, we’ve explored various color palettes, shared tips on incorporating colors into your home decor, and provided DIY project ideas to unleash your creativity.
Whether you prefer bold and vibrant shades or subtle and calming tones, let color be your ally in creating a space that reflects your individual style and brings you joy. As the summer days unfold, we encourage you to explore the world of color, experiment with new combinations, and infuse your surroundings with hues that inspire happiness and relaxation. Let your creativity soar, and may the colors you choose become a vivid backdrop to your cherished memories.
Thank you for joining us in this color-filled journey. We hope our summer guide has provided you with inspiration, guidance, and a newfound appreciation for the transformative power of color. Wishing you a vibrant and memorable summer ahead!
Want to contact us? Send us an email to Support@countrychicpaint.com or Visit our website to use our chat widget!


Do you want first access to our Seasonal Color Guides? Sign up for our newsletters or Follow Us on social media!

67 SUMMER 2023 COLOR GUIDE
68
