P H O T O I N S I G H T S
May 2023
Pre-capture technology
Mirrored images
Shooting through textured glass
Photography quiz
Photo tours

Ask Jim
Student Showcase
Back issues
Jim Zuckerman’s
On the cover: A rusting car with a tree growing through it in Old Car City, White, Georgia taken during the Abandoned in Georgia photo tour. This page: Two male cardinals, south Texas.

2
Table of Contents 4. Pre-capture technology 9. Mirror images 16. Shooting through textured glass 19. Photography quiz 21. Jim’s eBooks 24. What’s wrong with this picture? 26. Short and sweet 28. Ask Jim 29. Photography tours 31. Student Showcase 37. Past issues 44 Subject index
It’ve read a lot of articles and seen YouTube videos in which photographers express their panic about the advent of AI imagery technology. They fear their incomes will be hurt and the demand for stock and assignment photography will plummet.
First, the value of photographic images has declined significantly and there are very few people making decent money selling pictures now. When I joined a stock agency in 1987, the average sale was $500 with the photographer and the agency splitting this 50/50. Now, the average sale for professional photographers in stock agences is .05 to .25 per image per month with photographers getting about 1/3 of this. If you have 10,000 good images in an agency, that’s an estimated $500 to $2500 per month times 1/3. It’s hard to survive on that today, so if AI adversely affects this income, it’s not much of a loss.
Second, all new technologies disrupt the status quo. When cars became popular and affordable, all the industries related to horses that serviced every sector of the country were suddenly irrelevant. People have to adapt, embrace change, and re-invent themselves to get ahead in this world.
Finally, if making images with a camera is your hobby (which is probably 99% of my readership), then how AI impacts photography should be of no concern to you. There will always be cameras, in one form or another, to capture families, friends, vacations, and whatever you see and experience in your life. That’s not going to change. You should have nothing negative to say about AI. If you don’t want to experiment with it, then don’t. For those of us who do, it’s a lot of fun and an amazing creative outlet.
Jim Zuckerman photos@jimzuckerman.com
www.jimzuckerman.com

3
Pre-capture technology
Biird photography is a passion shared by many photographers. Up to now, if you thought it was just too hard to capture great pictures of these elusive subjects, especially as they fly, now is the time to re-think your assessment. There is a new technology that puts the odds in your favor.

Actually, it’s not that new. Several years ago I met a man during one of my photo tours who had an Olympus camera, and he explained to me what pre-capture was all about. I thought it was interesting, but since I wasn’t looking for
a new camera system to buy I dismissed it and, to be honest, forgot about it.
I just concluded a tour to south Texas in which my group photographed the beautiful bluebonnets and Indian paintbrush, and then we had 3 days of photographing birds from various blinds. My local guide had the Olympus OM-1, and she demonstrated the pre-capture technology to me. Instantly I was impressed. This is a game changer for bird photography. Using my Canon R5, I was struggling to react fast enough to capture flight shots as various
4
species of birds alighted on perches with food bait. When they took flight, again it was a contest between their incredible speed and my typical human reaction time. They usually won. I got a few shots I’m happy with, but the OM-1 virtually never struck out. The camera captured flight shots every time.
Here is how it works. A bird is perched on something, and your camera is positioned on a tripod such that you are happy with the composition. You need to leave some room in the frame for the bird’s forward flight path (assuming you accurately guess in which direction it will fly). Before the bird takes flight, you press the shutter halfway down and the camera starts shooting. At 20 frames per second (or whatever the fastest frame rate is on your camera), it will take a lot of frames.
When the bird finally flies, push the shutter all the way down and the shooting stops. The camera then deletes all of the frames except the last several frames as programmed by you. So, if your camera shoots at 20 fps and you elect to retain the last 7 frames, that time period is 1/3 second.

Capturing large birds taking flight and landing, like the crested caracara on the prevous page, is relatively easy. They are slow fliers and it takes them a bit of time to spread their large wings and work the air. Smaller birds, though, like the pyrhhuloxia, below, and the green jay on the next page, are like bullets. They are so fast that it takes patience and persistence to capture these kinds of flight pictures.
The number of frames you can shoot with this
5
technology depends on the individual camera. Fuji offers this technology, and Nikon does as well in their Z-9 model. I’ve heard that the Nikon software isn’t as good as the Olympus and Fuji, but since I don’t shoot Nikon I can’t confirm that.
According to Canon rumors, there is supposed to be an imminent major release of firmware for the Canon R5 that will give this camera the pre-capture technology. The brand new Canon R6 Mark II comes with this remarkable feature. When enabled, similar to the Olympus, a half-press of the shutter tells the camera to begin firing and buffering frames. Once the shutter is fully depressed, the camera disregards all of the frames except the last half second of the buffered pre-click images.
This is such a valuable technology because
birds display their most beautiful wing positions when taking flight and landing. You can use pre-capture in both scenarios.

An alternative
If you don’t have pre-capture yet, and you are working with bird set-up shots in which you bait them with seeds, nuts, mealworms, or suet, place the perch with the food about 15 to 20 feet from a tree or some kind of protective cover. Birds will first assess the scene from the safety of the cover, and then they will swoop down to eat. 15 to 20 feet is far enough so the birds have to fly to your perch as opposed to gliding down to it, and you can prefocus on the point where you expect them to land. The camera is mounted on a tripod. You can watch the birds leave the protective tree with your eyes, and that gives you the time to starting shooting.
6
Morocco Photo Tour

August 29 - September 10, 2023

7
All the bird photos in this article were taken with this method because I don’t have the precapture technology yet. Hopefully, within a month or so, the Canon firmware update with change this.
When I photograph medium or large birds, I typically use a shutter speed of 1/3200th of a second. That freezes even the wing tips. However, for smaller birds that are particularly fast, I prefer to use 1/4000th if there is enough light. This usually is fast enough to freeze even the fastest fliers like the scissor-tailed flycatcher, above.

My other settings are f/8 or f/11 (I prefer the latter if there is enough light) because birds have depth, especially when they spread their wings. F/11 provides a little depth of field. I let the ISO setting adjust per the ambient light. Because mirrorless cameras allow you to see the expo-
sure in the viewfinder, I never use the exposure compensation feature now. On manual exposure mode, which is what I use for bird photography, it’s a simple matter to change the ISO in order to adjust the exposure to taste.

8
Even before Photoshop, I experimented with mirrored images. I’d make a print with the correct orientation, and then I’d flip the negative or slide in the enlarger and make another print with everything reversed. I’d then mount them together to create the unique optical illusion.
In Photoshop, you can create a simple mirrored image in about 15 seconds. The results are usually surprising only becaused it’s difficult to fully previsualize the results. But that’s part of the fun. If you go the next step
and create a repeating pattern, as I did in the image of Venice, below, you’ll be truly intrigued by what you end up with.

There are two different ways to mirror an image. You can mirror the entire photograph or only a portion of it. Let me demonstrate both of these because the results are quite different.
Mirroring the whole image
1. Open an image in Photoshop, either horizontal or vertical. For this example, I’m using

9
the elevated view of Prague, Czech Republic (right). Copy it to the clipboard with Select> all then Edit > copy (the keyboard shortcuts are Command/Ctrl A, then Command/ Ctrl C). The photo is now in Photoshop’s clipboard, the temporary holding place for a picture or part of a picture. You can’t see the clipboard, but it’s there.

2. Now choose the command, Image > canvas size. The dialog box that opens is shown at lower right. At this point, you have to make a decision. Do you want the image to be mirrored on the right side or the left side? The results will be very different. In this case, I elected to mirror it on the left. So, in the tictac-toe box (yellow arrow), I clicked in the center right square. The white arrows show you where the new, expanded area will be: to the left.
3. I doubled the width dimension (red arrow) to 2400 pixels. That gave me the image at the top of the next page. The color of the blank area doesn’t matter (that comes from the background color box at the bottom of the tools palette) because it will be covered up.
4. Next, I pasted the clipboard photo into the opened image using Edit > paste.
5. Finally, I used Edit > transform > flip horizontal, and then with the move tool I simply moved it into place to create the mirror as shown at the bottom page 11.
It’s a good idea to enlarge the composite to examine how precisely the two images align. If they are not perfect, use the arrow keys (when the move tool is selected) to nudge the layer into place. Then flatten the file with Layer > flatten image.
If you start with a horizontal photo, the mirrored composite will end up looking like a panorama shot because it will be double the width of a normal image. Depending on the subject matter, if you prefer a more normal

10


11
The color that shows up as you expand the canvas doesn’t matter because it will be covered by the new layer.
Ethiopia Photo Tour

Jan, 21 - Feb. 3, 2025

12
aspect ratio, you can resize it to 3:2. This compresses the elements in the scene, of course, but sometimes that turns out to be quite interesting. Alternatively, you can expand the canvas downward with the command, Image > canvas size. This time you double the vertical dimension. Use the Photoshop plug-in Flood to add a reflection at the bottom of the frame. This is what I did with the twilight image of Brugge, Belgium, below. Without the reflection added, this would have been a long, panorama-like picture. I added the stormy sky for drama before I mirrored the image.
Multiple mirrors
Another thing to note about the composite below is that I mirrored the original photograph four times. If you look closely, each of the rows of buildings -- left and right -- are mirrors themselves. I kept expanding the canvas
with the command, Image > canvas size to accommodate the broadened image. I did the same with the the mirrored composite on page 9, but in this case I didn’t use Flood. Instead, once I had the four panels composited together, I then copied that entire image to the clipboard, expanded the canvas downward (Image > canvas size with a doubling of the verticle dimension), and then pasted the clipboard image below. With Edit > transform > flip vertical, I was able to create a mirror-like reflection of the entire upper section of the image.
The mirrored composite of tree branches on the next page was done exactly the same way. Any subject can work for this technique: nature, people, macro, wildlife, still lifes, etc.
Mirroring part of the image

13
For a completely different look, try selecting only part of the image to set up a mirrored composite. See the image at right I took in a 16th century palace in Venice, Italy. The red arrow shows you the selection line. I purposely selected half of the mask, and the entire selection goes to the top of the frame and to the bottom.

I then hit Edit > copy, and now only the right side of the photo per the selection was placed in the clipboard. I chose Select > deselect and then with Edit > paste, half of the image was pasted into the photo.
Using Edit > transform > flip horizontal, the layer was flipped. With the move tool, I carefully moved the left half of the image into place, thus completing the mirror. You can see the results on page 15.
This technique can produce intriguing (and bizarre) composites. You don’t have to select half the image. Instead, for example, you can select 1/3 or 1/4 the image, depending on what the original photograph is and what kind of result you’re looking for. §

14

15
Shooting thru Textured Glass
Atechnique I’ve enjoyed since the early 70’s is shooting through textured glass. There are many ways, now, to abstract photographs and to add all kinds of effects for artistic purposes, but I’ve never seen any of them simulate what you can create by using textured glass.
All that’s needed is a small piece of glass. If you want to do portraits, then a 16x20 piece works well. For flowers, you only need an 8x10 inch piece. Many times, glass companies have remnants of various types of textured glass which can be cut to your specifications for just a few dollars. When you purchase glass, the first thing you need to do is tape the edges and corners with thick duct tape to protect yourself from cuts. Glass is
incredibly sharp and unforgiving if you handle it carelessly.
To set up the shots, make sure the glass is held perpendicular to the floor or ground. For a makeshift stand, I made a narrow cut in a small piece of 2x4 wood, and the glass sits in there perfectly.
You can control how much definition your subjects will have by the distance between them and the glass. The closer the glass is to the subjects, the more definition there will be. For example, the glass was about four inches away from the flowers shown below.

I prefer to use extensive depth of field so both the texture in the glass and the subjects are

16
sharp. Note that even though you are shooting abstracted subjects, sharpness is still important. There is a big difference between a blurred abstract and a sharp abstract. I typically like to use f/16 to f/32.
I always use a tripod for this technique because that frees my hands in case I need to hold something else. It also makes using a small aperture with a low ISO feasible.
It’s important to make the back of the camera, i.e. the plane of the digital sensor, as par-
allel as possible to the plane of the glass. This helps increase depth of field. You’ll be shooting fairly closely to the surface of the glass, and this decreases depth of field. The combination of a small aperture and making the sensor parallel is enough to recover that loss.
I recommend both the subject itself and the piece of glass be photographed in diffused light. If you are going for the look of a painting, this will help a lot. If you selected the ideal textured glass, the results will look very much like a painting, a real work of art. §
There are many types of textured glass. Choose one (or two) in which the texture is more subtle as opposed to pronounced and bold. You want the focus to be on the subject, not the texture.

17
AI ONLINE WORKSHOP
Learn how to produce stunning images with Artificial Intelligence


Starts June 10, 2023

18
Photography Quiz
1. The background behind a subject is:
a. Not that important and can be ignored
b. Virtually as important as the subject and must be carefully considered
c. Best to be rendered with complete depth of field all the time
d. Best to be rendered with shallow depth of field all the time.
2. High res jpeg mode gives you the same quality as RAW.
a. True
b. False
3. When shooting doors and windows, to emphasize symmetry the shooting position should be
a. Dead center
b. Slightly off-center
c. At a 45 degree angle
4. The two most important aspects of fine art photography are
a. Depth of field and shutter speeds
b. Fill flash and Aperture priority
c. Aperture priority and Shutter priority metering
d. Graphic design and lighting
5. When you shoot at twilight or night and your subject is a city skyline, you should use a tripod and
a. ISO 100
b. ISO 400
c. ISO 800
d. ISO 1600
6. The primary enemy of macro photography is
a. Depth of field
b. Wind
c. Tripods
d. Wide angle lenses
7. Outdoor portraits look best (you may choose more than one)
a. When the sun is at your back
b. At noon
c. At sunrise or sunset
d. On a cloudy day
8. Most landscape photographs should
a. Have complete depth of field
b. Be taken on a bright sunny day
c. Be taken without a tripod
d. Be taken with a high ISO
9. Converting color to black and white with digital technology (or film) always causes
a. An increase in noise
b. A gain of contrast
c. A loss of contrast
d. A loss of sharpness
10. In your camera menu, the option ‘sRGB’ gives you the most extensive color gamut
a. True
b. False
19 Answers on page 47
UPCOMING PHOTO WORKSHOPS
Frog and Reptile Workshop

This is a macro workshop where you will have up close and personal encounters with exotic poison dart frogs and primitive looking reptiles. Jim will explain how to use a ring flash to simulate difused daylight, and he will talk a lot about depth of field as it relates to macro work. This workshop takes place in Kansas city.
August 19 - 20, 2023
Mystical Swamps of Louisiana

Autumn in the swamps of Louisiana (and Texas) is spectacular. The mix of orange and green leaves is beautiful and, at this time of year, we have the best chance of photographing fog. There are egrets, herons, and osprey to photograph as well as alligators in this primeval and mystical environment.
October 21 - 25, 2023
Winter Wildlife Workshop
Photograph beautiful North American mammals plus a snow leopard in natural environments. Mountain lions, red foxes, arctic foxes, bobcats, lynx, wolves and more are in their full winter coats. This is a very special workshop.
January 5 - 10, 2024

1919 10 w
20


18 Expand your photographic artistry with eBooks
on any ebook to see inside 21
Click


2321 212123 21 1919
continued Click on any ebook to see inside 22
eBooks
WINTER WILDLIFE WORKSHOP

January 5 -10, 2024

23
23
What’s wrong with this picture?
TThere is nothing wrong with this picture per se. The composition is good with Shiprock off center, the lighting is beautiful, and the complete depth of field shows everything in focus as it should be with landscapes. But, despite the striking shape of this landform, it’s a boring picture because: 1) the sky is dull and uninteresting and 2) the foreground is boring as well.

So, what to do in a situation like this? You can accept the image as is and be somewhat disappointed, or you can use Photoshop to improve it. The picture on the next page shows you the remarkable difference.
Here is what I did. Planning ahead, I looked for a foreground I wanted to use and spotted these grasses. I photographed them with a 24mm focal length. The grasses were too far away from Shiprock to make the single capture look good
24
because the wide angle lens made the impressive rock too small.
In Photoshop, I used Image > canvas size and expanded the canvas, i.e. the picture area, into a vertical composition. I then copied the horizontal grass picture into the clipboard and pasted it (Edit > paste) into the Shiprock image.

I then added a layer mask with Layer > layer mask > select all. Finally, I used the gradient tool (with the foreground/background color boxes black and white, respectiverly) to blend the grasses with the original landscape beneath the mountain..
Everything was now perfect except the boring sky, of course. So I used the sky replacement feature in Photoshop (Edit > Sky replacement) to add a more dynamic one. §
25
1. When painting with light at night, as I did here in Old Car City in Georgia, you have to keep the flashlight moving. Your shutter has to be long enough to give you the time to do that. Otherwise, you’ll have hotspots in the picture. This was done over a 20 second exposure.

2. You don’t have to accept the fact that a beautiful subject is in an unattractive location. This classic English building was right on a road through a small village, so as I drove around England I looked for a foreground that could replace the road. I used this field of grass, and then I cloned from one picture to the other.

3. Telephoto compression looks great with a repeating design as in Bibury, a village in England. However, it’s essential to have complete depth of field so all of the elements from the foreground to the background are sharp. Either raise the ISO so you can use f/22 or f/32, or use a tripod.

4. Photographers typically prefer black backgrounds for subjects, and admittedly they look great behind flowers. But white is also effective. A simple white poster board works well to achieve this kind of look. Just make sure the bright white background doesn’t adversely affect the meter reading. §

SHORT AND SWEET
26
Coast of France

April 4 - 13, 2024

27
ASK JIM
Every month, Jim will answer a question from his online students, from people who participate in his tours and workshops, or from subscribers to this magazine. If you have a question you’d like Jim to answer, please drop him a note at photos@jimzuckerman.com.
Q: Jim . . . Do I use auto ISO for HDR?

Edward Gabelman, Cinncinati, Ohio
A:No, it’s best to use a fixed ISO. With HDR, there should be one variable that gives you the bracketed images, and I feel it is best to make that variable the shutter speed. If the ISO varies, you’ll have different types and amounts of noise for each image and I think that may not look good. §
28
Partial List of Photography Tours 2022 - 2024

ENGLAND and WALES

HUDSON RIVER VALLEY
Aug/Sep 2023
POLAR BEARS/Canada Nov 2023 WINTER WILDLIFE Jan 2024


SNOWY OWLS

Jan 2024 HOLLAND & BELGIUM Apr/May 2024 CARNIVAL in VENICE Feb. 2024


May 2024
ABANDONED in GEORGIA

March 2024
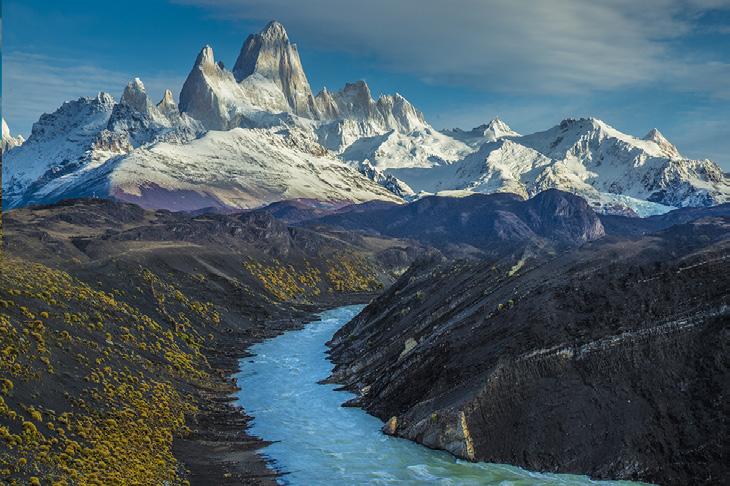
Oct 2023 INDONESIA Jul/Aug 2024 PATAGONIA
ICELAND DRONE TOUR

Aug 2024
For a complete list of all the photo tours/workshops Jim conducts, go to his website: www.jimzuckerman.com.


29
Sep 2023 MOROCCO
Polar Bears from Ground Level


November 9 - 16, 2023
Based in Churchill, Canada
30
j
Student Showcase
Each month, Jim features one student who took beautiful and inspiring images on one or more of his photography tours or workshops. It’s really fascinating how photographers see and compose such different images even though we may go to the same places. Everyone takes great photographs on Jim’s trips.

Tom and Marj Green, Los Altos Hills, California Abandoned in Georgia photo tour, Balkans photo tour.
31 27 27
31
© Marj and Tom Green


32 33 31 29 29
32
Student Showcase, continued
© Marj and Tom Green
Student Showcase, continued


3533 29 293129 31 33 35 33 37
33
© Marj and Tom Green


33 33 31 31 33 34
34
Student Showcase, continued
© Marj and Tom Green
ENGLAND & WALES PHOTO TOUR

September 12 - 22, 2023 Medieval ruins Quaint villages Awesome architecture

35
HOLLAND & BELGIUM
April 24 to May 2, 2024

36


37 Nov. ‘12 Dec. ‘12 Jan. ‘13
on the past issues of P H O T O I N S I G H T S you would like to read. Feb. ‘13 Mar. ‘13 Apr. ‘13 May. ‘13 Jun. ‘13 Jul. 13 Aug. ‘13 Sept. ‘13 Feb. ‘14 Mar. ‘14 Apr. ‘14 May ‘14 Jun.‘14 Oct. ‘13 Nov. ‘13 Dec. ‘13 Jan. ‘14
Click


Sept. ‘14 Oct. ‘14 Nov. ‘14 Dec. ‘14 May ‘15 Jun ‘15 Jul.‘15 Aug.‘15 Sept.‘15 Oct.‘15 Nov. ‘15 Dec. ‘15 Jan. ‘16 Feb. ‘16 Jan. ‘15 Feb. ‘15 Mar. ‘15 Apr. ‘15 38
Click on the past issues of P H O T O I N S I G H T S you would like to read.


39 Mar. ‘16 Aug. ‘16 Jan. ‘17 Feb. ‘17 Mar. ‘17 Apr. ‘17 May ‘17 Jun ‘17 Jul. ‘17 Aug. ‘17 Sept. ‘17 Sept. ‘16 Oct. ‘16 Nov. ‘16 Dec. ‘16 Apr. ‘16 May ‘16 Jun ‘16 Jul. ‘16 Click on the past issues of P H O T O I N S I G H T S you would like to read. Oct. ‘17


O T O I N
I
Nov. ‘17 Dec. ‘17 Jan. ‘18 Feb. ‘18 Mar. ‘18 Apr. ‘18 May ‘18 Jun ‘18 Jul ‘18 Aug ‘18 Sept. ‘18 Oct. ‘18 Nov. ‘18 Dec. ‘18 Jan. ‘19 Feb. ‘19 Mar. ‘19 Apr. ‘19 May ‘19 Jun ‘19 40
Click on the past issues of P H
S
G H T S you would like to read.


41
O
O
Jul. ‘19 Jan. ‘20 Jun. ‘20 July ‘20 Aug. ‘20 Sept. ‘20 Oct. ‘20 Nov. ‘20 Dec. ‘20 Jan.. ‘21 Feb.. ‘21 Mar.. ‘21 Feb. ‘20 Mar. ‘20 Apr. ‘20 May ‘20 Aug. ‘19 Nov. ‘19 Dec. ‘19 Sept/Oct. ‘19
Click on the past issues of P H
T
I N S I G H T S you would like to read.


Apr.. ‘21 May ‘21 Jun.‘21 Jul.‘21 Aug.‘21 Sept. ‘21 Feb. ‘22 Mar. ‘22 Jul. ‘22 Aug. ‘22 Sept. ‘22 Oct. ‘22 Nov. ‘22 Apr. ‘22 May ‘22 Jun. ‘22 Oct. ‘21 Nov. ‘21 Dec. ‘21 Jan. ‘22 42


43 Dec. ‘22 Jan. ‘23 Feb. ‘23 Mar. ‘23 Apr. ‘23
1/3 focus law
Subject index for past Photo Insight issues
‘15
3D sphere Mar. ‘16
90 degree finder Mar. ‘13
Abstracts in soap Feb. ‘15
Abstracts, Shooting Mar ‘19
Aerial photography Jun. ‘13
Aerial photography
‘21
African safari May ‘16
Airplane windows
Alien landscapes
Anatomy of 8 photographs
Angled perspectives
Aperture vs. shutter speed
Aperture priority
Aurora Borealis
Auto white balance
Autofocus, when it fails
Autofocus failure
Autofocus failure
Autofocus challenges
Auto ISO
Auto White Balance
Autumn Foliage
Autumn Color
Autumn foliage photography
Back button focus
Backgrounds, wild
Backgrounds, busy
Backlighting
Backlighting
Birds in flight
Birds in flight
‘16
‘13
‘16
‘19
‘14
‘17
‘13
‘15
‘15
‘17
‘18
‘17
‘21
‘18
‘21
‘18
‘12
‘13
‘16
‘22
‘13
‘14
Birefringence May ‘18
Birds in flight Mar. ‘16
Birds in flight, camera settings
Bird Photography
Blacklight photography
Black velvet
Black and white conversions
Black and white solarization
Black and white with color
Black and white plus color
Blown highlights
Blue monochromes
‘23
‘19
‘21
‘14
Mar. ‘17
Sep. ‘17
Jan. ‘20
Mar. ‘23
Feb. ‘18
Jan. ‘22
Black Plexy Aug. ‘22
Blur, field
Blur technique
Bokeh
Nov. ‘18
Oct. ‘17
Jun. ‘15
Botanical gardens, shooting Apr. ‘22
Butterfly photography Jul. ‘14
Camera buying guidelines
Camera settings for landscapes
Dec. 21
Feb. ‘23
Camera setting priorities Jun. ‘17
Canon R5 Mar. ‘21
Capturing lightning Jun. ‘13
Capturing what you don’t see May ‘21
Catchlights Jul. ‘16
Changing perspective May ‘21
Cheap flash stand Apr. ‘13
Children photography Jun. ‘14
Choosing a telephoto lens Dec. ‘20
Chromatic aberration May ‘13
Chrome Dec. ‘18
Cityscapes Aug. ‘14
Cityscapes May ‘16
Clone tool, fixing an issue Sep. ‘17
Clone tool technique Jul. ‘20
Composites and Light Dec. ‘17
Compositing images Apr. ‘19
Compositing, 7 steps Jan. 22
Composition, different approach Jan. ‘15
Content-aware, New Aug. ‘20
Content aware move tool Jan. ‘23
Contrast vs. exposure Jul. ‘15
Converting to black and white Mar. ‘22
Correcting keystoning Jun. ‘21
Creating a star field Jan. ‘14
Creating Art out of Motion May ‘22
Creating a Sketch
Creative blurs
Dec. ‘17
Jan. ‘14
Dark backgrounds Nov. ‘19
Dawn photography
Jan. ‘17
Dawn photography Feb. ‘17
Dead center Jan. ‘13
Dealing with smog Oct. ‘16
Decay photography Sep. ‘15
Define Pattern Sep. ‘18
Depth of field Aug. ‘16
Depth of field confusion Jan. ‘20
Depth of field and distance Dec. ‘18
Depth of field and obliqueness May ‘21
Depth of field, shallow Apr. ‘20
Depth of field vs. sharpness Nov. ‘20
Double takes Apr. ‘20
Drone photography Mar. ‘23
Drop shadows Apr. ‘19
Dust, Minimizing Aug. ‘19
eBook, how to make Jan. ‘13
Eliminating people from photos Jun. ‘22
Embedded in Ice Oct. 17
Energy saving bulbs Sep. ‘14
Equidistance and telephoto lenses Apri. ‘23
Exploring the power visuals of AI Mar. ‘23
Exposing for the sun Sep. ‘16
Exposure, the sun Jul. ‘13
Exposure technique Sep. ‘13
Exposure, snow Jan. ‘14
Exposure triangle Nov. ‘14
Exposure, to the right Apr. ‘15
Exposure compensation Sep. ‘16
Exposure compensation Mar. ‘21
Extension tubes Dec. ‘13
Face sculpting Apr. ‘21
Face sculpting Feb. ‘22
Festival photography Sep. ‘20
Fill flash Sep. ‘13
Filter forge Feb. ‘13
Fireworks Jul. ‘13
Fireworks, Compositing Jun ‘20
Fisheye lenses May ‘13
Fisheye lenses Feb. ‘15
Fisheye fantasies Oct. 21
Flash backlighting May ‘15
Flash, balancing exposure Oct. ‘15
Flash, balancing off-camera Dec. ‘18
Flat art Sep. ‘16
Flexify 2 Mar. ‘20
Flood fixes problems Nov. ‘19
Jul.
Jan.
Mar.
Jan.
Jan.
Jan.
May ‘14
Sept.
Apr.
Dec.
Apr.
Aug.
Jan.
Apr.
Nov
Mar’
Sep.
Sep. ‘20
Oct.
Oct.
Nov.
Apr.
Apr.
Oct.
Aug.
Jan.
Jan.
Jun
Feb.
Mar.
44
Floral Portraits, Indoors
Subject index for past Photo Insight issues
‘21
Flowers May ‘15
Flower photography
Flowers in harsh light
Focus on the eyes
Focus points
Focus points
Focus stacking
Focus stacking
Focusing in the dark
Foreign Dancers, Photographing
Foreign models
Fractals, generating
Fractals
Framing
Freezing ultra action
From Terrible to Beautiful
Fun with paint
Fundamental ingredients
Fundamentals That Make Great Photos
Fun With Christmas Lights
Fun with Food
Graphic Design
Garish imagery
Getting money for used gear
Great subjects
Great ceilings & HDR Panos
Green screen
Ground level shooting
Grunge technique
Heavy Lens Debate, The
HDR, one photo
HDR at twilight
HDR, realistic
HDR, hand held
HDR, hand held
HDR, hand held
HDR panoramas
HDR, choosing the number of frames
‘21
‘16
‘20
‘15
‘20
‘17
‘19
‘16
17
‘13
‘13
‘19
‘17
‘17
‘19
‘16
‘13
‘19
‘21
‘20
Keystoning, correcting Aug. ‘15
L Bracket Feb. ‘18
L Bracket
Landscape photography
Landscape photography
Feb. ‘21
Dec. ‘12
Apr. ‘14
Landscape photography Nov. ‘16
Layer Masks, The Power of Feb. ‘22
Light fall-off
Light painting
Lighting a face
Lightning photography
Liquify
Liquify Distortions
Feb. ‘14
Dec. ‘21
Oct. ‘13
May ‘20
Feb. ‘18
Sept/Oct. ‘19
Long lens portraits Oct. ‘18
Long Lenses for Flowers Jul. ‘20
Low light photography May ‘15
Luminar 4
Macro flash
Macro flash
Jan. ‘20
Nov. ‘12
Sep. ‘14
Macro flash Aug. ‘15
Macro flash
Macro photography and DOF
‘15
22
‘15
‘19
‘13
‘22
‘13
‘23
‘13
‘13
‘15
‘16
‘17
‘18
‘16
‘22
High wind Apr. ‘17
Highlights Apr. ‘14
Highlights, overexposed
Histograms, Why I Don’t Use
‘15
‘19
Histogram problems Apr. ‘20
Hotels with a view
Humidity
Hummingbird photography
Hyperfocal distance
Image resizing
‘20
‘13
‘13
‘13
‘18
Implying motion Sept.‘14
Impossible DOF Feb. ‘16
Impossible DOF Jan. ‘17
Indestructible camera bag
Infrared photography
Insane ISO settings
Interiors
iPad: Loading photos
iPhone photography, pros and cons
Jungle photography
Kaleidoscopic images
Kaleidoscopis images
‘14
‘14
‘22
‘15
‘22
Macro trick
Aug. ‘22
Feb. ‘22
May ‘19
Managing soft focus Jul. ‘21
Mannequin heads
Metering modes
Meters, How They Work
Apr. ‘16
Nov. ‘16
Jul. ‘18
Meters, when they fail Dec. ‘16
Metering situations, Impossible Jul. ‘19
Middle gray
Nov. ‘15
Minimizing dust on the sensor Nov. ‘21
Mirrors
Mirror images
Model shoot
Moon glow
Mosaics
Mundane to Ideal
Museum photography
Natural Light Portraits
Negative space
Neon edges on black
Neutral Density filters
Jan. ‘19
May ‘23
Jan. ‘17
Oct. ‘16
Jun. ‘17
Nov. ‘19
Mar. ‘13
Aug. ‘21
Jan. ‘16
Aug. ‘14
Jun. ‘18
Neutral Density filters and water Mar. ‘22
Night photography
Night Safaris
Feb. ‘14
Jun. ‘18
Night to Twilight Dec. ‘17
Noise reduction
Oil and water
Optical infinity
Feb. ‘17
May ‘20
Jun. ‘16
Organization of photos Mar. ‘18
Out of focus foregrounds Jan. ‘20
Paint abstracts
Paint abstracts
May ‘13
Aug. ‘21
Painting with light Sep. ‘15
Panning motion
Dec. ‘16
Pano-Mirrors with a twist Jan. ‘18
Parades
Parallelism
Parallelism and DOF
Sep. ‘13
Nov. ‘19
Feb. ‘21
Perspective, Super Exaggeration of Dec. ‘21
Photo shsaring Apr. ‘23
45
Aug.
Apr
Jul.
Dec.
Mar.
Sep.
Mar.
Aug.
Oct.
Nov’
Jun.
Sep.
Jul.
May
May
Aug.
Oct.
Apr.
Jan.
Jan.
Jul.
Dec.
Jan.
Apr.
Jul.
Mar.
Oct.
Feb.
Feb.
Apr.
May
Jun.
Dec.
Nov
Jul.
Jun.
Jun.
Feb.
Jun
Mar.
Oct.
Apr.
Jul.
Aug.
Dec.
Jul.
Dec.
Oct.
Aug.‘17
Apr.
Dec. ‘14
Jan. ‘15
Aug. ‘20
Subject index for past Photo Insight issues
Photo terms Nov. ‘22
Photography to Art Dec. ‘17
Photography solutions Jan. ‘18
Photoshop, content Aware Nov. ‘12
Photoshop, sketch technique Apr. ‘13
Photoshop, replace background Apr. ‘13
Photoshop, actions palette Dec. ‘13
Photoshop, layer masks Feb. ‘13
Photoshop, the clone tool May ‘13
Photoshop, soft foliage Oct. ‘13
Photoshop, mixer brush tool Sept. ‘14
Photoshop, b & w with color Jun. ‘14
Photoshop, drop shadows Jul. ‘14
Photoshop, creating texture Feb. ‘14
Photoshop, face mirrors Feb. ‘14
Photoshop, liquify Mar. ‘14
Photoshop, face mirrors Aug. ‘14
Photoshop, digital spotlight Sep. ‘14
Photoshop, enlarge eyes Nov. ‘14
Photoshop, darken the periphery Dec. ‘14
Photoshop, mirror images Dec. ‘14
Photoshop, beam of light Apr. ‘15
Photoshop, polar coordinates Mar. ‘15
Photoshop, chrome May ‘15
Photoshop, actions palette Nov. ‘15
Photoshop, cut and paste Nov. ‘15
Photoshop, geometrics Oct. ‘15
Photoshop, plugins Oct. ‘15
Photoshop, multiple selections Apr. ‘16
Photoshop, sharpening Apr. ‘16
Photoshop, Flood plugin Apr. ‘16
Photoshop, Desaturation Aug. ‘16
Photoshop, making a composite Aug. ‘16
Photoshop new tool May ‘20
Photoshop, place one element behind Aug. ‘18
Photoshop, the pen tool Feb. ‘16
Photoshop, canvas size Jan. ‘16
Photoshop, using the earth Jun. ‘16
Photoshop, define patterns May ‘16
Photoshop, paste into Nov. ‘16
Photoshop, b & w with color Feb. ‘17
Photoshop, open a closed door Apr. ‘17
Photoshop, palettes May ‘17
Photoshop, My favorite plugins Jan. ‘20
Portrait options Jan. ‘19
Portrait techniques Nov. ‘15
Portraits Mar. ‘13
Portraits, mixed lighting Aug. ‘14
Portrait Professional Nov. ‘19
Portraits, Lens choice Sept/Oct. ‘19
Portraits, side lighting Sep. ‘17
Portraits, window light Mar. ‘15
Portraits, outdoors May ‘17
Post-processing checklist Dec. ‘13
Post-processing: Contrast Aug. ’17
Practicing graphic design, Part I Dec. ‘22
Practicing graphic design, Park II Jan. ‘23
Practicing graphic design, Part III Feb. ‘23
Pre-capturing technology May ‘23
Predictive Focus Sep. ‘18
Problem/solution Apr. ‘17
Problem Solving in Photoshop May ‘22
Problem with cruises Jan. ‘18
Protecting extremeities from the cold Dec. ‘22
Protecting highlights
Dec. ‘12
Puppies Jan. ‘15
Puppy photography Feb. ’18
Reflections
Reshaping faces
Feb. ‘13
Oct. ‘22
Restoring old photos Jun ‘20
Ring flash, advantages Jul. ‘21
Ring flash versatility Oct. ‘21
Rule of Odds
May ‘22
Safari May ‘13
Safari strategies Jul. ‘15
Seeing as the lens does
Seeking Cool Snow Photos
Selective filtering
Selective focus
Self-critiques
Self-critiques
Self-critiques
Sensor cleaning
Nov. ‘14
Jan. ‘21
Mar. ‘18
Jun. ‘15
Jul. ‘13
Oct. ‘13
Nov. ‘20
Jun. ‘18
Sepia and dark contrast Jun. ‘15
Shade May ‘14
Shady side
Jun. ‘18
Shadows, Paying Attention to Mar. ‘18
Sharpness problems
Mar. ‘14
Shooting in Inclement Weather Nov. ‘22
Shooting through textured glass May ‘23
Shooting through wire mesh Sept. ‘14
Shooting into the light
Silhouettes
Jun ‘20
Jun. ‘13
Silhouettes, How to make Apr. ‘22
Silhouettes, Exposing for Sept/Oct. ‘19
Silvered landscapes
Sketch, How to Make
Skies make or break a picture
Sky replacement
Mar. ‘20
Jun ‘19
Aug. ‘21
Nov. ‘20
Sky replacement strategies Aug. ‘22
Snow exposure Nov ‘17
Snow exposure
Nov. ‘19
Soft light Jan. ‘13
Smart phone photography May ‘19
Stained glass Mar. ‘17
Star photography Jul. ‘16
Star photography and noise Jan. ‘18
Stock photography Sep. ‘14
Sunrise & sunset
Tamron 150-600mm
Jan. ‘19
Apr. ‘14
Ten reasons photos are not sharp Jan. ‘19
Texture, Adding Mar ‘19
Texture Mapping in 3D Jul. ‘21
Topaz AI Gigapixel Mar ‘19
Topaz glow Jan. ‘15
Topaz glow Sep. ‘17
Topaz Impression Sep. ‘15
Topaz Remask 5 Oct. ‘17
Topaz Simplify 4 Dec. ‘12
Topaz simplify 4 Jun. ‘14
Topaz Studio Apr. ‘18
46
Subject index for past Photo Insight issues
Translucency & backlighting
Travel photography
Travel portraits
Travel tips
Travel photographer’s guide
Tweaking exposure on the fly
Twilight photography in the rain
Tripods
Two subject sharp rule
Two subject focus rule
Two subject focus rule
Urban heights
Ultra distortion
Unusual Panos
Upside Down Reflections
Warm fingers in winter
Water drop collisions
‘13
‘17
‘23
What NOT to do in photography
White on White
White vignette
White balance
White balance, custom
Wide angle conundrum
Wide angle lenses
Wide angle portraits
Wide angle lenses
Wide angle lenses: Outside the Box
Wide angle keystoning
Wildlife photos with wide angles
Window light
Window light portraits
Window frames
Winter photography
‘21
‘18 When You Needed a Zoom
‘15
Quiz answers
90% - 100%: You could have been a pro
80%: Your glasses probably need a new prescription
70%: Don’t quit your day job
60%: You should really be using an iPhone
47
Nov.
‘18
Feb.
Mar. ‘14
Apr. ‘14
Jun.
Apr.
Apr.
‘19
Mar.
‘18
May
‘14
Jan.
‘20
Jun.
‘21
Jun.
‘21
May
‘18
Nov.
‘22w
Aug.
‘21
Nov.
‘15
May
‘18
Aug.
Apr.
Dec. ‘20
Aug.
Feb.
‘15
Mar.
‘16
May
‘19
Mar.
‘13
Nov.
‘14
Jun.
‘17
Jun.
‘22w
Nov
‘17
Mar.
‘15
Dec.
‘15
Aug.
‘18
Feb.
‘16
Dec.
May
‘12 Winter bones
‘13
Dec. ‘15
Nov. ‘18
Jul. ‘18 Workflow May ‘13
Winter photography
Winter photography
Wire Mesh, Shooting Through
1. b 2. b 3. a 4. d 5. a 6. b 7. c & d 8. a 9. b 10. b
Your score
by: Donald Moore

48 PHOTO INSIGHTS® published by Jim Zuckerman All rights reserved © Jim Zuckerman 2023 email: photos@jimzuckerman.com Edited
This page: A beautiful road in South Carolina

