PHOTOGRAPHY

NEW
196
pages of pro composition and kit advice and techniques
pages of pro kit advice, composition tips and shooting techniques
Teach Yourself Modern
LOCATE SCENIC SPOTS SHOOT SHARPER EDIT TO PERFECTION Digital Edition SECOND EDITION
LANDSCAPE
xxx
WELCOME
Landscape photography is one of the most rewarding yet challenging areas in which a photographer can specialise. It is so hard to take unique shots of popular locations, but we’ll explore shooting at the classic honeypot spots as well as navigating to more unique locations. Whether it’s cloudless skies unexpected weather or tricky light conditions, this book is full of guides and projects to help you tackle every landscape. We’ll explore compositon and shooting in black and white, as well as editing tricks that will take your shots to the next level.
Step-by-step tutorials will show you advanced techniques for getting the most out of outdoor scenes, from seascapes to mountaintops and rolling fields. This practical guide also has useful tips for taking more creative shots using both in camera techiques and postprocessing. As you will need kit that can keep up with the action, we also deliver the verdict on the best accessories for your camera.
72 TECHNIQUES

Future PLC Quay House, The Ambury, Bath, BA1 1UA Editorial Editor Rebecca Greig Designer Laurie Newman Compiled by Sarah Bankes & Adam Markiewicz Senior Art Editor Andy Downes Head of Art & Design Greg Whitaker Editorial Director Jon White Cover images Getty Images Photography All copyrights and trademarks are recognised and respected Advertising Media packs are available on request Commercial Director Clare Dove International Head of Print Licensing Rachel Shaw licensing@futurenet.com www.futurecontenthub.com Circulation Head of Newstrade Tim Mathers Production Head of Production Mark Constance Production Project Manager Matthew Eglinton Advertising Production Manager Joanne Crosby Digital Editions Controller Jason Hudson Production Managers Keely Miller, Nola Cokely, Vivienne Calvert, Fran Twentyman Printed in the UK Distributed by Marketforce, 5 Churchill Place, Canary Wharf, London, E14 5HU www.marketforce.co.uk Tel: 0203 787 9001 Teach Yourself Modern Landscape Photography Second Edition (PTB4382) © 2022 Future Publishing Limited We are committed to only using magazine paper which is derived from responsibly managed, certified forestry and chlorine-free manufacture. The paper in this bookazine was sourced and produced from sustainable managed forests, conforming to strict environmental and socioeconomic standards. The paper holds full FSC or PEFC certification and accreditation. All contents © 2022 Future Publishing Limited or published under licence. All rights reserved. No part of this magazine may be used, stored, transmitted or reproduced in any way without the prior written permission of the publisher. Future Publishing Limited (company number 2008885) is registered in England and Wales. Registered office: Quay House, The Ambury, Bath BA1 1UA. All information contained in this publication is for information only and is, as far as we are aware, correct at the time of going to press. Future cannot accept any responsibility for errors or inaccuracies in such information. You are advised to contact manufacturers and retailers directly with regard to the price of products/services referred to in this publication. Apps and websites mentioned in this publication are not under our control. We are not responsible for their contents or any other changes or updates to them. This magazine is fully independent and not affiliated in any way with the companies mentioned herein. Future plc is a public company quoted on the London Stock Exchange (symbol: FUTR) www.futureplc.com Chief executive Zillah Byng-Thorne Non-executive chairman Richard Huntingford Chief financial officer Penny Ladkin-Brand Tel +44 (0)1225 442 244 PHOTOGRAPHY Teach Yourself Modern LANDSCAPE
CONTENTS
008. ESSENTIAL KIT FOR MODERN LANDSCAPES
Choose the best cameras, lenses and accessories for stunning scenics

16. MODERN LANDSCAPES
Mark Bauer offers a creative guide for shooting landscapes with fresh techniques
30. LANDSCAPE LOCATIONS & NAVIGATION
James Abbott shares his tips for finding landscape locations, from honeypot spots to more unique places
44. MASTER COMPOSITION
Learn how to change your compositions, make them more eye-catching and frame stunning scenes
58. SHOOT FOR THE LIGHT
Peter Fenech explains how you can adapt your shooting technique and approach to master every lighting condition
72. SHOOT BLACK AND WHITE LANDSCAPES
Create stunning monochrome scenes by mastering exposure control and textural balance
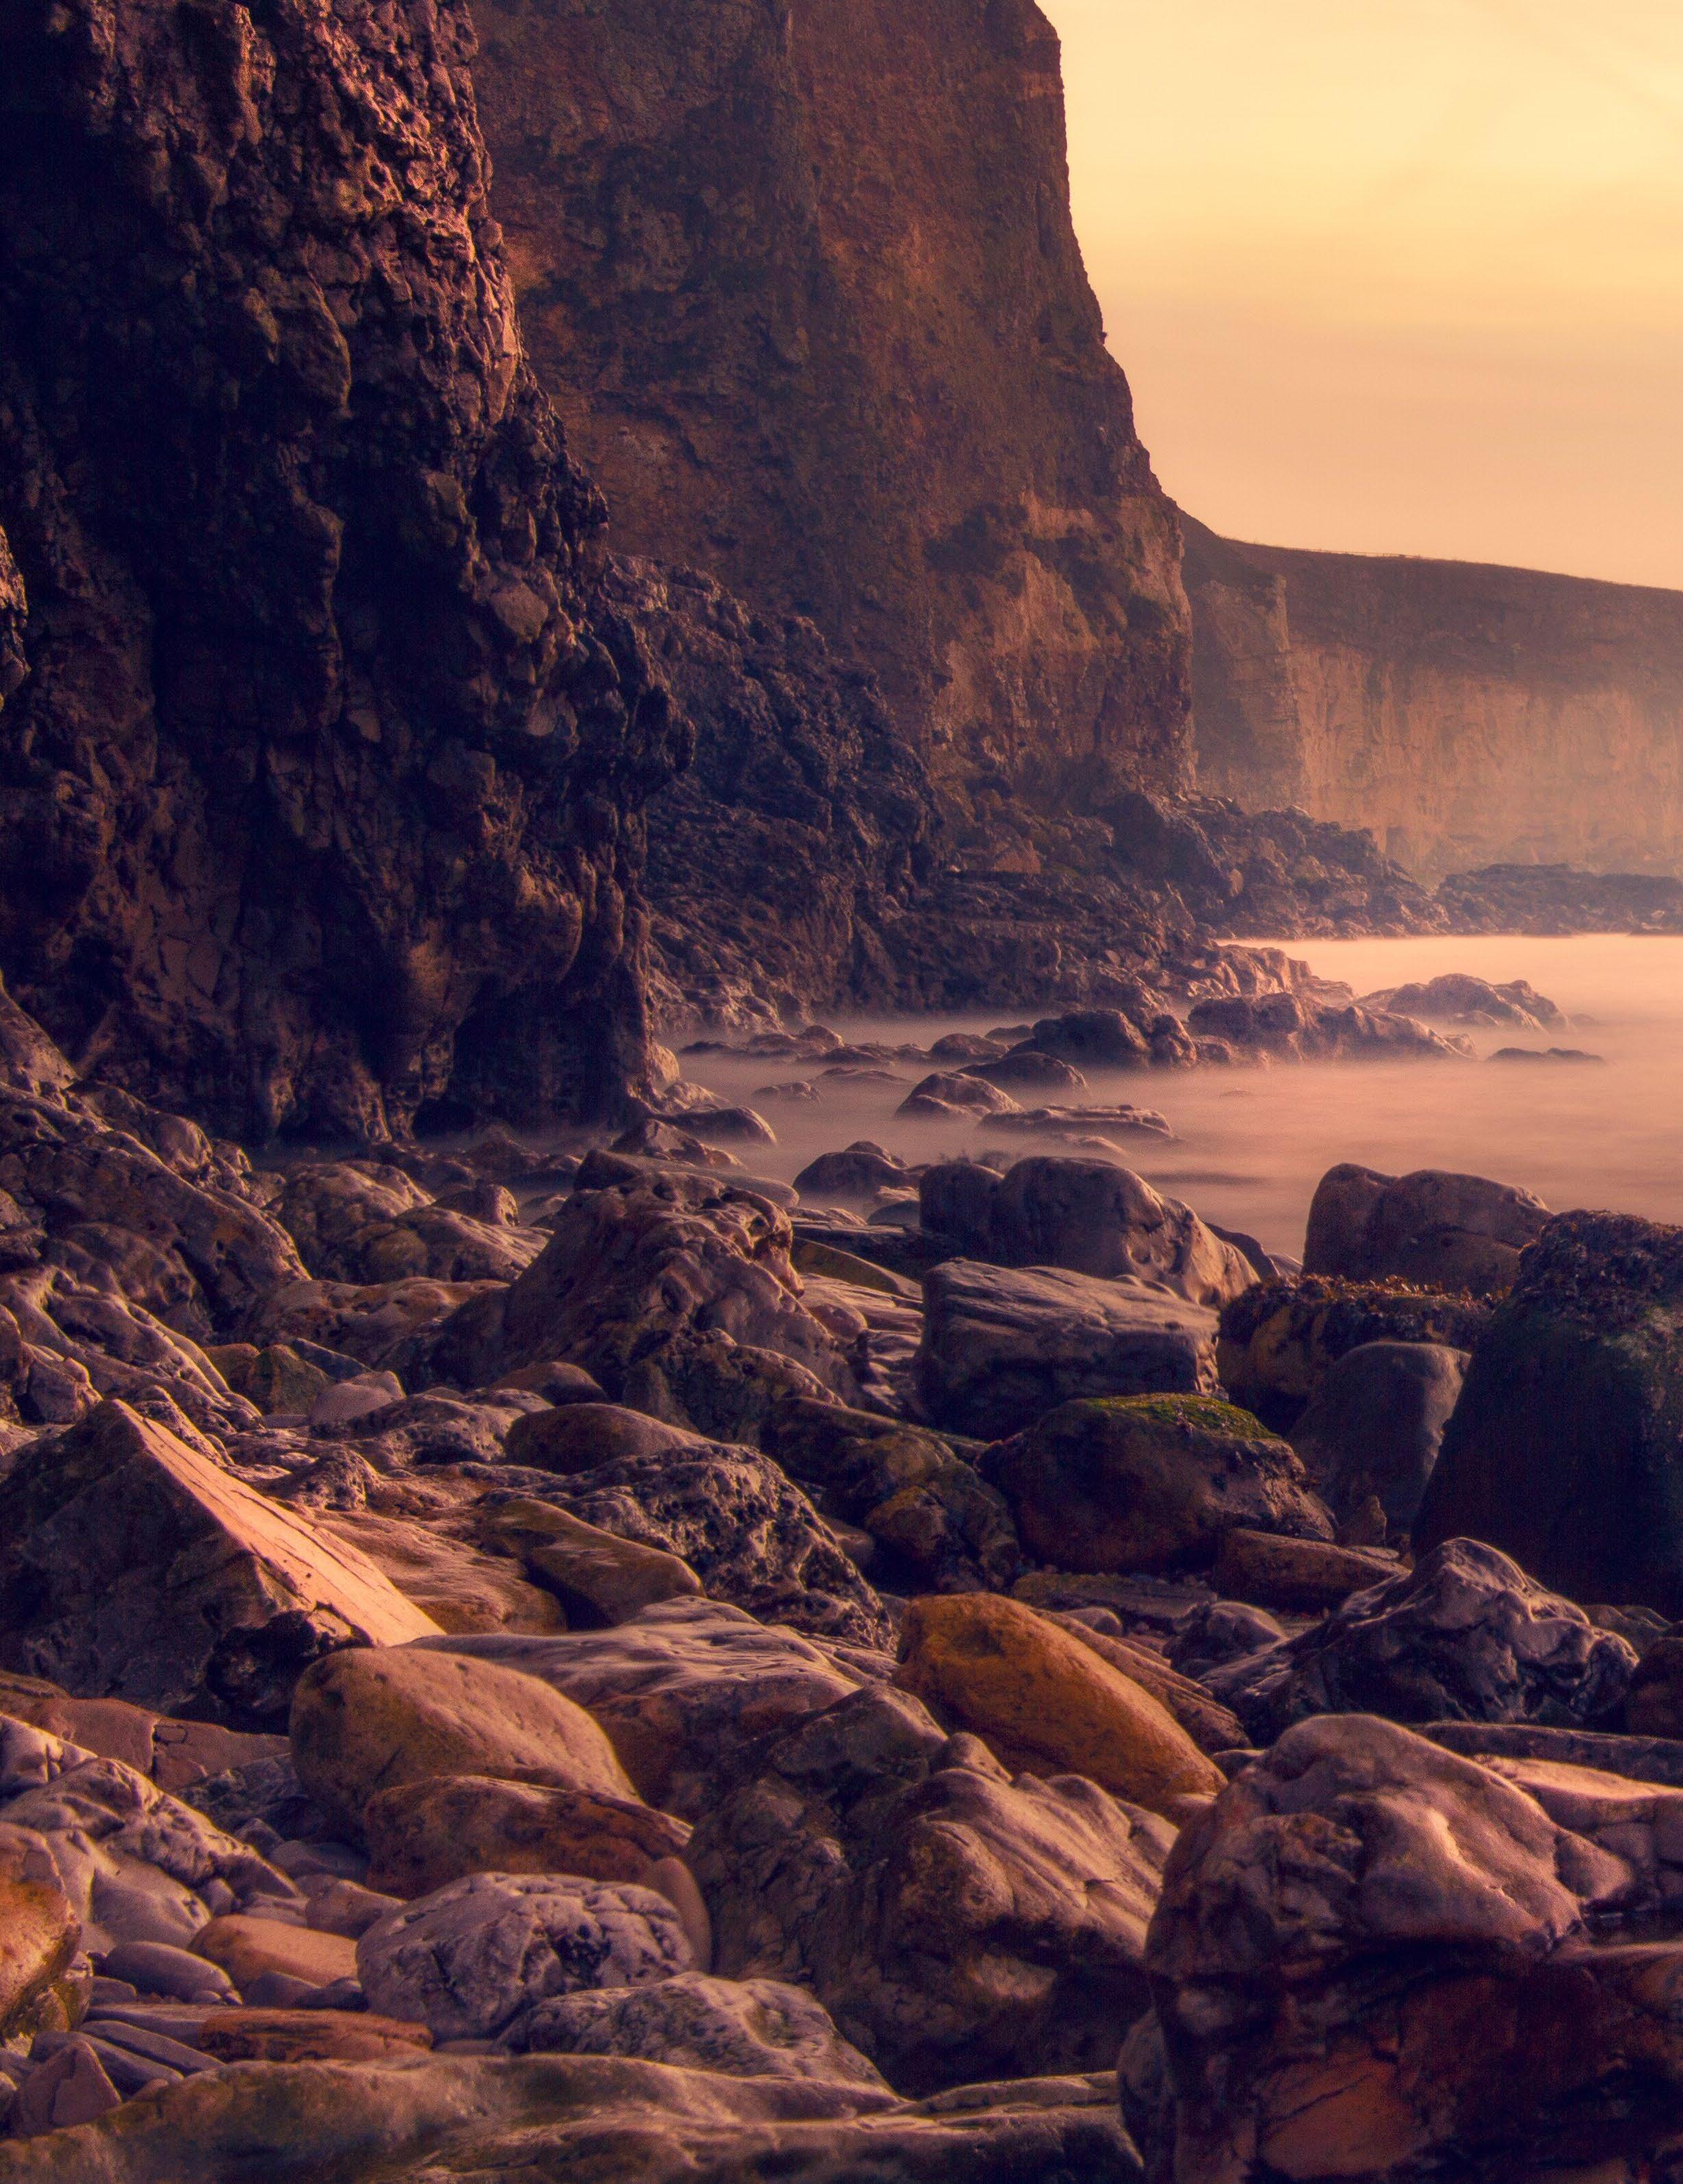
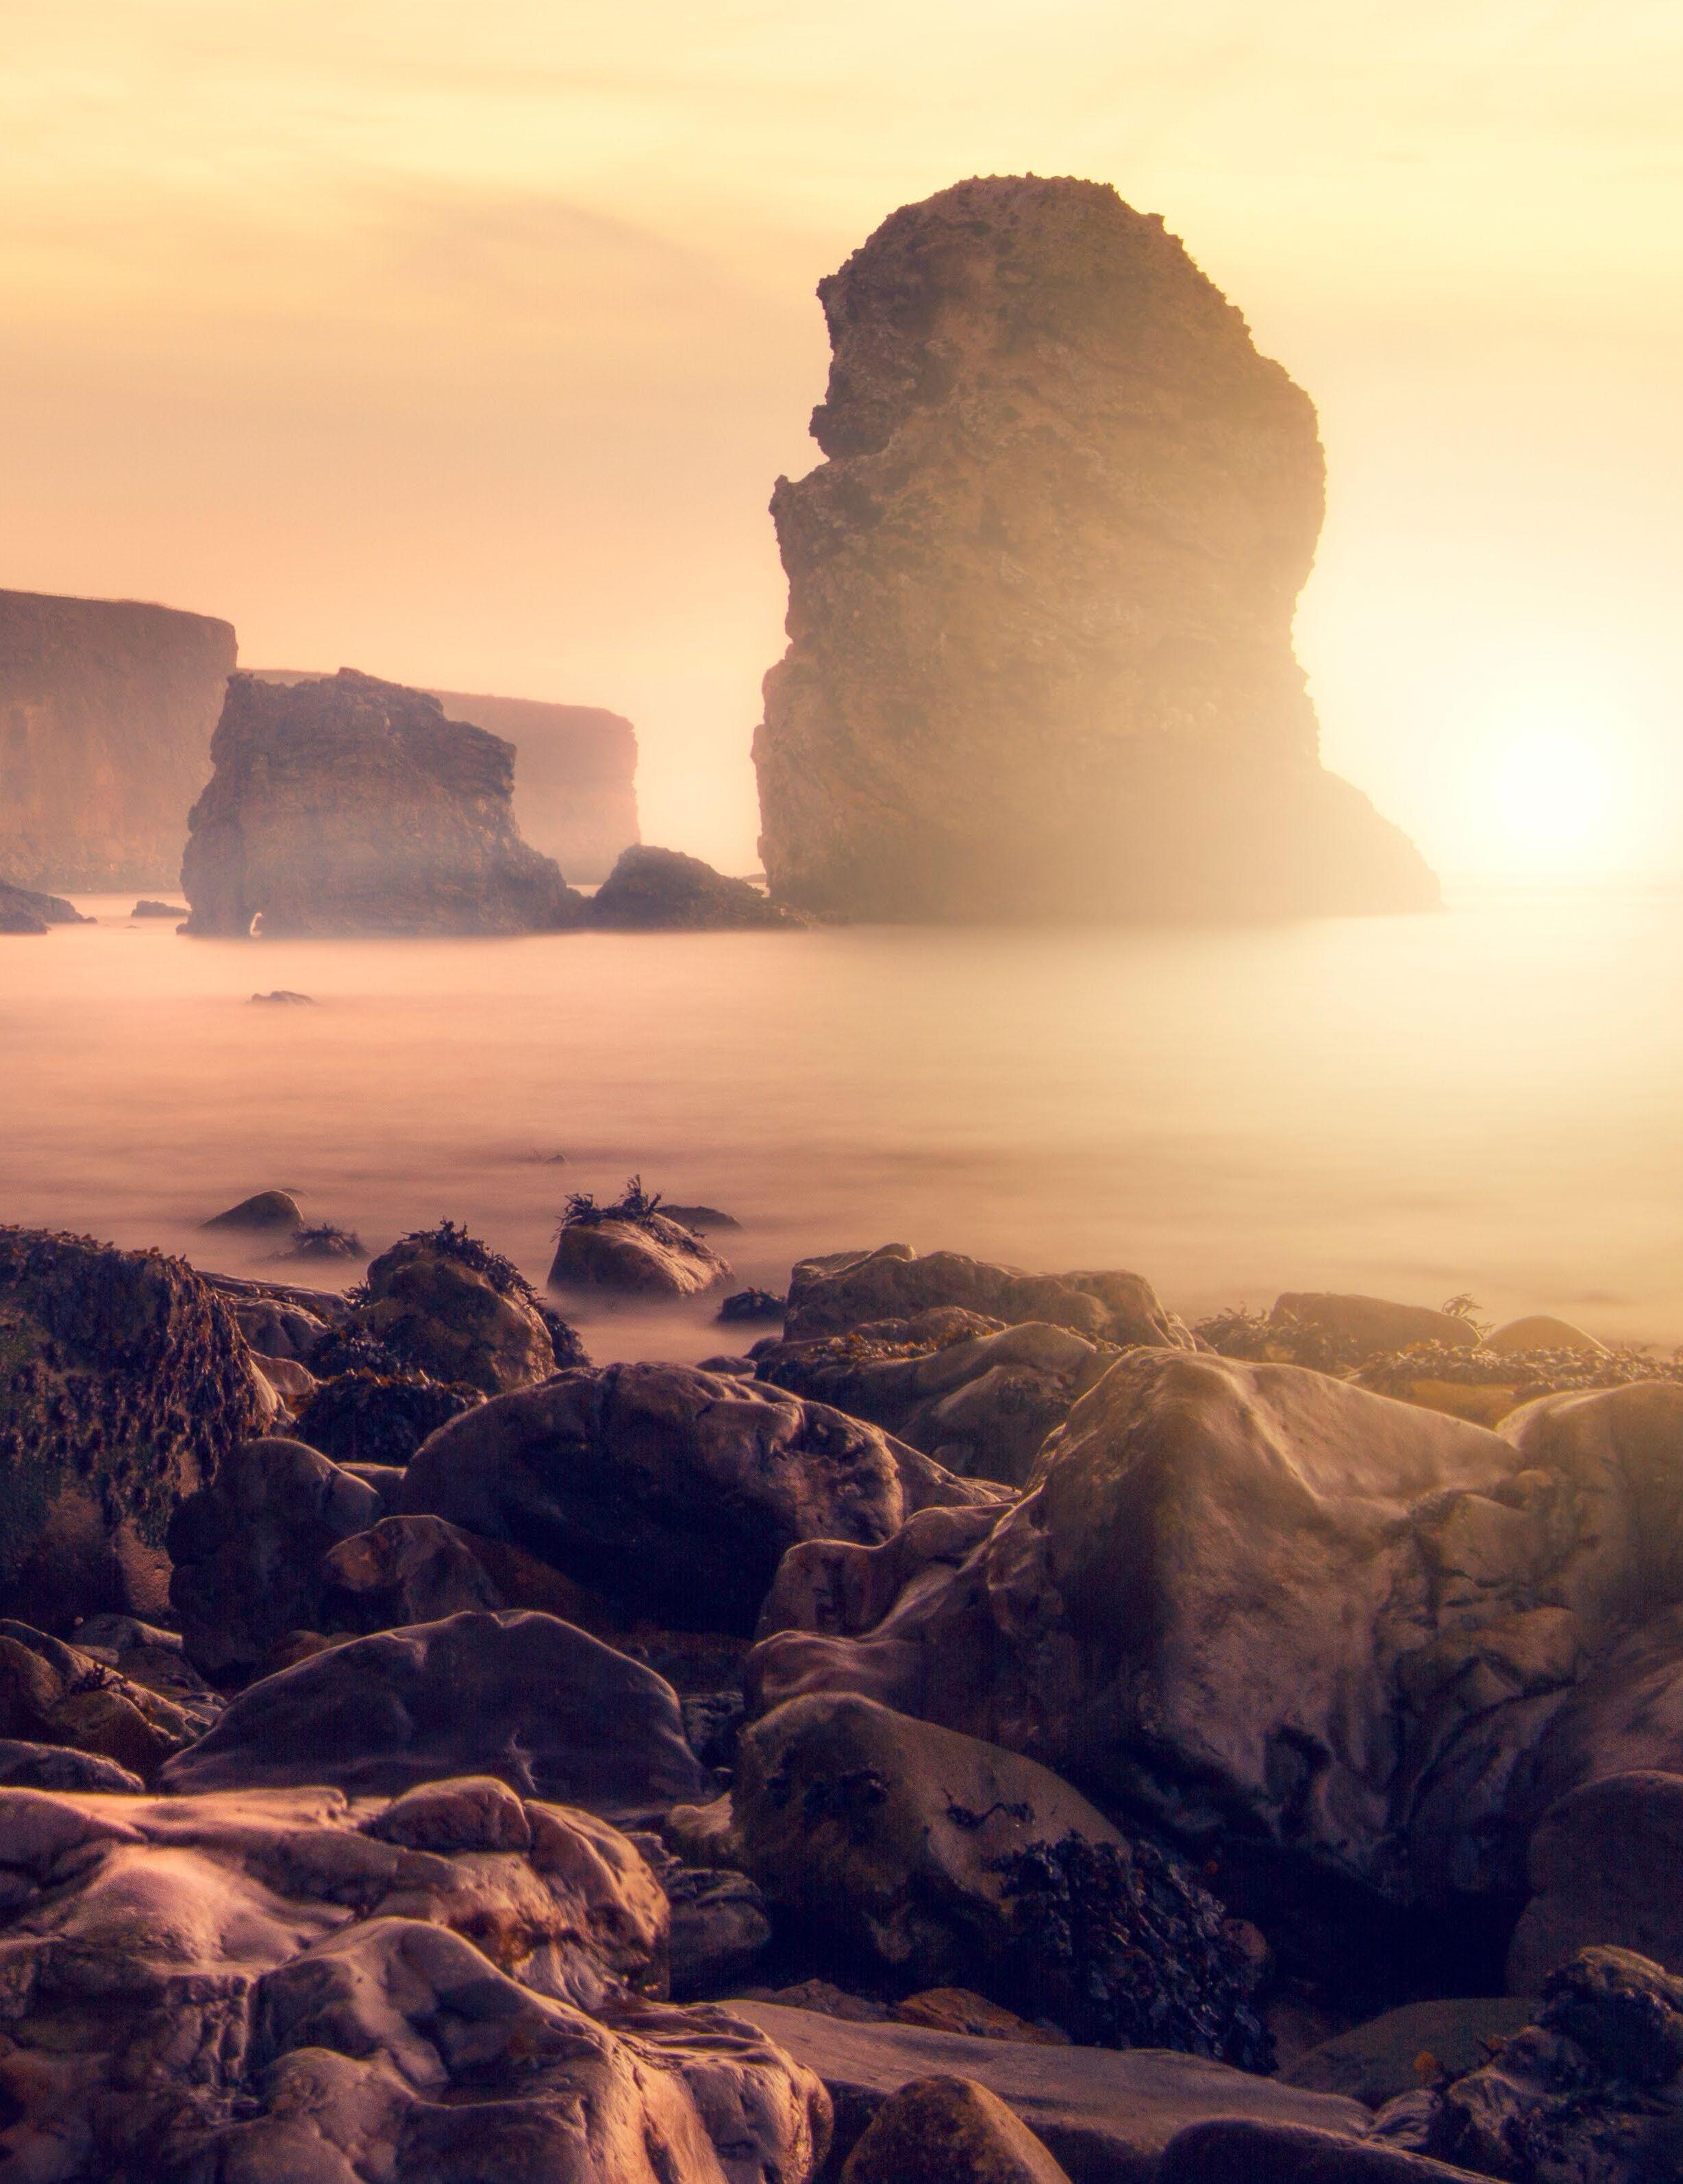
86. SHOOT PROFESSIONAL COASTAL LANDSCAPES
Take your seascapes and beach scenes to the next step with these creative techniques
100. NEW WAYS TO SHOOT LANDSCAPES
Digital landscape photography is more than just hyperfocal distance and ND grads. James Abbot shares the techniques that matter
114. SHOOT CREATIVE LANDSCAPES
Expand your range of artistic techniques and create next-level landscape captures us behind the scenes
128. LANDSCAPE PHOTOGRAPHY EDITING MASTERCLASS
Professional photographer Peter Eastway explains his approach to editing landscape photographs
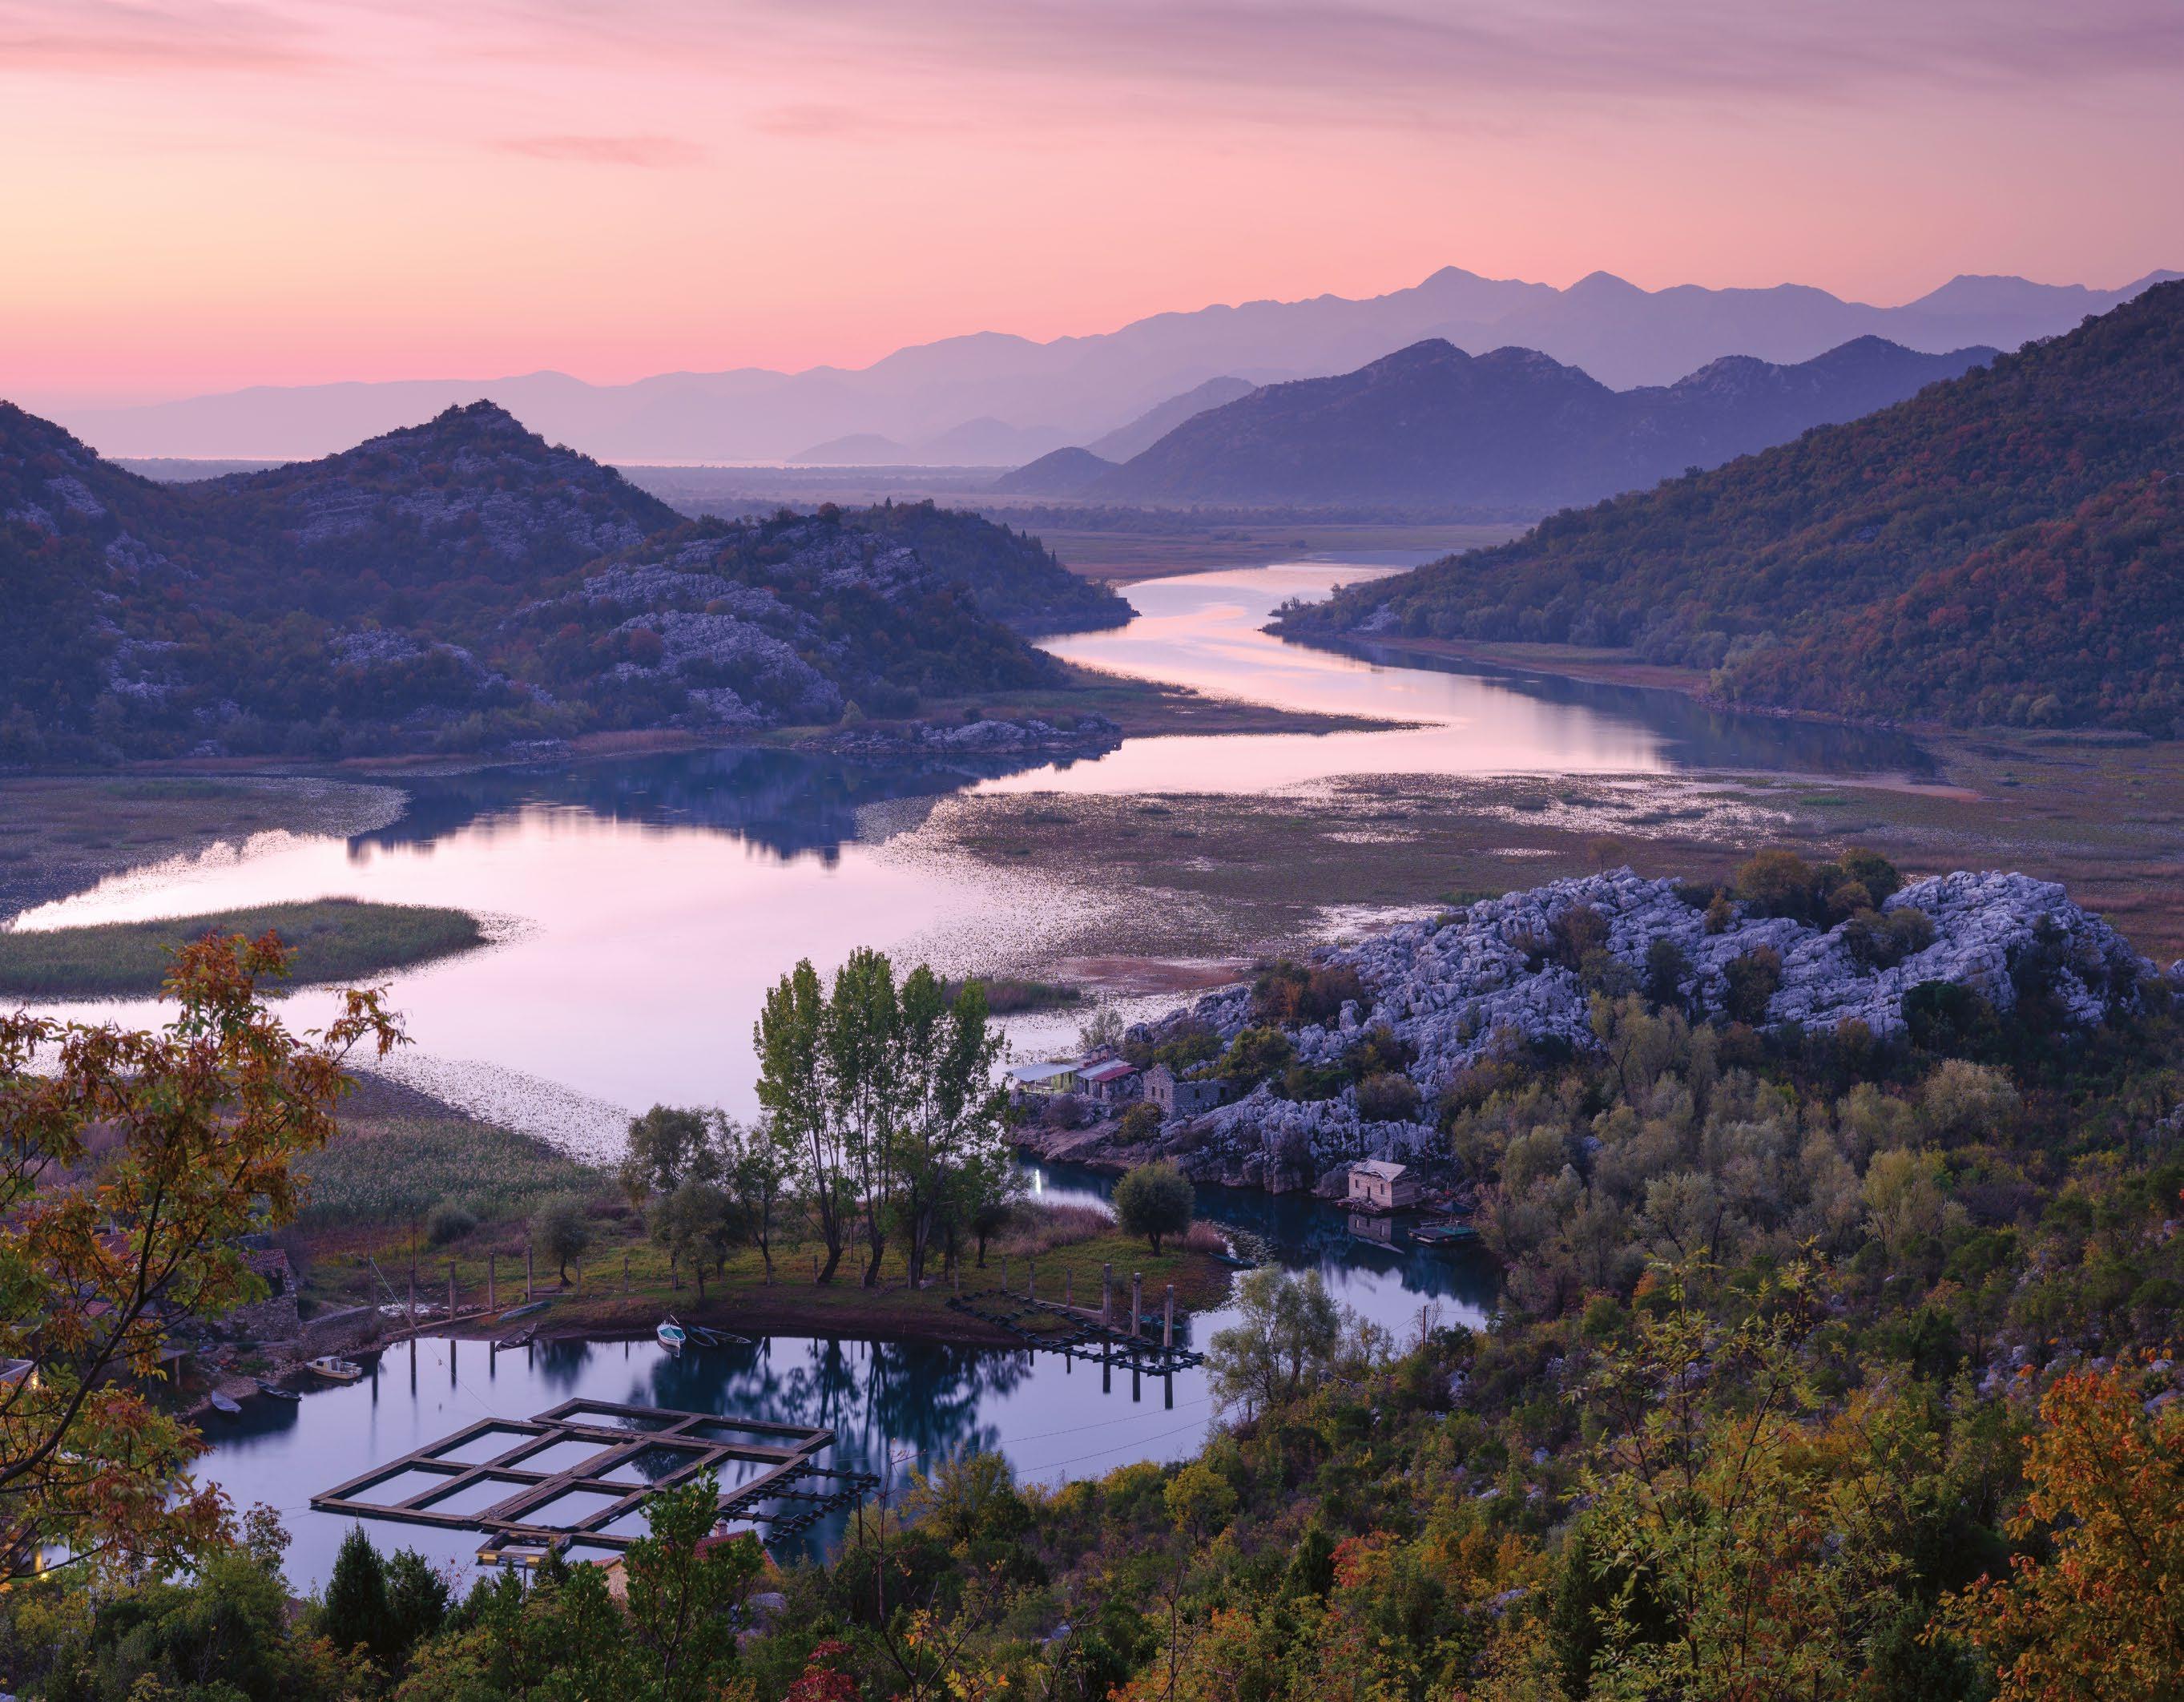
30
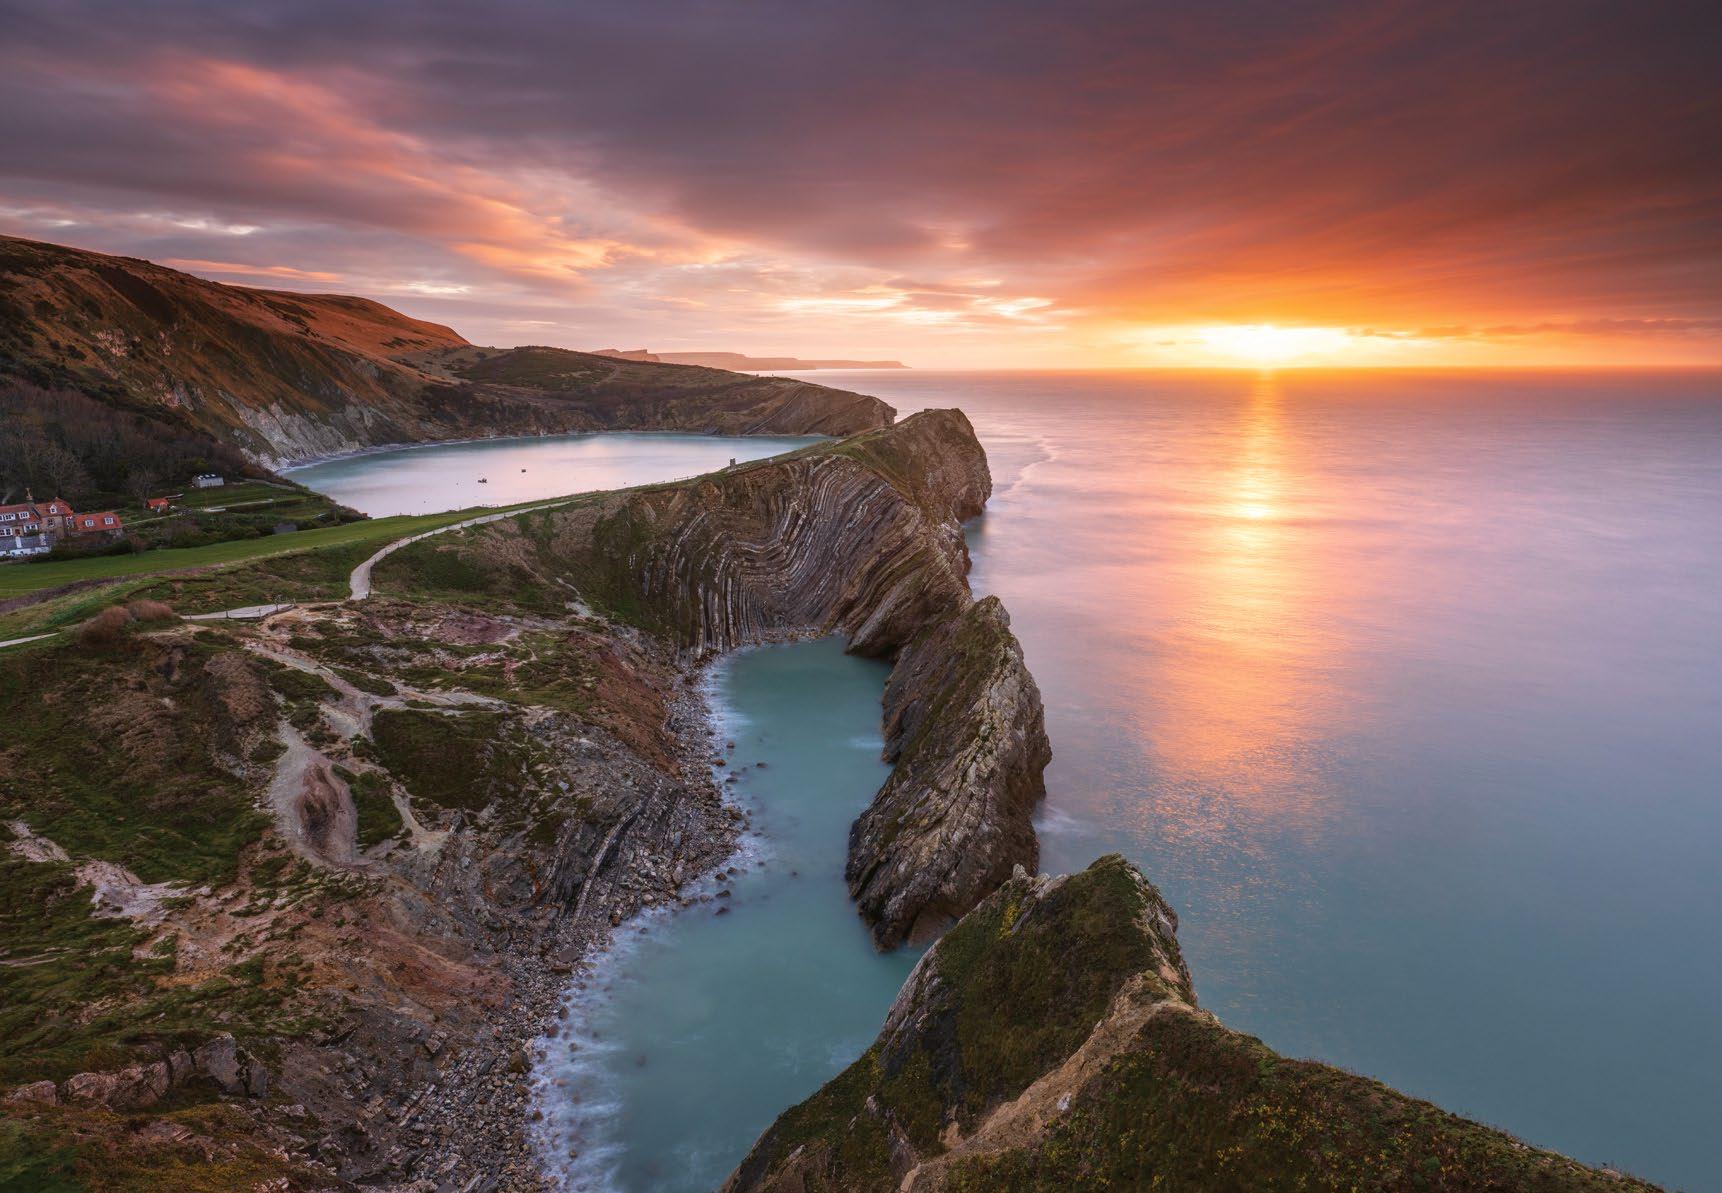
86
PROJECTS
144. MASTER SHUTTER DRAGGING
Rebecca Greig shows you how to achieve abstract results with this relatively simple technique
146. WORK WITH MULTIPLE FILTERS
Overcome the practical challenges of stacking optical filters when working in the field
148. FINE-ART MONOCHROME LANDSCAPE
Create a striking black and white scenic shot
154. WORK WITH LENS ADAPTERS
Give old hear a new lease of life with a manual or electronic lens mount adapter
156. USE A FISHEYE FOR LANDSCAPES
Gain a new, unique perspective by shooting ultrawide compositions with a fisheye lens
158. GET LOW THE EASY WAY
Use a simple trick with your tripod to get a worm’s eye view of a scene
162. SHOOTING THE WAVES
Tom Ormerod shows you how to plan and execute soothing wave motions
168. FOCUS-STACKED LANDSCAPES
Louise Carey captures pin-sharp images from front to back with a manual focus stacking technique
174. THE ORTON EFFECT
Give your landscapes a dreamy look with this modern take on an established technique
180. CREATE A STITCHED PANORAMA
We show you have to create a stunning widescreen landscape using multiple images
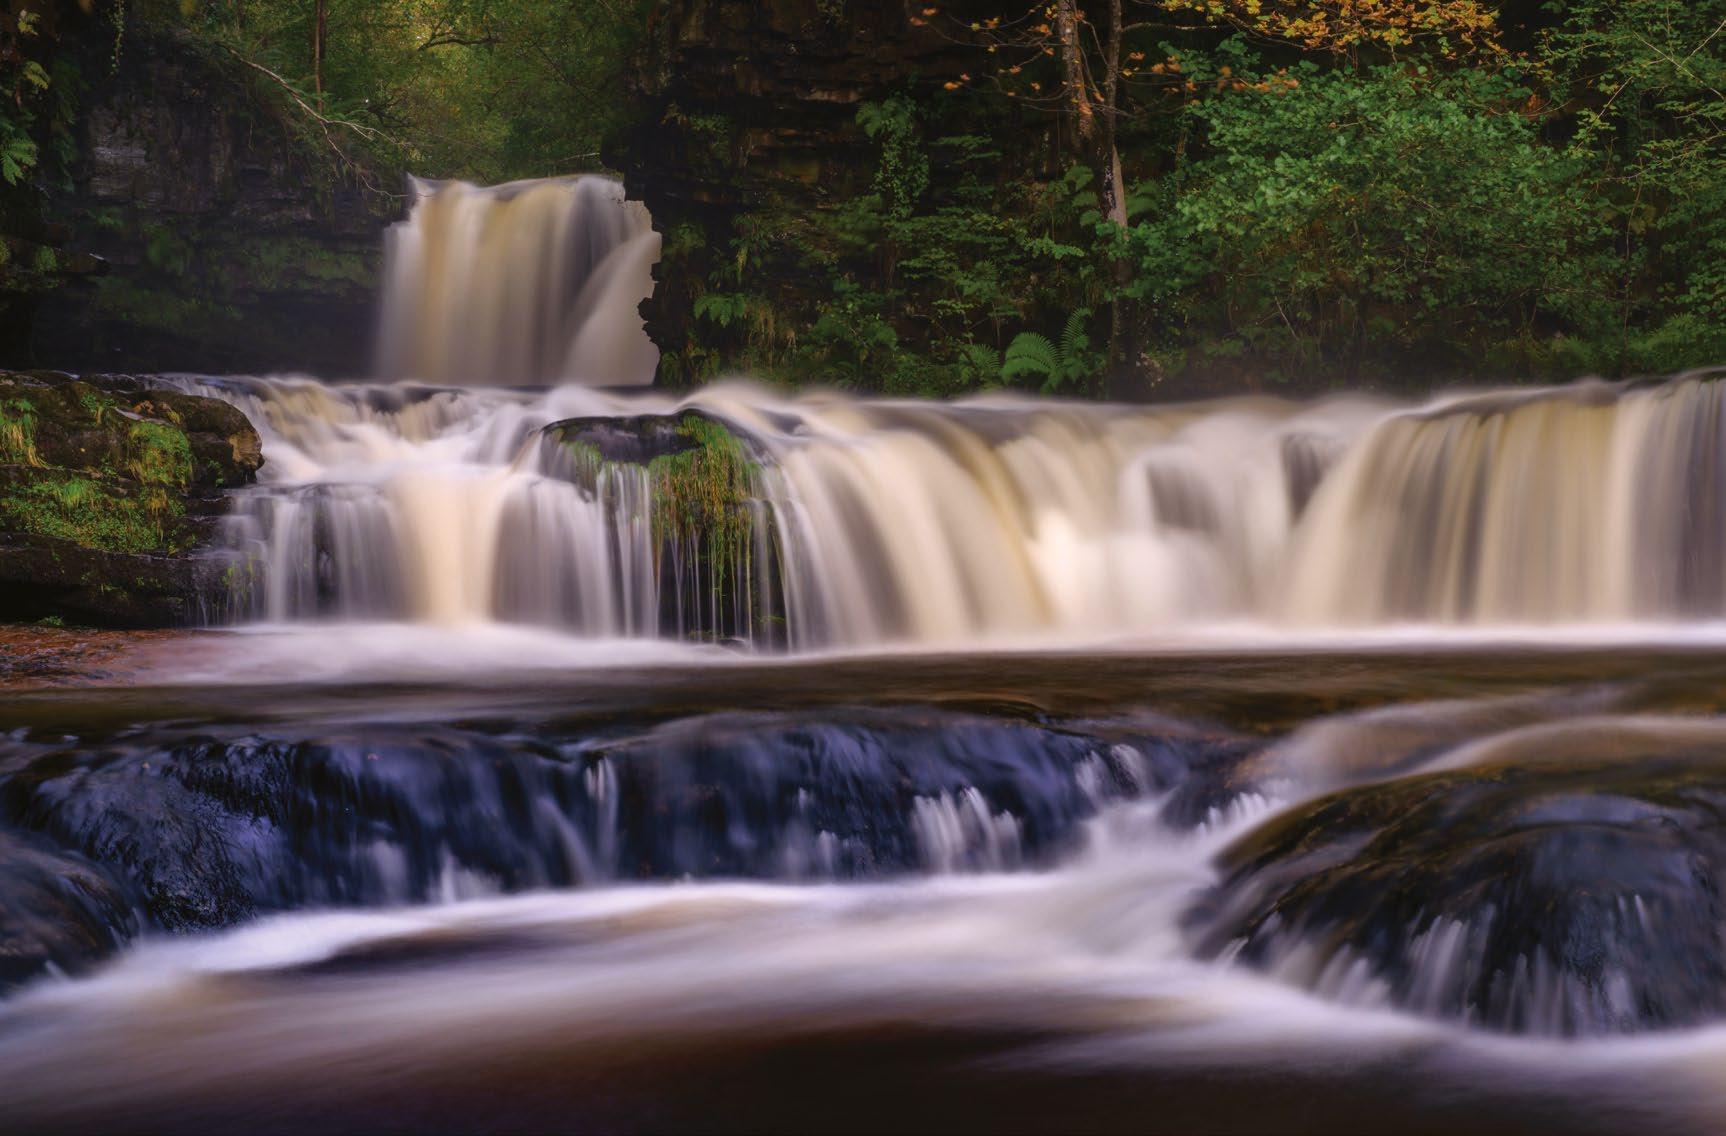
186. CAPTURE MOVING WATER
Experiment with shutter speed to capture motion in the water
160 114 7
128
ESSENTIAL KIT FOR MODERN LANDSCAPES
Choose the best cameras, lenses and accessories for stunning scenics
Afew years ago a troubling question circulated throughout the photography industry – is landscape photography dead? It was an opaque and overtly negative suggestion, but it arguably had a basis in fact. In the modern age, where almost everyone has a capable camera in their pocket, in the form of a smartphone, millions of images are generated every day.
This creates competition and makes it challenging to create truly unique photographs. Since landscape photography is one of the most
popular genres, it is by nature a well studied subject, with many similar images of familiar locations appearing on social media platforms. The question referred not to the ongoing enthusiasm for landscape photography, but the ability of image creators to find and capture novel perspectives in the modern world. After all some of Ansel Adams, the accepted king of the genre’s most popular and influential images, are at least 80 years old. What more can we add with a landscape image that hasn’t already been said long ago?
Modern photo gear and software allows us to explore landscapes in ways never thought possible. The cameras described here allow huge amounts of digital information to be captured, showing stunning levels of colour and detail. Lenses are equipped with amazing optical technologies, for super-sharp photos, even in extreme conditions, and there are accessories for every occasion.
Let’s explore the core items of the modern photographer’s kitbag and choose the best items for your landscape photography requirements.
8 TECHNIQUES
All the tech Modern camera technology can open up opportunities for capturing landscape images with more colour, detail and dynamic range than ever before
 © Peter Fenech
9 ESSENTIAL KIT FOR MODERN LANDSCAPES
CHOOSE YOUR CAMERA
Demystify the options and pick the best camera for you
There are more camera options than ever from which to make a selection. This is both a blessing and a curse! On one hand it’s nice to have a wide range of exciting possibilities, but on the other the choice can be a daunting one.
Just what is the difference between a mirrorless camera and a DSLR? What is a Full Frame sensor and is it really that much better than APS-C? Why would you want a Medium Format camera and what does that even mean?
Well luckily it’s almost impossible to buy a bad camera these days, so whatever you pick you will get great images. The important aspects you need to consider are your budget, how many features you really need and, most importantly, what feels right to you.
That last part is critical, as even a pro-spec camera model will fail to get you the shots you dream of if you don’t feel at home with it. There is such a thing as too much camera - if you pick a
model overflowing with confusing features, it will only serve to frustrate you and hold back your creativity. You need to pick something which allows you to practise high-end techniques while providing easy access to the most essential tools.
DSLR cameras are seen as the benchmark for quality but today’s mirrorless models offer an incredible balance of size, portability and image detail. Let’s look at some of the best camera options for any budget and assignment type.
10 TECHNIQUES
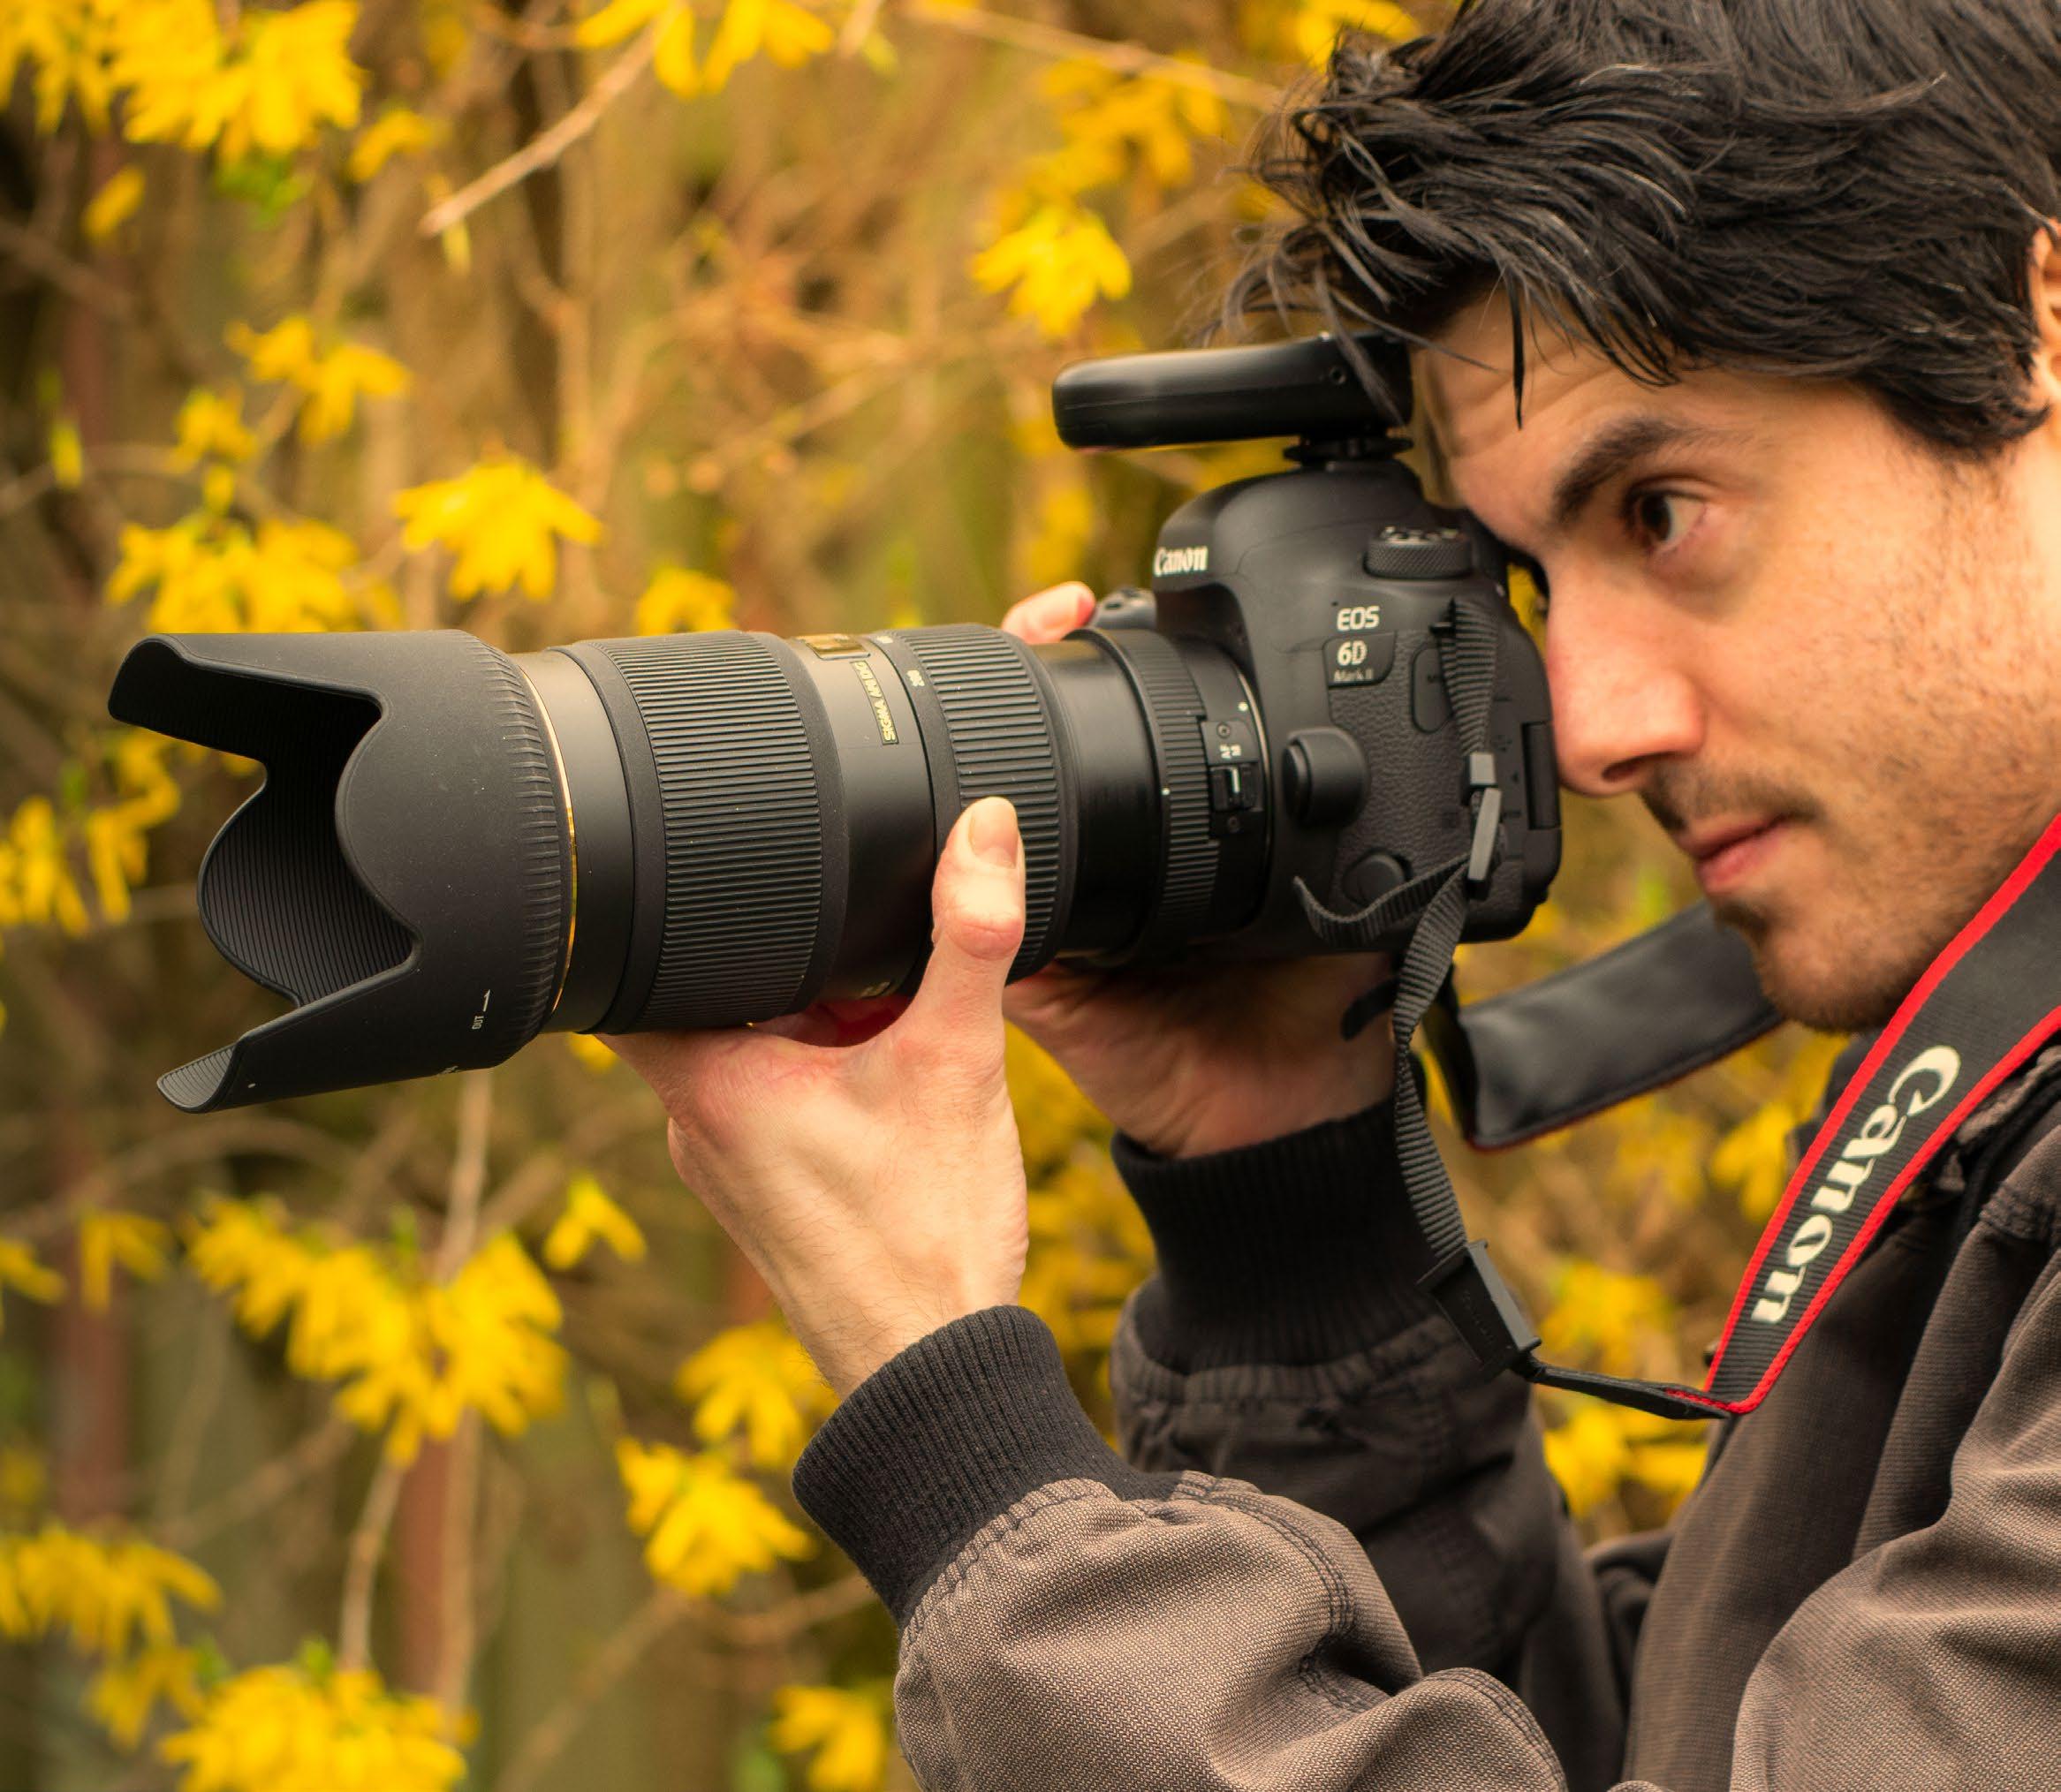
For landscape photography professionals generally prefer Full Frame cameras, due to the wider angle of view. The Full Frame DSLR has become the staple of the modern landscape shooters kitbag © Peter Fenech
CANON EOS 2000D

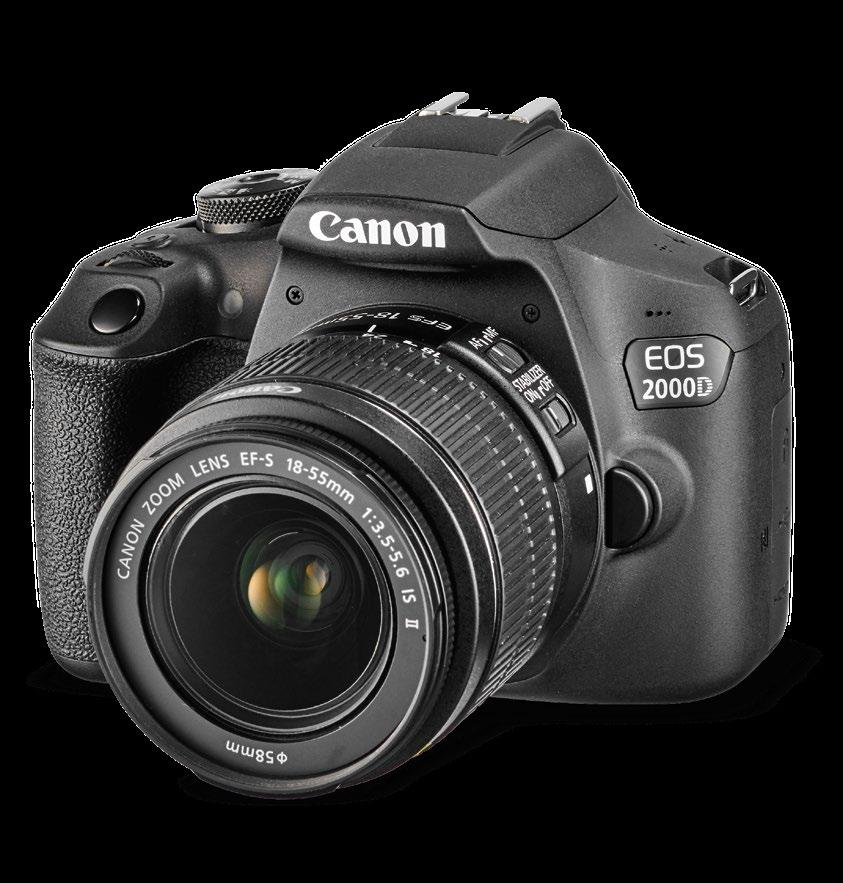
£469/$449
canon.co.uk
(with 18-55mm kit lens)
APS-C format cameras use a smaller sensor than Full Frame, which can limit their low light performance, but also keeps the body and lenses smaller. The EOS 2000D is a great first DSLR for landscape photography. It’s very lightweight, so is easy to carry on photo trips, and features a detailed 24.1 megapixel sensor. This is more than enough resolution for everyday landscape shooting and enables beautiful A3 prints. The 2000D also features a handy feature guide and creative
CANON EOS R5
£4,199/$3,899 (body only)
canon.co.uk
The EOS R5 is a revolutionary mirrorless camera. It’s 45MP Full Frame sensor offers near Medium Format quality, it has a huge native ISO range of 100-51,200 and sensational autofocus. The 8K video also means usable still images can actually be taken from video clips, while the IBIS system can reduce shake by up to 8 stops. This is all in a body weighing only 650g. The R5 is arguably the perfect choice for landscape photographers on the move, as the wifi and Bluetooth connectivity allows easy image sharing. A modern classic, but with a price tag to match.
FUJIFILM X-T4
£1,449/$1,699
fujifilm-x.com

NIKON D780
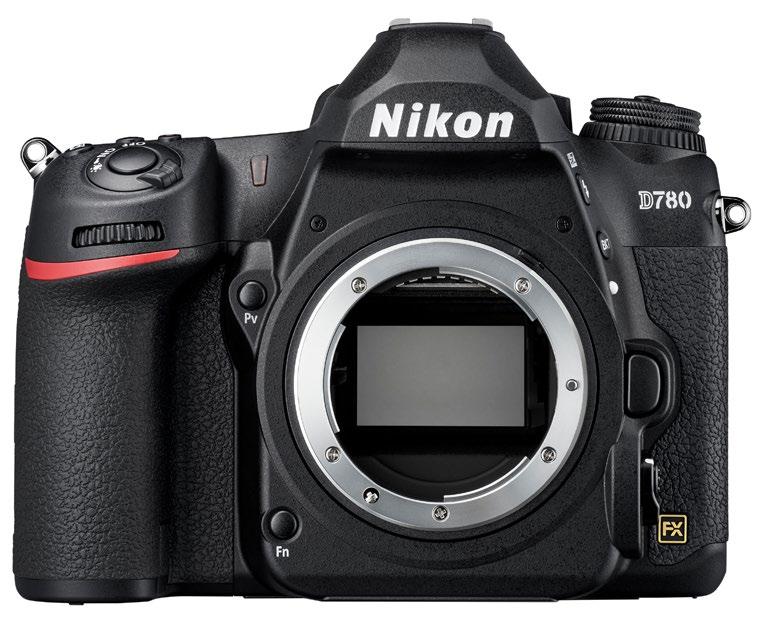
£1,990/$2,297 (body only)
nikon.co.uk
Full Frame cameras offer bigger pixels and therefore better light gathering capability. This makes images less grainy in low light and provides a wider dynamic range, allowing more detail in the brightest and darkest areas of a scene - ideal for landscape photography. The D780 offers a perfect, affordable introduction to Full Frame with a 24.5MP resolution, an advanced 51-point AF system and advanced 3D Matrix Metering system, for accurate exposure calculation. It is quite bulky but has great handling and isn’t too heavy. You’ll also get 4K video if you need it and a crystal clear 100% optical viewfinder.
(Body only)
Mirrorless cameras are the future of interchangeable lens models. Advances in autofocus technology and electronic viewfinders have allowed manufacturers to remove the reflex mirror found in DSLRs, which permits far smaller and lighter camera designs. The X-T4 is one of the best APS-C cameras ever made and combines stunning 26.1MP still images with 4K video, at a range of frame rates. As an enthusiast camera it has a tough build, making it perfect for outdoor photography. Don’t let the retro design fool you - this model is packed full of modern features, including in-body image stabilisation (IBIS) and high-res 100% viewfinder.
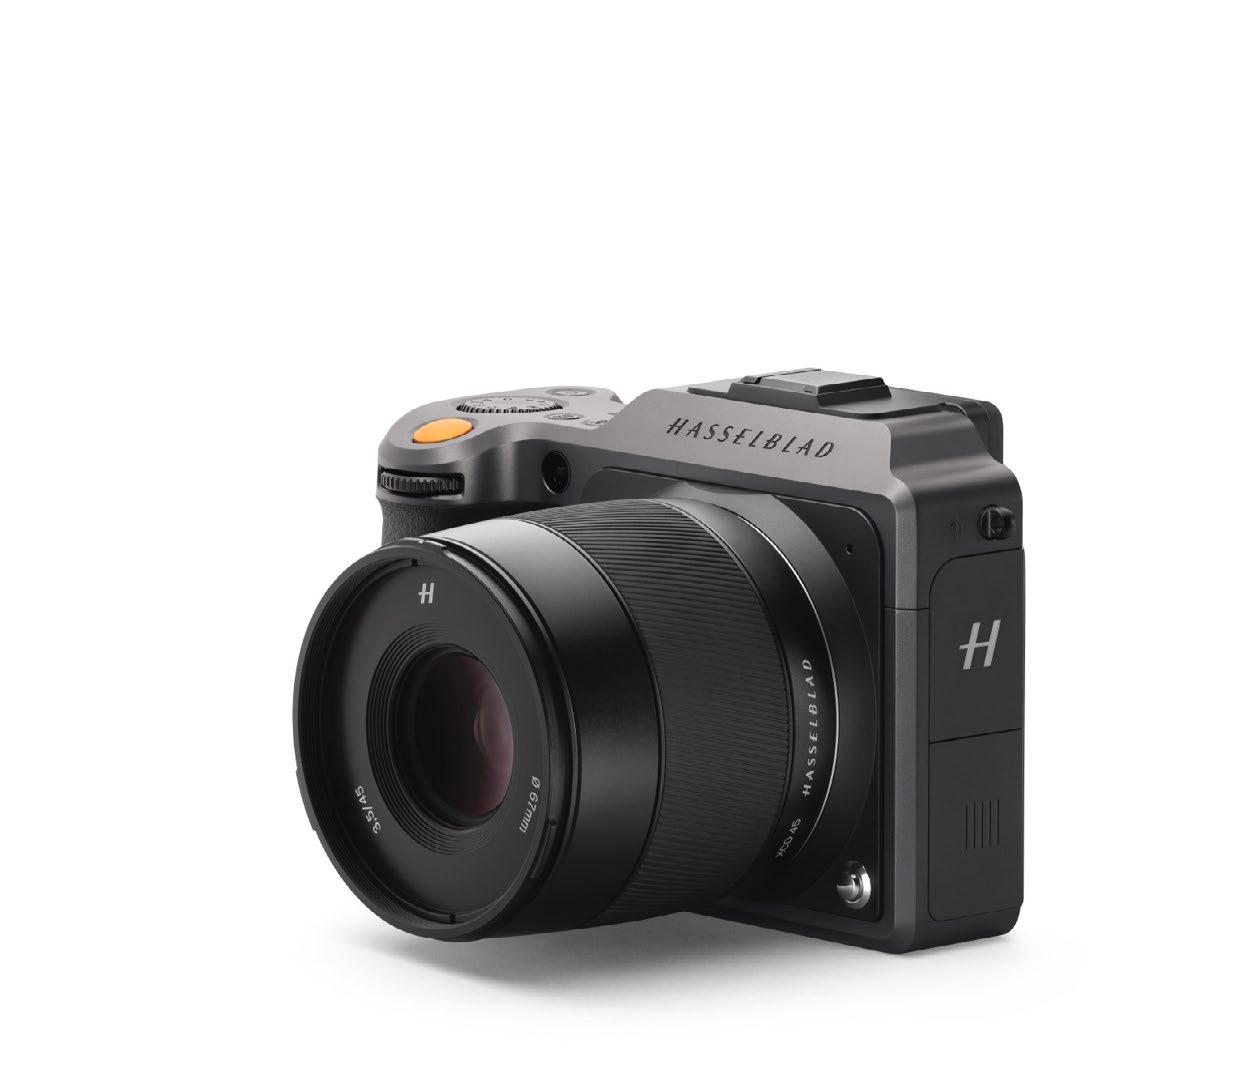
HASSELBLAD X1D II 50C
£5,399/$5,750 (body only)
hasselblad.com
When the X1D was released in 2016 it was a revolution in Medium Format photography. This follow up furthers the portability previously unheard of for MF cameras. With a sensor larger than Full Frame the X1D II 50C allows extremely shallow
11
ESSENTIAL KIT FOR MODERN LANDSCAPES
CHOOSE THE RIGHT LENSES
Pick optics to make the most of your high resolution camera
Lenses are arguably the most important aspect of a photographic system. Even if a camera appears to have resolutionary specifications, it is the range of lenses available which defines how well a manufacturer caters for professional users. This is even more true today, where common sensor resolutions fall in the 30 to 40 megapixel category, meaning any optical flaws a lens might have are so much more difficult to hide. Generally speaking it is better to have a setup where the camera limits the overall possible quality, whereby the lens out-resolves the sensor. This way
you can be certain you are getting the absolute best possible images from your camera, and as you upgrade (which is likely to happen more often for camera bodies than lenses) you will definitely see an improvement in quality.
Just as with sensor formats, lens mounts and camera compatibility can prove a little overwhelming at first. If you shoot with an APS-C camera, usually all of your camera makers proprietary lenses will work with your model, whereas a Full Frame camera can only be paired with optics projecting a significantly widediameter image circle. For Canon users, entrylevel DSLRs like the EOS 2000D can be paired
with both EF and EF-S lenses, while the pro-level EOS 1DX Mark III will only accept EF- denoted optics. Similarly Nikon FX (Full Frame) DSLRs can’t be used with DX format lenses and still shoot at the maximum resolution. This is a problem landscape photographers in particular are exposed to, since wide-angle lenses are the most frequent type to be found in both Full Frame and APS-C variants.
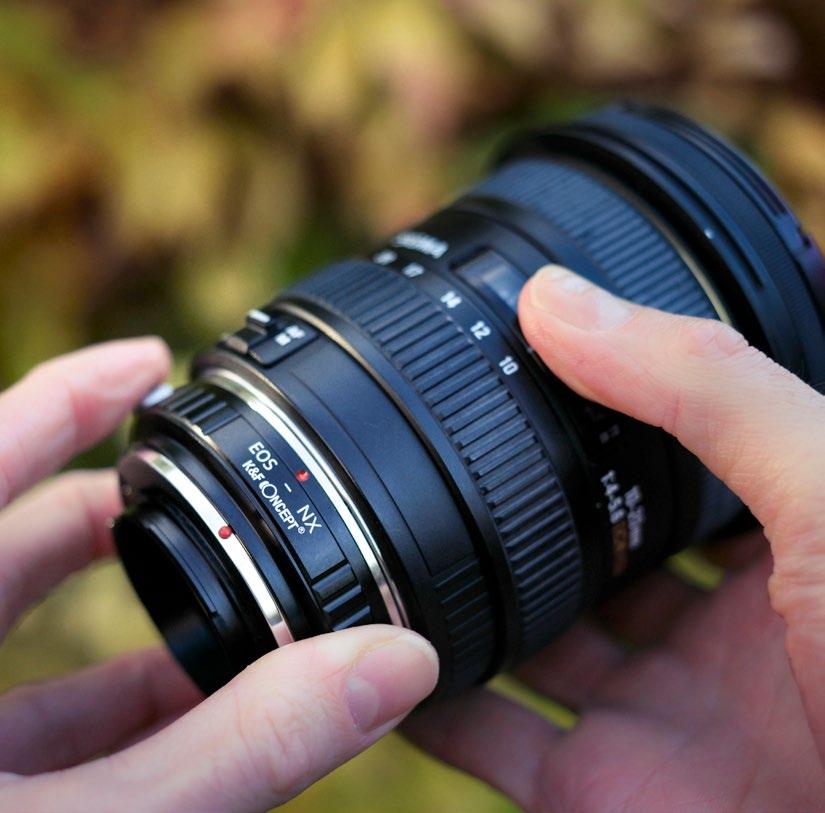
As luck would have it the dawn of the mirrorless camera has spawned yet another set of different lens mounts, which are not necessarily backcompatible with an equivalent DSLR range. We explore some different options.
 While we often associate landscape images with wide-angle lenses a telephoto zoom like a 70-200mm or 70-300mm optic is a great choice for isolating details in the scene
© Peter Fenech
If you are upgrading your kit don’t forget you can adapt your existing lenses. You can’t use APS-C format models on Full Frame but the inverse works, as does DSLR to Mirrorless
While we often associate landscape images with wide-angle lenses a telephoto zoom like a 70-200mm or 70-300mm optic is a great choice for isolating details in the scene
© Peter Fenech
If you are upgrading your kit don’t forget you can adapt your existing lenses. You can’t use APS-C format models on Full Frame but the inverse works, as does DSLR to Mirrorless
12 TECHNIQUES
© Peter Fenech
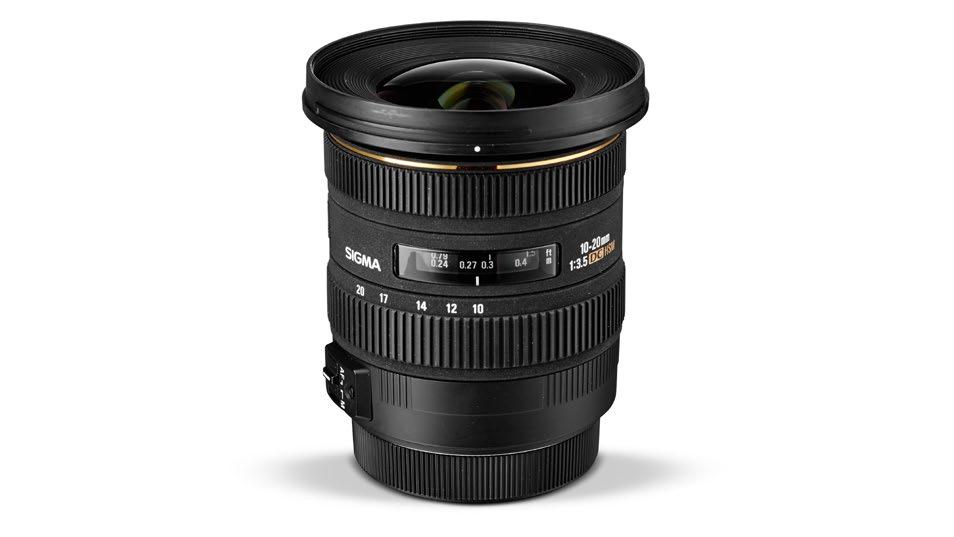
SIGMA 10-20MM F/3.5 EX DC HSM
£319/ $499
(Canon mount)
sigma-global.com
Designed to offer the equivalent to a 15 or 16mm lens on Full Frame this APS-C format lens is a firm favourite amongst beginners and enthusiast photographers. It offers a decent build quality, with good overall image quality and a wide field of view, perfect for landscapes and interior images. The constant f/3.5 aperture is also handy for low light shooting. The Hyper Sonic Motor (HSM) offers smooth and quick focussing and the minimum focus distance of 24cm is ideal for capturing foreground detail in the
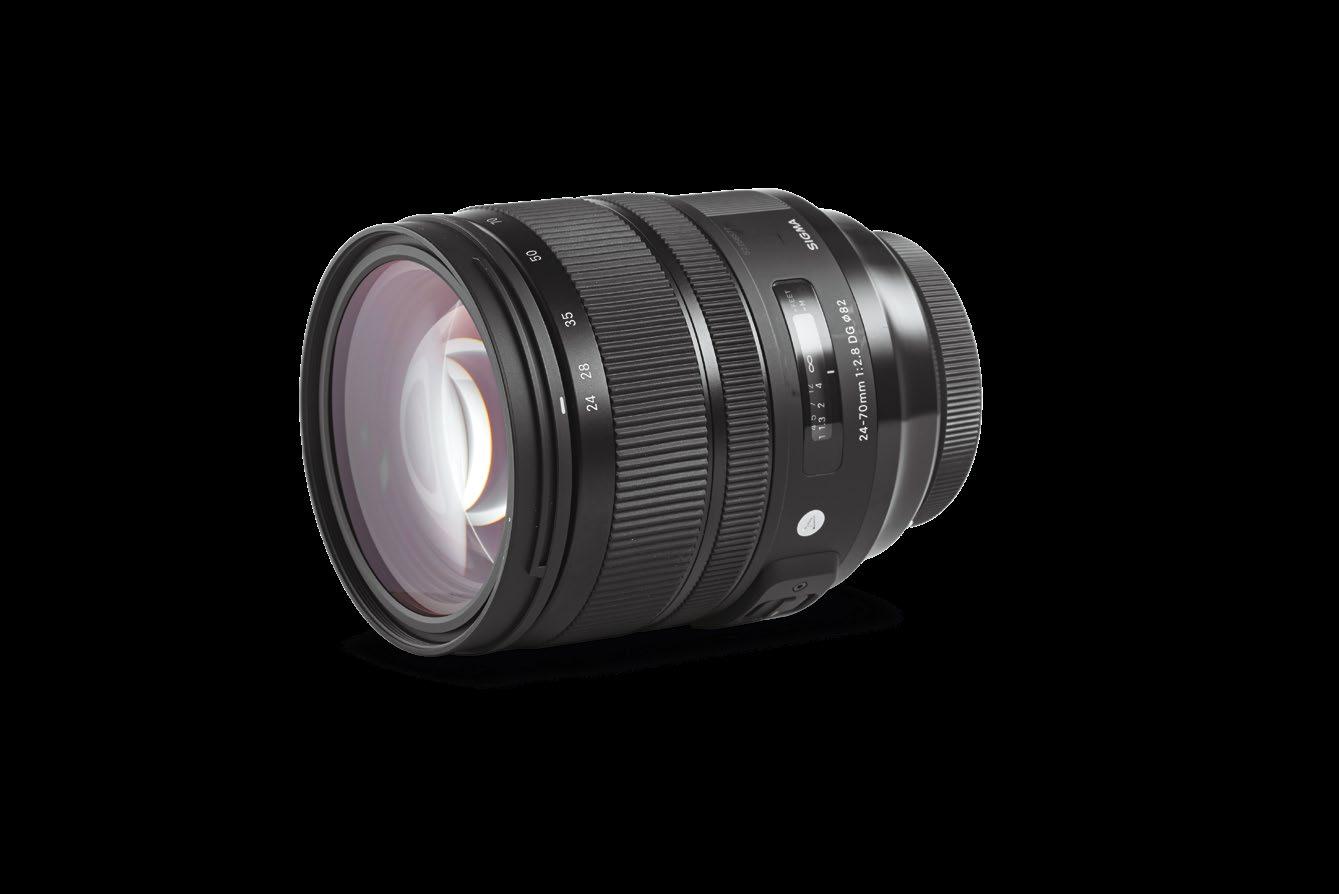
70MM F/2.8 DG OS HSM ART
£1,149/ $1,099
sigma-global.com
As the second lens no landscape photographer should be without, the 24-70mm is a good investment if you’re an enthusiast shooter, with a slightly bigger budget. We say this as generally 24-70 f/2.8 lenses are pro grade and carry a hefty price tag, but this Sigma offering is fantastic value. It features multiple low-dispersion (SLD) optics for minimal colour fringing along high contrast edges and displays good sharpness at the centre and corners. It’s very well built too, so can take a few knocks, but at over 1kg it is a pretty heavy lens. Well worth the investment.
F/2.8 DI VC USD G2
£1,124/ $1,199 (Nikon Mount) tamron.eu
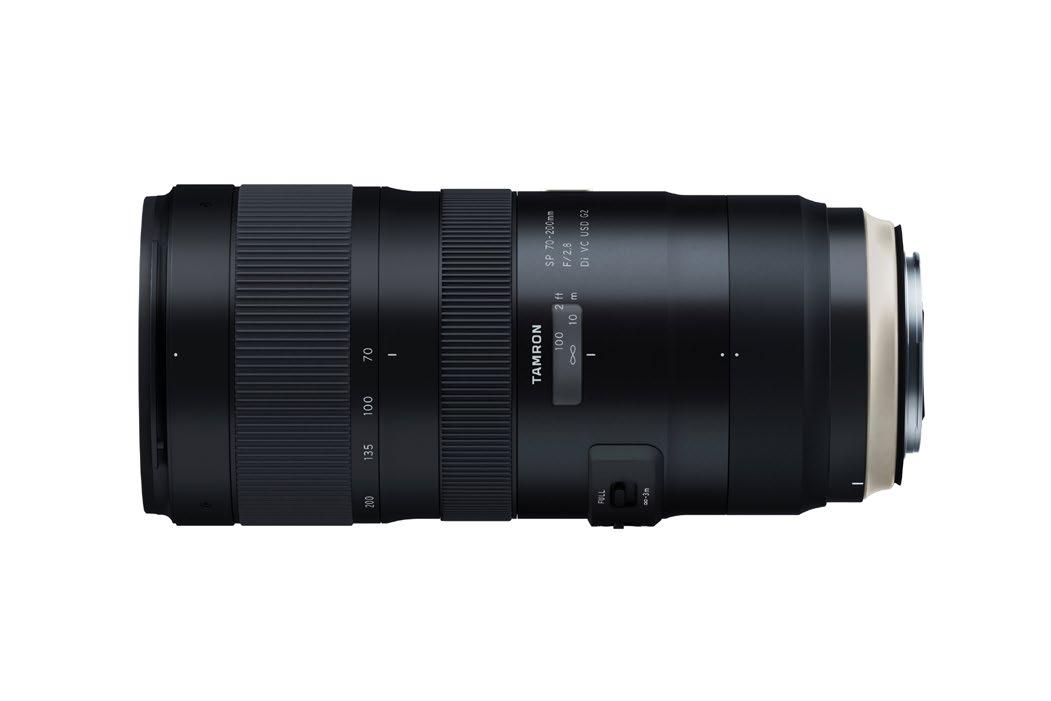
For landscape photography we often concentrate only on wide-angle lenses, but telephoto optics are equally important for bringing distant objects closer in the frame and for compressing perspective. This 70-200mm from Tamron is a semi-pro favourite and for a fraction of the price of the Canon, Nikon or Sony equivalents you get weather sealing, water repelling fluorine coatings, ultra-fast autofocus and 5 stops of Vibration Compensation. The lens is compatible with both APS-C and Full Frame cameras too. The XLD glass manages fringing well, for superior high contrast areas. Meanwhile, internal focusing makes use of polarising and ND Grad filters easy.
CANON TS-E 17MM F/4.0
£2,259/ $2,149
canon.co.uk
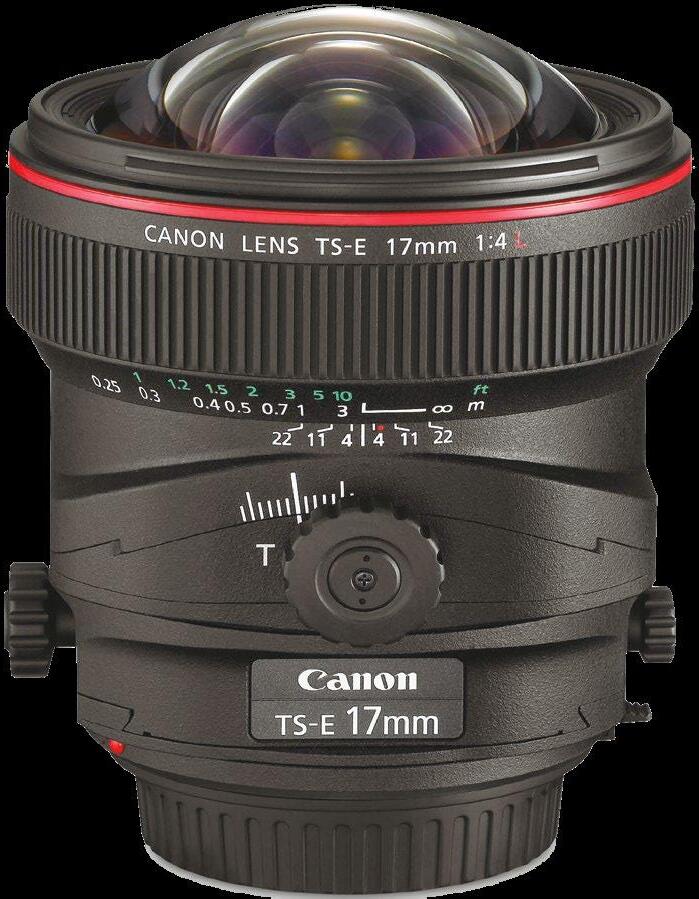
Tilt/shift lenses are perfect for creating fake miniature special focus effects, but beyond this they are a powerful tool for controlling depth-of-field. By using the tilt function with this lens you can stretch the focussed plane so you get sharp detail in areas close to and far from the camera. This lens is part of Canon’s professional L-Series, so is sharp and features the company’s Subwavelength Structure Coating, for minimal flare and ghosting effects - great when shooting towards the sun. It is a highly specialised lens, so is not recommended for beginners, but for pros it’s a solid choice.
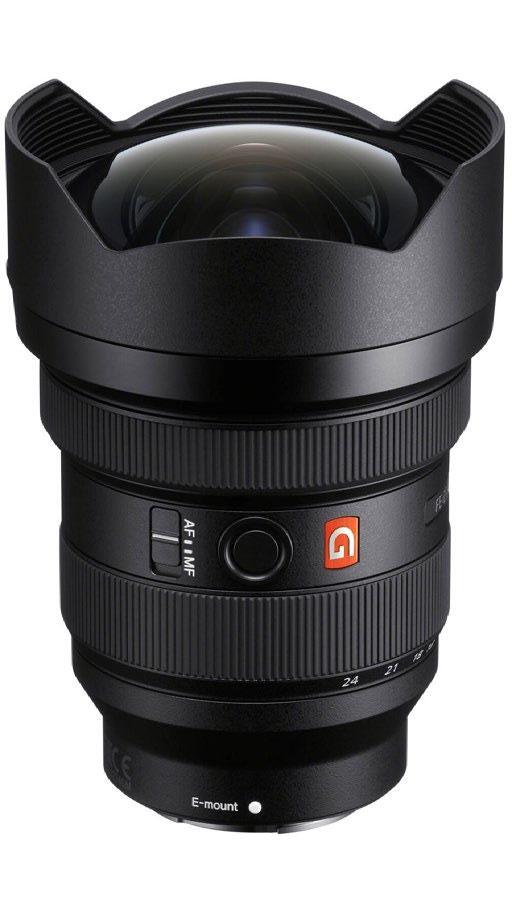
SONY FE 1224MM F/2.8 GM
£2,899/ $2,998 sony.co.uk
Sony is often seen as the third big player in mirrorless cameras and has become exceptionally popular amongst landscape photographers. This 12-24mm lens is an outstanding wide-angle optic. It’s one of the widest Full Frame lenses available and is pin sharp corner to corner. The glass is of the highest grade, featuring multiple Low Dispersion elements, to make the most of Sony’s high resolution sensors. You’ll also find a handy function button for rapid access to settings. Unsurprisingly, it is beyond most enthusiast budgets and is heavy. Watch out for unbalanced compositions, with empty foreground areas, when shooting landscapes at 12mm.
 200MM
200MM
13 ESSENTIAL KIT FOR MODERN LANDSCAPES
OTHER KITBAG ACCESSORIES
Add to the versatility of your gear with these essentials
In the modern age of photography many effects can be applied in software. While this is partly due to convenience and expense, there are actual quality benefits from minimising the use of physical, hardware accessories. For example, when using cheaper lenses, which are already going to render images with less sharpness and contrast than professional optics, it is a good idea to avoid adding too many filters to the lens, which can further refract the light and blur detail. However, in other cases, there is just no denying the need for hardware accessories - there are certain items which are not even close to being replaced by software alternatives.
Many filters have effects which impact the way light enters the camera and is recorded by the sensor. Since these effects come into play before the digital data is even generated, they cannot be directly simulated after the fact. Polarizing filters physically cut out certain types of light waves using a microscopic structure - while colour can be deepened in Photoshop the harmful effects of polarized light remain, so software does not remove the problem at its source.
Similarly ND filters reduce the overall amount of light entering the lens - something Photoshop cannot control. Meanwhile, although anti-blur tools now exist in Photoshop and similar suites,
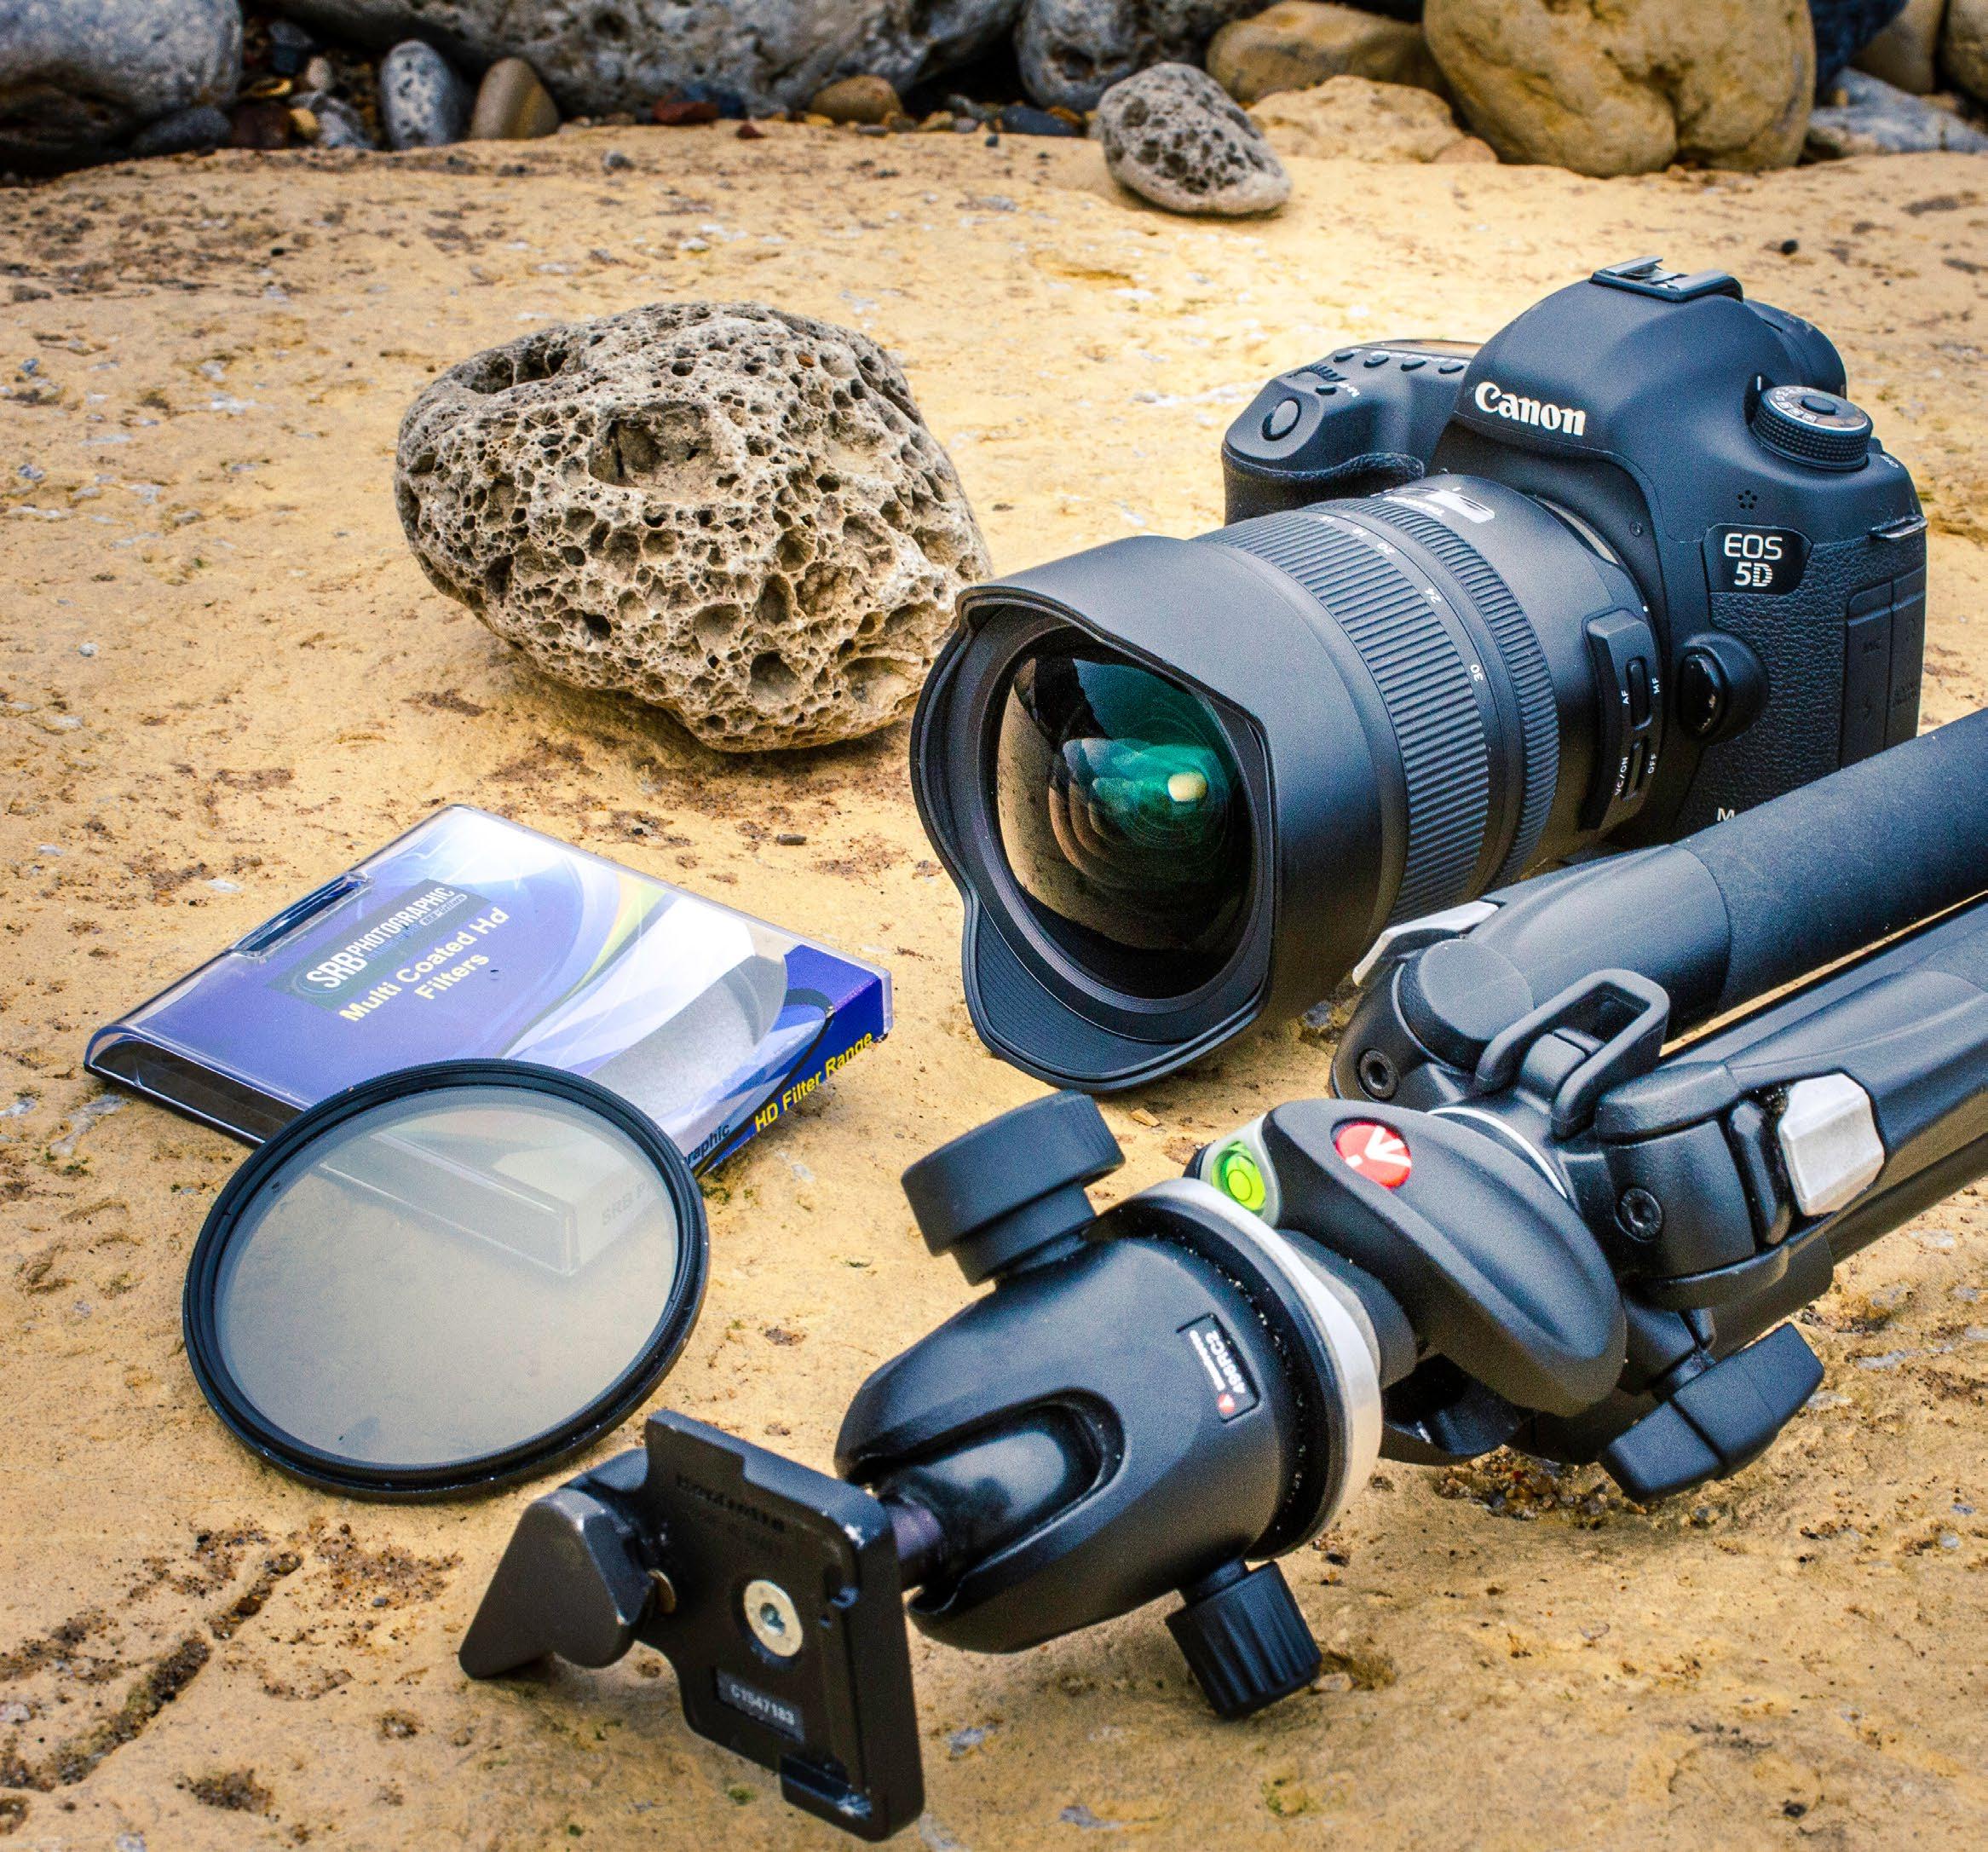
nothing can be done to fully remove camera shake from a handheld shot, highlighting the importance of a good tripod in your equipment arsenal.
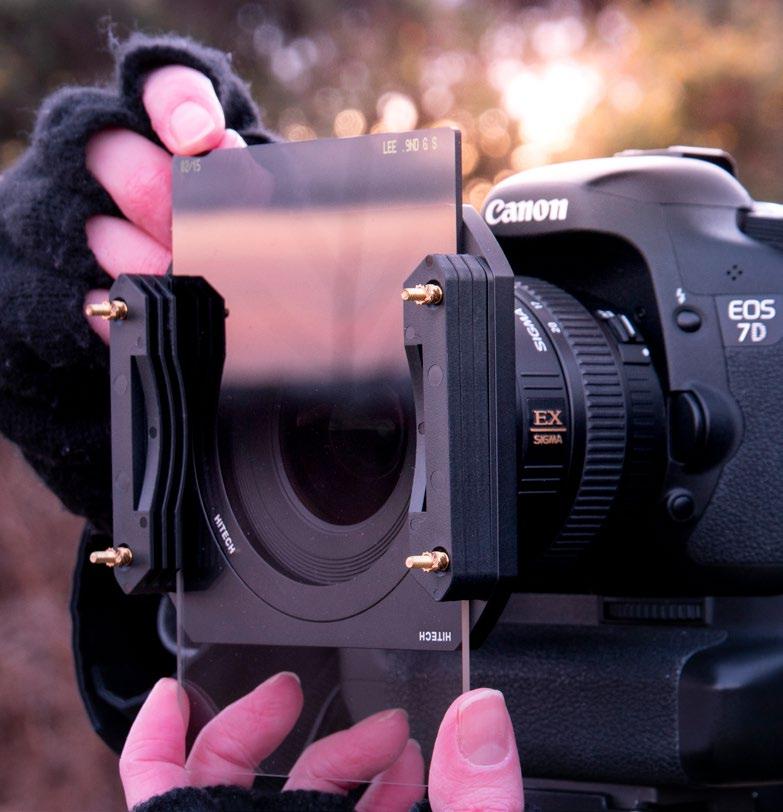
The accessory items listed here all play an important role in ensuring a high quality RAW file from which to start the creative process. They represent the absolute core equipment every professional or advanced creative landscape photographer should own, to side-step problems when out shooting. They minimise unnecessary post processing work - something which you will soon grow to appreciate as you progress towards being a pro photographer.
 A good study tripod is an absolute must for shooting at dawn and dusk – the best times for landscape photography – and for creative long exposure images
14 TECHNIQUES
© Peter Fenech
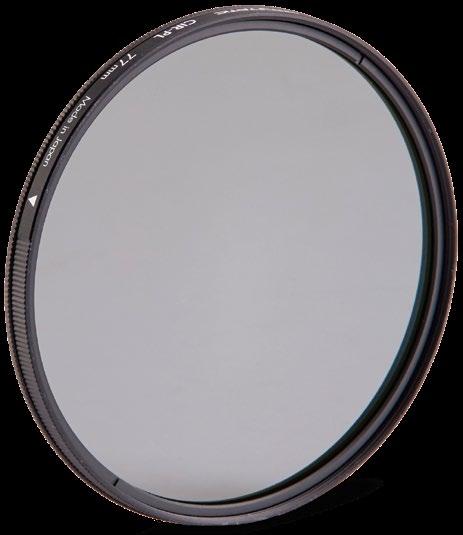
HOYA FUSION ONE CIRCULAR POLARIZER
£100/ $138 (77mm)
hoyafilter.com
Few filters are as well known or as closely associated with landscape photography as the polarizer. Often referred to as being like placing a pair of sunglasses on the lens, a polarizer increases colour saturation and reduces reflections. Light waves vibrate in multiple directions and when this is random, saturation is higher. Reflected light is polarized, so favours a single vibration plane, causing weak colour. A circular polarizer will cut this out, restoring impact. Overall exposure is reduced by around 1EV, so you might need a tripod, but this is an essential landscape photography tool. This Hoya model is a popular example.
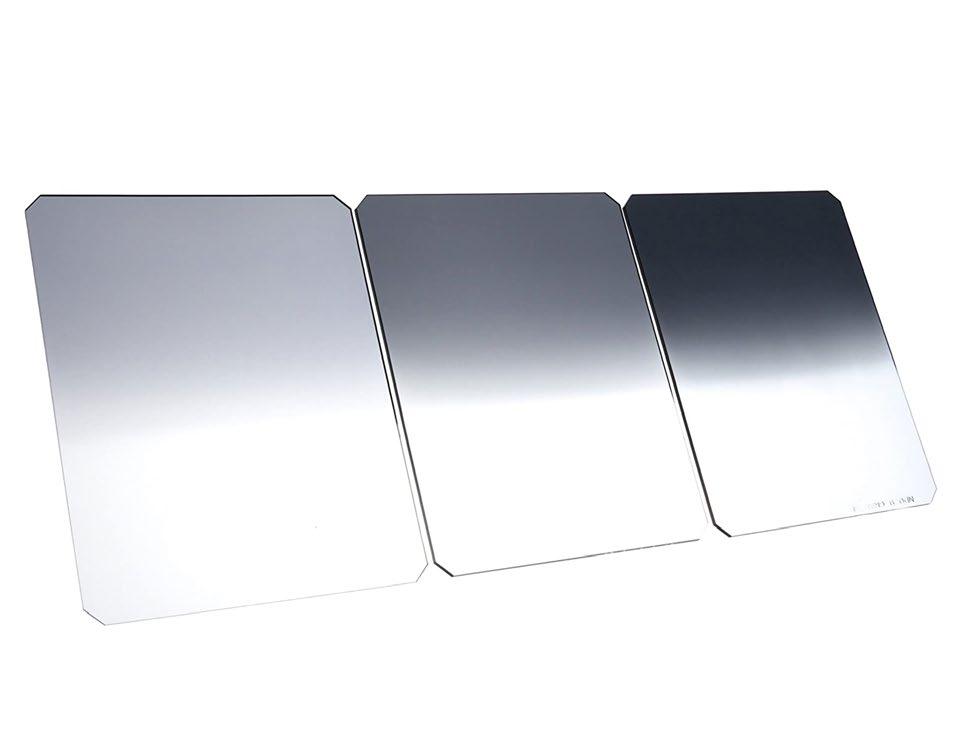
ND GRADS
£152/ $186
formatt-hitech.com
The sky is almost always brighter than the foreground in a landscape, which makes capturing the correct exposure in both areas of the frame difficult. A Neutral Density (ND) Gradient Filter is darkened at the top, cutting light from the sky and balancing out the exposure across the composition. Common densities are 0.3/ND2, 0.6/ND4 and 0.9/ND8 which filter light by 1,2 and 3 stops respectively. Furthermore most NDs are available in soft and hard transitions for different subjects. This HITECH ND Grad set is of high optical quality, meaning lens sharpness is not compromised.
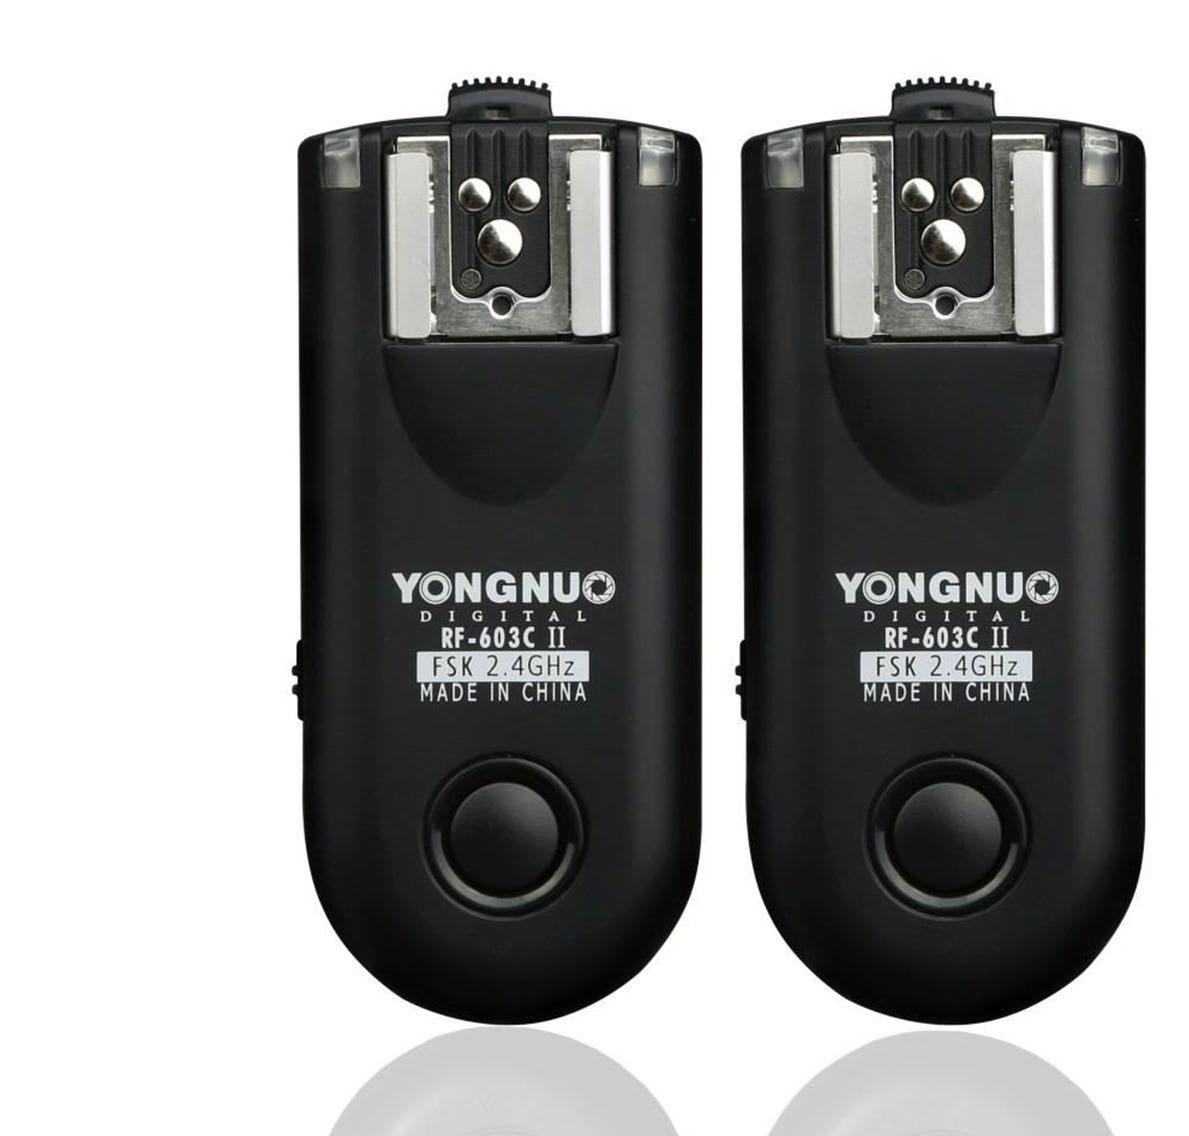
REMOTE TRIGGER
£40.99/$38.99 photo-store.net
FULL NDS
£89 /$110 (100mm) leefilters.com
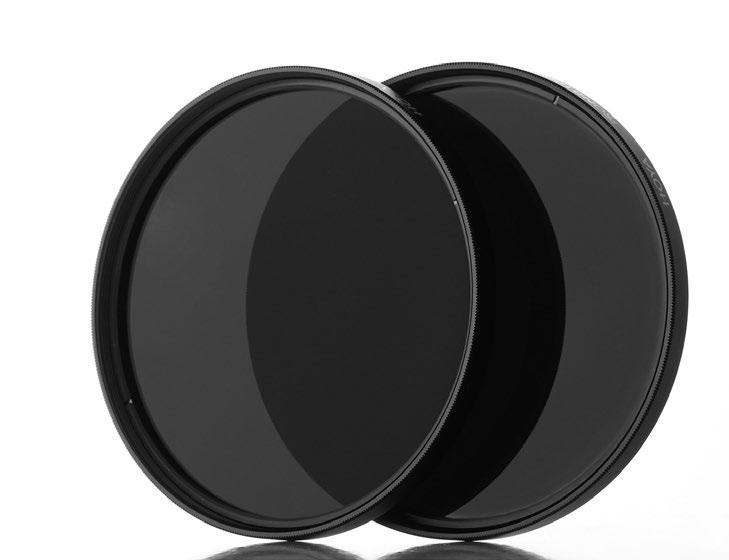
Unlike ND Grads, full ND Filters have equal density at the top and bottom, reducing exposure across the whole frame. This allows long exposure photography, by enabling the shutter to be left open for longer. A 0.9/ND8 would lengthen the exposure from 1/60sec to 1/8sec for example. For landscapers a popular choice is the 3.0/ ND1000, which is a 10 stop filter, allowing ultra-long exposures, even in daylight. Just watch out for unsightly colour casts. The LEE Big Stopper is one of the most popular 10 stop NDs on the market, available as a square filter.
HEAD
£169 + £79 (head)/ $210 + $125 (head) manfrotto.com
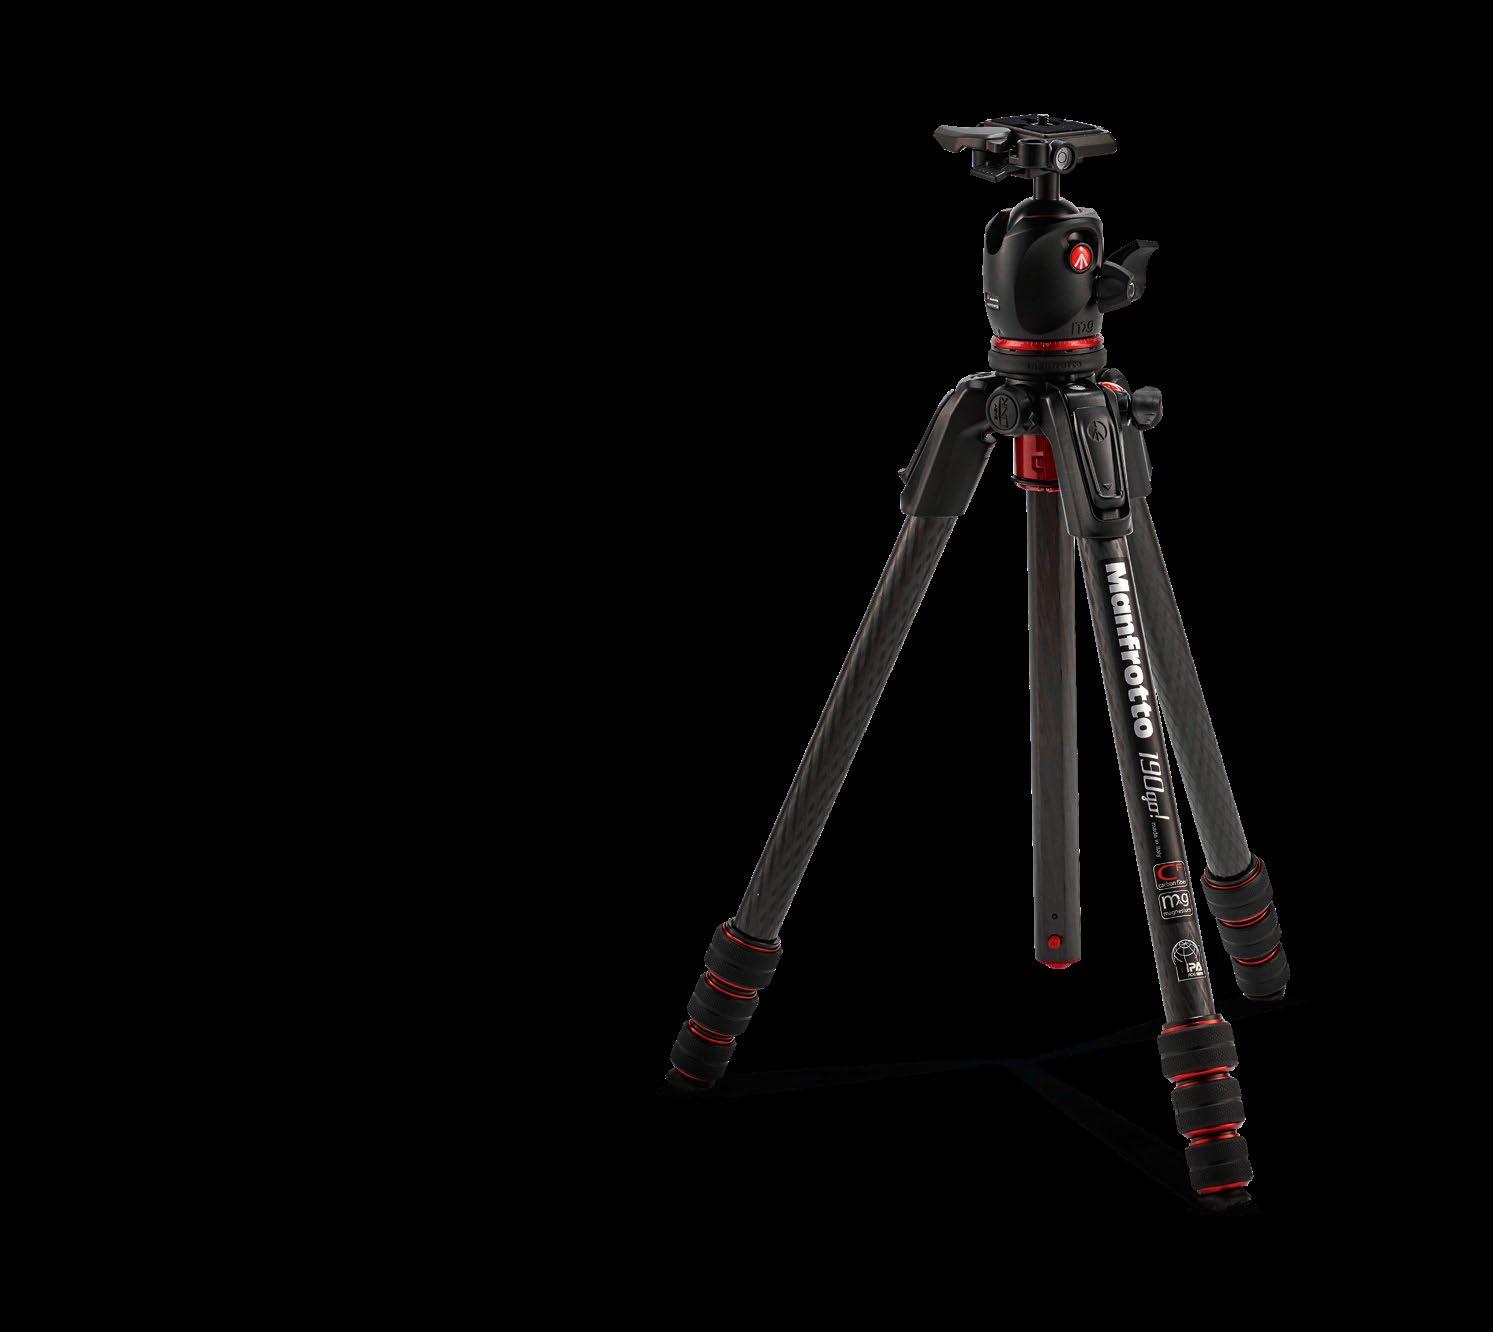
Whether you are shooting long exposure images, shooting panoramas, bracketing your shots for HDR or simply using a small aperture, for general everyday landscape photography, a tripod and versatile head are vital. Look for tripods with durable rubber feet and weight hooks for maximum stability, while a reversible centre column allows low-level photography. A ball head is a great choice for rapid recomposition – just ensure it fits your legs of choice. The Manfrotto 190 Go Aluminium Tripod is a great amateur level model, with lots of features, and the Manfrotto 496RC2 ball head is a durable and affordable compatible option.
For many landscape images it is advisable that you don’t touch the camera when firing the shutter. This introduces vibrations which can create blur and reduce sharpness of fine details. A remote trigger allows you to take images without any physical contact to the camera body. A wired option is the cheapest, plugging into a port on the camera. Meanwhile wireless triggers or a dedicated smartphone app allow you to stand further from the camera, for even less chance of blur. These Yongnuo triggers double as flash triggers and are an affordable, reliable choice. Simply place a receiver in the hot shoe.
15 ESSENTIAL KIT FOR MODERN LANDSCAPES
MOD
LANDS
Medium-format quality
When prioritising image quality over weight and portability, medium format delivers outstanding results – excellent tonal qualities and breathtaking detail
Mark Bauer is one of the UK’s leading landscape shooters. Although best known for his evocative images of Dorset and locations in the south west of England, his work takes him to destinations around the world. Mark has been working as pro for 15 years, has written six books (including The Landscape Photography Workshop) and is a highly experienced photography tutor. See more of Mark’s latest work at markbauerphotography.com
 All images © Mark Bauer
16 TECHNIQUES
ERN
CAPES
Mark Bauer offers a creative guide for shooting landscapes with fresh techniques, the latest gear and expert insights
The last three decades have seen enormous changes in photography. In the 1990s, autofocus was still exciting – integrated AF didn’t make it into a professional camera body until 1988, when it appeared in the Nikon F4. It was just a single, fixed AF point, but it was considered revolutionary. Matrix metering was revolutionary too – it only took readings from five parts of the frame, but a metering system that automatically compensated for tricky lighting situations was a huge step forward
in photography from just centre-weighted or spot metering options.
Of course, the big change was the advent of digital capture. Exactly when digital SLRs became viable for landscape photography can be debated, but most people would agree that it was with the introduction of the first full-frame models – the Canon EOS-1Ds and the ill-fated Kodak DCS-14n. More affordable full-frame options followed, and by the late 2000s the majority of photographers were shooting their landscapes digitally.
Equipment has continued to evolve: 14 stops of dynamic range, 50 megapixels and exceptionally clean high ISO are becoming standard. Yet the techniques employed by landscape photographers have not always developed with the kit – most of us still use a tripod as a matter of course, seem wary of setting anything other than the base ISO, and the sales of filters are stronger than ever. It’s time to re-examine techniques and see what is still relevant and what needs changing in the world of modern landscape photography.
17 MODERN LANDSCAPES
Modern landscape gear
It’s fashionable to claim that gear is unimportant, but can it make a difference?
While good technique and a creative eye are the most important factors when it comes to creating good landscape shots, there’s no denying that the right kit is important. And when it comes to kit, the modern landscape photographer is spoiled for choice; there have been huge developments in the last two decades, and in particular in the last few years, with the advance of mirrorless systems, huge increases in megapixel counts and ever-expanding dynamic range.
Multiple formats are available, ranging from Micro Four Thirds to medium format with sensor sizes equivalent to 645 film. All of them have their place: the smaller formats are light and extremely portable, coming into their own when your photography takes you off the beaten track, perhaps hiking long distances with heavy camping equipment, or when flying
and restricted in terms of cabin baggage size and weight. The large formats are the best choice when image quality takes precedence.
Resolution has always been important in landscape photography, as landscape images tend to contain lots of ‘high-frequency’ (or fine) detail. Without enough resolution, fine detail like distant foliage can be rendered with a somewhat smeared appearance, especially when making large prints. So whatever system you shoot with, opting for the highest megapixel count is rarely a bad idea.
Even with modern cameras offering such clean high ISO, and image stabilisation giving the ability to handhold at surprisingly low shutter speeds, most landscape photographers still prefer to mount their cameras on a tripod. Although there are occasions when handholding is possible – and
occasionally even preferable – a tripod is still classed as an essential piece of kit; especially with long-exposure seascapes being so popular. There are plenty of brands to choose from and tripods to suit every budget, but as a general rule sturdy tripods don’t come cheap. Technology has also had an impact here, with carbon fibre increasing the strength-to-weight ratio – carbon fibre tripods are lighter than metal equivalents and also absorb vibrations much better.
There was a time when no self-respecting landscape photographer would head out on a shoot without a set of filters, including grads, neutral densities, a polariser and some colourcorrection filters, such as 81-series warming filters. Most photographers’ filter pouches are less packed these days, but few people have abandoned filters altogether.
18 TECHNIQUES
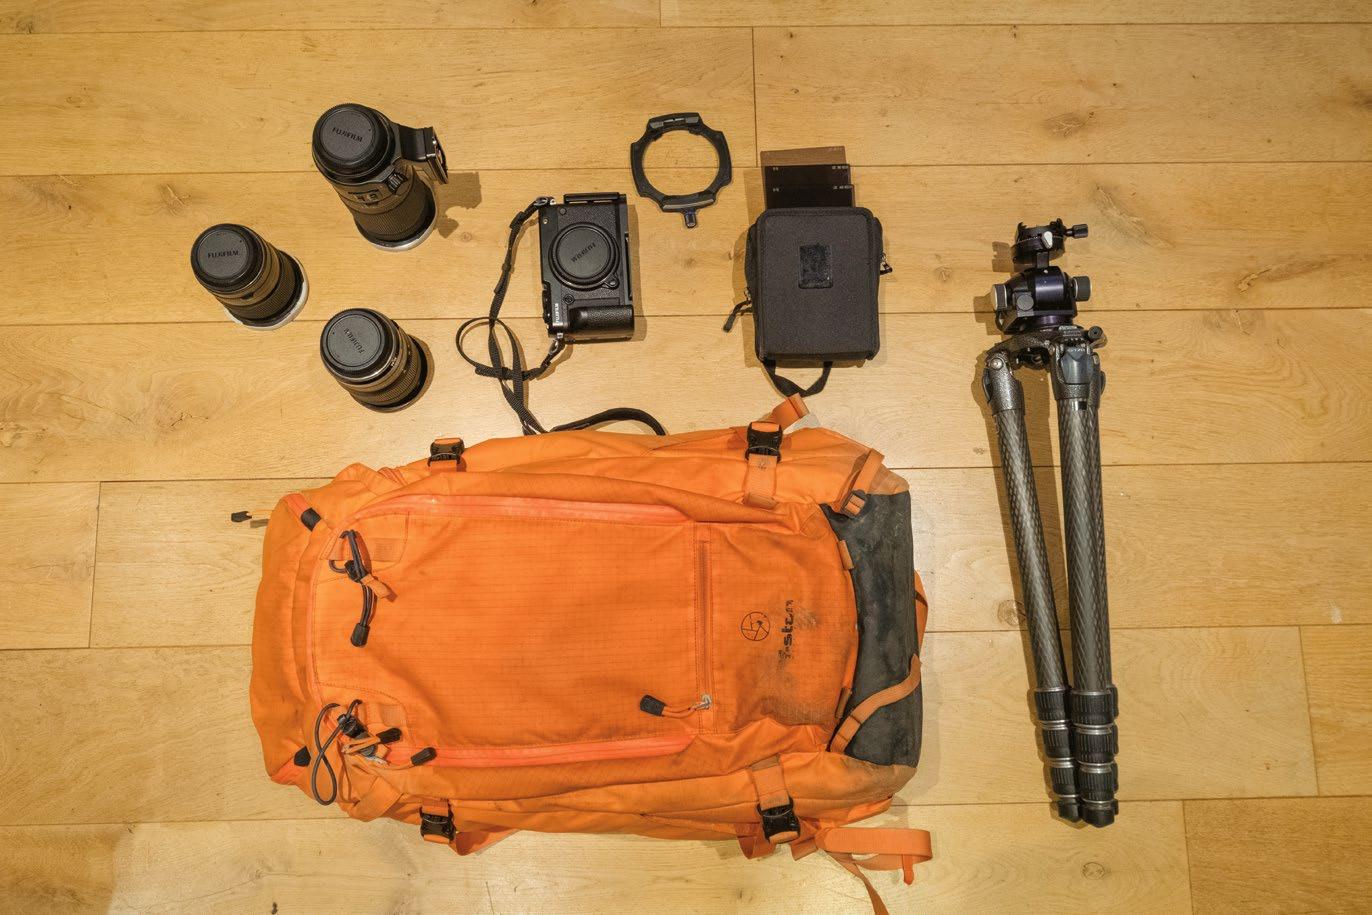
Mark’s kitbag What does a landscape pro take out?
Most landscape photographers still prefer to mount their cameras on a tripod
A standard (50mm) lens enabled the inclusion of foreground interest without pushing the mountains too far into the distance
Right Traditional techniques
In certain situations, like this extremely bright sunrise, traditional techniques such as using graduated filters are still relevant
Pros and cons of mirrorless vs SLR Which is the best choice for you?
Weight: Mirrorless cameras are lighter and more portable than DSLR equivalents.
Viewfinder information: The electronic viewfinders (EVFs) of mirrorless cameras are very flexible; you can call up and dismiss a wealth of information, such as a live histogram, electronic level and other shooting information.
High-quality lenses: The shorter mount-to-sensor distance of mirrorless cameras means it’s easier to design higher-quality lenses, especially wide angles; it’s also easy to adapt third-party lenses via adaptors to the cameras.
Is smaller better? Mirrorless cameras are lighter – a good thing – and usually smaller than DSLR counterparts. But the size can cause problems for photographers with large hands, who can find controls fiddly.
Battery life: Mirrorless cameras will never be able to match DSLRs for battery life, as EVFs use a lot of power compared to optical viewfinders (OVFs) found on DSLRs.
EVF quality: EVFs have come a long way, but not everyone likes them. They can struggle in low light, giving a grainy image, and it’s not always easy to see shadow detail.
Direct controls: DSLRs have larger bodies by necessity, so it’s easier to add dedicated controls for specific functions, which can make for fast and easy handling in the field.
Lens range: DSLRs have been around long enough for each manufacturer to have developed a full system. They have a wide range of lenses, including specialist optics, such as tiltshift lenses, to choose from.
Viewfinder: Many photographers still prefer an optical viewfinder, as it gives a bright, clear view of the scene, which is more ‘real’ than looking through an EVF.
Size and weight: DSLRs are heavier than their mirrorless equivalents. This can make quite a difference on a long hike, or when packing bags with airline weight restrictions in mind.
Reviewing images: You can only review images on the rear LCD, which can be difficult to see in bright light; mirrorless cameras enable you to review the image in the viewfinder.
Third-party lenses: Although DSLRs generally have a wider range of native lenses than mirrorless cameras, the opportunities for using third-party lenses via adaptors is far more limited.
FUJIFILM GFX 50R MIRRORLESS MEDIUM-FORMAT CAMERA LEE FILTERS 23MM, 32-64MM, 100-200MM
ARCA
HEAD
GITZO SYSTEMATIC GT3543LS WITH
-SWISS D4
Left Natural perspective
PROS OF DSLRS
PROS OF MIRRORLESS 19 MODERN LANDSCAPES
CONS OF DSLRS CONS OF
MIRRORLESS
Shooting close to the cliff edge with a wide angle created an exaggerated sense of height
Being so light, mirrorless lenses really come into their own when you have a long hike to a viewpoint
Through the lens
Good lenses are the most important factor in image quality – a camera is only as good as the lens in front of it. If you have to choose between spending money on high-end lenses or a high-end camera body, go for the lenses.
Until relatively recently, the usual advice was that prime lenses deliver better quality than zooms. This was especially true with wide-angle lenses. However, zoom lenses have come a long way recently, and modern wide angles like the Canon 16-35mm and Nikon 1424mm are as sharp as all but the best primes. Zooms are obviously much more convenient; having multiple focal lengths in one lens means you need fewer lenses and will have no gaps between focal lengths. The
Everything you need to know to choose the right lenses
three zooms that will cover pretty much any landscape scene are (in full-frame terms); 16-35mm, 24-70mm and 70-210mm.
Lenses with fast maximum apertures (f/2.8 and above) are bulkier, heavier and more expensive than their slower equivalents. In many cases, there is often little to choose between them optically, so for landscape photographers, who rarely shoot wide open, it often makes sense to get the slower – and therefore lighter and cheaper – version of a lens. The exception to this is in night-sky photography, where shooting wide open with a fast lens is necessary. If astrophotography appeals to you, one of your options should be a fast wide-angle lens.
Whether you focus manually or use the camera’s autofocus is immaterial; what’s important is knowing where in the scene to focus and making sure that the focus is locked on that point. Using AF and then switching to manual focus is one option, while another possibility is to set your camera up to use ‘back button’ focus.
Tilt-shift (or perspective-correction) lenses are specialist optics that include movements to enable you to avoid converging verticals and extend the depth of field. These lenses can be very useful in landscape photography but are expensive; the same results can be achieved by software perspective correction and ‘focus stacking’.
Left above
Extra height
Pictured
Densely-packed trees
Using a telephoto lens compresses perspective, reducing the apparent distance between trunks
Left below
Weight Watchers
20 TECHNIQUES
How to shoot with different focal lengths
When should you use each one?
Wide-angle lenses are most closely associated with landscape photography, not just because they allow a wide field of view, but also because of the drama they can create by exaggerating linear perspective. You can create a different sort of drama with telephoto lenses by compressing perspective, for example so that mountain ranges loom large, stacked threateningly on top of each other.
23MM (18MM FULL-FRAME EQUIVALENT)
Linear perspective
Wide-angle lenses are excellent for exaggerating linear perspective. By getting in close to foreground interest, you can make the foreground loom large in the frame, with the rest of the scene stretching out into the distance behind it.
64MM (50MM FULL-FRAME EQUIVALENT) 155MM
Standard lens
A focal length of 50mm (or equivalent) covers the same field of view as the human eye; images that have been shot with ‘standard’ lenses show a more natural perspective, similar to how we perceive a scene when we are there in the flesh.

Telephoto compression
The drama that’s created by telephoto lenses is very different to that created by wide angles; the perspective is compressed, narrowing the apparent distance between elements so that they seem to be almost stacked on top of each other.
21 MODERN LANDSCAPES
Exposure and tone features
Which exposure functions should you use for landscape shots?

From the various choices of exposure mode, there are two that are of interest in landscape photography, Aperture Priority and Manual, as they allow control of aperture selection –which is important as it’s one of the factors that controls depth of field. The key difference is that in Manual you have to also select the shutter speed, whereas in Aperture Priority, the camera does this; however, it’s possible to override the camera’s choice using the exposure-compensation facility.
Both are viable options, depending on the conditions. In rapidly changing light, for example at dawn or dusk, Aperture Priority may be the better choice, as it frees you up from having to constantly meter the scene and adjust the shutter speed, thus allowing
you to better concentrate on other things, such as composition.
Most cameras also offer a selection of metering patterns: typically centre-weighted, spot and multi-pattern ‘intelligent’ metering. Serious landscape photographers always used to use spot metering, generally metering from a mid-tone in the scene. Multi-segment metering in modern cameras is highly reliable and accurate, however, so this would be recommended for most situations.
Whichever exposure mode and metering pattern you choose, let your camera’s live histogram guide you. As a result of increased bit depth and dynamic range, ‘exposing to the right’ is rather outdated advice, and the main thing is simply to avoid clipping either
highlights or shadows. If this is not possible and tonal range exceeds the dynamic range of your sensor, you will either have to bracket images and blend them, or use filtration to compress the tonal range.
It is more important to deliver pleasing rather than accurate colour, but make sure it’s believable, Auto white balance usually delivers good results and can be tweaked during processing. If one colour dominates the scene, for example during a colourful sunrise or sunset, auto white balance can misinterpret this as a colour cast and ‘correct’ (i.e. neutralise) it. You may want to use one of the camera’s presets, such as Daylight or Cloudy, to preserve the scene’s integrity. Live view is excellent for previewing effects.
22 TECHNIQUES 22
Left Multi-pattern metering Multi-segment metering copes well with tricky lighting situations, such as strong backlighting – but keep an eye on the histogram
Right Changing light
In rapidly changing light such as dawn or dusk, Aperture Priority mode is a good choice
HDR vs filters
There are two ways to solve the problem of excessive contrast in landscapes: either use a graduated neutral-density filter to darken a bright sky, or blend bracketed exposures into a single image that contains all the tones. Grads are useful if something in the scene is likely to change, as you only need a single image; exposure blending is necessary if you have a very uneven horizon, which makes filtration more difficult.
Flat horizon
With a mainly flat horizon, it was easy to filter this sunset coastal scene

Uneven horizon
With an uneven horizon, two images were blended for this contrasty scene

23 MODERN LANDSCAPES
Top Long exposures
No amount of image stabilisation will get a sharp image for long exposures; you’ll need a tripod
Super sharp tools
Several factors can be used and combined to capture sharper landscape shots
Several factors contribute towards image sharpness. First, you need good-quality lenses and an understanding of aperture selection. Lenses have a sweet spot – usually in the mid-range around f/8 – where they perform best, though you may need to stop down a little more to get sufficient depth of field for the scene.
The second factor is stability. Most landscape photographers prefer to use a tripod, but handholding can sometimes be beneficial: for example, you may be able to shoot from an otherwise impossible angle, and in high winds it can actually be more stable. When handholding, make sure that you have a high enough shutter speed – the rule of thumb is for the shutter speed to match or exceed the focal length, for example 1/125sec if using a 100mm lens. You may need to increase the ISO to achieve this.
Above Handheld landscape
Handheld landscapes are possible even with longer lenses, thanks to in-lens and/or in-body stabilisation
Below Image stabilisation
Blustery weather can be dramatic, but stability is a problem, even when using a tripod. Image stabilisation can help
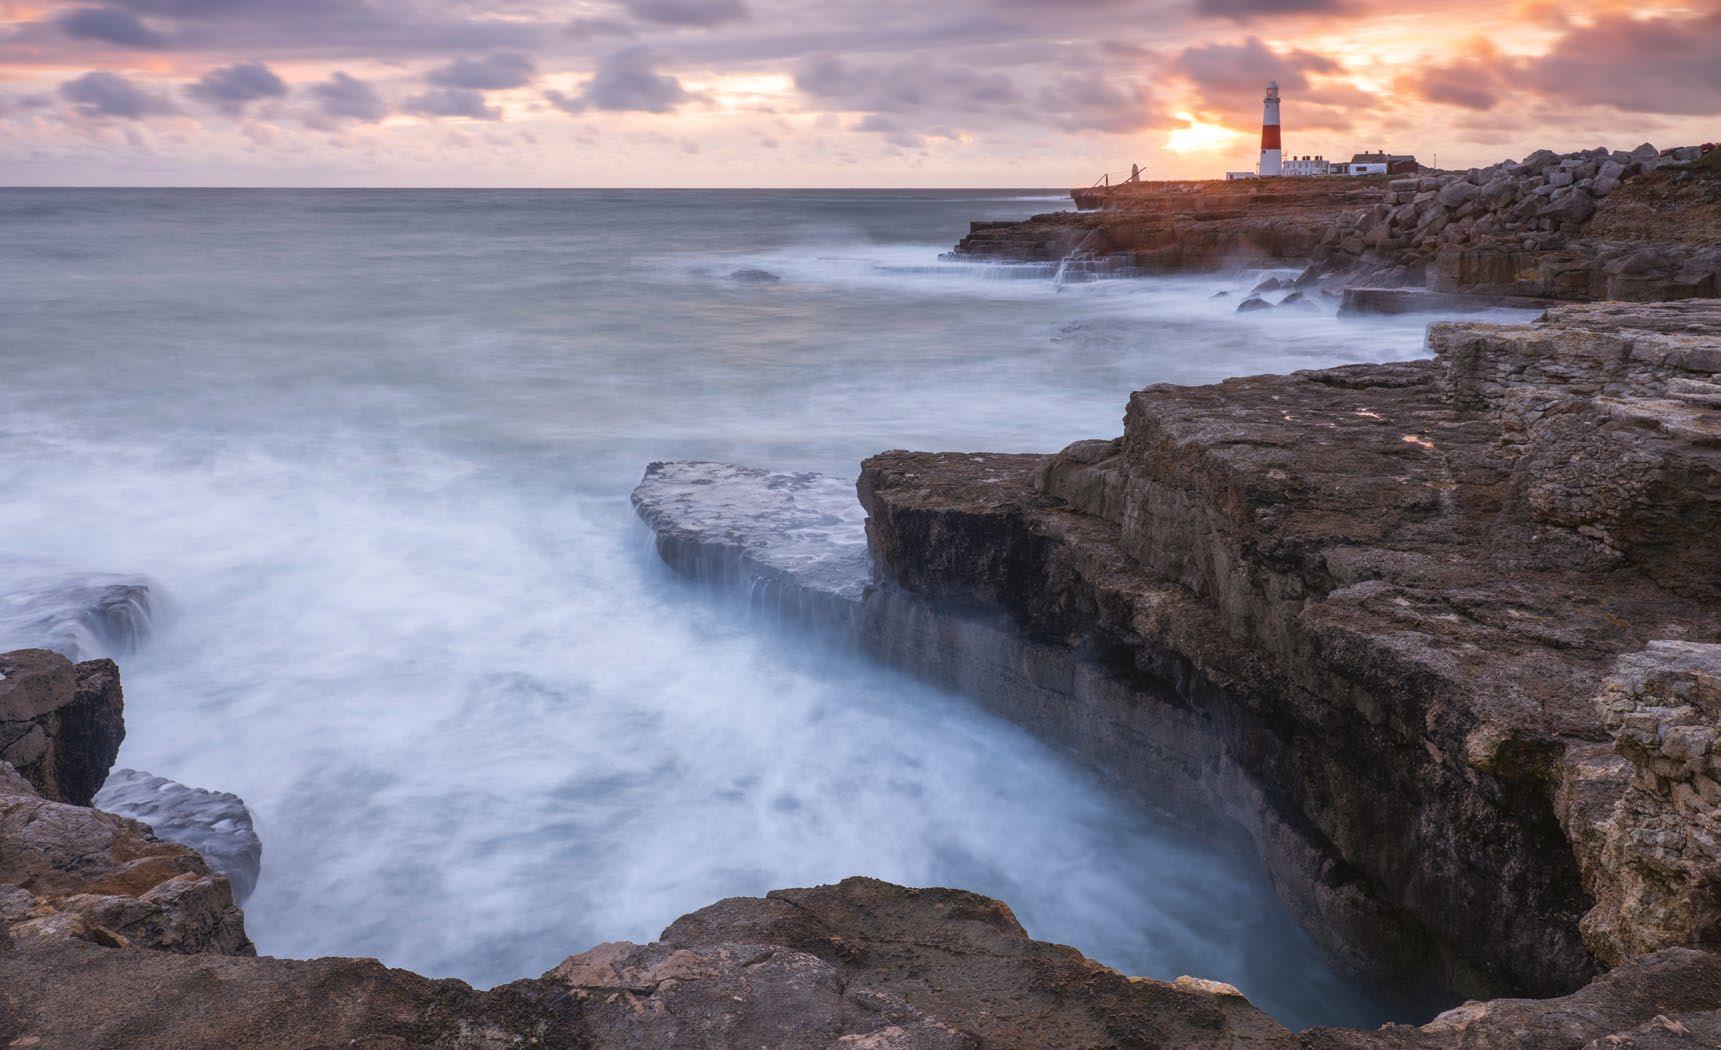
Image stabilisation enables you to get sharp shots with slower shutter speeds (and therefore lower ISO), realistically two or three stops slower than normal – for example, around 1/30sec with a 100mm lens. There are two kinds of stabilisation – in-lens stabilisation and in-body stabilisation (IBIS). Some systems can combine IBIS and lens stabilisation to allow shooting at even slower speeds.
Controlling depth of field is another key skill. Using the hyperfocal distance is traditionally how photographers have maximised depth of field, but there is a simpler, very reliable method: double-distance focusing. Identify the nearest object that you need to be sharp and calculate the distance from it to the camera. Then focus at double this distance.
Having decided where to focus, you can choose manual or autofocus, but it’s important to keep focus locked on that point. If focusing manually, zooming in using live view enhances accuracy. Focus peaking – available on mirrorless cameras and some DSLRs –highlights the in-focus parts of the image in a bright colour and is an excellent aid. It also provides useful guidance on the depth of field that’s available. If autofocusing, back-button focus (where AF is assigned to one of the rear buttons and decoupled from the shutter) means that the camera will not refocus when the shutter is pressed.
24 TECHNIQUES
MODERN LANDSCAPES
Focus stacking
To maximise depth of field without specialist lenses, try focus stacking

To achieve sufficient depth of field, you often need to stop your lens down past its sweet spot, losing sharpness due to diffraction. Tilt-shift lenses can generate much greater depth of field than normal lenses, but they are expensive, and not everyone can justify
the cost of specialist lenses that lack the flexibility of autofocus zooms.
Focus stacking is a technique that enables you to extend depth of field with any lens while shooting at its sweet spot. You blend several images that have been focused at
different points throughout the scene to give a single image that’s sharp from foreground to background. It is important to ensure there is no drop-off in sharpness at any point, so there should be a clear overlap of depth of field from one image to the next.
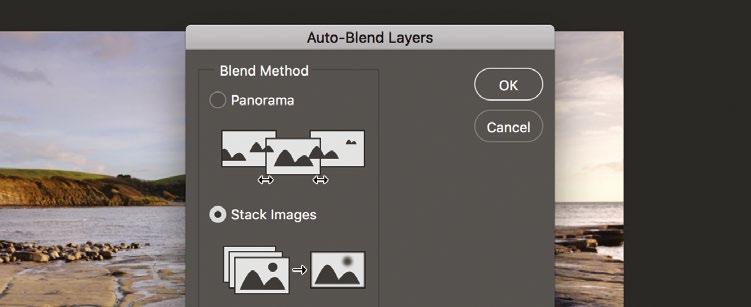
1 Set up Select either Aperture Priority or Manual mode and set the camera either to manual focus or back-button focusing, so the focus stays locked where you want it. Choose a mid-aperture to maximise sharpness.
2 Focus image 1 Zoom in on the live view to the part of the composition nearest the camera, and focus there. If focusing manually, use focus peaking if your camera can. Shoot, check sharpness and exposure.
3 Focus image 2 Focus further in, but at a point where the previous image was still sharp so that there is overlap between the sharp parts of each image. Shoot, check and repeat until you reach infinity.
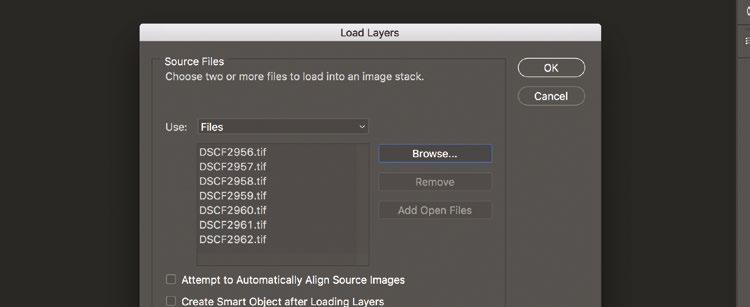
4 Import images Import your images into Photoshop. Click on File>Scripts>Load Files Into Stack. In the dialogue box that appears, select your files and click OK. Keep files in the order they were shot.
5 Align layers The files will be open with each image as a separate layer. Select all layers and click Edit>Auto-Align Layers. In the dialogue box, click on Auto, and wait for the layers to be aligned.
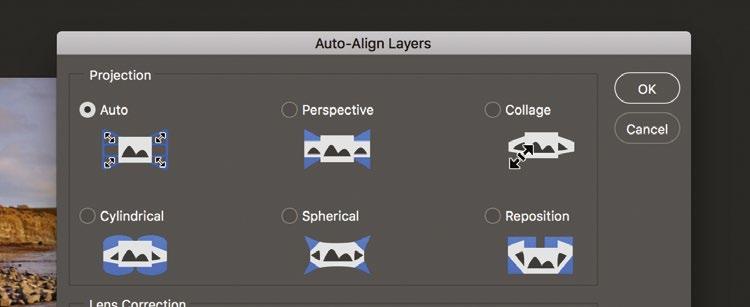
6 Blend layers Click Edit>Auto-Blend Layers. Check the Stack Images box and click OK. Photoshop will take sharply focused parts from each layer and blend them to produce an image with enhanced depth of field.
If necessary, crop the image to remove blurred edges, flatten the layers and then continue to make your usual image adjustments to contrast, colour balance, saturation and so on
 Final image
25
25
MODERN
Tools for low light
Low-light photography is far easier in the digital age, and these techniques will keep your shots sharp
As digital capture became the norm, the popularity of low light and night photography boomed, because the techniques involved became more straightforward; high ISO digital capture is much cleaner than high ISO film, and also because digital long exposures are much simpler to calculate. With digital, if you lose a stop of light, you simply double the total exposure. Not so with film, which suffers from ‘reciprocity failure’, where it loses sensitivity in low light, making exposure calculation complex.
When shooting low-light landscapes, there is a certain amount of guesswork once it gets too dark for your camera to meter accurately, but essentially it’s just a matter of leaving the shutter open for long enough. In most instances, you shouldn’t worry about subject movement, as this often just adds to the atmosphere, especially with water and clouds.
If shooting at dawn and dusk, remember to allow for the fact that light levels will be changing while the shutter is open – add or remove about half a stop from your calculated exposure. Check the histogram on your review
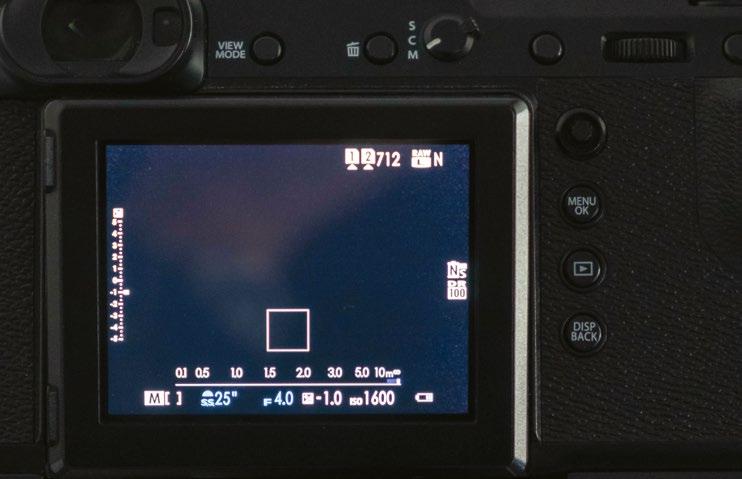
image and be prepared to recalculate and reshoot if necessary.
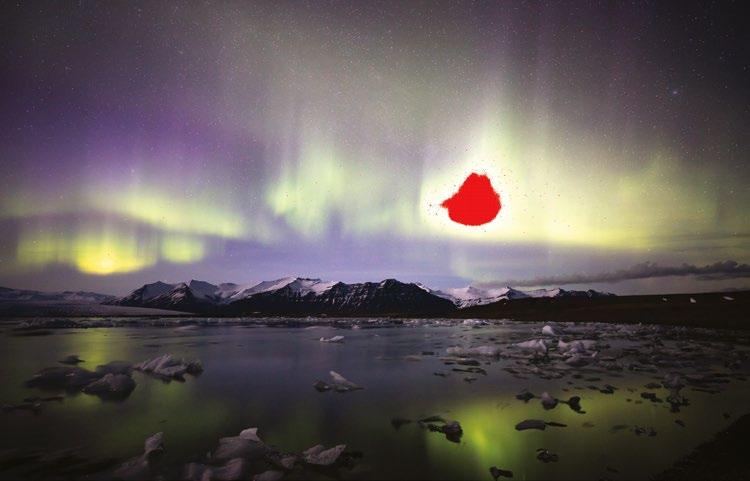
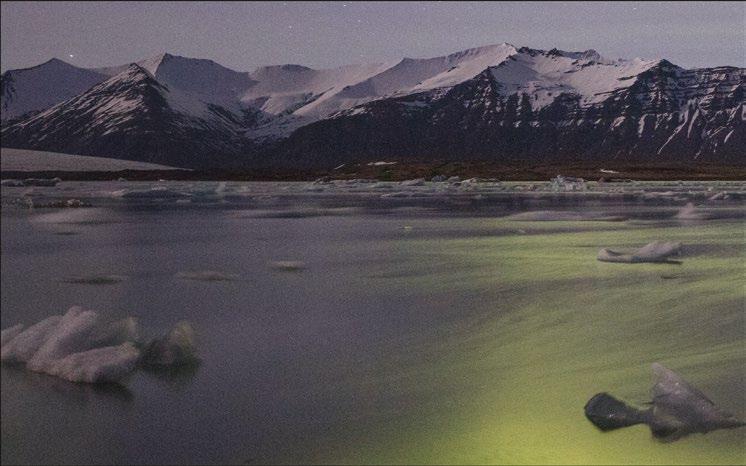
If the night sky – for example the Milky Way – is your subject, shutter speed becomes important, as usually you want it to be short enough to keep stars sharp. To calculate the maximum exposure length that will avoid blur, use the ‘500’ rule. Divide 500 by the focal length of your lens, e.g. if shooting at 20mm, this is 25 seconds. To achieve correct exposure at 25 seconds, you’ll need to adjust the other exposure variables – aperture and ISO. Take a test exposure at ISO 1600, check the histogram and then make any necessary adjustments. In such low light, you’ll normally shoot at maximum aperture, so fast lenses are recommended. Set focus manually on infinity. Depth of field will be limited, so focus stacking is a relevant technique. Some photographers take two exposures: one for the sky, with the lens wide open focused on infinity; and a second, much longer exposure with the lens stopped down, for the land. These are then blended.
Night-sky landscapes
Learn how to shoot and process night-sky photographs
Final processed image
The final image shows excellent clarity and detail but minimal noise. A very large print could be made from this file
1 Set up Set manual exposure, ISO 1600, the maximum aperture and focus on infinity. Calculate the appropriate shutter speed using the 500 rule; set the shutter speed and then shoot.
2 Review and reshoot The test shot at ISO 1600 and 25 seconds is slightly overexposed, losing detail in the brightest part of the northern lights. Reduce shutter speed –the shorter the better to keep stars sharp.
3 Assess image Import the image (this tutorial uses Lightroom) and zoom in to check sharpness and noise. Viewing at 100% reveals good sharpness and moderate luminance noise – but no colour noise.
AFTER
26 TECHNIQUES
In such low light, you’ll normally shoot at maximum aperture, so fast lenses are recommended
BEFORE
4 Make basic adjustments Carry out white balance, tone and sharpening adjustments. It’s best to avoid using Clarity or Dehaze sliders here, as these will accentuate any noise present in the image.
5 Sharpen image Apply sharpening. Sharpening increases noise, so masking areas of smooth texture, such as the sky, is a good idea. Holding down Alt while pushing the slider to the right highlights masked areas.
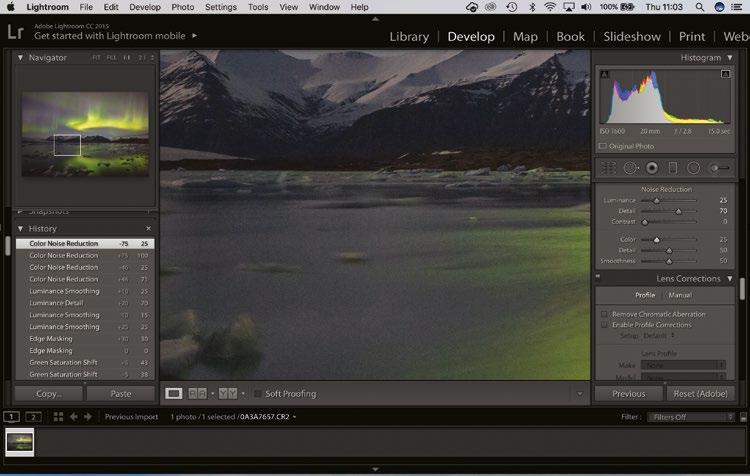
6 Reduce noise Adjust the Luminance slider to balance reducing noise and retaining detail; make further fine adjustments using the Detail and Contrast sliders. If needed, apply Color noise reduction.

27
MODERN LANDSCAPES
White balance
Auto white balance can be fooled by strong colours at sunrise or sunset, so use a preset such as Daylight
Ten general tips for modern landscapes
1 Plan shoots carefully There are many apps such as The Photographer’s Ephemeris that aid planning. Use them to gain an advantage.
2 Don’t use filters unnecessarily Modern sensors often capture a full range of tones without the aid of a grad, so why cover the lens?
3 Learn to handhold Image stabilisation helps, but good technique is invaluable. Support the lens with your left hand, and tuck your elbows in.
4 Image stabilisation and tripods Using image stabilisation when tripodmounted can cause vibration, but in windy conditions it can help.
5 Secure your tripod
Stabilise a tripod by hanging your camera bag from it with a bungee cord so the bag sits on the ground.
6 Know when to stop With post-production, it’s often true that less is more. Use sliders – especially Saturation and Clarity – conservatively.
7 Shoot in low light The most atmospheric light is often at twilight. Make the most of this time of day.
8 Shoot in dull weather
Overcast days are not instantly appealing, but if there is texture in the sky interesting photographs can be taken.
9 Use a polariser Its effects can’t be recreated digitally. It’s not just for blue skies – by removing surface glare, it can make foliage look amazing too.
10 Chimp away ‘Chimping’ has a bad reputation but is good practice; check exposure, sharpness and composition.
28 TECHNIQUES
ON SALE NOW Whether you’re an enthusiast or an expert, this brand-new title will help you to master every aspect of portrait photography, from kitbag essentials and core techniques, to how to get creative in your shoots
OUT
TO SHOOT
Or get it from selected supermarkets & newsagents Ordering is easy. Go online at:
FIND
HOW
YOUR BEST PORTRAITS YET
& Landscape locations navigation
30 TECHNIQUES
James Abbott shares his tips for finding landscape locations, ranging from honeypot spots to more unique and lesser-known places
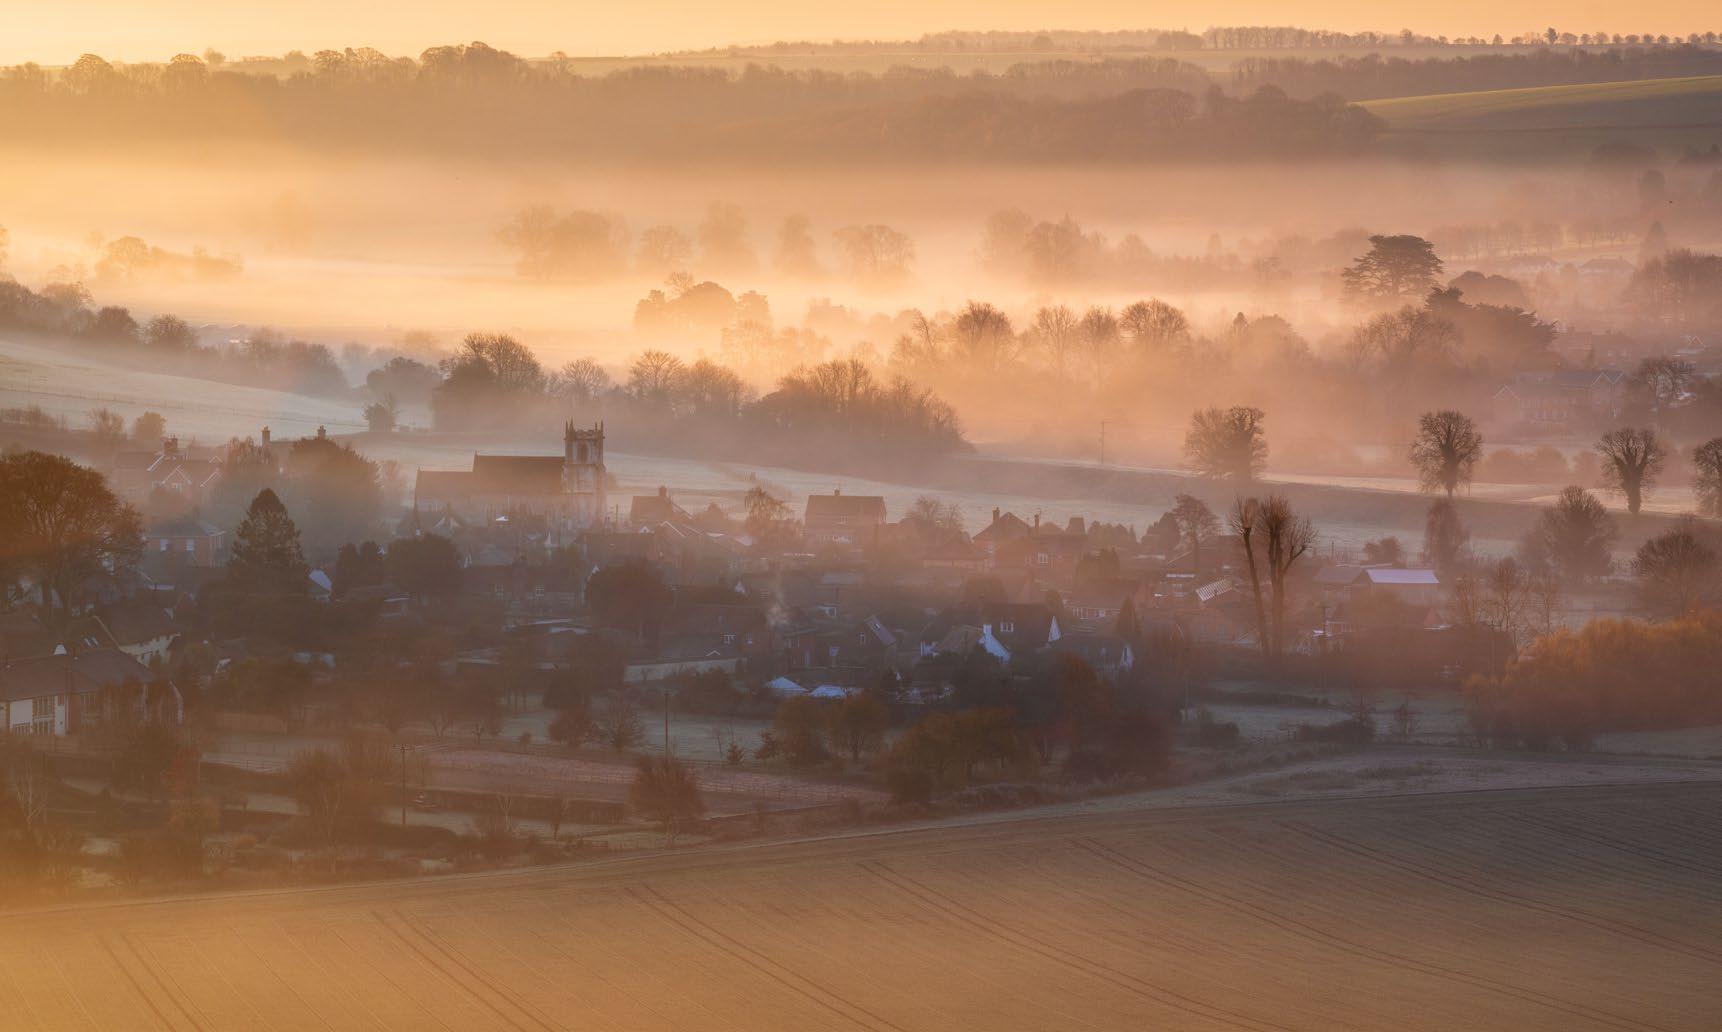
Variety is the spice of life, and landscape photography is certainly no exception. Most landscape photographers are lovers of the great outdoors, and visiting new locations is part of the enjoyment. From the best-known honeypot locations, photographed millions of times before and easily researched in photography location guidebooks, to virtually unknown locations that can be discovered in various ways, the world is brimming with amazing places that are just waiting to be photographed.
Finding new locations can be something of an art form for some photographers, particularly those who strive to capture the unseen. Poring over OS Maps, Google Maps’ satellite views, or simply going for long walks are part and parcel of their approach, not to mention a huge dose of luck. Some may stumble upon these locations accidentally, while others will research obscure and unknown places for weeks before visiting. After weeks of limited freedom due to selfisolation – just a small amount of exercise each day and the odd trip to the supermarket –
photographic opportunities have been severely limited, and everyone will be itching to get out, not least landscape photographers, who have been kept away from their favourite locations. But when the curtain lifts and life begins to get back to normal, make sure you’ve planned your landscape shoots so that you have a shot list with detailed location information. All you need to do then is simply jump in your car to head out shooting once again.
© James Abbott
31 LOCATIONS & NAVIGATION
Iconic locations
Every country in the world is bursting with amazing locations
The idea of ‘insert tripod legs here’ is something of a joke in the landscape photography community, which is used when discussing popular locations where most photographers essentially take the same shot. Some of these places are one-trick ponies where there’s just one viewpoint that provides an image, while others provide greater scope for finding more unique compositions.
Honeypot locations are incredibly popular, as the name suggests, and it’s safe to say that practically every country in the world has them, and their popularity has grown exponentially thanks to social media. This certainly doesn’t mean they’re not worthy
of your attention, but it’s often difficult to take more unique shots of them. Well-known honeypot spots are popular for a reason –they’re classic locations where you’re sure to take a great shot if the light and weather conditions are favourable. The problem with these places, however, is that they’ve been photographed a million times before and will be shot a million times again.
It’s often said that in these honeypot locations, the best approach is to get the archetypal shot first so you have that in the bag, before moving onto more experimental compositions and approaches. It’s a logical way to work, because when you know you
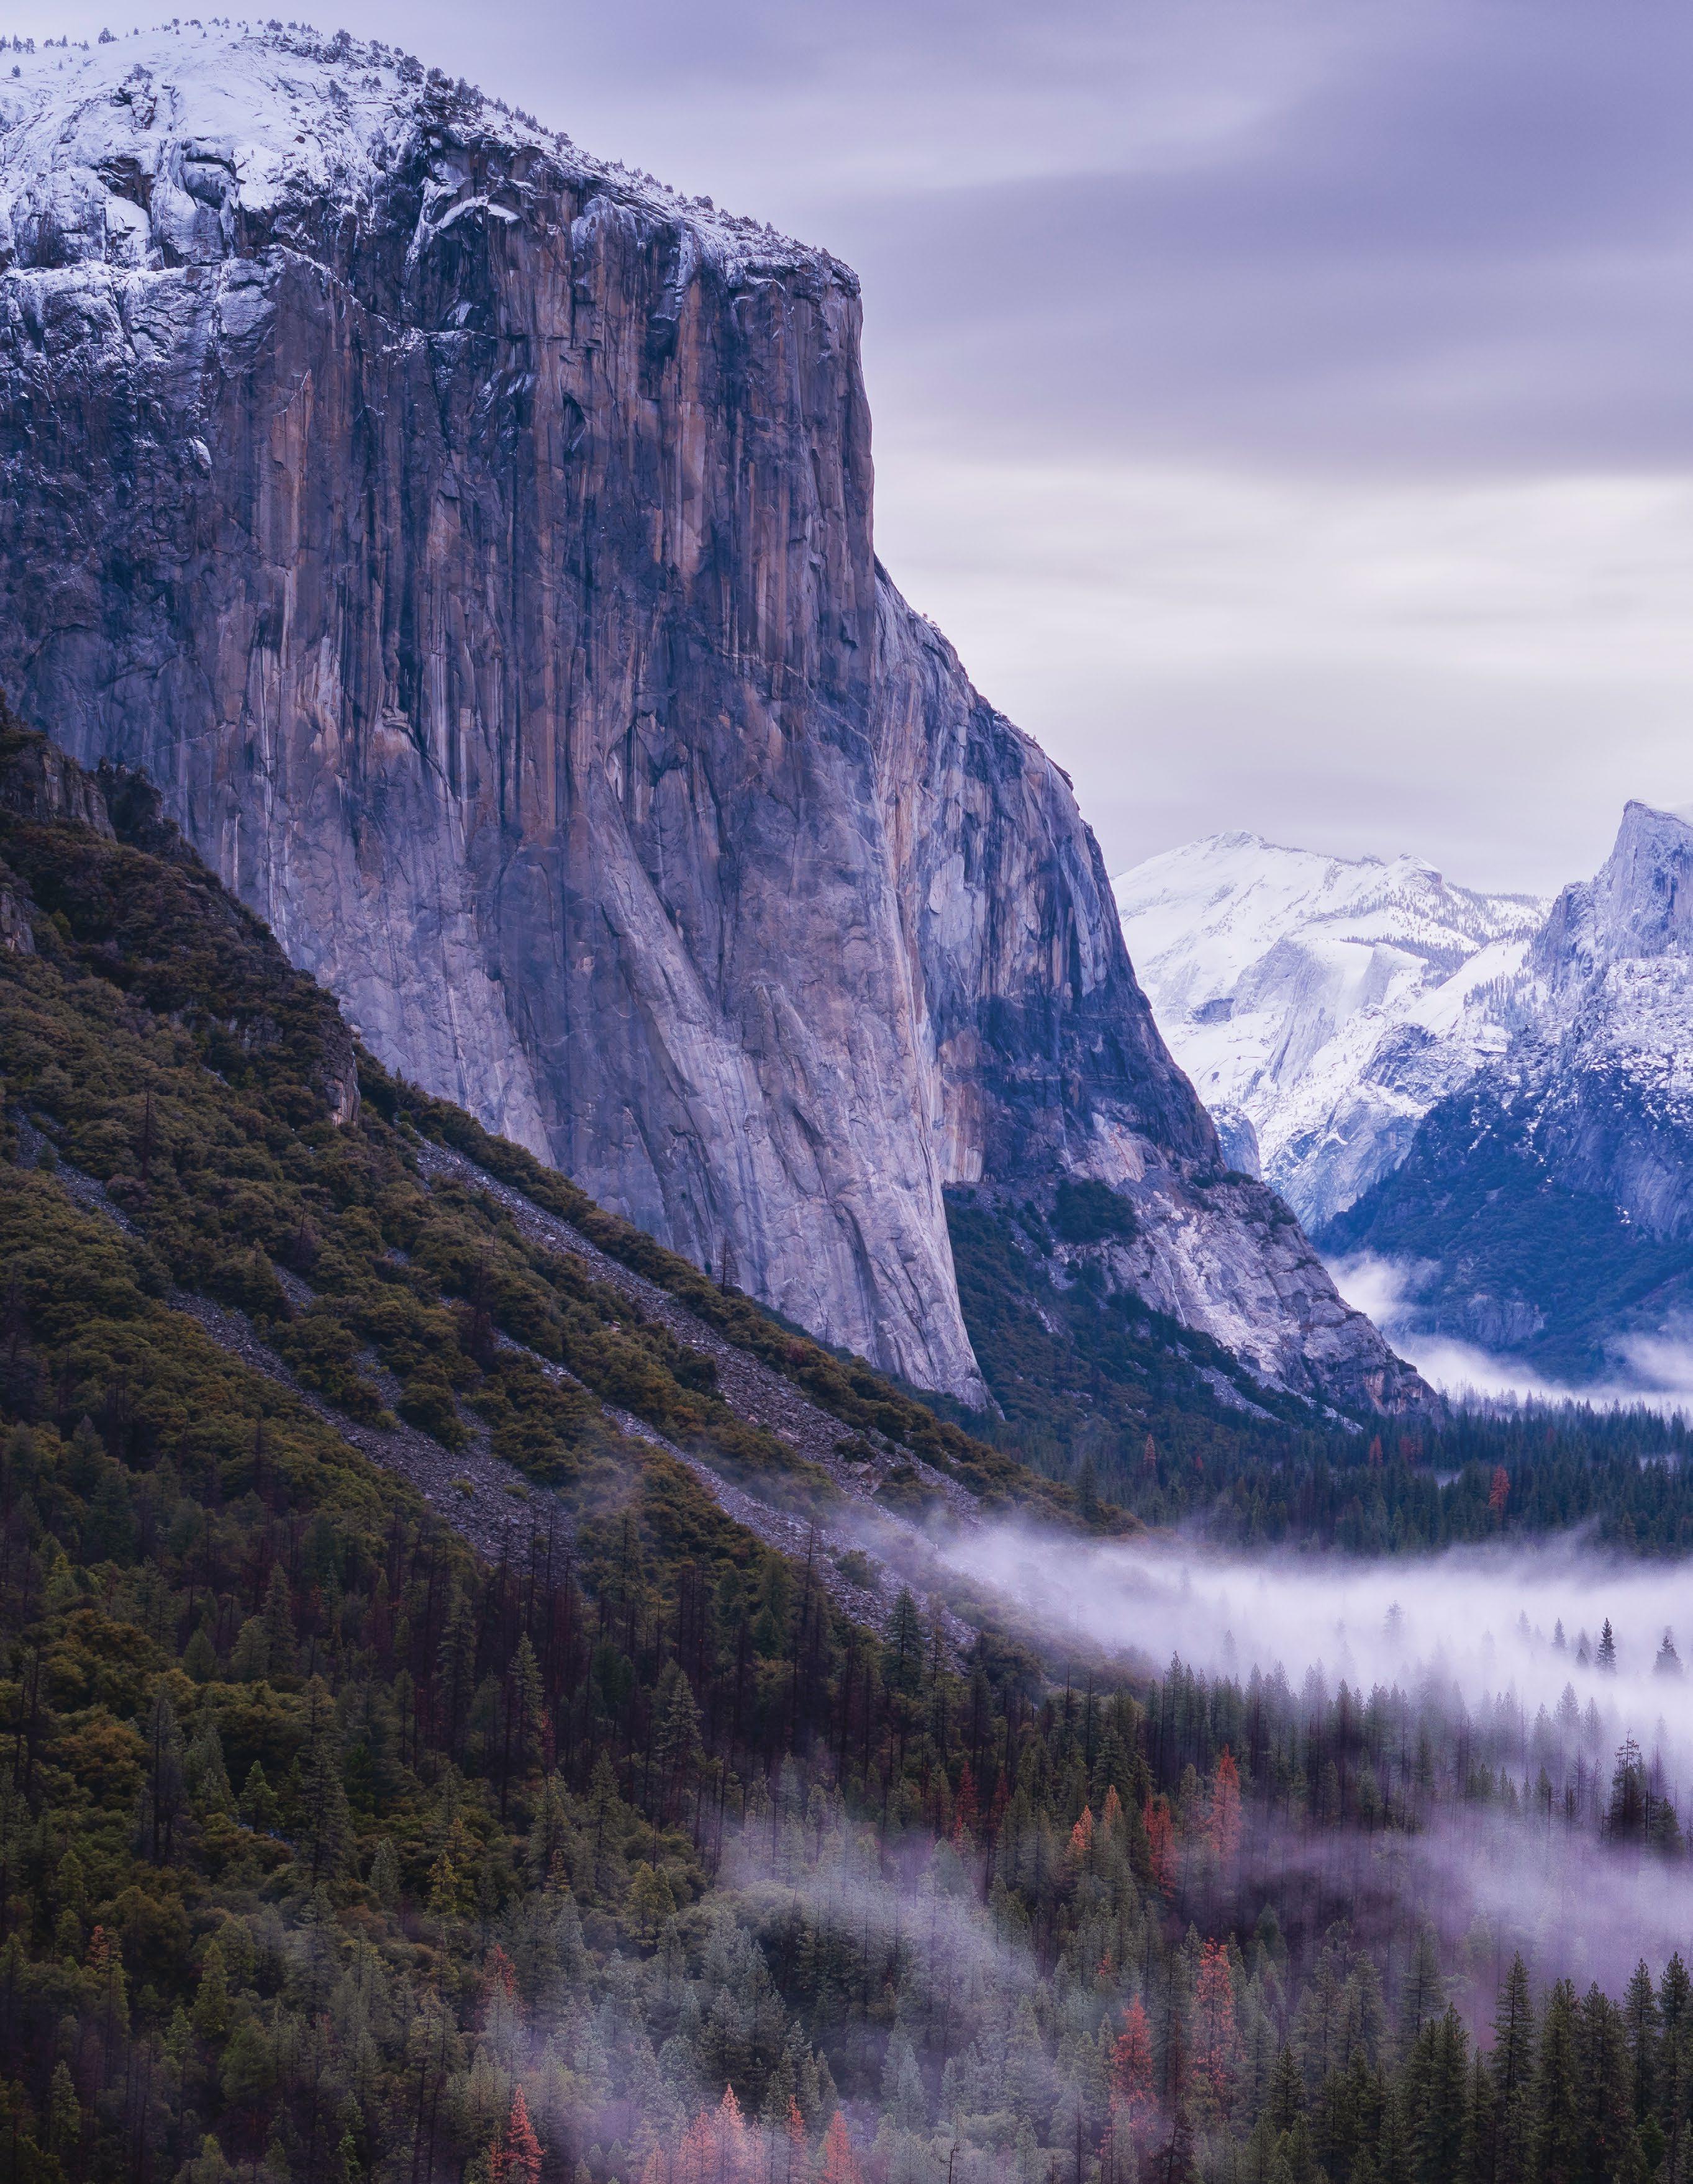
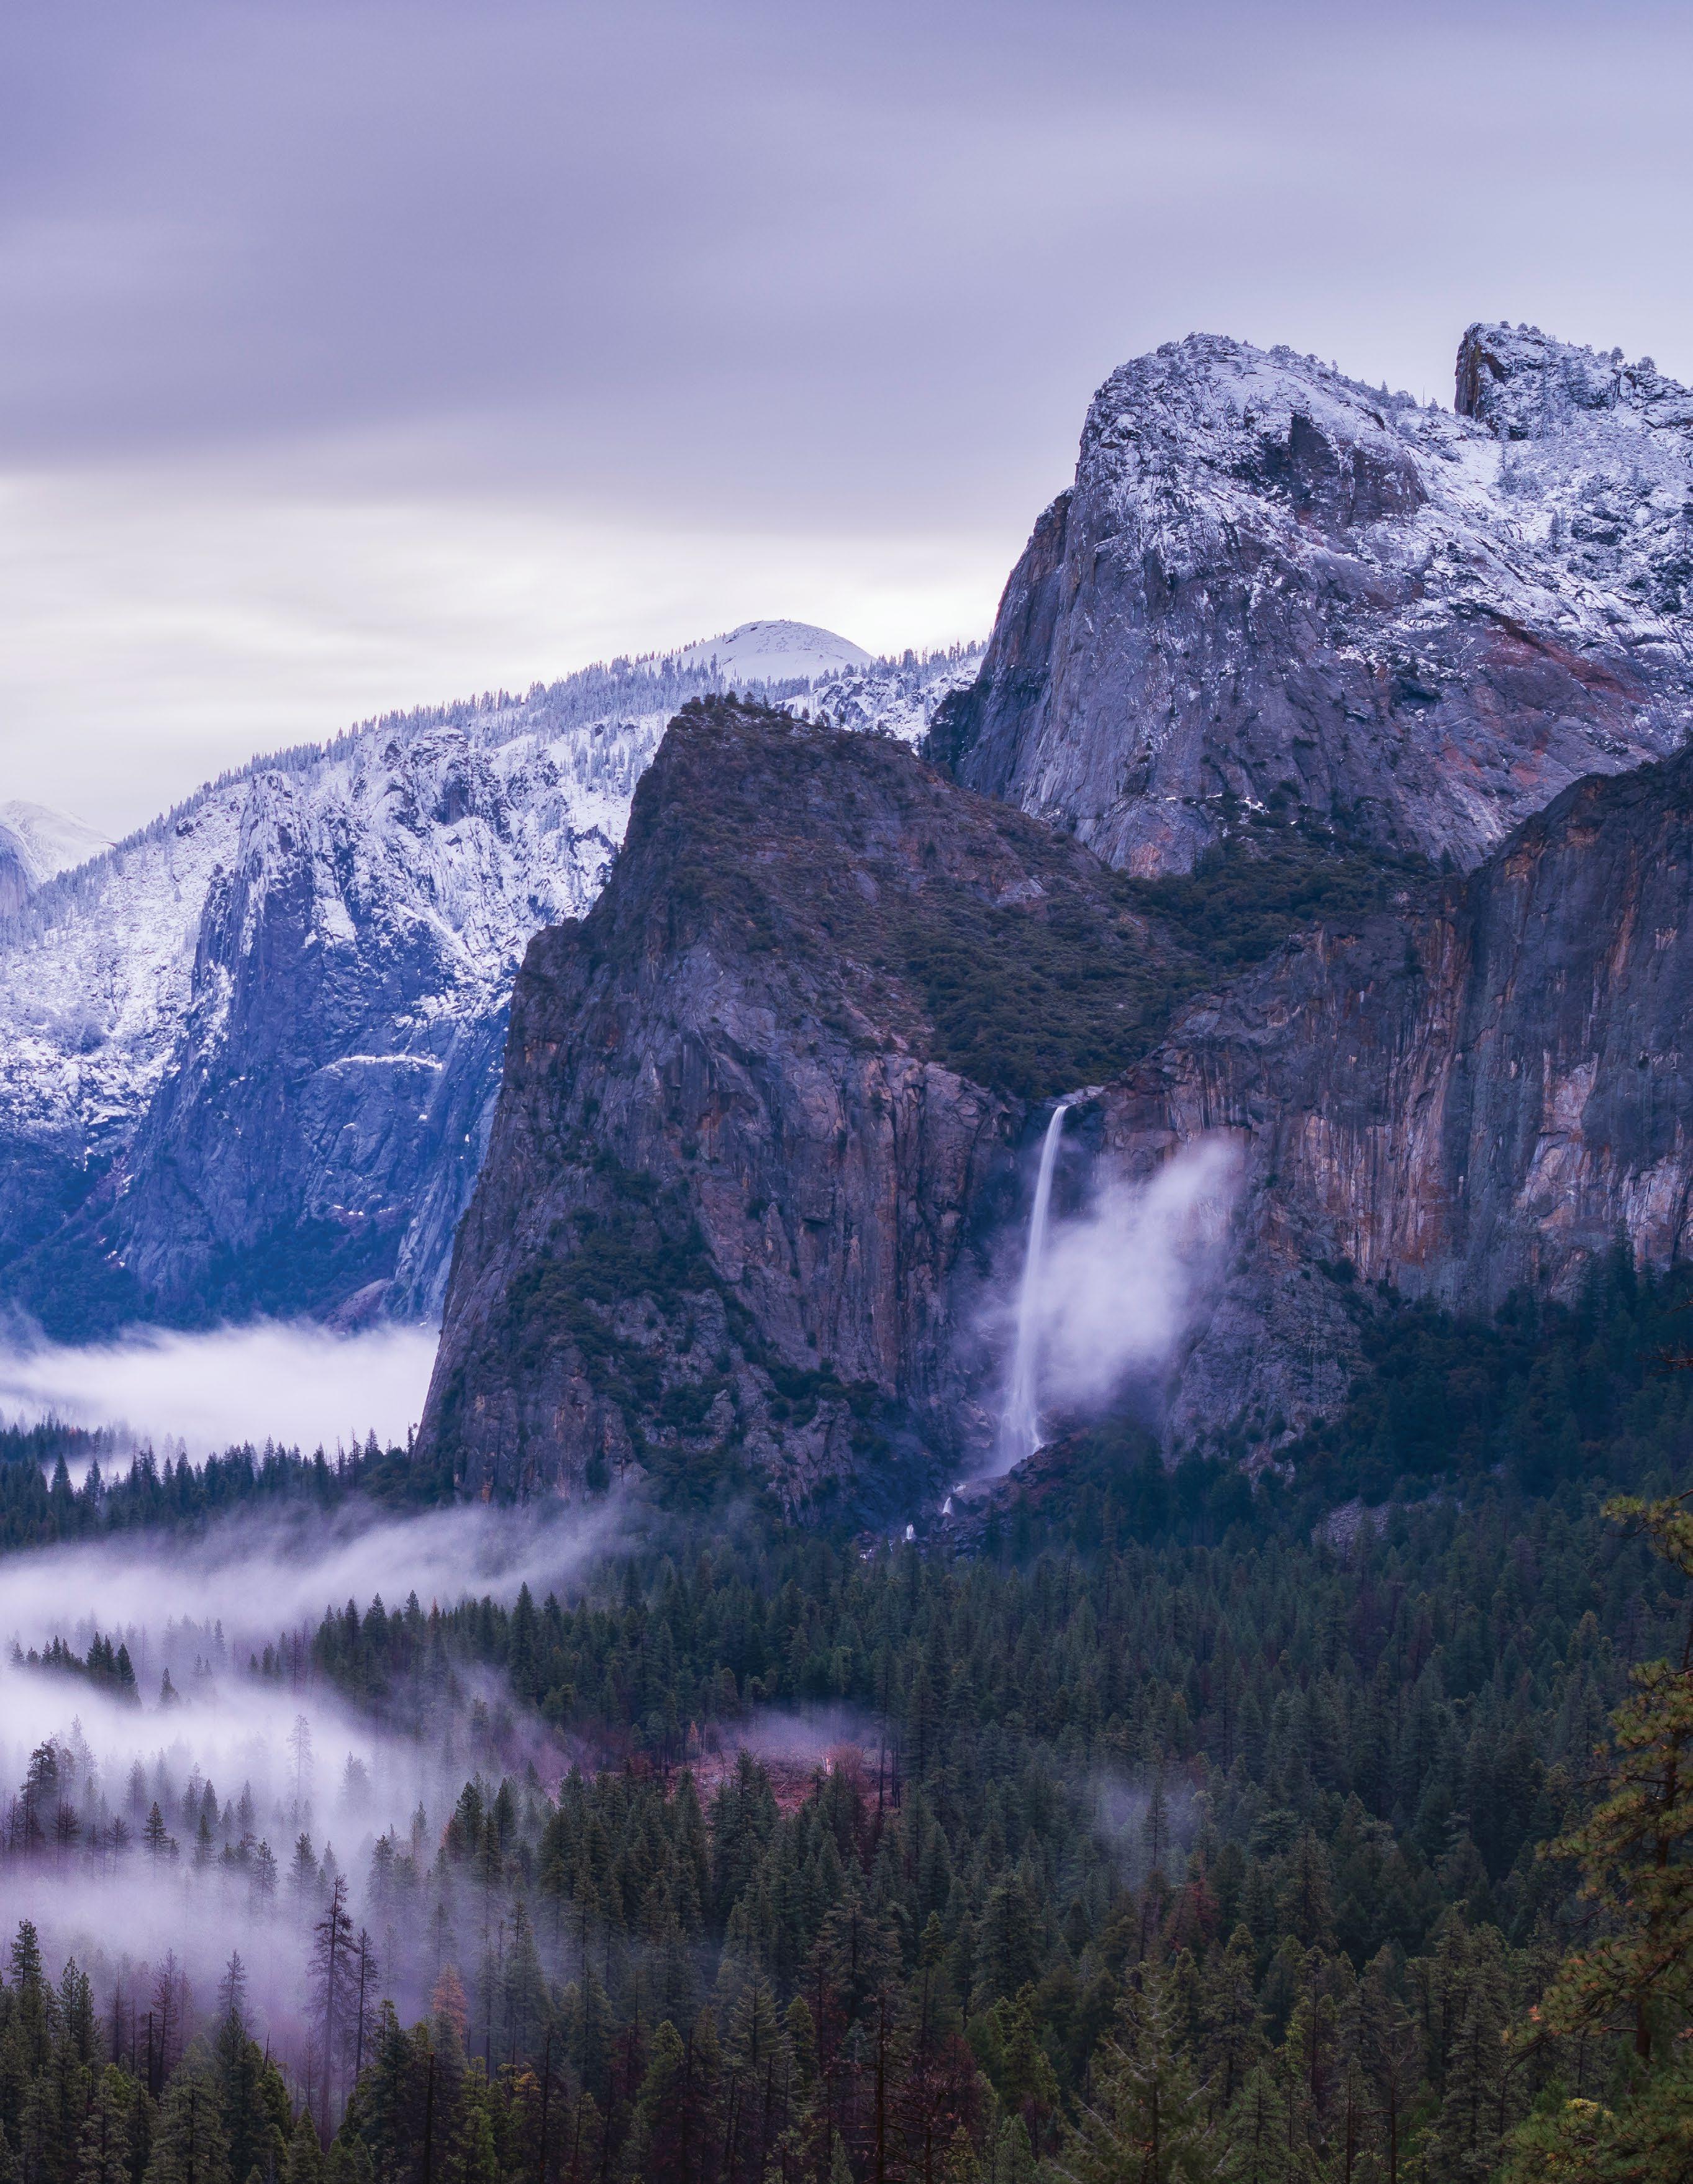
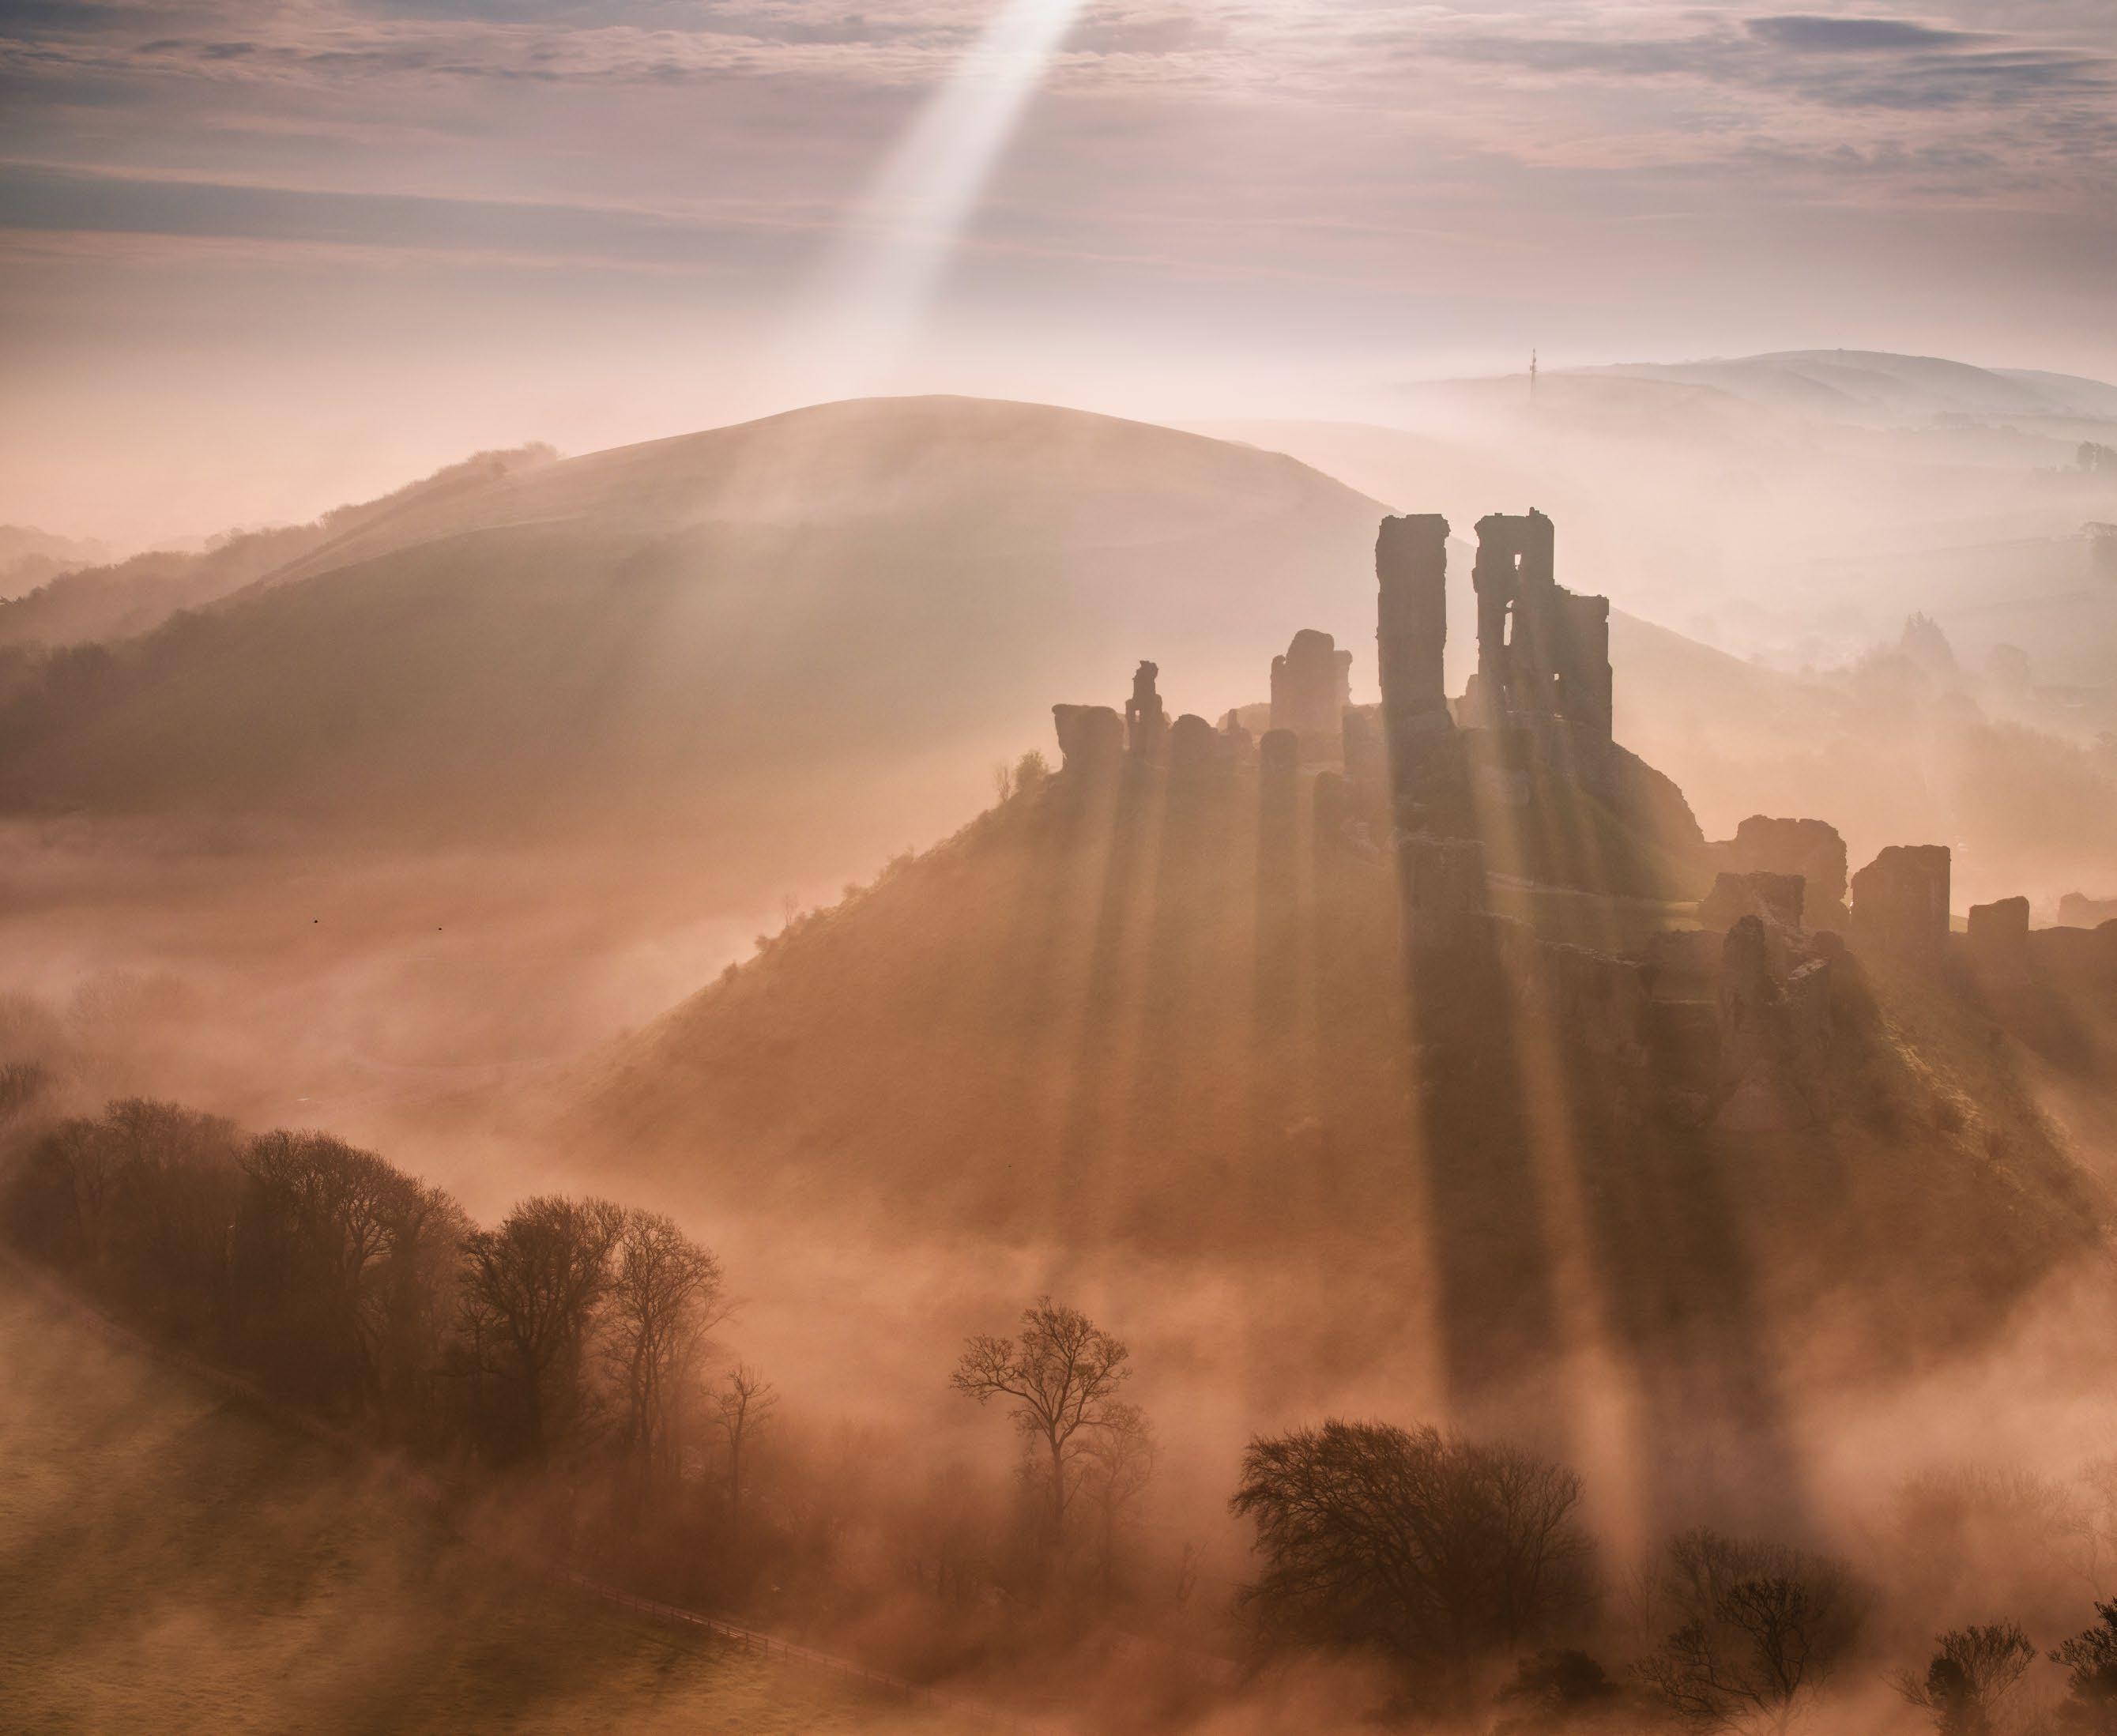
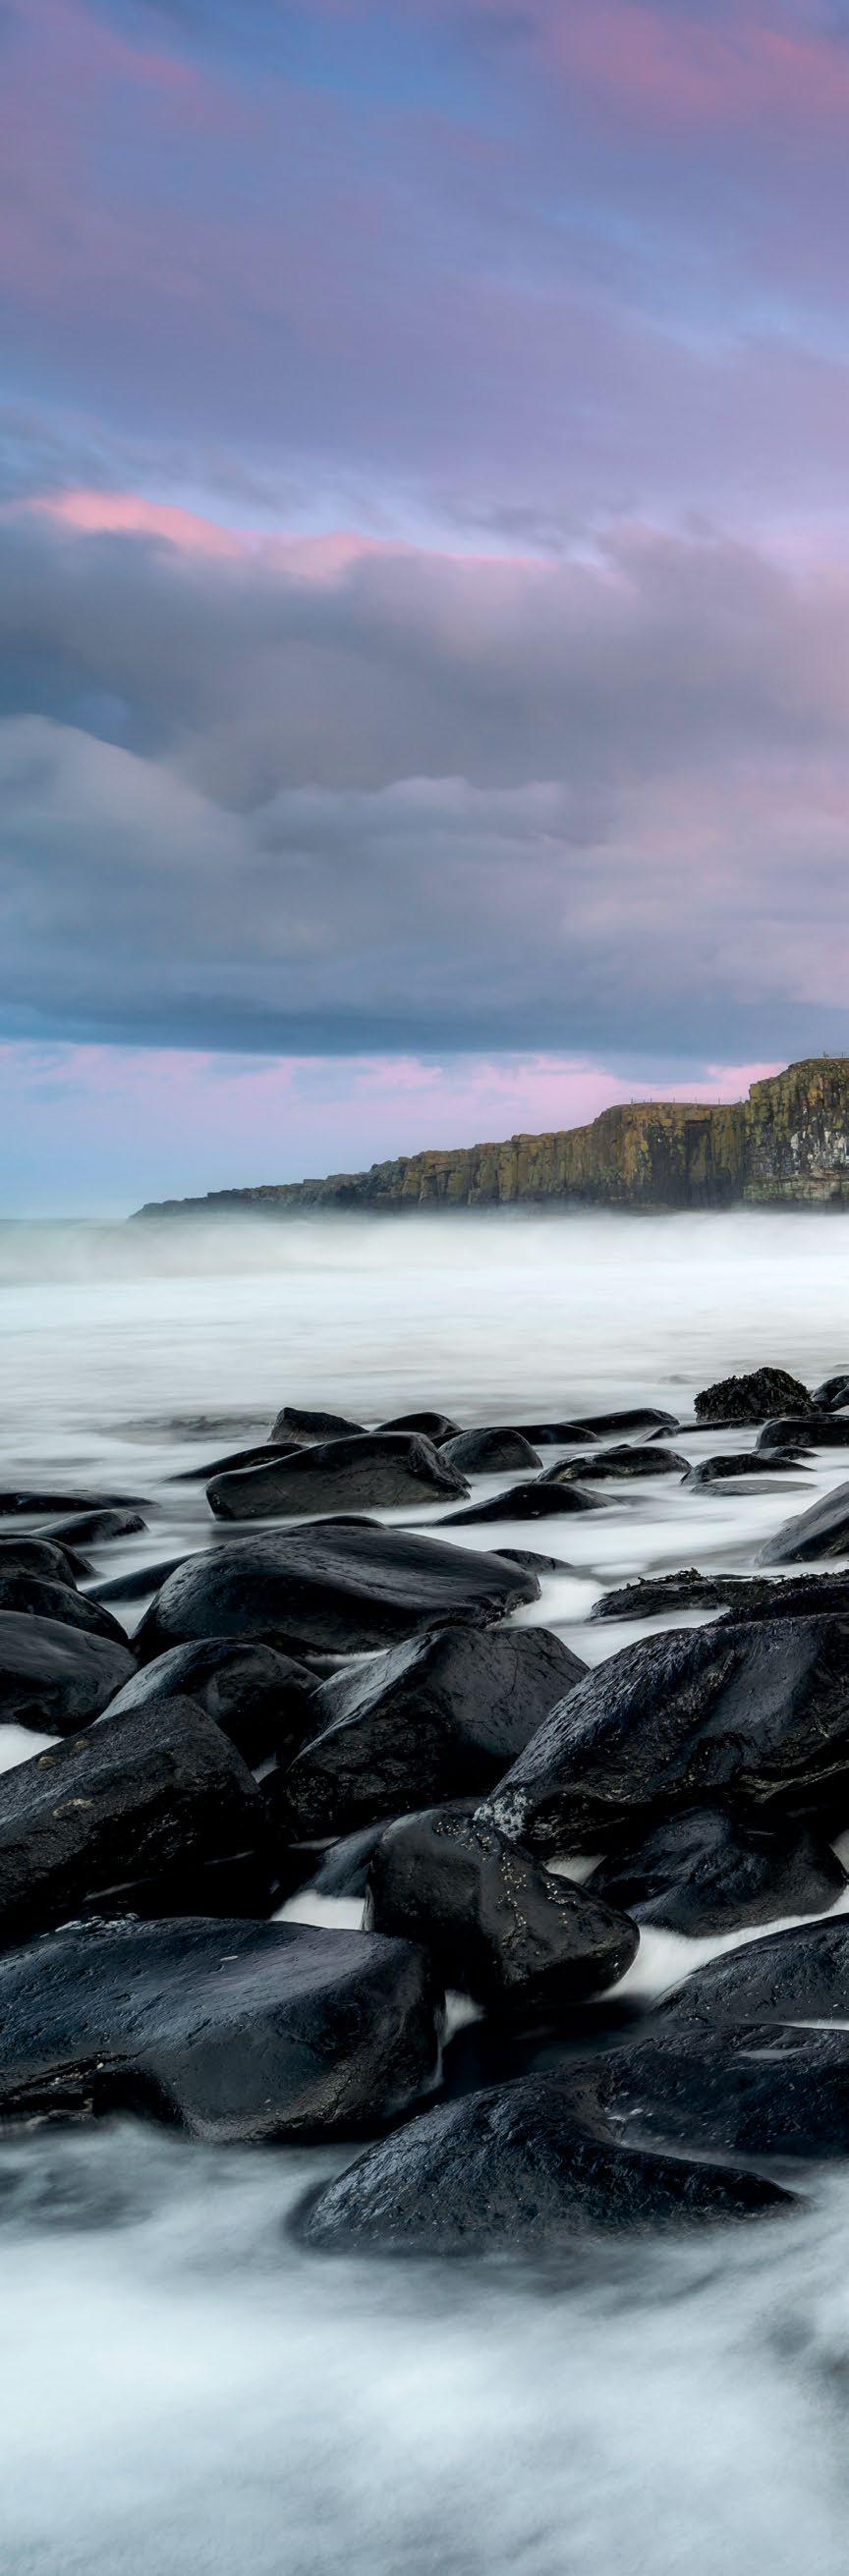
have ‘the shot’, you’re free of the self-imposed burden to produce an image that works and can let the creative juices flow. Weather conditions can play a part in making shots of a specific location look different. Think about Corfe Castle in southern England, which is an incredibly popular spot on misty mornings – you’ve no doubt seen numerous images depicting this familiar scene. In situations like these, weather conditions become an integral part of the classic image, and sometimes simply shooting in different weather can be enough to create an image that’s unique. Here are just a few great UK photo spots to get you started…
32 TECHNIQUES
x5 © James Abbott
Off the beaten track
To find locations that aren’t on the ‘landscape photography circuit’, and that enable you to produce a truly original image, you have to be prepared to put some legwork in – both literally and metaphorically. Research is needed beforehand, while some walking will also be required to reach these out-of-the-way locations. On the next page, we’ll show you how to find features in the landscape that offer photographic potential, using phone apps for planning, as well as simply going for a walk to see what you find.
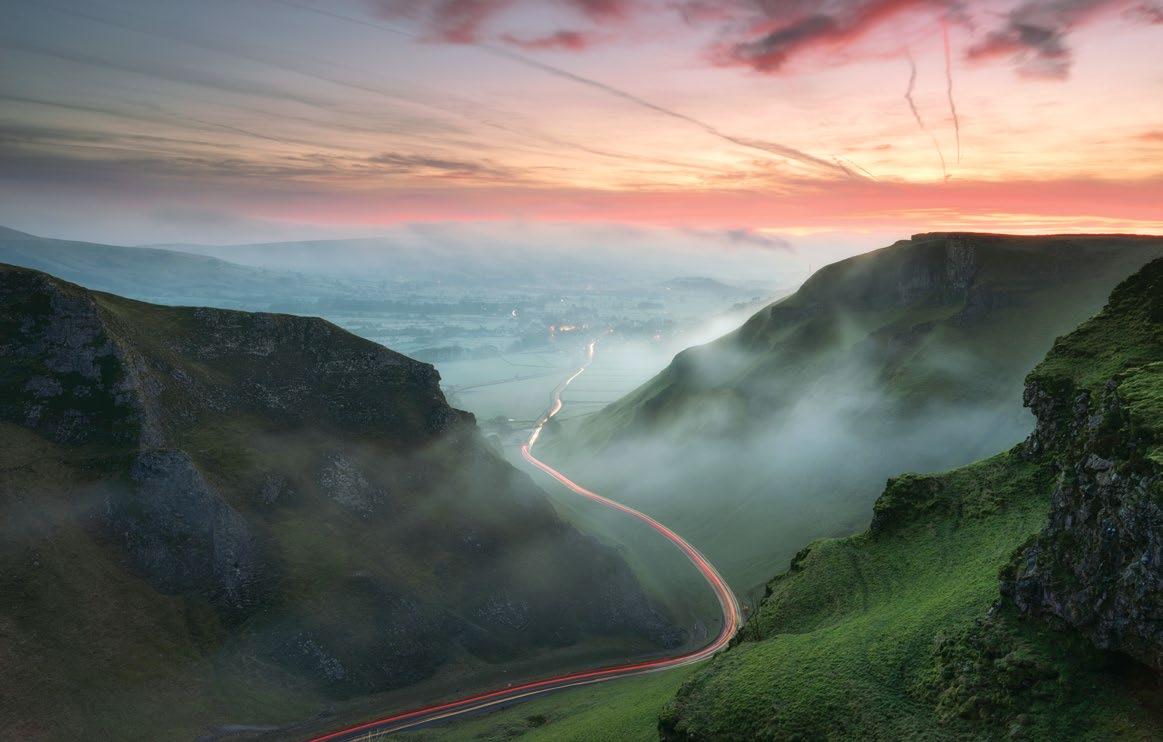
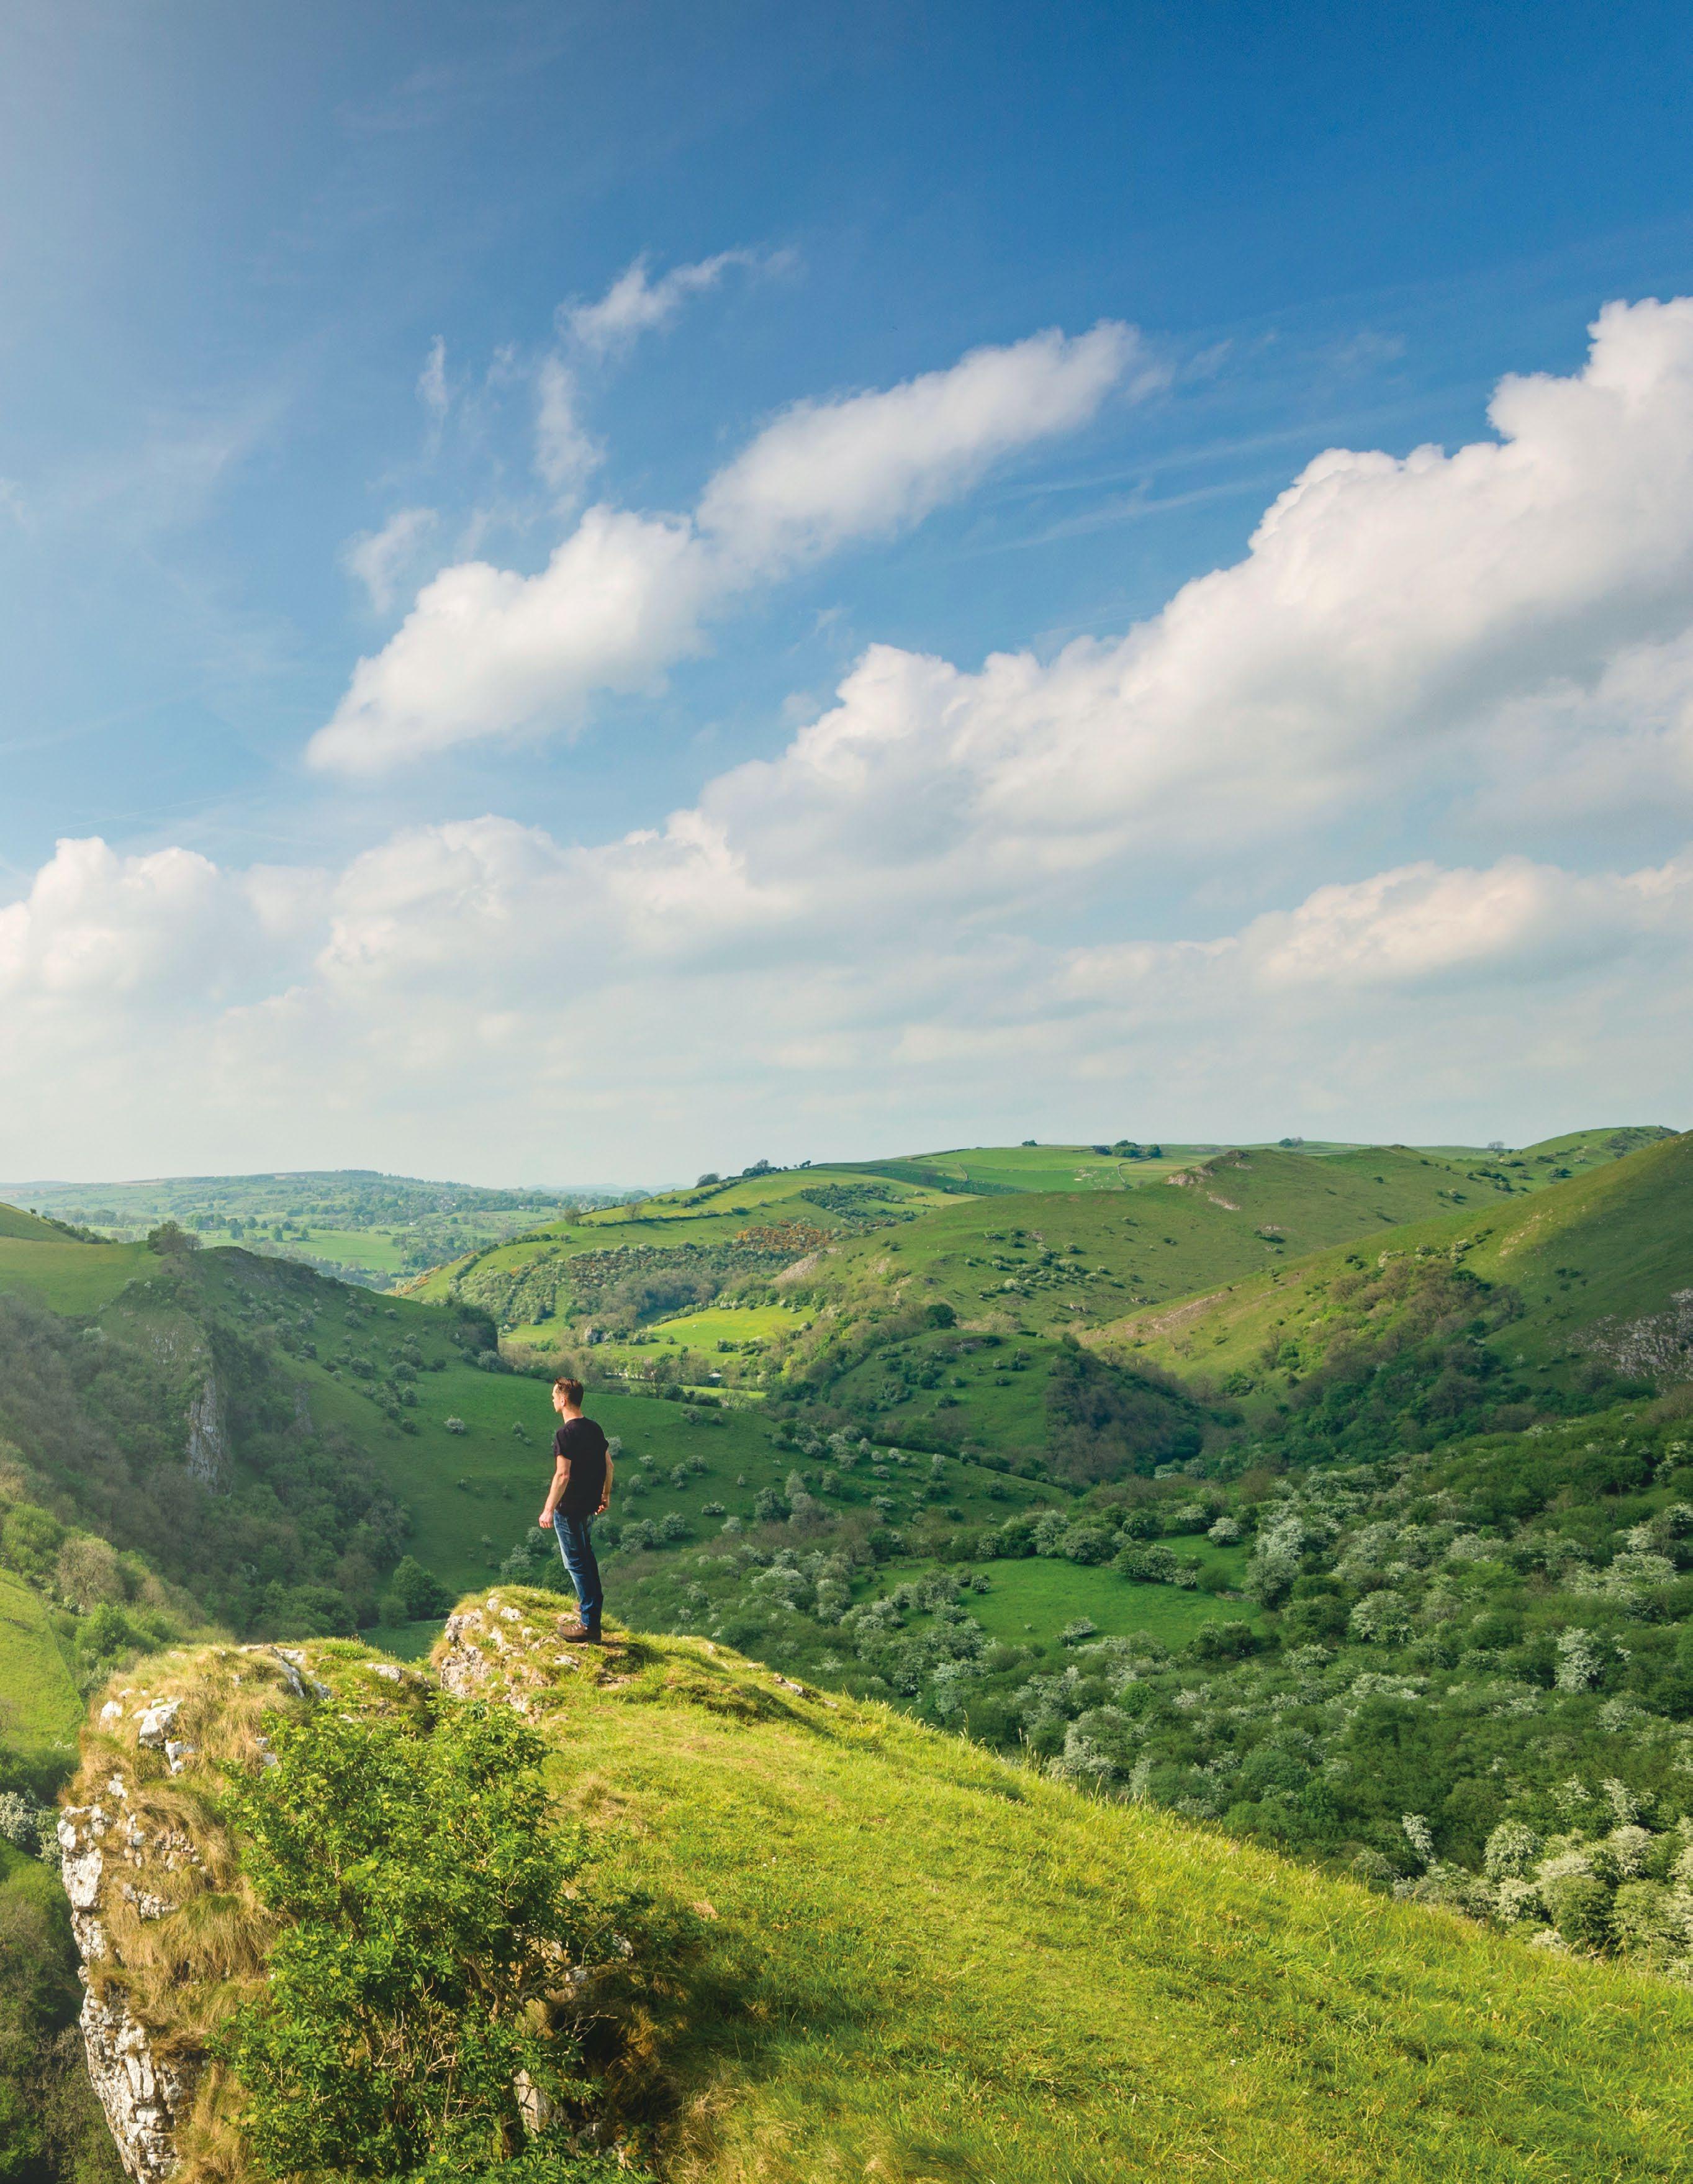
The location of the image below, with a drystone wall and lone tree, was discovered accidentally during a recce walk in the Peak District, where the weather conditions at the time suited the location perfectly – although a sunset visit is planned for the future.


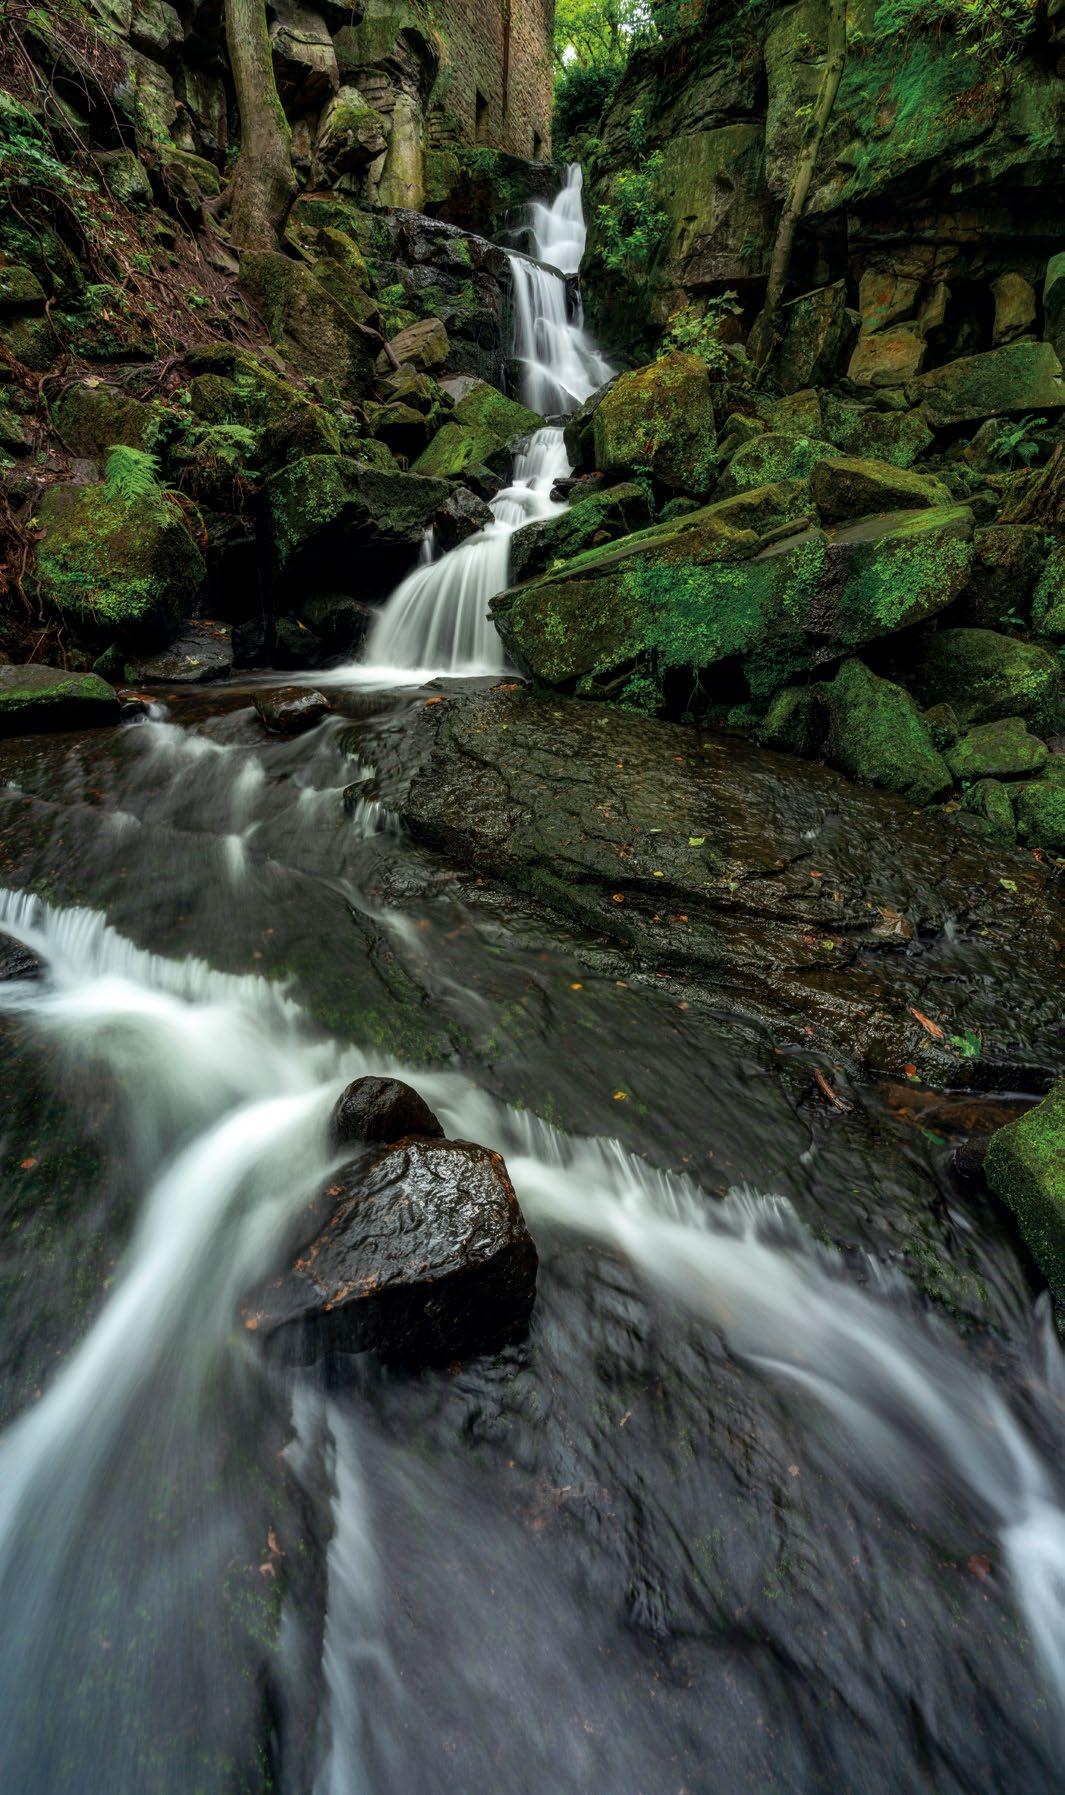
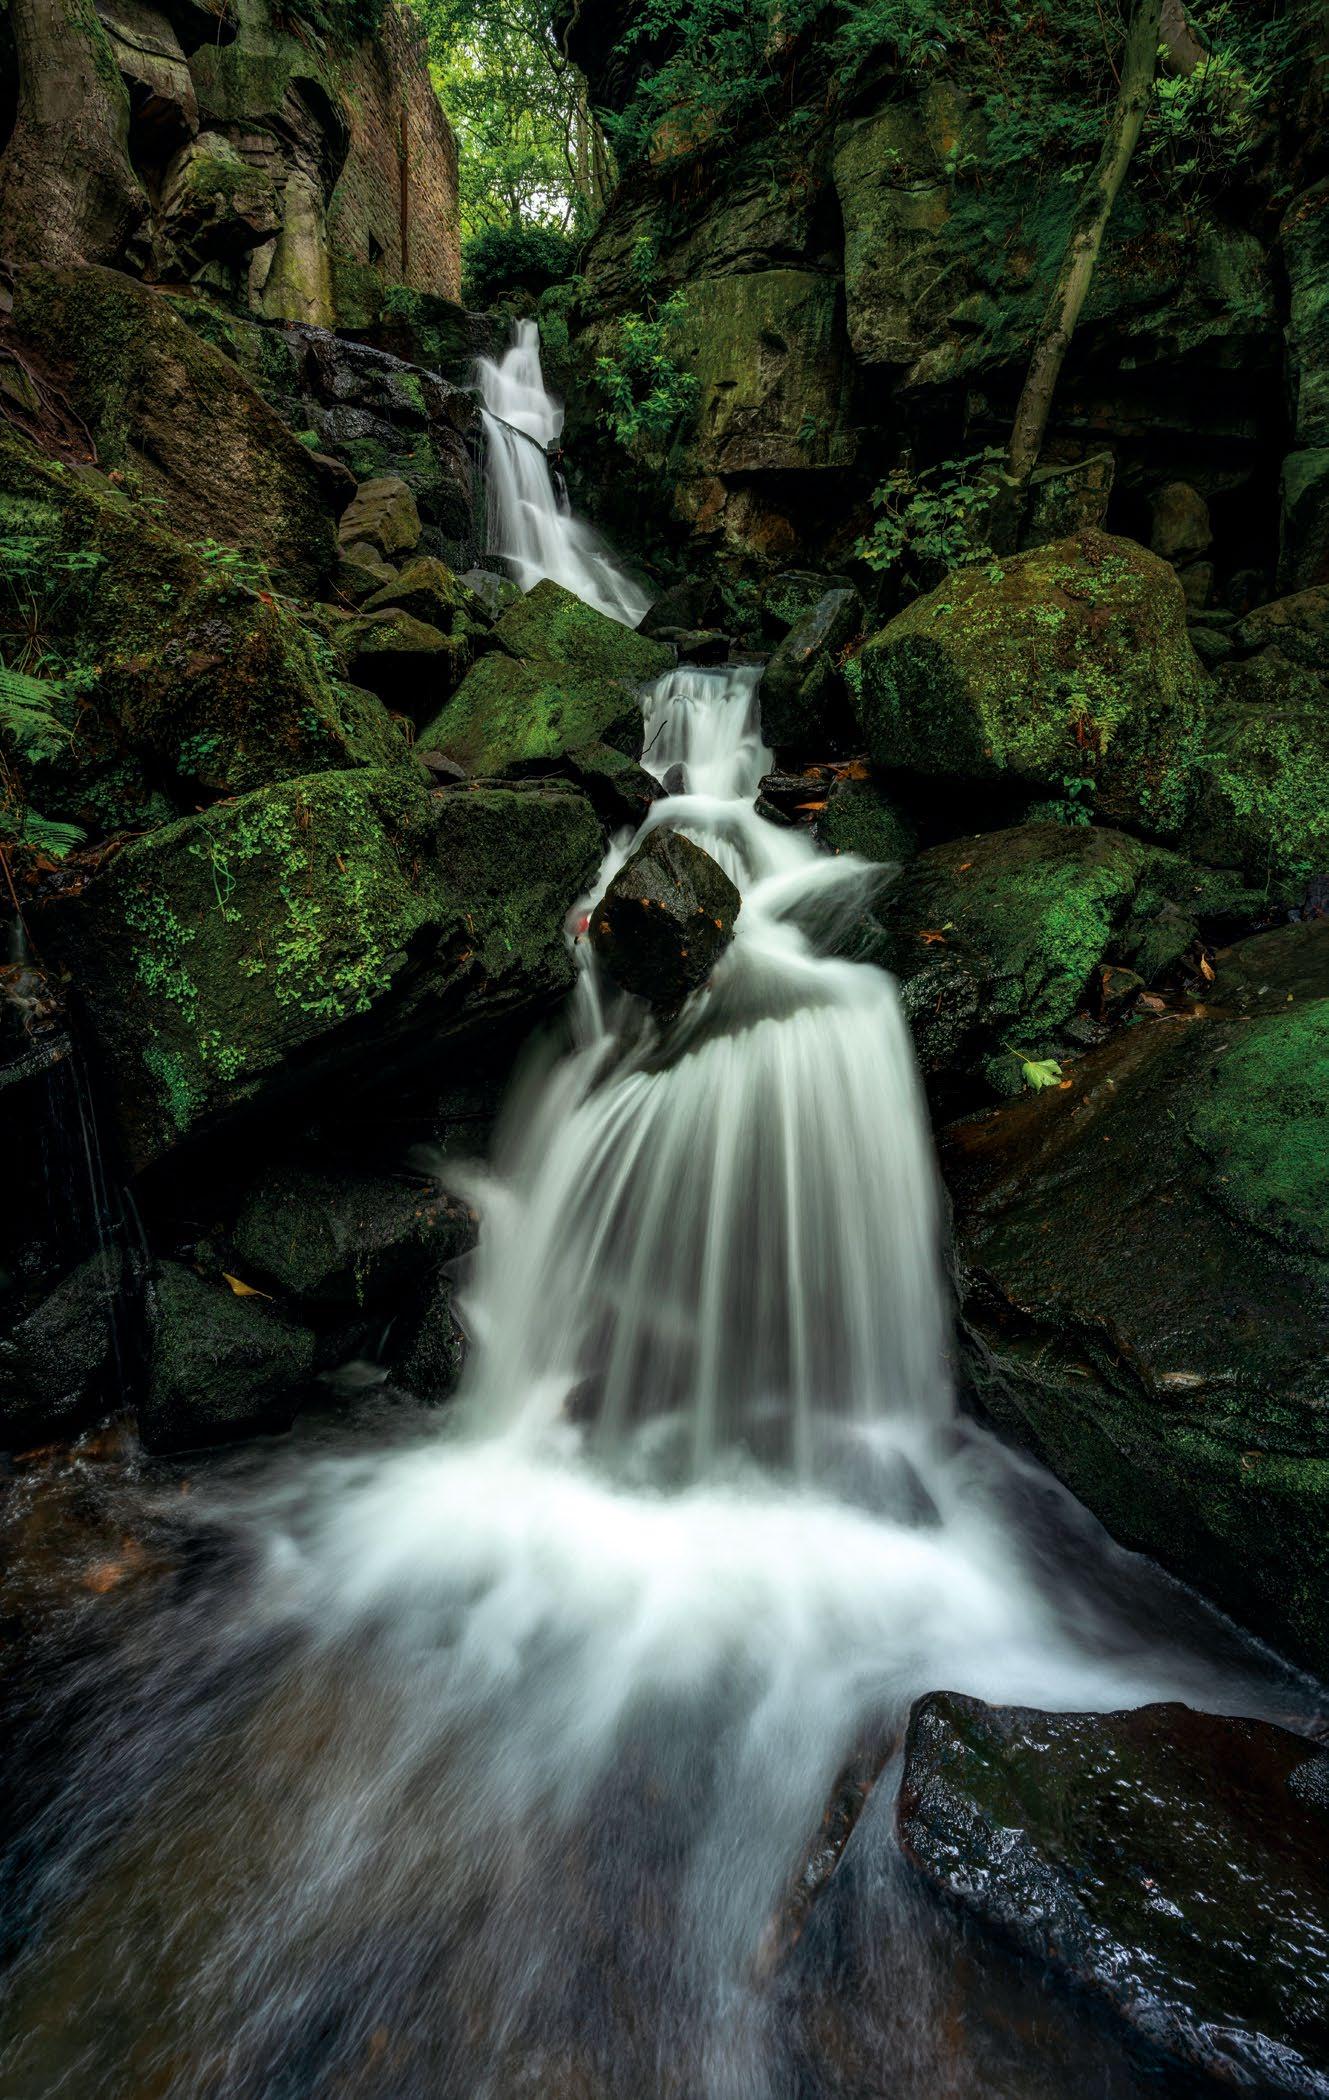
This small river has multiple falls and viewpoints, and is one of the most popular locations in Snowdonia, in North Wales
One of the most breathtaking views in the UK after an easy stroll, with the right weather it is a photographer’s ideal site
After shooting the landscape version of this sunrise, I quickly changed format to upright before moving down to a lower position
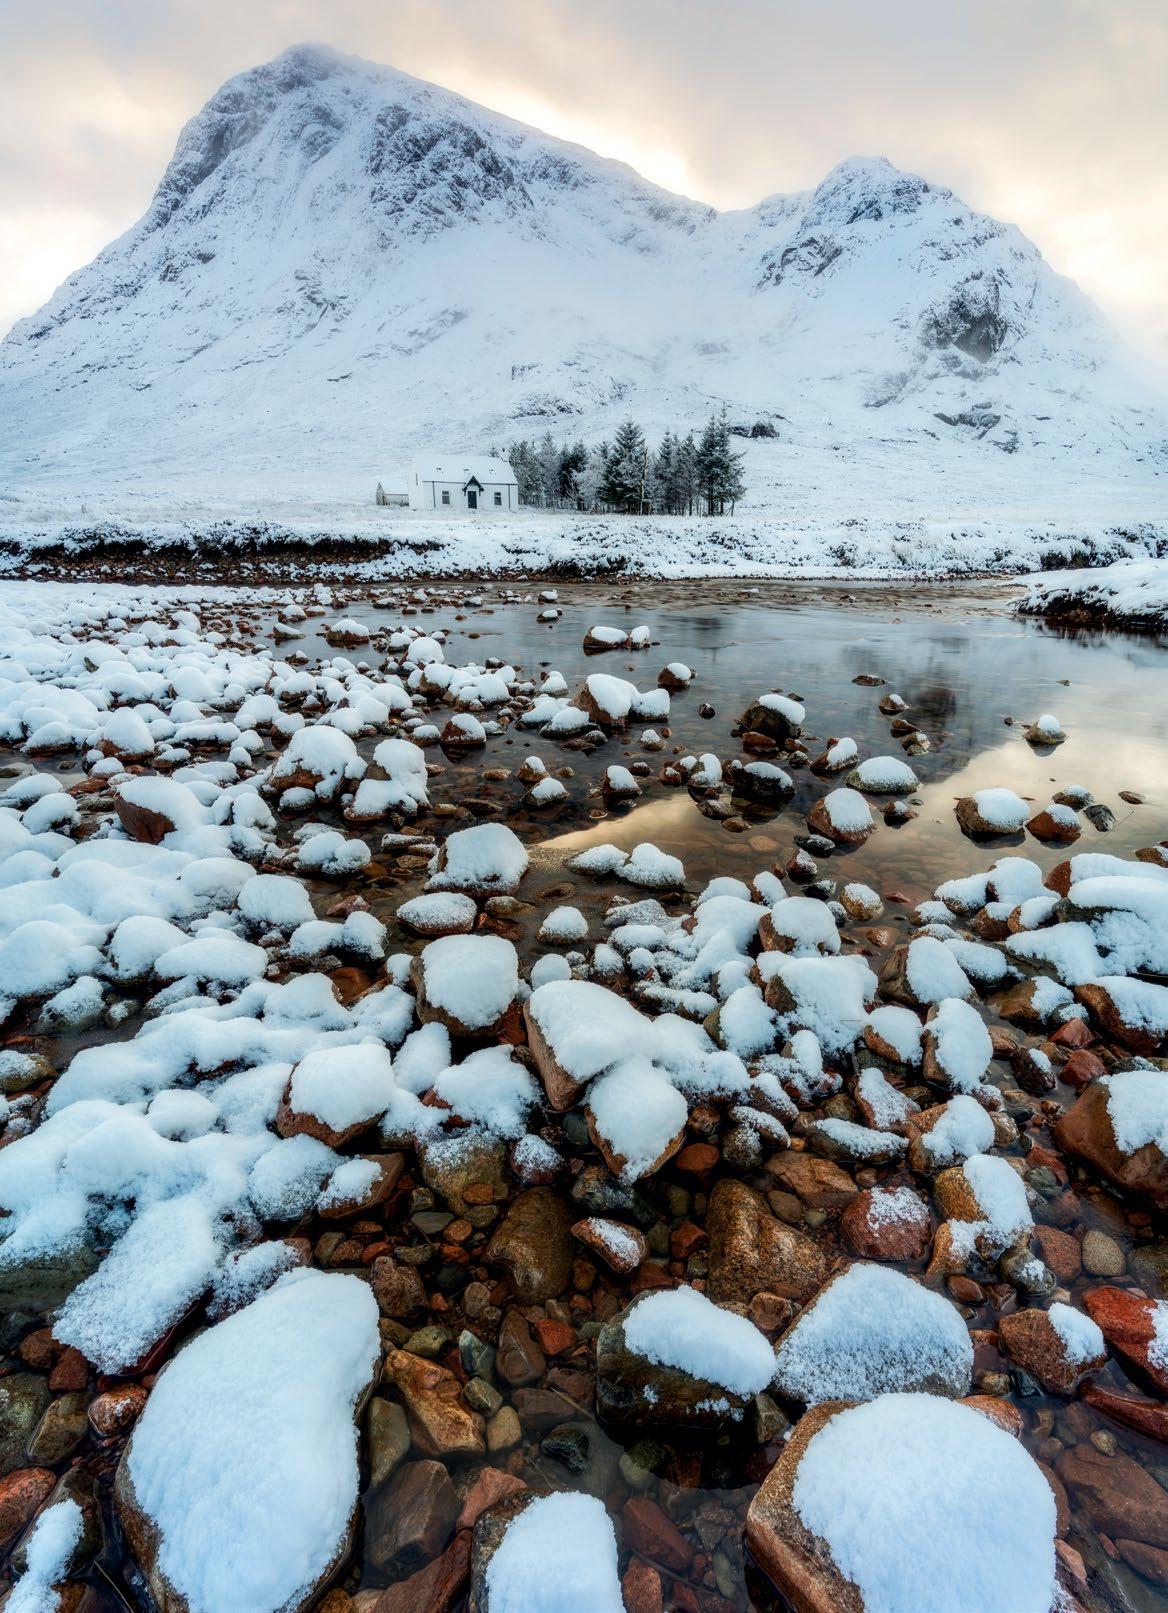
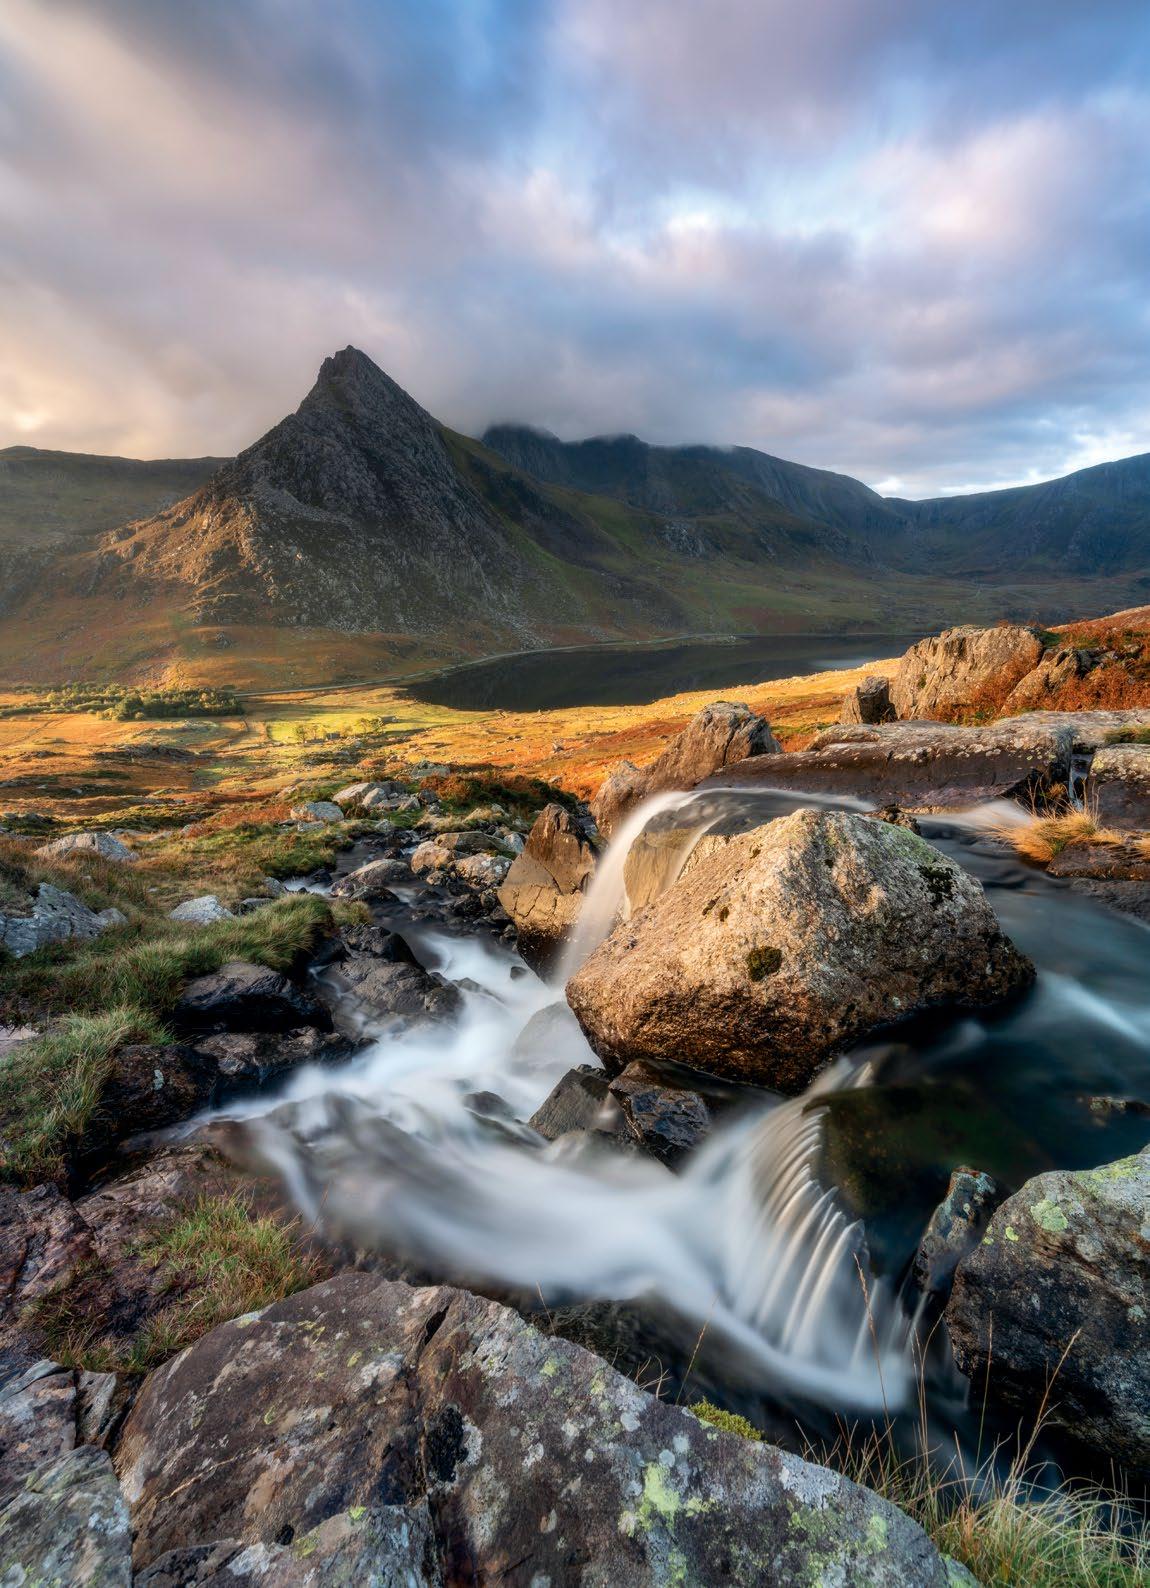
Buachaille Etive Mor in the Scottish Highlands is one of many amazing locations found along the A82 as it winds its way to Glencoe
 Top Left Winnats Pass
Middle left Corwen
Bottom left Lagangarbh Hut
Far left Afon Lloer
Top Left Winnats Pass
Middle left Corwen
Bottom left Lagangarbh Hut
Far left Afon Lloer
33 LOCATIONS & NAVIGATION
Location & shoot research
Find locations and get a head start by identifying possible compositions before you even leave the house
Two of the best online sources of maps and satellite views of very restricted areas of the Earth are OS Maps online and Google Maps. There are, of course, other mapping sites available, but these two are the most popular, and for good reason. These services can provide a wealth of detailed visual information that enables you to do a ‘virtual recce’ of locations before visiting, and help you find features in the landscape that may act as focal points in your landscape shots.
Advantages of OS Maps include the ability to plot routes and to print maps from the website, while advantages of Google Maps include the ability to see user images of some
locations, to measure distances between points to estimate walking time, and if you have the Google Maps app on your phone, to follow directions even to off-road locations. For this, it’s recommended that you download offline maps in case you experience a loss of data connection in remote areas.
OS Maps has route functionality through its app if you have a data connection, or using downloaded routes that can be loaded into maps (GPX files), but to download offline maps you need to have an online subscription to OS Maps. Owners of traditional paper OS maps that were purchased in recent years, meanwhile, can download digital versions
of those maps to the app using a code that comes with the paper versions.
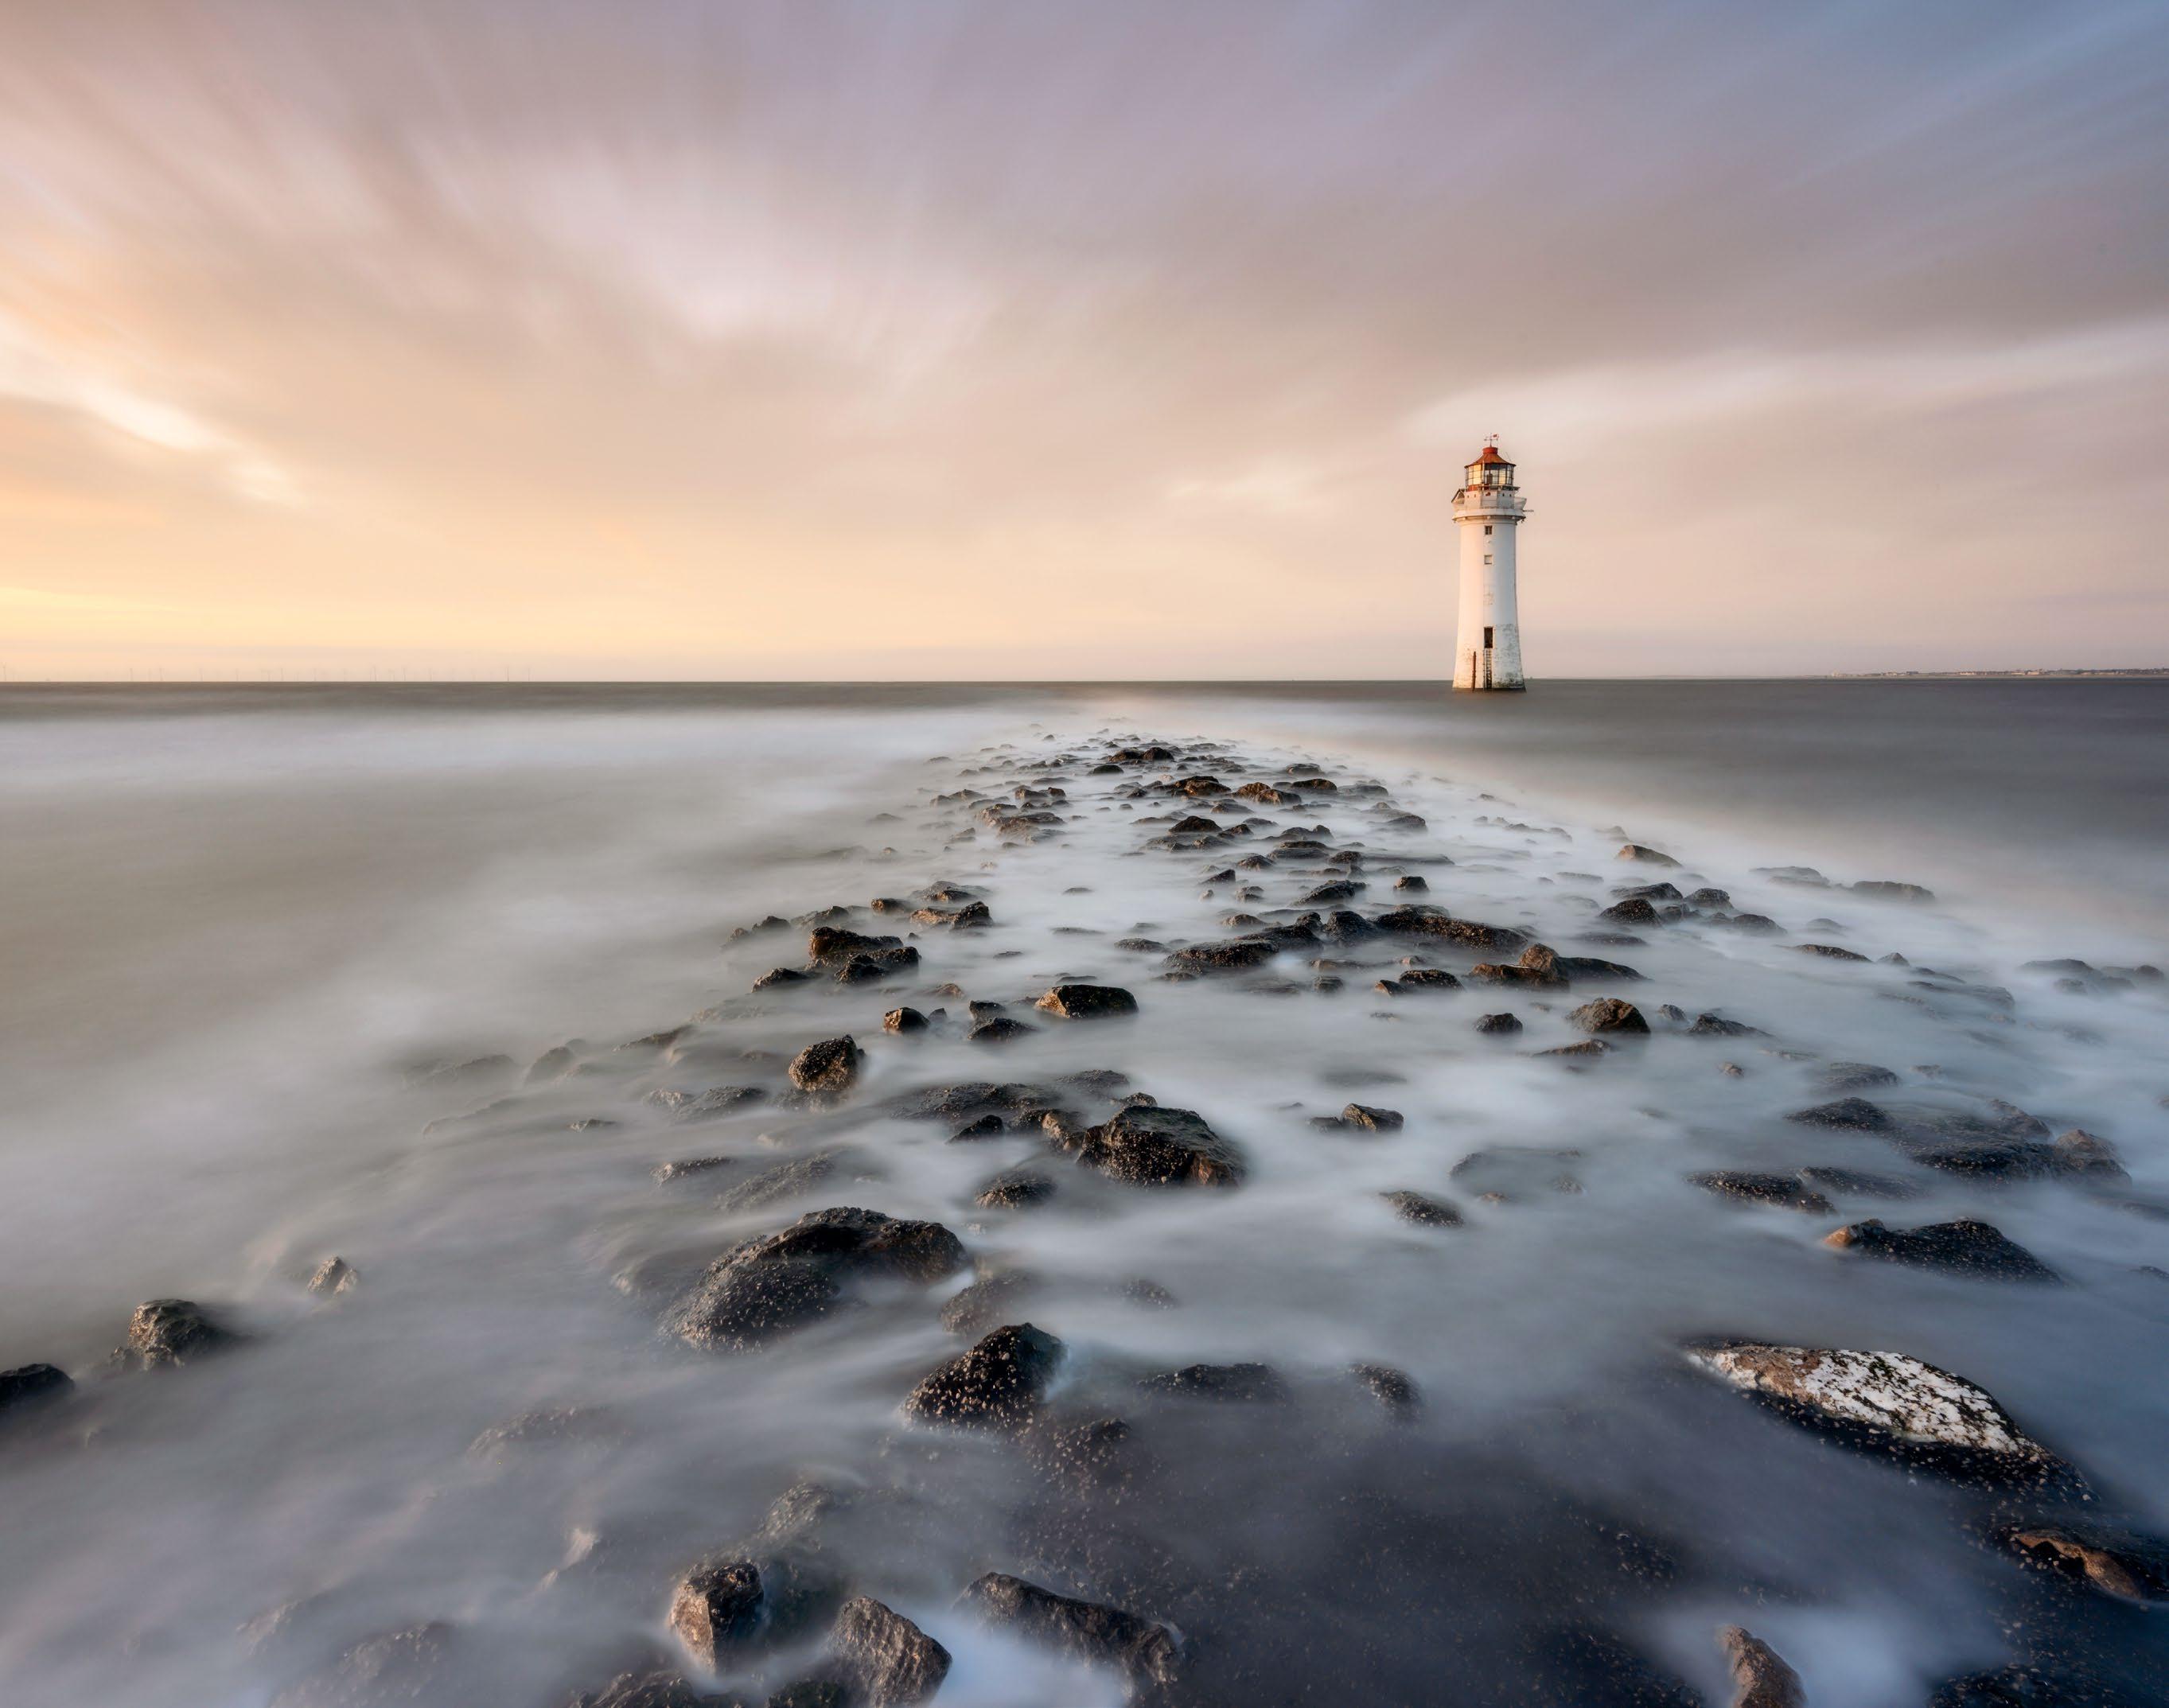
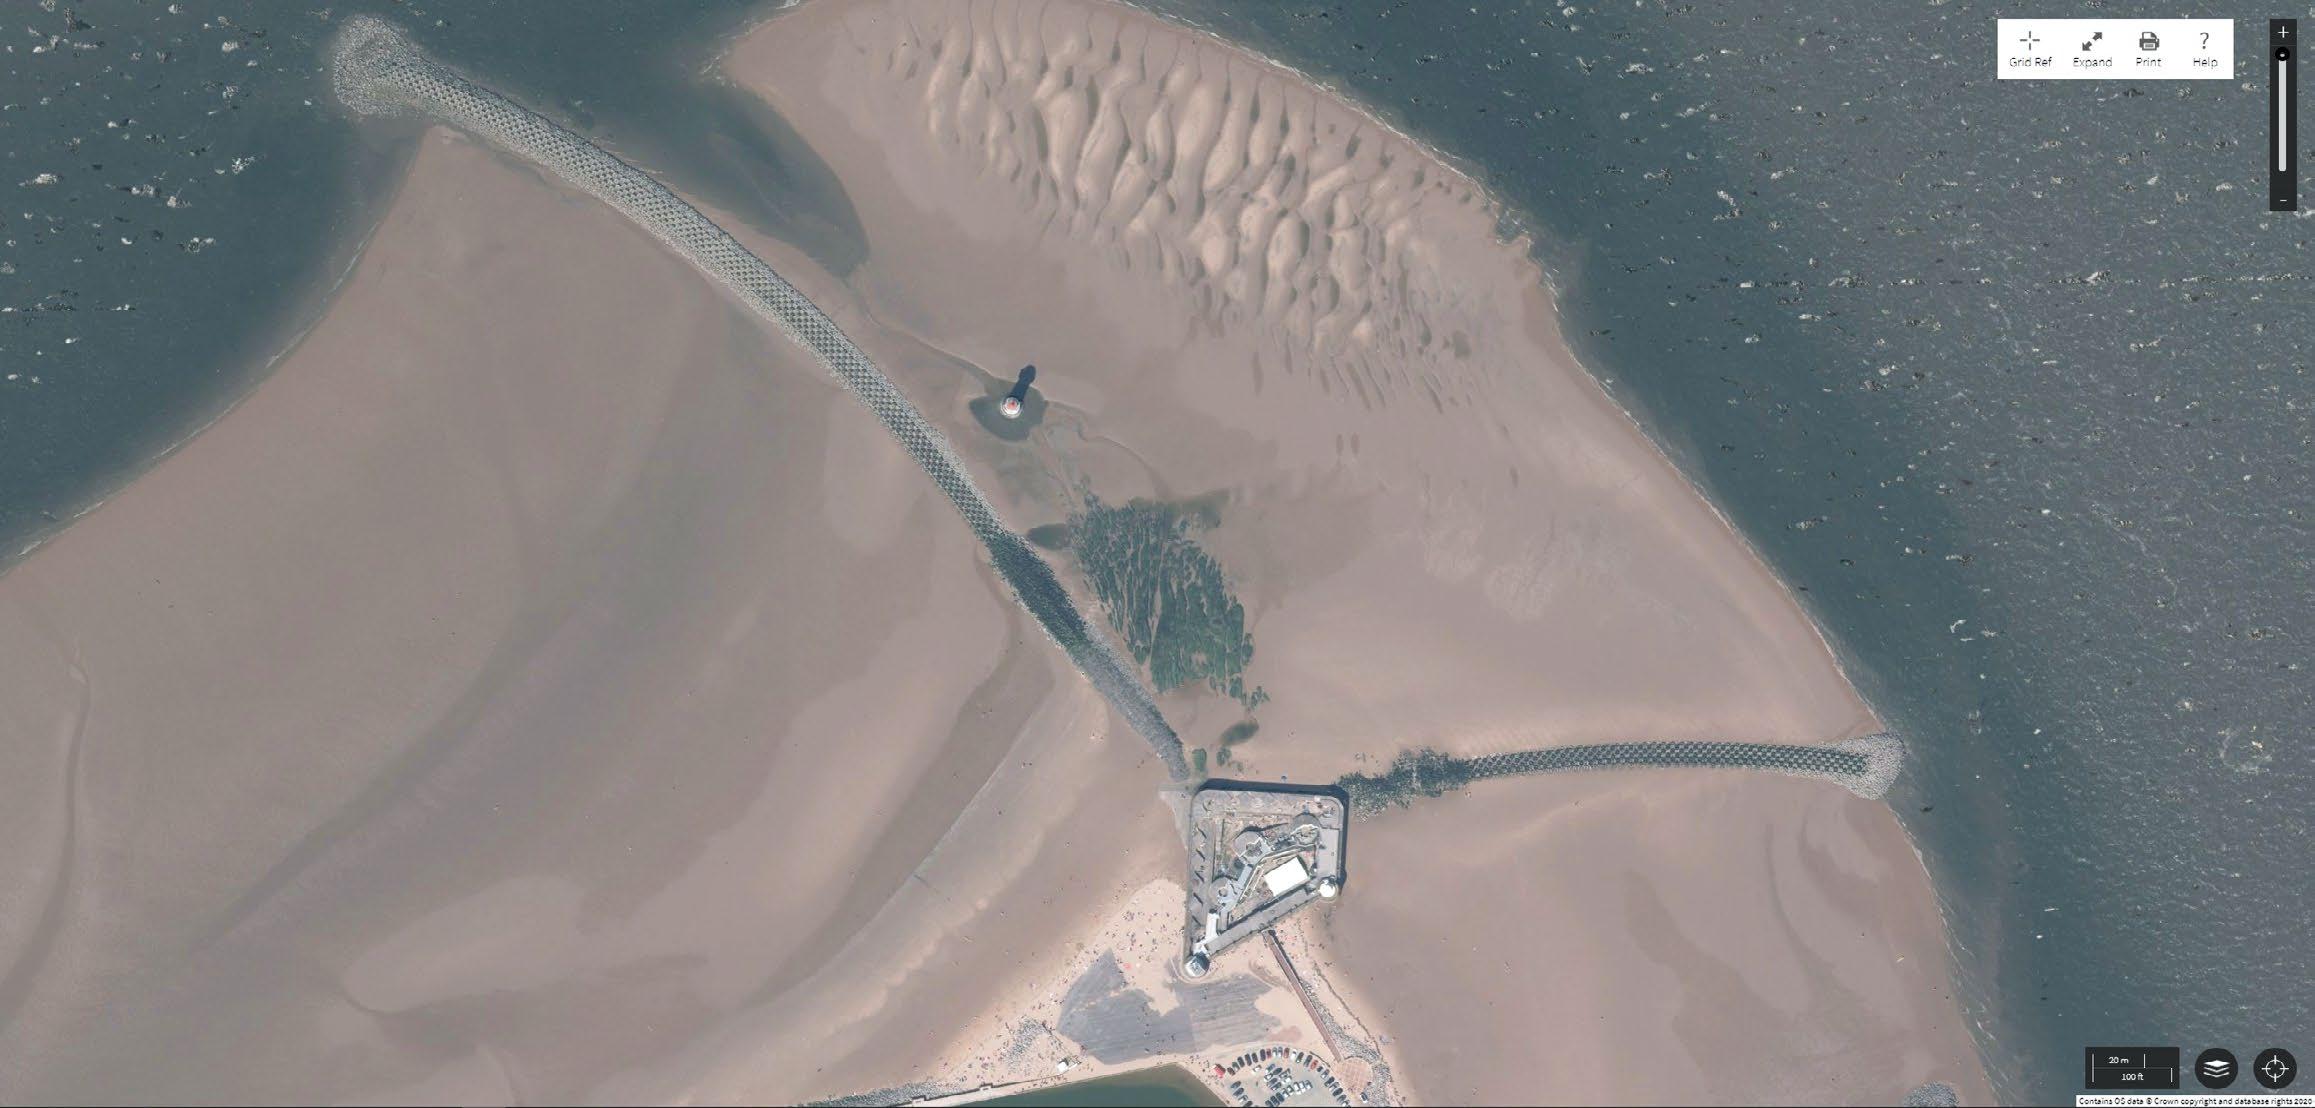
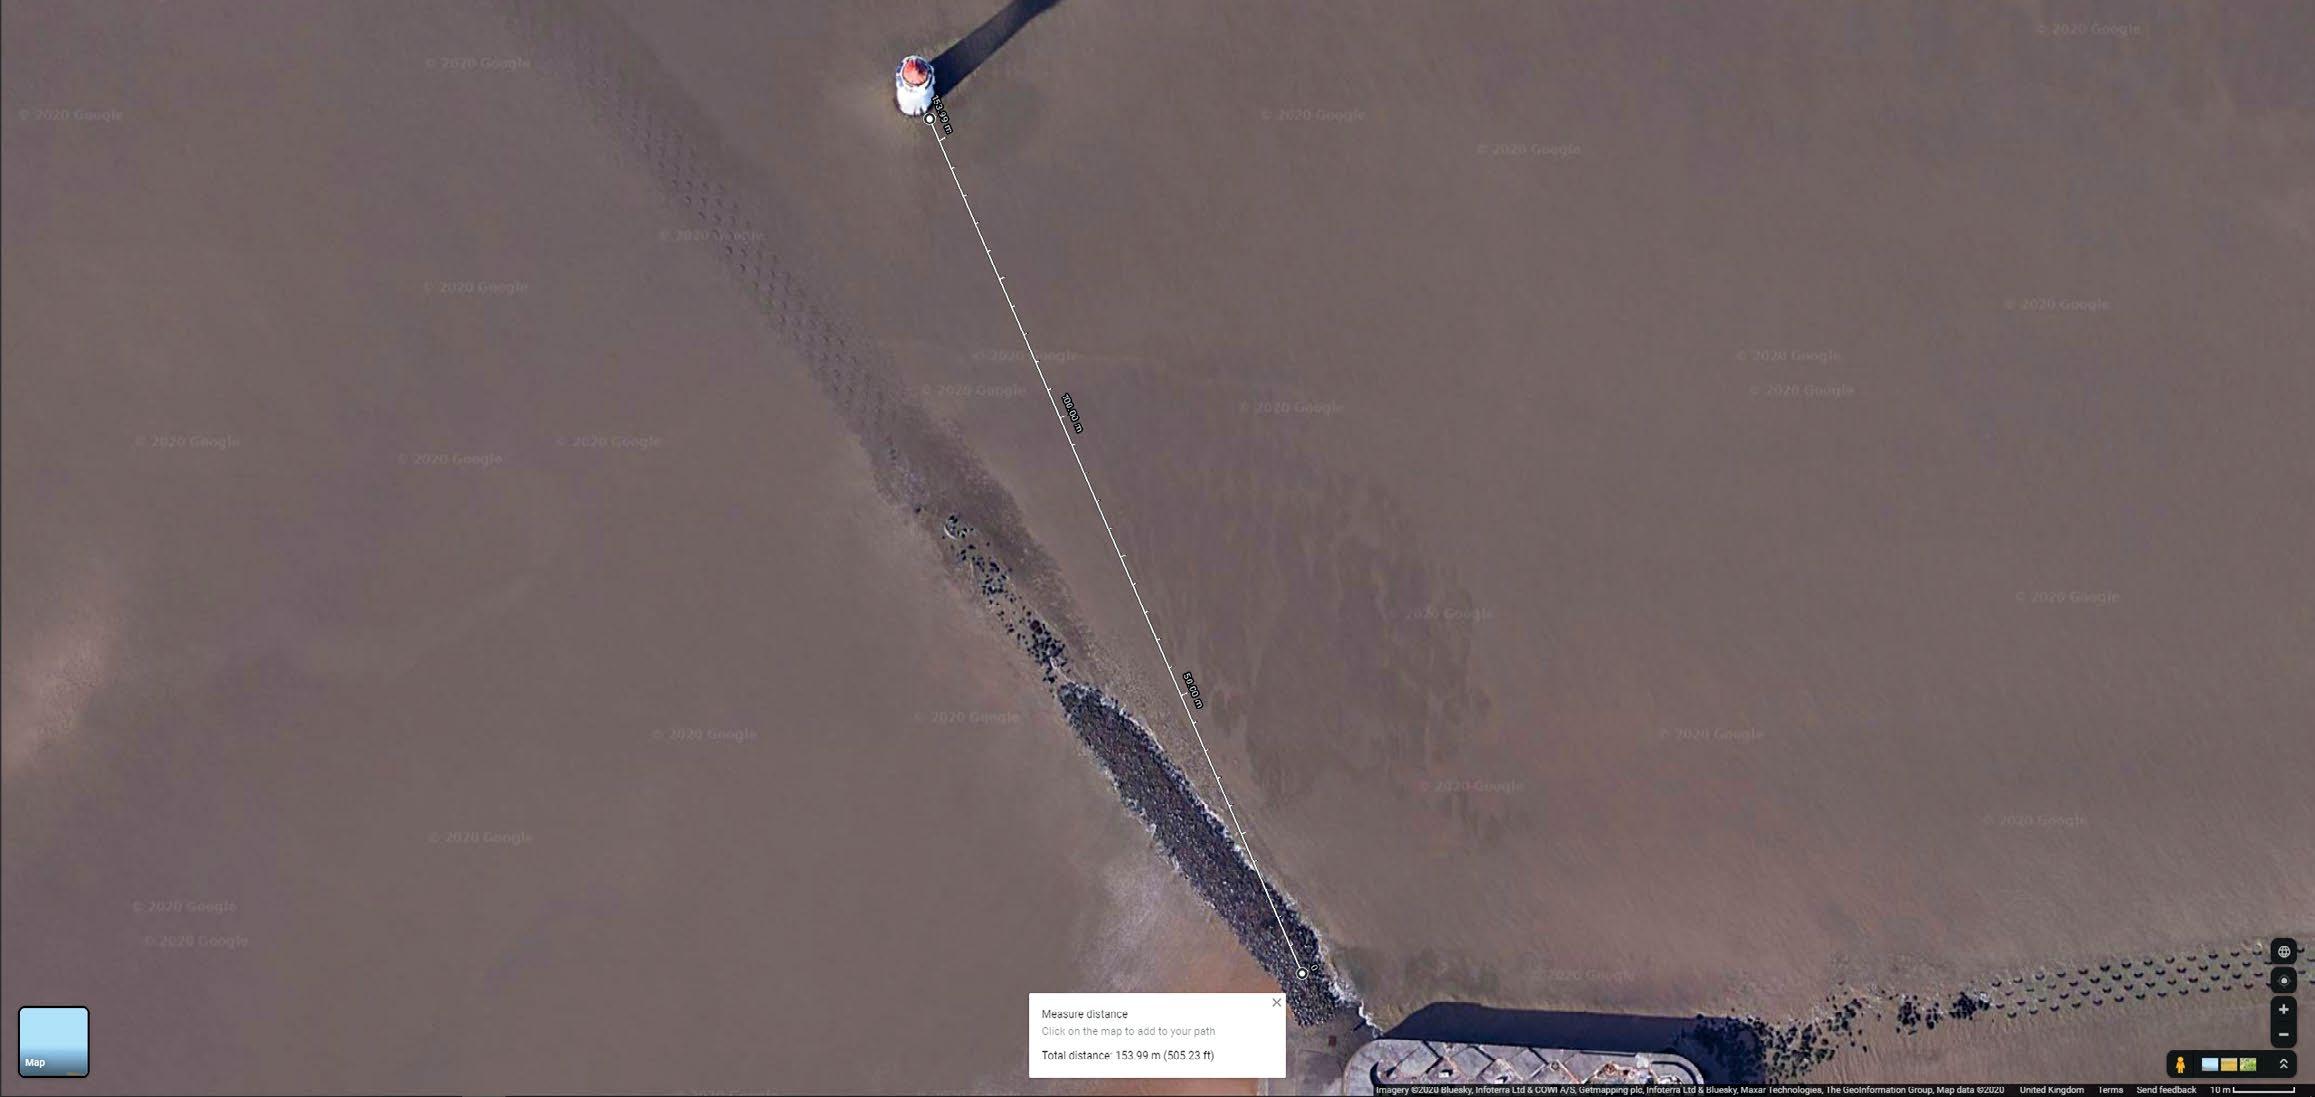
Using at least two online mapping and satellite imaging services such as OS Maps and Google Maps is beneficial because the satellite imagery can differ between the two. In the case of New Brighton Lighthouse/Perch Rock Lighthouse, Google shows the location at high tide, while OS Maps shows it at low tide. Low to mid tide is the most popular time for shooting at this location, but as you’ll see in the main image here, high tide certainly shouldn’t be discounted, and this detail was confirmed using online maps before visiting the location to shoot.
A silky smooth sunset long exposure on the Wirral thanks to a big stopper and the high tide washing over the sea defence
 Pastel sunset
34 TECHNIQUES
© James Abbott
OS Maps
OS Maps is another useful tool, and can be used in combination with a physical, printed map when on location
Recommended planning apps


The Photographer’s Ephemeris
The Photographer’s Ephemeris is an easy-to-use location-scouting app that uses Google Maps, so you can view several different types of map to research locations. There’s detailed information covering sunrise and sunset times and transit across the sky, moonrise and moonset times, moon phase, and more. There’s a free-to-use browser-based version of The Photographer’s Ephemeris, and the Android app costs £2.69 while the iOS app costs £9.99. The Apple version is more expensive, but it does include more functionality, including augmented reality for location scouting.
PhotoPills
PhotoPills is an all-in-one app for shoot planning that enables you to plan both day and night shoots with detailed information about sunrise and sunset times and transit across the sky, moonrise and moonset times, moon phase, as well as 3D augmented reality showing the Milky Way and more using several map types. The only downside to PhotoPills is that it can be complicated to use, but there are tutorial videos on the website. PhotoPills costs £9.99 in both the iOS and Android stores, and can sometimes be found on sale with up to 50 per cent off.
Google Maps
Google Maps is a useful tool for virtual location scouting and planning shoots ahead
Clear Outside
Clear Outside is a free weather app for both Android and iOS that provides the most detailed weather information of any weather app available. Seven-day and hourly forecasts are updated hourly to include low, medium, high, and total cloud cover, mist, visibility, and chance of rain, among other data. Other information includes sunrise, sunset, and transit, moonrise and moonset times, moon phase, as well as civil/nautical/ astronomical darkness, and much more. Location search isn’t great, but the information provided makes up for it.
© Crown copyright 2020 Ordnance Survey. Media 060/20 © Google 35 35 LOCATIONS & NAVIGATION
On-location planning
Nothing beats visiting a location in person
Whether you’re visiting a well-known location or one you’ve discovered on a map for the first time, it’s worth doing a recce beforehand in the middle of the day, when light isn’t favourable. The advantage of this is that you may not be able to shoot at this time anyway, so you can use your time more efficiently. Finding a location for the first time in the dark, or returning to your car in the dark can be a challenge in itself. This can be avoided with a mid-day recce. Plus, by doing a recce before shooting, you’ll be able to get an idea of the shots you’d like to take when you visit again, which will enable you to work more efficiently. There’s nothing worse than visiting a location for the first time, getting lost on the way, and then missing sunrise or sunset as a result. Sometimes it’s unavoidable due to a last-minute change of plan, but it’s not ideal.
Photography location guidebooks can be useful resources because they provide all the information you need to find locations, including providing basic maps and additional information, such as the best time of year and time of day to shoot. These take some of the legwork out of finding locations, but the downside is that other people will use them too, so the locations covered may be busy. The best way to use location guidebooks is as a starting point to introduce you to different areas of the UK, and indeed other countries. It’s possible to buy guidebooks for most parts of the UK and also abroad. So, as well as providing a resource for preshoot research, these types of book can also be taken on shoots with you for use in the field, which can be invaluable when you’re unfamiliar with an area.
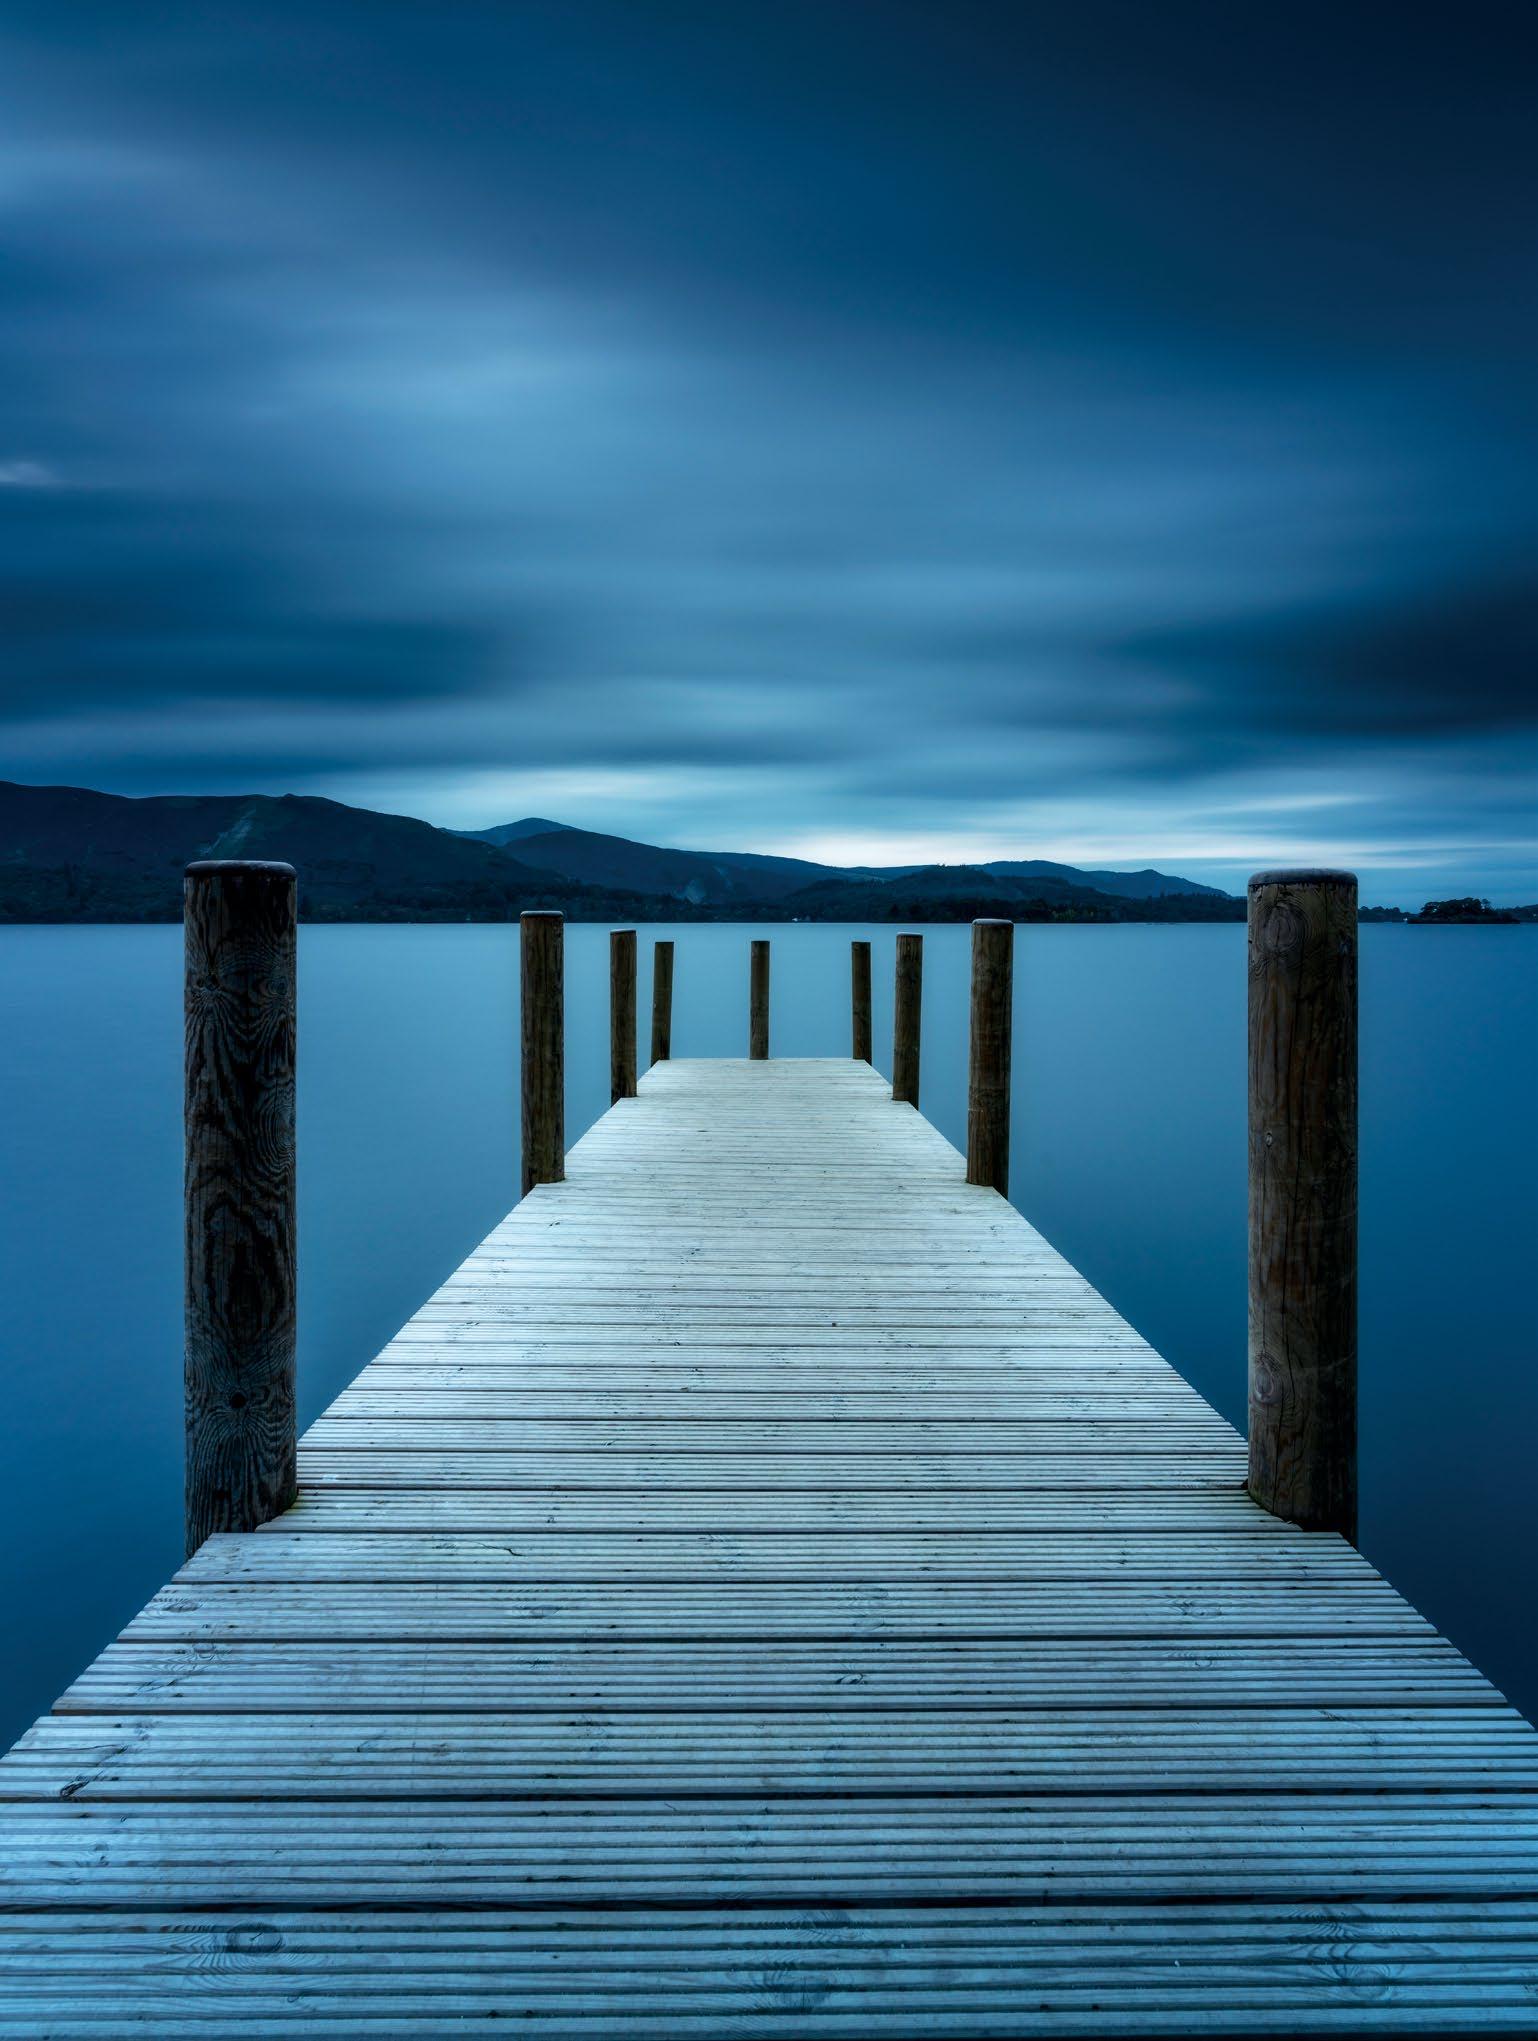
Above Scout ahead By visiting a location prior to your shoot, you can plan your shots ahead and ensure that the next time you go on location, you’ll be ready for the best moment Left Ashness Jetty Recently replaced with this new structure to the dismay of many, Ashness Jetty remains a popular spot for capturing Derwent Water in the Lake District
TECHNIQUES 36
x3 © James Abbott
Location guidebooks
Two of the best collections of location guidebooks available are published by fotoVUE and are produced by different photographers, as well as a series of books by Ellen Bowness that is published by Long Valley Books. Both sets of books are excellent and offer detailed information to help you get the best from each featured location. fotoVUE books provide more locations in each large book, while those by Ellen Bowness are smaller and suitable for squeezing into your kitbag. If you live in a country other than the UK, guidebooks are also available, including ones by PhotoTripUSA.
LOCATIONS & NAVIGATION 37
Basic navigation skills
Learn the basics of map reading, so you can follow routes with confidence and locate potentially interesting landscape features
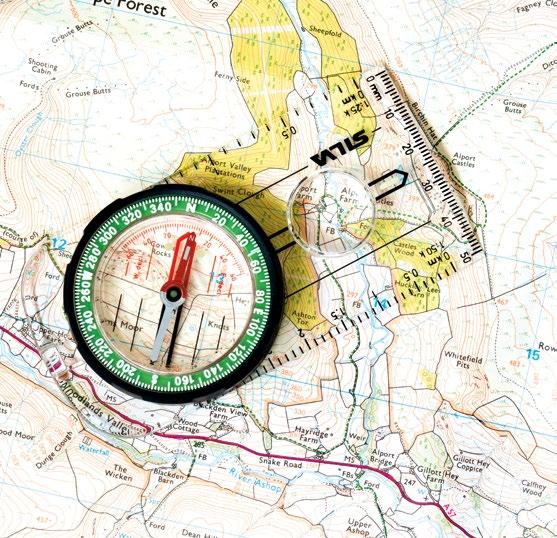
Knowing how to read a map and use a compass is essential for anyone enjoying the outdoors. In more remote locations –fells and mountains especially – it’s always recommended that you carry a traditional paper map and compass, even if you’re using a GPS-based mapping app on your phone, because if weather conditions take a turn for the worse and you can’t use GPS, a traditional map and compass, along with the ability to use them, can be a lifesaver. Recommended GPS-based mapping apps for phones include OS Maps and ViewRanger.
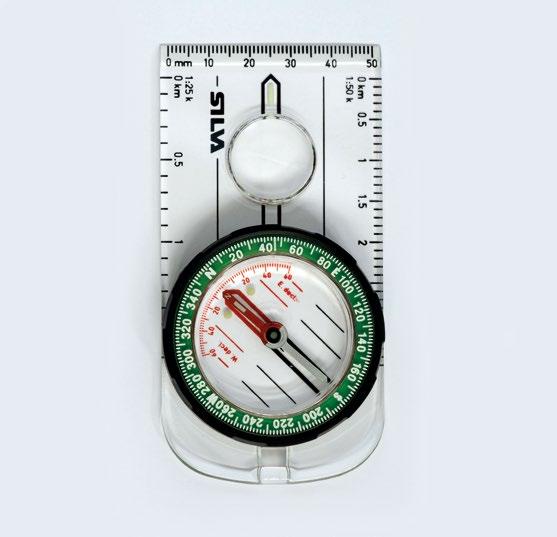
Getting to grips with the basics of maps and compasses is easy. Compasses generally consist of: a clear plastic base
with a compass housing that turns; the needle; a 1:25k map scale on the left; a 1:50k map scale on the right; a magnifying lens; millimetre scale at the front; a direction-oftravel arrow pointing to the millimetre scale.
Maps generally come in 1:25k and 1:50k scales, hence the two scales for distance measurement on the compass. Paper OS Maps are most common at 1:25k scale, with 4cm to 1km or 2.5in to 1mi – grid boxes are 4x4cm, so that’s 1km2 per square.
When you open a map, the top of the map is always north. These grid squares create a numbered grid made up of eastings (horizontal lines) and northings (vertical lines). Always think, “Along the corridor and
up the stairs”. You can pinpoint any square using these numbers. To pinpoint a specific position within a square you imagine the square is made up of 10 vertical and 10 horizontal lines, including the main grid lines, and these are numbered (see step 4). Then there are contour lines, which denote whether the ground is flat or hilly. Closetogether contour lines show a steep incline, while those further apart show a gentler gradient. Contours have numbers, which at a basic level tell you if there’s an uphill (ascending) or downhill (descending) slope. This is a basic introduction, and more info about map reading can be found on the OS website: www.ordnancesurvey.co.uk
TECHNIQUES 38
1 Holding the compass
You should hold the compass level and in front of you so that the direction-of-travel arrow is pointing forwards. With the compass flat on the map, when the direction arrow is pointing in the right direction and the needle is pointing to the top of the map (north), you can turn the compass housing so that north matches the needle and you know which direction you’re travelling in.
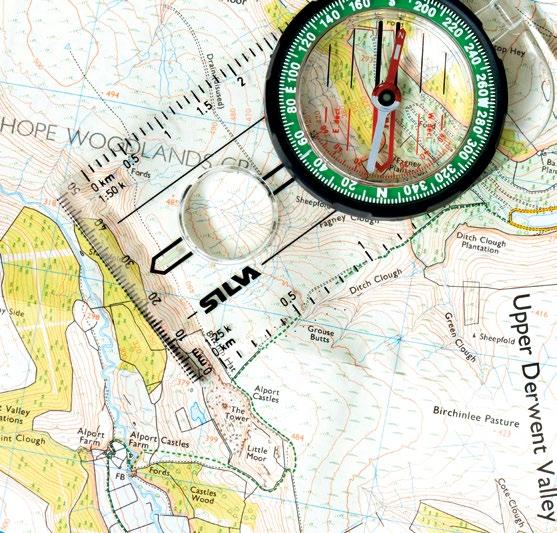
2 Finding direction
If you were at Alport Castles and wanted to walk to Ditch Clough Plantation, point the direction arrow in the intended direction of travel along the track marked with green dashes, with the red end of the needle (north) pointing towards the top of the map. Turn the map until the north needle and direction arrow match up, with the bottom of the compass facing you.
3 Measuring distance
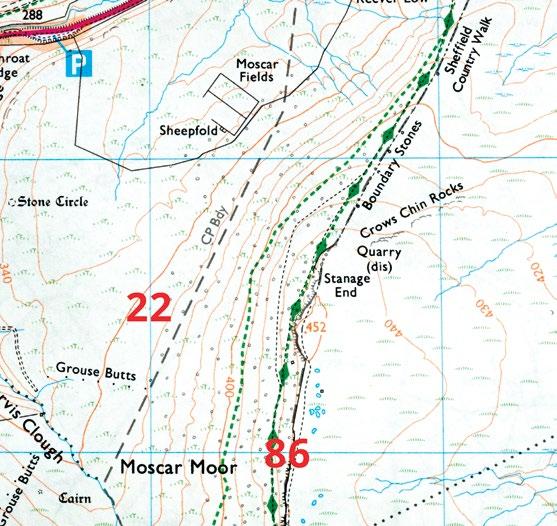
The previous step shows that you need to follow the track northnorth-west towards Birchin Hat before turning right to continue following the track north-east towards Grouse Butts. This map is 1:25k scale, so using the distance scale on the compass you can see the distance of the track to Ditch Clough Plantation is 1.3km from the point where the track turns.
4 Grid references
When you record or find a grid reference, always give the easting (horizontal line) first and the northing second (vertical line). So read the number associated with the bottom horizontal line of a square, and then the one for the left vertical line. Here that would be 86 and 22. To turn this into a six-figure reference for Crows Chin Rocks, it would be 867 226.
Exploring the landscape
A combination of maps and surveying the landscape while walking can be a great way to find new locations to shoot
 ©
James Abbott
©
James Abbott
LOCATIONS & NAVIGATION 39
Work the location
Squeeze everything you can from the location and cover every option
When approaching any location, it’s always best to do so with an open mind. Whether it’s a well-known honeypot spot or one you’ve found on a map, even with a wealth of research, you will often still need to think on the spot and respond quickly to a variety of different challenges.
Challenges can often become opportunities, and it’s this unexpected aspect of landscape photography that makes it exciting –especially when you visit a place at the perfect time of year, at the perfect time of day, and the conditions are, well, perfect.
These occasions are few and far between, but when they do occur it’s always best to cover as many compositions as possible, shooting each composition in both landscape and portrait format so you can take advantage of the conditions – you may never experience them at that particular location again. Plus, doing this may only take 30 seconds per shot on the day, which is much less time than a potential revisit if you get home and realise that a shot would look better if it was taken in a different format or a slightly different way.
Of course, having that research behind you is better than not having it, but it’s these unexpected opportunities and conditions that you can never really anticipate. For this reason, it’s always best to be on location around an hour before sunrise and up to an hour after sunset to give you time to respond and capture the light as it changes. Quite often, the best light comes at these times, but that is down to personal taste, as some landscape photographers prefer vibrant colour and soft light, while others prefer the contrast of the sun as it hits the horizon.
Above Play with composition Try taking shots from different angles and positions to capture a range of perspectives on your chosen subject – make the most of your time in that place Right Get ‘the shot’ Bag that perfect shot you wanted first, so you then have the freedom to experiment with different techniques and compositions while you’re on location x6 © James Abbott TECHNIQUES 40
Left Think of formats
Will landscape or portrait format create the best shot? Try both when on location to have a range of options
Revisit locations and use different techniques
These two images were taken six months apart – one in autumn and one at the end of winter – and the shooting position is almost identical. The autumn shot was a standard sunrise shoot, while the winter image was taken at the end of blue hour when it was
almost pitch black, and required a 4.5-minute exposure that captured car light trails. Revisiting locations is a fantastic way to capture them in different seasons and in a different light. Another approach that can work well is to shoot the same scene using

Above Suitable conditions
Different conditions suit different scenes and images, so be on location for the best time of day for your scene
different techniques, which could include ND grads for sky detail, grads and a big stopper for ultra-long exposures, HDR, or waiting until after dark and painting the foreground with light. The opportunities can be as endless as you make them.
LOCATIONS & NAVIGATION 41
WINTER AUTUMN
James’s local location tips
James gives his top tips for finding opportunities for landscape shots
1 Go for walks Going for walks in the countryside close to where you live is the perfect way to find new and lesser photographed locations that you don’t have to drive for hours to reach.
2 Scour Google Maps Google Maps is the perfect resource for finding places you might not necessarily see when you’re walking or driving, and is ideal for planning shoots in general.
3 Explore local woodland
Almost everyone has woodland near their home, including those who live in cities. It’s a challenging yet highly rewarding subject.
4 Shoot at night The darkness of night can reveal new and exciting opportunities, ranging from astrophotography to painting with light using torches or even your flashgun.
5 Micro landscapes Wide-angle vistas are the most obvious approach to landscapes, but you can also focus on the minutiae of the world by shooting ‘mini landscapes’ with your macro lens.
jamesaphoto.co.uk
@jamesaphoto
The rule of threes Woodland photography is often seen as a more unique form of landscape photography as most shots are one of a kind, but composition and technique are often the same
TECHNIQUES
42
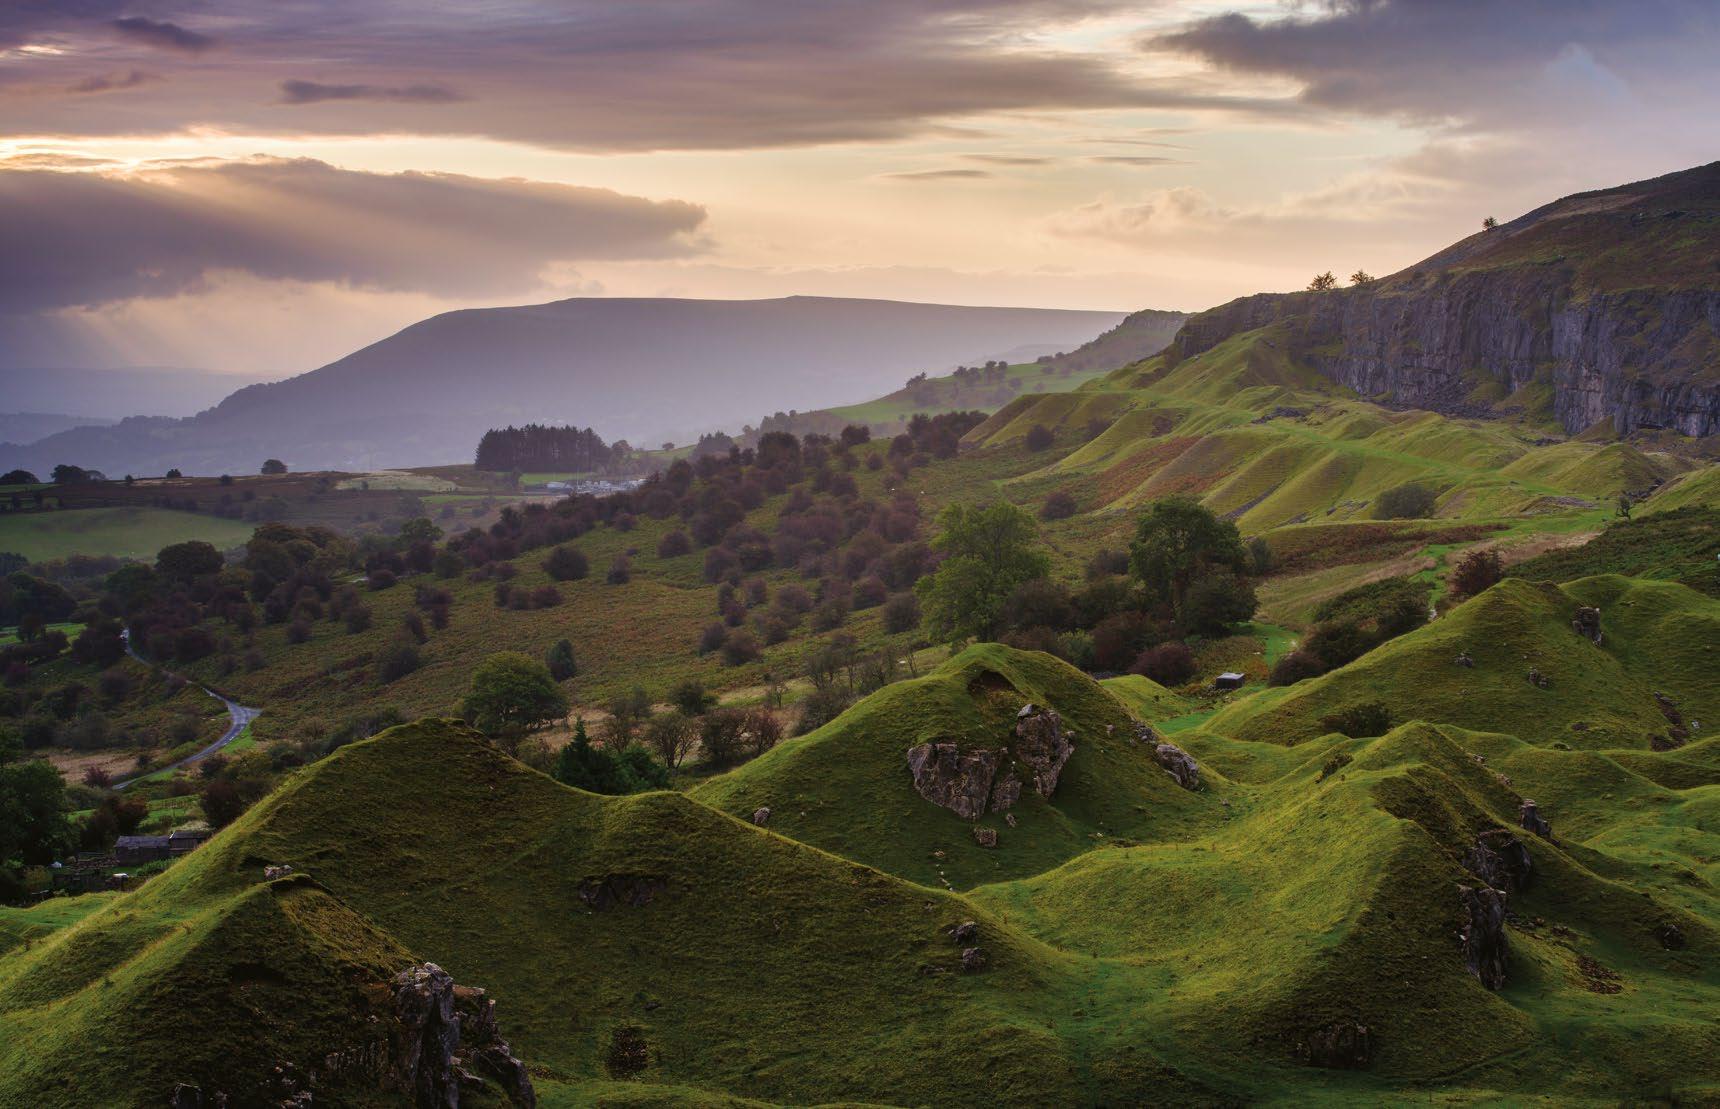
Buachaille Etive Mor from the Cauldron
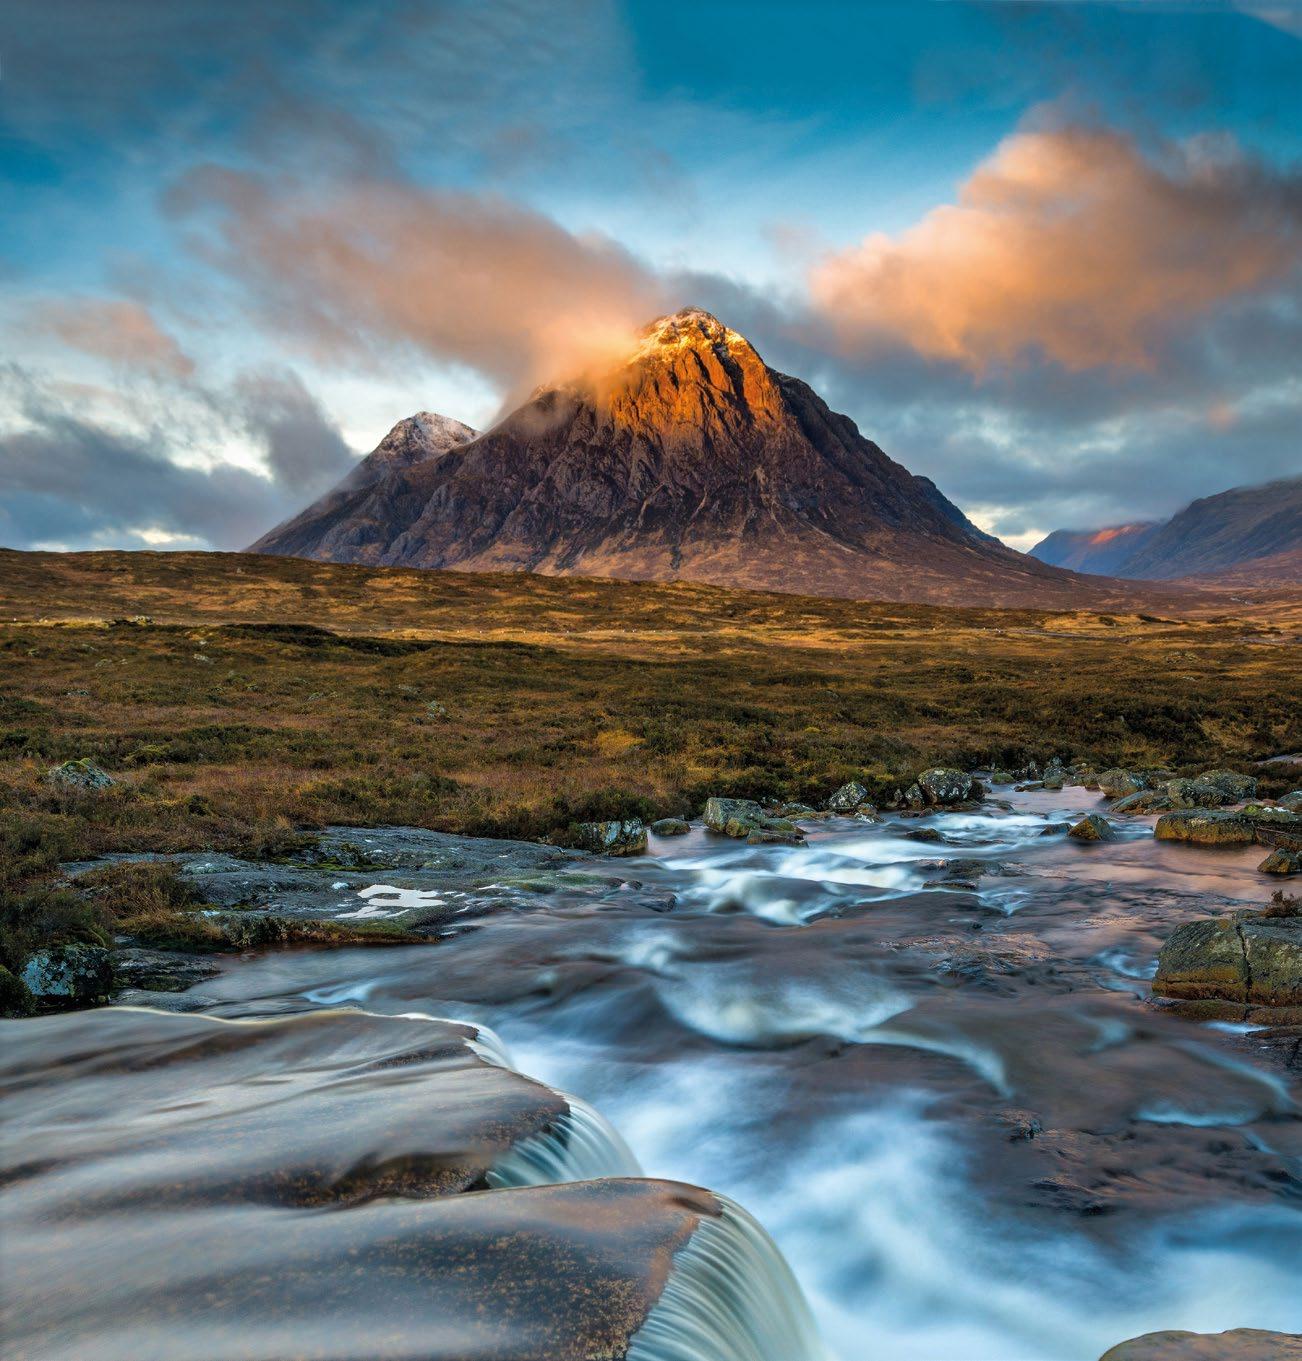
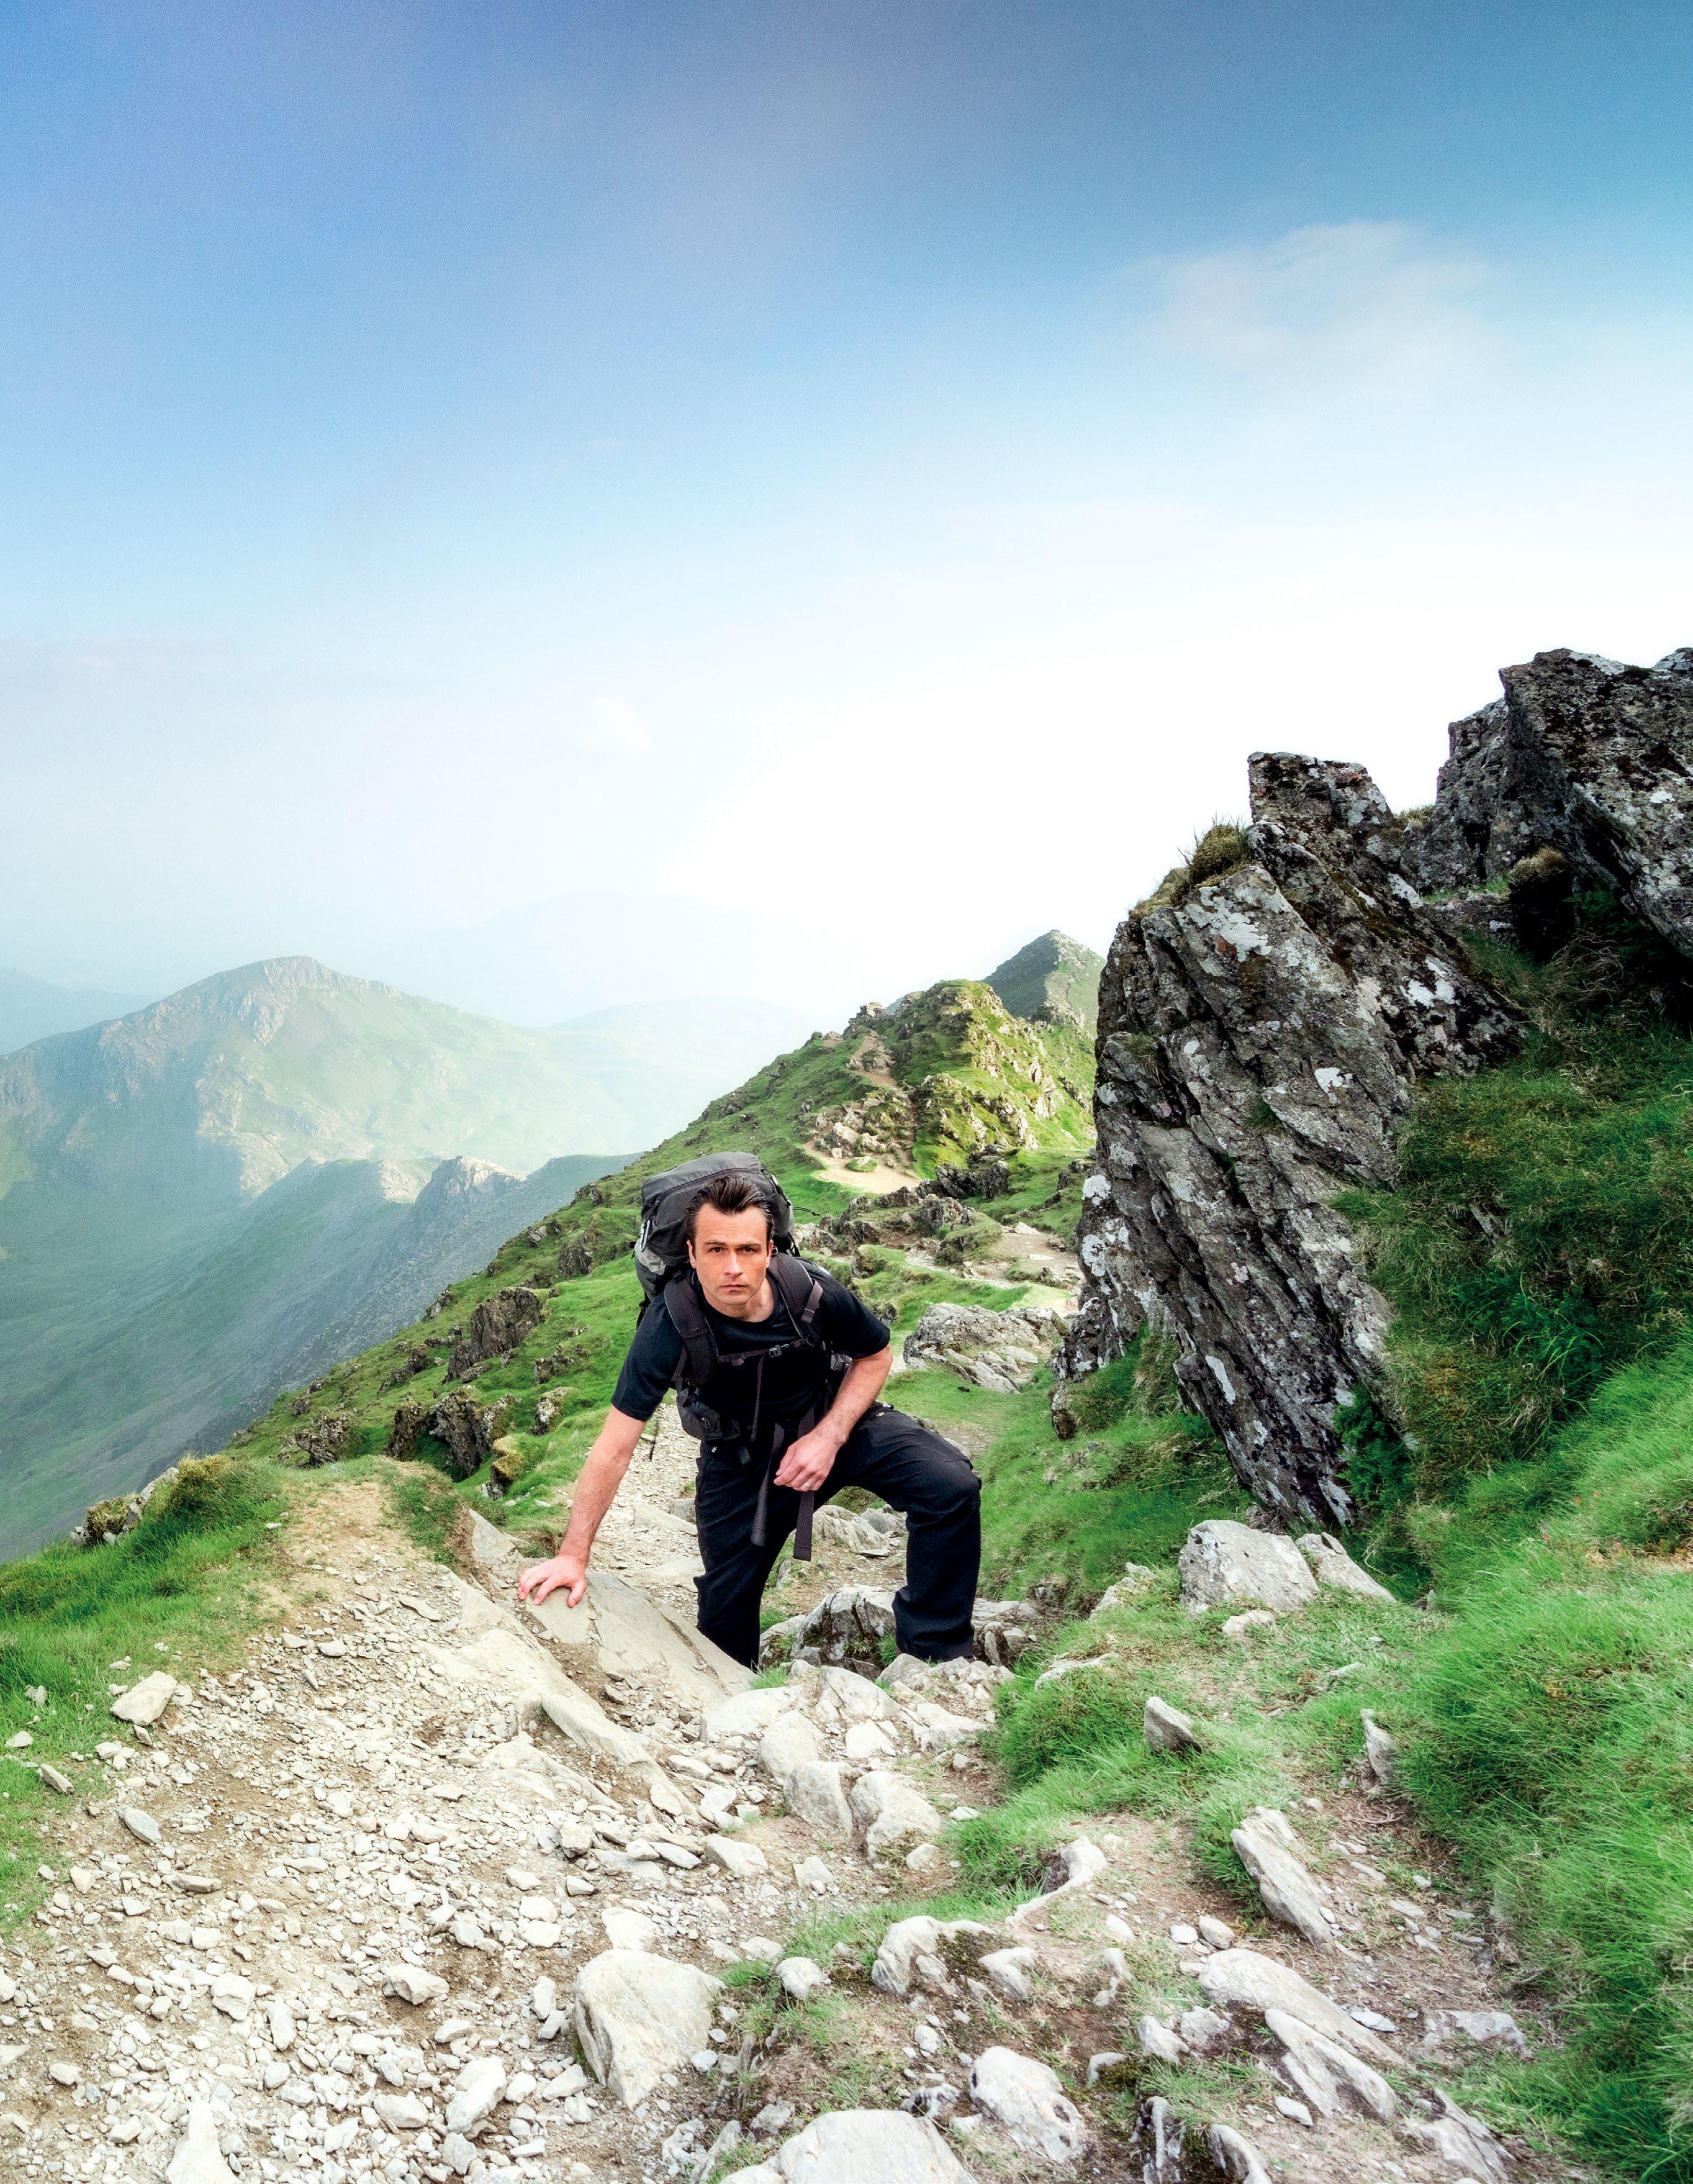
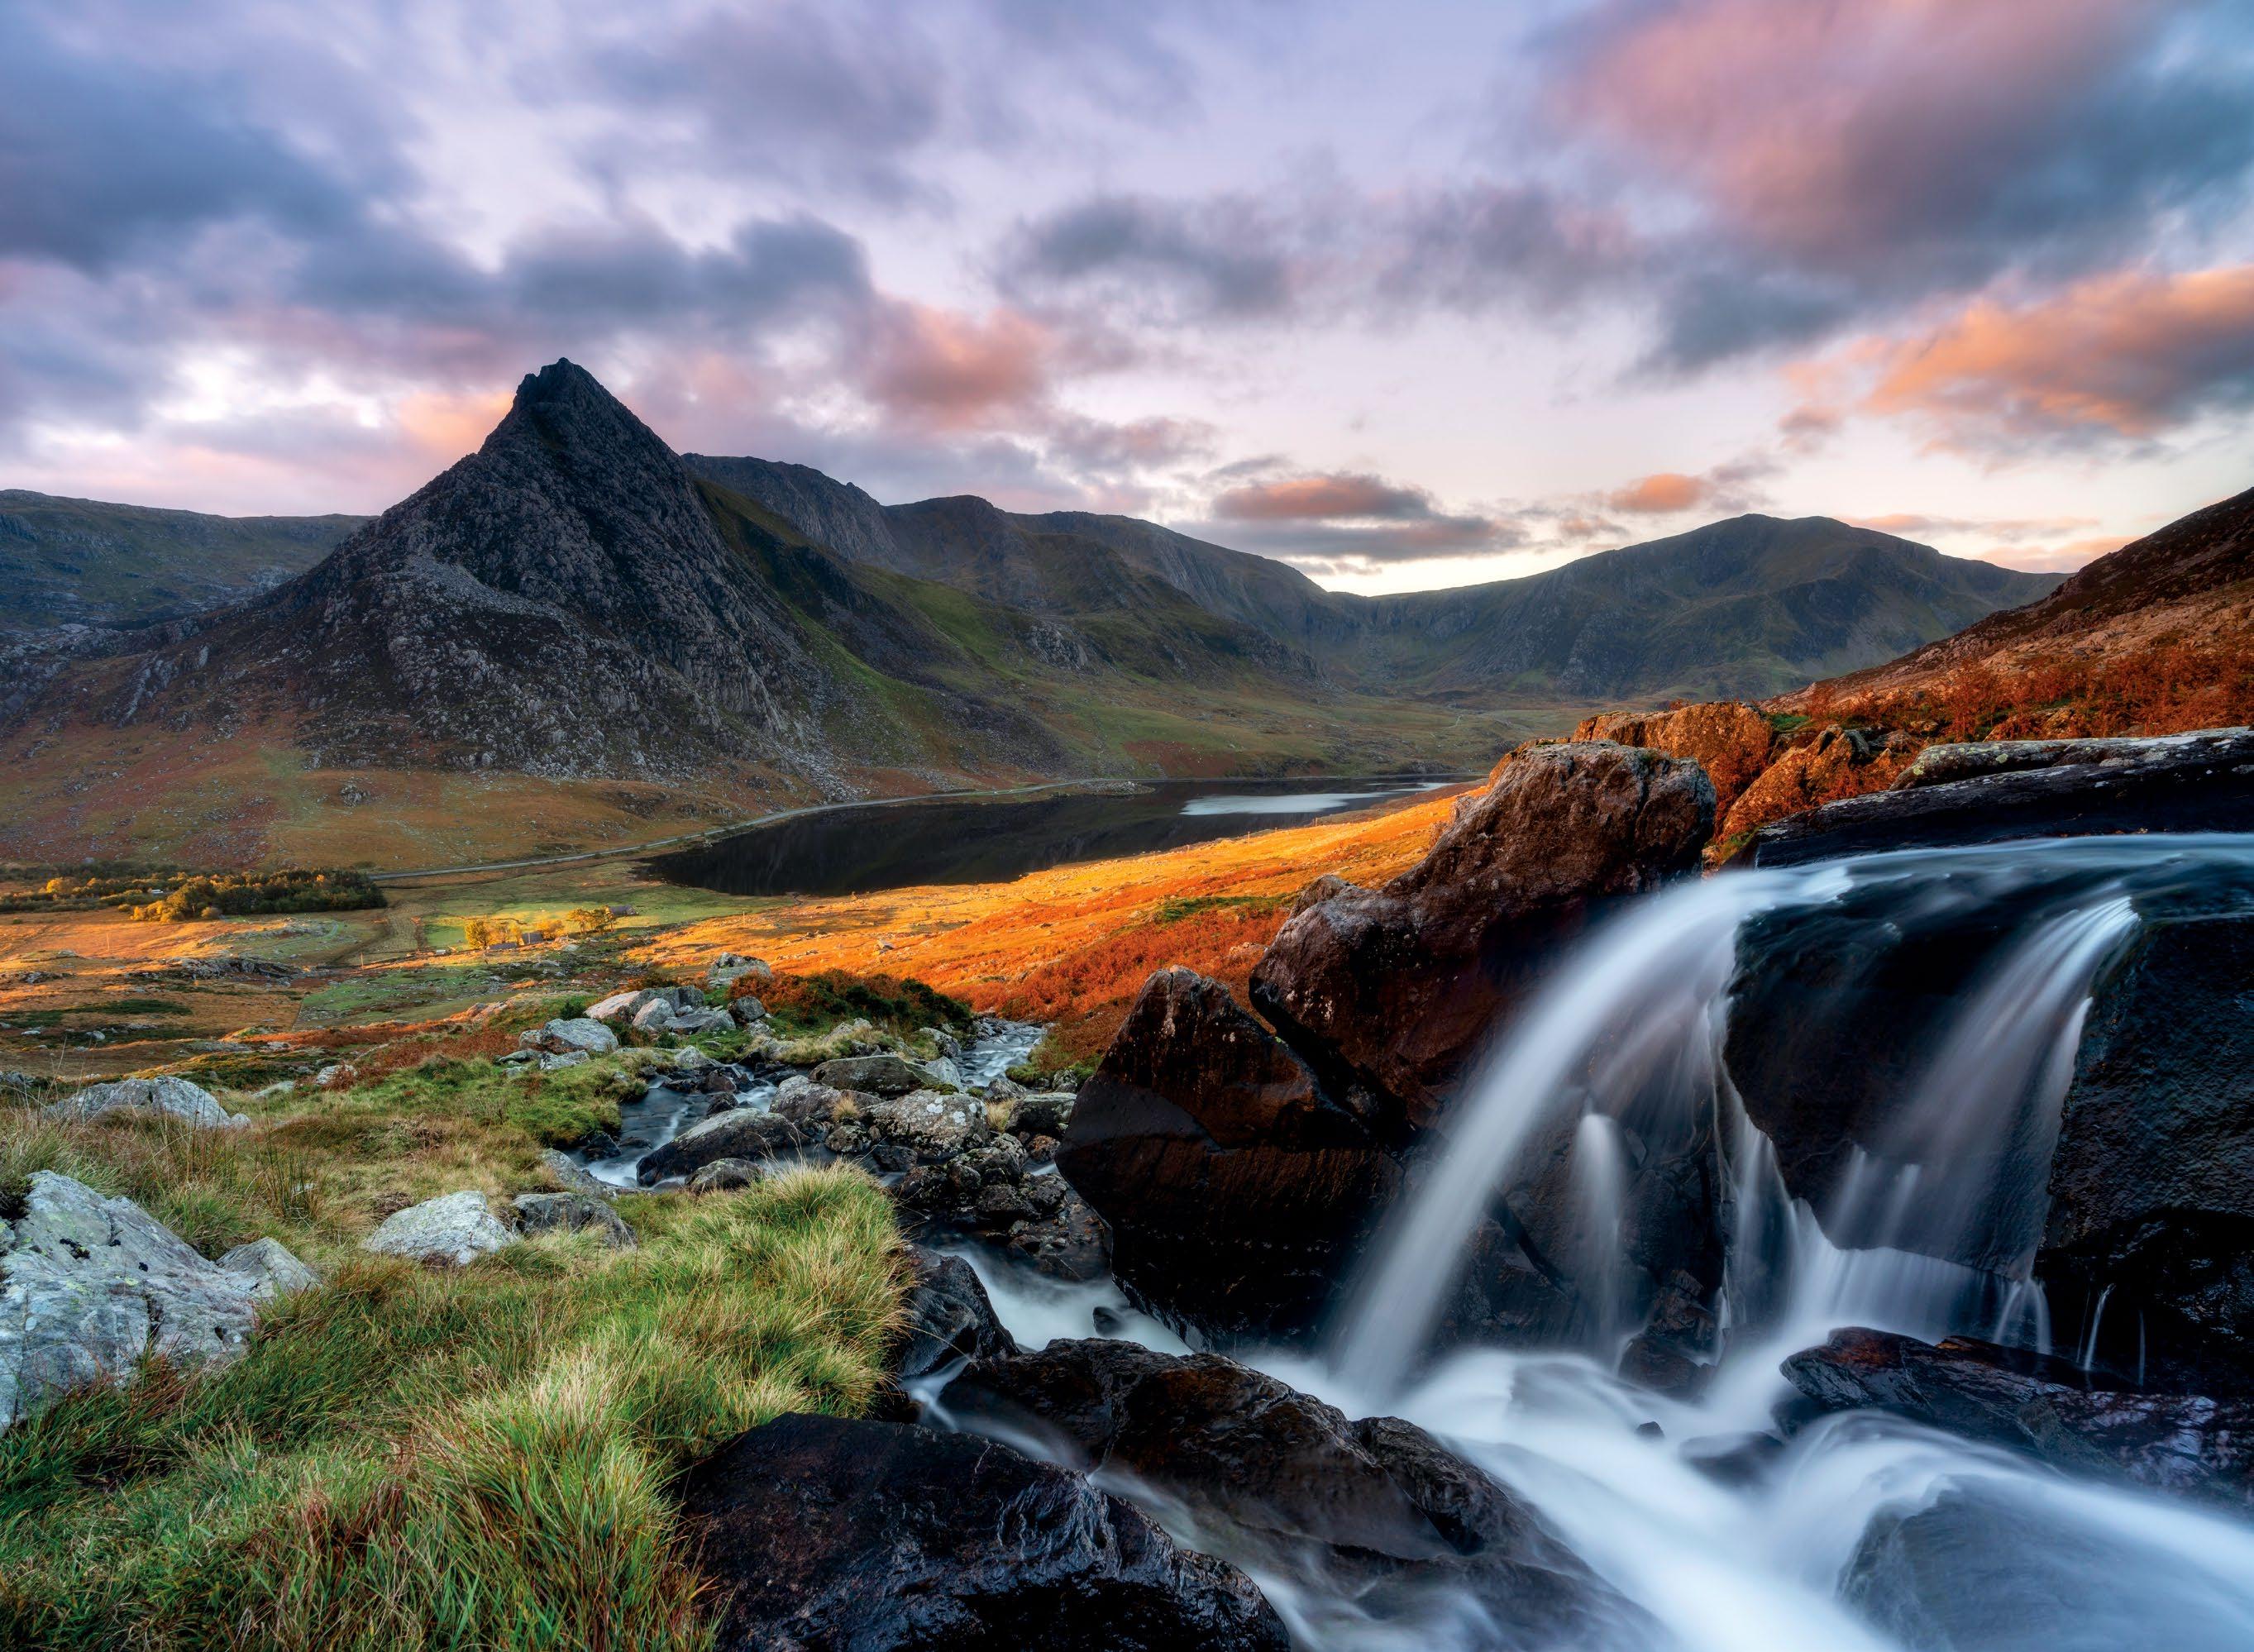
This is Stob Dearg. At 3345ft, this is the highest point on Buachaille Etive Mor and is probably the most photographed mountain in Scotland which guards the entrances to both Glen Coe and Glen Etive. This location has so much photographic potential. This is a long exposure that has blured the movement of the water and uses the foreground rocks to draw from the bottom of the image all the way to Stob Dearg. A different lens, shooting angle or technique would transform this shot completely. So, when you visit even the most photographed location, be sure to experiment. You might be keen to get the classic shot, just make sure you try somethin a little different too. Choose black and white, use an unconventional shooting angle or lens and see what results you get.
LOCATIONS & NAVIGATION
© Getty/ Peter Ribbeck
43
MASTER COMPOSITION
We give a masterclass on how to take better landscape shots. Here’s how to change your compositions, make them more eye-catching, and frame stunning scenes
44 TECHNIQUES
The landscape genre is a brilliant photographic avenue to explore, and whether you’re well versed or are yet to turn your hand to them, post-lockdown is the perfect time to get out there and expand your portfolio. The UK is full of scenic mountains, forests, gardens, and coasts that are never far away, but many countries are spoilt for choice when it comes to stunning vistas. All these locations make for strong photos whether dappled in sunlight or drenched in a torrential downpour, so you can be sure to get something all year round. Composition is key to a great landscape, and there will usually be a main element
you can place in your frame to make it the focal point you want the viewer be drawn to. Classic examples include a tree, mountain peak, the sun setting over the horizon, or even a lighthouse towering out of the sea. However, it can be a juggling act to position this key point in relation to the other elements in your scene, such as the horizon, sky and lead-in lines. Even with minimalist landscapes you’ll have to contend with these, though you’ll have fewer elements to position in the shot, so framing will be a little easier if you go down this route.
In this feature we’re going to delve deeper into how the placing of these elements can
be changed or repositioned to make them work as strongly as possible and achieve a visually arresting and engaging image. We’ll be looking at classic approaches to framing your landscapes – tried and tested methods such as the timeless rule of thirds or golden ratio – but we’ll also explain when it’s okay to break away from these rules when they simply don’t work with the scene in front of you. We’ll reveal how different lenses and focal lengths can have a dramatic effect on the overall look of your landscape, as a wide-angle or fisheye lens will deliver a very different look and style compared to, say, a telephoto lens. Let’s get started!
45 MASTER COMPOSITION
© Gettyimages
Classic compositional approaches
Improve your landscape compositions with these tried and tested techniques
Since the dawn of photography artists have been experimenting with different compositions. Over the past few centuries, however, we’ve come to accept some basic fundamental rules that you can employ if you’re struggling to get a decent composition of the scene in front of you. Many of these compositional tricks have been borrowed from other visual mediums like paintings or drawings, and are seen as easily transferable to photography.
You’ll have likely heard of the rule of thirds before, and it is one of the classic compositional approaches that we’ll explore in more depth below. The reason you’ll have heard of it before, and probably even used it to frame your shots previously, is for good
reason – it’s a tried and tested method that forces you to position and space your focal points and horizon in a way that makes use of the available space and draws the eye in. An image is typically perceived as more photogenic if the focal point is carefully positioned one third of the way in from one or two sides, giving it more room to breathe compared to if you were to butt it up against the frame edge.
However, as with any rules, they’re only guidance, and if you have a creative reason
to go against the rules that helps you tell the narrative you want, then be sure to try that approach too.
We’ll take a look here at some other lesser-known compositional rules that can help you to improve your framing too, such as the golden ratio, which is better suited to compositions with a central focal point. We’ll also look at how the mathematical equation of Fibonacci’s spiral crops up time and again in nature and can be used to improve your landscape compositions.
46 TECHNIQUESTECHNIQUES
Many of these compositional tricks have been borrowed from other visual mediums
Fibonacci spiral Consider trying a lessis-more approach

The golden or Fibonacci spiral is a mathematical pattern coined by Fibonacci. The amount that this spiral pattern crops up in nature is eerie, such as inside shells, fossils and many plants. Now you’re aware of it you probably won’t be able to stop seeing it in the real world. You can take advantage of this famous pattern when composing your landscapes, as you may be able to find a lead-in line in your scene that spirals towards your focal point, such as this wonderful spiralling staircase.
It can be useful to challenge yourself by shooting with a more minimalist approach and including only one main subject in the frame. This will help you to get more creative with how you compose the active and dead space around your focal point, like the tree in this image, and also gives the viewer a single obvious focal point to make the composition work more effectively.
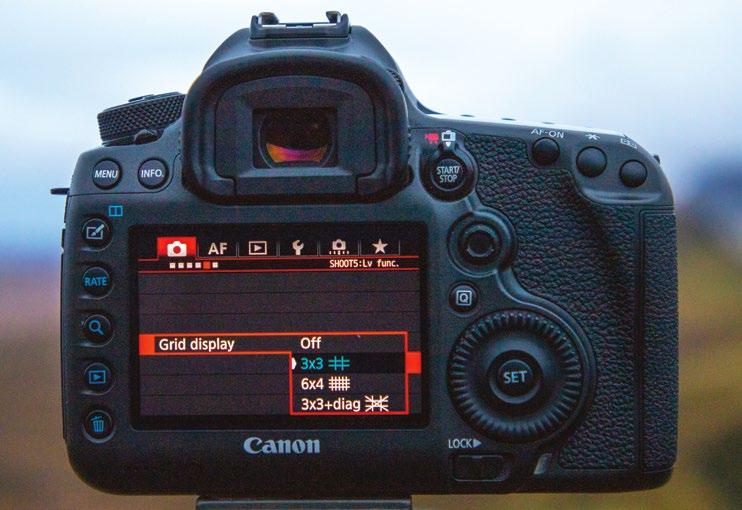
Rule of thirds Golden ratio
The rule of thirds is the quintessential composition technique that you’ve no doubt heard of. This is where you divide your frame into nine equal boxes so that you have a 3x3 grid, and then line up your horizon with one of those lines, depending on whether you’re shooting in the portrait or landscape orientation. You then position your focal point on one or more of the cross sections of the grid. The reason this works so well is because it gives your image a good amount of breathing space, where your subject or focal point isn’t uncomfortably close to the edge of the frame, or right in the middle.
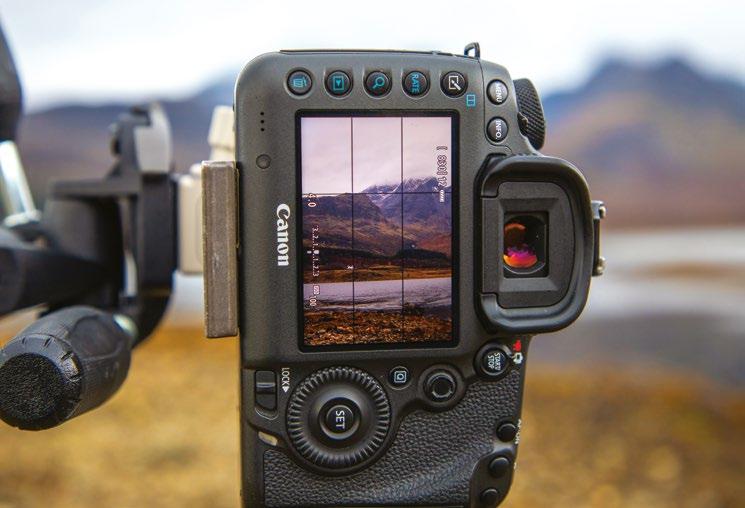
The golden ratio is similar to the rule of thirds technique, as the frame is divided up into nine boxes. What makes it different from the aforementioned technique is that the golden ratio uses the ratio of 1:1.618, so the boxes aren’t equal. The middle horizontal and vertical boxes that form a ‘cross’ shape are much more squat than those in the corners, and this places the intersecting lines of the grid much more centrally. The effect of this is that the action will appear to happen in the middle of the frame and will help to draw the viewer’s eye in towards the heart of your shot.

©
© Dan Mold 47 MASTER COMPOSITION MASTER COMPOSITION 47
© Gettyimages © Gettyimages
Gettyimages
Aspect ratio and focal length
Discover how the size of your camera’s sensor and the lens you attach to it can play a big role in the composition of your images
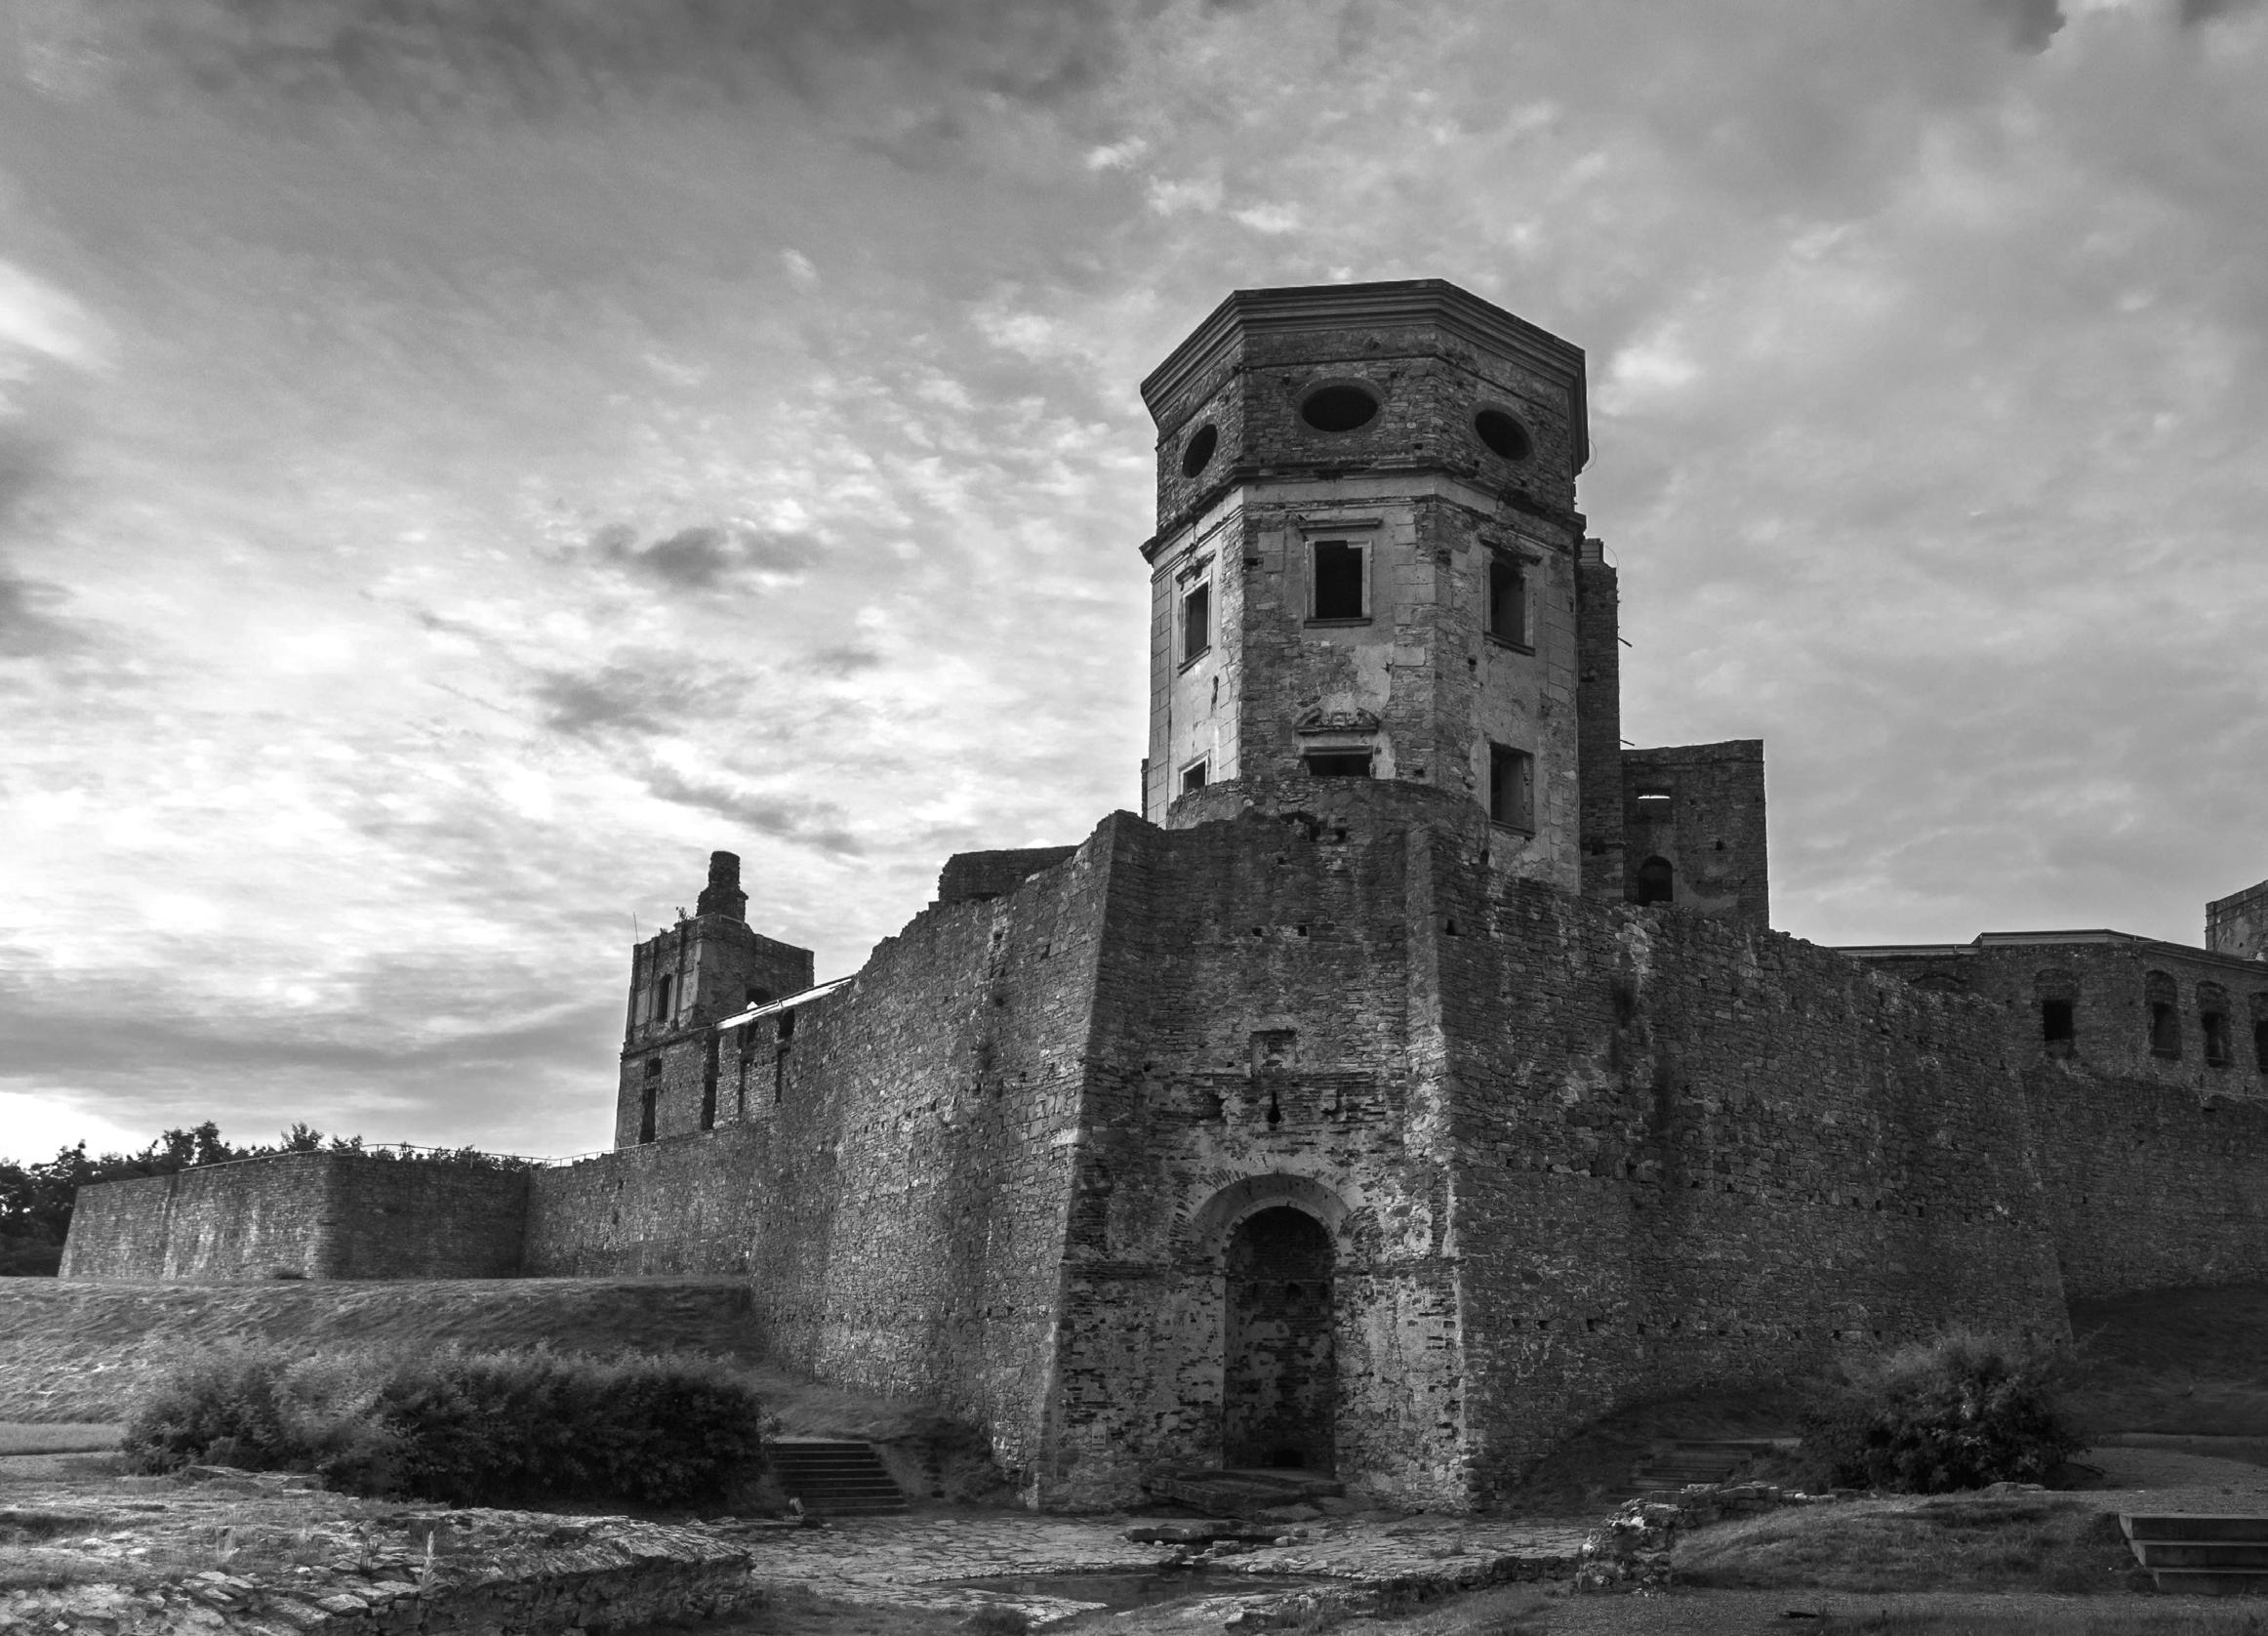
It’d be easy to think that when you take a picture you’re completely in control of how the landscape will look in the frame, but in many ways you’re locked into the predetermined aspect ratio. For a printed image your aspect ratio would be the proportion of the width compared to the length, so an image 30cm wide by 20cm tall would have an aspect ratio of 3:2 – or 2:3, if it was in portrait orientation.
An aspect ratio of 3:2 is pretty standard in digital photography, though it’s actually determined by the design and size of the electronic sensor inside your camera body. Some camera manufacturers, such as Olympus and Panasonic, implement vastly different aspect ratios, as their native images come out at 4:3, so your composition would need a completely different approach compared to using the standard 3:2 ratio.
Although you’re tied into the natural framing that your sensor outputs, you can crop in to your preferred aspect ratio in Photoshop, and many cameras also let you crop to change the aspect ratio in-camera, but at the expense of losing pixels and resolution. There isn’t a ‘correct’ aspect ratio to go with, as it’s completely down to personal preference, but it’s worth being aware of this before splashing out on a new camera.
Another part of photography that you may not think would have too much bearing on your compositions is your choice of lens and the focal length you choose to shoot at. To keep things simple we’ll be looking at the focal lengths of a full-frame camera here, though if you’re
using a cropped sensor like an APS-C you can find out the film equivalent focal length by multiplying them by the crop factor, such as 1.5x on Nikon or Sony’s APS bodies, 1.6x on Canon, or 2x on Micro Four Thirds.
When you zoom in more on a scene the perspective changes as the elements in your scene become more compressed, which can have a huge impact on how you compose your shot. Many photographers actually prefer to shoot landscapes with a long telephoto lens for this reason.
Four different aspect ratios
16:9
Many cameras have the ability to shoot in a much wider 16:9 aspect ratio, though this is done most of the time by cropping the sensor and losing resolution. It’s a great option if you are after a more cinematic look for your landscape shots, or want to shoot video.
3:2
This is probably the most common aspect ratio you will find in a digital camera, with many Nikon and Canon camera models adopting full-frame and APS-C sensors that have a width-to-height ratio of 3:2, such as 6000px by 4000px. It is a very popular option.
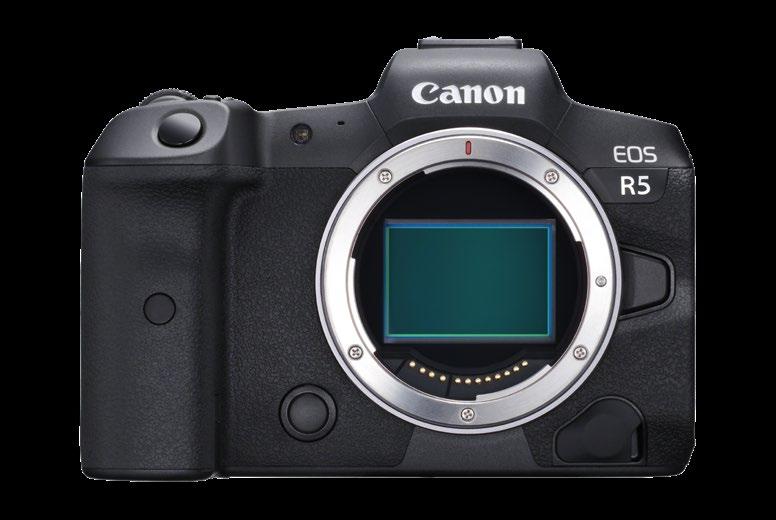
4:3
Olympus and Panasonic have been using a Micro Four Thirds sensor in their camera models since 2008, and it has proven popular with photographers for its slightly more square aspect ratio of 4:3, which also makes better use of the imaging circle that lenses produce.
1:1
This aspect ratio means the length of your picture is equal to its height, making it square. This can be a powerful framing technique as it’s not as common as others, although it has become more popular recently because of Instagram’s square image format.
48 TECHNIQUES 48 TECHNIQUES
Different focal lengths
WIDE-ANGLE LENS – 20MM
Wide-angle and ultra-wide-angle lenses allow you to squeeze in loads of the scene in front of you, and you can include the foreground, midground and background in the frame. You may see some barrel distortion around the edges of the frame as a result, and this usually becomes more apparent the wider you go.
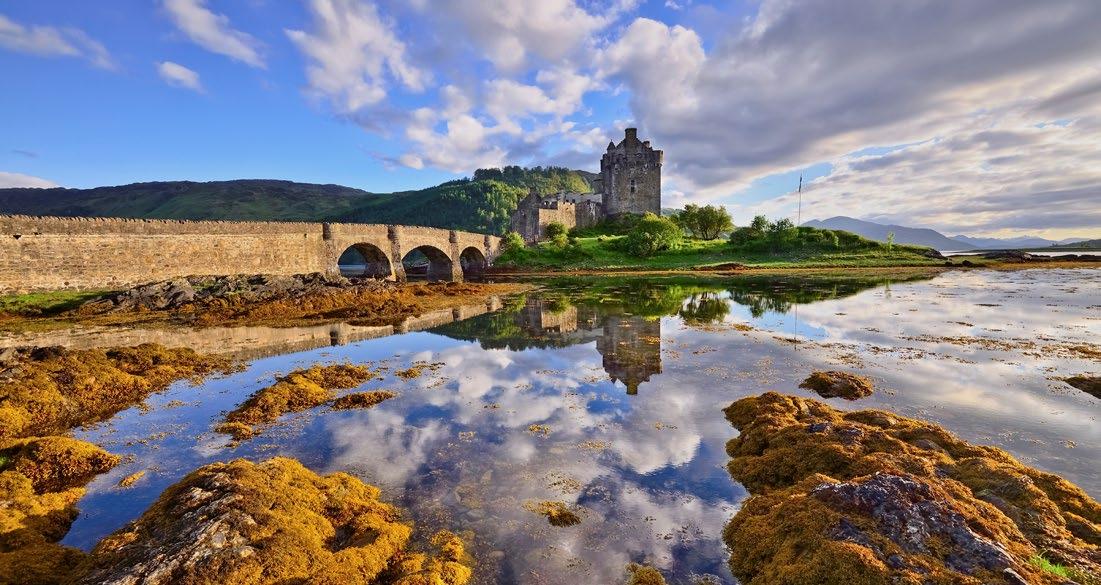
SHORT TELEPHOTO LENS – 105MM
STANDARD LENS – 50MM
This focal length is often referred to as ‘standard’ because it has a similar angle of view as the human eye, so images taken at this focal length look natural to us. Focal lengths wider than this are called wide angle, while focal lengths after this, which have a more narrow field of view, are telephoto lenses.
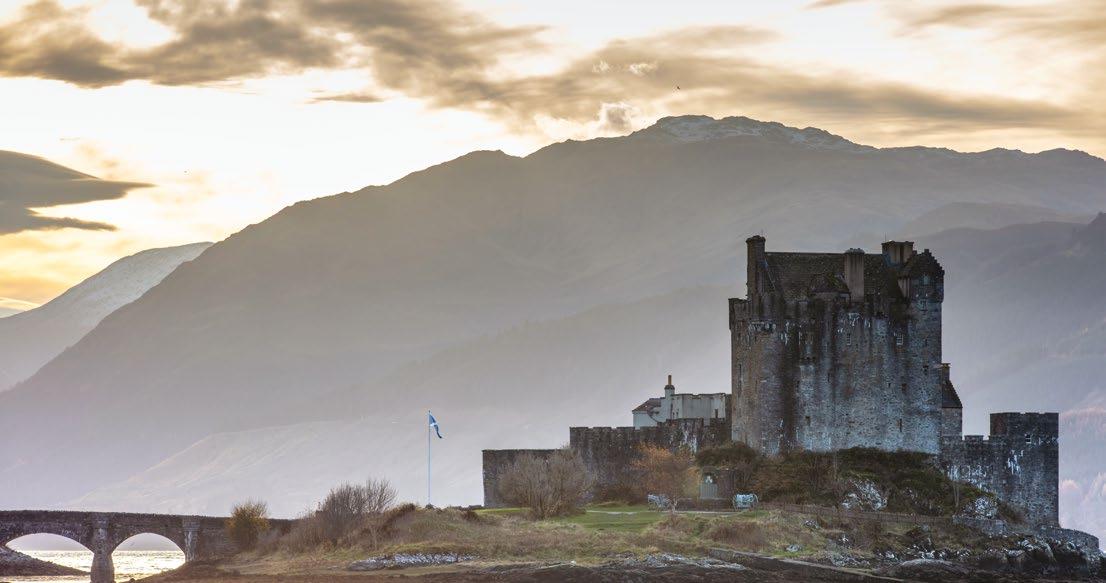
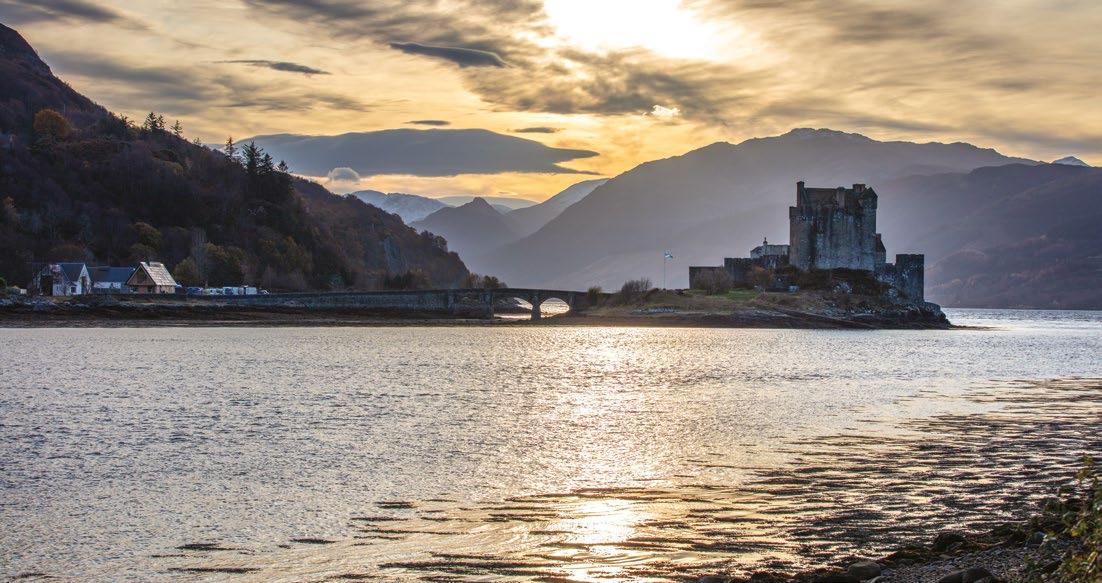
TELEPHOTO LENS – 200MM
A focal length of 105mm has more zoom than the standard 50mm, so there’s more compression between the objects in your frame. When you go above 50mm you’ll start to see pincushion distortion creep into the frame, which is where the outside edges appear to be pinched in towards the middle of the frame.
Now we’re at the top telephoto end, and magnification is much higher, making distant subjects like wild animals appear larger in the frame. These have large amounts of compression, making it much easier to blur the background when shooting portraits, or to compress the rolling hills of a landscape scene.
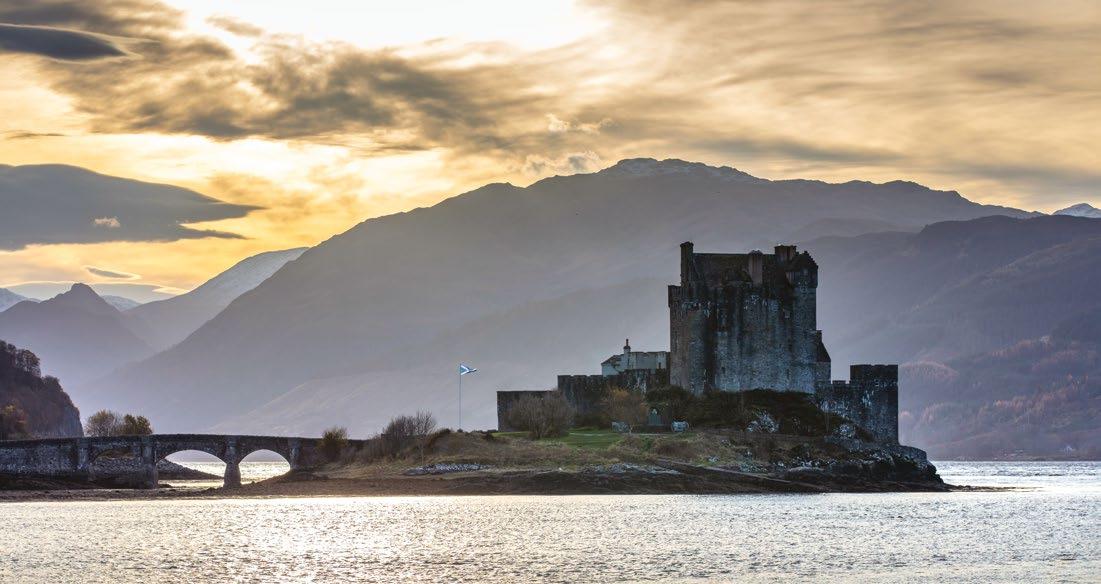
© Gettyimages 49 MASTER COMPOSITION 49
Lead the eye in
Get to grips with lead-in lines in your landscapes
Lead-in lines, often called leading lines, are so-called because they lead the eye in towards a point in your picture. If placed carefully, they can gently guide the viewer’s eye towards a specific point in the landscape that you want to be the focus for your shot, such as a tree or structure that will anchor the shot. They’re a very handy framing device that you should always consider when shooting your landscapes, and it’s often worth just double-checking and having a look around to see if there are any natural formations such as the coastline in this image, or man-made structures like paths or fence posts that can be used to take the eye from the outside of the frame in towards the centre. You’ll be surprised what you can use to lead the eye in when you start getting creative.
1Use lead-in lines to draw the eye in
A lead-in line is a great way of including something in the foreground of your composition that has a line to naturally guide the eye towards your focal point. For this shot of Normanton Church in Rutland Water, we composed it to include the hard edge of the shoreline in the lower half of the frame, which arches round and brings the eye towards our focal point. By recomposing and aiming the camera up a little, we lose the lead-in line and any foreground interest, so the image is much weaker and dominated by the sky.
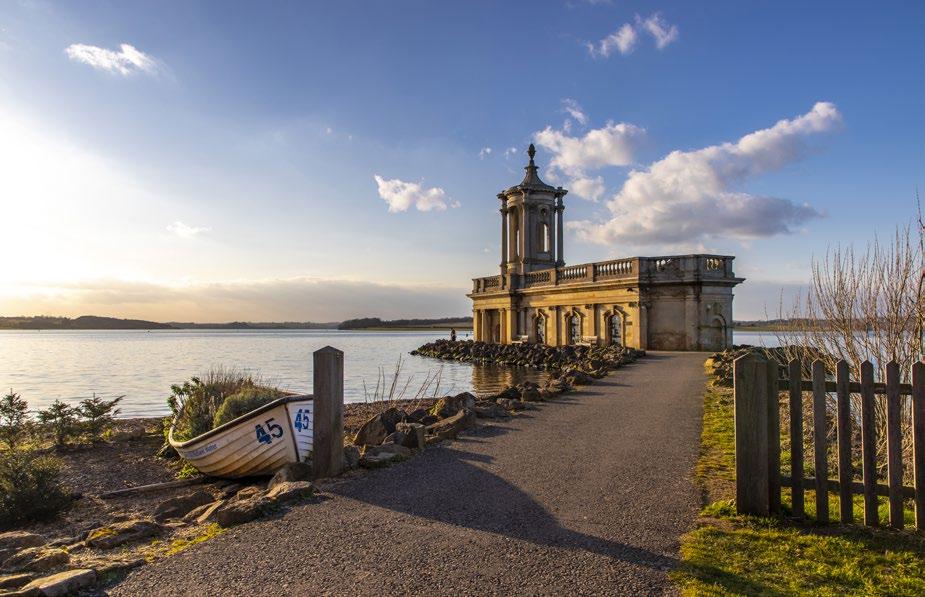
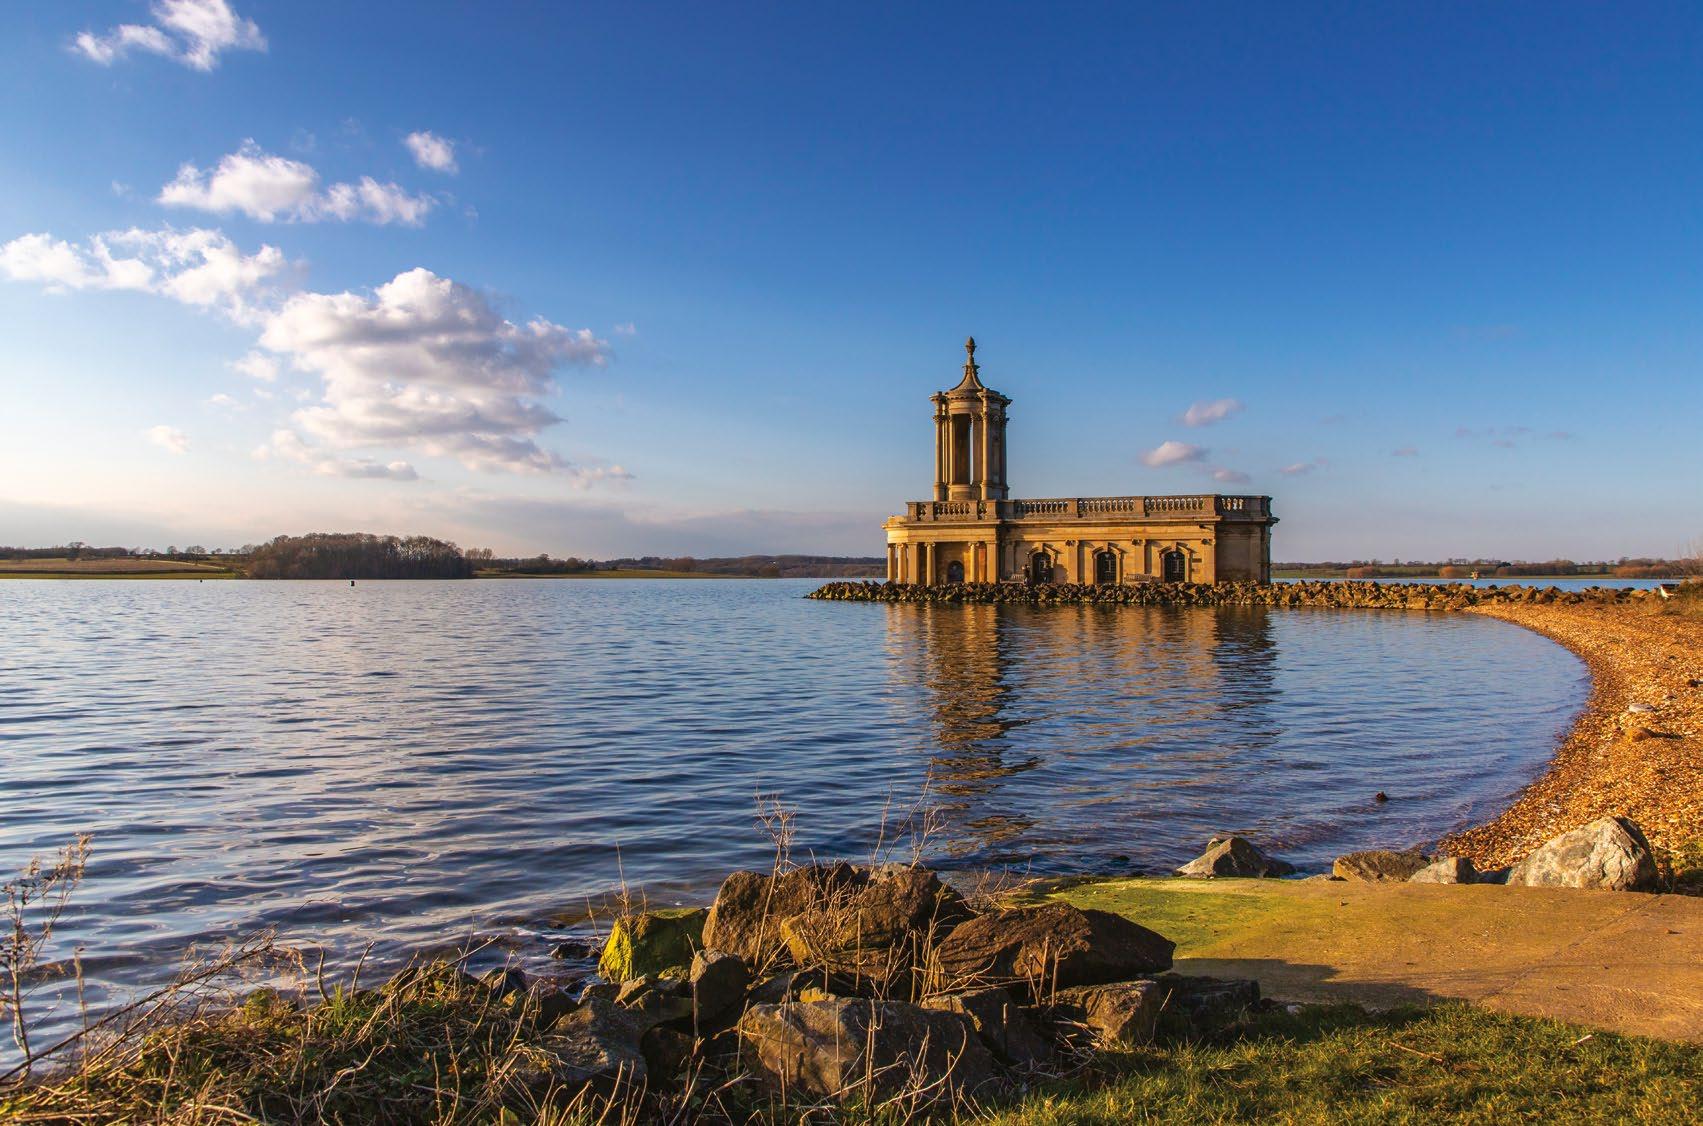
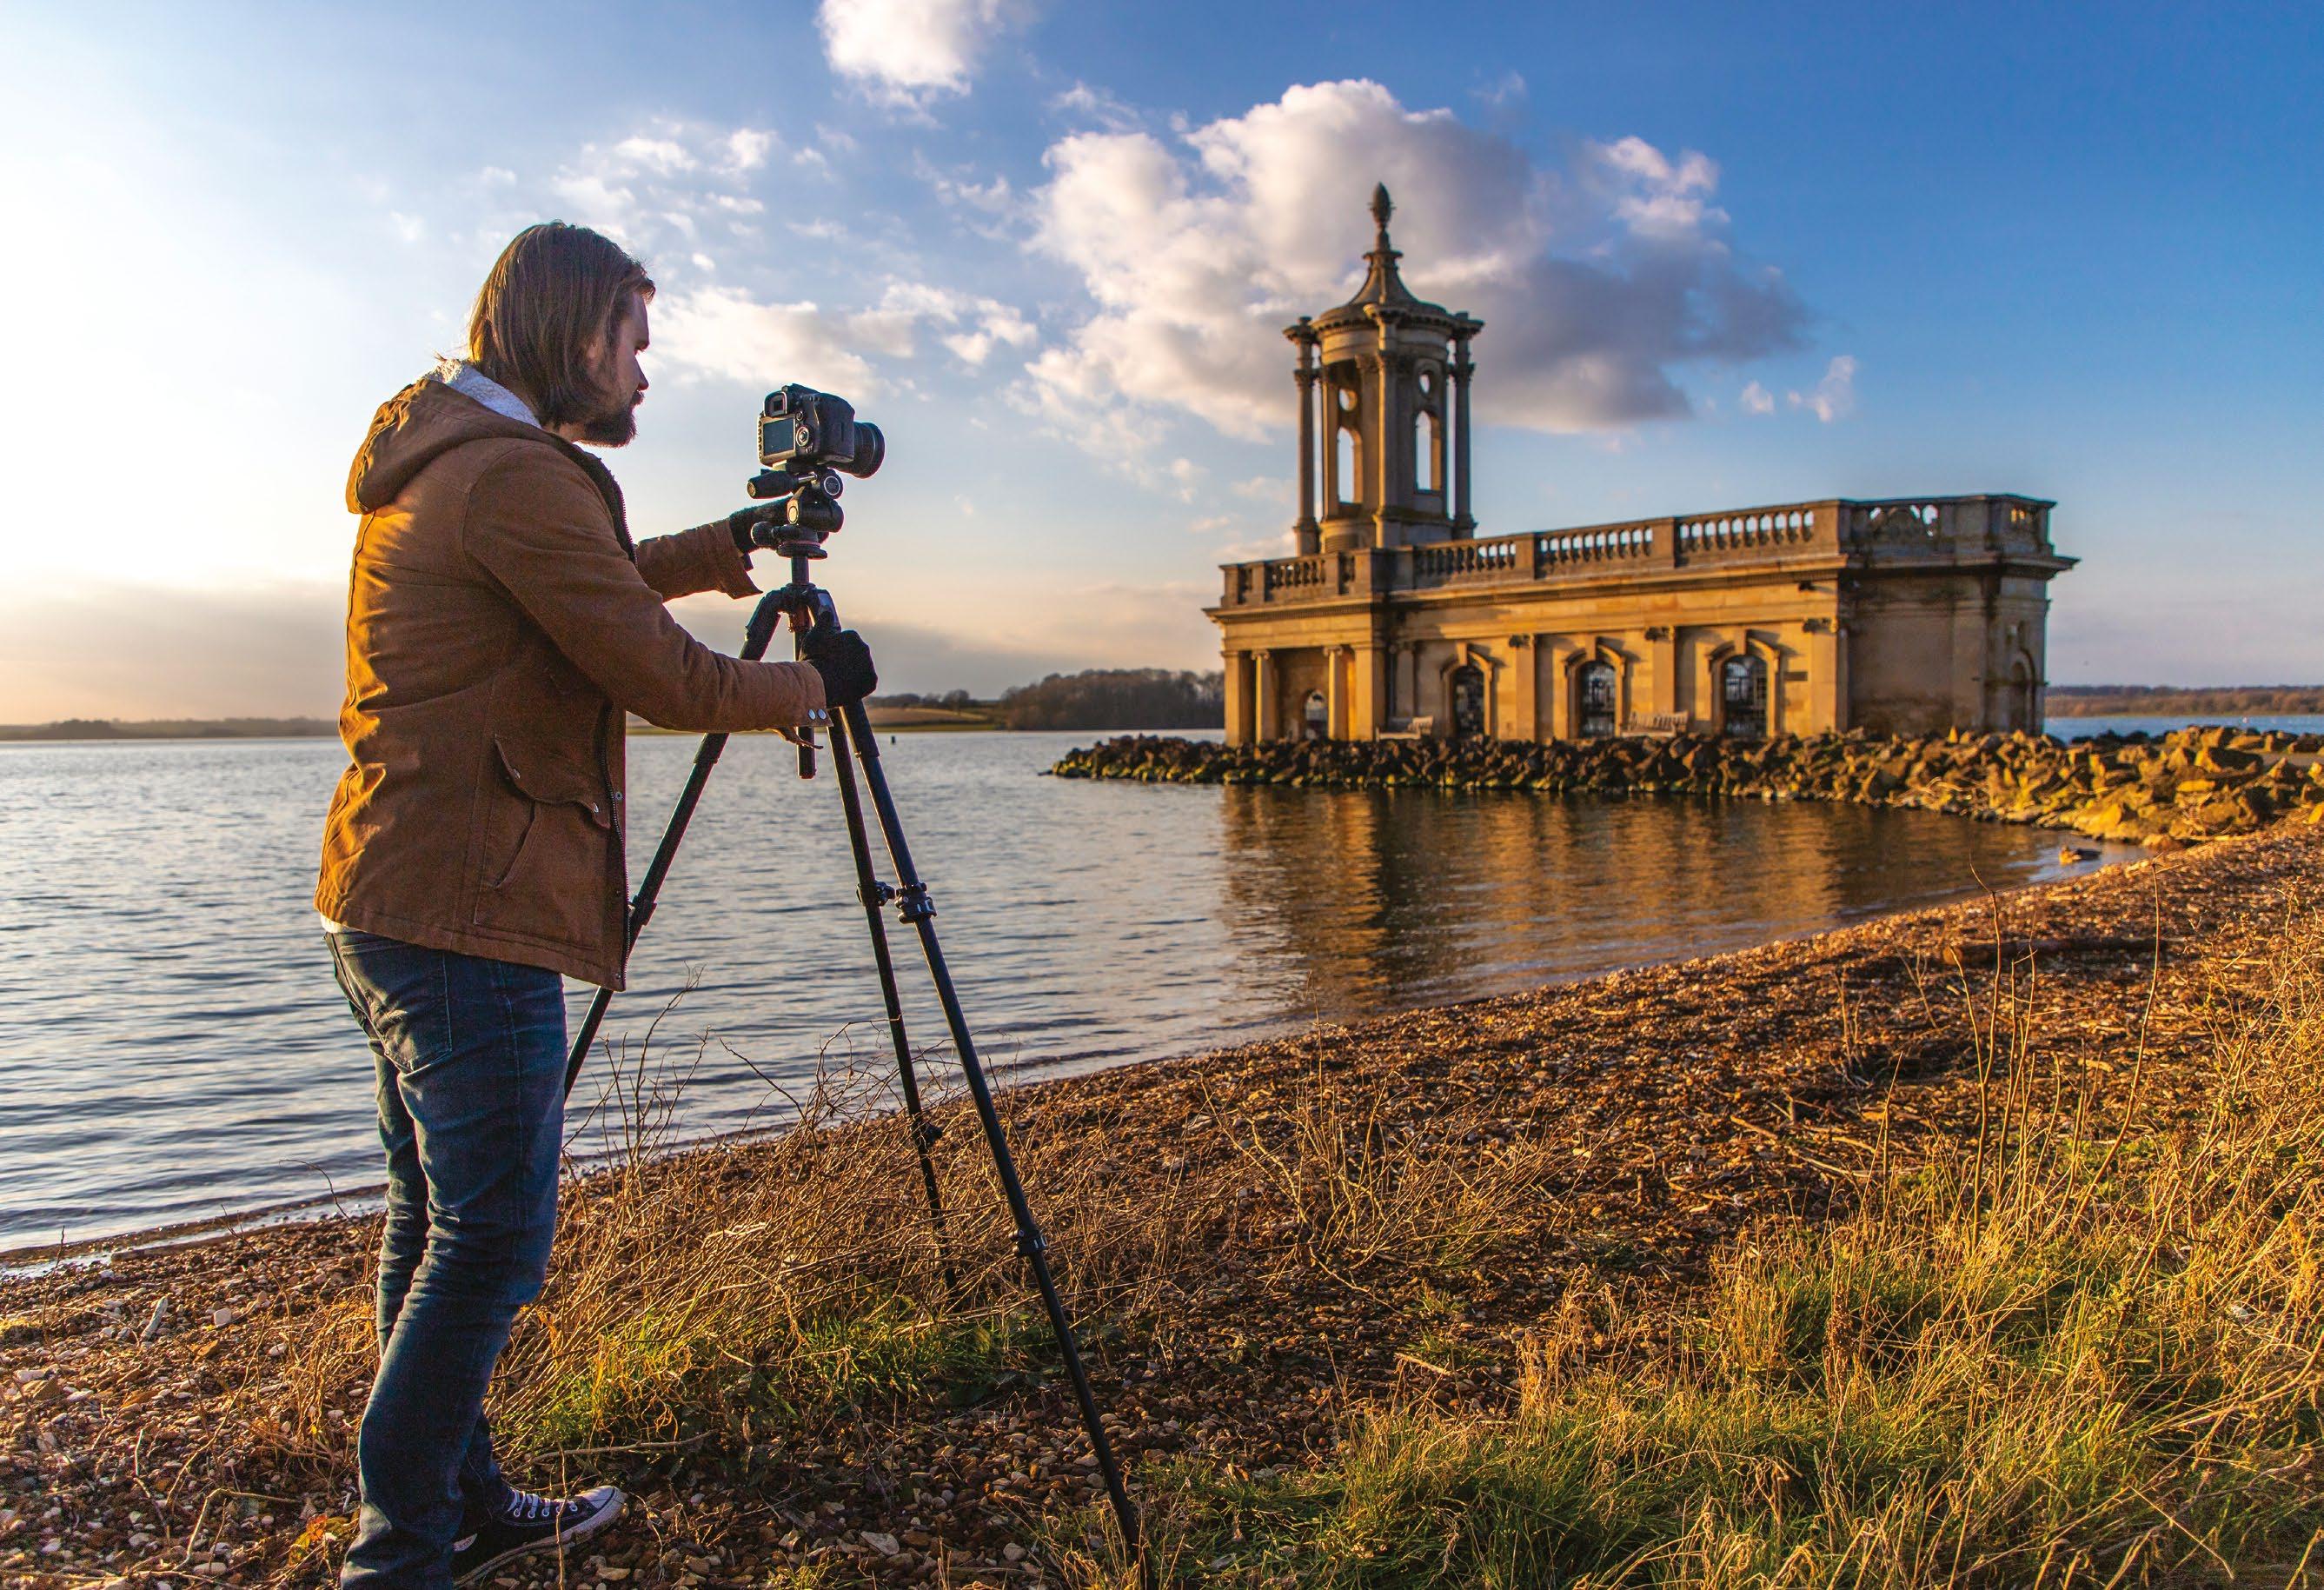
THREE-WAY HEAD
A three-way tripod head is the best choice for landscapes, as it allows you to really take your time and finetune your composition on three axes. The MHXPRO-3W X-Pro 3-Way from Manfrotto (pictured here) is fantastic for landscapes, and the arms collapse inwards when not in use to save space.
Shooting landscapes on a tripod
ORDER OF EXTENSION
Always extend the top leg sections of the tripod first as they’re the thickest sections and therefore the sturdiest, moving down to the thinner leg sections after this. If you still need extra height then it’s time to extend the centre column – this should be a last resort as it’s the wobbliest part of any tripod.
STURDY LEGS
If you’re in the market for a tripod be sure to go for a sturdy set of carbon fibre or metal legs. Go for one with individually adjustable leg angles so you can get creative shots closer to the ground. Some even come with reversible centre columns or a short centre column.
TRIPOD FEET
Some tripods have spikes built into the feet that can be revealed by twisting the rubber feet or removing them, though not all do. This can be handy in rocky and icy terrain when your tripod might need more grip, and will stop it moving while you’re trying to compose.
50 TECHNIQUESTECHNIQUES
One of the biggest advantages of digital cameras over their film counterparts is the ability to use the LCD screen to compose and then inspect your shots when you’ve taken them, rather than wait weeks for them to be developed. Most creative mirrorless or DSLR cameras have a built-in electronic level that you can use, a bit like a bubble level, to make sure your camera isn’t tilting down and to ensure that your horizon is straight. Go into Live View mode and you can usually press the Info button to activate it, or find it tucked away in the menu.
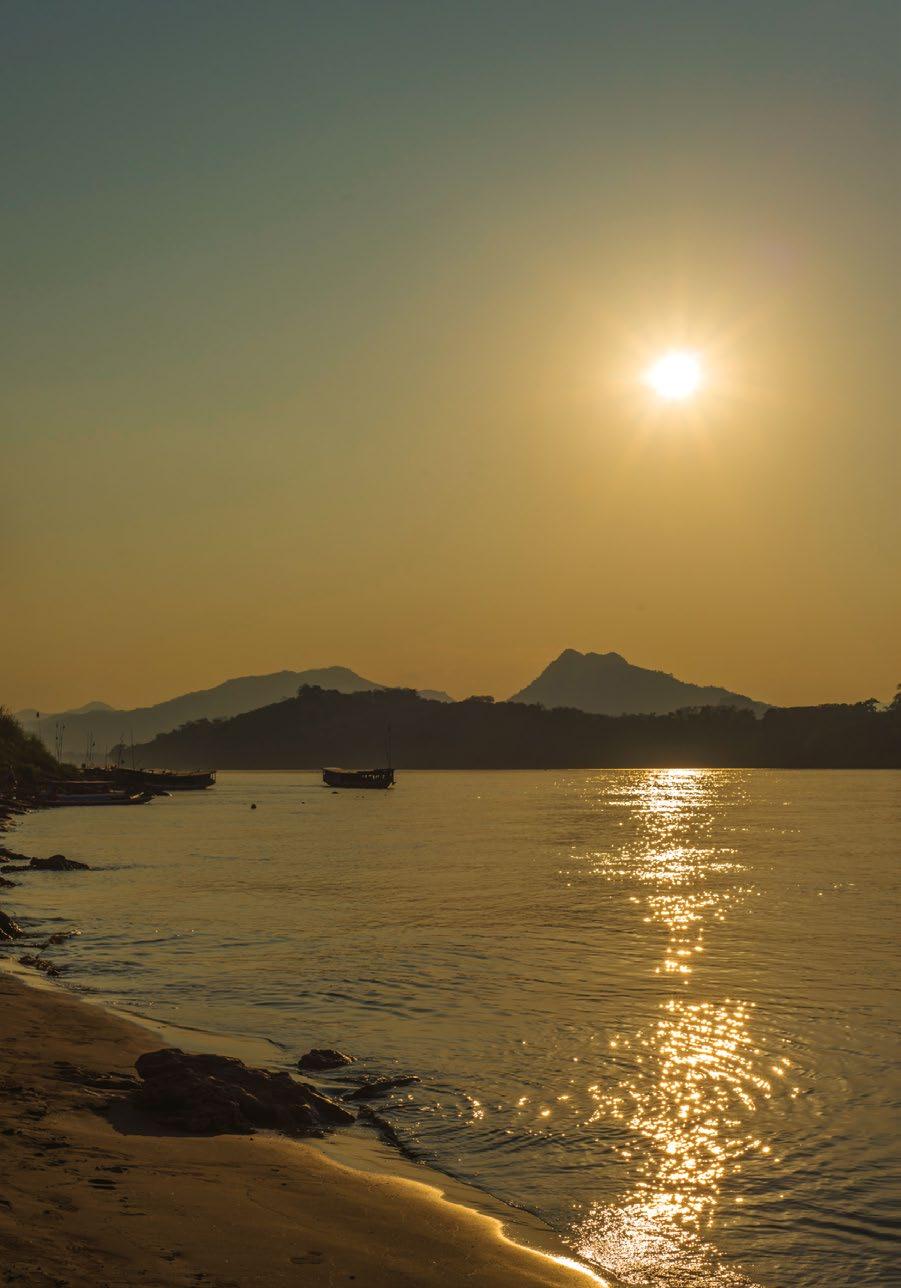
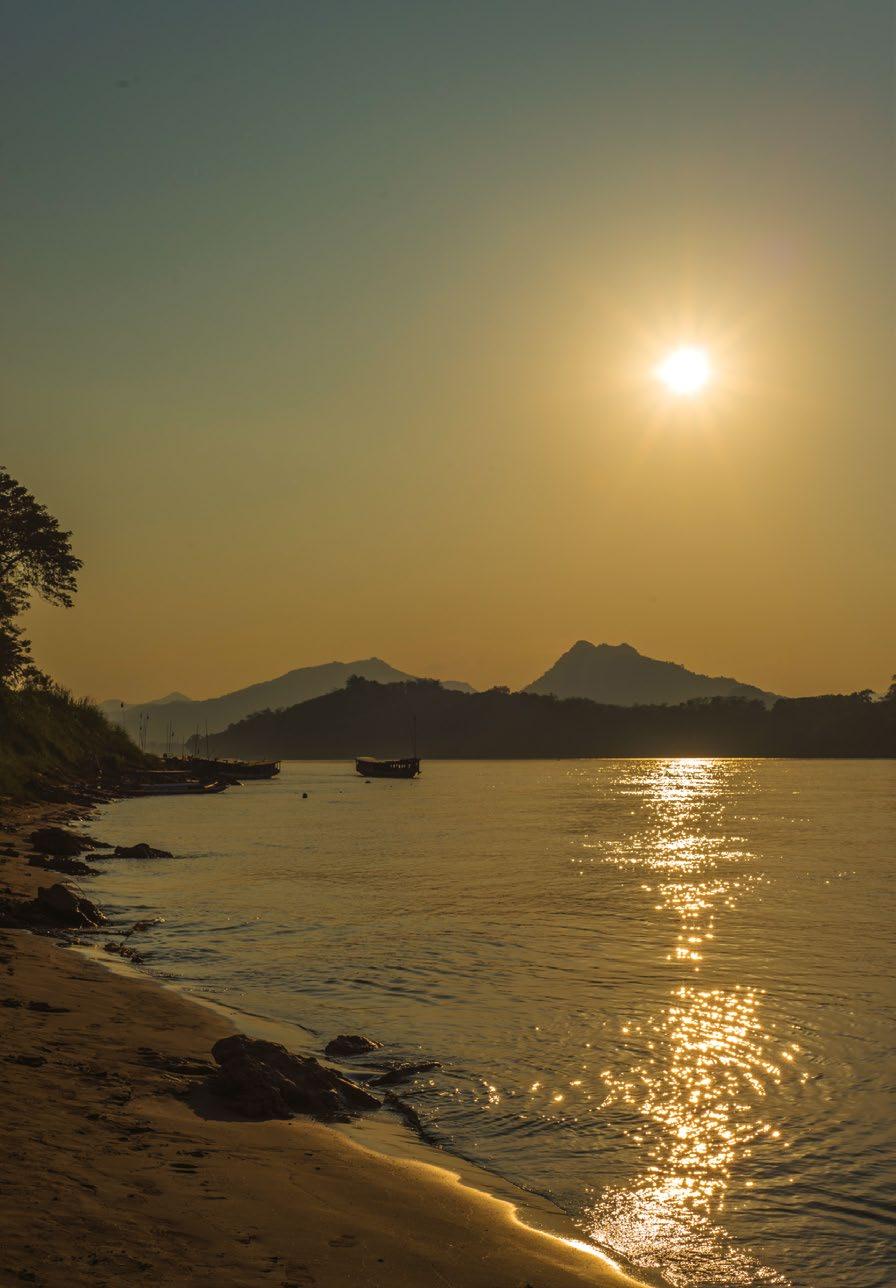
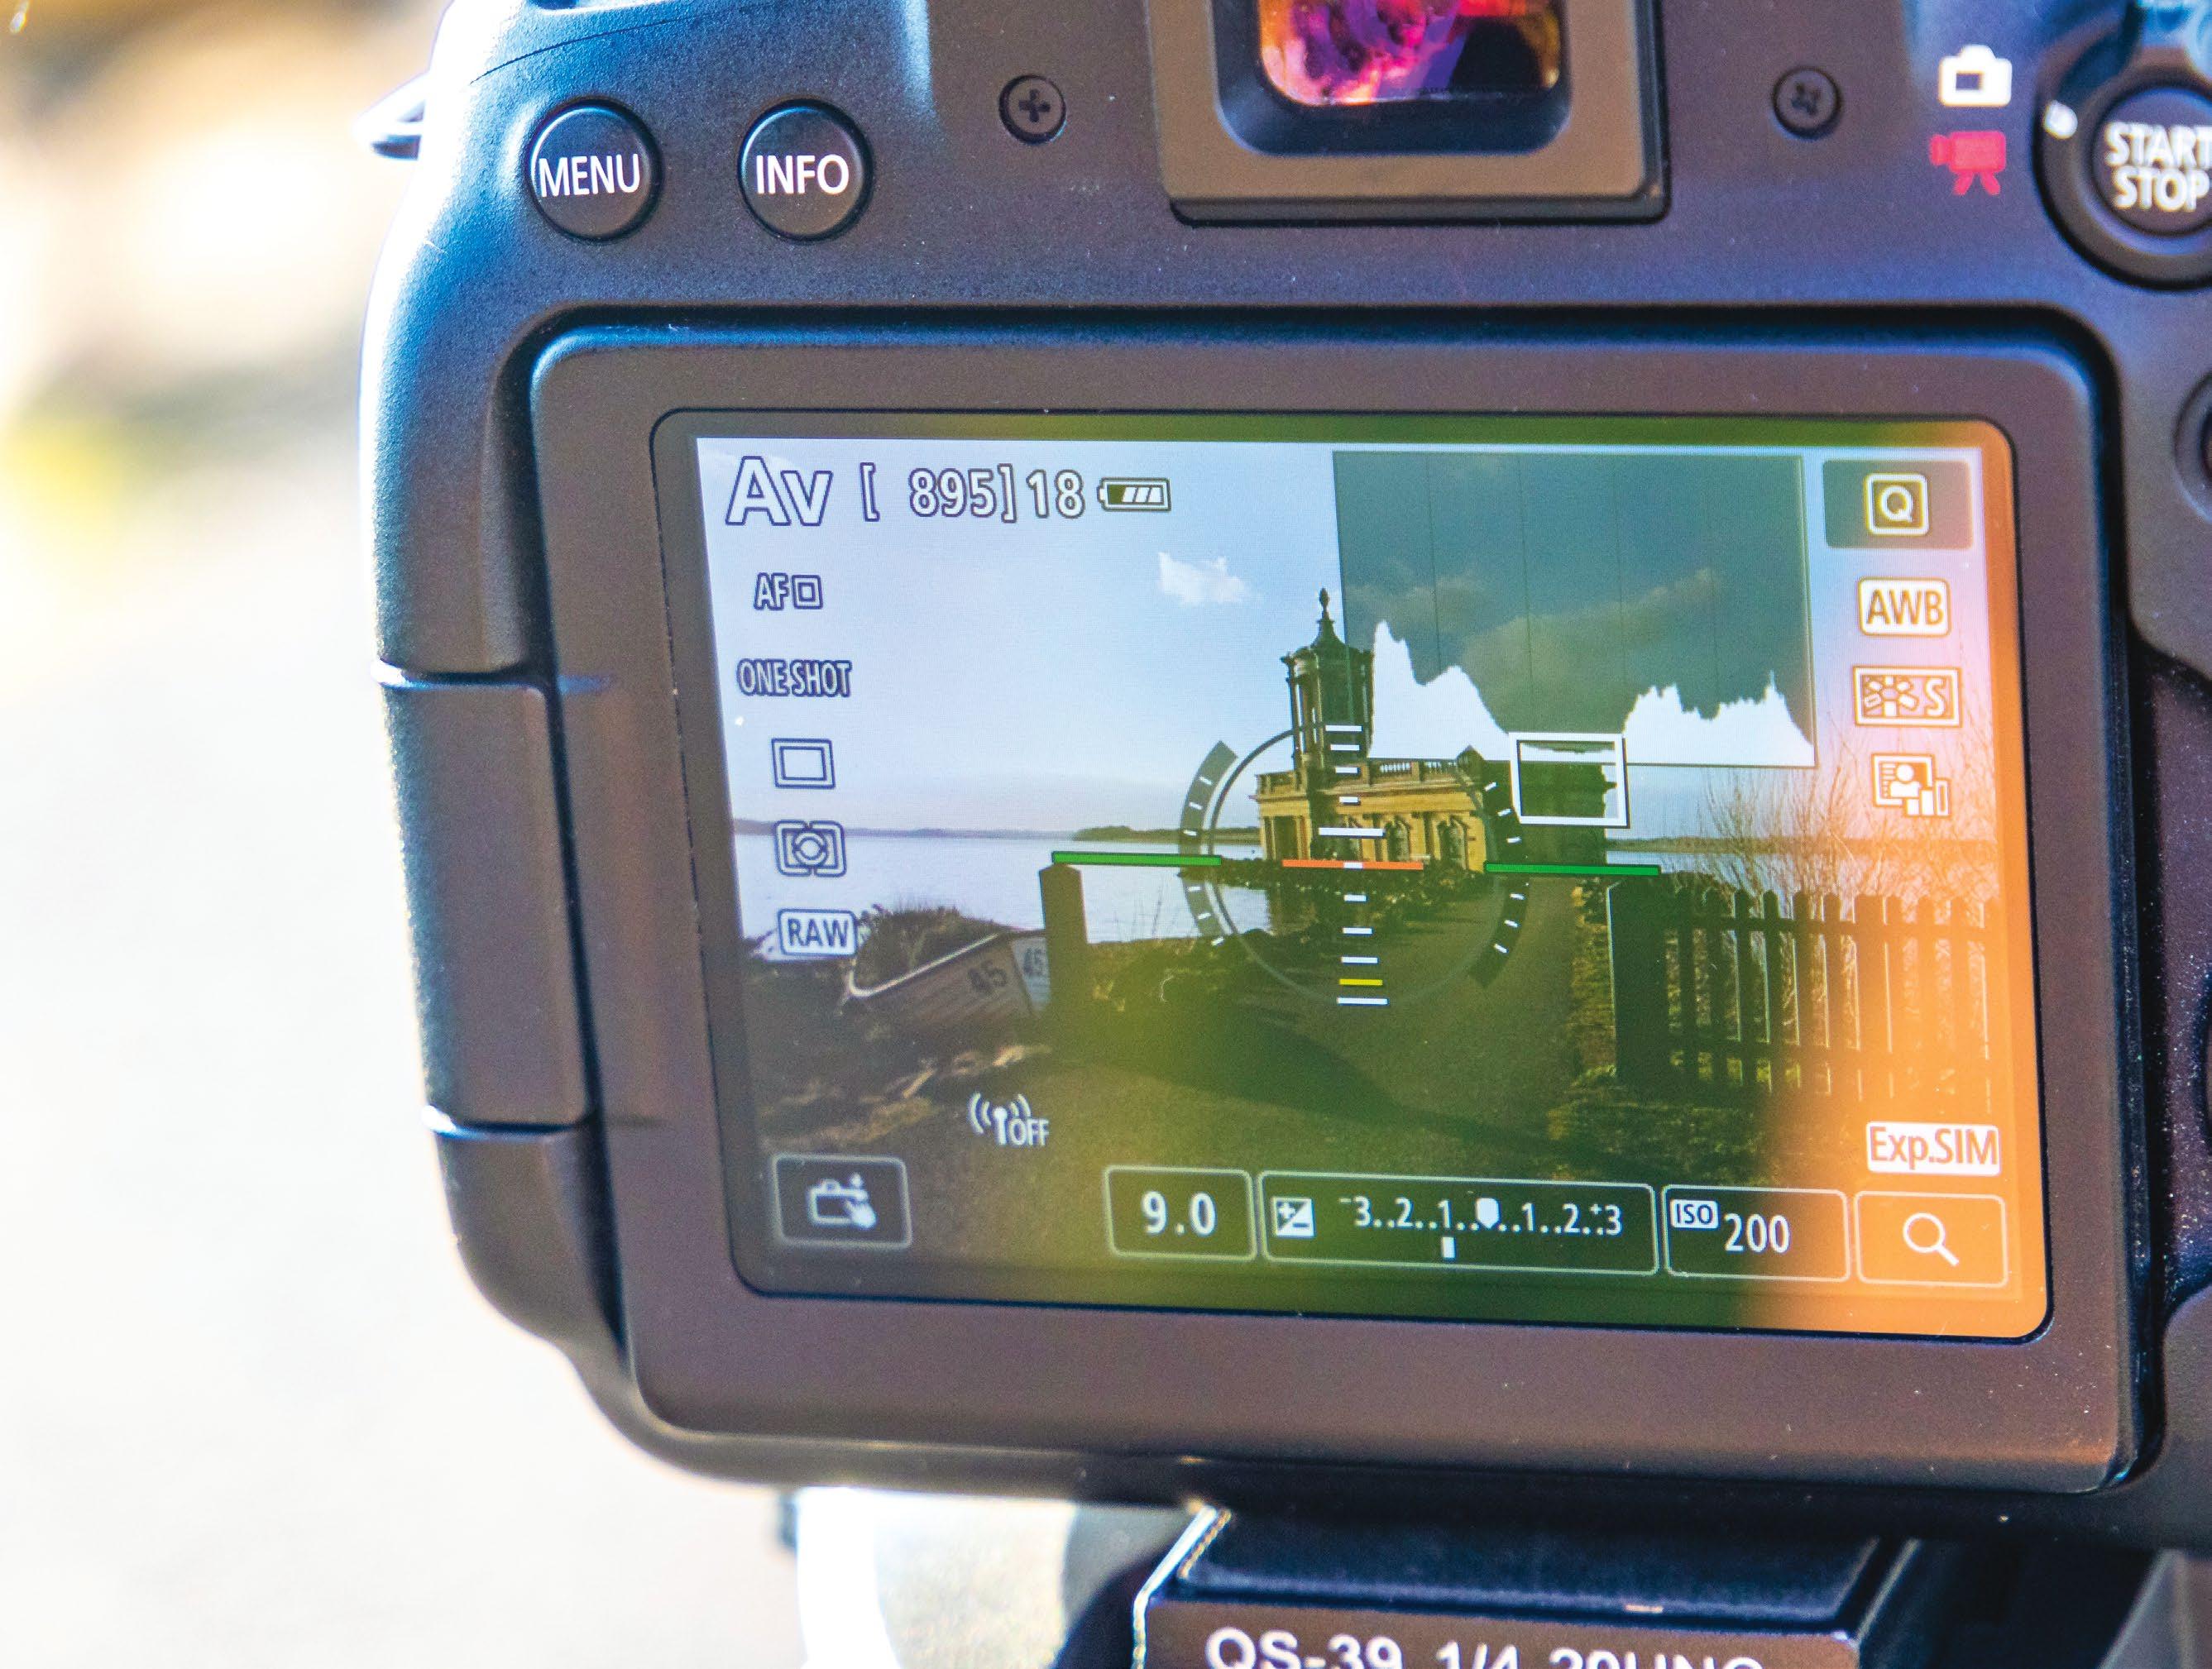
3 Lead the eye in, not out!
A lead-in line should lead the eye in towards the part of your scene you want the viewer to pay particular attention to, such as a tree, boat, lighthouse, or whatever you determine your focal point to be. They can, however, make your image infinitely weaker when they don’t do this and instead lead the eye elsewhere, or out to the edge of the frame. This makes the viewer look away from your image and can disengage them completely, so be sure to watch where your lines are going and ensure they lead to somewhere of importance in the frame.
2 Make sure the horizon is level – it’s a lead-in line too
51 MASTER COMPOSITION
x2 © Dan Mold
Play with perspective
Understand how changing your shooting height and depth of field can impact the perspective
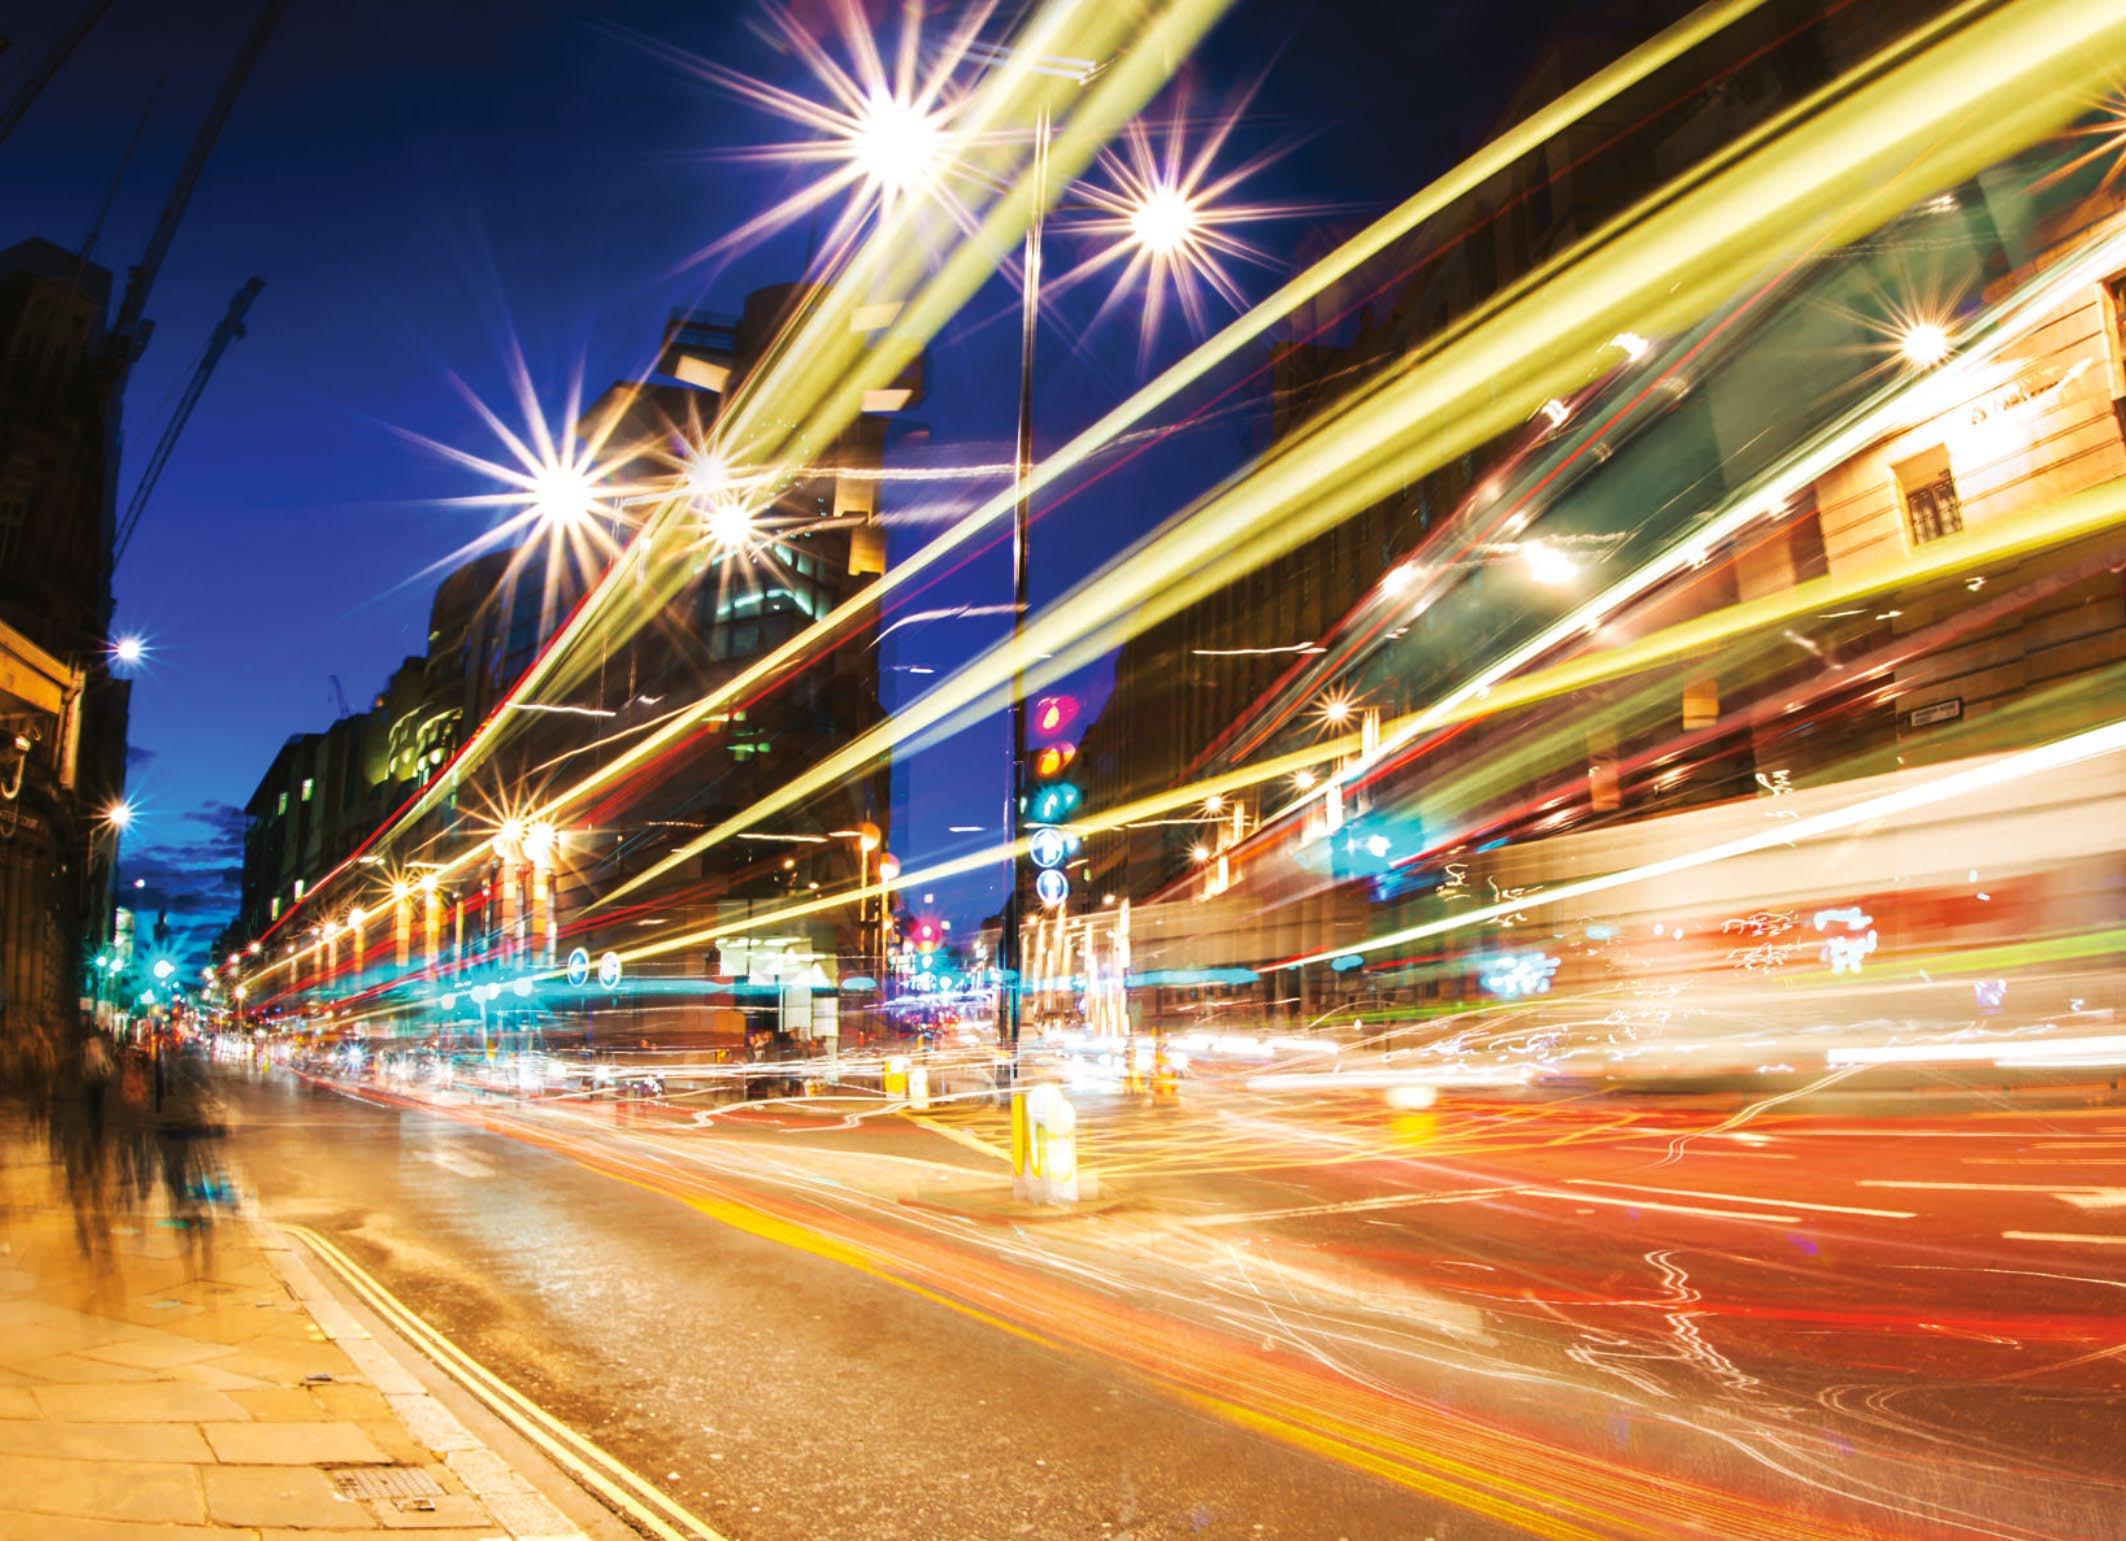
Perspective is a huge part of composition that is often overlooked. It’s all to do with what you include in the frame, the spacing between objects or your foreground and background, and also the distance of the camera to the floor. Many of the pictures we take are shot at head height, but simply crouching down or reaching up can change your perspective massively. Many digital cameras now employ articulating LCD screens, making it much easier to compose at these awkward angles, and it’s a simple and quick way of giving your shots a completely different look. A simple change of shooting height can also make your subject look more or less dominant by introducing a high or low angle, which alters the mood of the shot.
© Dan Mold
Simply crouching down or reaching up can change your perspective massively
Including something substantial in the foreground is often described as adding foreground interest. It’s a great way of anchoring your image and providing some depth between the front and back areas of your shot. If you do choose to include some foreground interest, it’s worth experimenting with how close you get to it to make it larger or smaller in the frame. Many photographers opt to get really close to their foreground interest and use a super-wide-angle lens to change the perspective. You may actually find it easier to compose your landscapes in the portrait orientation when including foreground interest, as this will enable your foreground to take up all of the lower third of your image.
Foreground interest
NO FOREGROUND INTEREST
With just a blank grassy field taking up the bottom third of this sunset scene, there’s nothing to really anchor this image or help to lead the viewer’s eye through to the tree and setting sun far off in the background.
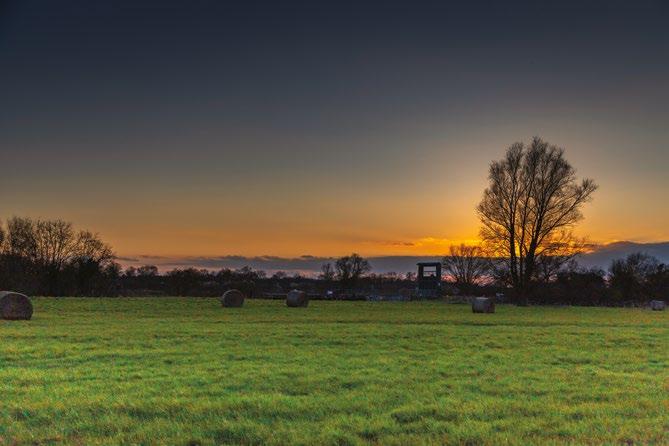
WITH FOREGROUND INTEREST
By moving closer to one of the bails of hay we’ve given the shot extra depth. We’ve created a 3D effect to show off the scale off the hay bail in the foreground, leading the eye through to the tree and setting sun behind it in the distance.
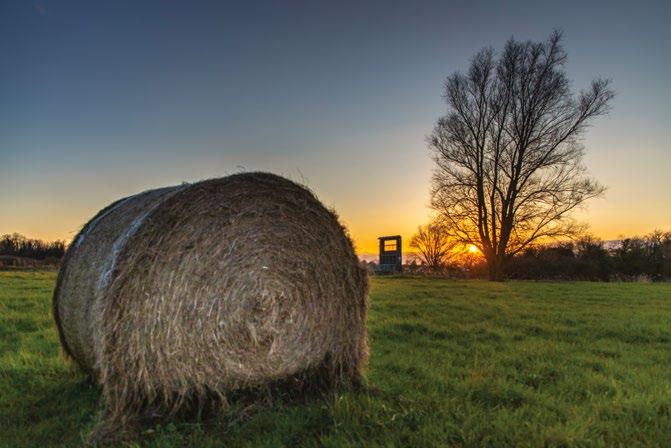
PERSPECTIVE1 PERSPECTIVE2
Head height
Most shots are taken around head height so they often lack the instant wow factor of images taken with a low or high perspective, as this is a view we’re accustomed to seeing. If it’s not appropriate to get super low to the ground or high up, it’s worth seeing what framing you can get by crouching on one knee, as even this will still offer a new viewpoint for your shot.
52 TECHNIQUESTECHNIQUES
Use depth of field to guide the eye
Using a wide aperture and getting close to the flowers in the foreground has made them the sharp part of the image, also called the focal point. This is where the viewer’s eye is naturally drawn to. Although the windmill is out of focus, it’s still sharp enough to make out its form and structure, so it’s an interesting landscape as the focus doesn’t fall where you’d expect it to.
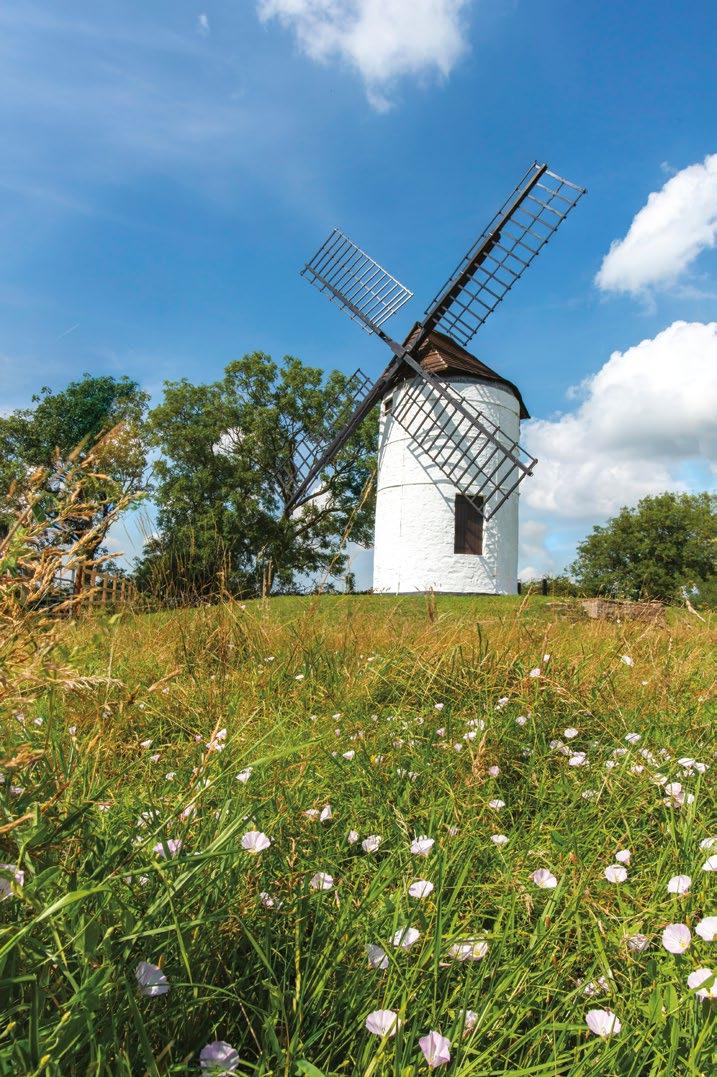
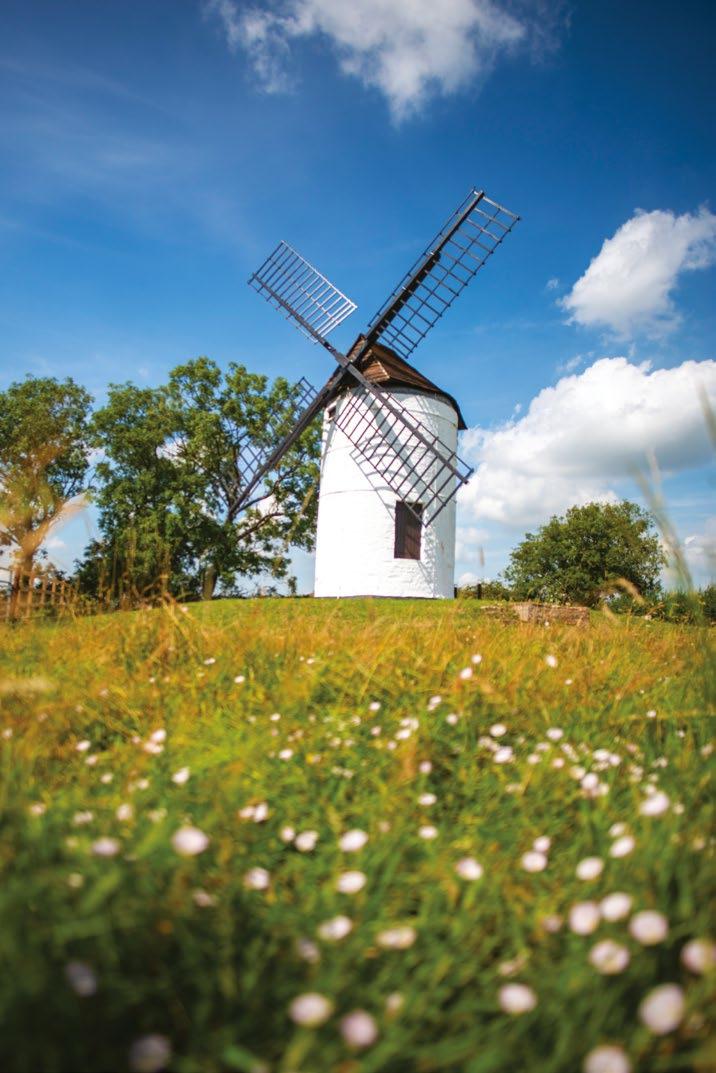
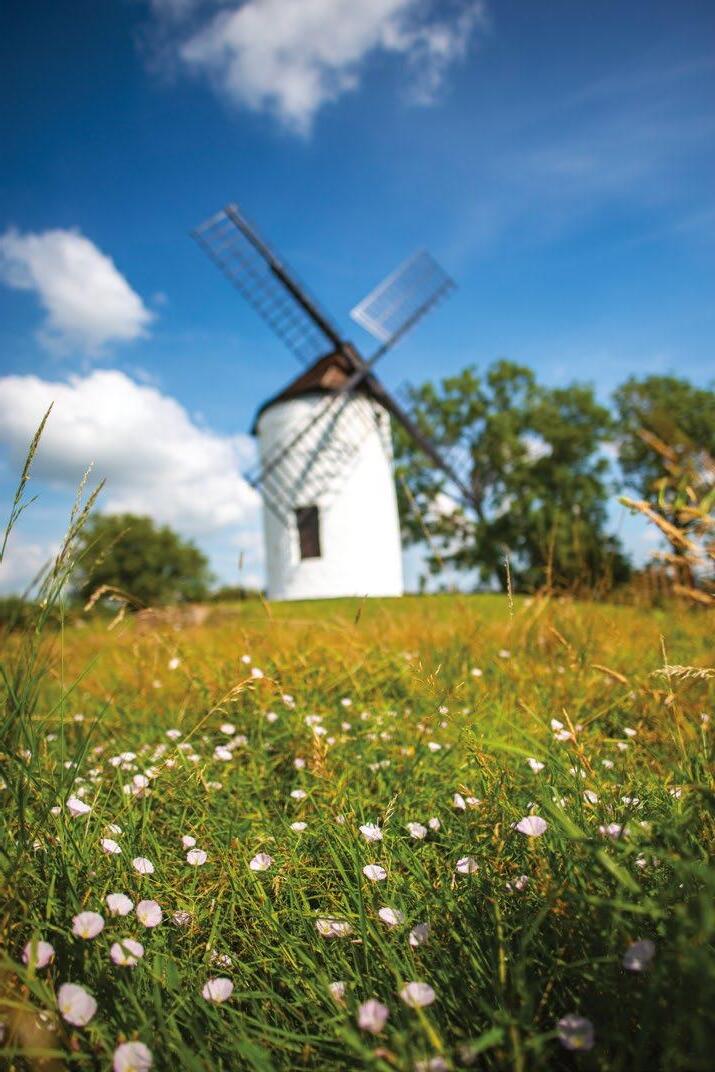
Low angle
This is perhaps a more classic landscape as it doesn’t look like the focus has been misplaced. Instead the focus is firmly centred on the windmill, making it the obvious focal point of the shot. Shooting close to the flowers and using a superwide aperture has nicely defocused the foreground, gently guiding the eye of the viewer to the windmill in the distance.
When you shoot from really low down to the ground it can be useful to employ a miniature tripod, so that you can get as low as possible. Shooting from this low angle gives you a sort of worm’s-eye perspective of the world, with everything else towering over and dominating the frame. It’s certainly a great way to catch the eye.
In this shot we used a much more narrow aperture of f/22 to expand the zone of sharp focus and get everything in the frame sharp, from the foreground to the background. Typically landscapes are taken at middle to high aperture values to get a good level of sharpness across the vista, but these examples show that a shallow depth of field can be a great way of changing up your compositions too.
High angle
A high angle is when you shoot from high up or on a high platform looking down across the landscape. This traffic trail shot here is a fantastic example of this; taken from a path that crossed over a busy road, you get a high angle of the roads trailing off into the distant horizon. There’s not always a convenient high-up platform to do this, but be on the lookout for raised footpaths and buildings you can shoot from that will give you a higher perspective, or even fire up a drone to get aerial shots from the skies.
 FOREGROUND SHARP BACKGROUND SHARP
SHARP ALL THE WAY THROUGH
FOREGROUND SHARP BACKGROUND SHARP
SHARP ALL THE WAY THROUGH
PERSPECTIVE3
© Dan Mold
53 MASTER COMPOSITION MASTER COMPOSITION
© Dan Mold
Creative approaches
Play by your own rules to get the creative composition that you envision
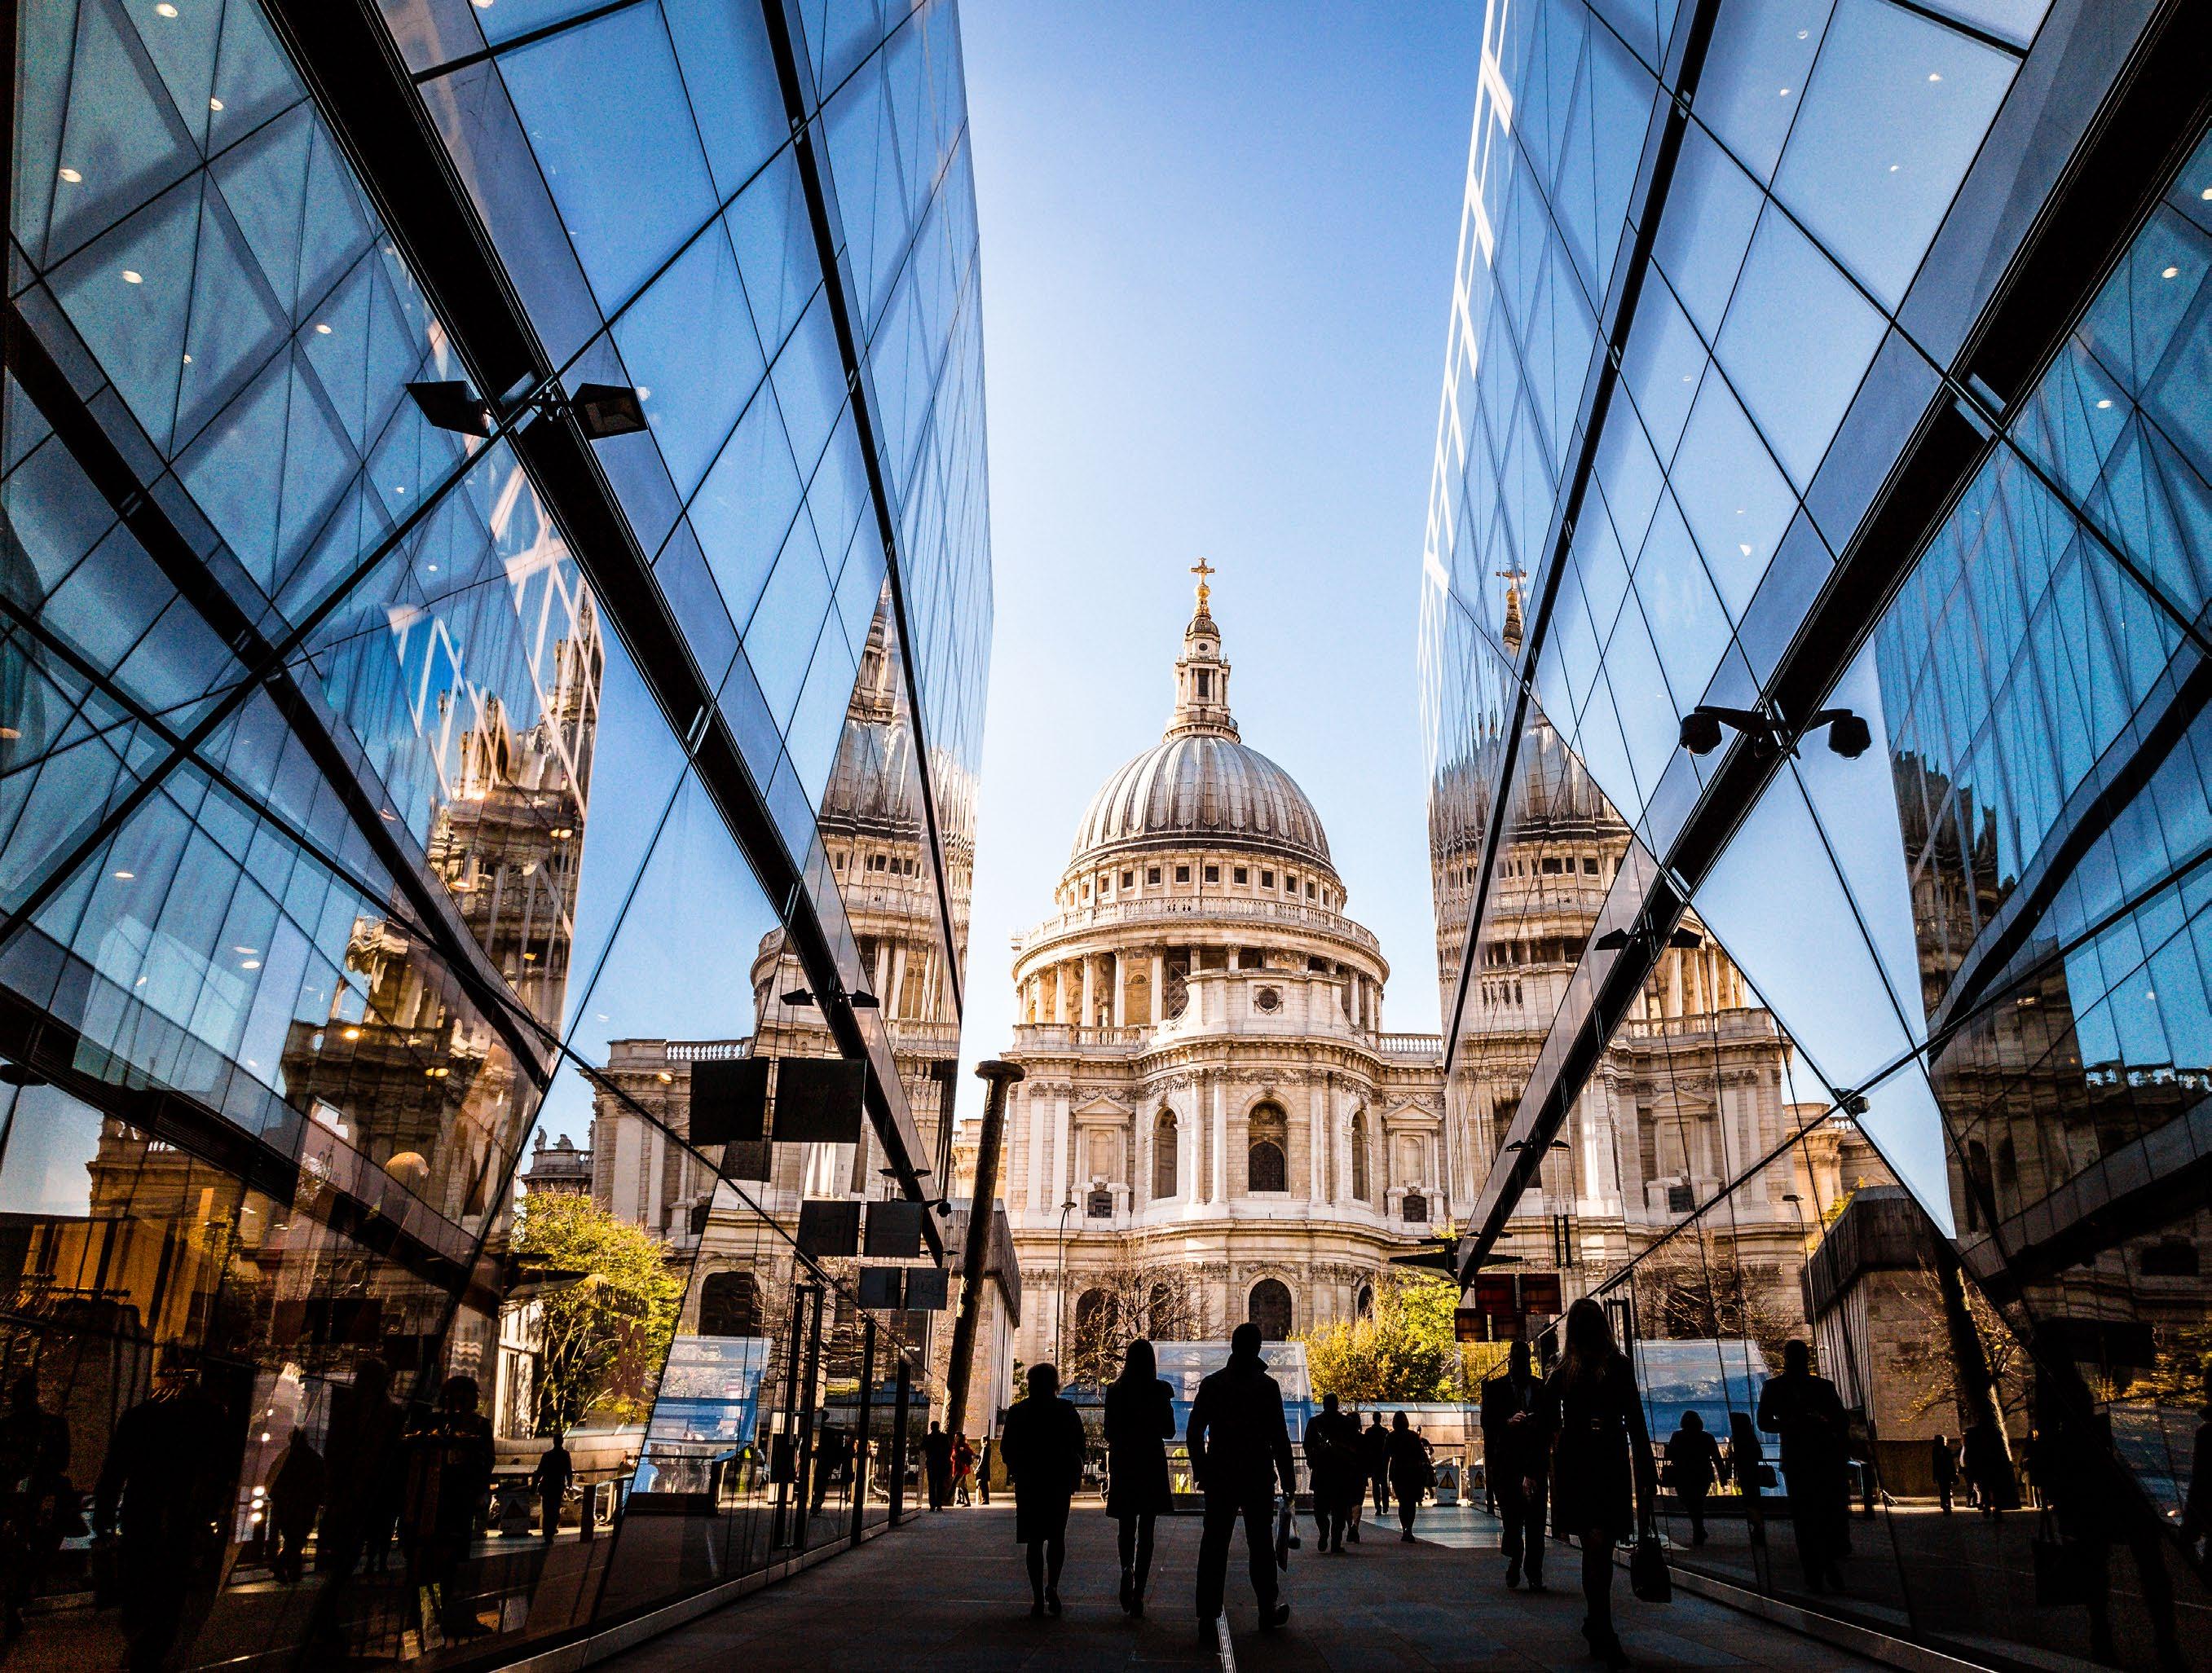
Now that we’ve covered the classic techniques and all of the technical jargon, it’s time to embrace all of this new-found wisdom and decide whether to use a tried and tested technique or something completely different. You won’t always have a scene in front of you that works with the classic methods, or perhaps your creative vision doesn’t neatly fit into the rule of thirds grid, but that’s okay! Here are some examples to get your creative juices flowing and show you that from time to time it can be worth going off-piste, possibly taking a shot that’s even more incredible because of it.
Here we’re going to explore the moments and opportunities when it’s okay for your horizon to not be perfectly level, to stray away from the rule of thirds, and to embrace the opportunity when there’s a chance to use symmetrical framing to position your focal points. Let’s also look at how you can make the space in your compositions work harder by transforming so-called ‘dead’ space that doesn’t add anything to the shot into ‘active’ space, which as the name suggests helps fill out the empty areas around your subject more effectively. Want to break the rules? Here’s what you need to know…
Go with a Dutch tilt
Going against our previous advice of making sure the horizon in your landscape is perfectly level, you can get some great results by intentionally shooting at a jaunty angle. The trick here is to make it obvious and not look like a mistake or afterthought. The off-kilter horizon is sure to grab the eye and look striking, while straight horizontal lines, such as those of buildings, will appear to shoot off at an angle.
54 TECHNIQUESTECHNIQUES
Try an odd aspect ratio


With online galleries such as Flickr and 500px absolutely filled with fantastic imagery, it’s harder than ever to make your images stand out. So while we’ve been talking about the classic and traditional ways you can compose your shots, a non-standard aspect ratio can be a good way to give your images an edge to make them even more eye-catching. It’s worth playing with a square composition at times too, as this will work perfectly on social media channels like Instagram. We favour putting a few strips of electrical tape over the rear LCD screen protector to give you a square view in Live View, making the composition easier to visualise.

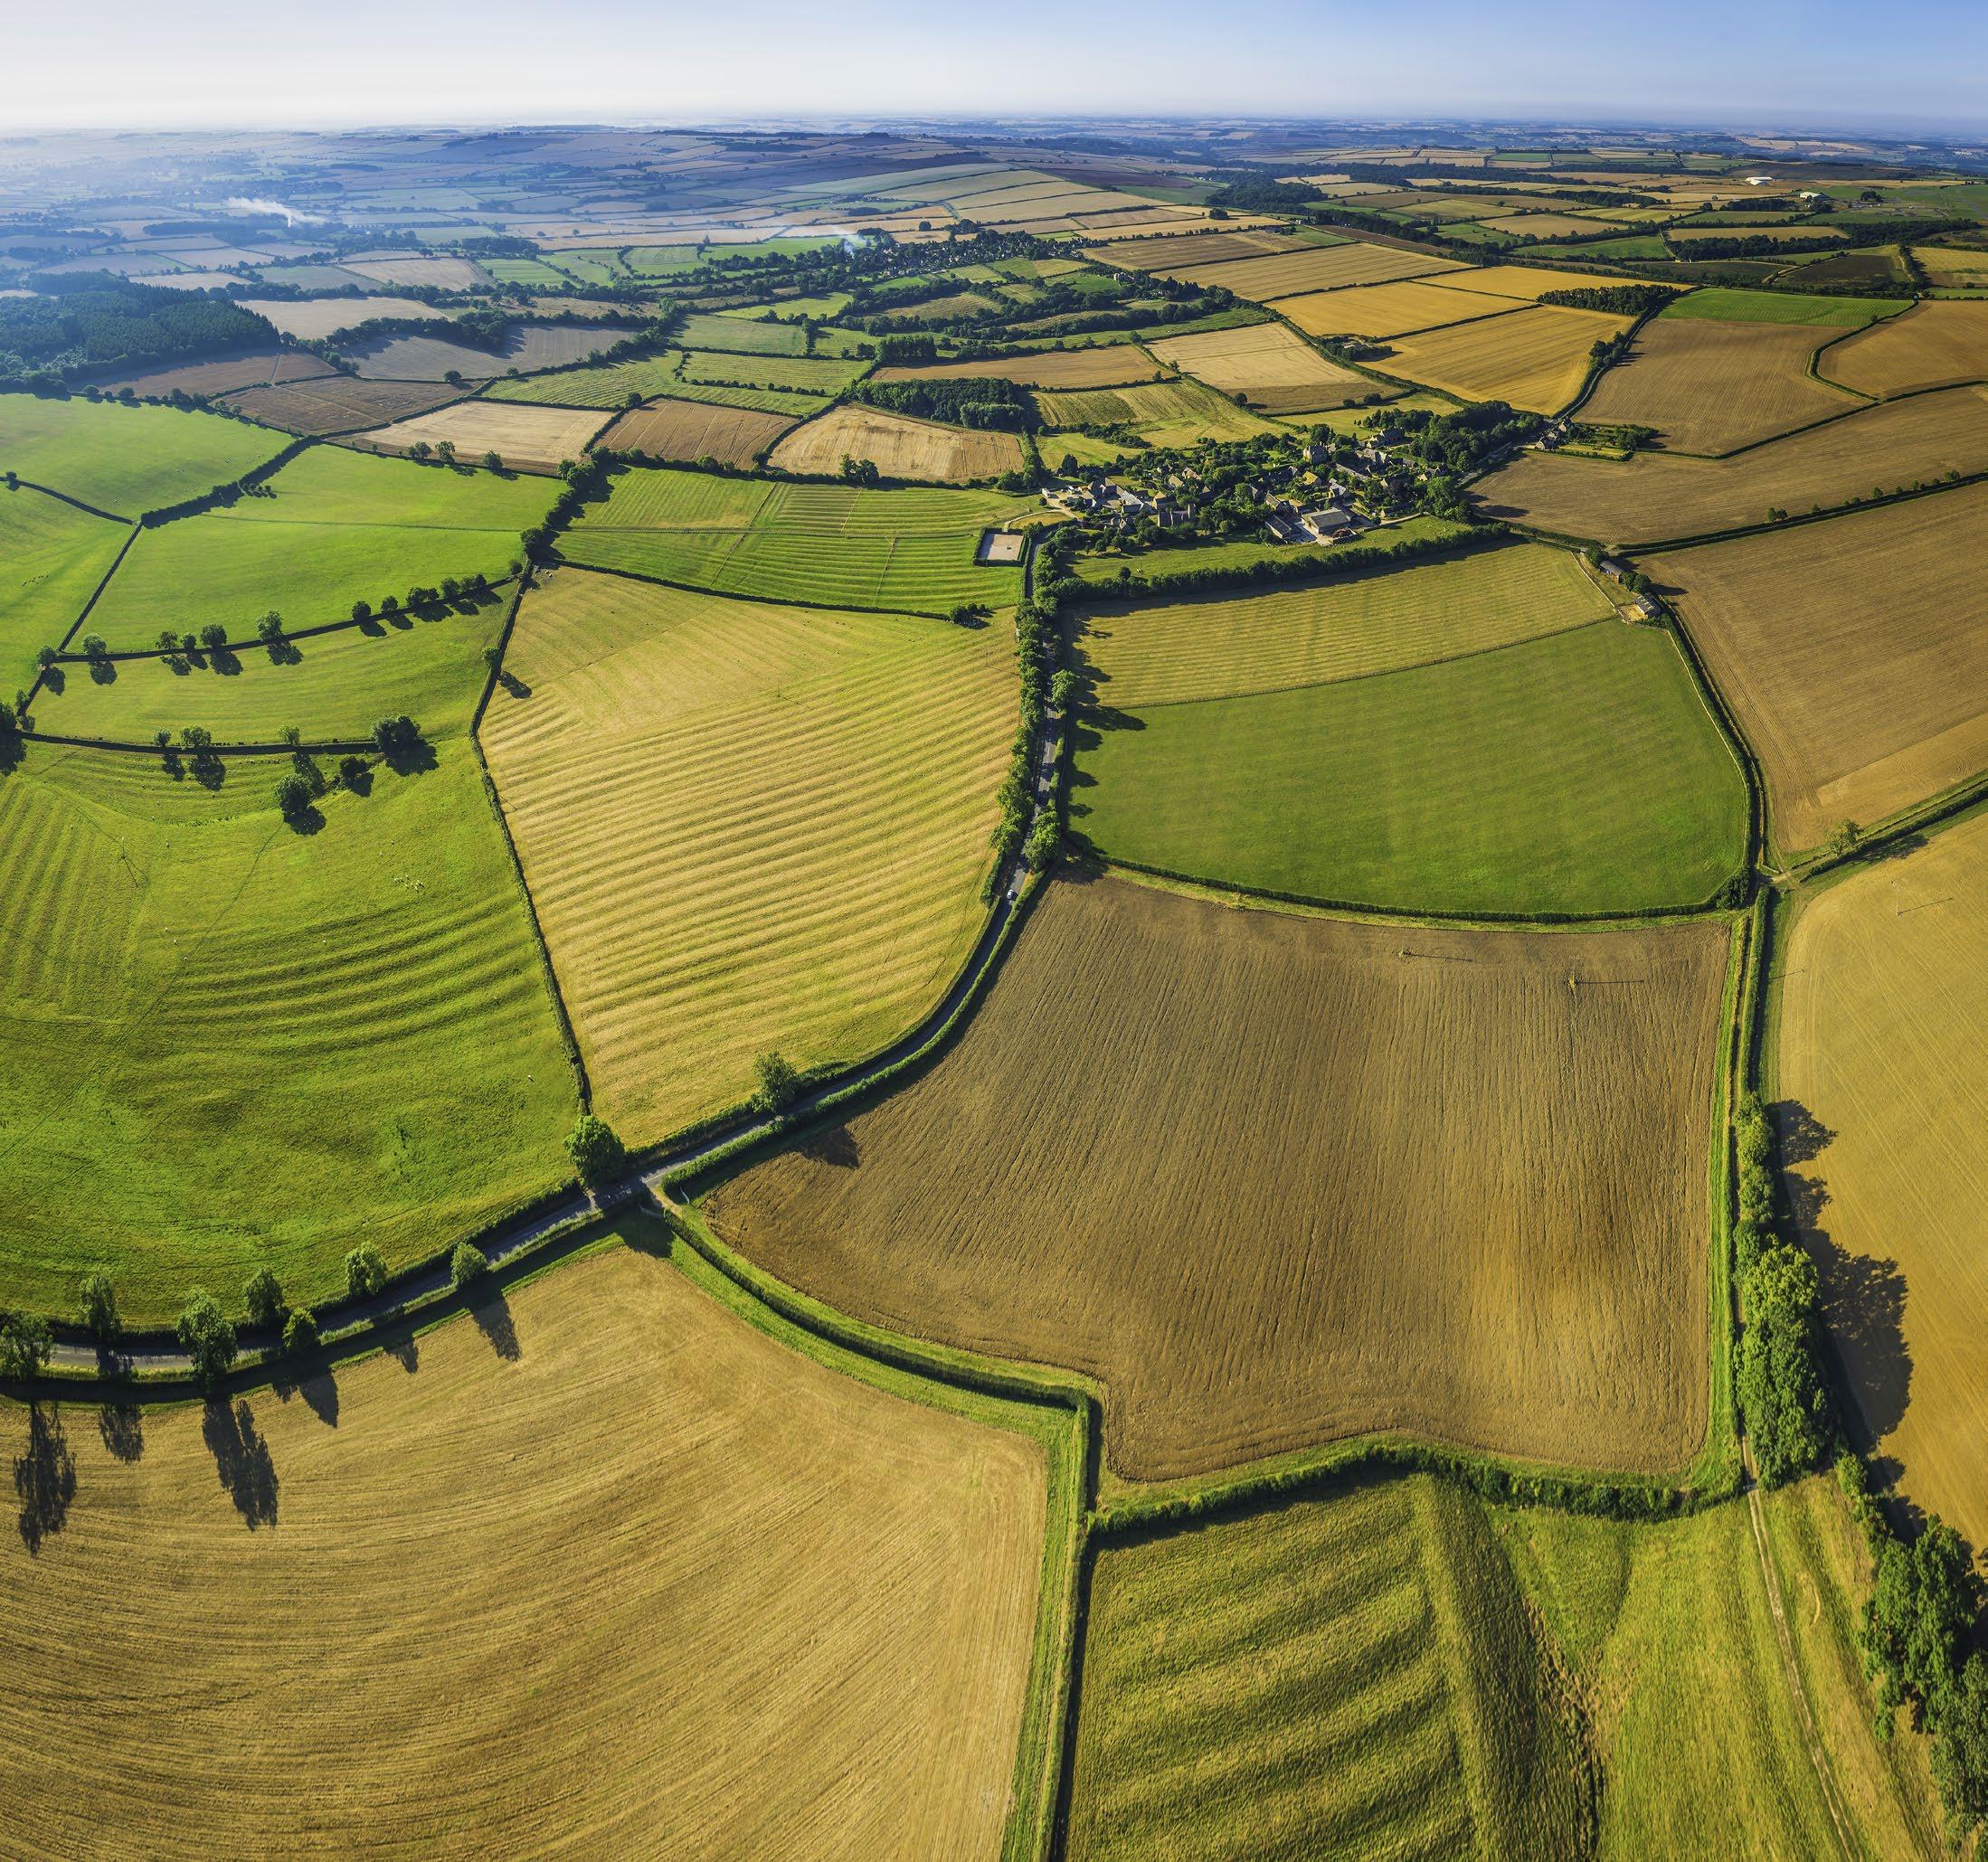
Dead space
This is when the space isn’t being used effectively, so a part of the shot doesn’t add anything to the photograph. Dead space can often be the result of a lead-in line or focal point leading the eye out of the frame. It can usually be turned into active space with a composition tweak.
Active space
This is where your lead-in lines and focal point face into the negative space in the environment (the space surrounding your focal point and foreground, such as the sky) to keep the viewer’s eye in the shot and not directing them out of it.


©
© Gettyimages
Gettyimages
© Dan Mold
© Dan Mold
55 MASTER COMPOSITION MASTER COMPOSITION
© Dan Mold
1 Straighten up A wonky horizon is the first thing we’ll spot in a landscape and will need correcting, unless you’ve intentionally shot at a jaunty angle for creative purposes. To do this, bring it into Photoshop CC and click on the Crop tool from the Toolbox to make it active. Then, in the Toolbar, grab the Straighten tool. Now you can draw over the horizon to make it perfectly level.
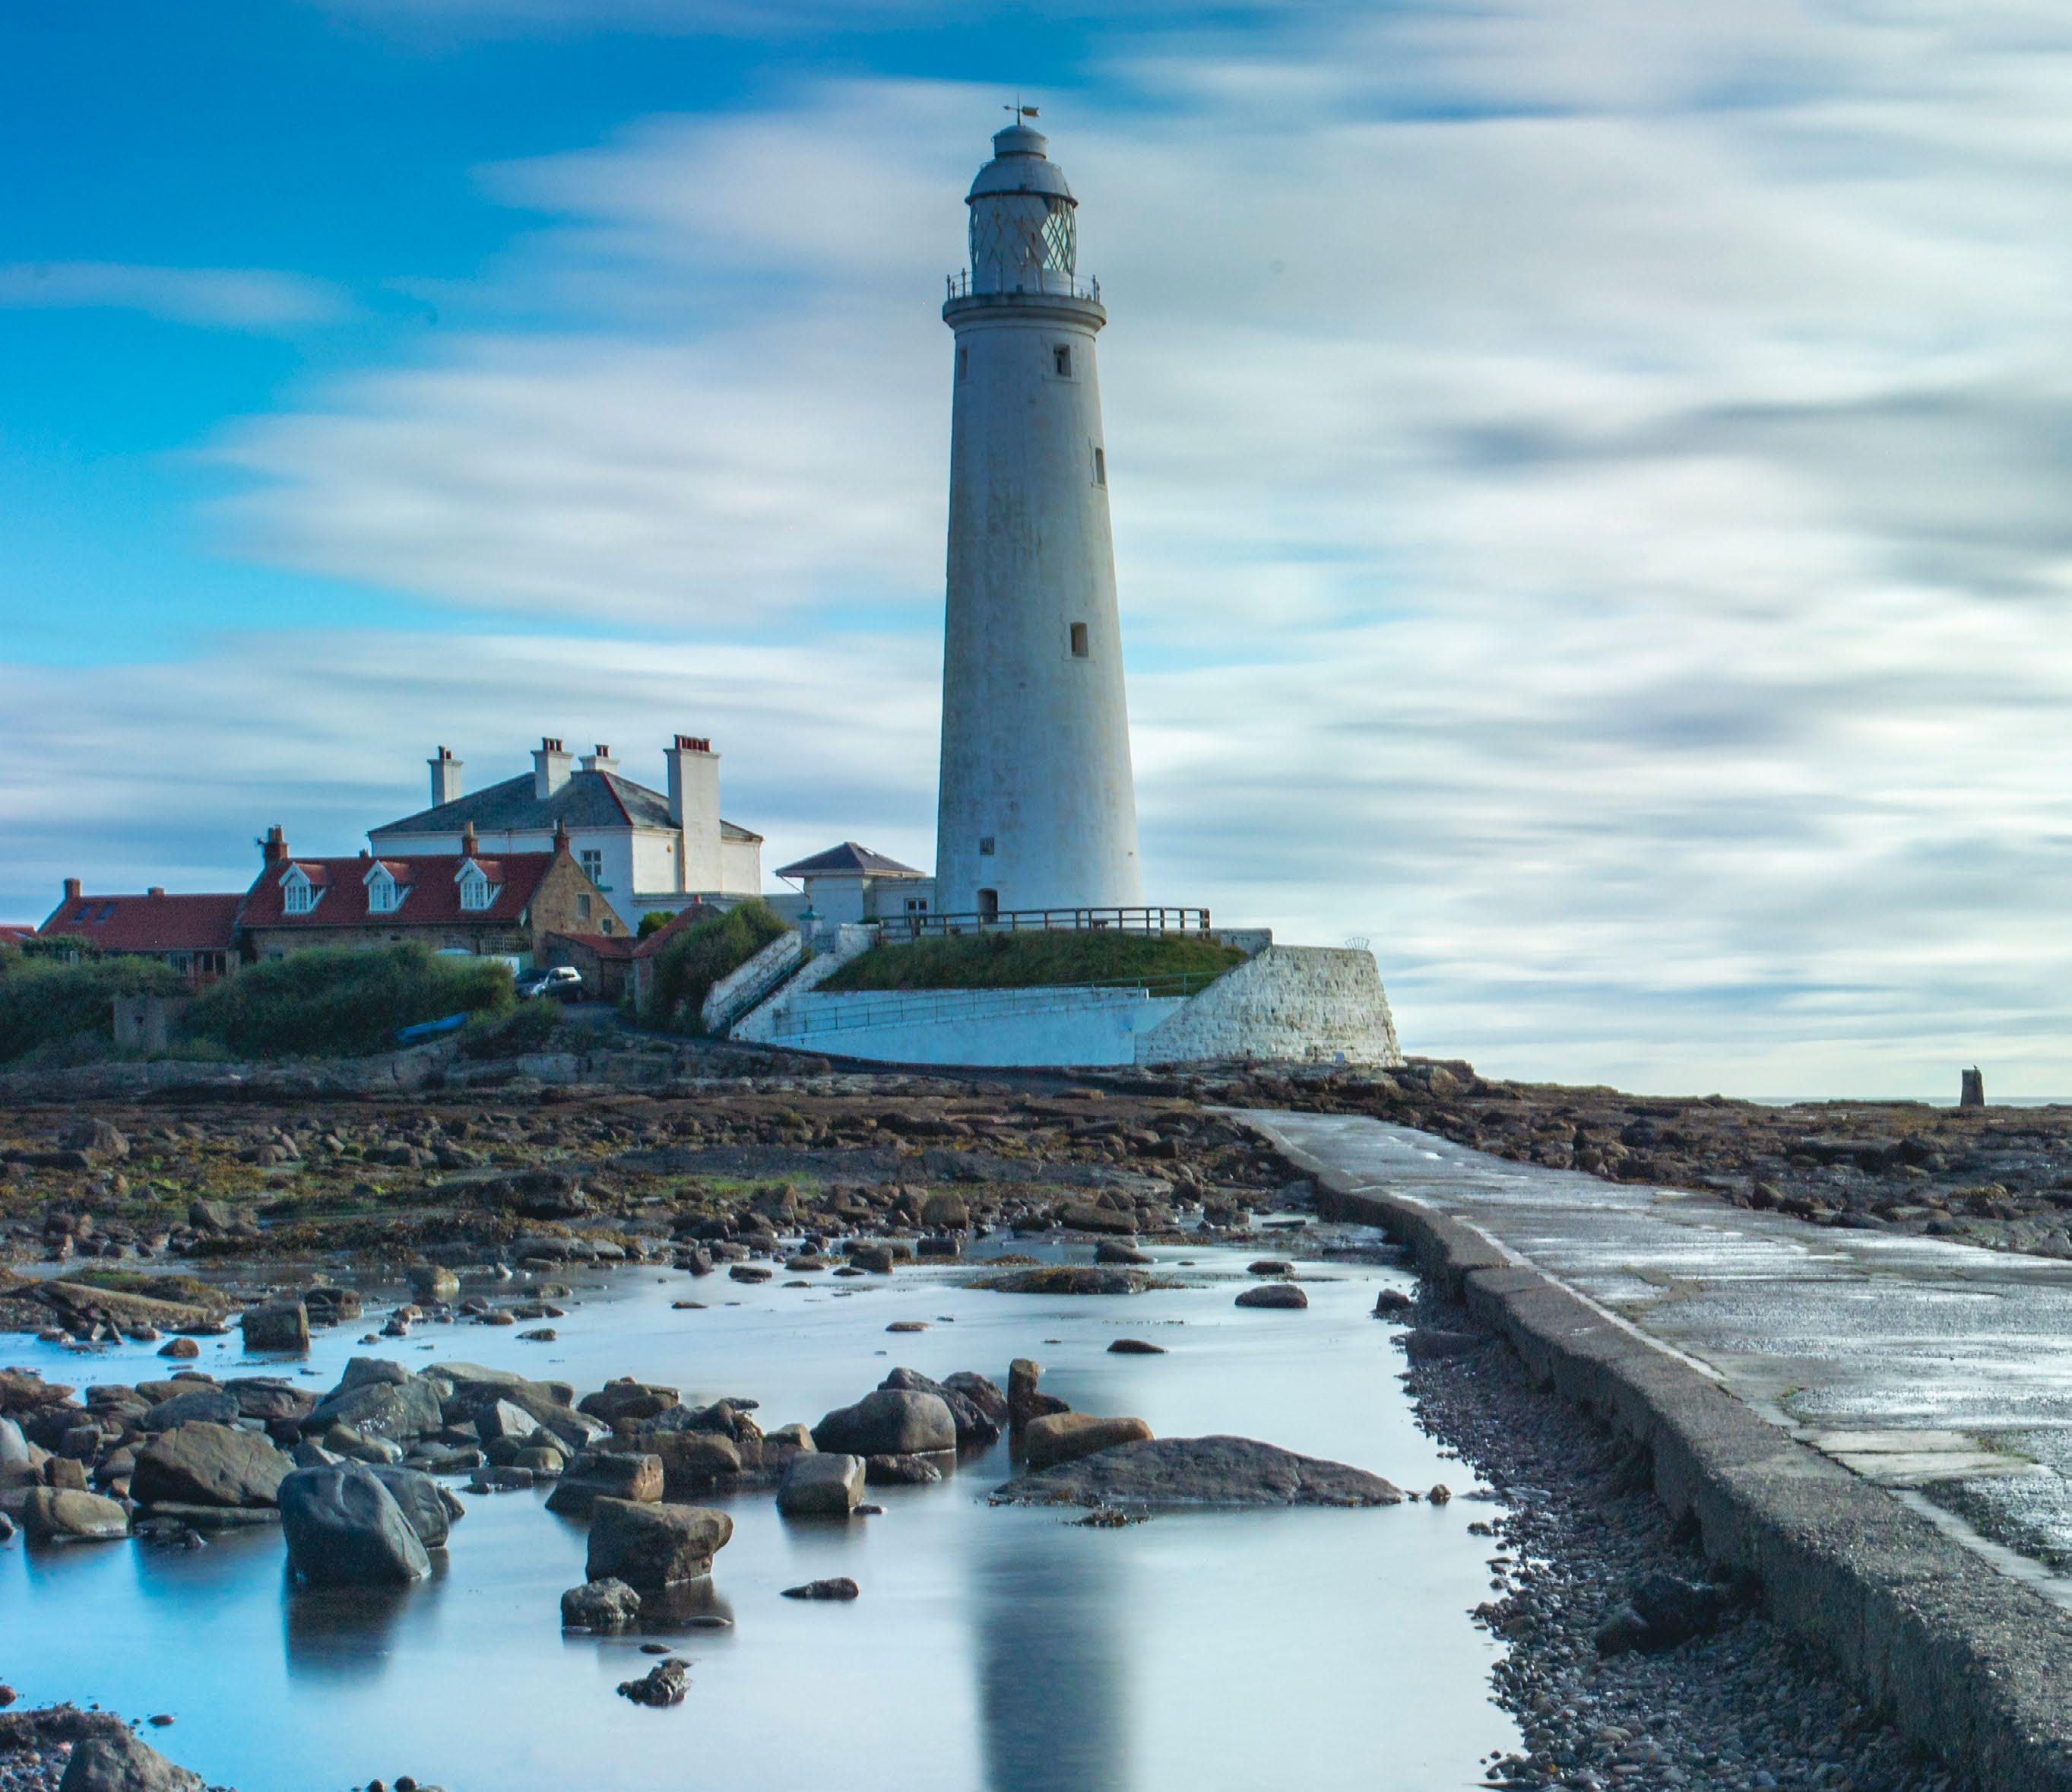
2 Use Content-Aware Usually when you rotate your picture to correct a wonky horizon you’ll have to crop inwards to make this change. You don’t have to lose these pixels, though, as you can tick the ContentAware option beforehand. You’ll lose less of your image when you crop it, as Photoshop will automatically predict and fill in the corners that you’d otherwise usually lose.
3 Crop overlay With the Crop tool active head up to the Tool Options and click on the Overlay Options icon to change which overlay you want to see, if any. Here you can choose framing devices such as rule of thirds, golden spiral and golden ratio, which can help you frame up if you got it slightly wrong incamera. You can also cycle through the Crop Overlay options by pressing the O key.
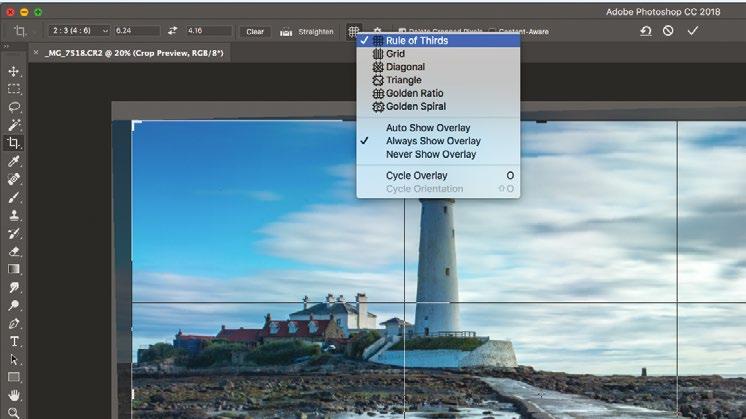
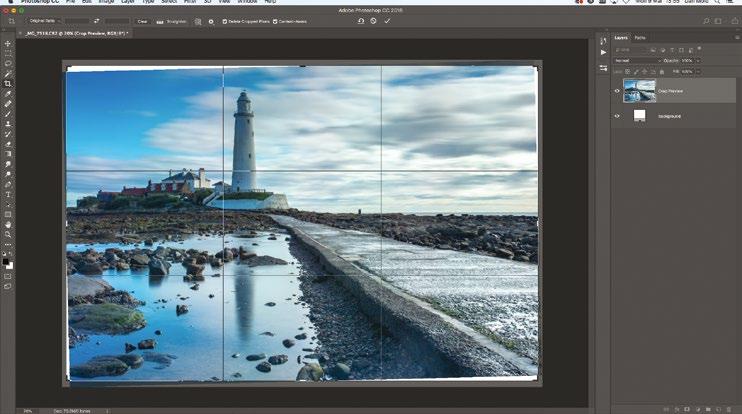
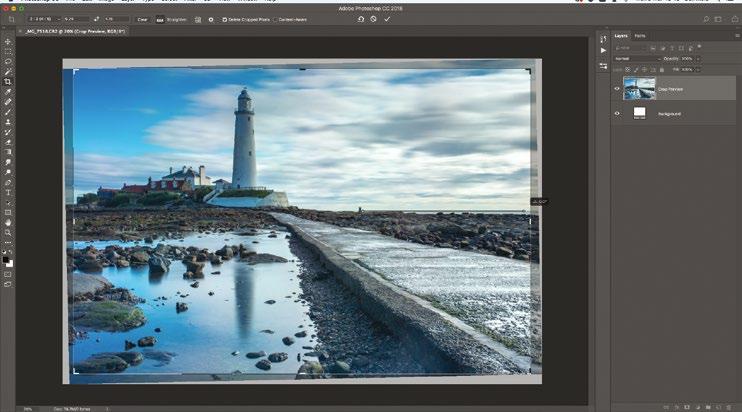
AFTER 56 TECHNIQUES
4 Recompose with a crop Drag in the corners of your crop box to change the composition of the image – what you include or leave out can have a huge impact on the final photo. Hold the Shift key as you drag the corner handles of the crop box in to keep the same aspect ratio, such as 2:3, or click on the drop-down menu to choose a set ratio. Alternatively, enter your own custom aspect ratio in the Tool Options.
5 Correct perspective distortion Hit Ctrl/Cmd+J to duplicate your image layer in Photoshop and then hit Ctrl/Cmd+T to put the picture into Free Transform mode. Now you can hold the Ctrl/Cmd key on the keyboard and drag the top corners of the bounding box outwards to prevent vertical structures like buildings appearing to lean in towards the middle of the shot. Hit Return when you’re done to set it in place.
Perfect your composition in postproduction
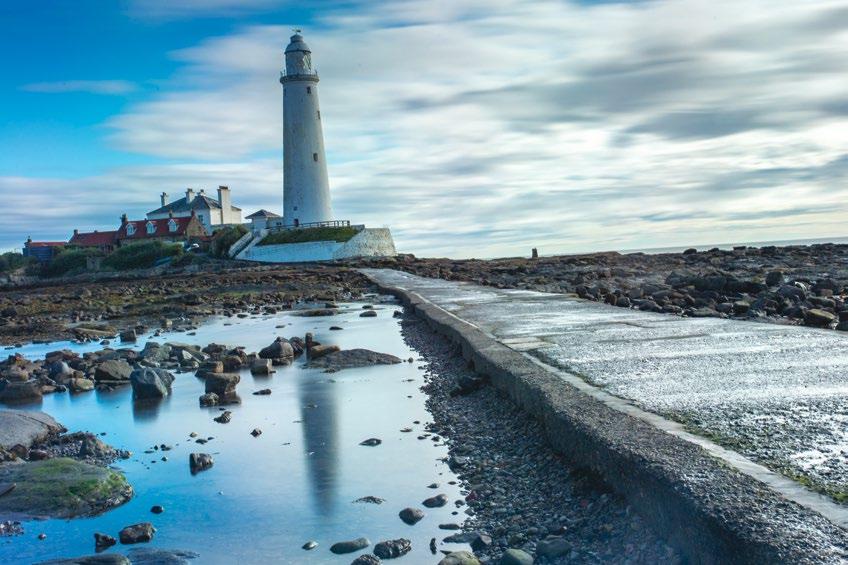
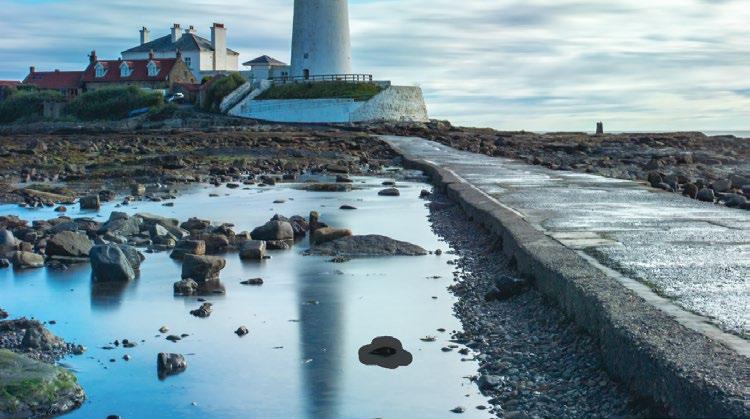
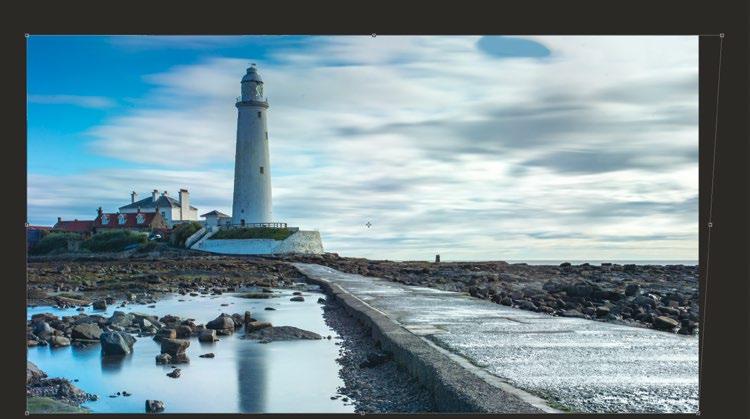
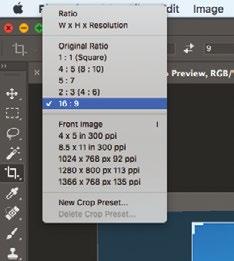
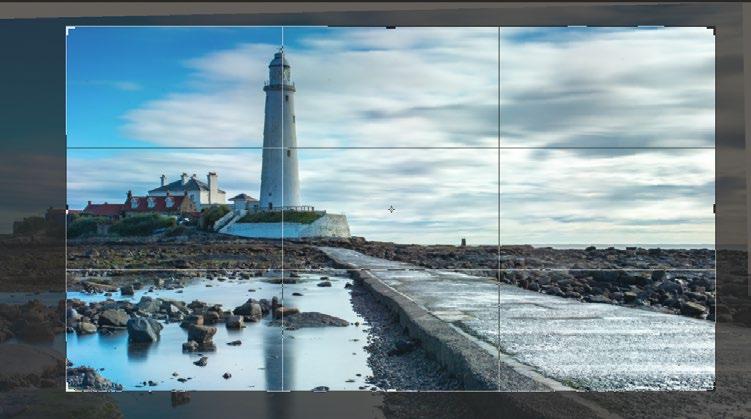

Take your compositions to the top of their game by spending the time to edit them back at your computer
Pressing the shutter button on your camera is rarely ever the end of the creative process when it comes to digital photography, as we have so much choice when it comes to editing programs and the tools that enable us to polish our pics. Even with film photography you have large amounts of creative control when developing your images in the darkroom, and it’s no different for the digital medium now. Image editing has always been part of the creative process.
You may be surprised to find that there’s a whole host of tweaks you can make to your shots to get the composition spot-on. Of course, it’s great to get this as close to perfect in-camera where possible, but we’re going to show you some adjustments that can make an already great photo even better. These include correcting perspective distortion where vertical structures appear to lean in towards the middle of the frame, fixing a wonky horizon, or removing a distracting piece of litter from the foreground. Here’s how you can do it…
6 Remove distractions Sometimes you’ll have taken a great picture only to see a distraction in the scene that you didn’t notice at the time, like a piece of litter, which pulls the eye away from your focal point. In this shot the water reflection would look cleaner and less cluttered without some of the small stones in the water, so these distractions can be removed by painting over them with the Spot Healing Brush tool.
Left No distractions
Above Has potential
BEFORE 57 MASTER COMPOSITION
The closer crop, straight horizon and removal of distractions help to rasie the level of this shot from the one caught in-camera
This shot has many good elements, but the wonky horizon and other small aspects distract from the lighthouse, the main focal point of the shot
Colour range

One of the reasons this image is successful is that it contains a full range of colours, from cooler hues in the shadows to fiery reds and yellows in the highlights
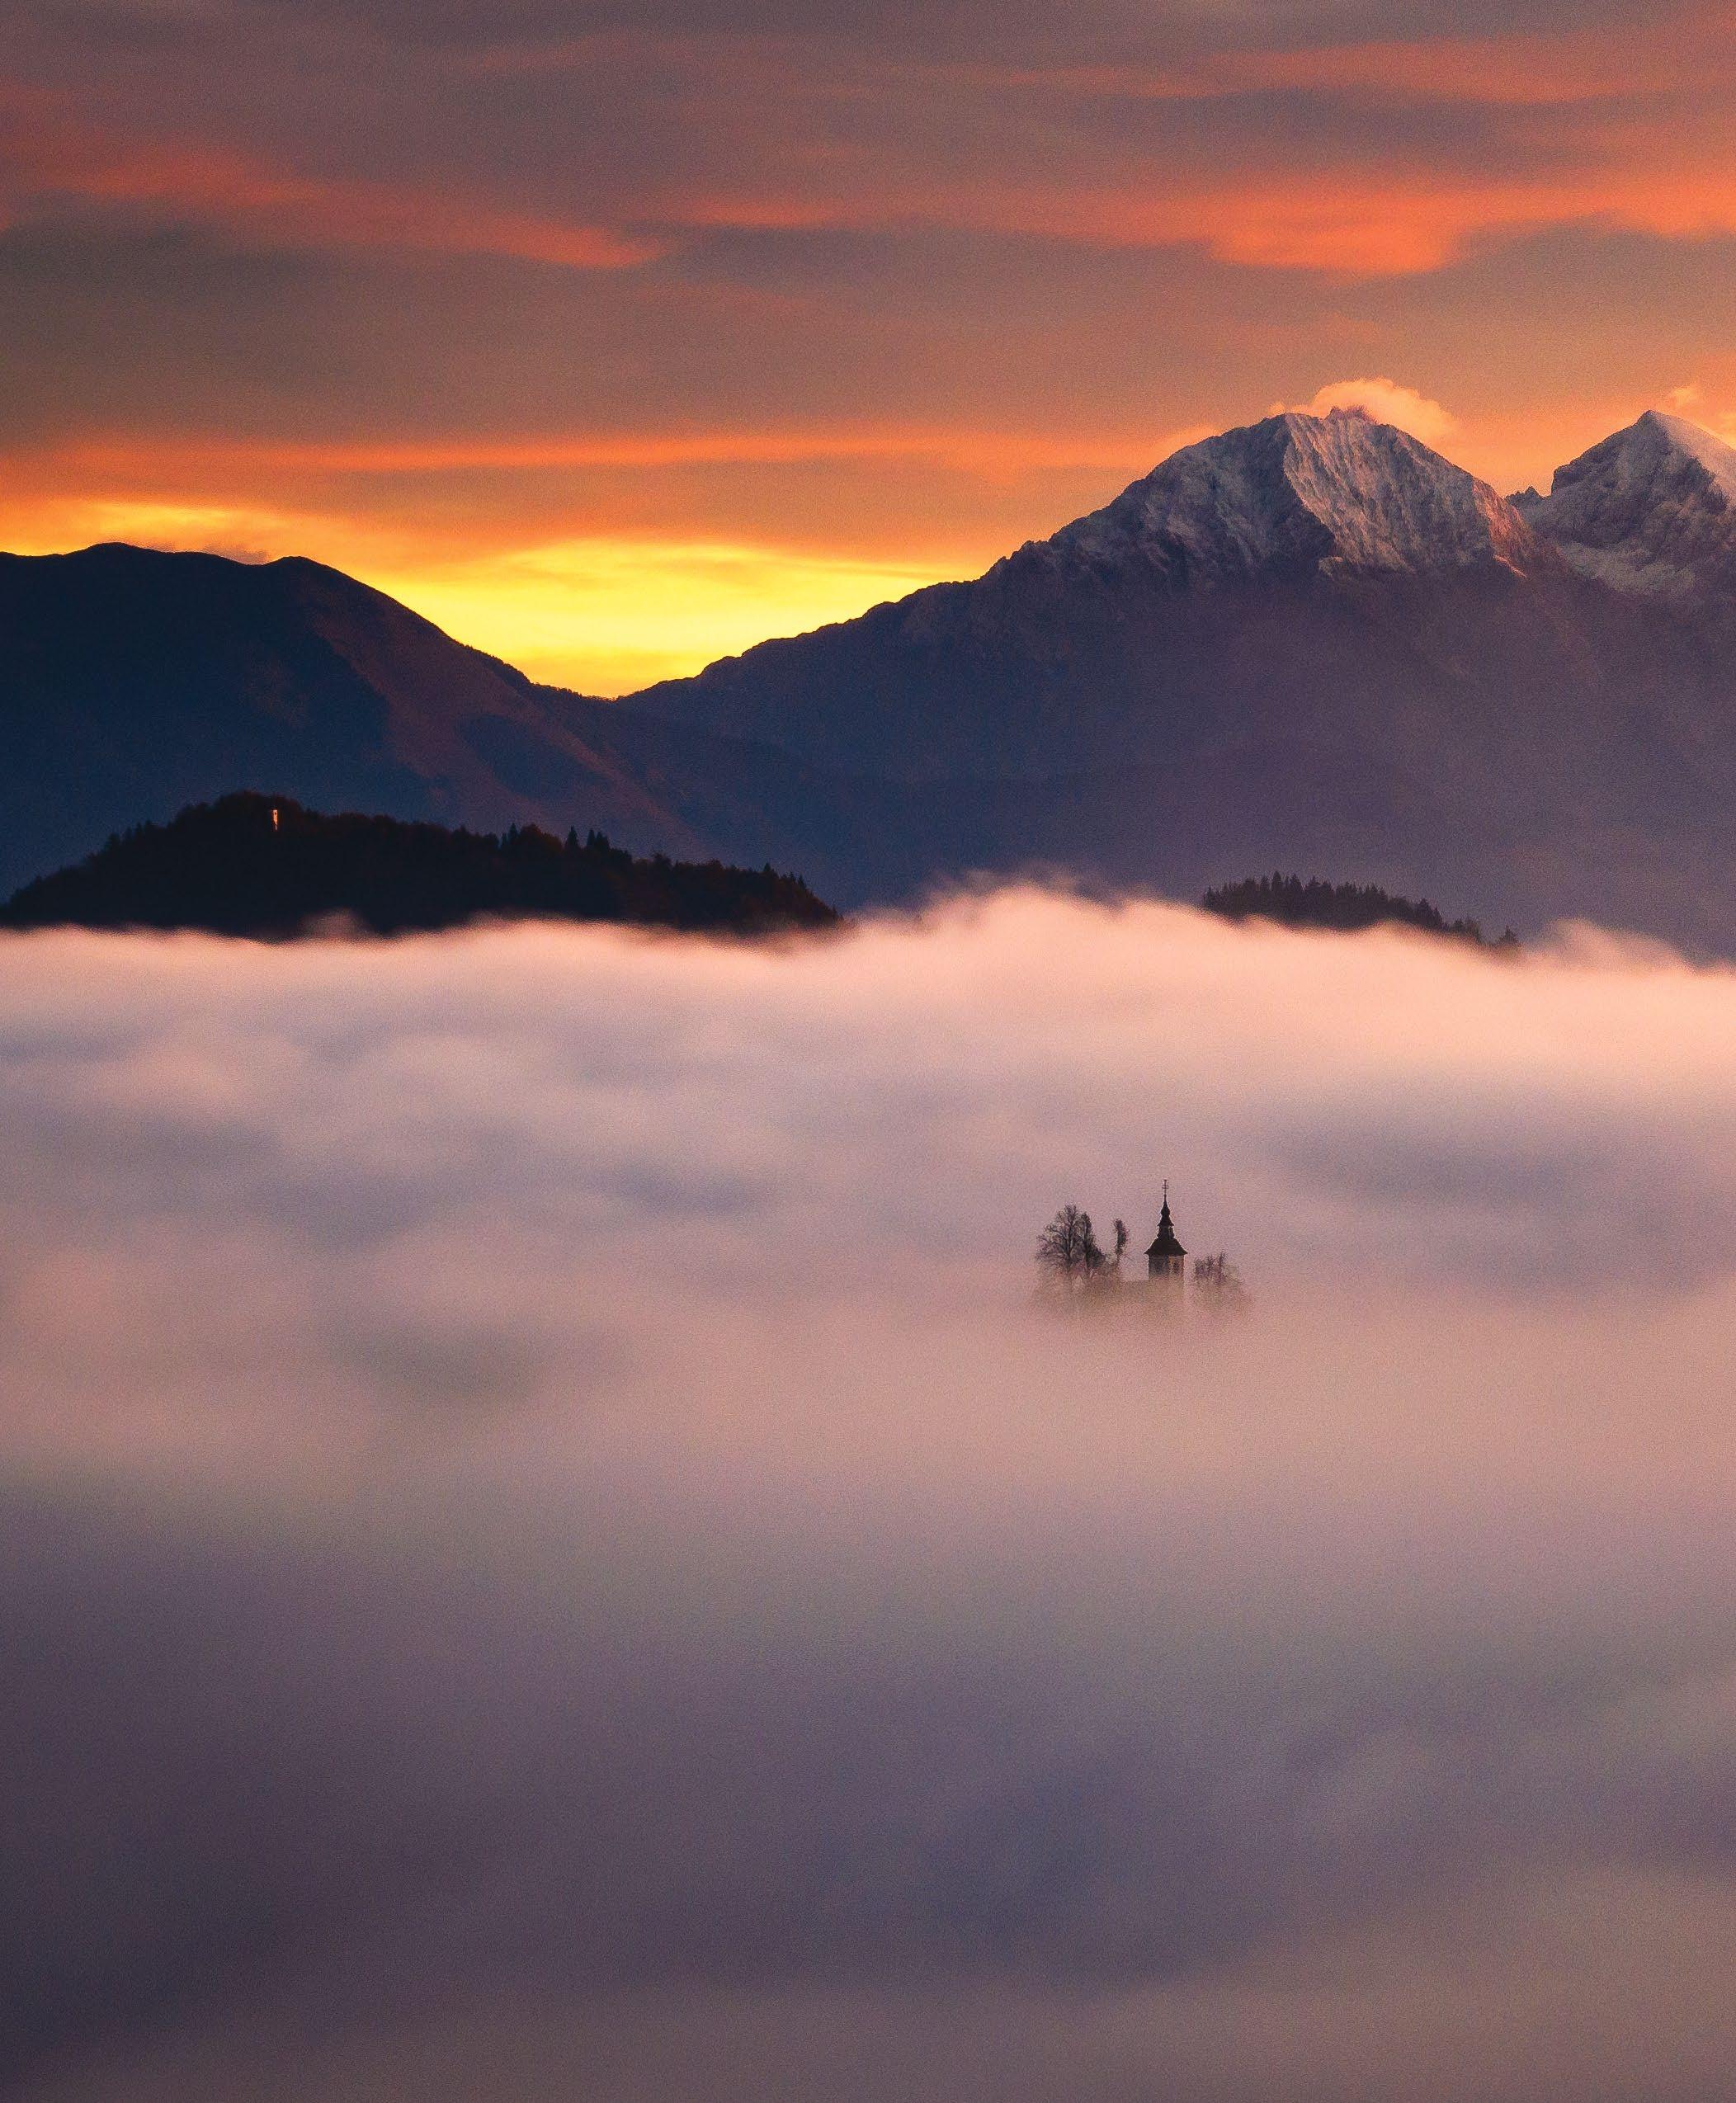 © Fabian Fries
Shoot for the
light
58
TECHNIQUES
Peter Fenech explains how you can adapt your shooting technique and approach to master every lighting condition
Saying that you need to alter your approach to capturing light according to any given scene might seem like an obvious statement. However, it is surprising how often we forget to do this once presented with a photogenic subject.
In our effort to quickly capture the scene before the opportunity is lost, photographers fail to tailor their shooting techniques to make the most of the angle, intensity and colour balance of the light. This is even truer in the digital age, as we have become more accustomed to being able to correct lighting and colour in post-processing.
Of course, exposure can be corrected with ease in RAW processing applications, and in Photoshop multiple frames can be blended for a wider dynamic range, and lighting
effects can be applied or removed at will. In this feature, though, we will be showing you more than simply ways to correct lighting errors.
By familiarising yourself with the main characteristics of light in various conditions, you can learn how to focus on the most attractive aspects of each lighting type, get all of the potential benefits and avoiding the common pitfalls.
By reacting to and using the light you have at your disposal, rather than aiming to overpower it and build up novel styles in post-processing, you can improve your photography massively.
Here, we’ll explore each of the common lighting conditions and reveal incredible picture opportunities at any time of day, and in any weather.
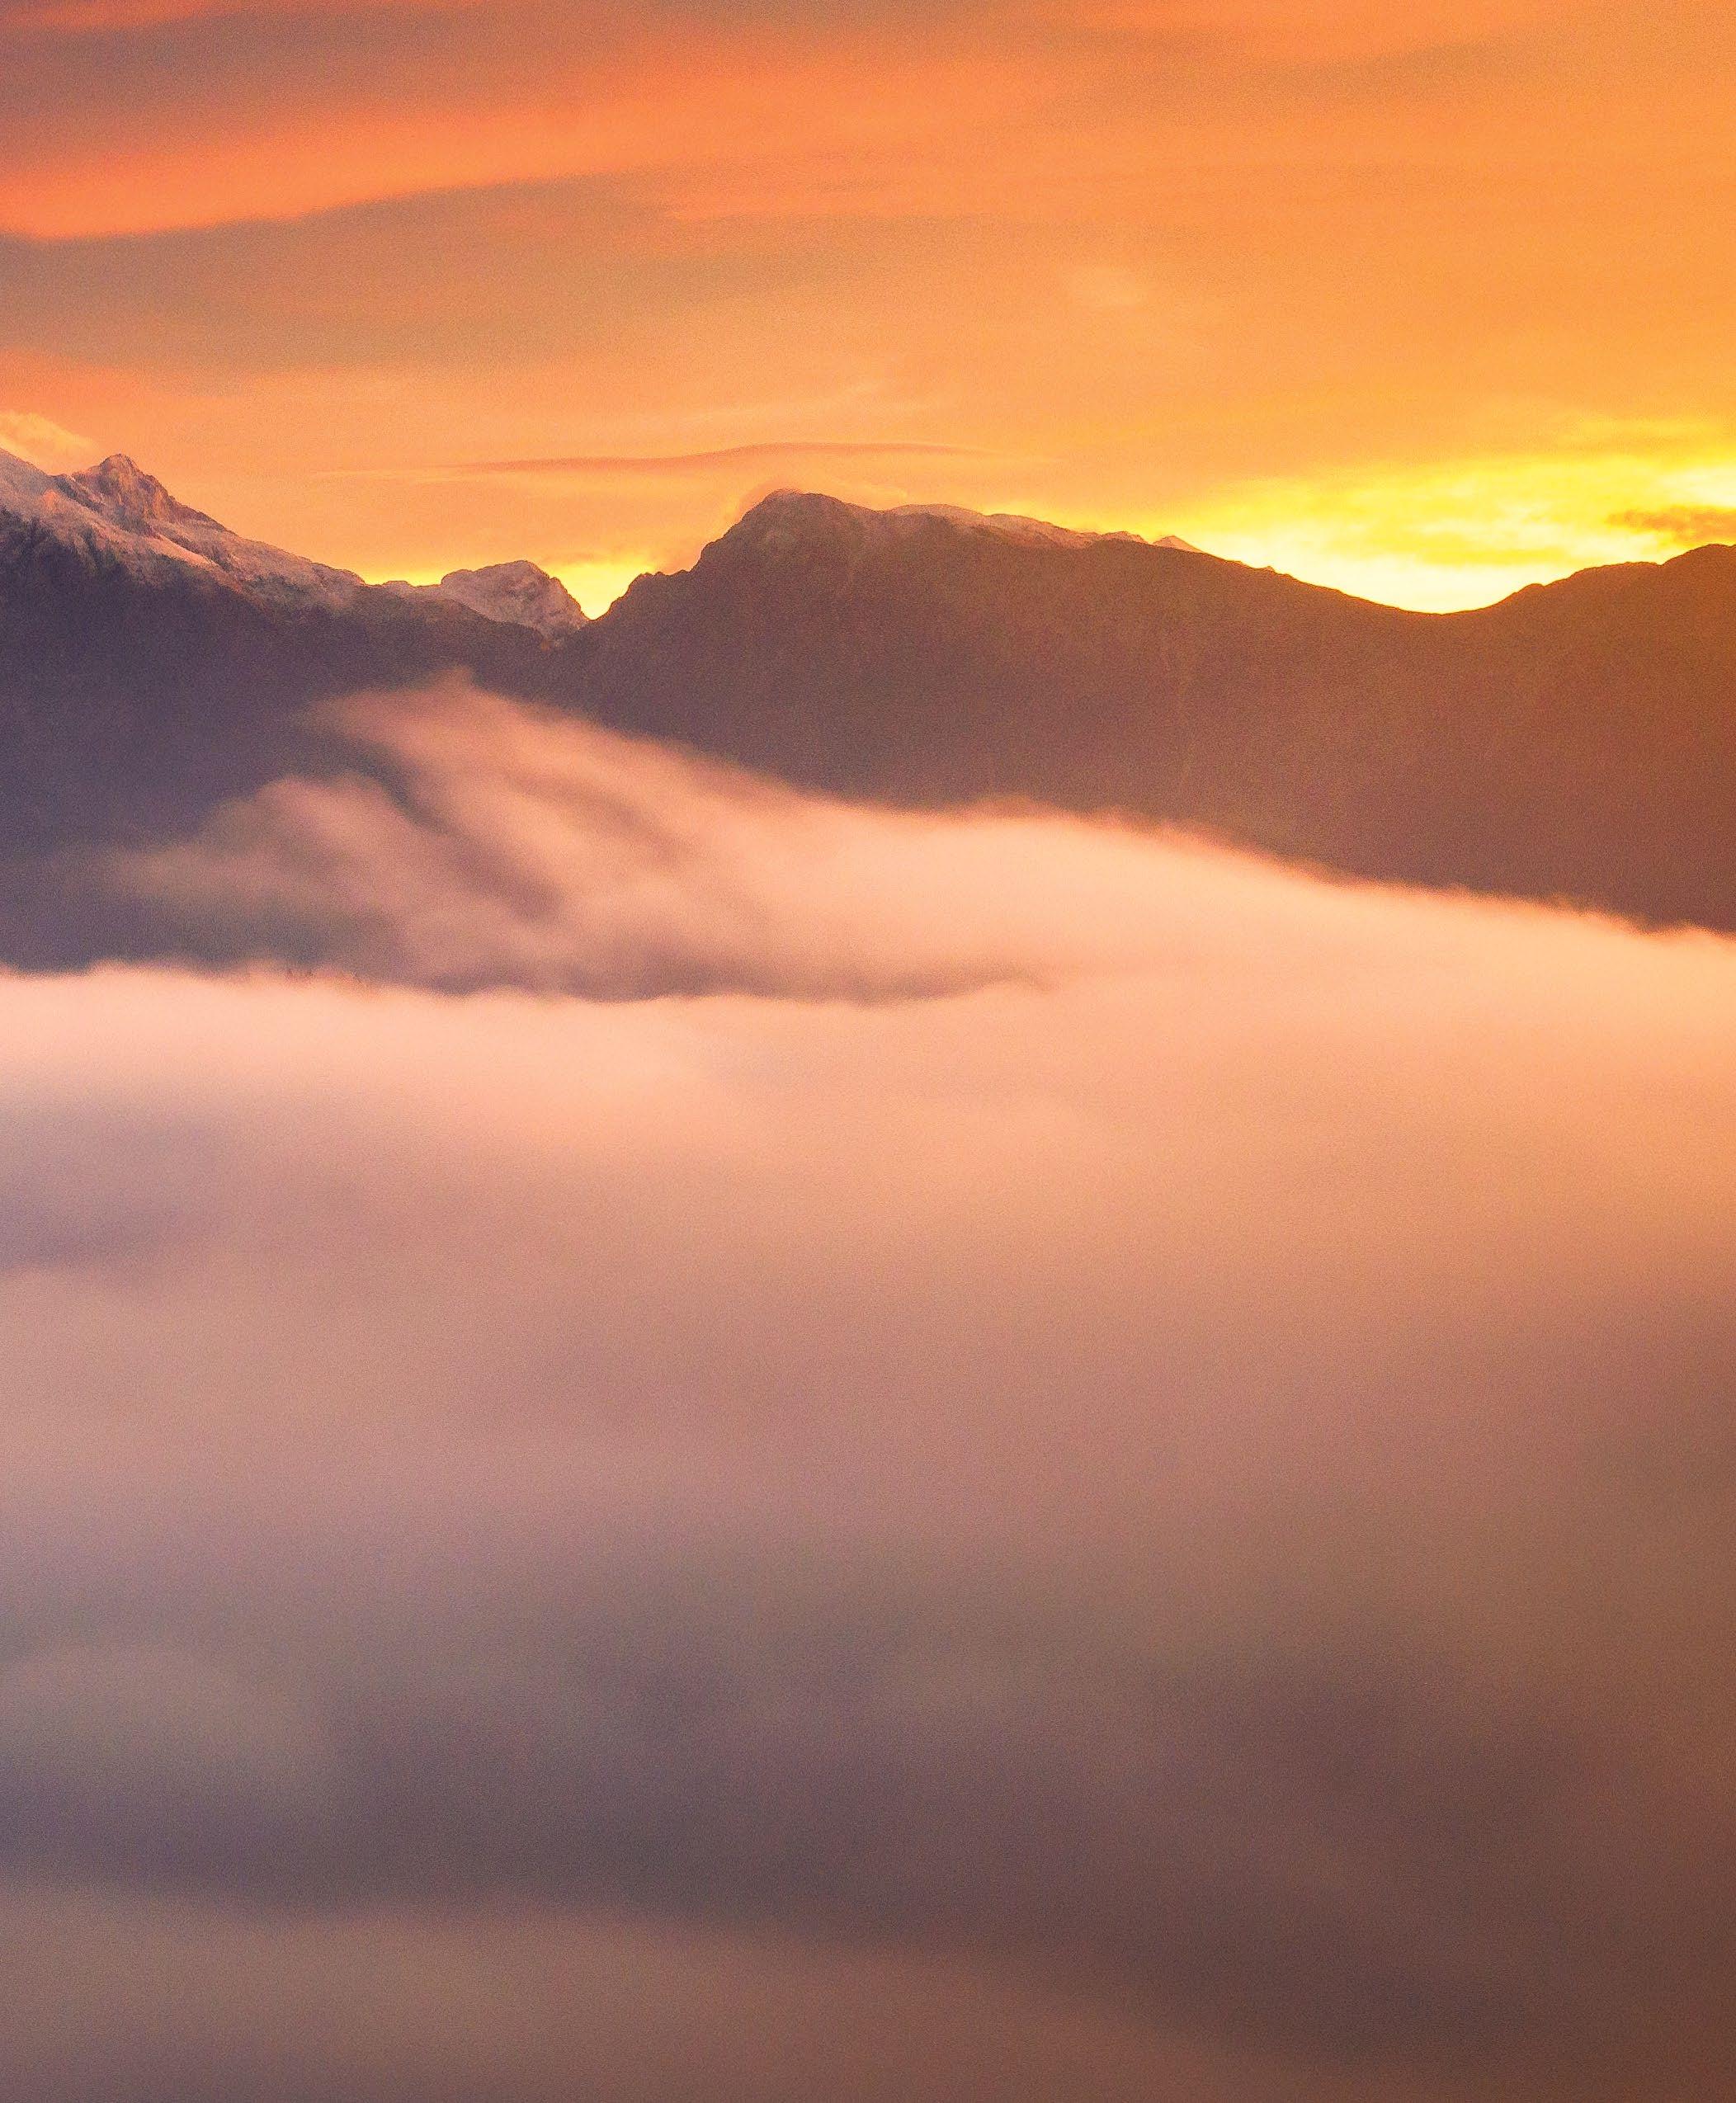
59 SHOOT FOR THE LIGHT
Capture golden hour landscapes
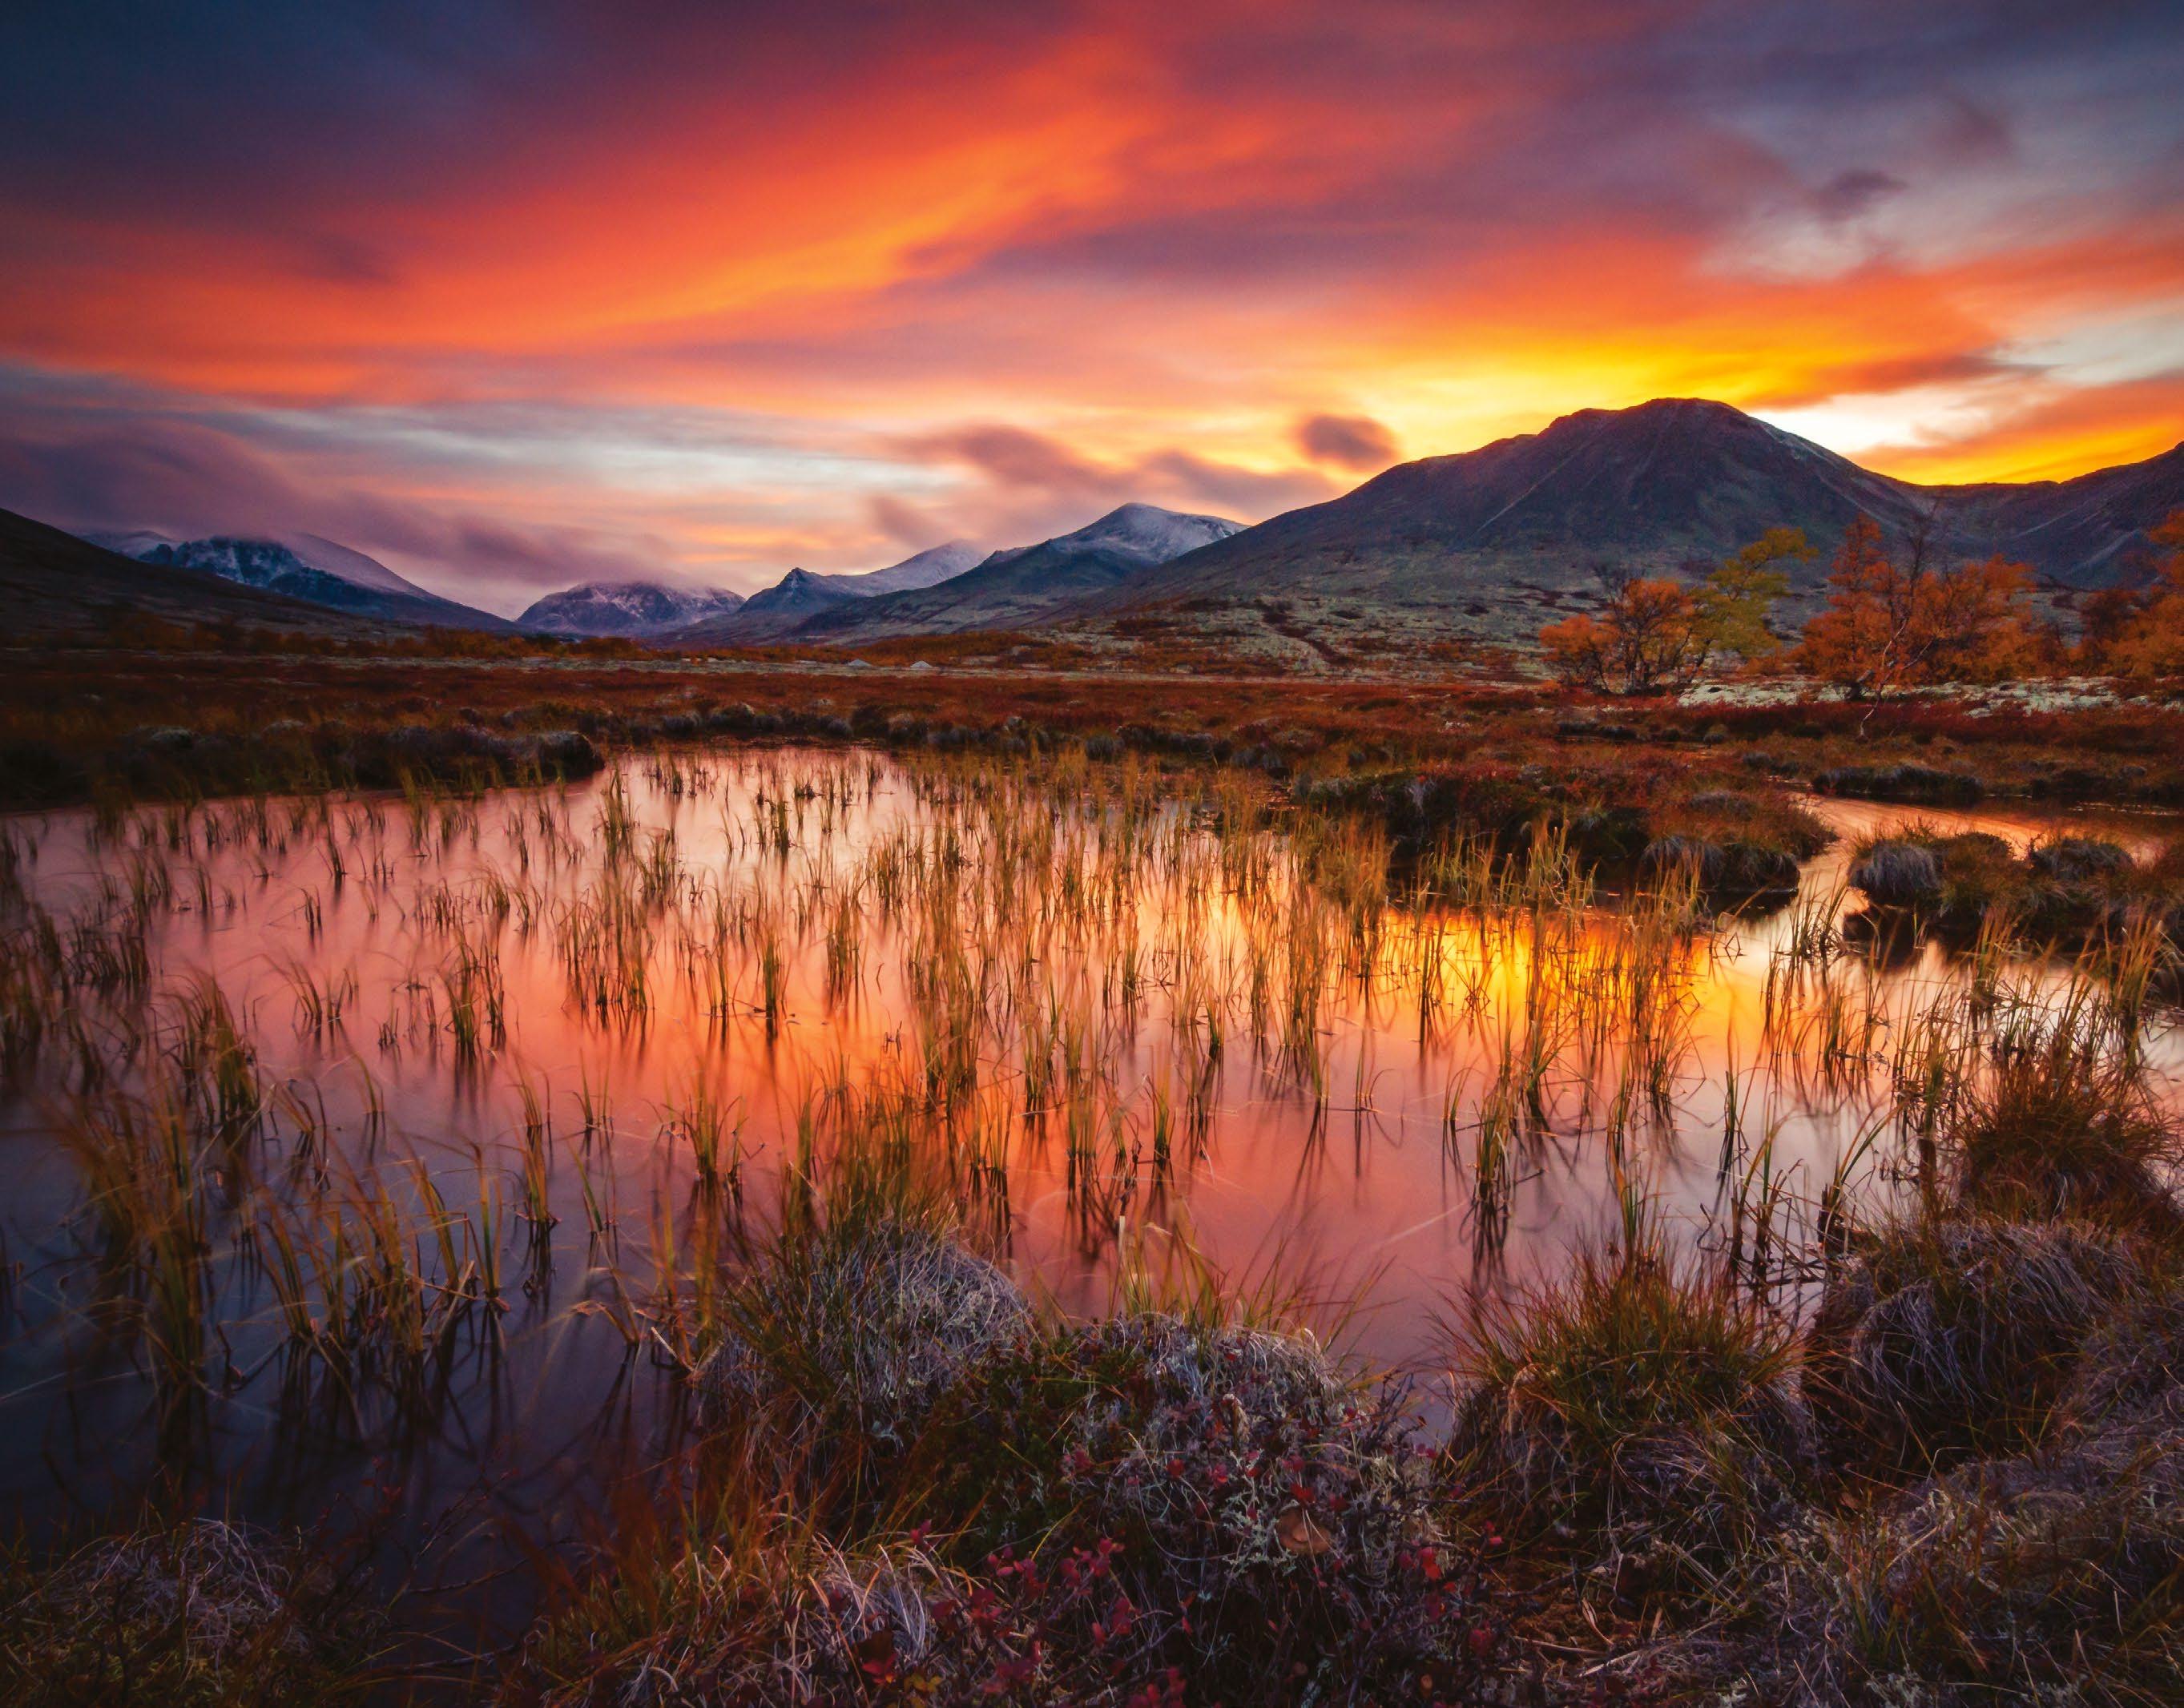
Work with low sun, temperature and colour for better sunrises and sunsets
It is common knowledge that early morning and evening are preferred times for landscape photography. Sunrise and sunset provide a combination of directional, detail-enhancing light and attractive, warm colours. These are accompanied by soft shadows, caused by the greater refraction of light as it passes through the atmosphere at a more oblique angle.
Such lighting is loved by landscape shooters because it not only brings out texture in natural surfaces and adds a warm glow to highlights, but the exposure is easier to manage, since the tonal spectrum is a better fit for the dynamic range of most cameras.
Anyone who has taken images during these times, however, will be aware of certain
Manage colour
Use saturation and warmth for shots with better balance
1 Try presets Begin by selecting a white balance preset, such as Daylight or Cloudy, to gauge the colour temperature of the scene. These settings should preserve the natural warmth of the low sun, while preventing a biased cast.
2 Customise your Kelvin setting
To maintain some of the cooler hues found in shadow areas during the golden hours, enter a manual White Balance that’s close to the chosen preset. If you opted for Daylight, for example, try setting a value between 4800K and 5800K for a balance of tones.
3 Adjust composition With steep gradients in colour temperature, such as at dawn and dusk, adjust your framing to include or cut out areas of the scene that possess a different colour balance. Shooting vertically will incorporate more sky, introducing greater colour variance into the scene.
4 Create custom presets Save your own white balance presets for use in regularly experienced conditions. Take a custom measurement for a series of settings – neutral, cool, warm, very warm, etc. – to cover all possible colour structures and have these at your fingertips. You can then recall these in seconds when needed.
difficulties that come with managing such high-saturation, low-angle sunlight. While the warm colours are naturally attractive to the human eye, they do have a tendency to swamp the scene, dominating the natural hues in the landscape. Without care, this can result in landscape images being stripped of impact, leaving little in the way of colour depth and contrast, which can be disappointing after witnessing such a magical sunrise.
There are also the practical challenges of shooting into a bright, directional light source of great intensity. Other than the safety issues of shooting with the sun in the viewfinder –for both the photographer’s eyes and the camera’s sensor – there is always a risk of
flare, ghosting and other light-leak artefacts. You can either choose to avoid these through careful positioning of the camera, or embrace them for creative effect. This choice will often depend on the scene type, the atmosphere you are attempting to create, and to some extent the equipment in use. Regarding the latter, if you are using a wide-angle lens, which is prone to flaring, it may be best to include rather than attempt to avoid such optical effects, especially if you have to incorporate the sun in your frame directly.
The good new is that there are plenty of ways of crafting low sun colour for impactful photos, and using intense light to create shots with the right balance of saturation and detail.
60 TECHNIQUES
Right Strong direction
Since the human eye is drawn to the brightest image area, featuring the sun can suggest depth, since the viewer’s eye will move from the darker zones to the low sun position
Right below Extreme colour

Sunrises and sunsets are known for intense colours, and one reason images fail is because the shot appears too ‘neutral’. Represent tones as they appear, using Cloudy or Shade white balance if using a preset in isolation
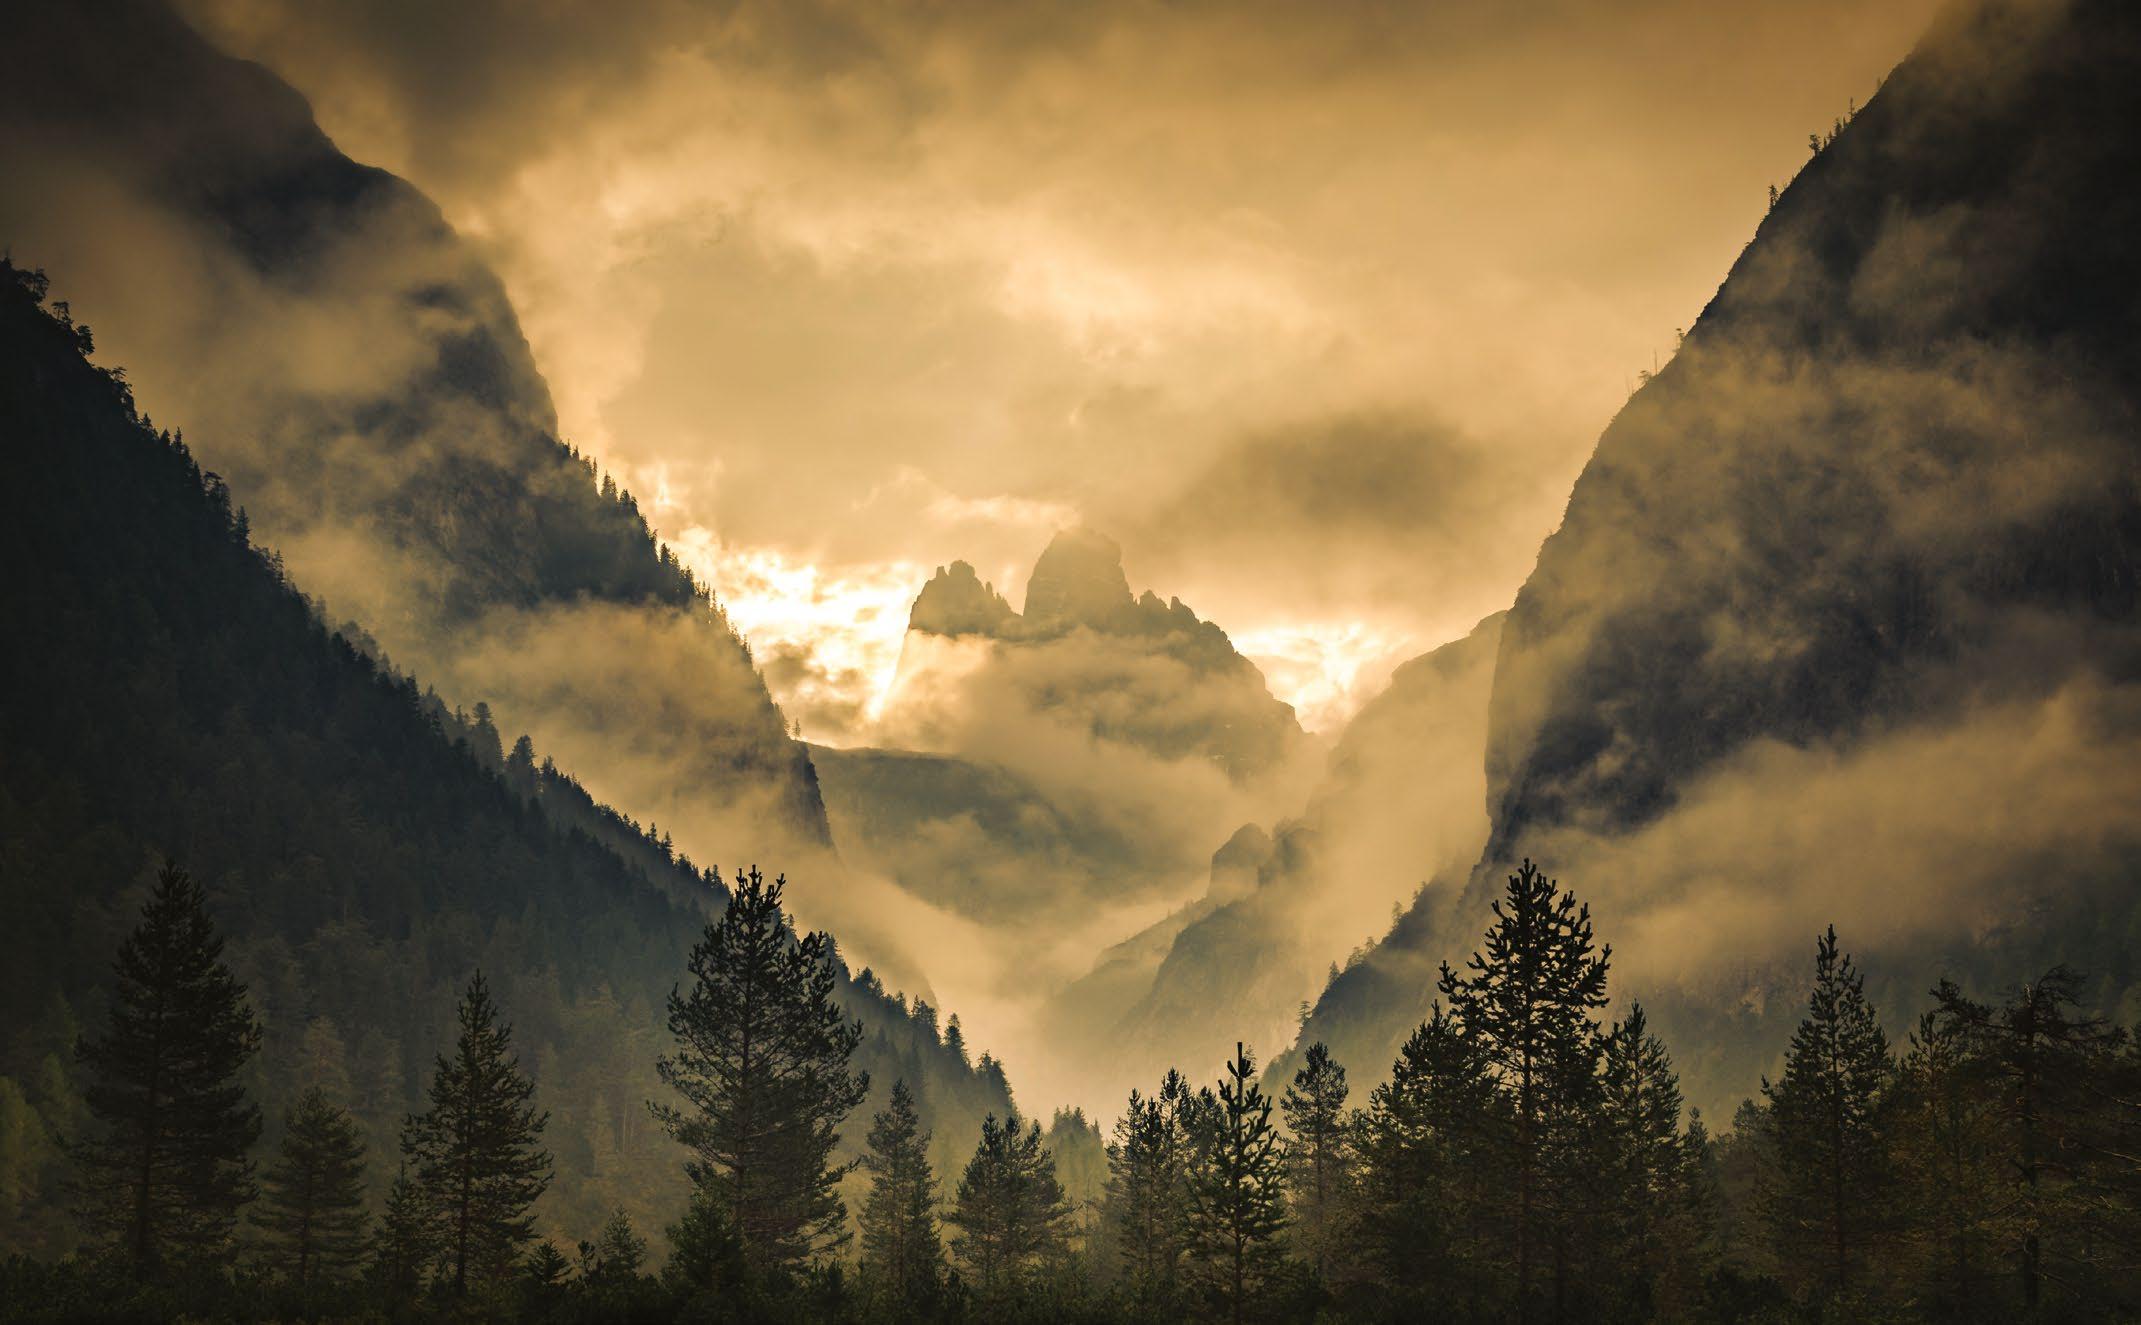
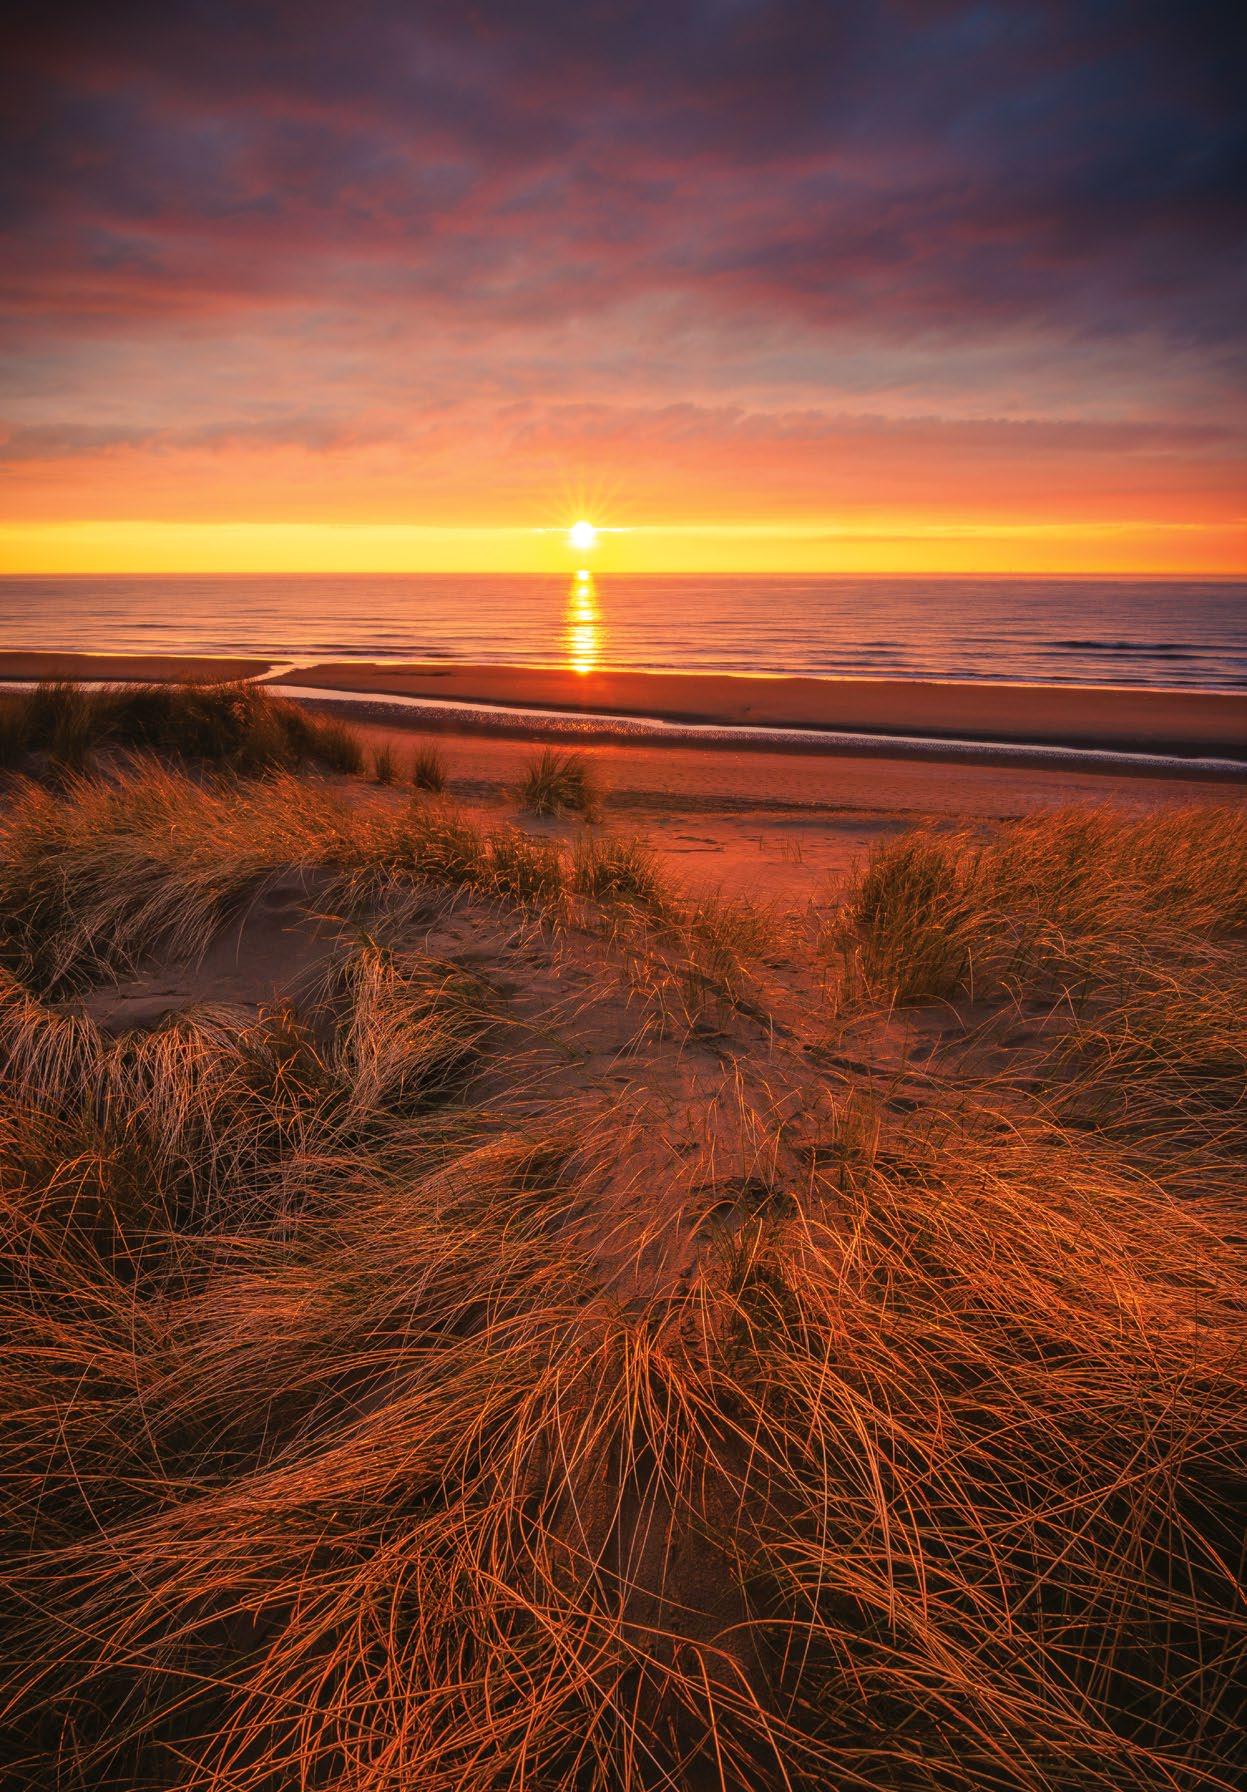
Light direction and lens flare
Flare is often seen as a bad characteristic of a lens because it can often dominate attention in a frame and obscure the main subject. If you find your lens flaring drastically, try making small adjustments to the direction in which the lens is pointing –sometimes a millimetre of pan can reduce internal lens reflections sufficiently. Next, open the aperture by a stop if possible, as this can reduce the sharpness of ghosting and flare artefacts. Consider shooting two images at different f-stops and blending these in software later, for the ideal sharpness-to-flare balance. Conversely, try embracing the flare, shooting wide open and allowing light to ‘wash’ across your image.
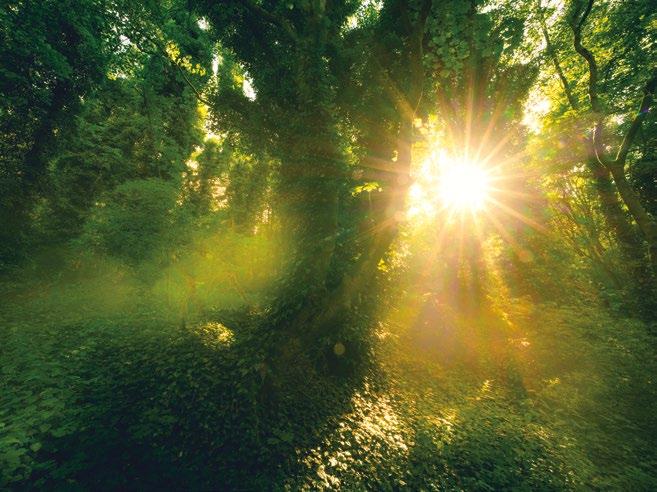
x3 © Fabian
Fries
61 SHOOT FOR THE LIGHT
© Peter Fenech
Shoot scenes in overcast light
Use flat lighting to your advantage and capture subtle details and bold colour
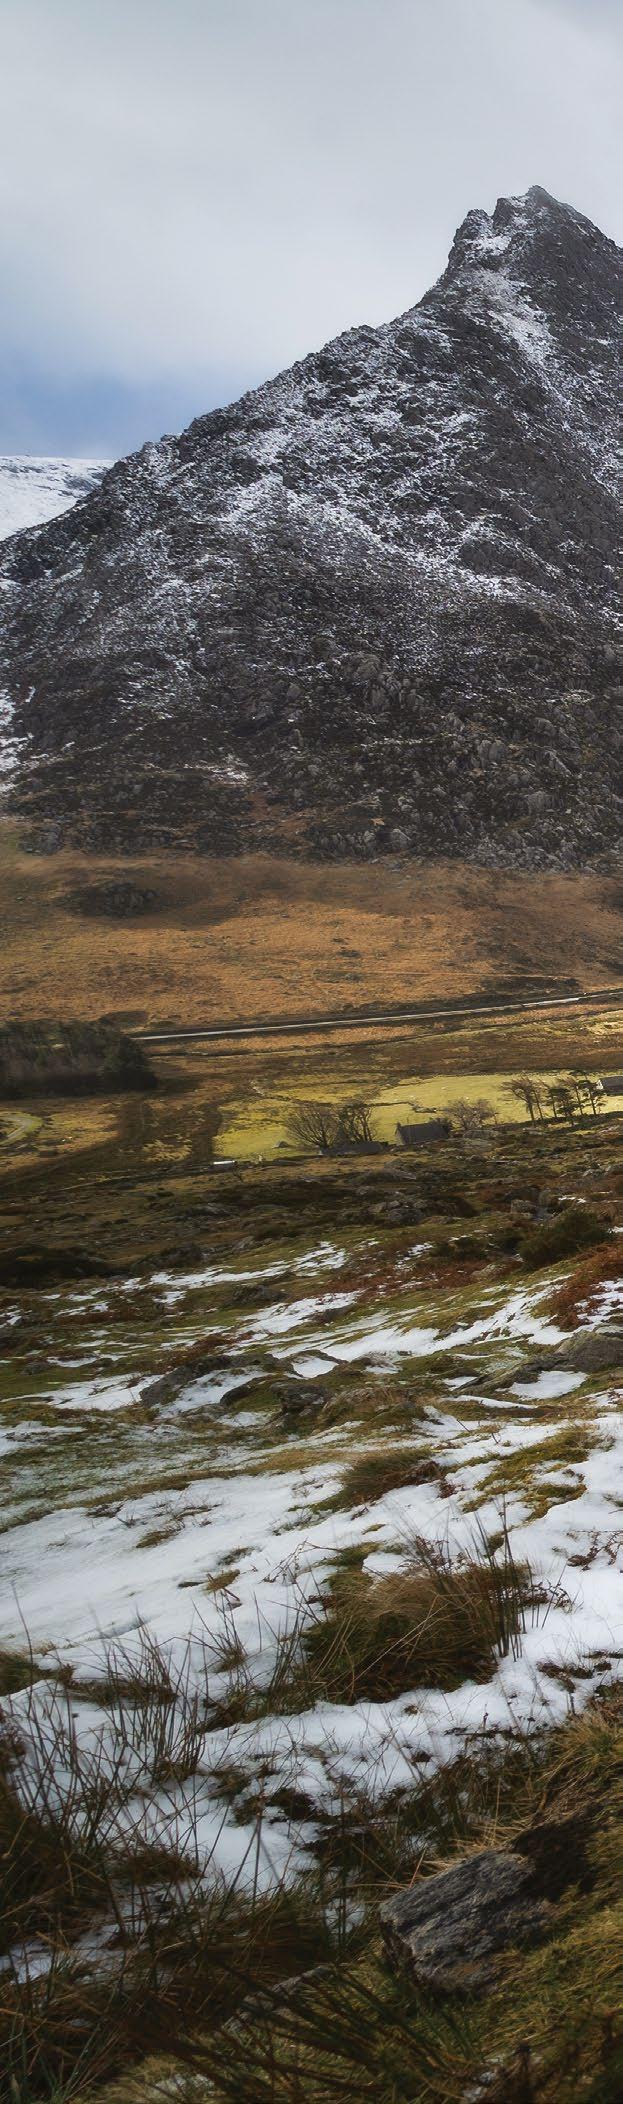
Cloudy conditions and blank, white skies are not the most enticing properties for outdoor photographers. Over years it can become a natural response to see this sort of weather forecasted and choose to stay indoors, rather than head out with a camera. This is justified in part, since overcast light doesn’t help to bring out texture in the landscape. Nor does it add attractive backlighting to outdoor portraits, side lighting to macro subjects or glassy, colourful reflections to architectural studies. However, as any pro photographer should recognise, these conditions are perfect to capture something unique.
While flat light is not particularly dramatic, there are redeeming qualities. Generally, the tonal range is a little more compressed, which
Right Suitable subject
reduces the overall contrast in a scene. This enables you to attempt images that you might not try under direct, undiffused sunlight, for fear of losing detail in the highlights.
Cloudy skies also act like a large softbox, filtering sunlight and diffusing it for a softer gradient of highlight-to-shadow on a subject. This makes grey days ideal for outdoor portraiture and macro images of delicate subjects, when in other lighting conditions we would have to employ our own methods of light modification, such as with handheld diffusers, scrims or light tents.
This may not seem of much use to landscape photographers, who usually prefer light with more punch, but cloudy weather can also benefit woodland scenes, shots of flower
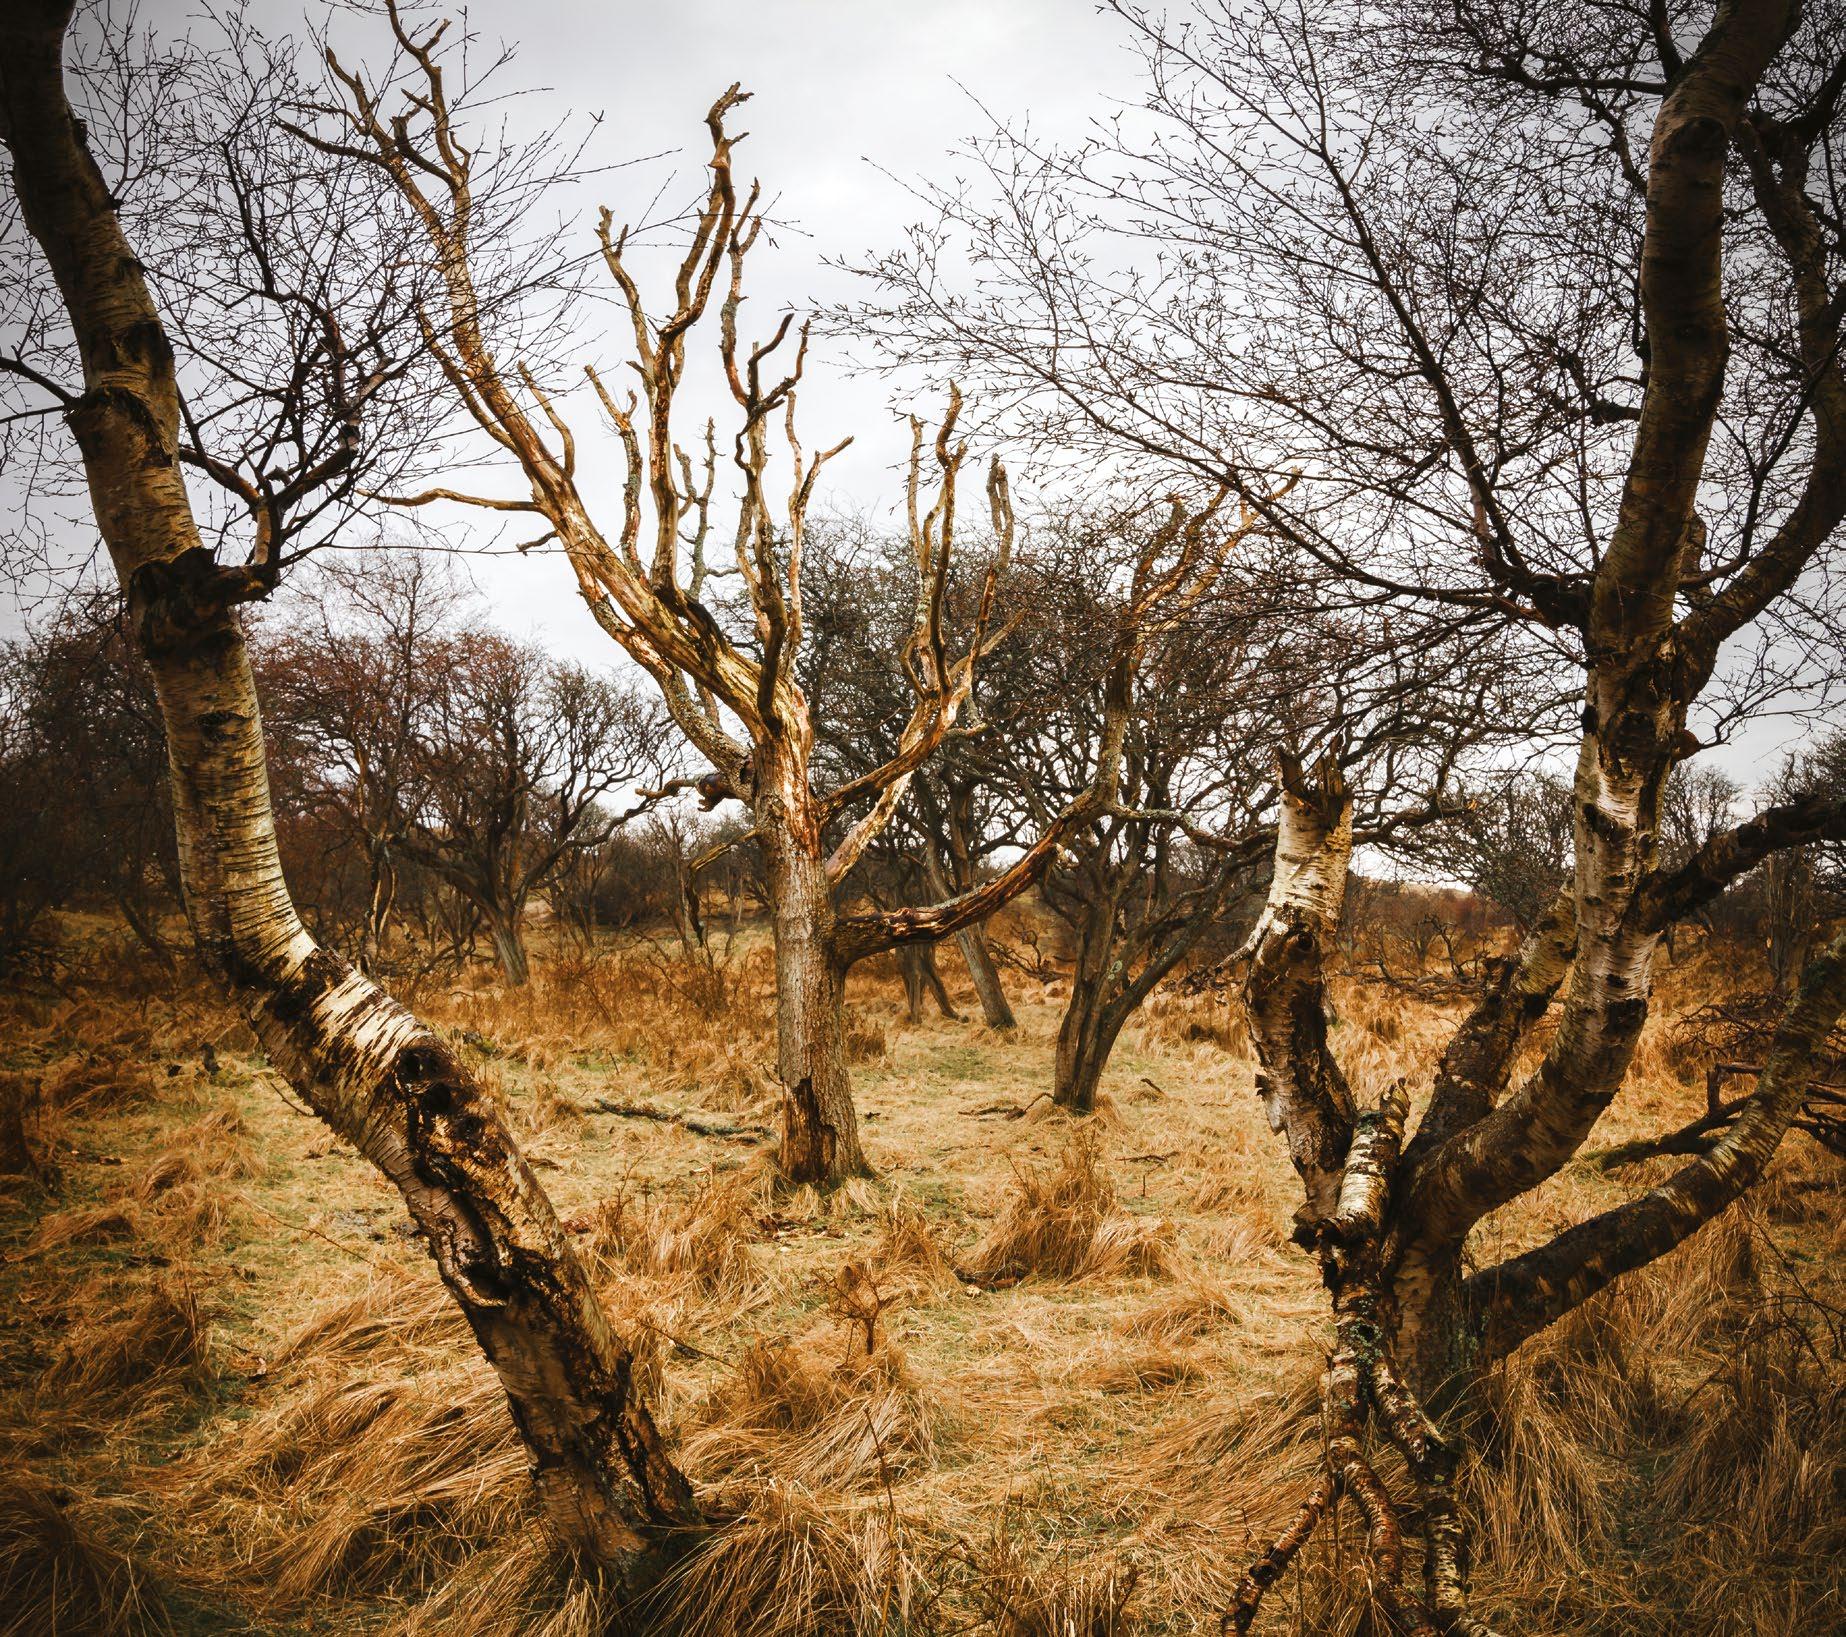
In cloudy light, look to contrast sharper textures with softer elements, such as water rushing over richly toned terrain. Here, Fabian Fries chose the ideal scene for the weather
Subtle tonality
Right above Weaker colours
meadows, and compositions that feature colourful buildings. Softer light produces greater colour saturation, so learning to balance your exposure, composition and white balance to match this will give you vibrant frames that are impossible in midday sun.
At the other extreme, those with an affinity for black and white photography can use this light as an opportunity to create high or lowkey minimalist shots, with a focus on subtle contrasts of texture.
If you exclude most of the sky, or actually make it a dominant part of the composition, you can try incorporating some clipping to reduce areas of the frame to solid white, which provides a blank canvas against which you can isolate your chosen point of interest.
Cloudy conditions give less dominant colours, such as green, greater attention. Use this opportunity to focus on lush ‘natural’ hues that are often drowned out by sunset reds or midday blues
CONSIDER COLOUR
Look for richly coloured objects to stand out against dull surroundings, which then become effective canvasses.
OVEREXPOSE
While you should avoid loss of highlight detail, pushing the exposure as high as possible will prevent dull tones.
LIMIT EMPTY SPACE
Compose your shot so that minimal bland sky is visible in the frame.
FOCUS ON DEPTH
Since you are lacking contrast, compose your shots to convey the 3D feel of a scene to compensate.
x3 ©
62 TECHNIQUES
Fabian Fries
SHOOT FOR THE LIGHT SHOOT FOR THE LIGHT
Useful accessories
Try these peripherals to improve shots in overcast conditions
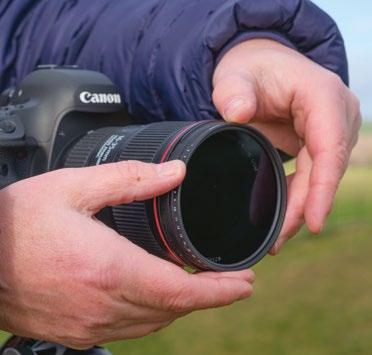
HARD ND GRADS
ND grads add a brightness gradient to dull skies, revealing detail in clouds and giving overcast scenes extra shape. Using hard grads will also create a contrast of tone and brightness between the ground and sky.
CIRCULAR POLARISER
Use a polarising filter to reduce sheen on the surfaces of leaves for deeper saturation and a richer colour palette. This helps to make the most of the saturating properties of overcast light. Pick subjects that are already colourful.
REMOTE RELEASE
Overcast days can be deceptively dark for your camera’s exposure meter. This can result in unexpectedly low shutter speeds, so a tripod is a must, while a remote shutter release is recommended.
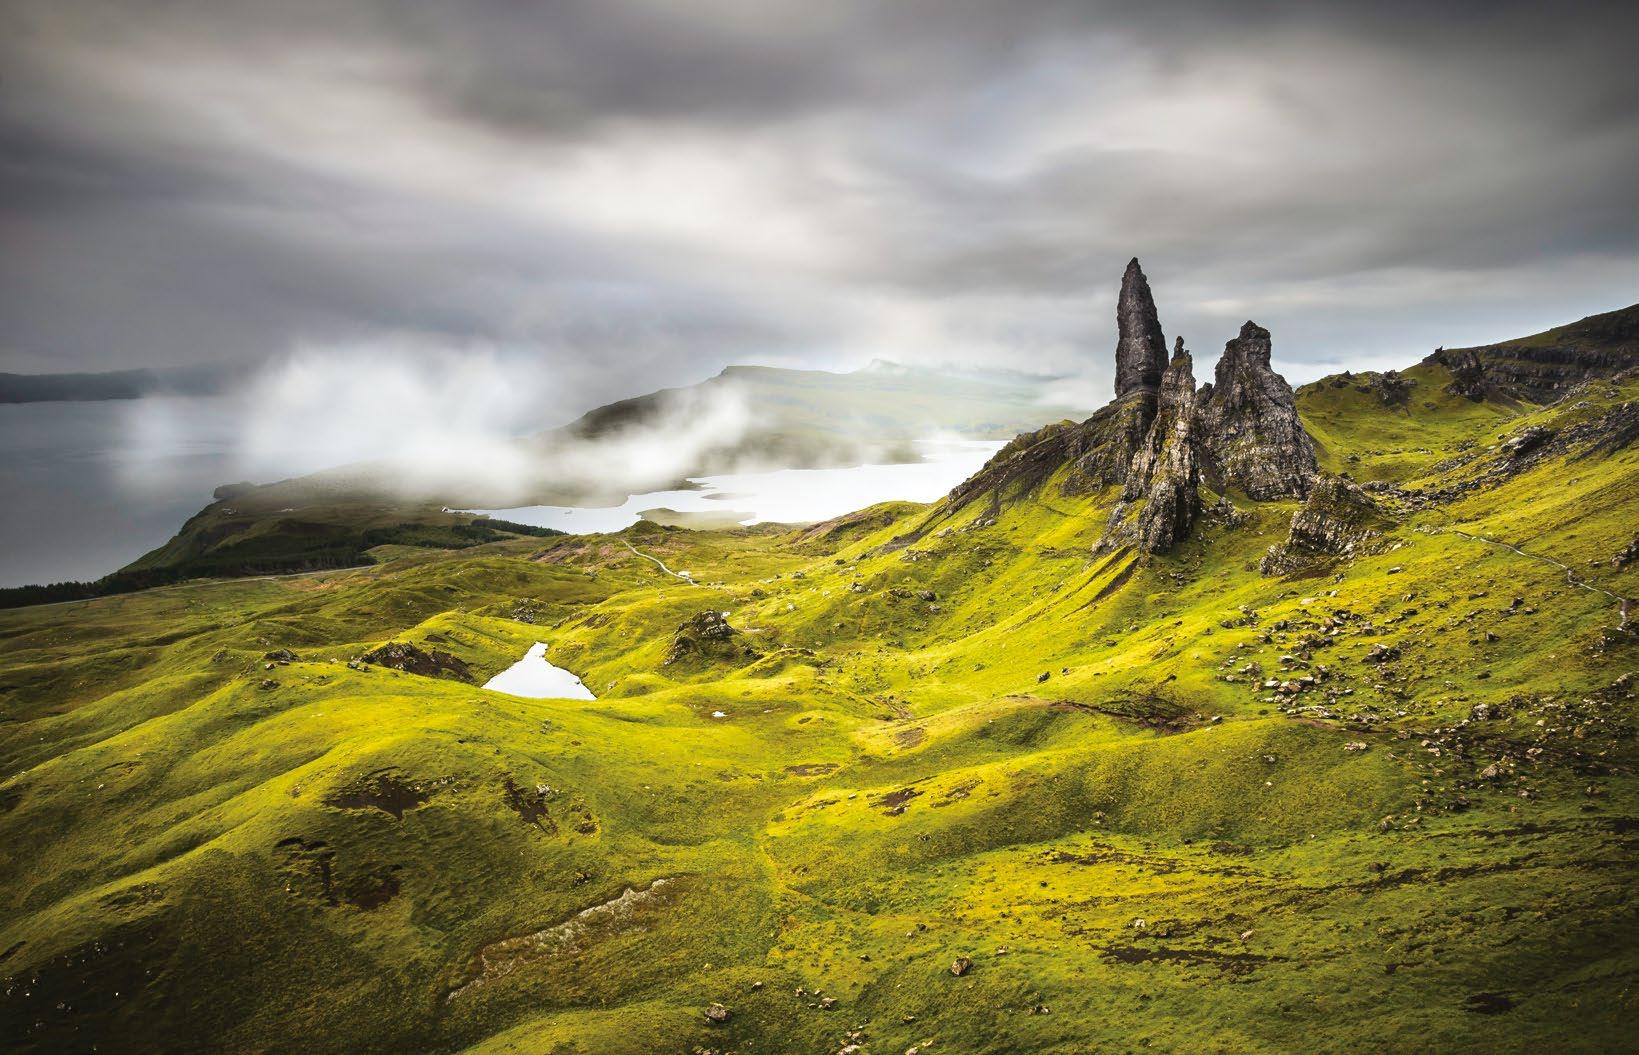
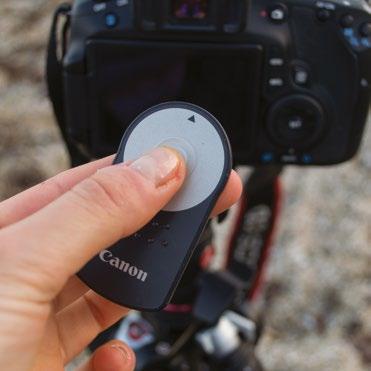
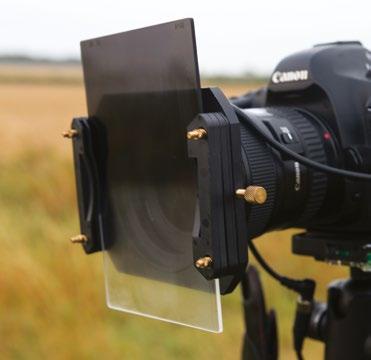
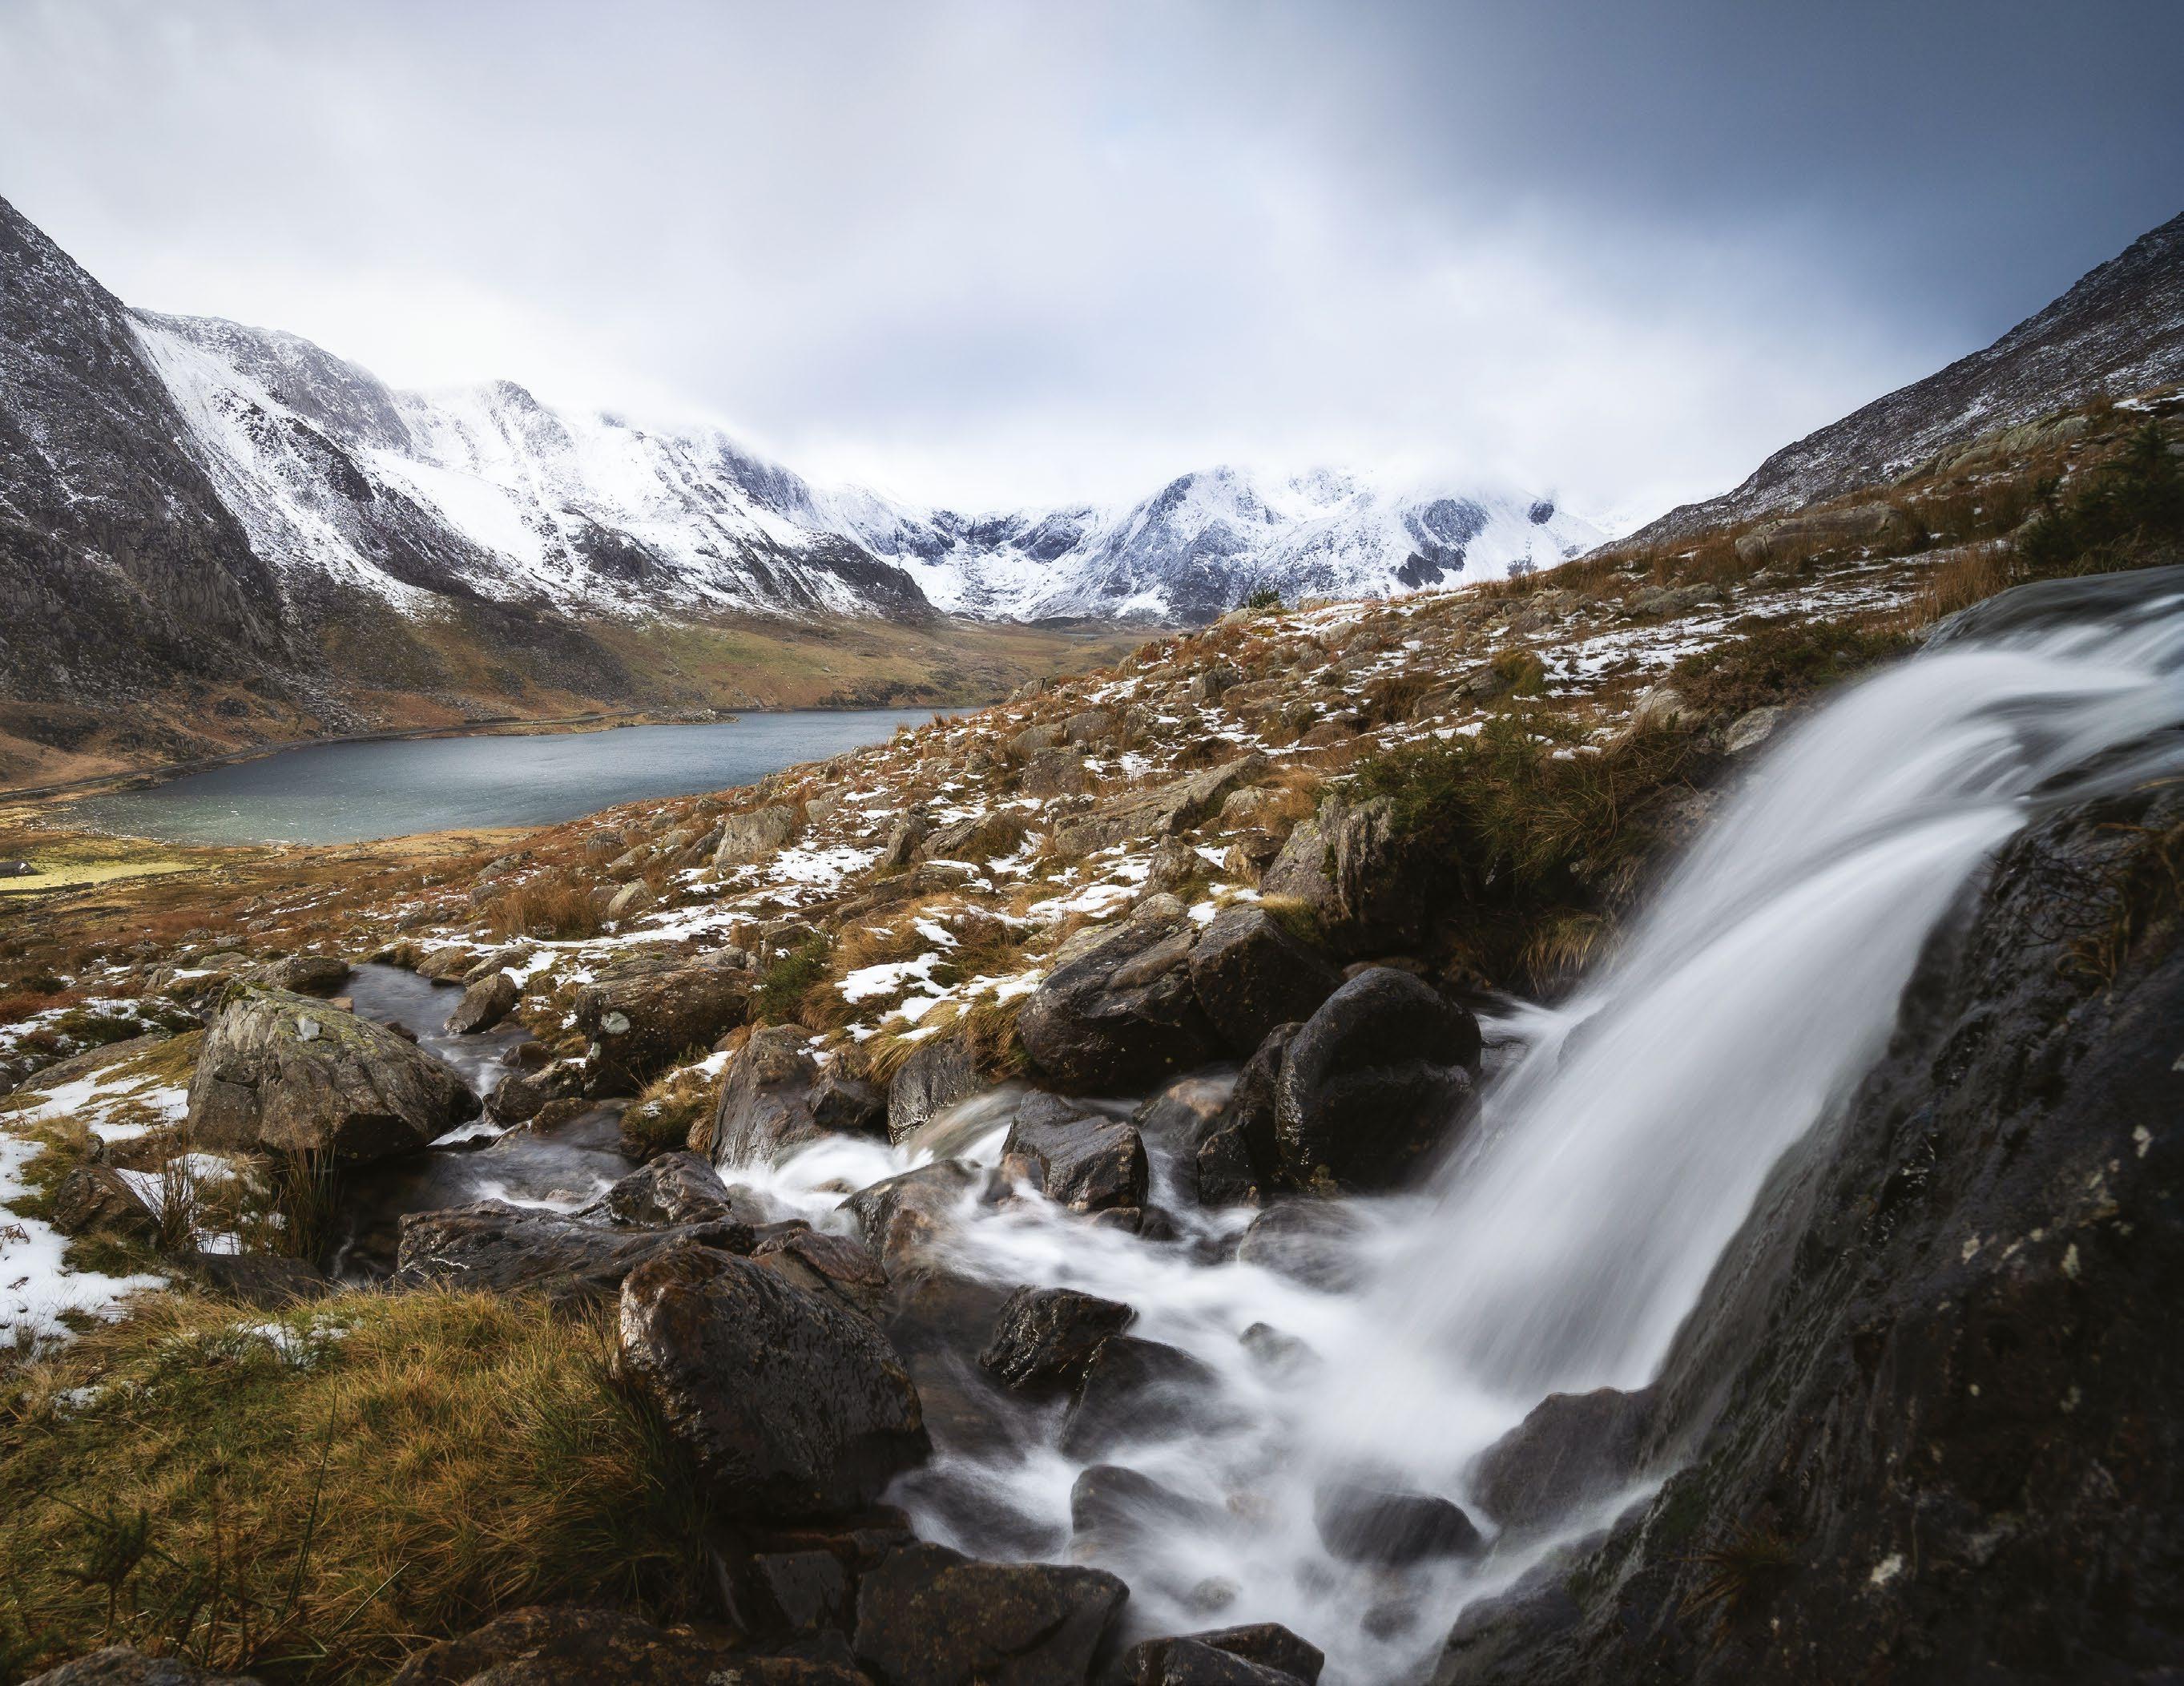
63
Manage alternative weathers
Work in challenging lighting and avoid the main causes of dull images
Stormy conditions are often a great opportunity to shoot dramatic images. The dark clouds contrast wonderfully with the landscape and set up a rare condition where the sky can actually be darker than the foreground – a reversal in the usual tonal distribution. This enables you to create shots with depth, and you’ll be able to capture detail in all areas of the frame without using hardware filters or software exposure blending. By adding an ND filter, you can push this even further, if you feel it is necessary.
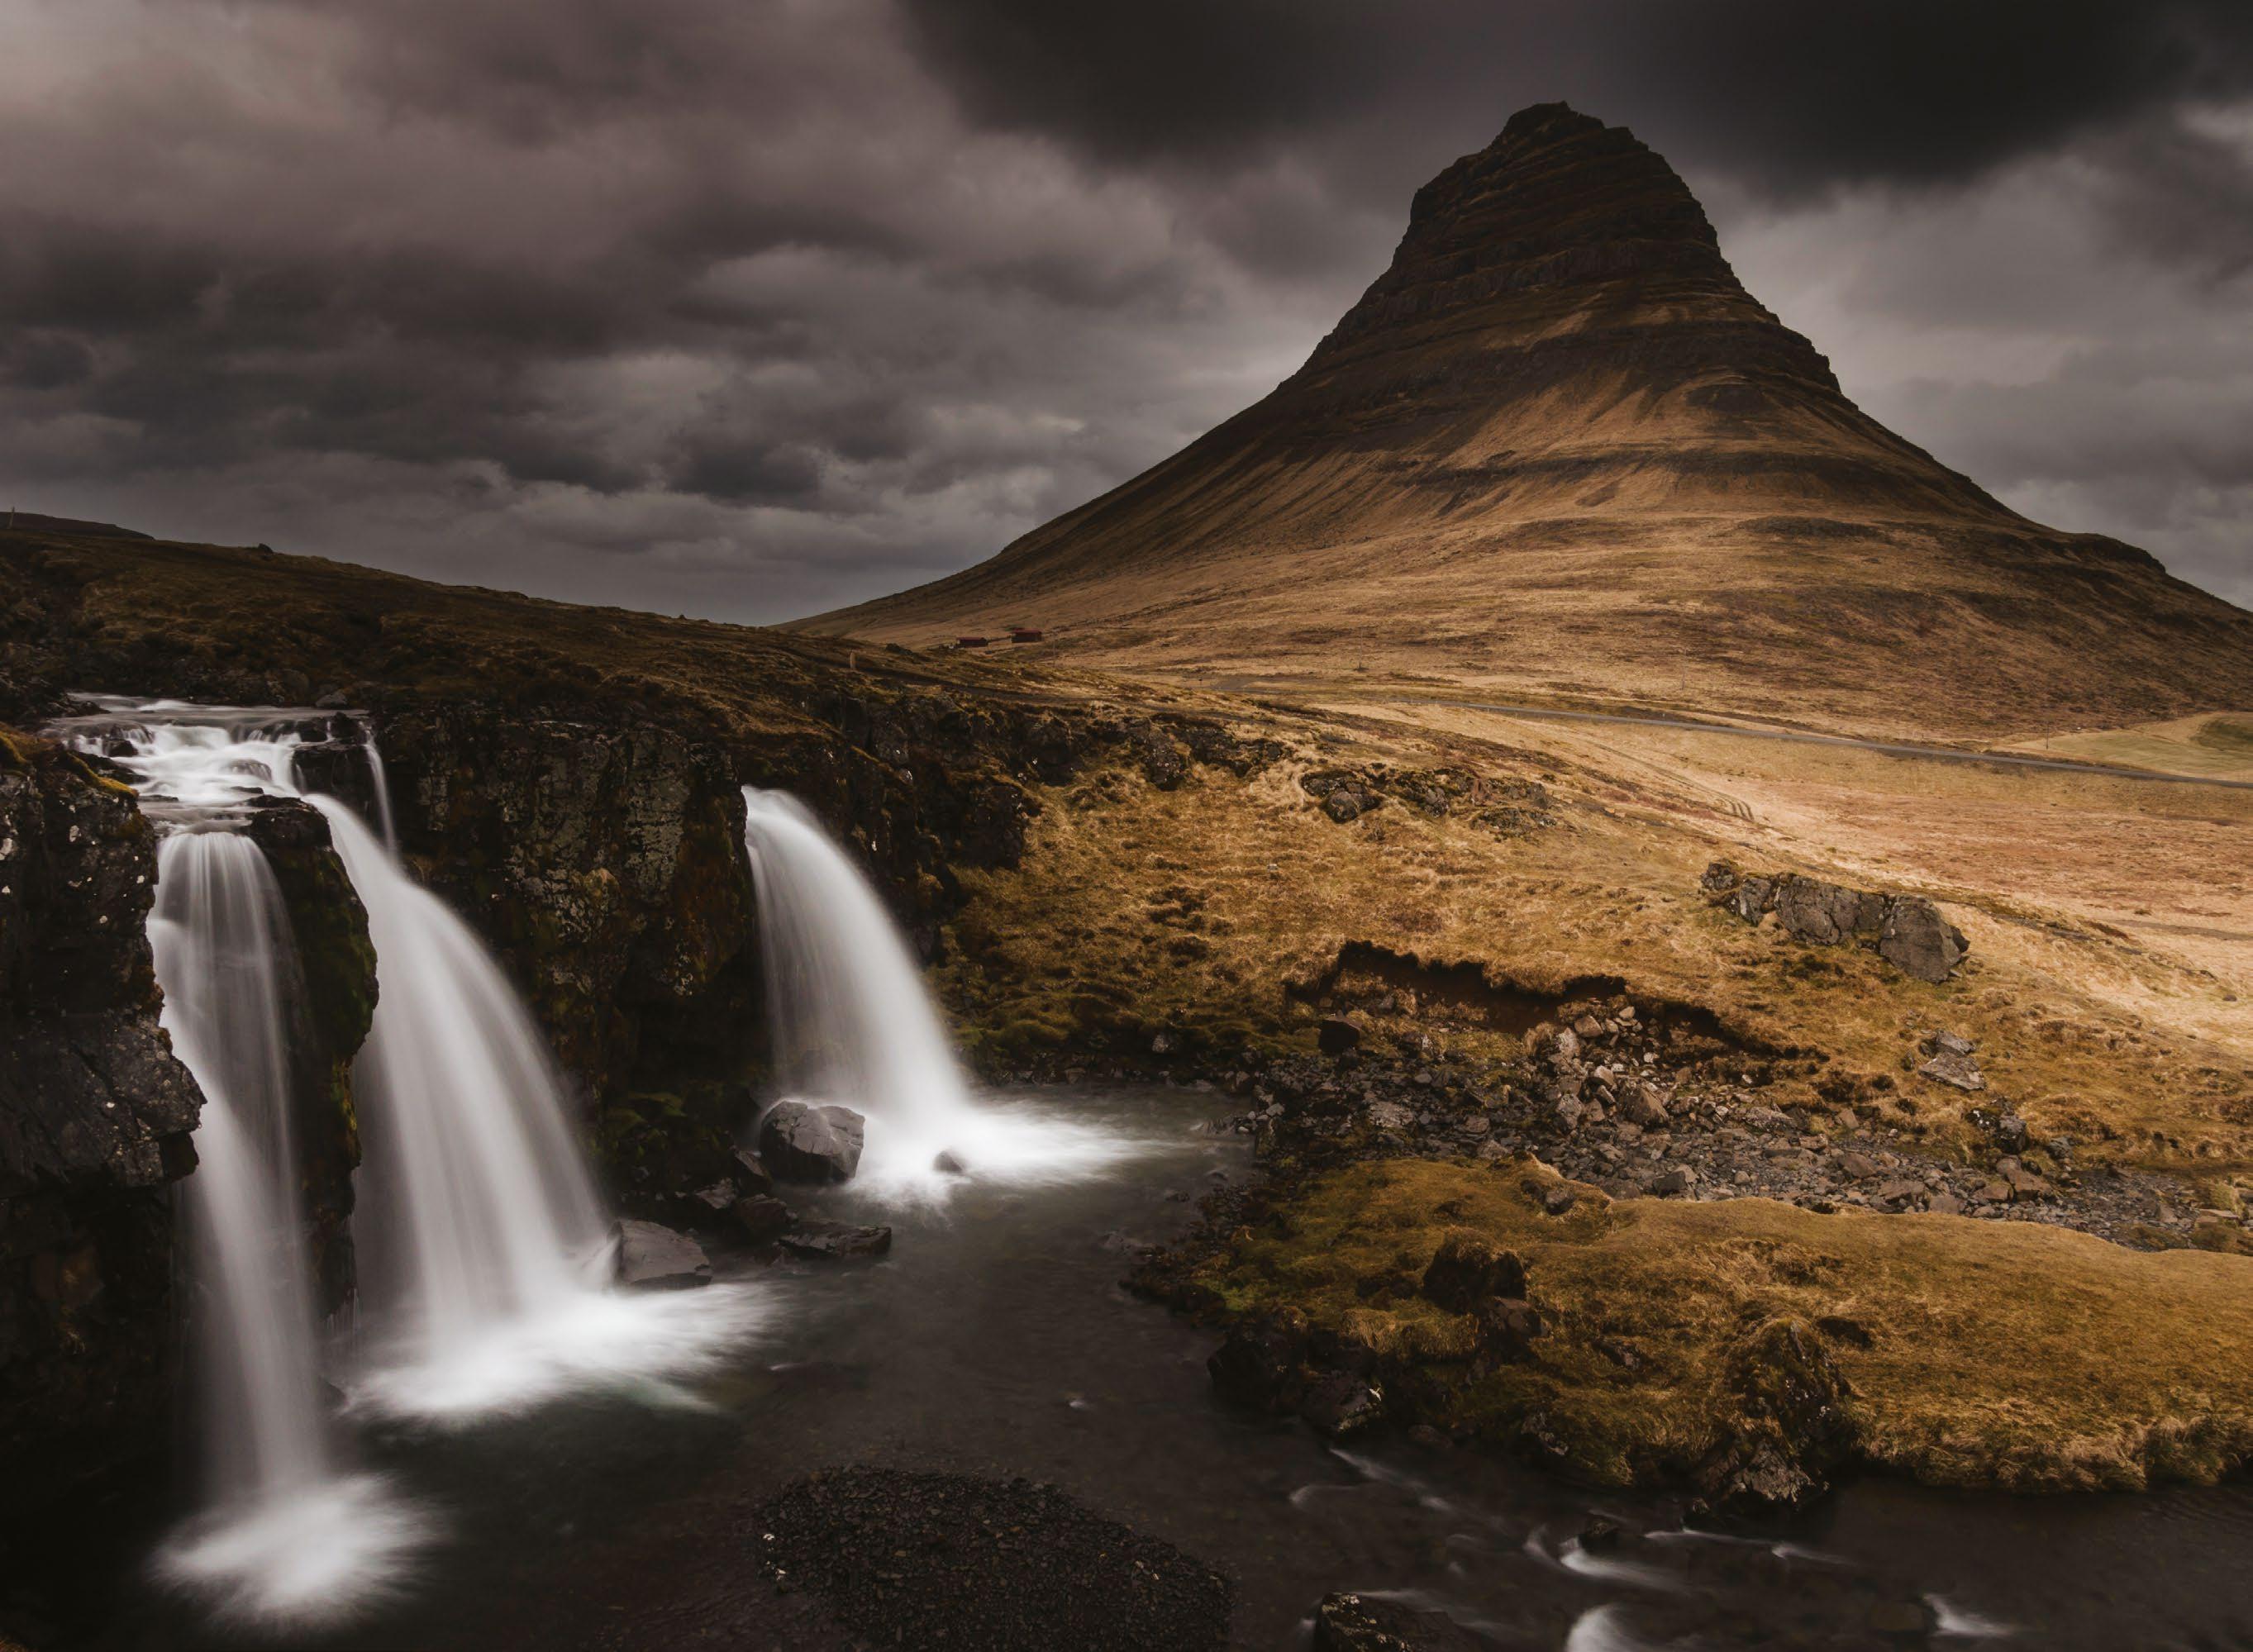
In most cases the ‘bad’ weather you experience won’t provide such attractive drama. More often than not, the light is simply flat, grey or complicated by atmospheric conditions, such as mist or fog. These don’t have the same visual magnetism as storm clouds, so you have to work to make them fit the subject matter. Misty conditions have tremendous potential for eerie, theatrical
photographs, but only if you can successfully expose and focus on the scene effectively. Bad weather causes havoc with most cameras’ automatic exposure systems. The tonal reversal alone can throw off the camera’s exposure calculations, as can fog and low cloud. Auto-exposure systems judge the tones in a scene based against an 18 per cent grey standard, so when presented with mist they will attempt to render this as grey. The same issue occurs with a bland white sky, and can lead to underexposure, with bright high-key tonality being reduced to unattractive muddy greys and browns. And even if the tones fall within the dynamic range,
bland skies still fail to impress, as they easily become featureless grey.
FOCUSING METHODS
Mist and low light can confuse autofocus and also make judging focus visually a challenge. Employ hyperfocal focusing or the double-distance method to ensure predictable focus coverage for a given f-stop and focal length. See DP Issue 229 for more on the latter focusing technique (http:// bit.ly/DP131DD).
When you’re shooting in inclement conditions, make sure you have a vision in mind of how you want to render the atmosphere of the scene. What’s the key element to expose for or focus on? Those dark looming clouds nearby, or light misty patches in the distance? Big problems when shooting can arise when a photographer tries to produce a ‘look’ that doesn’t fit with the conditions in which they are shooting. Here’s a look at how you can adapt your usual approach to better fit any poor-weather landscapes you find yourself in.
64 TECHNIQUES 64
OBJECT POSITION
Arrange your scene to demonstrate receding detail, with increased distance from the camera into the mist layer.

KEEP LEVEL
Since the gradient of mist obscurement usually occurs perpendicular to the sensor plane, avoid tilting the camera excessively to achieve the strongest effect.
Misty scenes
Left
Stormy skies
With darker tones dominating in bad-weather landscapes, there is an opportunity to create low-key images. Meter from the brighter midtones to make these darker, without blocking up the shadows
Exposing in mist
Mist can often confuse the autoexposure (AE) systems on your camera, but adding a few stops of positive exposure compensation can help to prevent underexposure. A more accurate way of ensuring a bright, airy feel without blowing highlights is to use the live histogram that’s present on most cameras, and push the tones until they almost touch the right side of the chart. This brightens mist, while avoiding clipping.
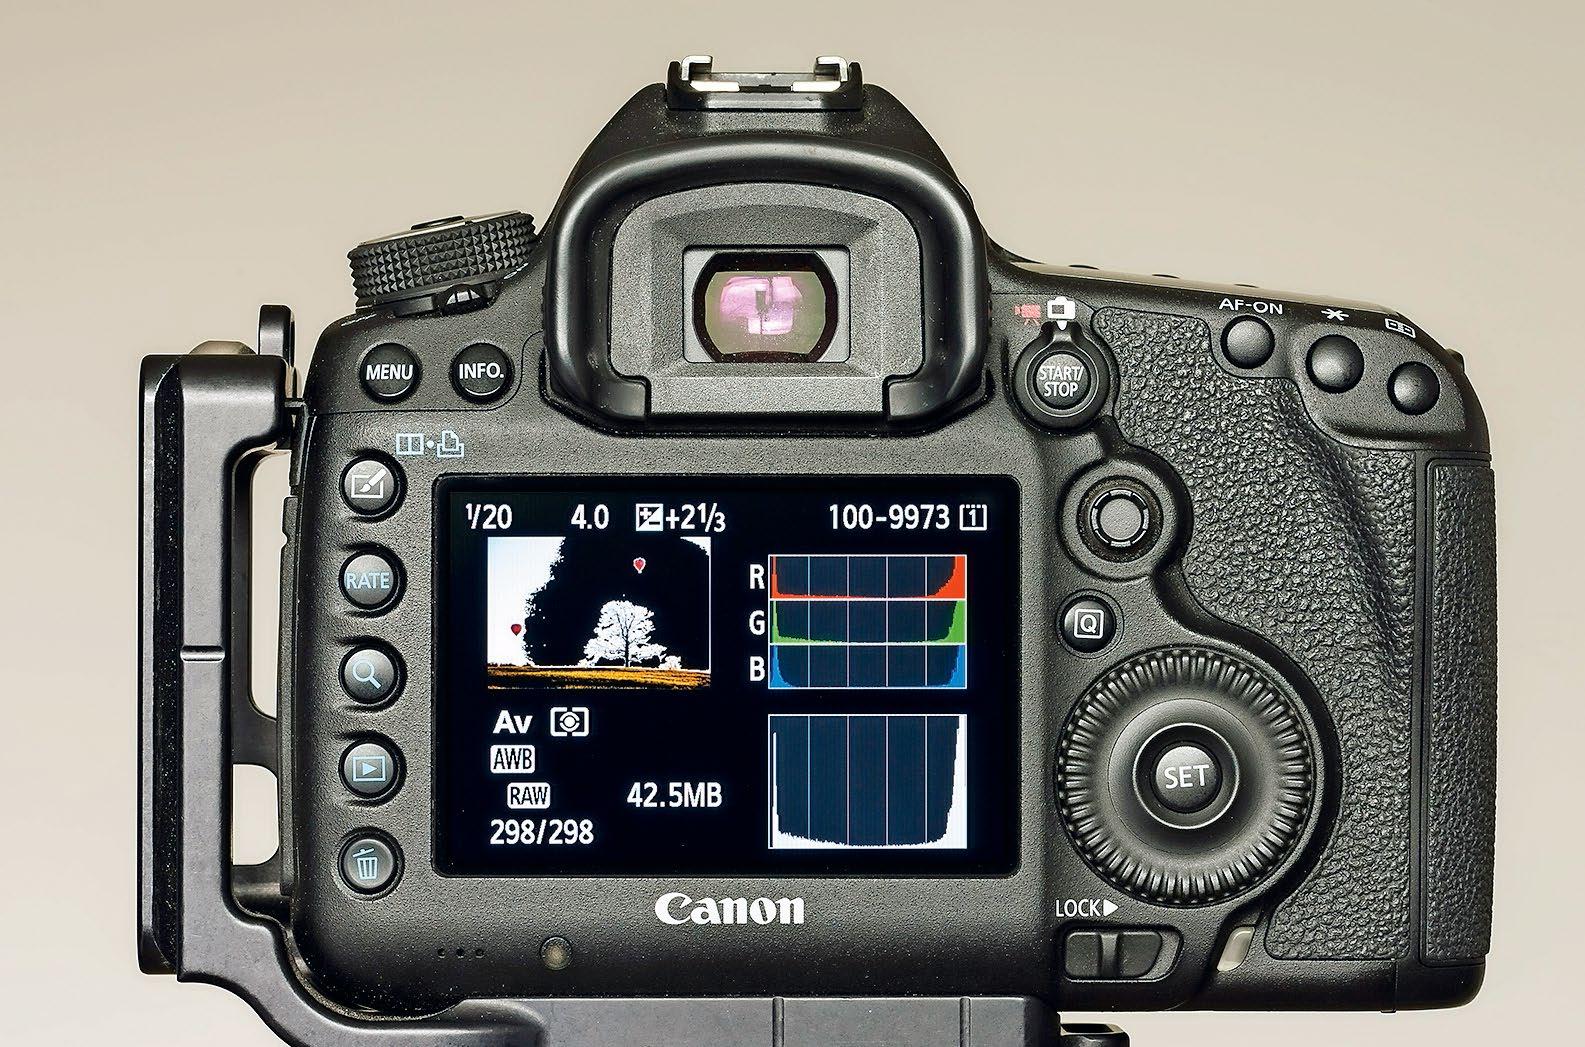
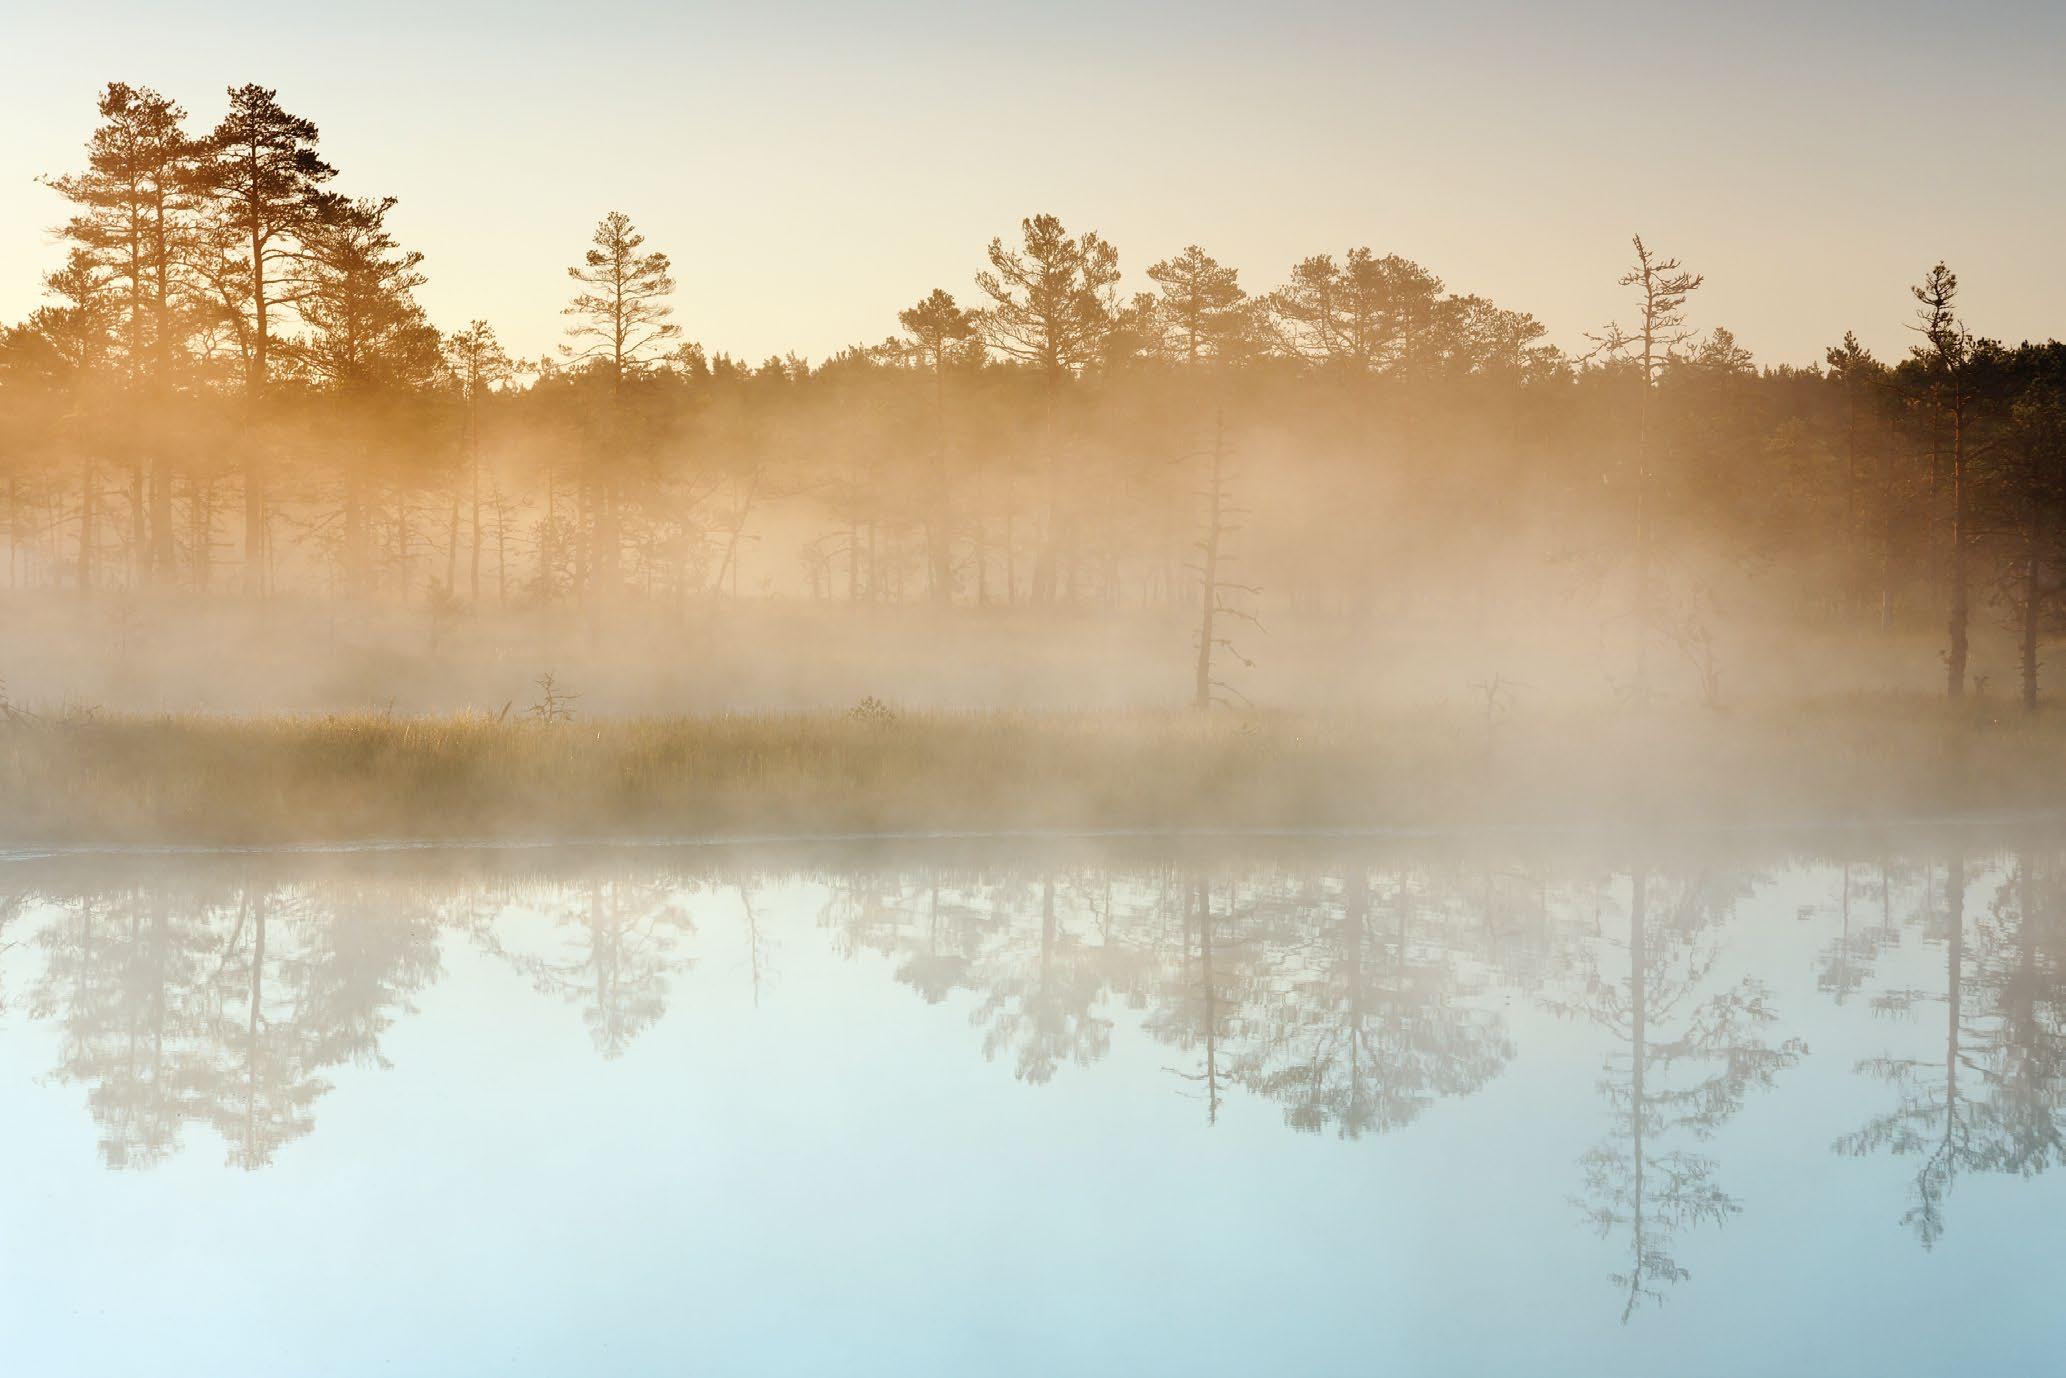
FOREGROUND PRESENCE
Mist is usually less dense close to the camera. Exclude this to preserve the impression of thick fog.
© Gettyimages
65 SHOOT FOR THE LIGHT
Misty conditions have tremendous potential for eerie, theatrical photos
© Fabian Fries
© Peter Fenech
Use harsh sunlight
Embrace deep contrast for eye-catching detail and colour, and get around the technical issues
Midday sunlight isn’t the first choice for most genres of photography. The high position of the sun produces a very flat image, due to a lack of direction that generates few shadows. This, combined with the intense, undiffused light can create images that are lacking in bold colour, with unsightly bright hotspots.
Many photographers choose to put their cameras away once the day moves towards noon, but even in bright daylight conditions there are still opportunities to be had. A core skill is being able to identify which locations and subjects are best to being studied and photographed, and which are best left to more sympathetic times of the day.
Part of the battle is in the selection of a shooting angle. If you attempt to shoot from the same perspective as you might when working in the golden hours, you’ll produce images with the tell-tale midday characteristics. This is because those positions are inspired by the texture-
The flat look
enhancing properties of low sun, which are missing while the sun is at its zenith.
Instead, consider changing position so that you are aiming the lens at 90 degrees to the angle of the sun, and lowering the camera to place the sky behind the subject. This camera angle should enhance the colour of the sky, once you have attached a polarising filter, and boosted the colour contrasts in the scene. The direct lighting on foreground elements will make them stand out against the colourful background, especially if the subject is a colourful flower or building.

You can also use the lack of shadows to your advantage. If the ambient light is creating flat images, then aim to do the same, working with the light rather than against it – an endeavour that will almost always be in vain!
Use a longer focal length, and look for elements to compress, creating images based on colour interaction rather than threedimensional detail and texture.
At midday, when the sun is high in the sky, there is little or no direction to the light it casts. This causes an absence of shadows, which can produce flat scenes. If you try to work against this the results can be disappointing, but if you use it to produce deep colour in already two-dimensional scenes, it can be an advantage.
Manage exposure How to deal with a wide tonal range and avoid lost detail
1Asses overall range Take a test shot in Evaluative metering mode and observe where there may be problem areas, such as bright highlights that are showing signs of overexposure and clipped detail. This will help you to select a composition that will make the overall tonal range manageable.
2Switch to Spot or Partial Reduce the frame area from which the camera takes exposure measurements by changing metering modes. Spot or Partial modes largely ignore the frame edges, so they enable you to get more precise measurements from smaller areas of highlights or shadows.
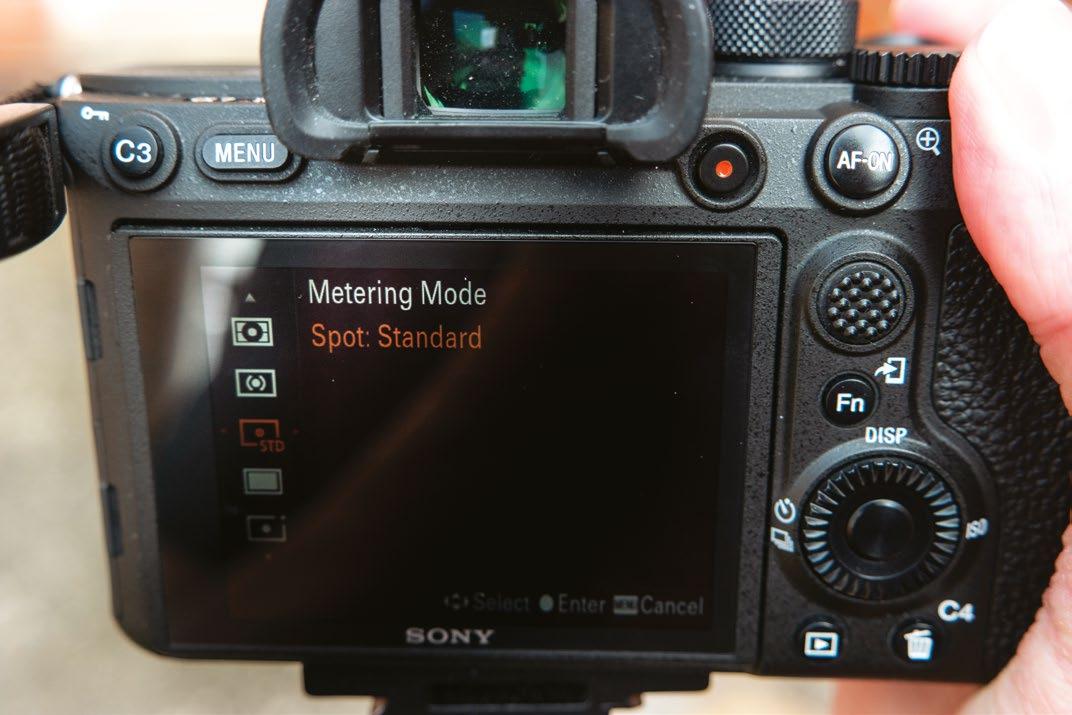
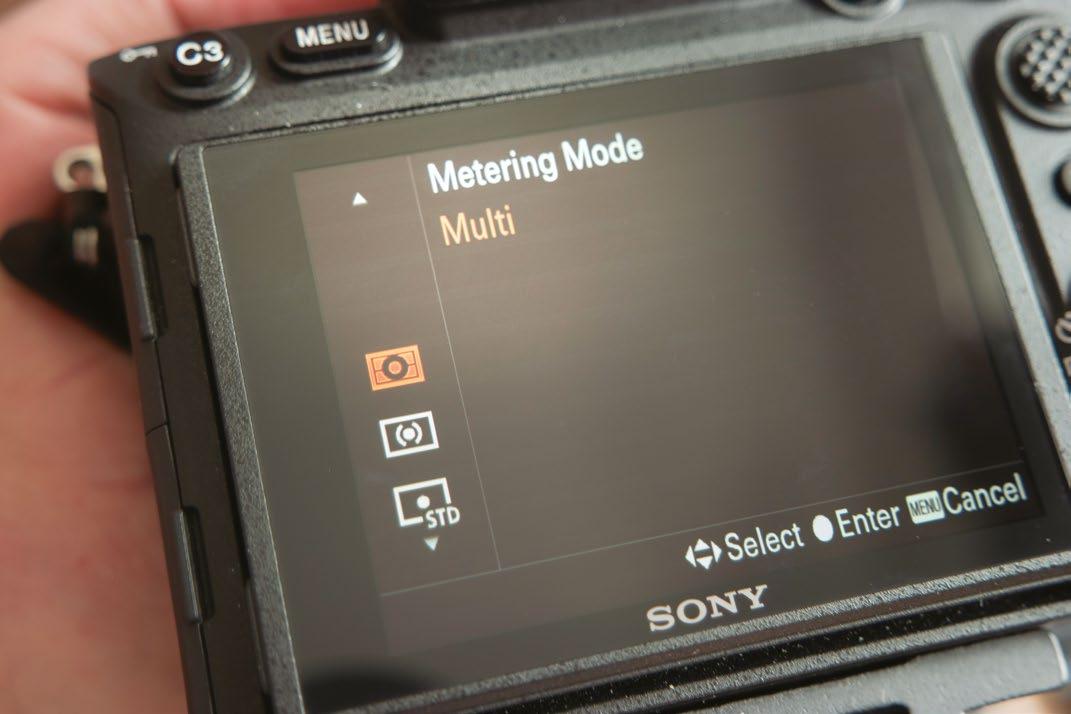
66 TECHNIQUES
Try intentional overexposure
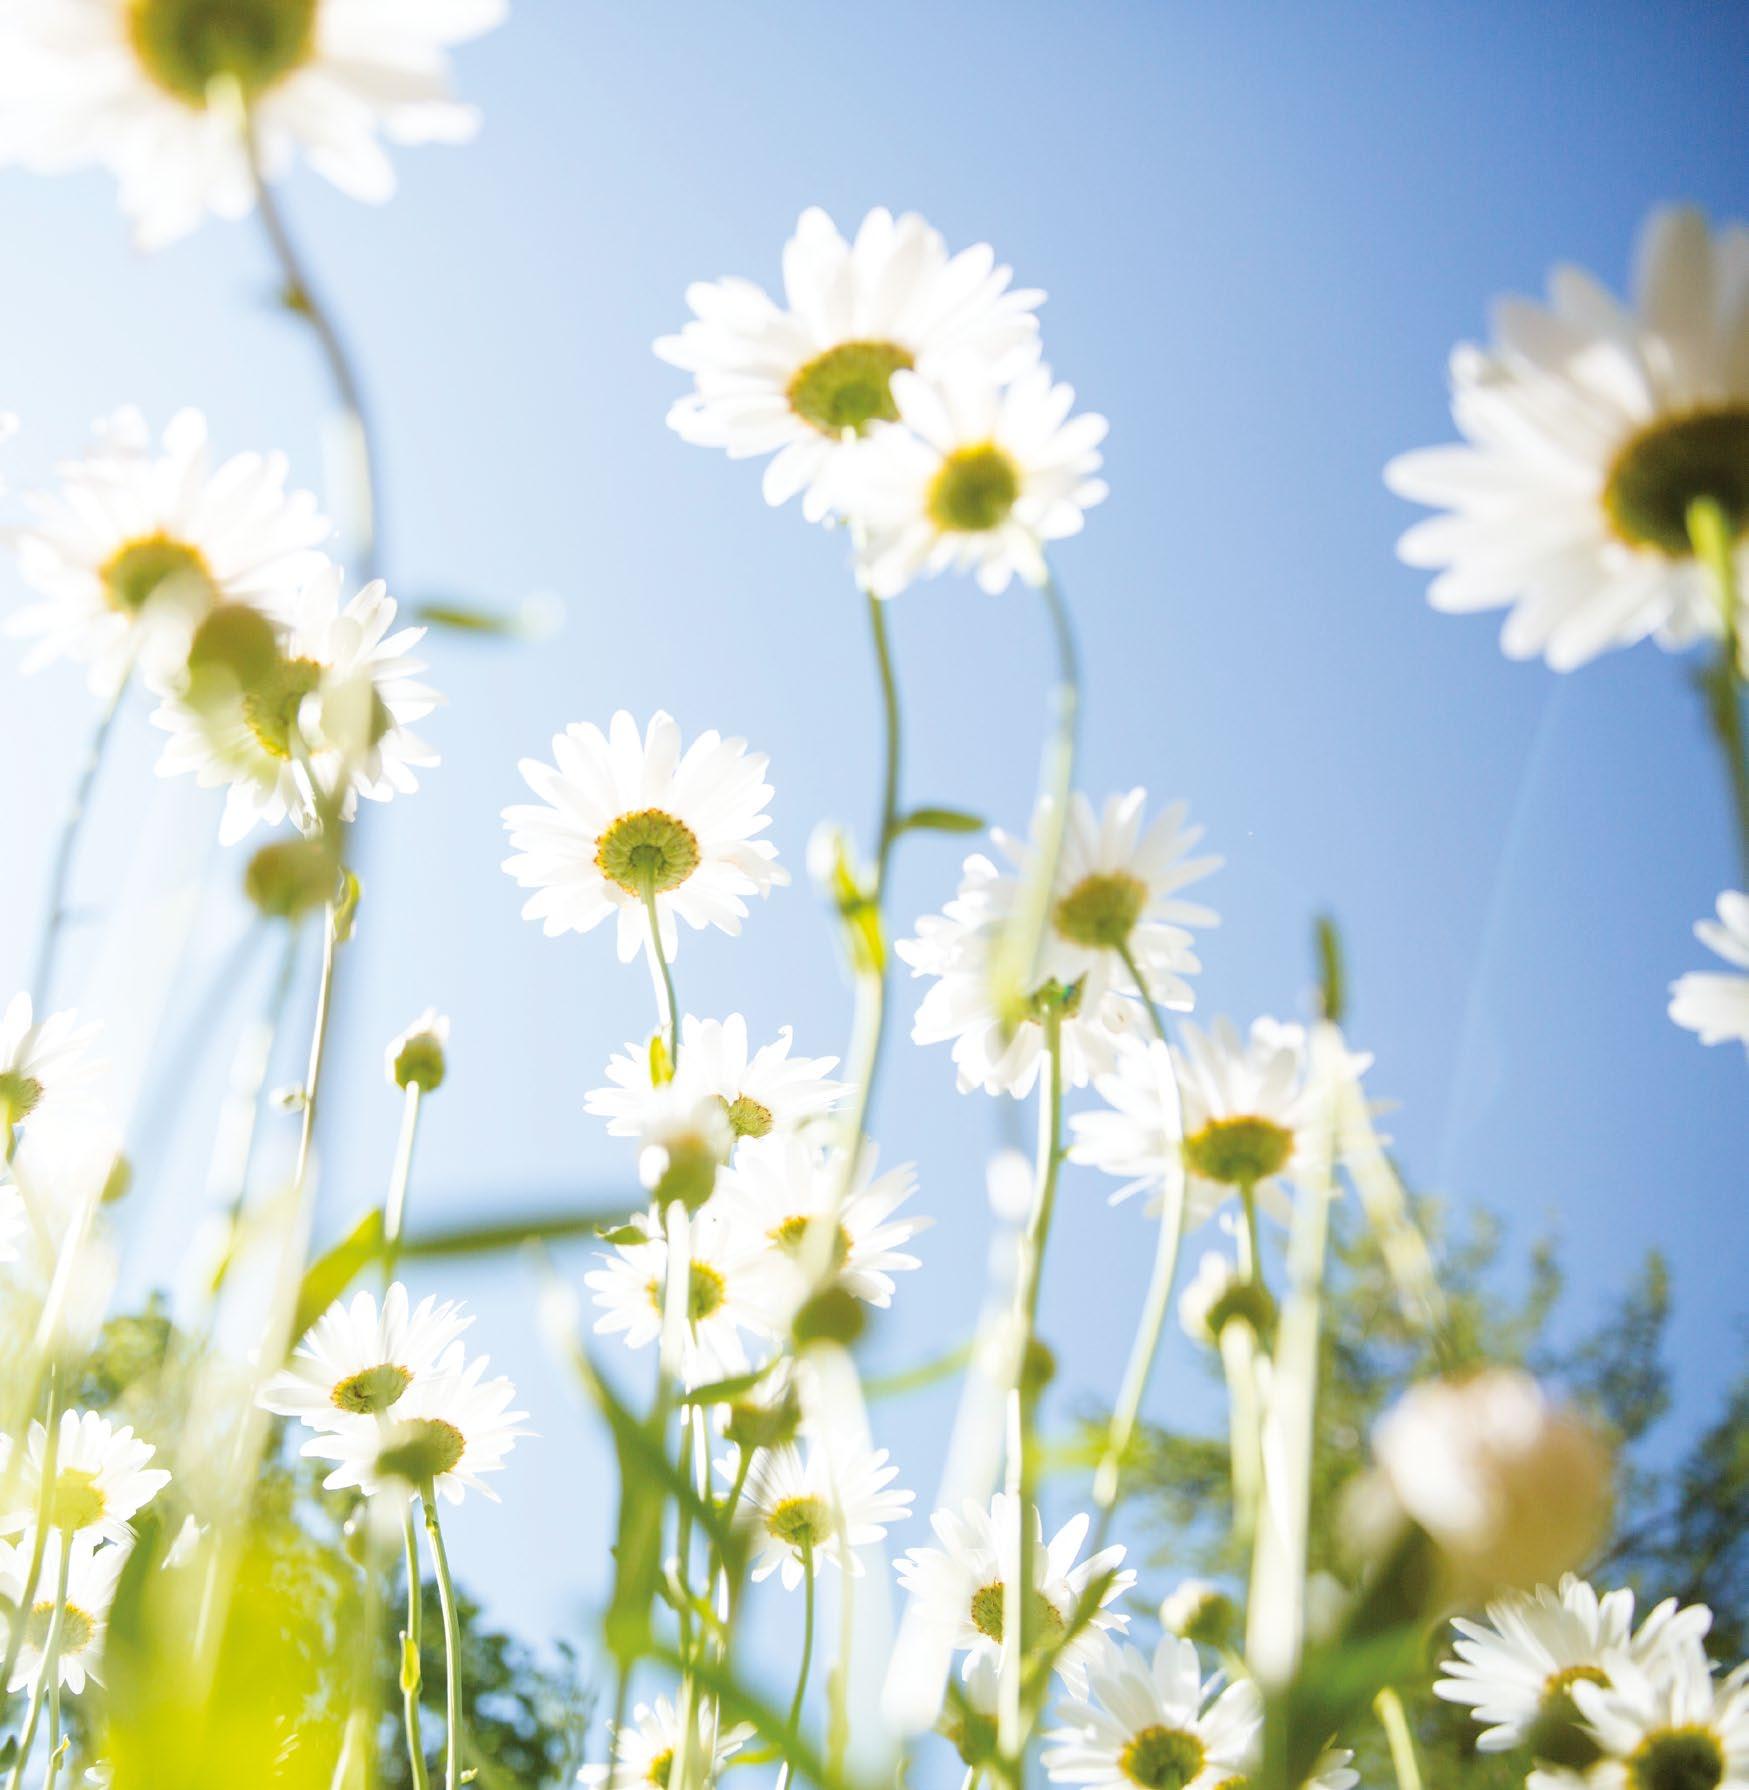
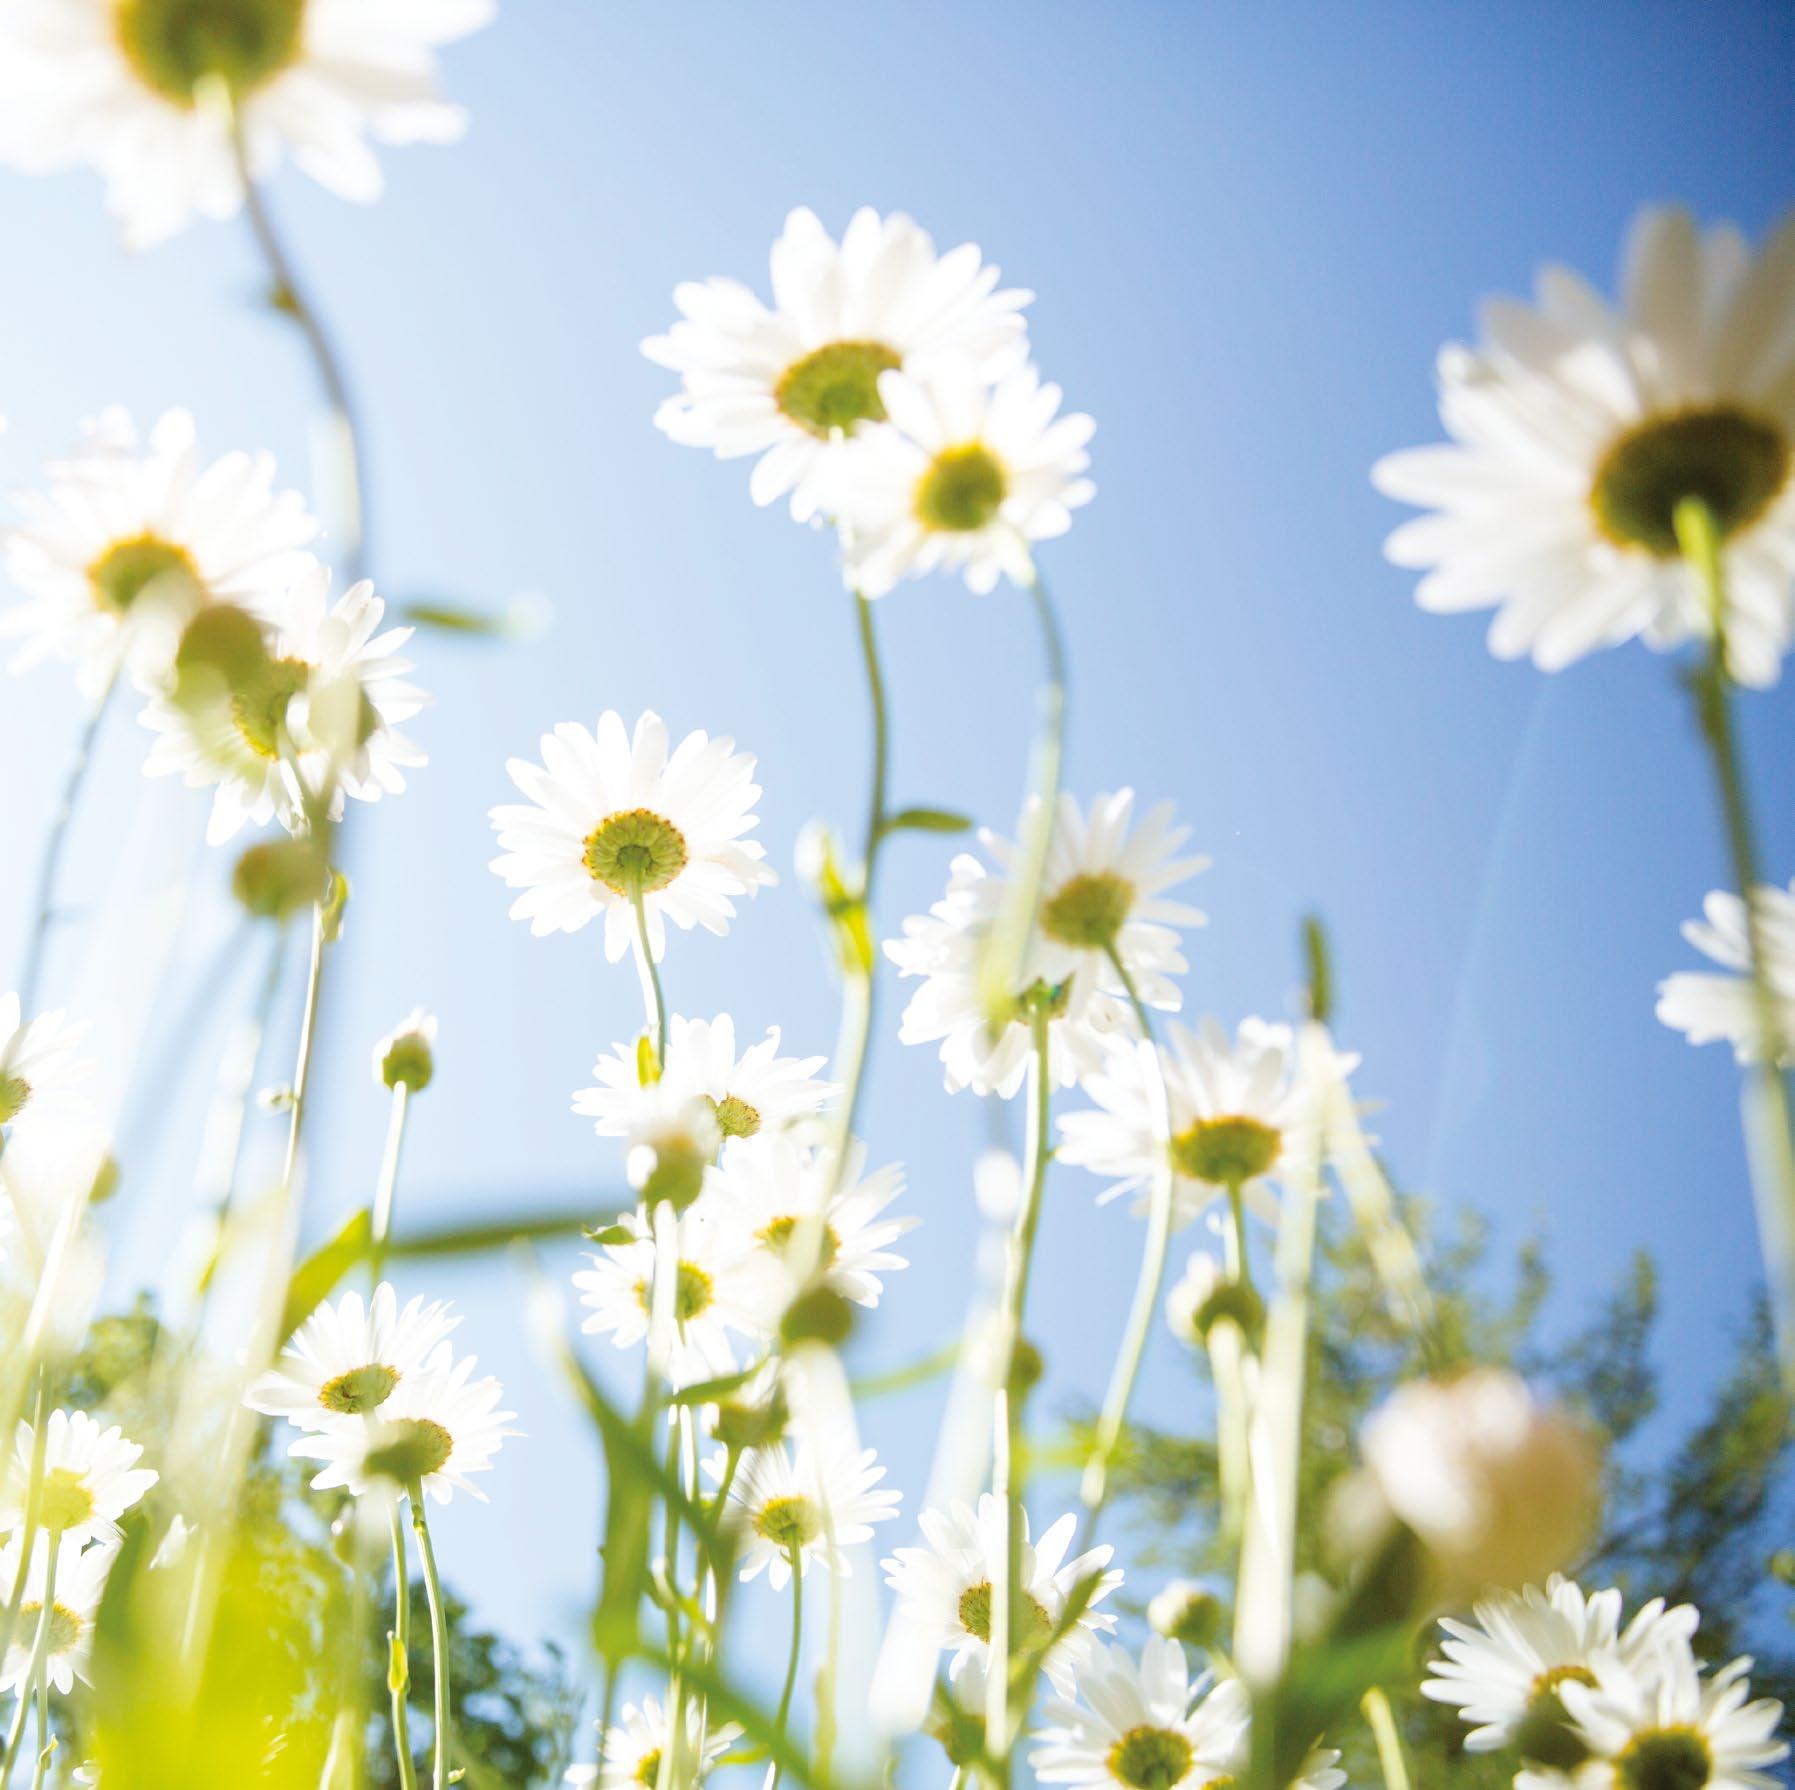
A popular method for working in harsh light is to embrace the excessive tonal range and allow certain highlights (left) or shadows (below) to clip. This can produce stylised images that are simple to create without the use of additional kit or software. Work out if shadow or highlight detail is more critical to the impact of your image, and bias your exposure accordingly.
Converting an image to black and white is a common step for bright scenes, as it results in graphic images focused on shapes and texture rather than colours that have been compromised by exposure choices.
3
Calculate difference Take a reading from the brightest highlights and deepest shadows, taking note of the settings the camera suggests. This will enable you to work out how many stops of difference (in EV) are between these extremes, and how far beyond the camera’s dynamic range the tones extend.
4 Select compression method If tones are only one EV out of range, try employing in-camera Dynamic Range Optimisation. For two or three stops, use an ND filter, especially if there is a flat horizon. This compresses the tonal range in a single RAW file. For more extreme differences, bracket exposures.
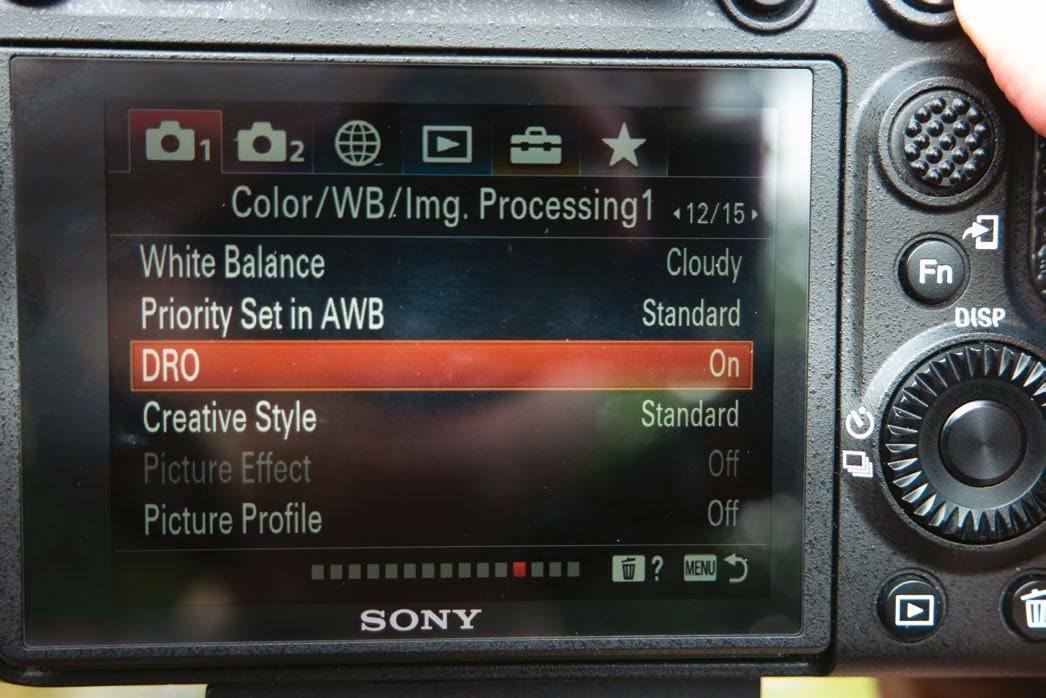 © Gettyimages
© Peter Fenech
x4
© Gettyimages
© Peter Fenech
x4
67 SHOOT FOR THE LIGHT
© Peter Fenech
Adapt to changeable conditions
Streamline your work behind the camera to cope in fluid lighting scenarios
If you live in the UK you are most likely aware of the classic jokes surrounding the unpredictable weather we have to endure. When out shooting, it is challenging enough to manage rain, wind and less-than-ideal lighting, but this is multiplied exponentially by continuously shifting light. It is something a photographer shooting in any temperate country or state must be prepared for, as overcast conditions rapidly give way to short bursts of high-contrast sunlight, followed by stormy skies and closing mist and rain.
It is certainly helpful to pre-plan the camera settings you will need for expected conditions, as this frees you to simply set up and get straight to shooting once you’re on location, with minimal adjustment. However, in the case
of shifting weather patterns, this can be a major flaw in a workflow. You need to be able to select camera settings to cover all possible combinations of lighting and atmospheric conditions, and to set up your cameras so that you can alter settings with minimal delay, capturing the best aspects of whatever conditions are unfolding. It is this flexibility that gives professional photographers the advantage to capture striking landscapes. Part of the process is down to experience and practice, but most camera models feature the ability to preset groups of parameters. Camera customisation plays a central role in speed and adaptability. Not only does this presetting workflow help prevent missed images, but it allows us to capture conditions
at their most photogenic – often at the boundary between two environmental states. As rainstorms pass, the sky is at its most dramatic, and as fog rolls in, surrounding areas of higher ground, we can see impressive structure to the fog banks, as some ground is yet to be covered.
While landscape and portrait photography may not be regarded as especially fast-paced genres, the most successful examples of these areas of photography are often those that have been captured as lighting shifts from one style to another. Therefore, learning to recognise when this is about to happen, and having the practical knowledge to seize the best visual qualities, is key to mastering outdoor photography.
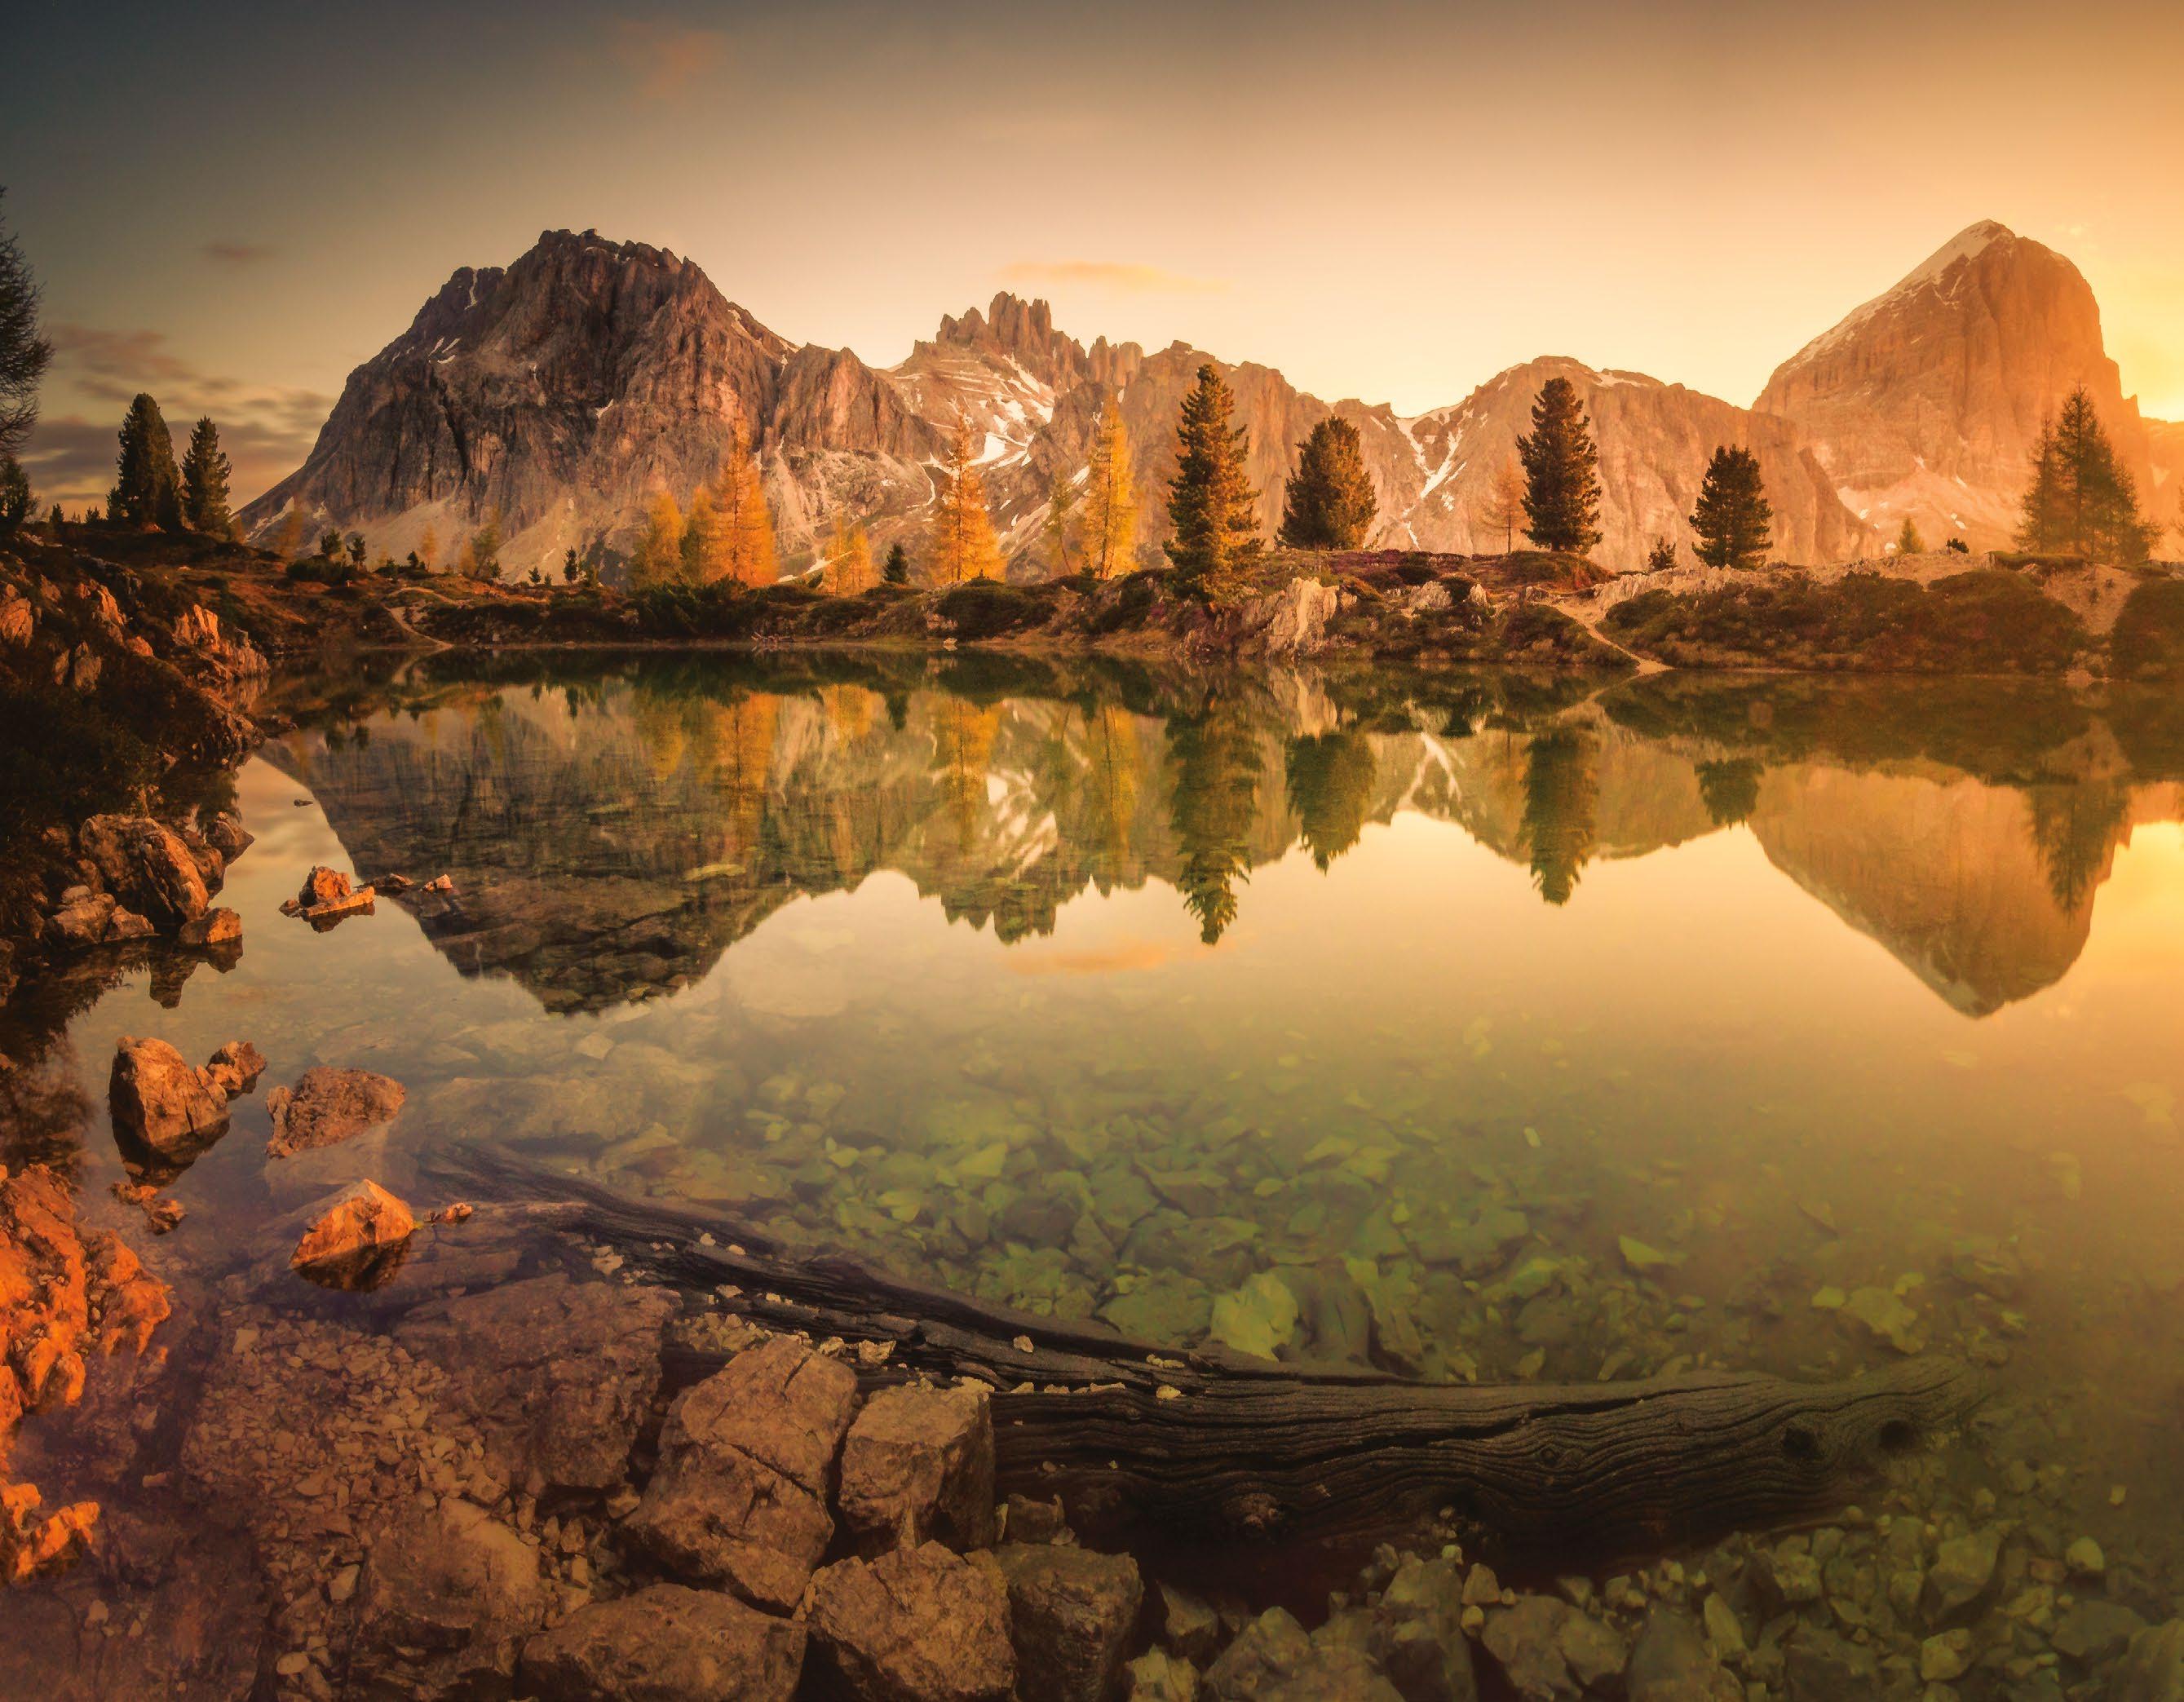
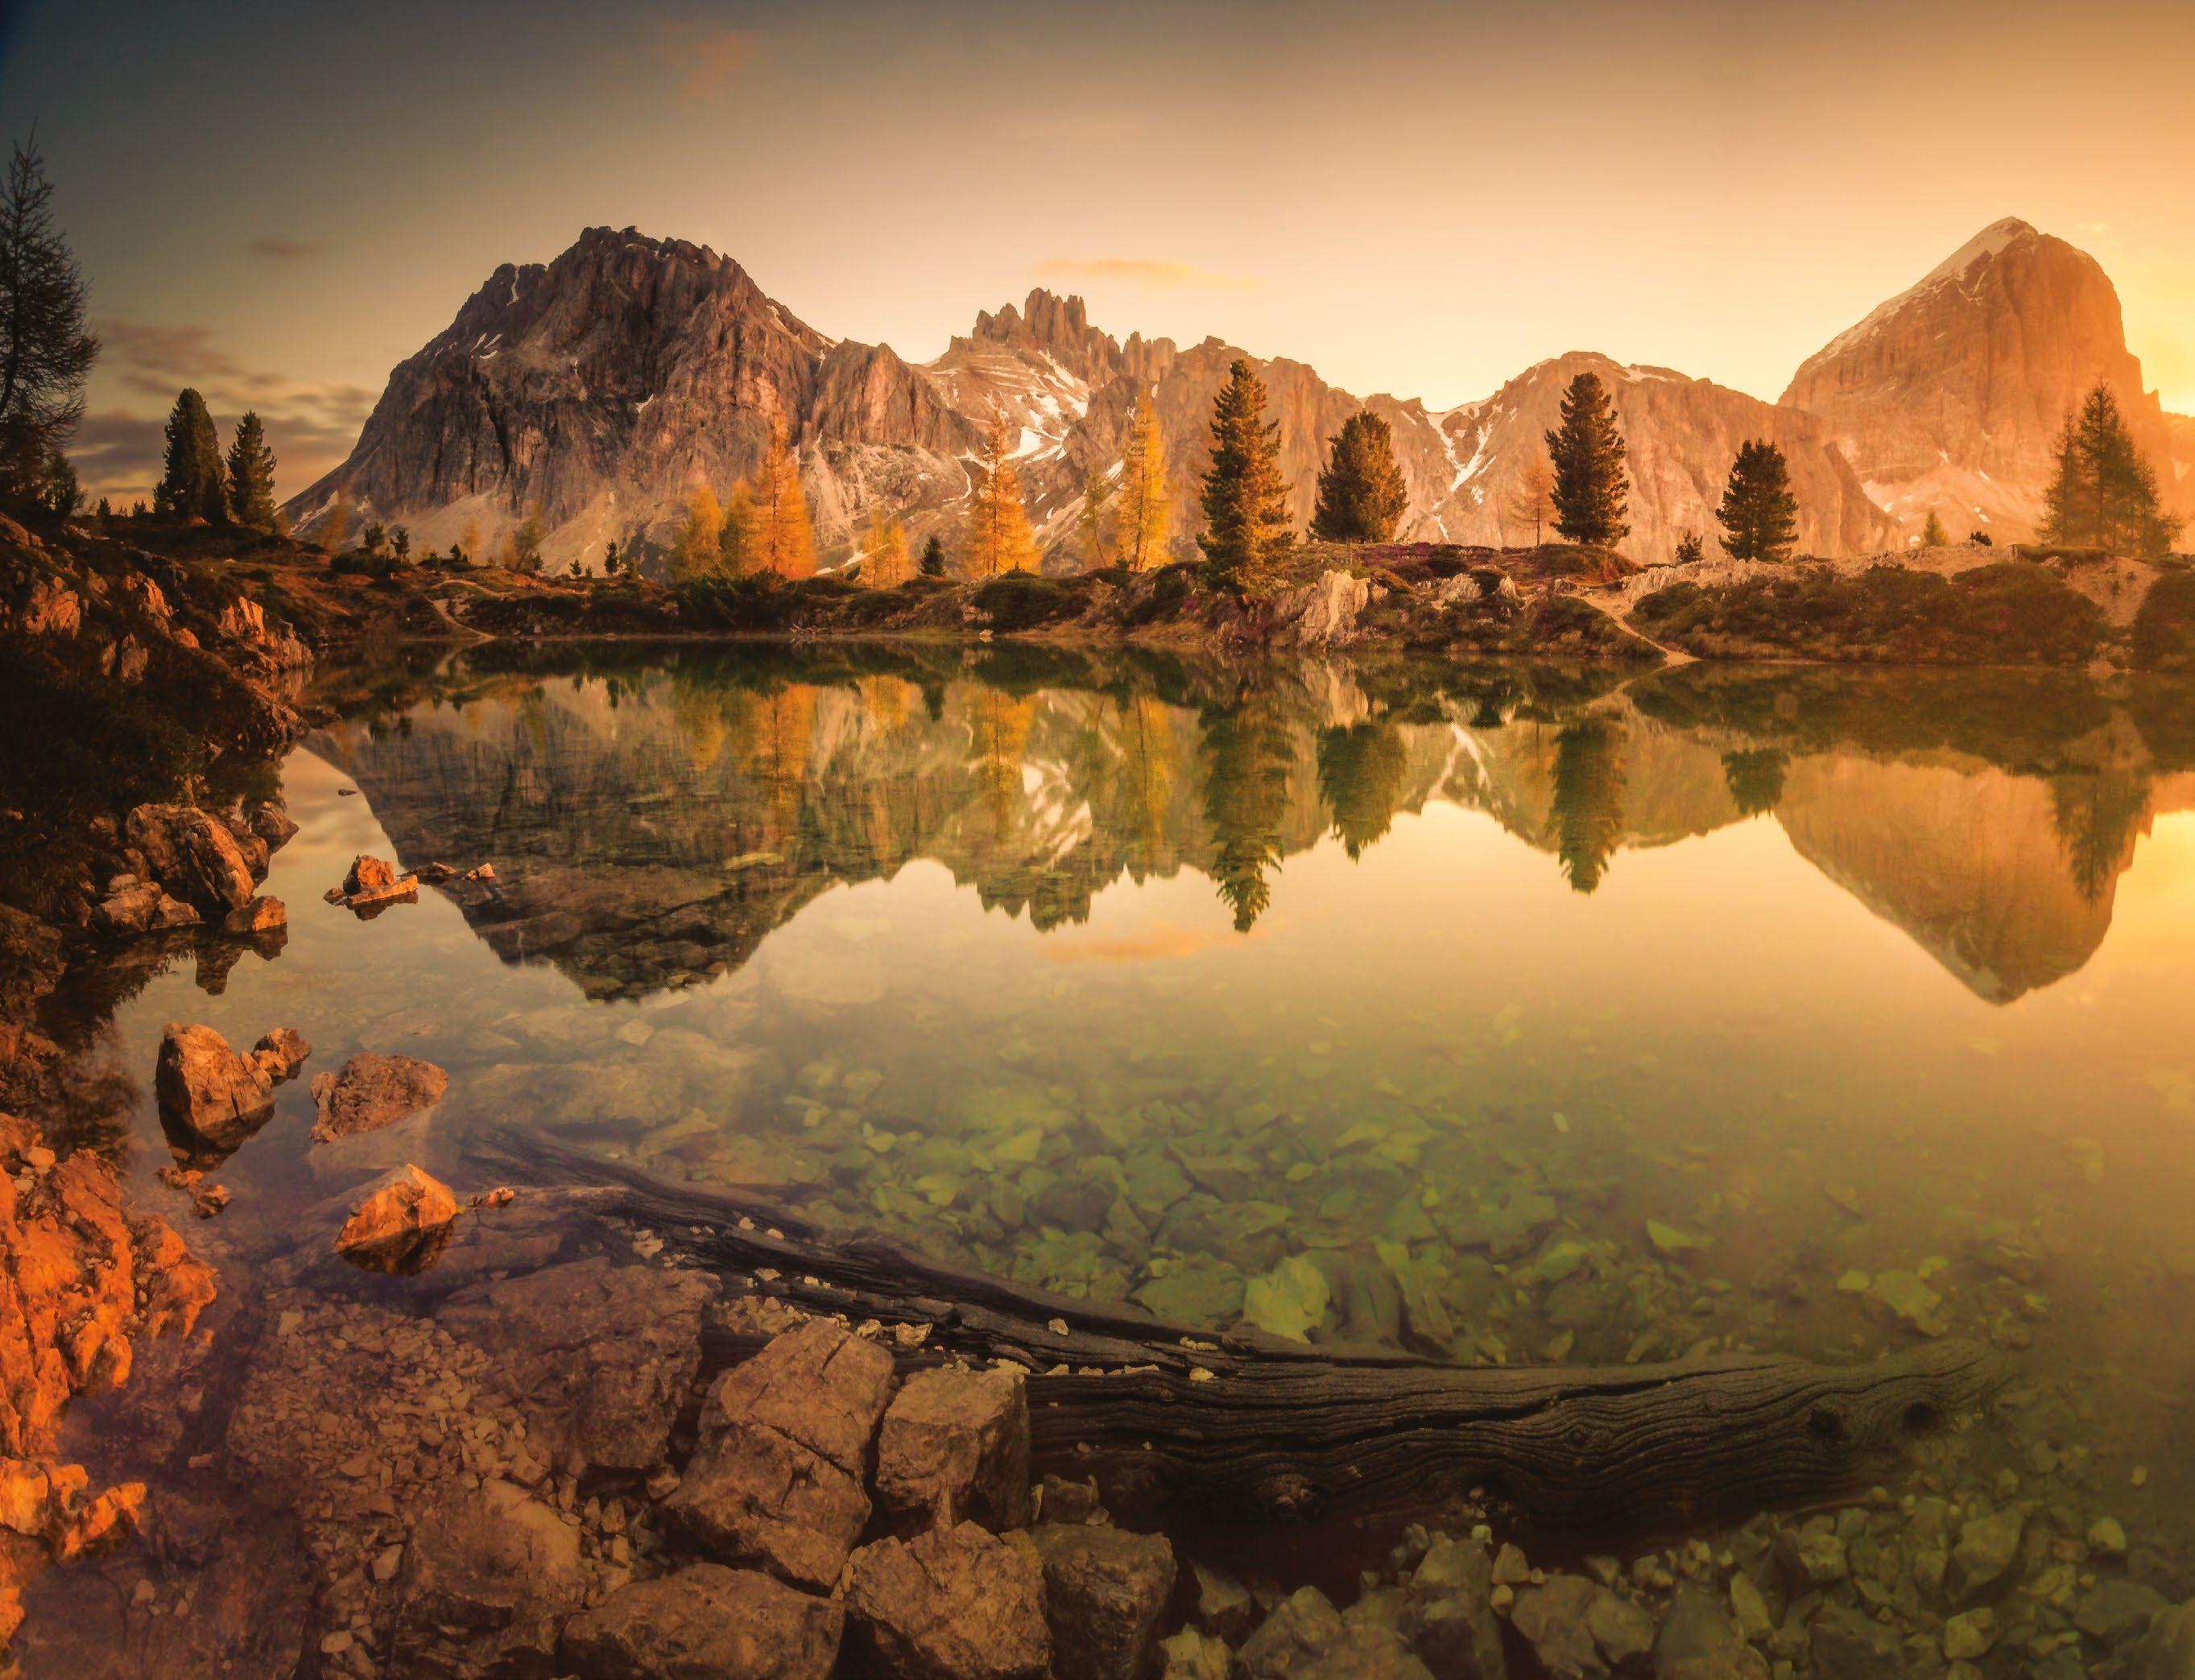
68 TECHNIQUESTECHNIQUES
Stay supported
When working in changeable lighting, where you cannot be certain what settings you’ll need to choose from one minute to the next, it is a good idea to keep your camera on a tripod at all times. This way, if your shutter speed needs to fall rapidly, you won’t be surprised by suddenly blurry images. Even if the exposure is short enough for handheld shooting, you won’t have lost anything by keeping your camera supported.
Create presets
Save in-camera setting presets for multiple lighting conditions. For example, in stormy lighting you may have to increase your shutter speed or use a higher ISO when handholding. However, you can also be confident that this will change suddenly as light breaks through gaps in the clouds, so save another preset with a lower sensitivity. Finally, save a ‘tripod’ preset, where you employ the lowest ISO and a long shutter speed to show movement where possible. Presets save time and ensure that you never miss a shot in variable light.
Left On the edge
The greatest drama occurs as light transitions from one type to another, so if conditions are not as you hoped, wait to see if atmospheric effects occur as the weather changes
Left below
Predictable, changeable
Sunrise and sunset are some of the most changeable conditions in which to shoot, but shooting RAW and presetting parameters, such as focus, frees you to concentrate on your composition
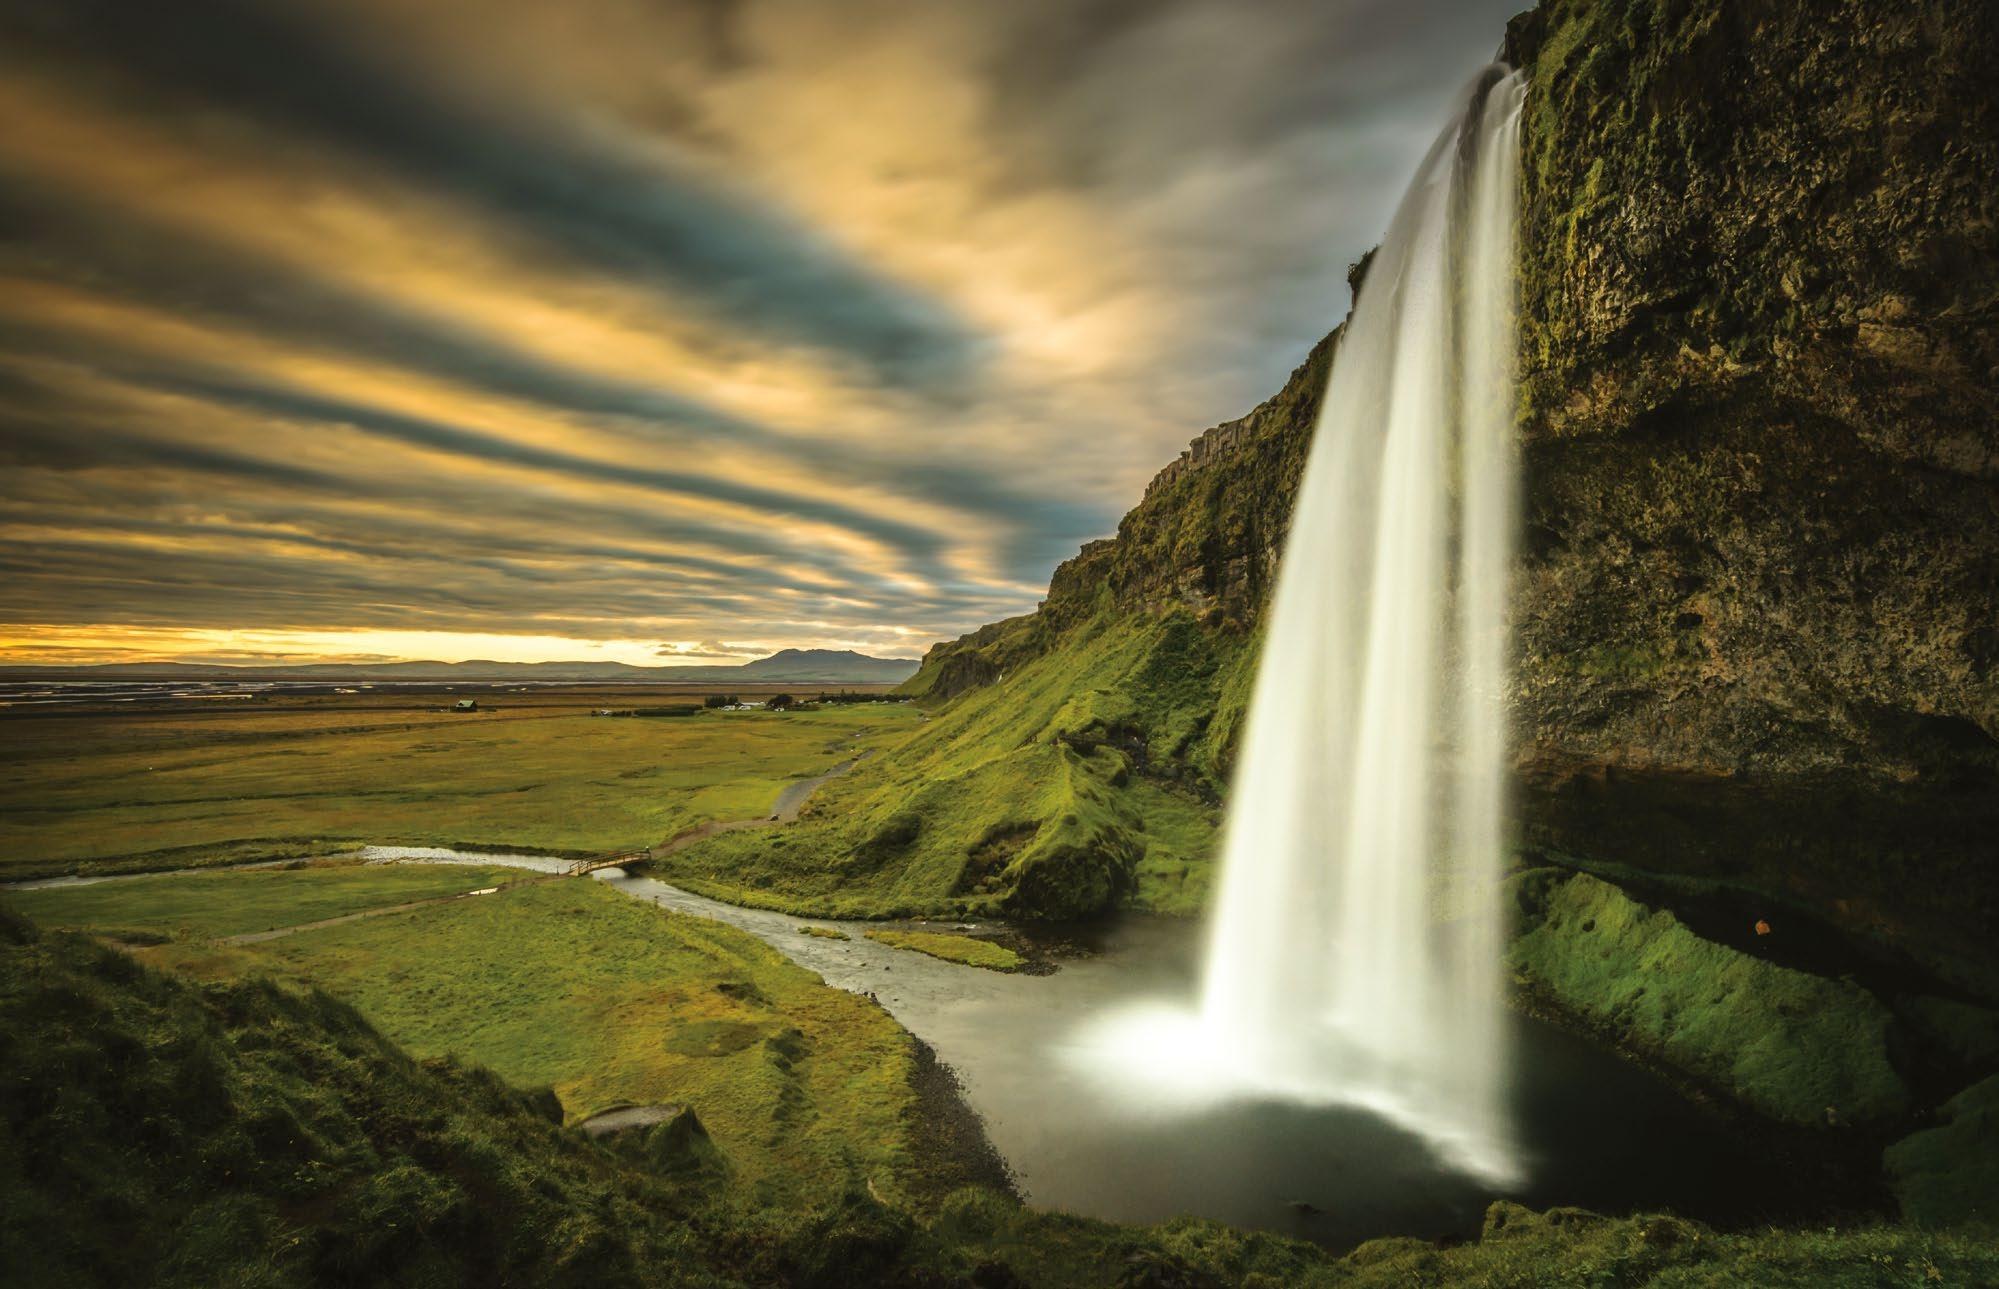
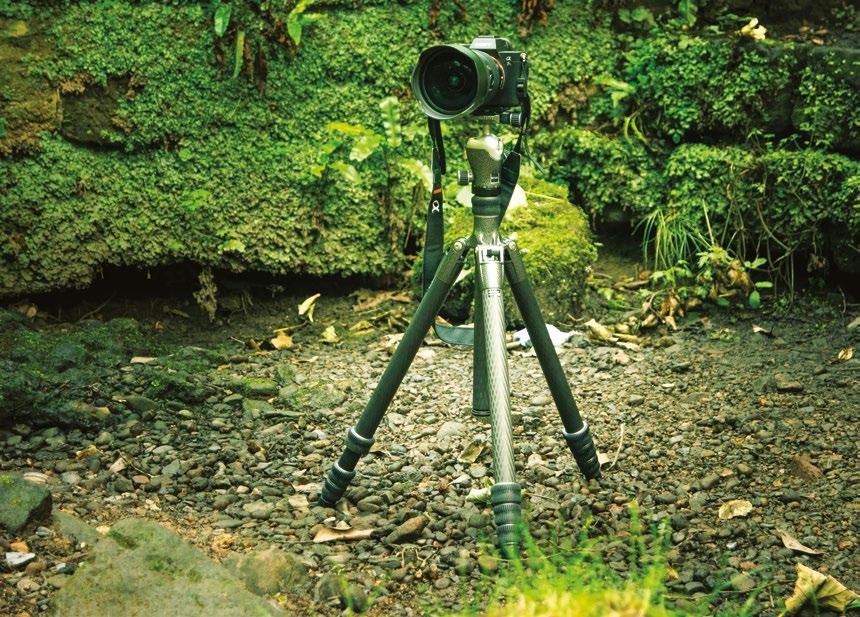

x2 ©
As rainstorms pass, the sky is at its most dramatic
Fabian Fries
© Peter Fenech
69 SHOOT FOR THE LIGHT
© Peter Fenech
Be adaptable
Top tips for making the most of the available light
1 Look first Before taking a shot, observe the lighting characteristics to ensure that your intended technique matches the setting.
2 Metering matters Switching metering modes changes how your camera interprets a scene and ensures that it ‘knows’ what exposure you want.
3 Remember the composition How you frame the shot can impact how the light appears, affecting exposure measurement and the balance of a scene.
4 Light and colour Both of these parameters are closely linked, so remember that how you approach one will affect the other.
5 Use the histogram While highlight alerts will easily flag lost detail, the tonal distribution is better demonstrated by the live histogram on your LCD.
6 Remember the edit While we are concerned with shooting steps here, the final processing may alter your choice of shooting style – making it brighter or darker, for example.
7 Change lenses While one focal length may not be compatible with a certain type of lighting, another may benefit from its properties, so try out several settings.
8 Go with it Use the available light to emphasise the exiting ambience. Try not to work against the lighting that’s present, for the best chance of success.
9 Anticipate challenges Before heading out on a shoot, check weather forecasts to give you time to plan how you want to shoot a specific location, based on the expected atmosphere and conditions.
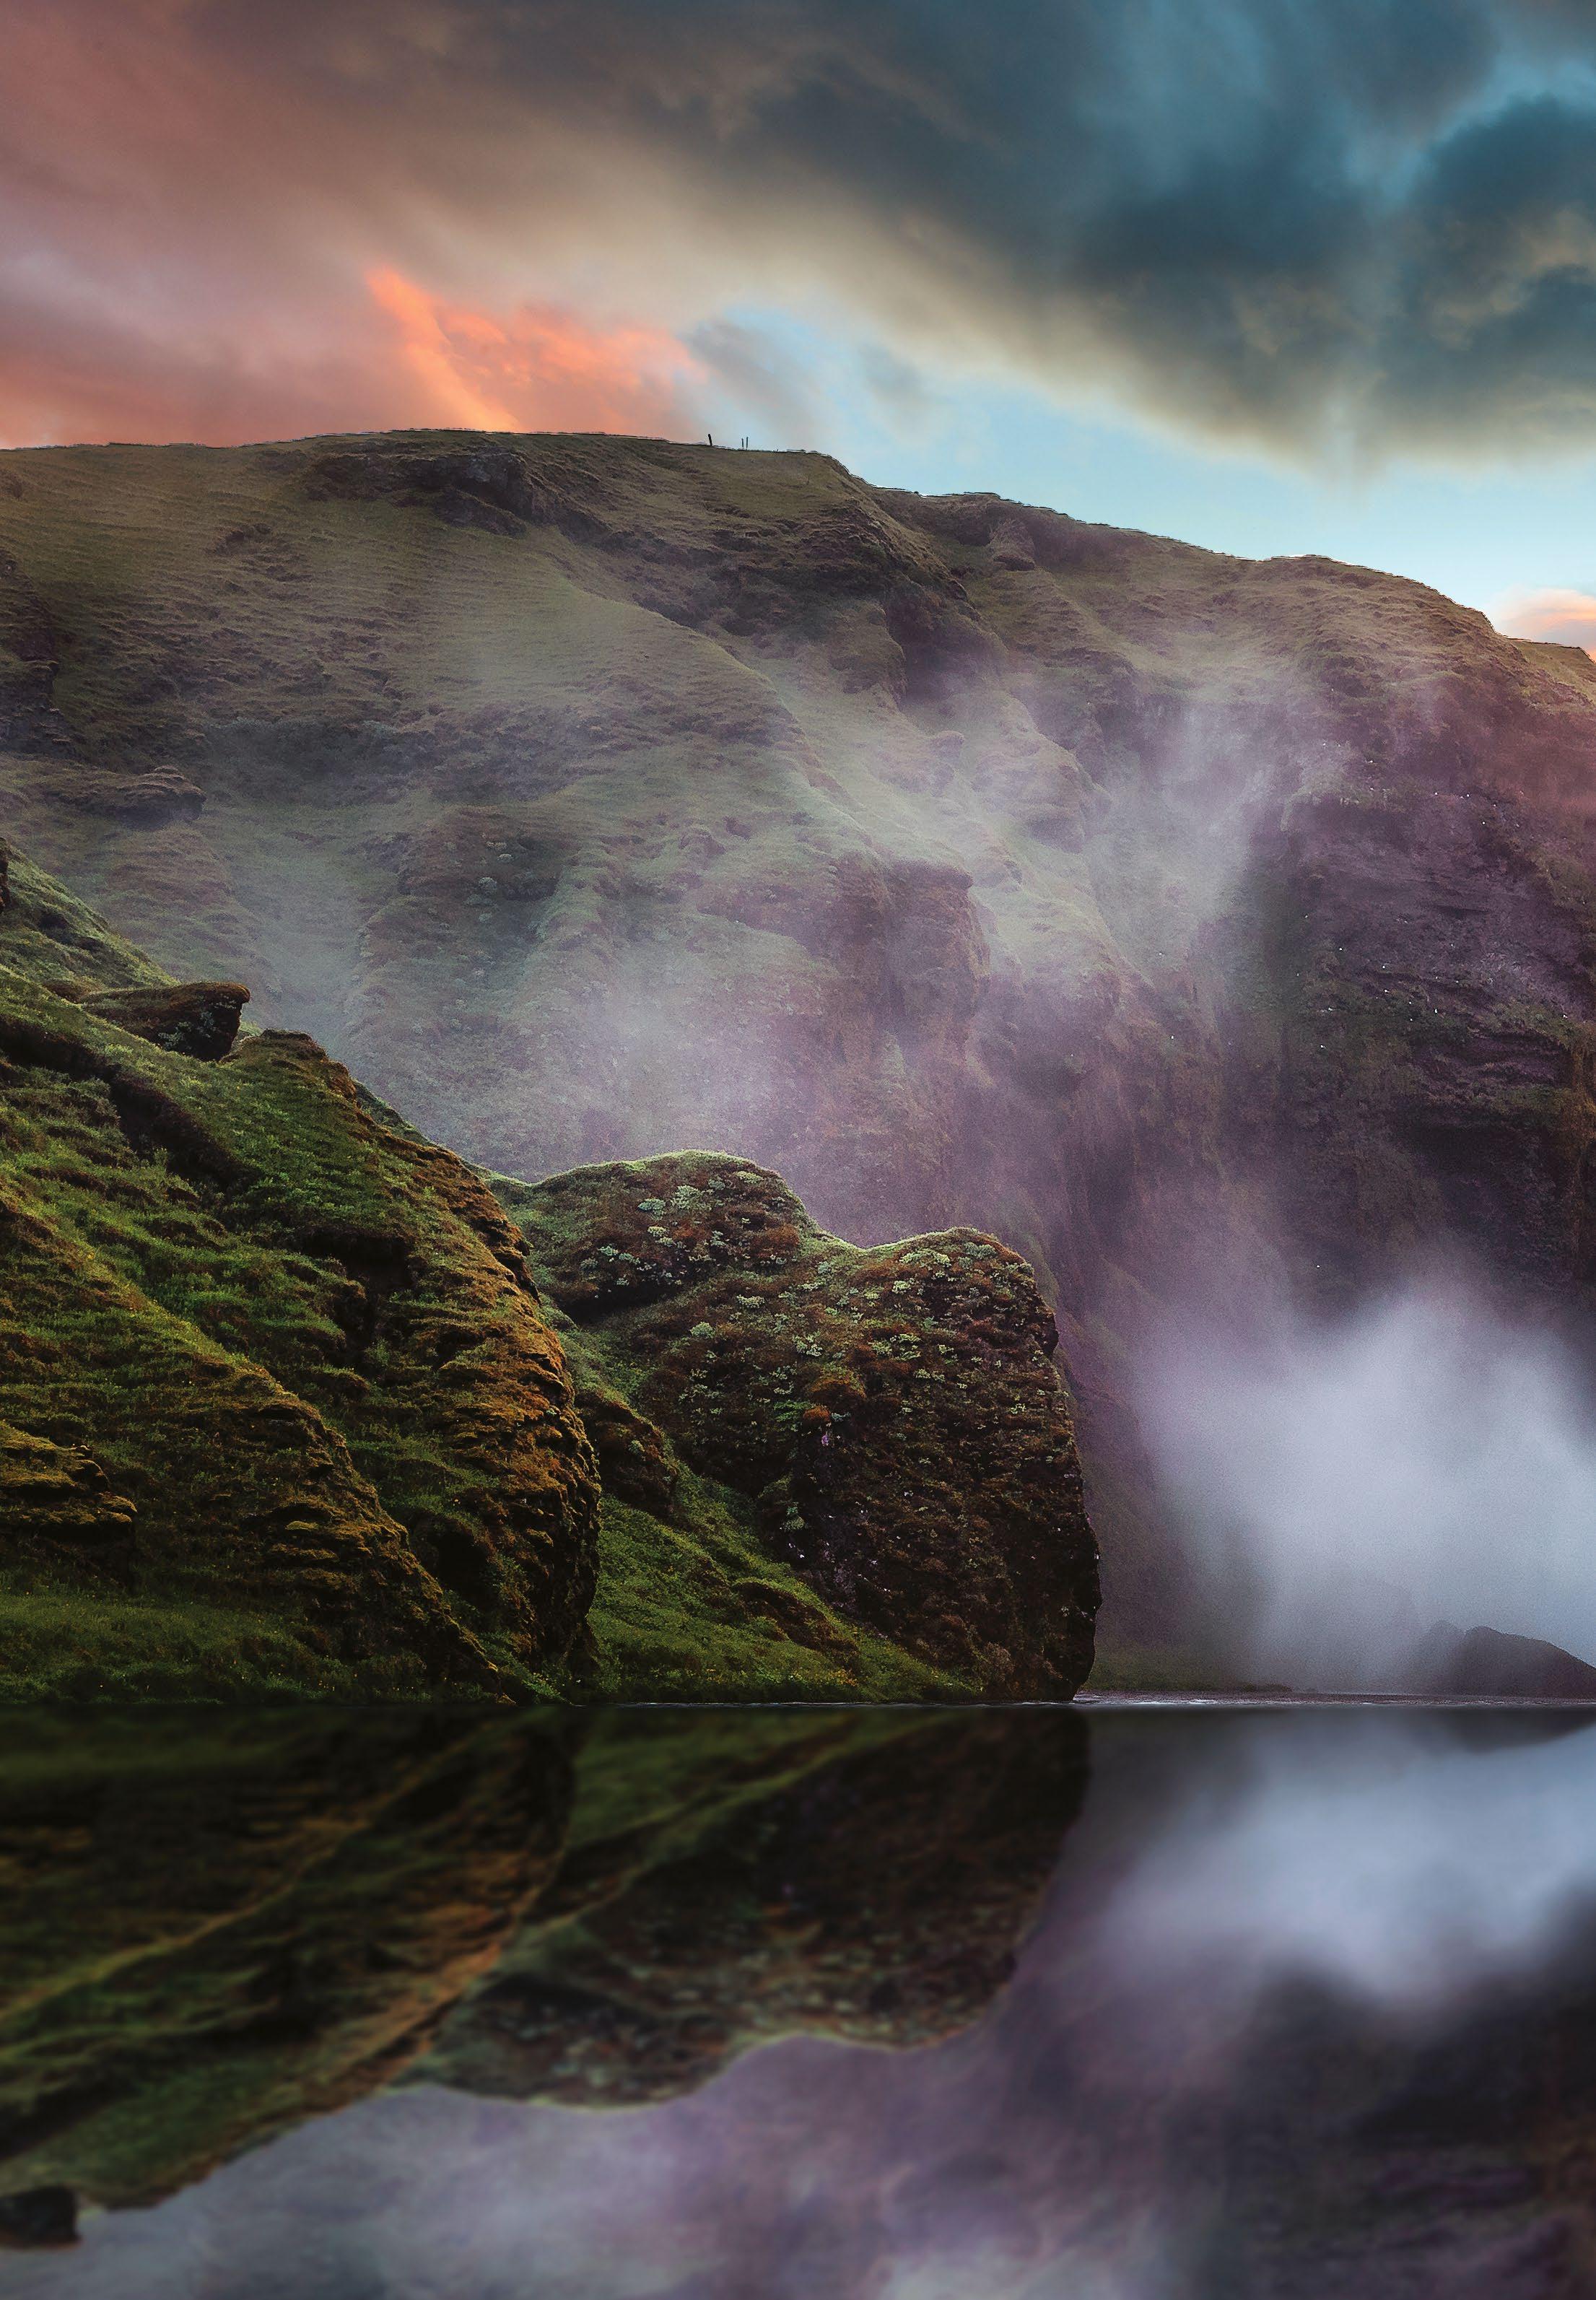
10 RAW advantage In any challenging light, a file with maximal editing possibilities is going to be an advantage. Shoot RAW for the best processing freedom.
Light or subject first? If you can revisit a location, select which subjects to shoot based on the lighting available. Adapting your approach around the available light will yield the greatest creativity
© Shutterstock
70 TECHNIQUES
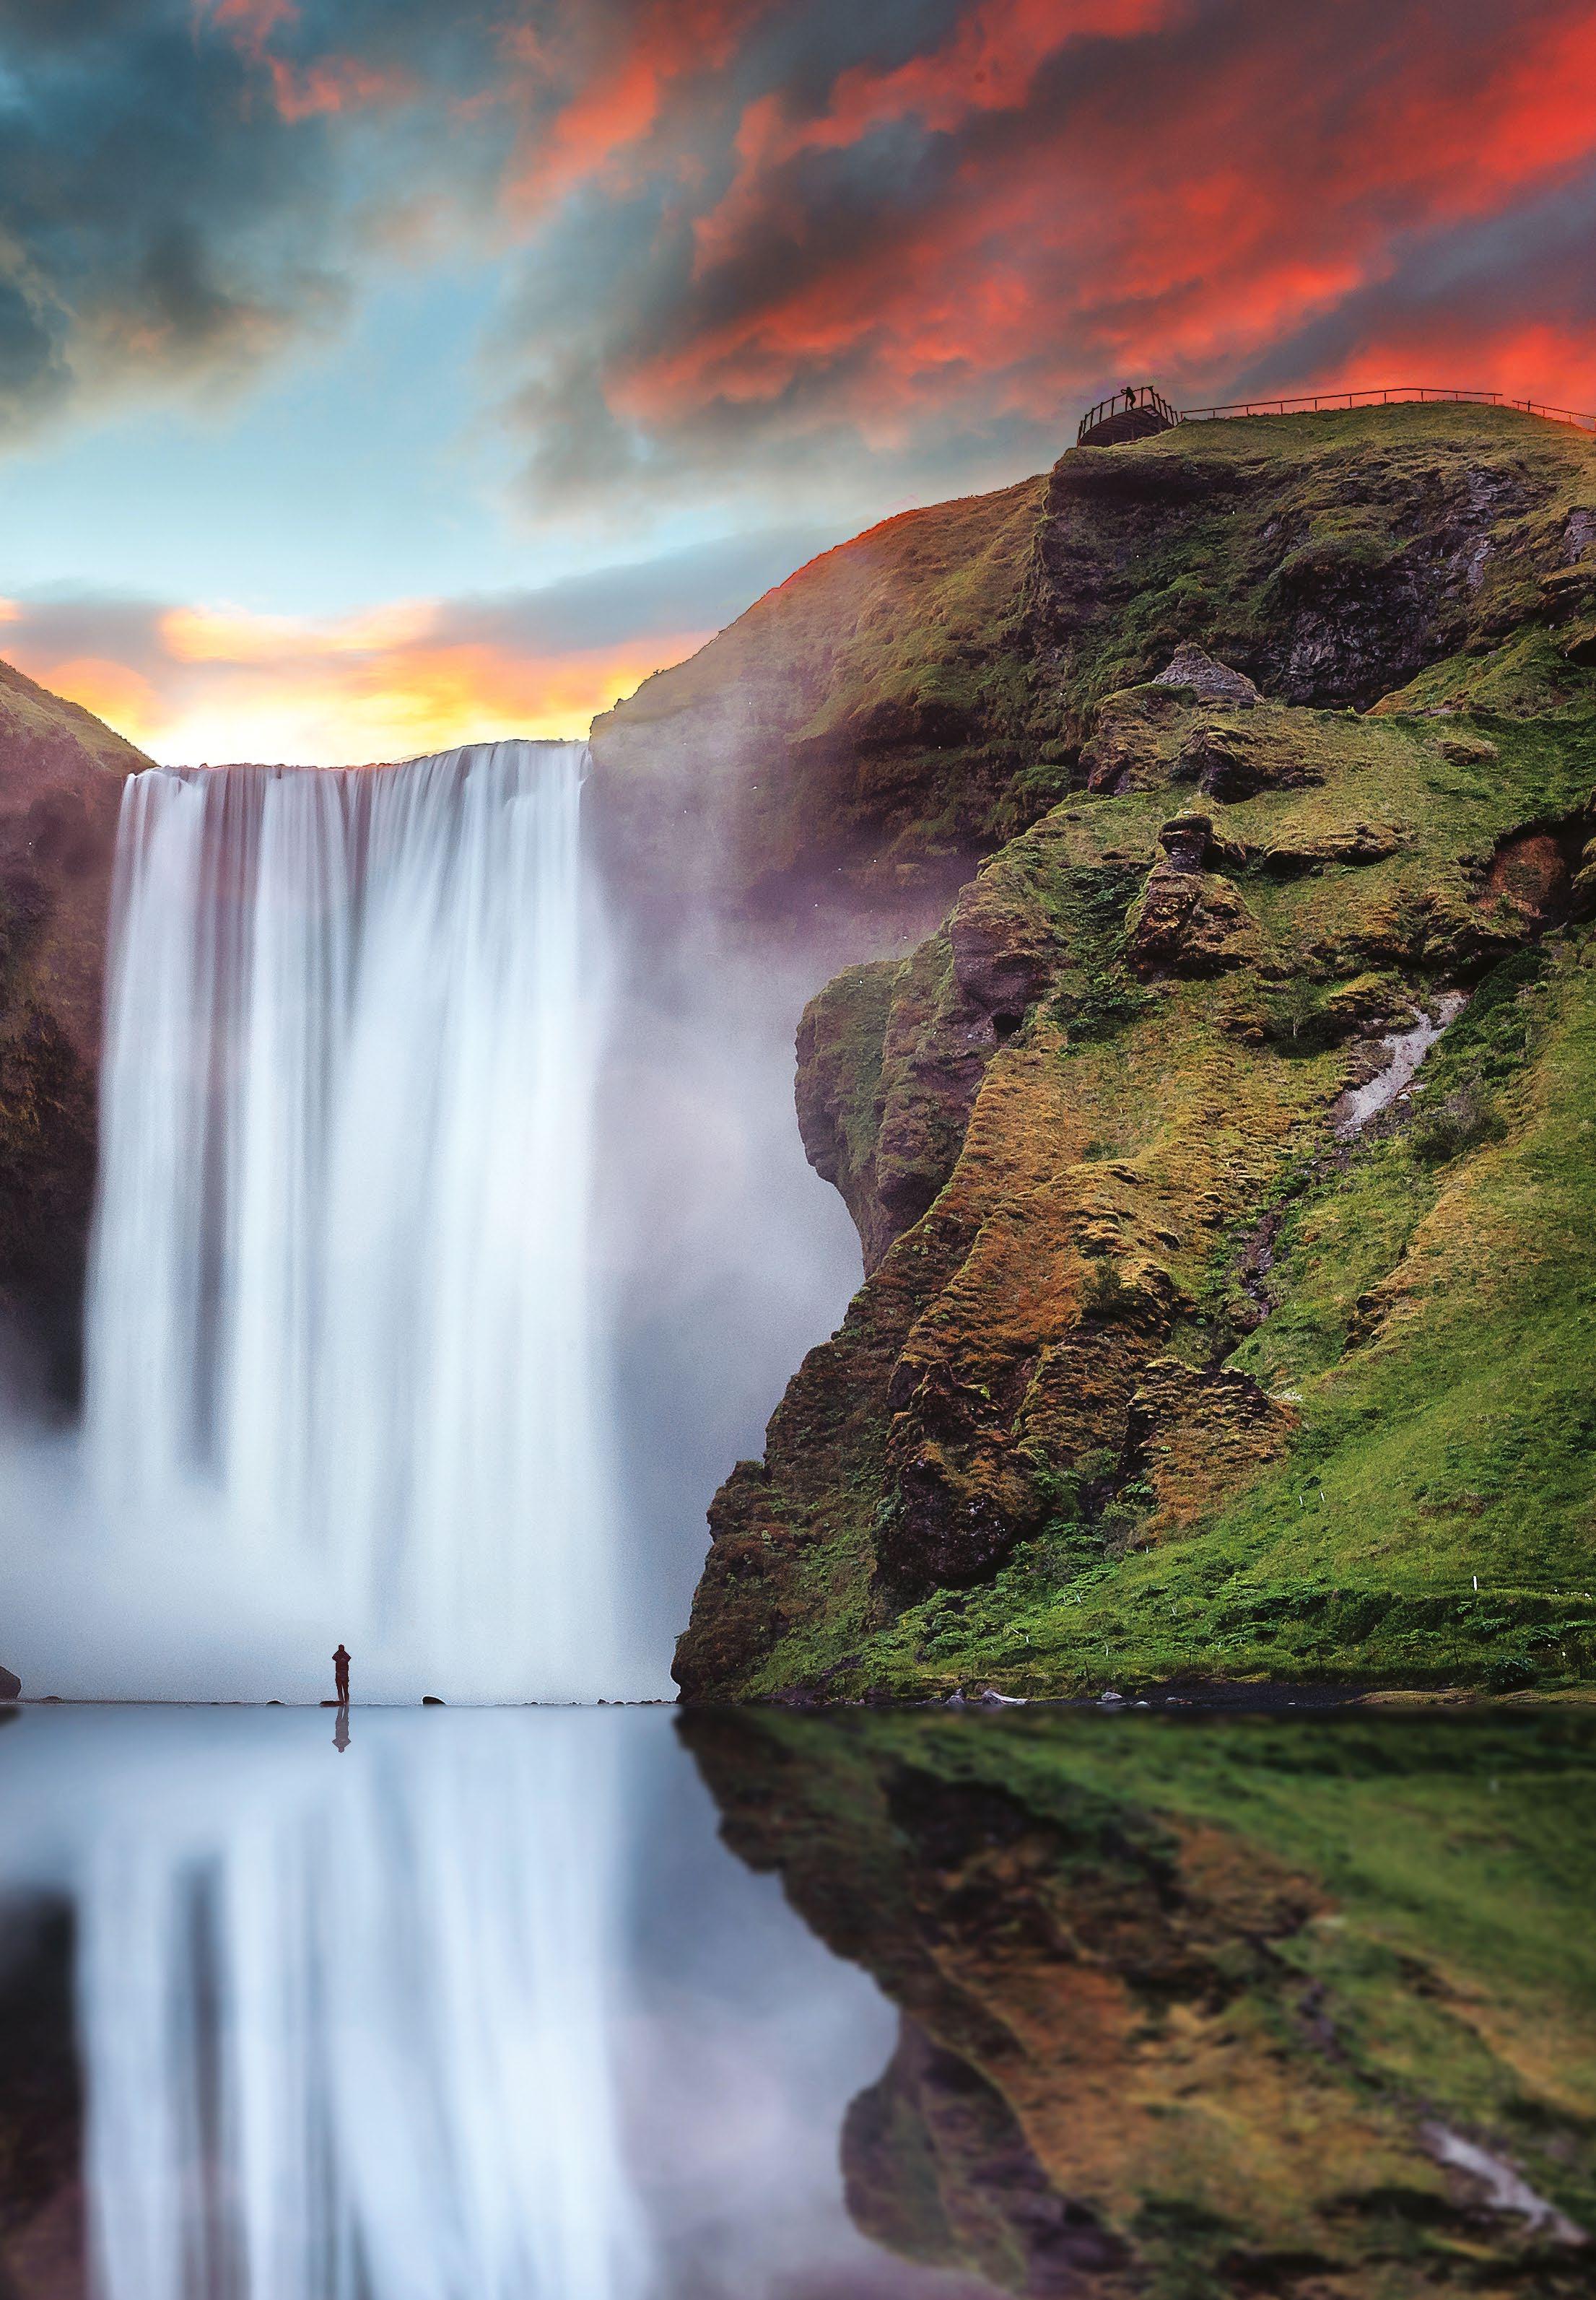
71 SHOOT FOR THE LIGHT
Black and white beauty
By choosing the right perspective, composition and using intelligent processing techniques, traditional landscape scenes can be transformed into monochromatic masterpieces
Shoot
landsc apes and black
Create stunning monochrome scenes by mastering exposure control and textural balance
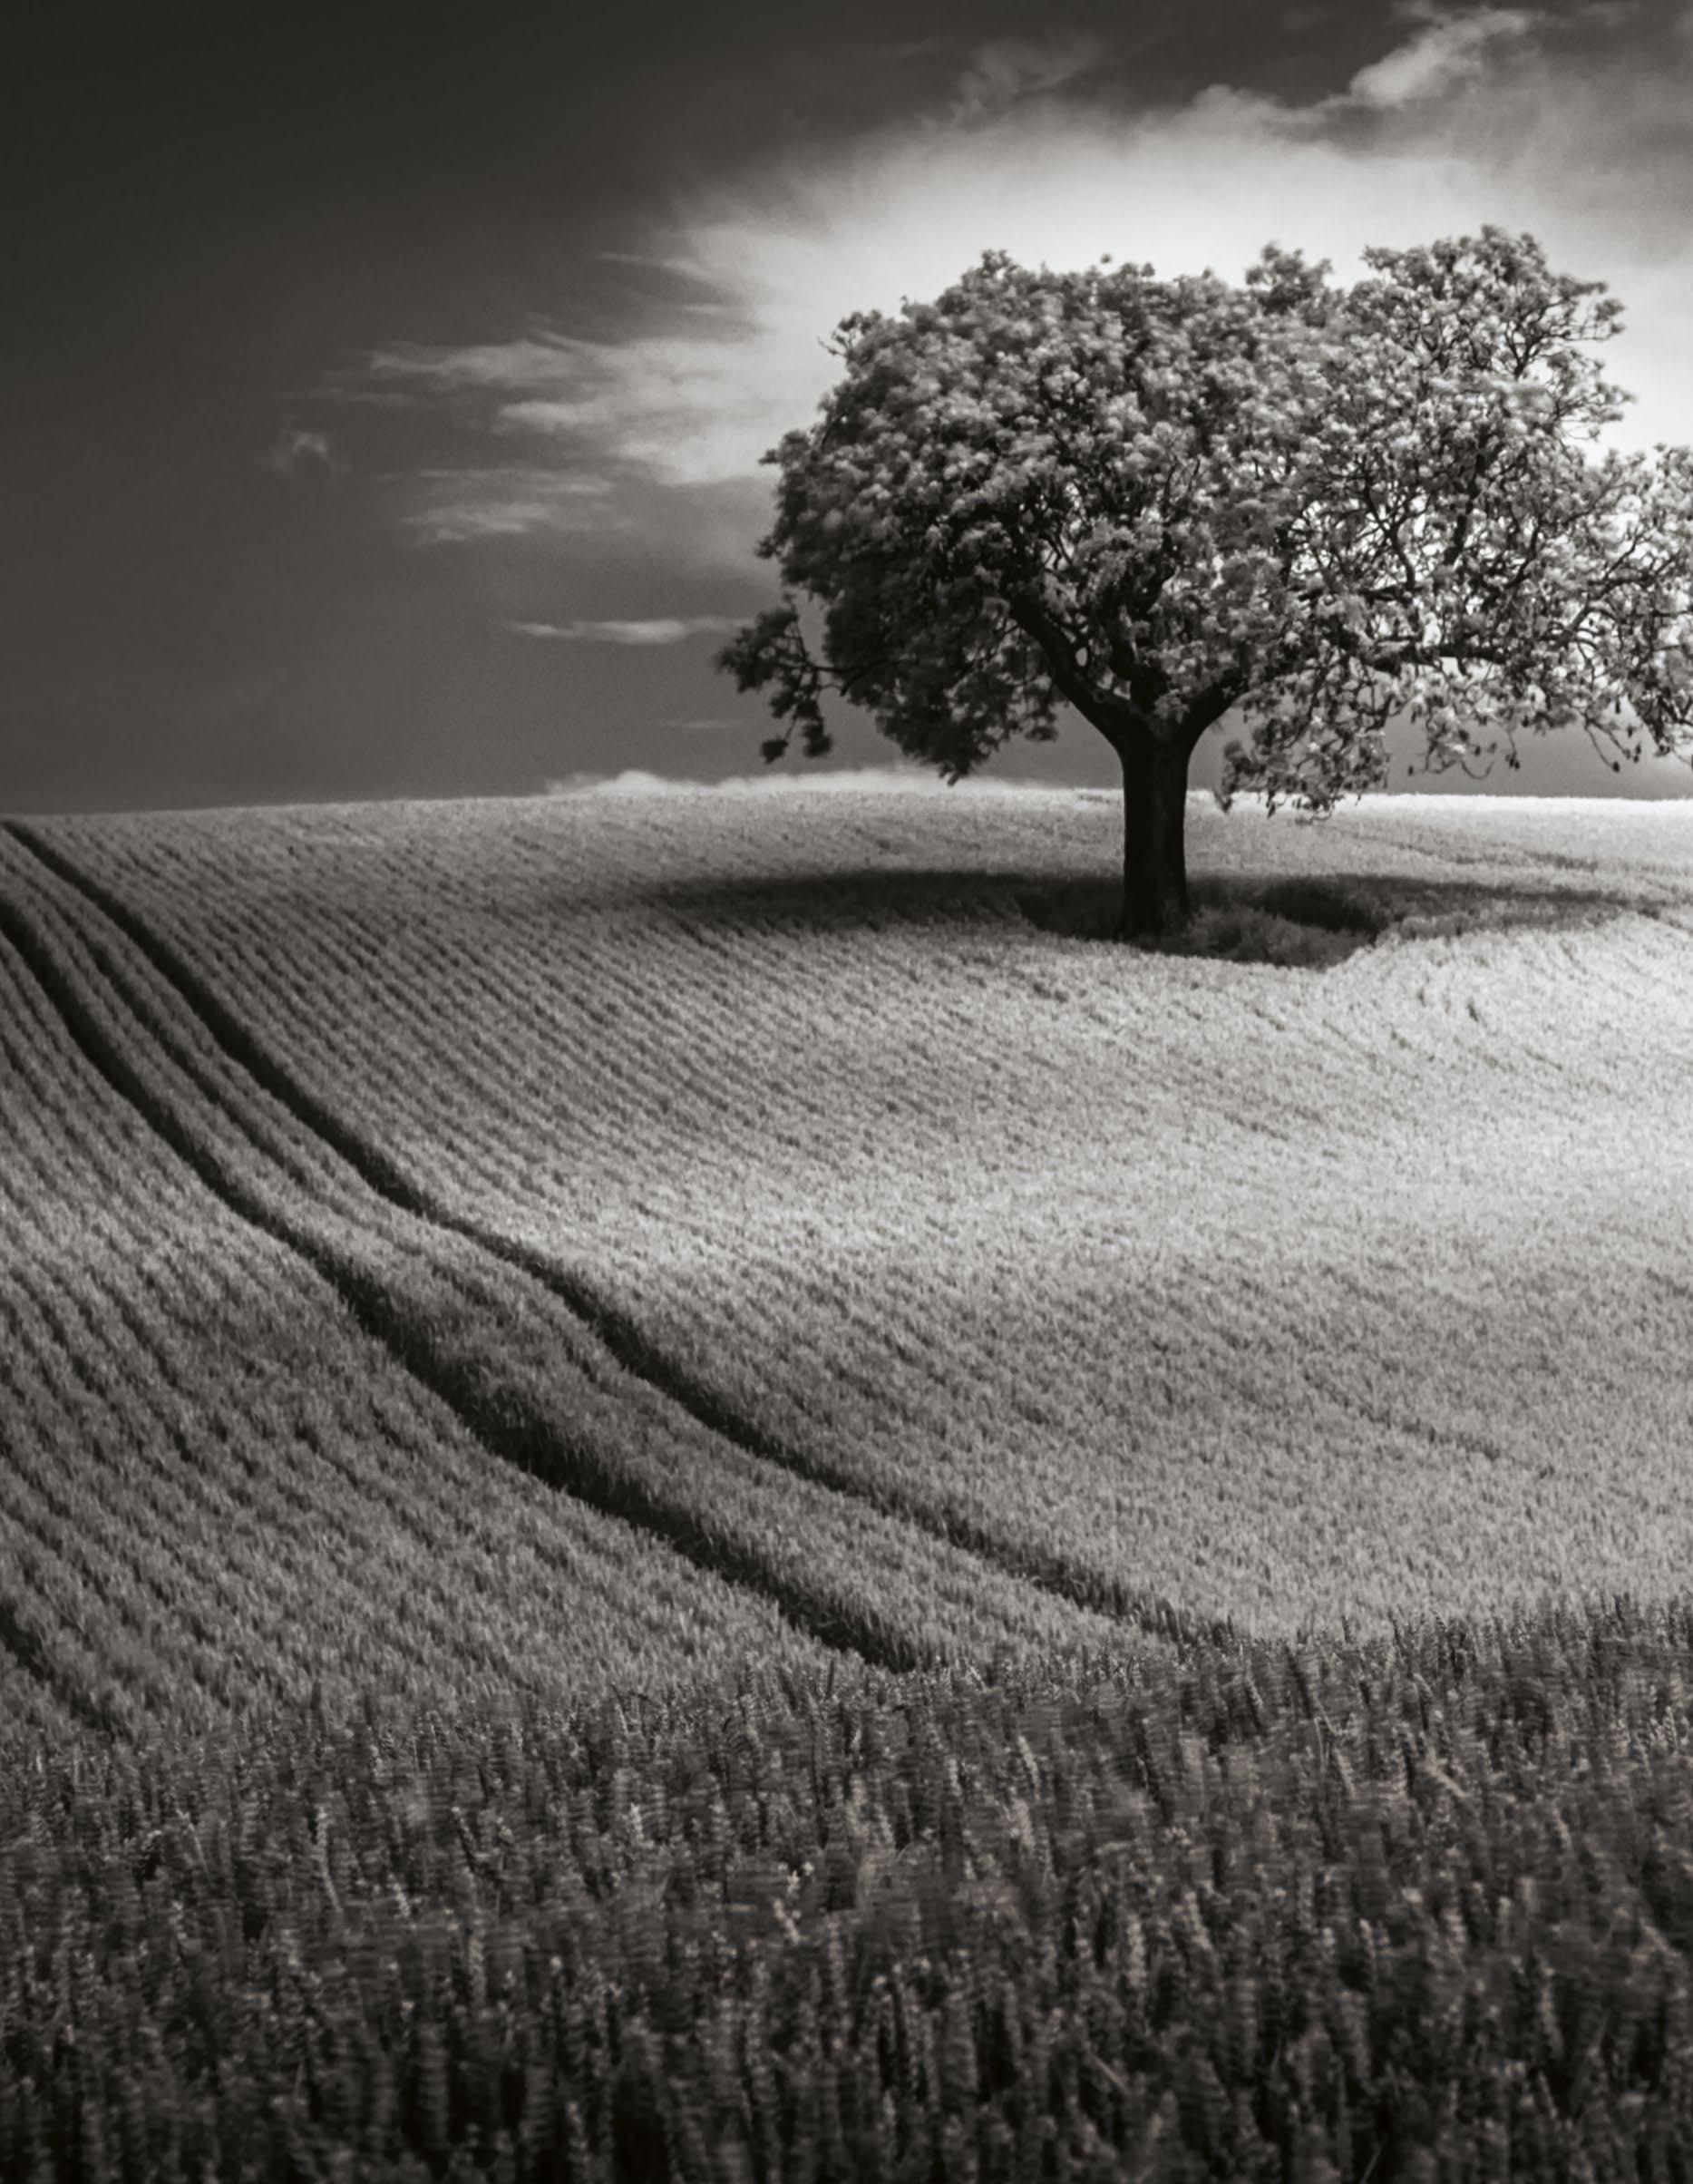
There is an undeniable irony that black and white photography is one of the most popular genres of the medium today. Despite the advances in photographic technology and colour reproduction processes, photographers the world over still choose to either shoot in
monochrome immediately or convert their colour digital images to black and white later in software.
Not only have black and white films maintained a significant presence on the market, but entire companies are based on products solely used to convert images to
monochrome, giving photographs a classic filmic quality. Software packages such as Silver Efex Pro from the Nik Collection by DxO are carefully crafted to apply film simulation filters to your shots, working to recreate the tonality and texture of wellknown film stock.
© Justin Minns
72 TECHNIQUES
apes white
It can be difficult to identify the exact qualities of black and white images that audiences identify with. But of all the areas of photography to benefit, landscape is a common recipient of the black and white treatment. The range of brightness values in scenic images lends itself to colourless

rendition, as this enables the viewer to focus on the most critical components of landscapes – texture and depth.
Removal of colour is not a get out of jail free card, however, and while it can be used as a creative technique to add drama and focus attention, desaturation cannot be
seen as a quick remedy for a bad shot. In order to create mono masterpieces we must first identify which scenes are receptive to conversion, and how best to approach this.
Here we’ll explore the best routes to identify landscape subjects and tailor image styles for maximum effect.
73
& WHITE
BLACK
Good contrast
Identify suitable scenes
Not every landscape works in monochrome. Recognise which subjects and lighting conditions offer the greatest potential
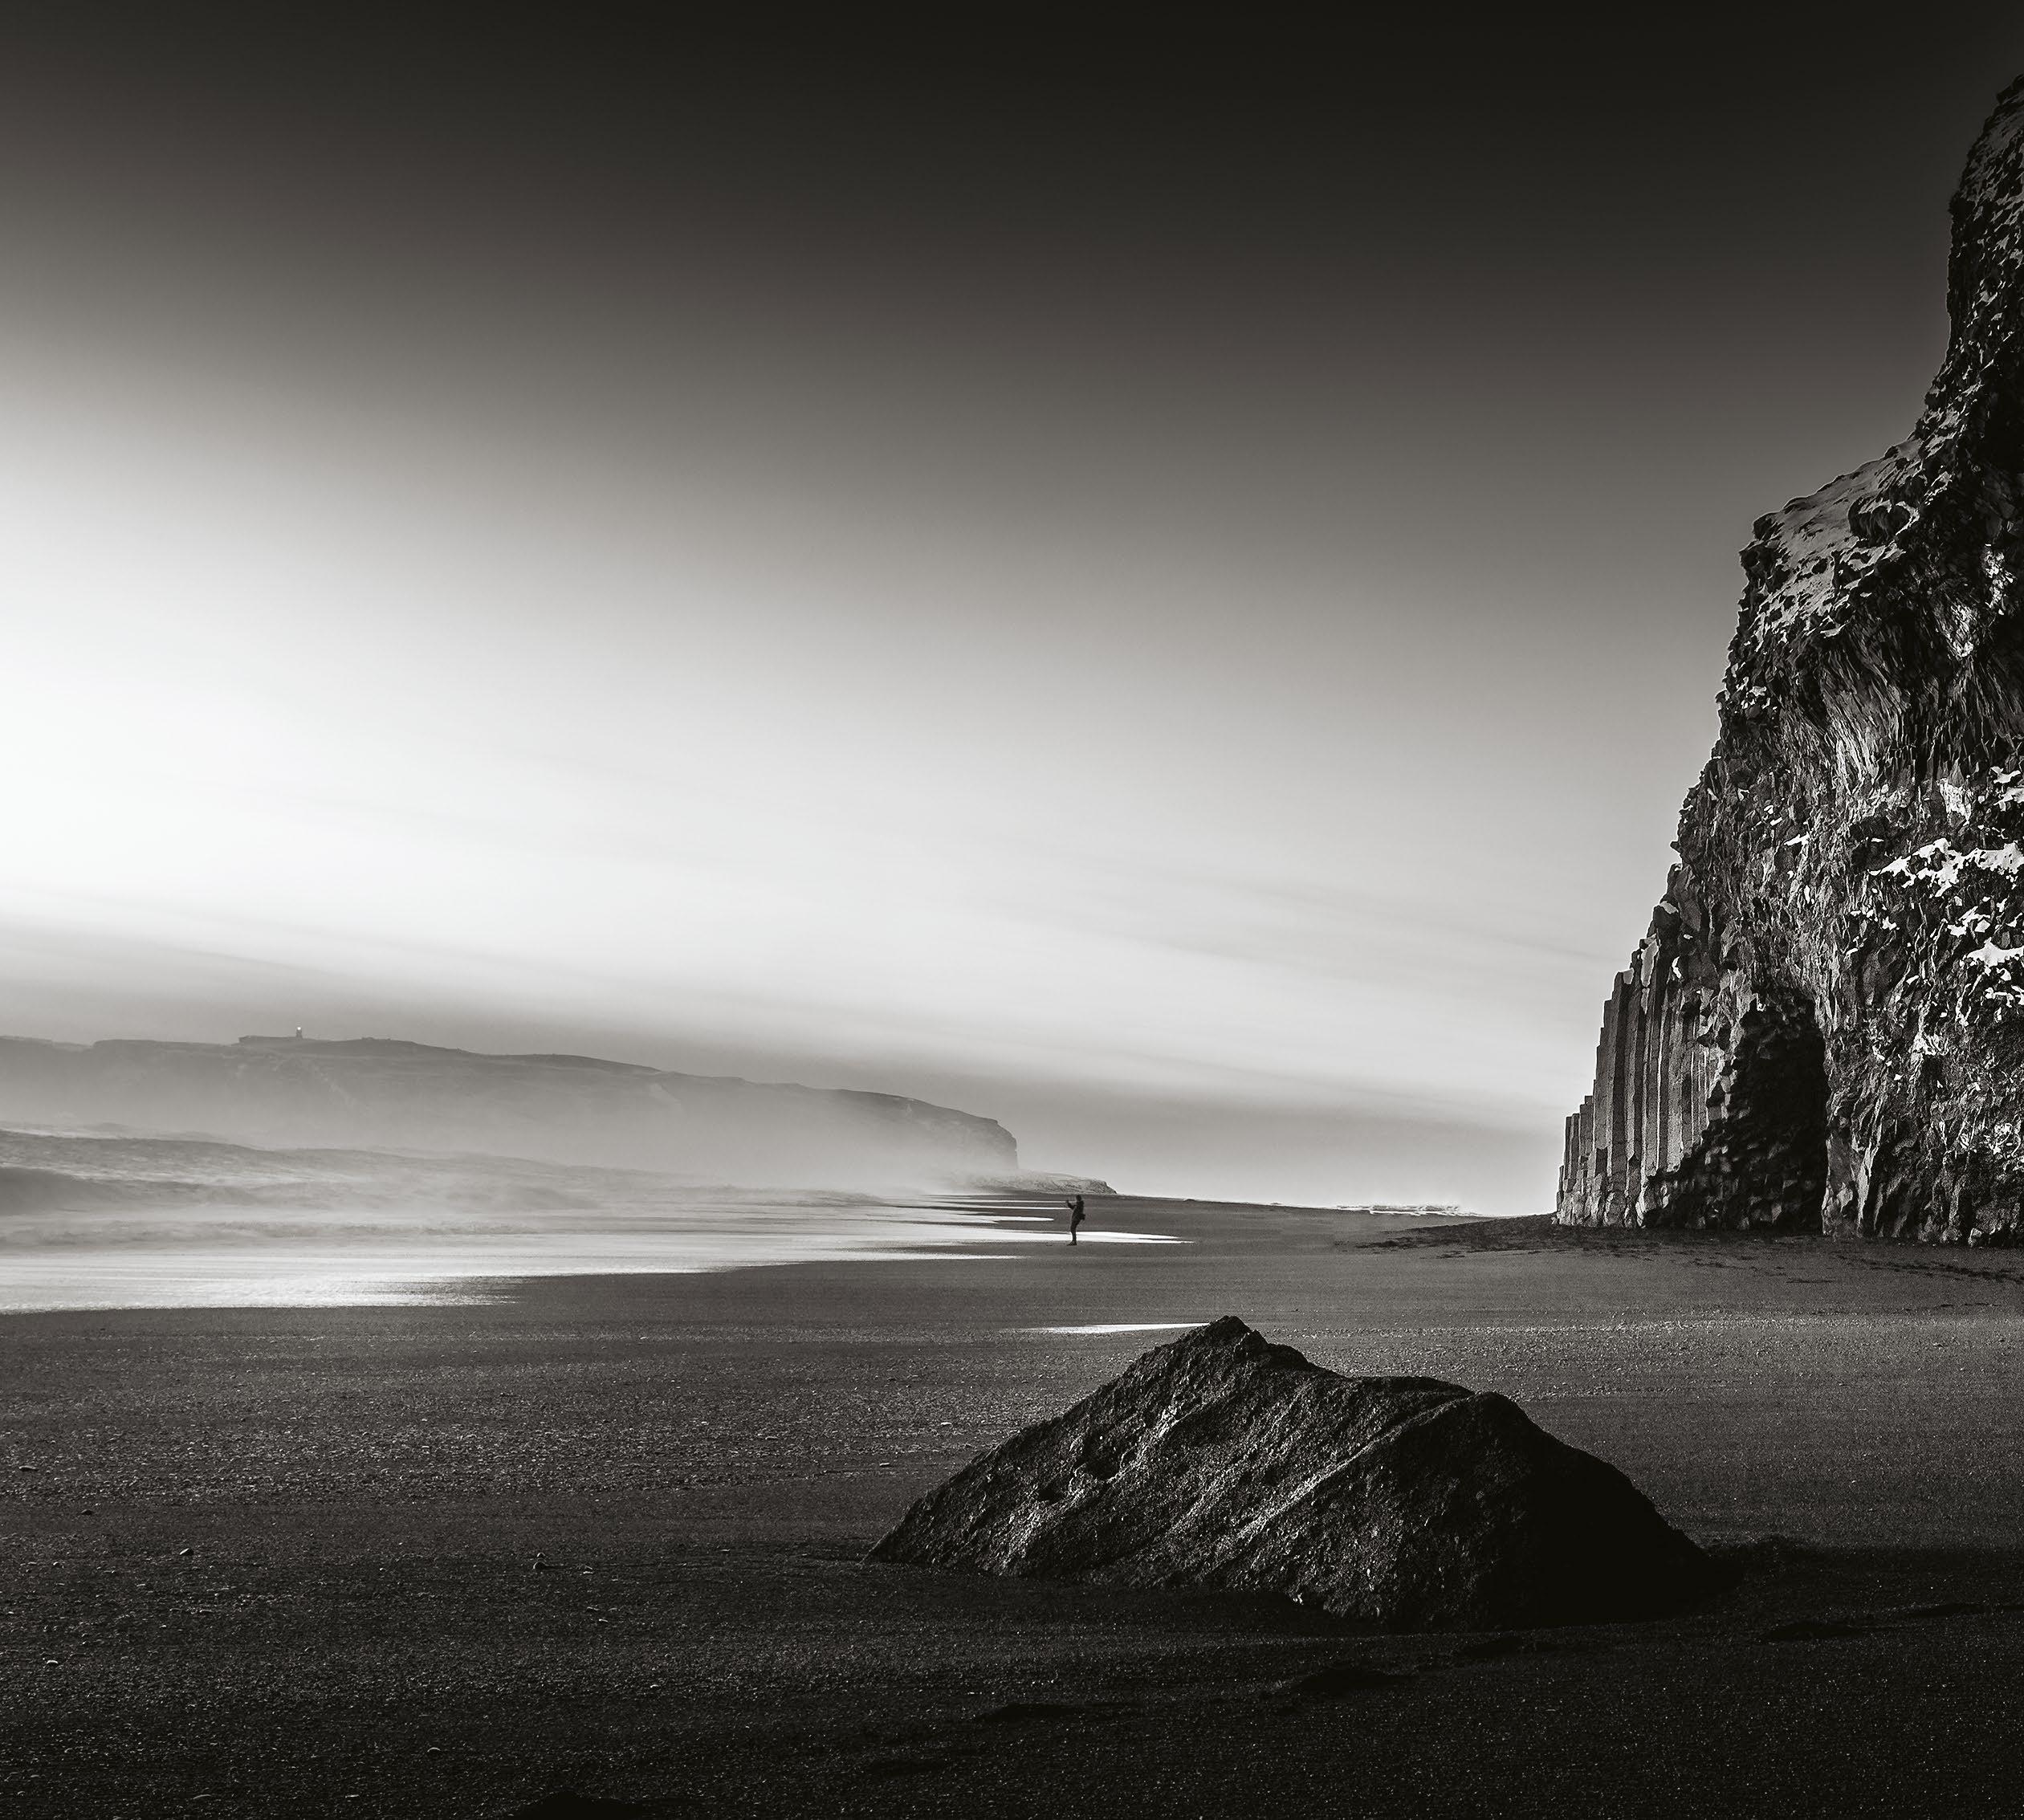
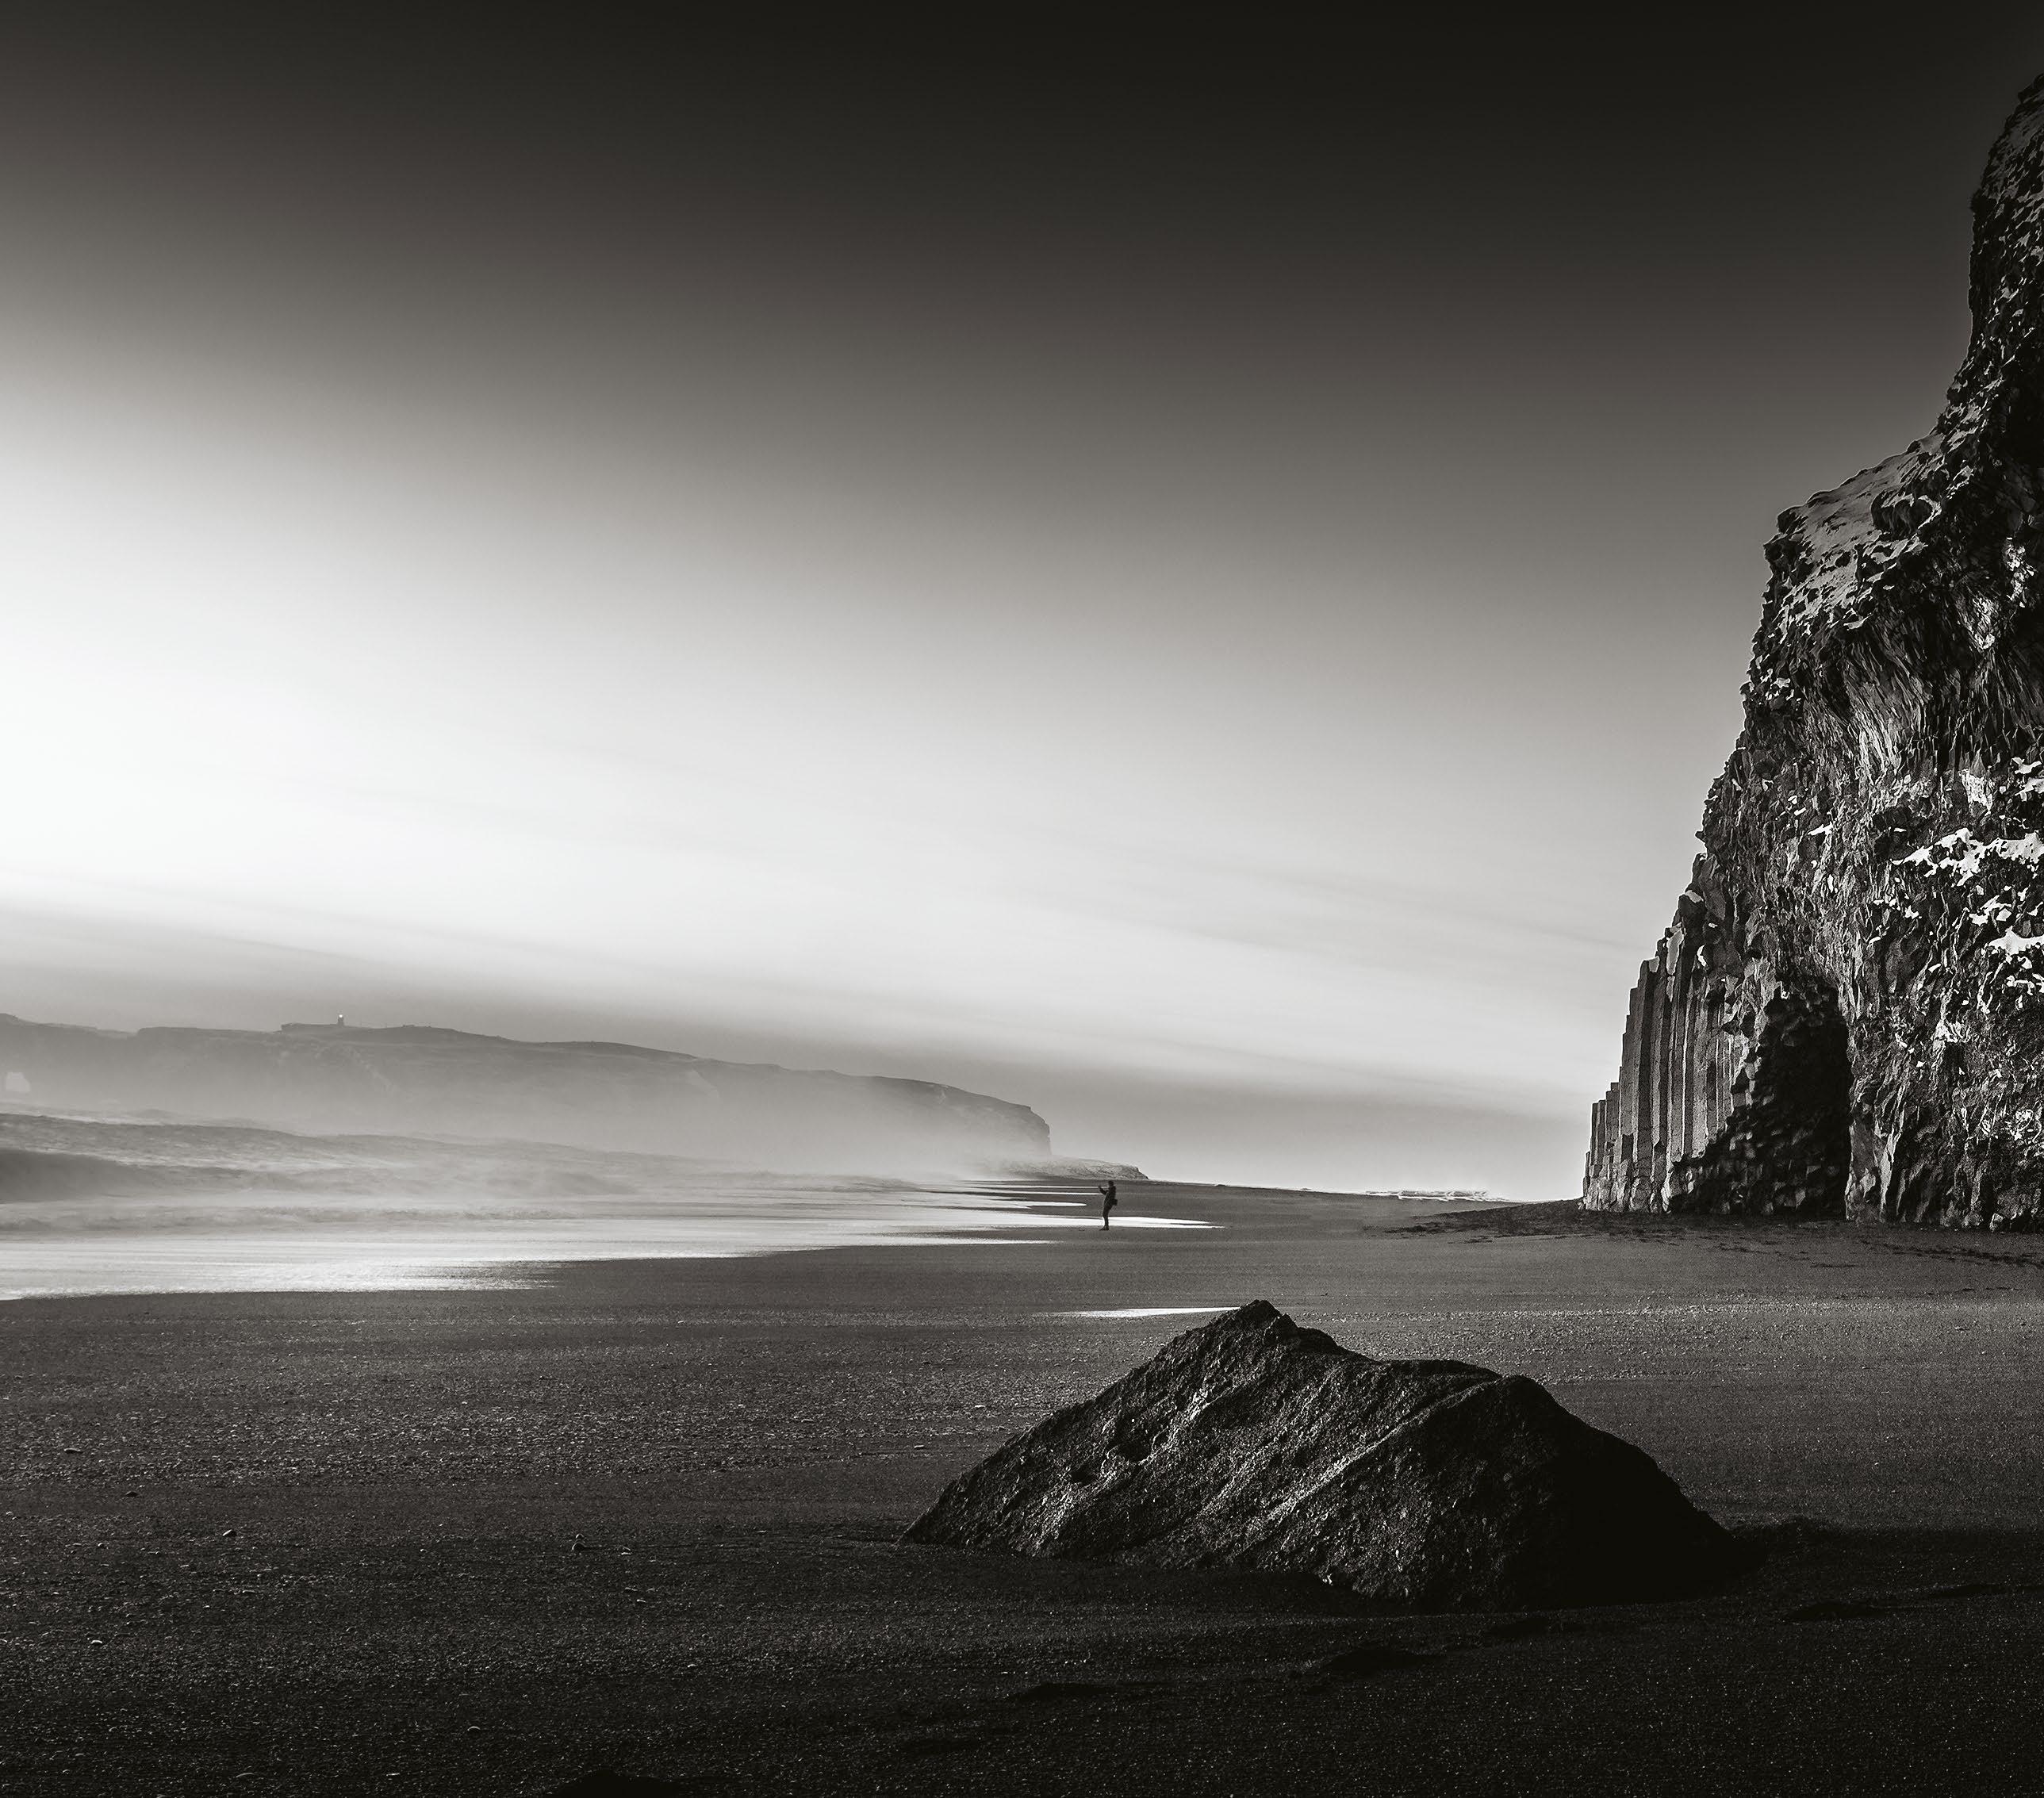
When black and white film was the only photographic medium available and every image created was devoid of colour, the viewer had their expectations set by these limitations. And while the photographer had to be aware of the effects of shooting a scene without the ability to reproduce colour and worked to maintain impact, they had the familiarity of monochrome in their favour.
In today’s modern age of advanced digital technology, where cameras are able
to capture even the most subtle of colour gradation and HD TVs display breathtaking contrast and saturation, things are very different. Audiences expect strong, life-like colour images, as even camera phones are able to reproduce impressive colour gamuts. If we are going to intentionally remove this chromatic information to produce a black and white image, we have to be certain there is enough interesting detail remaining to justify the existence of the shot.
This is the main area of confusion among new photographers. A successful monochrome photo is more than simply a digital file with the colour removed – to ‘sell’ the impact of a colourless scene we have to pick ones with appropriate tonality and shoot with the intention of converting it in processing. So what works well in black and white? A good example is a scene with extensive contrast, such as those found during the midday sun. This is far from the ideal time to
LOCAL CONTRAST White
LOW-FREQUENCY DETAIL A mono conversion can give greater separation and purpose to otherwise bland detail like cut grass or sand.
clouds in a deep blue sky show great contrast when a red filter is used.
74 TECHNIQUES
COLOUR VARIANCE
Scenes containing a good range of colours are more likely to exhibit contrast in the converted image.
shoot a standard landscape, as colour is often muted and uncomfortably cool, with a high kelvin value in the shadows. But it’s an ideal opportunity for a monochrome shot, as this will focus the viewer on the detail and form of landscape elements, without the distraction of intrusive hues. In any scene where you feel the colour is failing to add any value, thinking in terms of creating a black and white reproduction is a possible solution.
Although it may seem counter-intuitive in a monochrome workflow, it is critical to assess colour range. The colour visible in a scene will continue to dictate the tonality of your image after conversion, which is a vital consideration for predicting the contrast of the final image. Two colours that appear different in a colour shot can seem similar in monochrome, producing a flat shot if left unmodified.
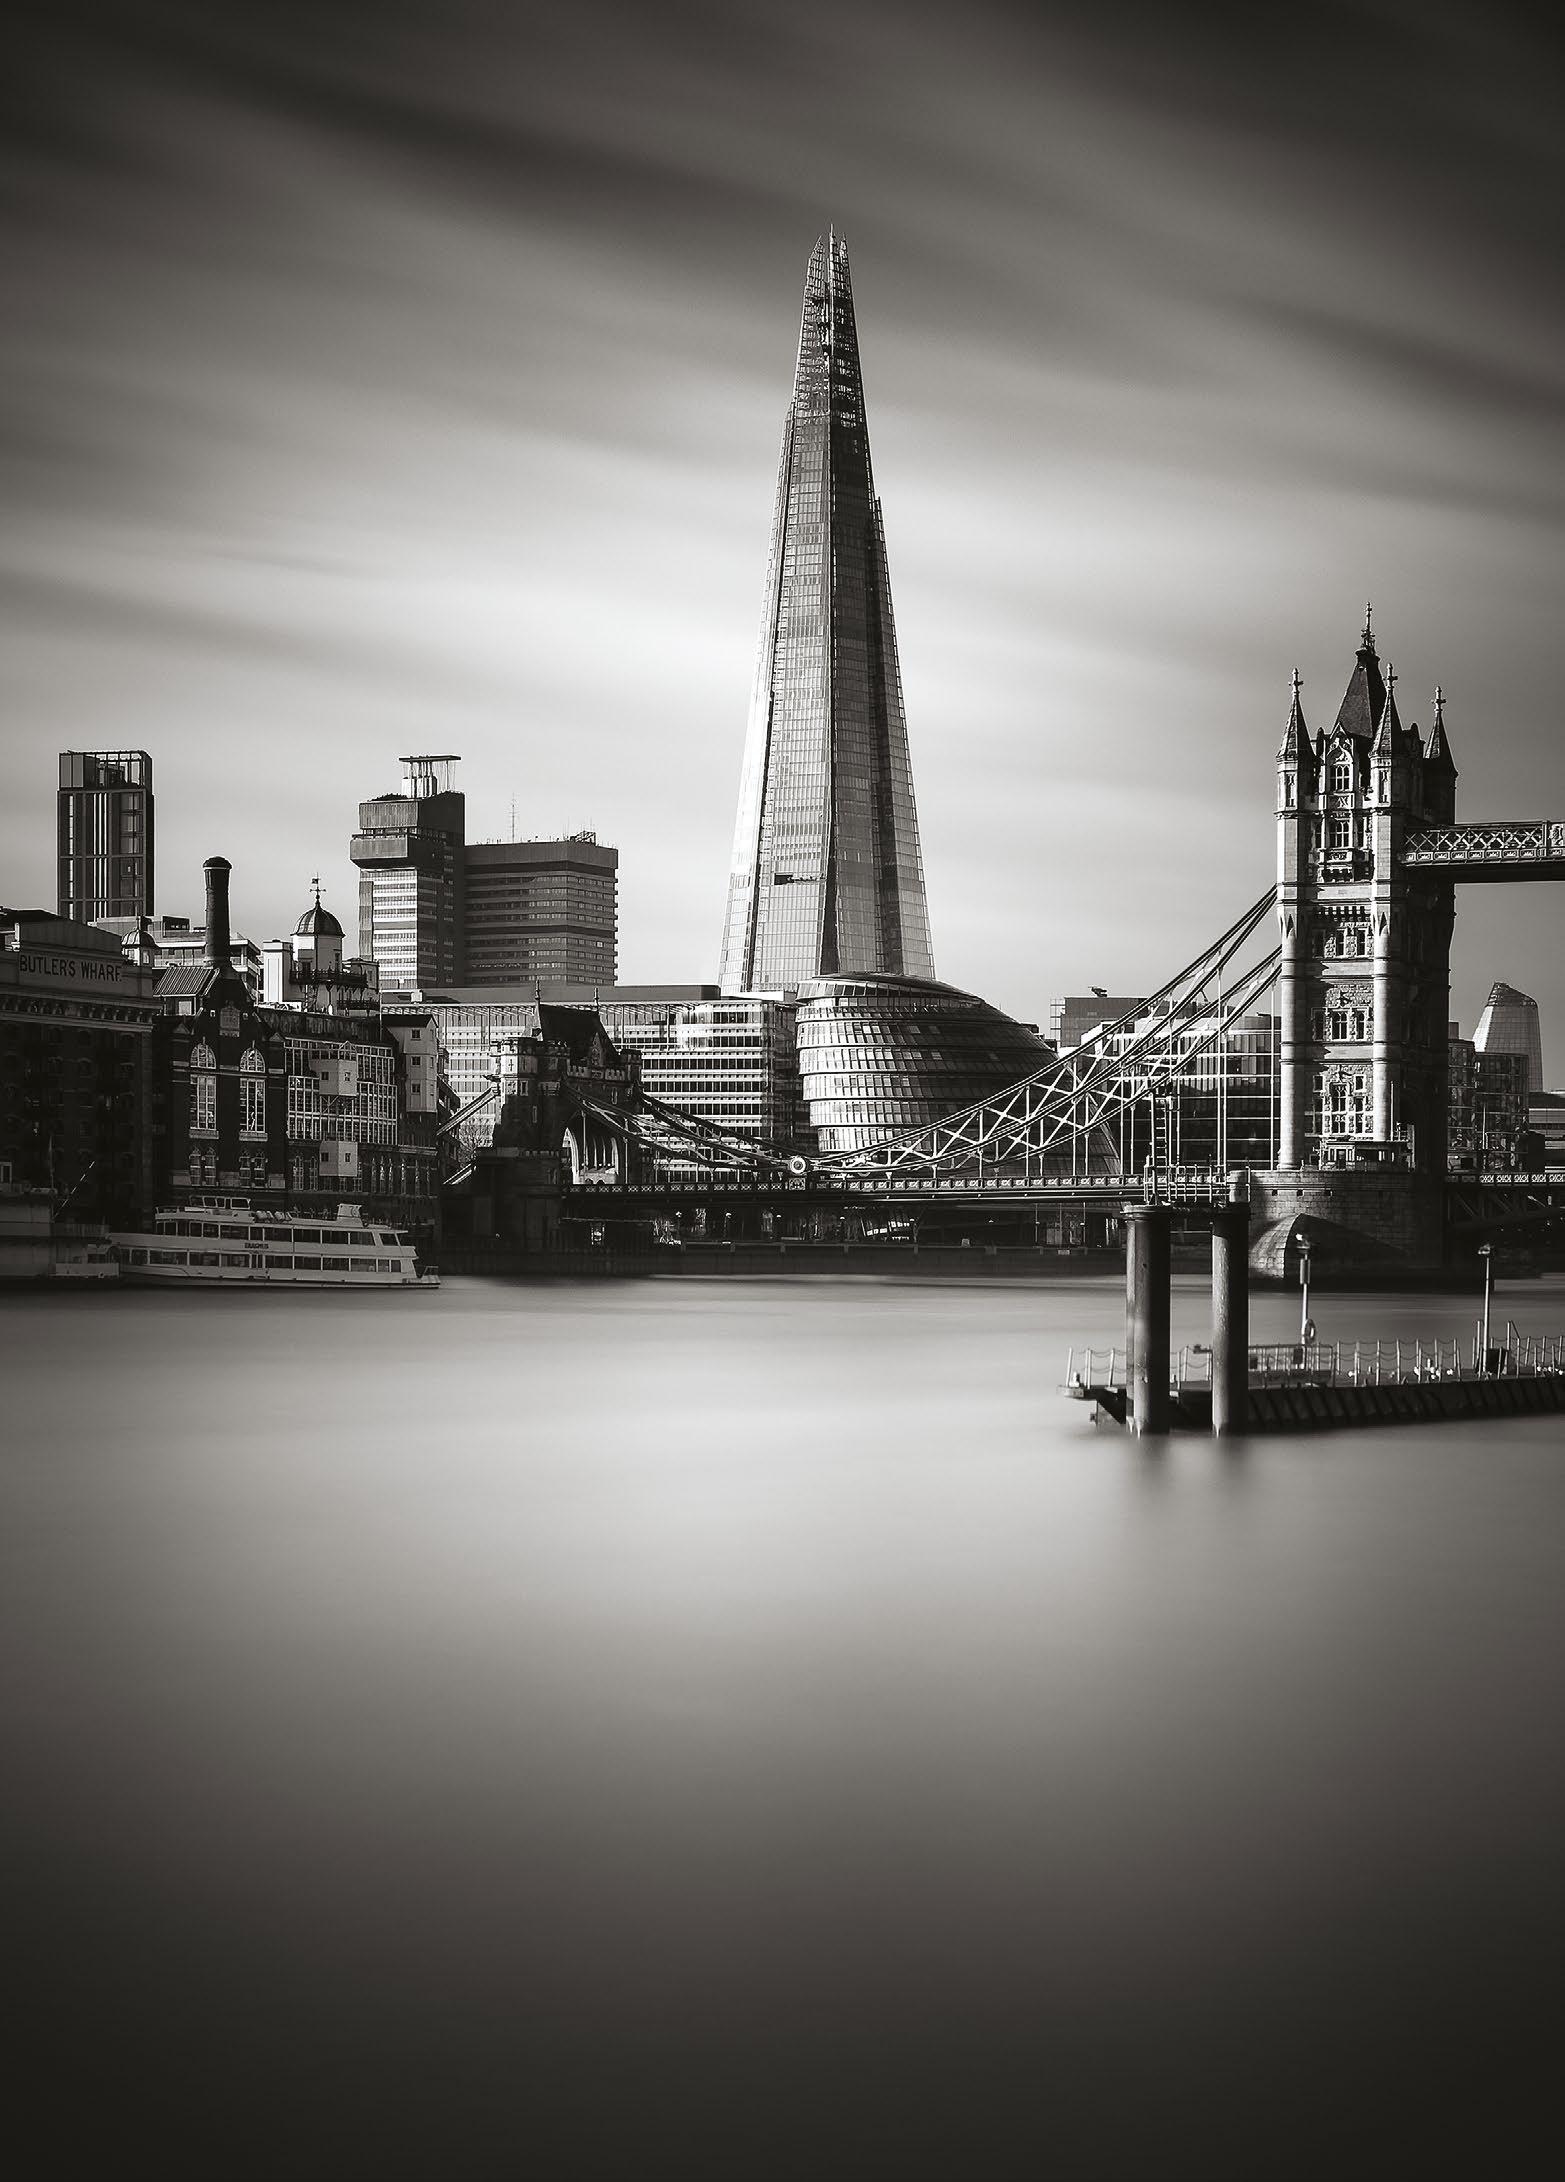
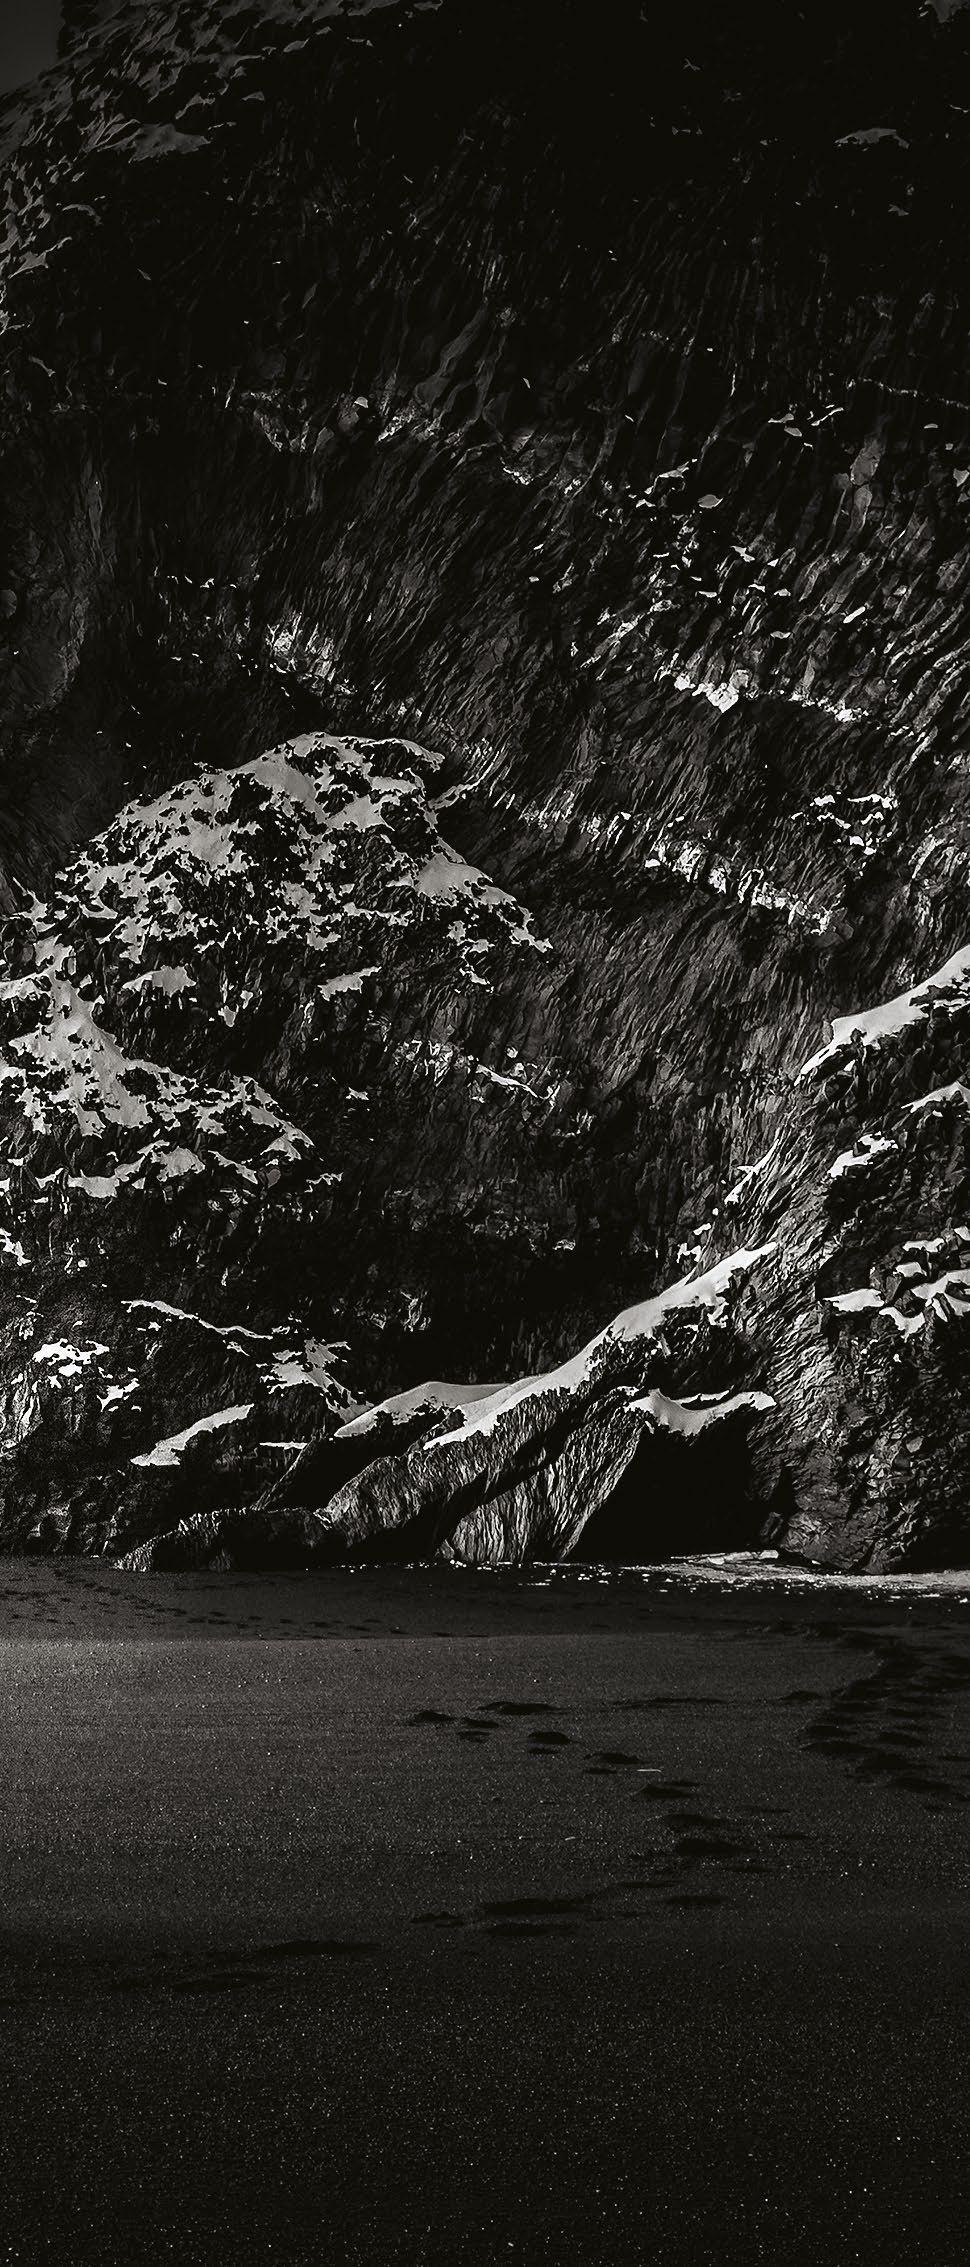
TONAL CONTRAST
Bright highlights and dark shadows are emphasised as features by removing colour.
FOCUS ON FORM
Strong directional light creates defined gradients that suit the graphic properties of monochrome.
Harsh lighting
OUT OF RANGE
In situations where dynamic range is exceeded, use this to your advantage for graphic impact.
Focus the viewer on the detail and form of landscape elements
Stormy scenes
DRAMATIC LIGHTING
Passing storms often produce striking directional light complemented by the textural focus of monochrome.
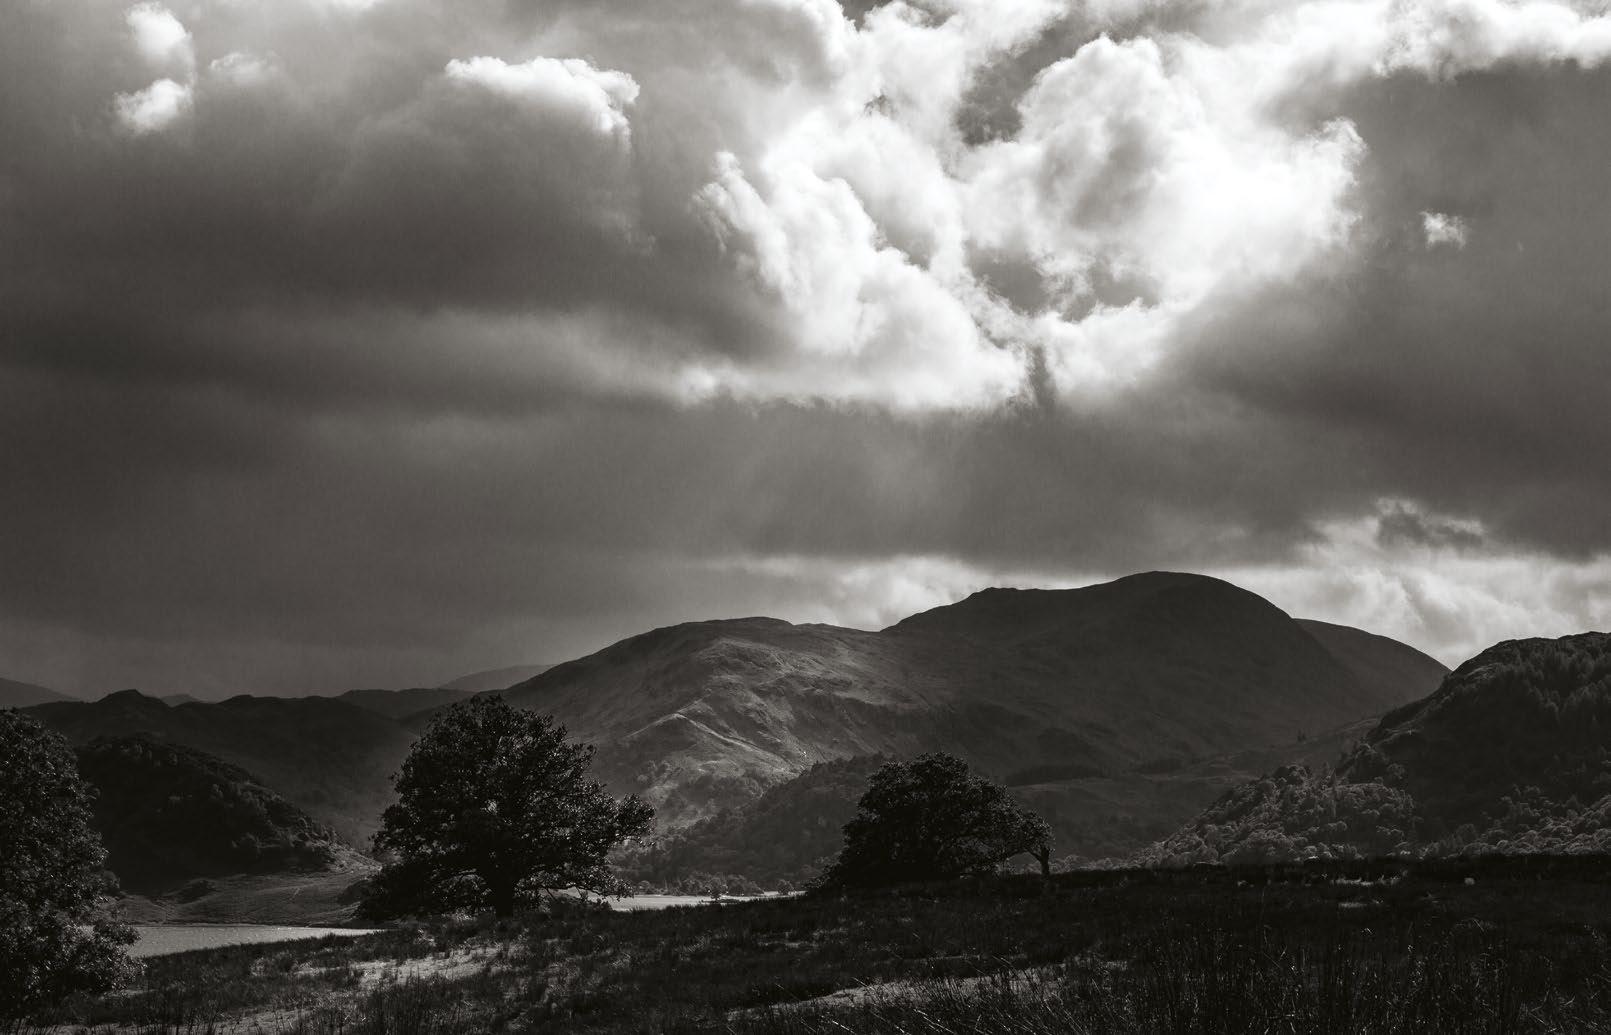
MUTED COLOUR
Rainy conditions can produce low colour saturation and contrast – it is often better to remove this completely.
TEXTURED SKY
Where there’s cloud detail, a monochrome treatment can focus attention on tonal variations.
©Peter Fenech x2 ©Laurent
Antony
75
& WHITE
BLACK
Shoot low key
Use dark tones to your advantage for moody, atmospheric landscape scenes
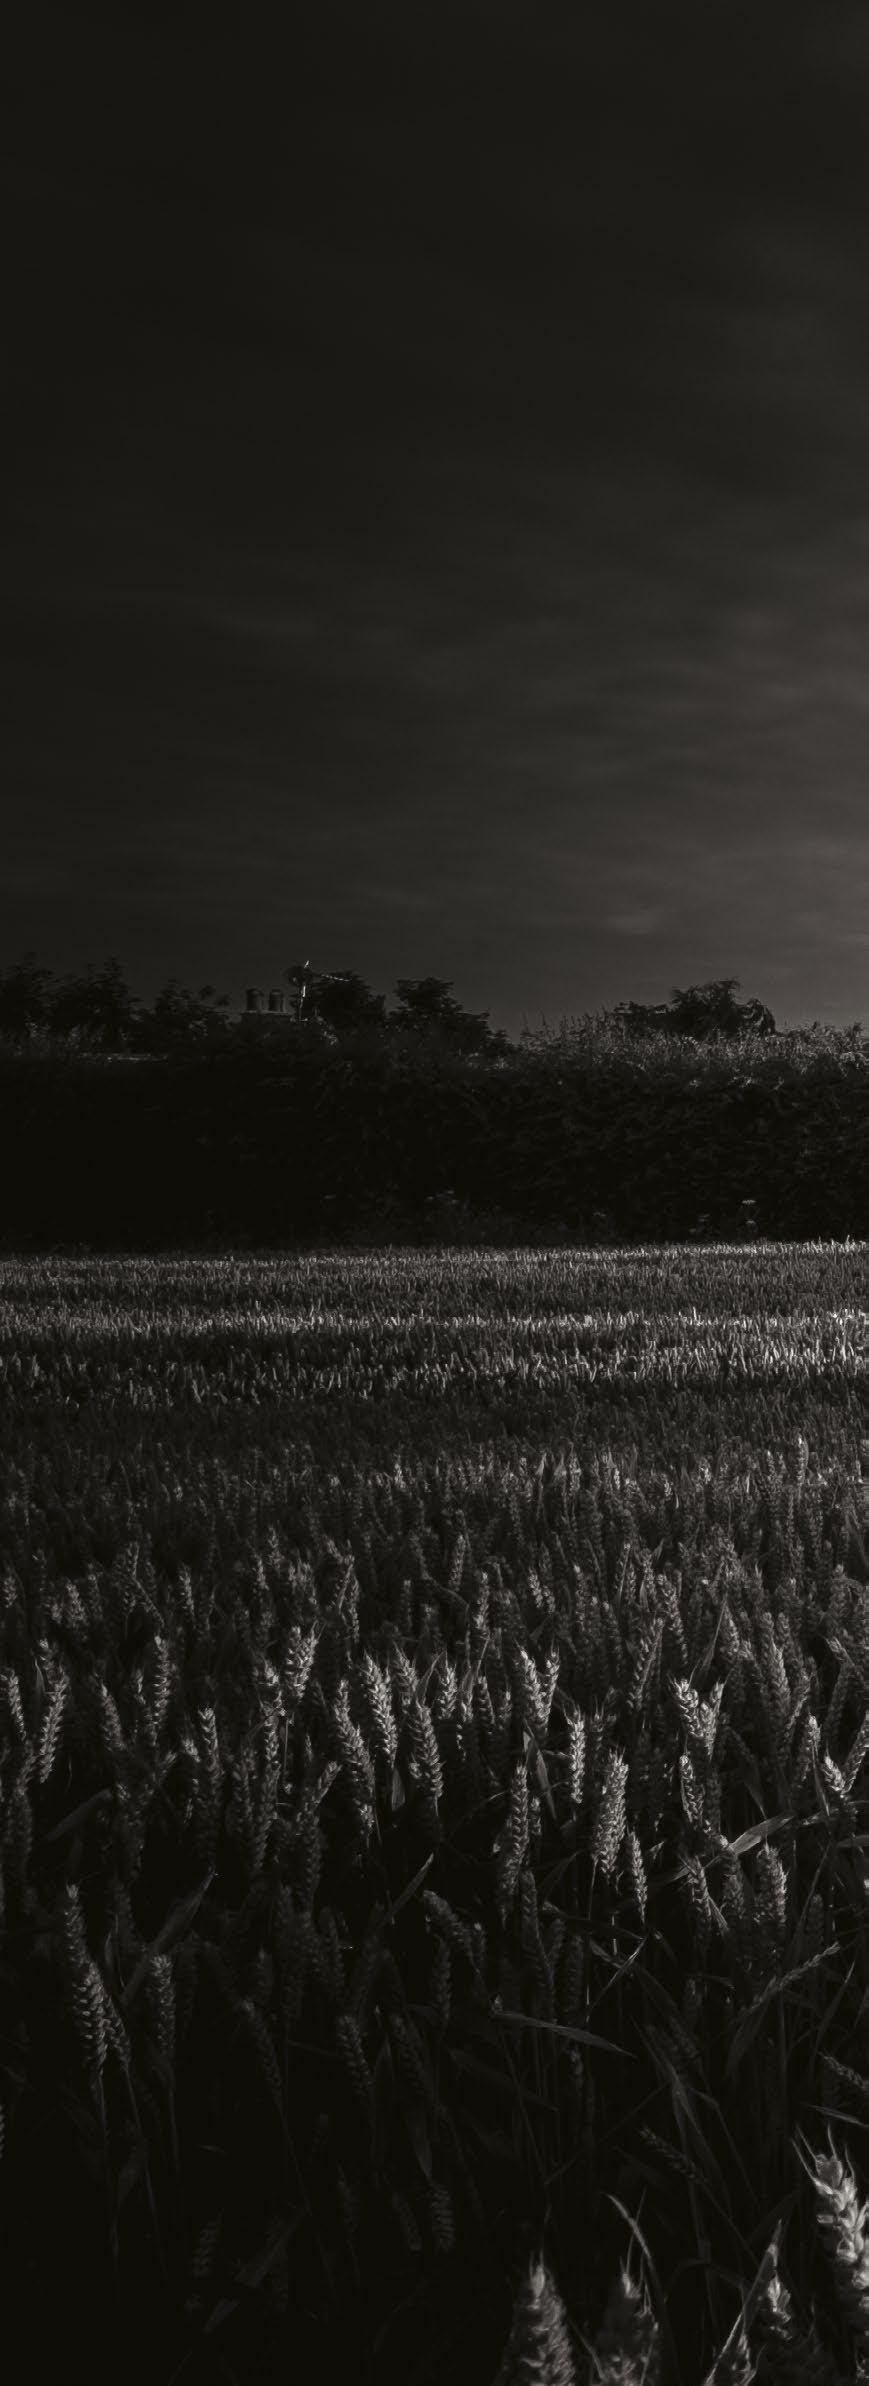
Low-key lighting has been favoured for its dramatic style in photography and cinema for decades. Closely associated with film noir, low-key images focus viewer attention on one area of the frame by limiting contextual detail. They introduce a sense of isolation and limit the feeling that the scene continues beyond the edges of the frame.
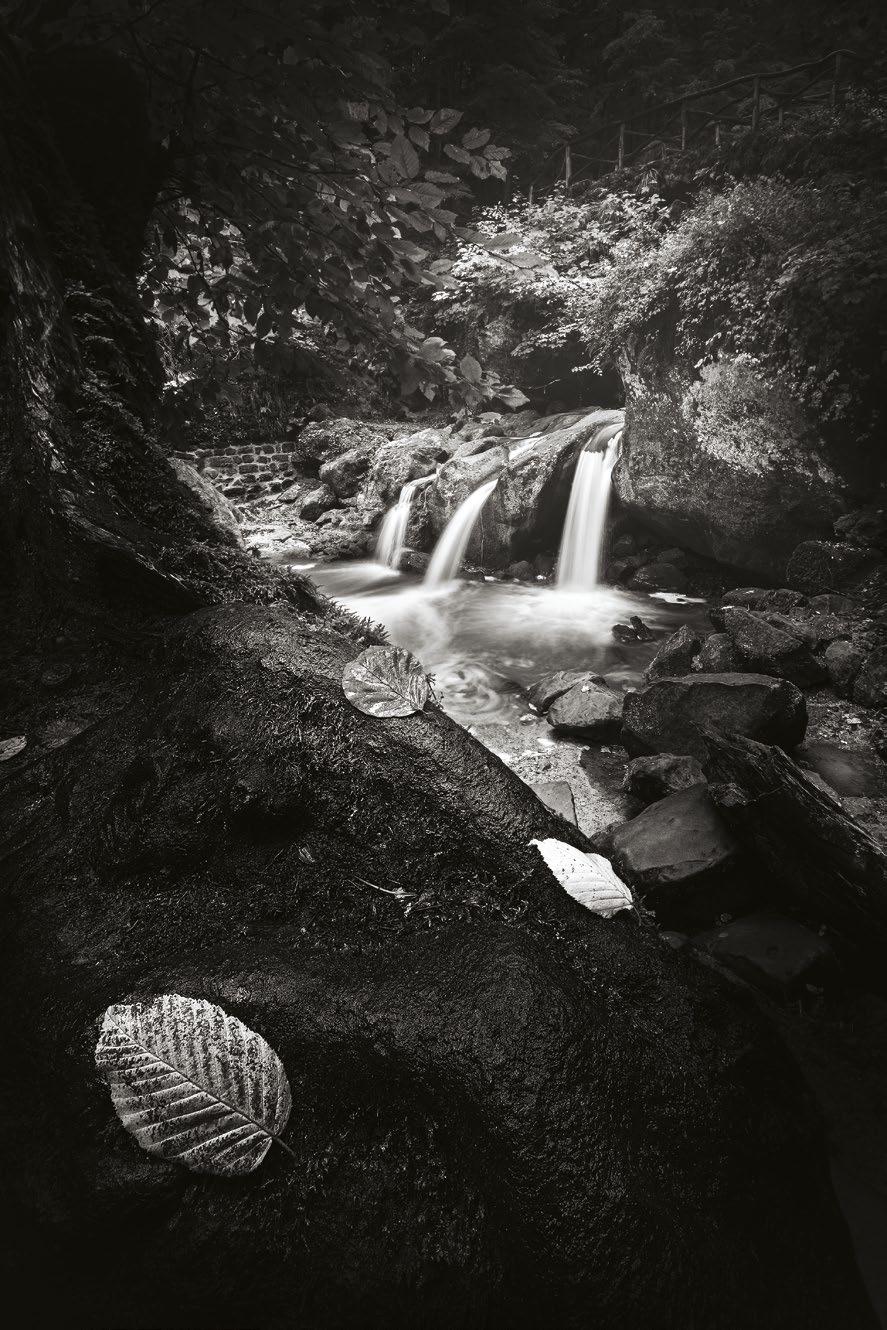
Low-key effects produce strong contrast, with a prevalence of deep shadows. This can be ideal for landscapes, where we want to emphasise intense light sources and highlight detail in textured surfaces. With care, the low-key formula can be used to produce a theatrical look to create the appearance of a set or a highly controlled environment, which is unusual in a natural location.
As photographers, our job is to control where our viewers should look. We take a busy scene and find the elements that are most photogenic, placing these centre stage in our composition. Low-key lighting moderates the dominance of individual zones and objects in the frame. By using strong lighting we can throw less-important areas into shadow for both practical and artistic purposes.
To do this we need a deep understanding of exposure measurement and the way in which our camera interprets light in different scenes. Low-key images have a bias towards shadows, so we should enhance how darker tones are rendered, being mindful of overexposure. Overexposure in this context doesn’t mean loss of highlight detail, but rather a lack of dense blacks caused by the camera pulling detail out of the deepest shadow areas. This would produce a scene with reduced drama and an awkward lack of contrast.
Below
Light direction
In images like this one the light is striking the landscape at an angle, picking out texture and shape without lifting too many shadows – similar to some traditional low-key lighting ratios
Right Shimmering
Exposing the shot to the left to hold dark shadows, photographer Justin Minns knew this shot of Saxtead Green Mill, bathed in morning sidelight, would look good in monotone
Expose for low key Lower your exposure for dramatic shadows and isolated image features
1 Compose your image We need to set the scene for the dramatic low-key style. Zoom in to exclude extraneous bright spots, such as dappled light filtering through trees, and place the main subject so that it will stand out against the dark surroundings.
2 Switch to Spot Use Spot Metering mode to bias the exposure towards a small area of the scene and prevent the camera from brightening the image to reveal background detail. This tells the camera you intend to create an atypical exposure.
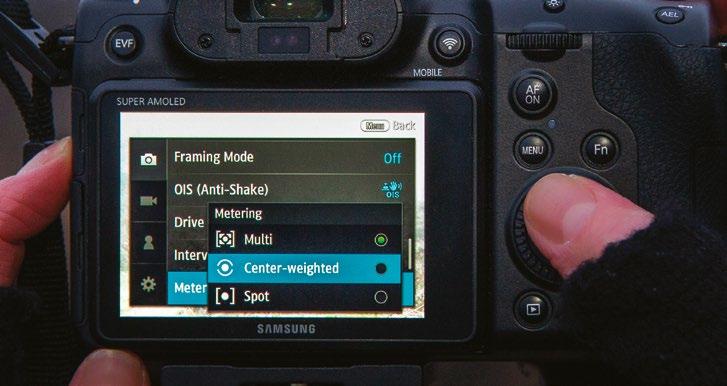
3 Meter from highlights Place the active AF point over the brightest area to take a meter reading that will set up a darker atmosphere. Hold down exposure lock (AE Lock) and refocus the scene, or enter the measured settings in Manual mode.
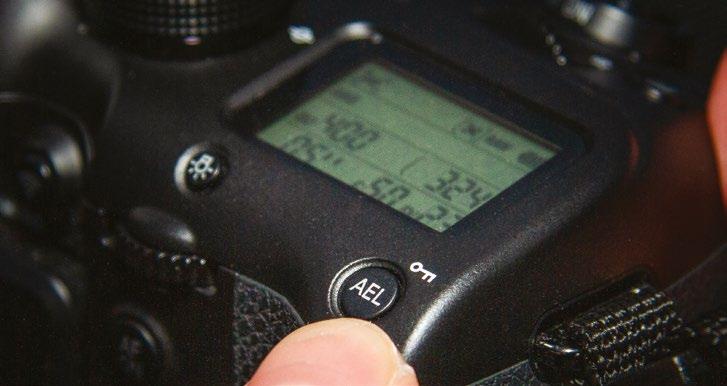
76 TECHNIQUES
©Laurent Antony
4 Drop the brightness In P, A or S modes use exposure compensation to darken the frame until you have a subject that stands out from an underlit background. In M mode, stop down the aperture or increase shutter speed to reduce brightness.
5 Adjust for function Adjust the aperture or shutter speed for further desired effects. For example, if you’d like a long exposure, prioritise shutter speed while varying other settings to maintain the low-key look. ISO can stay at 100 if tripod-mounted.
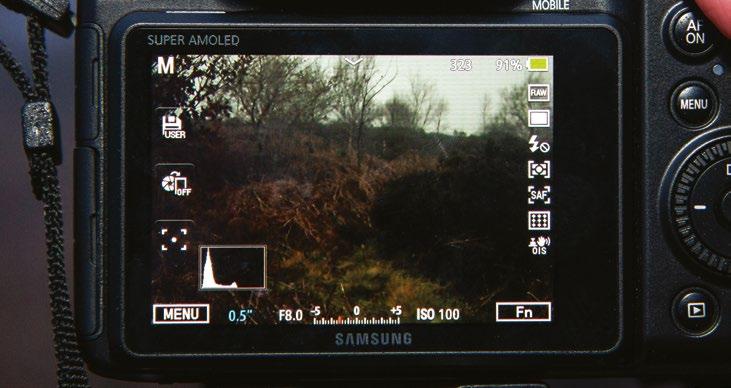
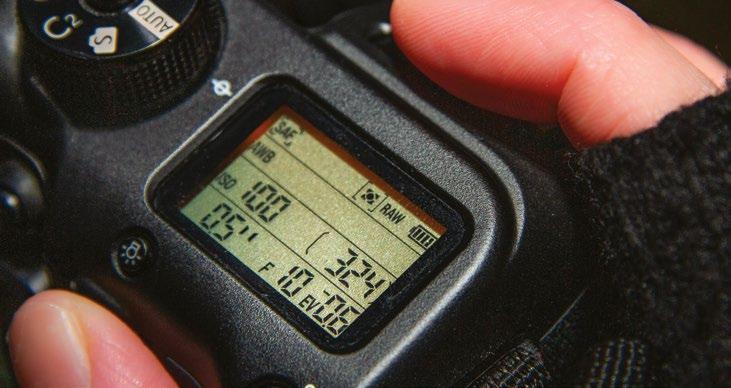
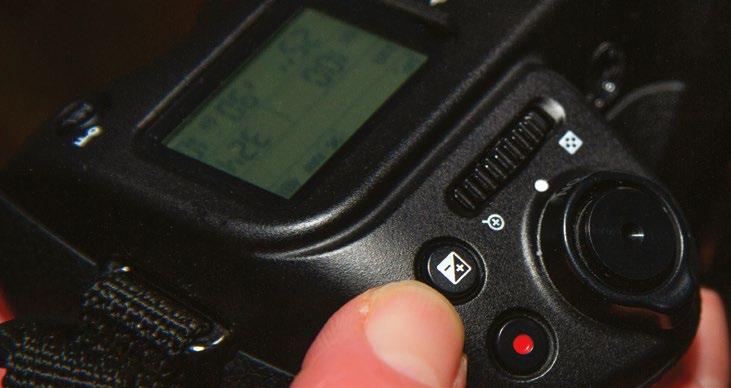
6 Check the histogram Keep an eye on the distribution of tones by referring to the histogram. Some clipping may occur, but this is expected – the majority of the tones should be bunched at the left side of the graph as there is a prevalence of shadows.
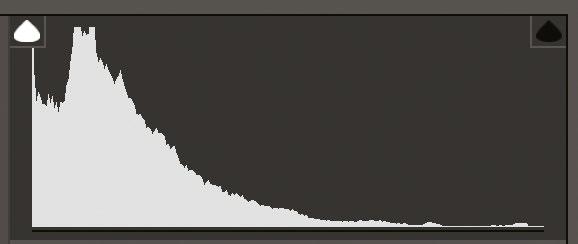
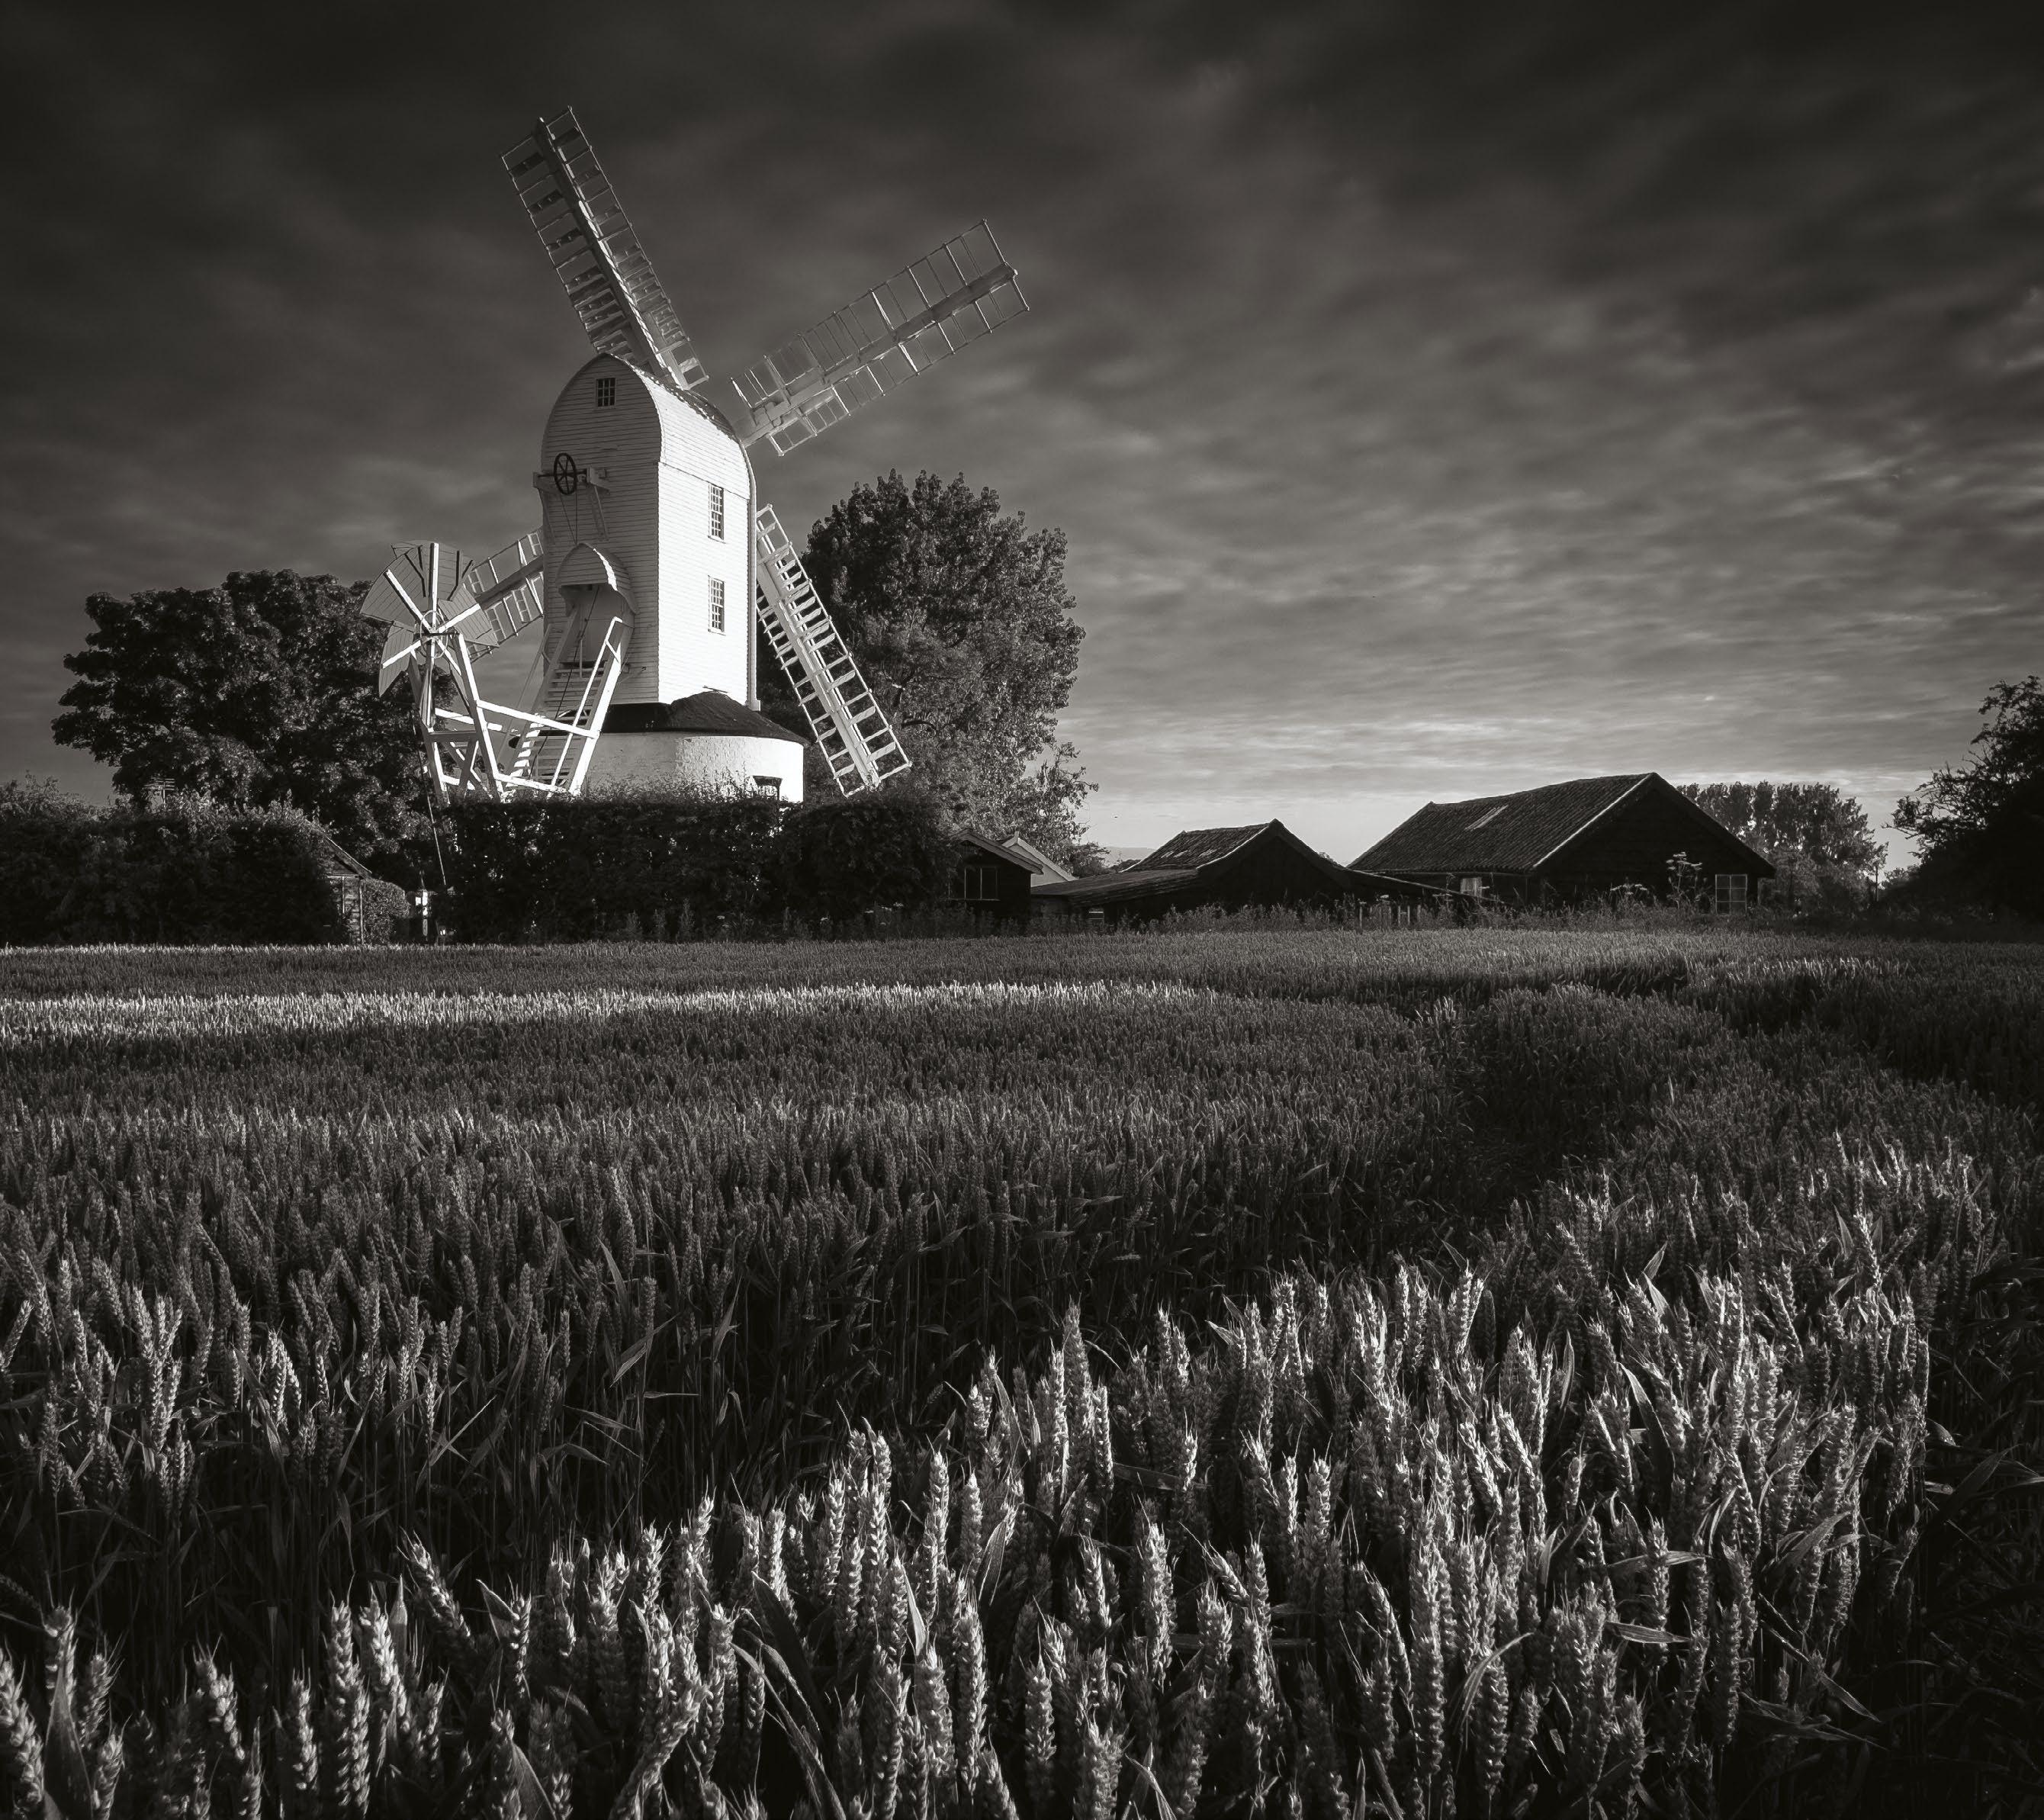
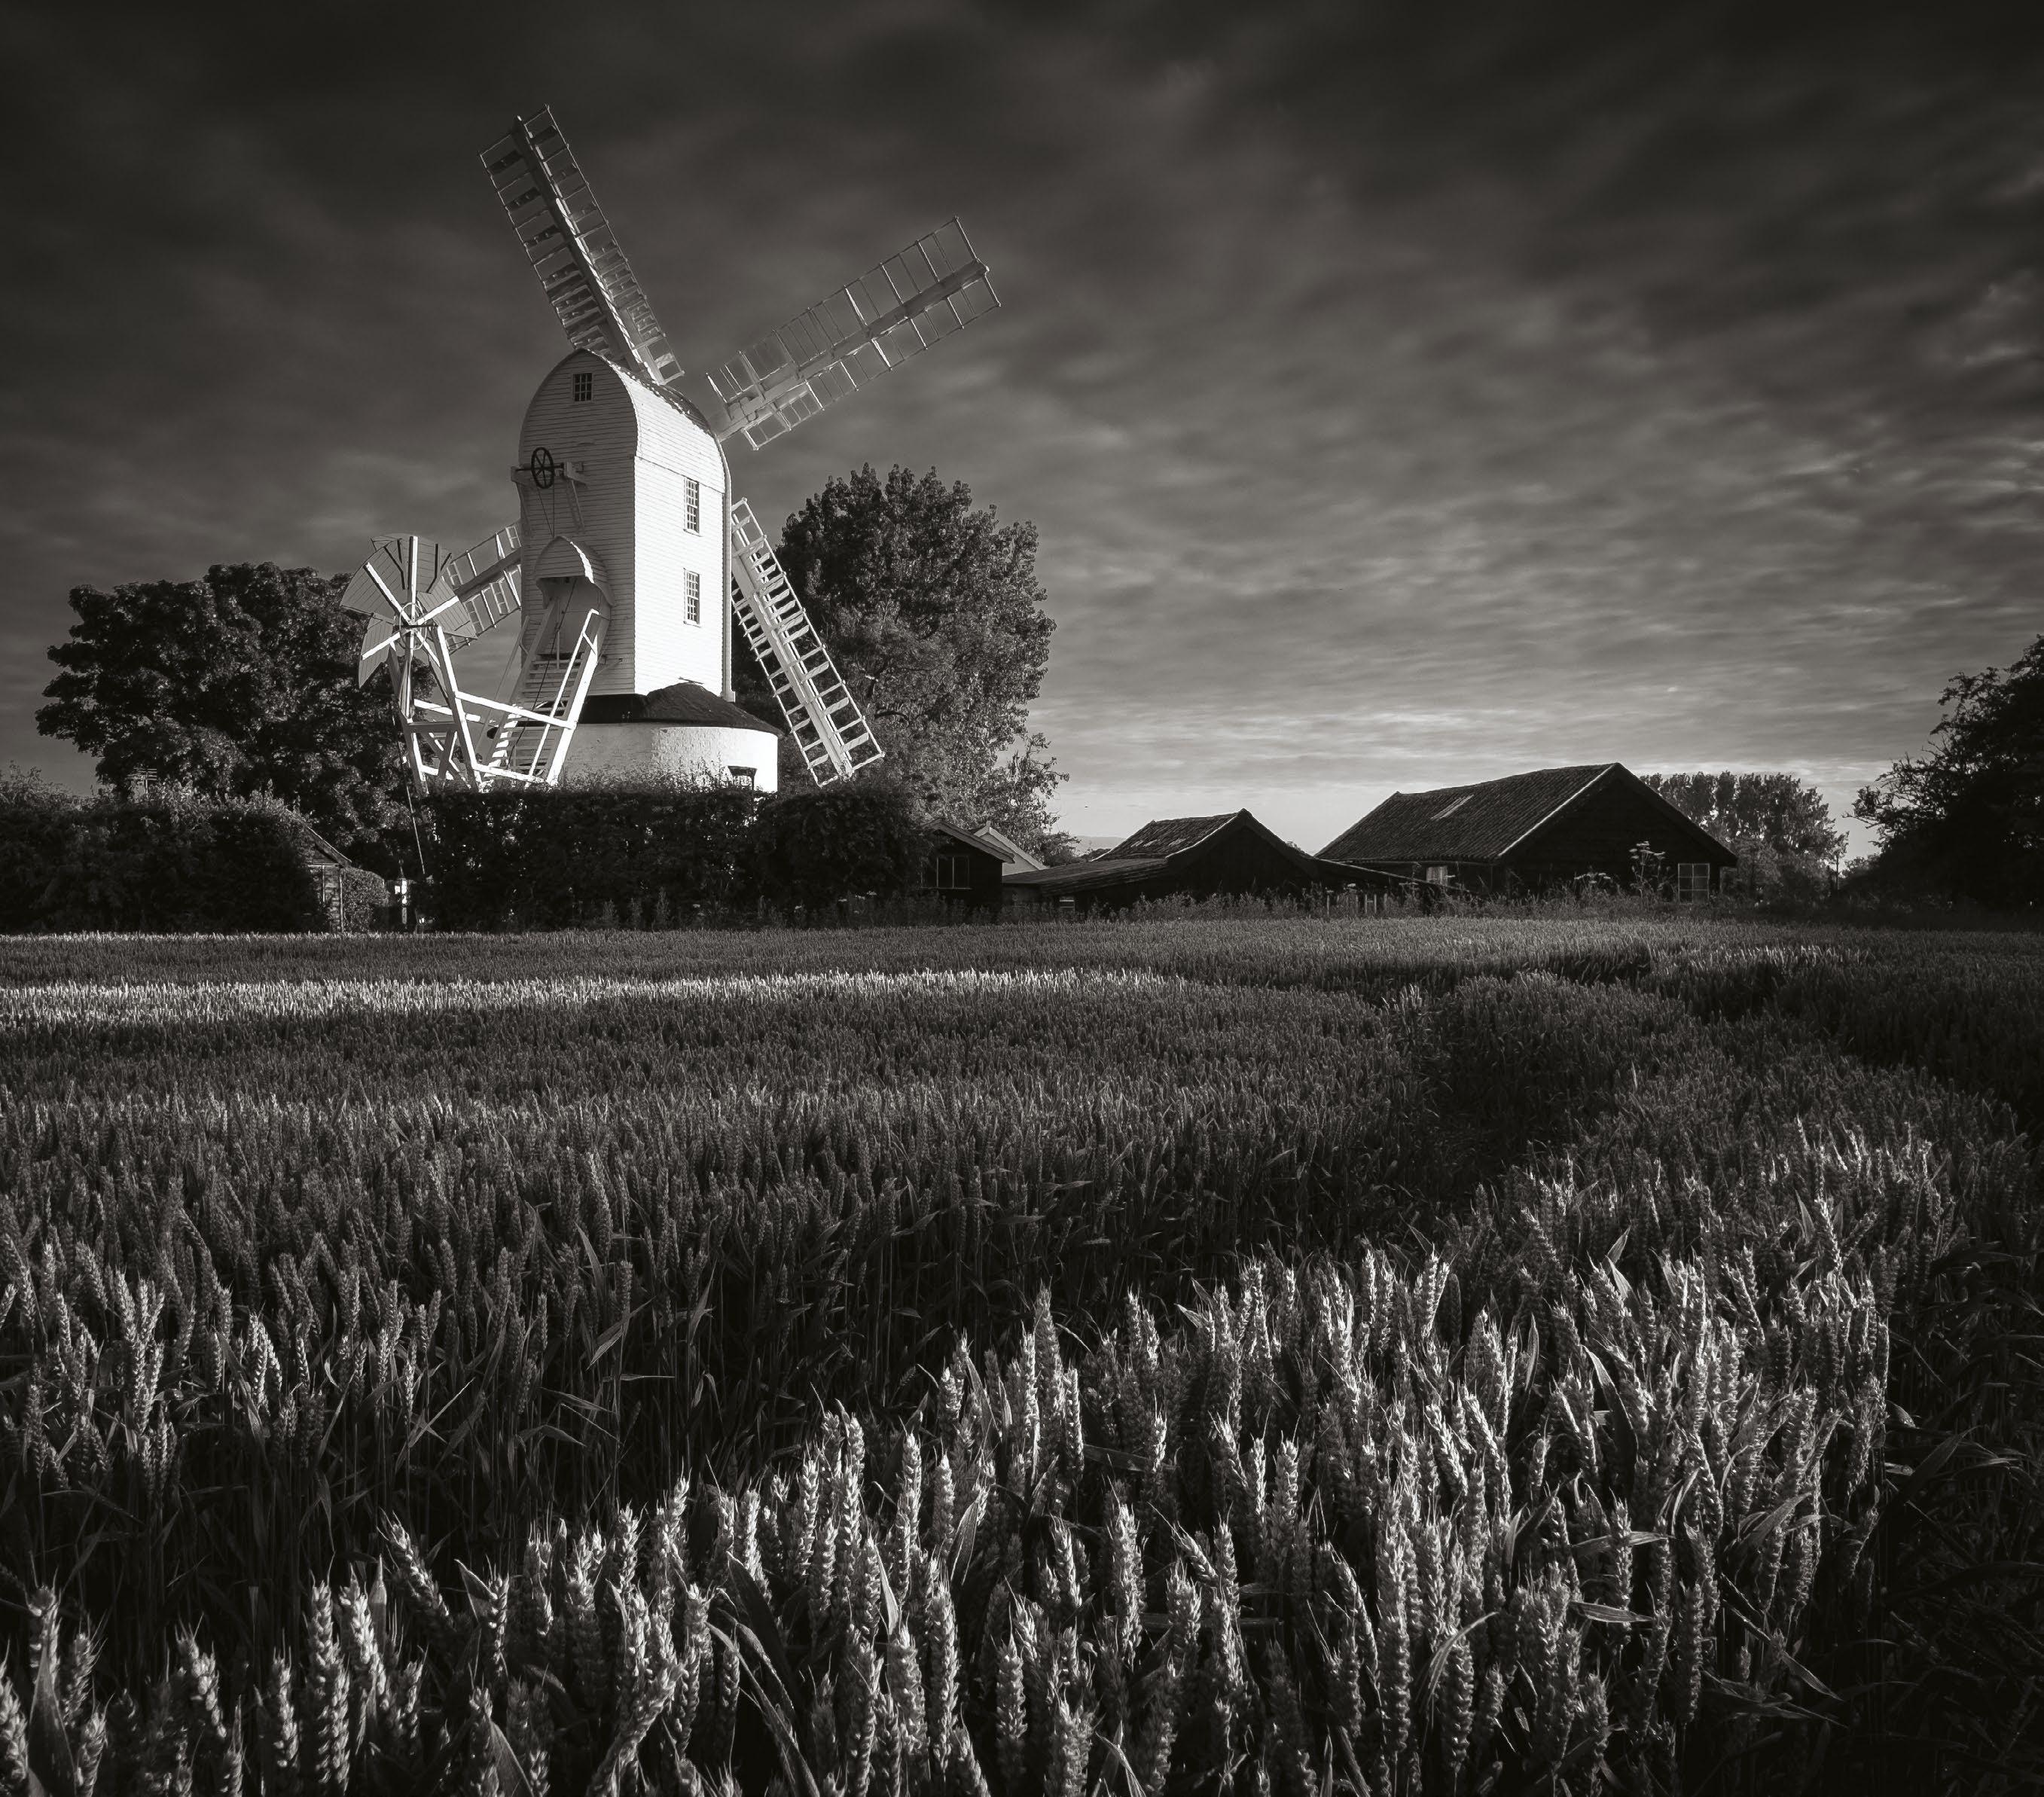 © Justin Minns
77
LOW KEY HISTOGRAM
BLACK & WHITE
Create high key images
Make the most of highlights to shoot bright and airy minimalist scenes

When it comes to black and white images there is a significant difference in the most effective style for each scene. One approach does not fit all conditions, and just as with the choice to convert to monochrome or leave it in colour, the style of black and white exposure and processing must be tailored for the scene currently being studied.
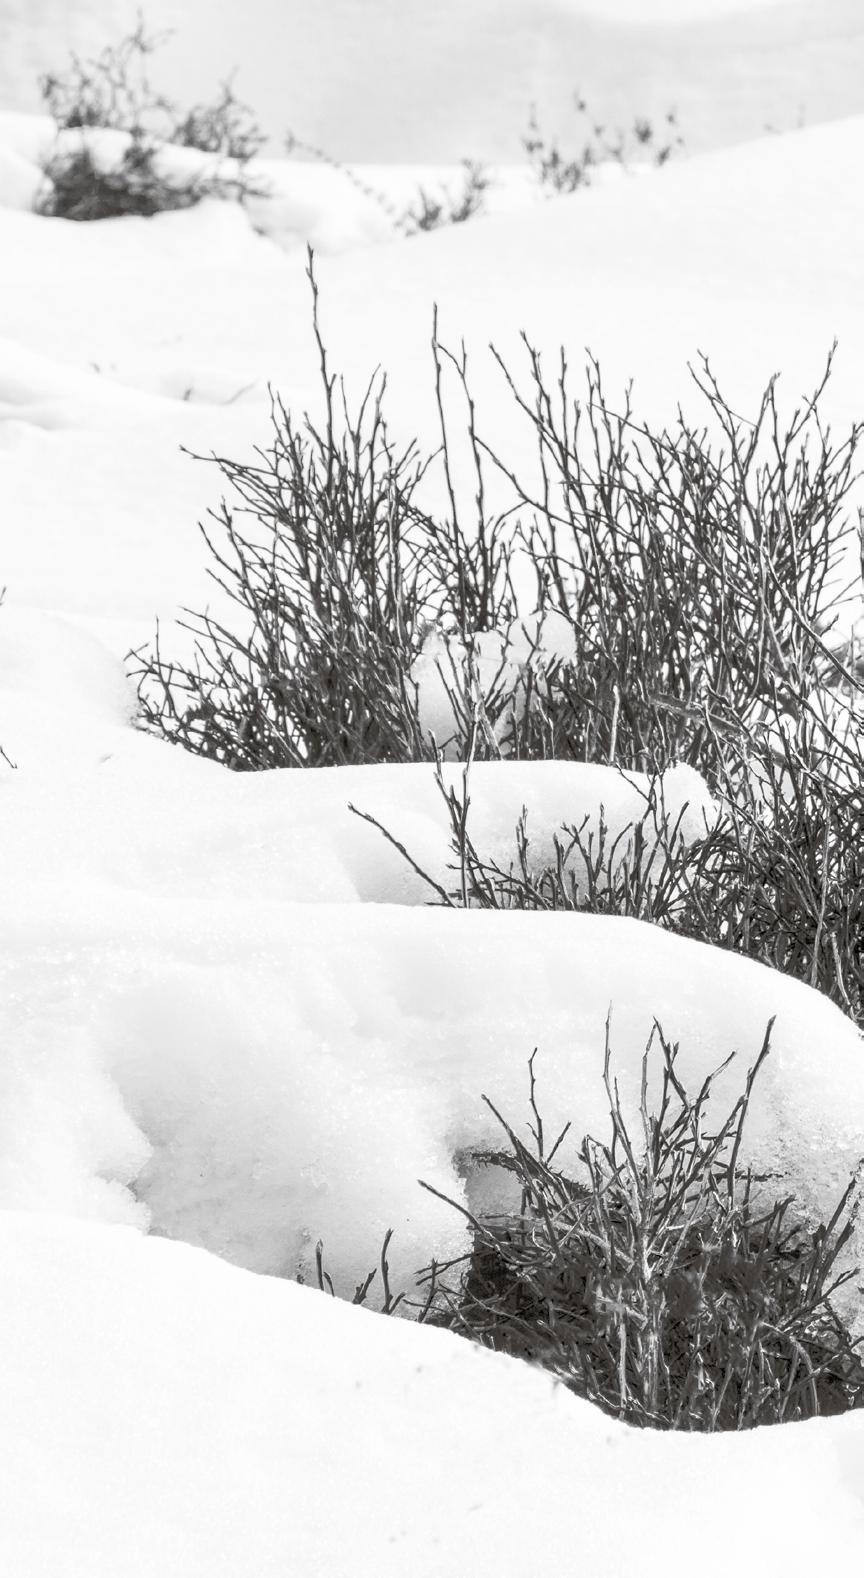
As such, low-key lighting will not fit all types of landscape or lighting. In these cases we can try adjusting our low-key approach to make exposure more appropriate for the scene, or alternatively we can instead consider inverting the settings and trying our hand at high-key lighting.
Just as low key uses shadows to best effect, the high-key approach exploits the highlights. Originally used as a method of reducing contrast on a set or location to avoid tones falling outside of the dynamic range of the filmstock, high-key images can almost be considered overlit, since they remove shadows almost entirely. In the natural landscape we can introduce this effect by biasing the
exposure towards the upper midtones and highlights. In some cases this may even result in the loss of retrievable details in the brightest highlights. While this is something we are widely taught to avoid at all costs, for our purposes here it can be advantageous. A bright white background adds a ‘blank canvas’ aspect that works to increase the visibility of other landscape features.
The key concept when attempting a style such as this is to clearly communicate your intent, especially when shooting a subject that is often approached in a highly formulaic way, such as a landscape. If your shot is to appear overexposed this must be your goal from the outset, and it must be evident that it is an intentional creative decision, not a miscalculation in exposure.
HIGH TECHNIQUES
By pushing the shadow/highlight balance to the extremes we can give our images a bright lifestyle-type atmosphere. This can greatly benefit minimalist scenes or juxtapose those that usually display strong colour and detail, producing a surprising and intriguing tonality.
Understand the zone system
It is useful to understand the relationship between brightness and detail, as described by the zone system. Ansel Adams’s original, iconic system warned photographers to avoid zones 0 and X, as these were pure black and white respectively, and still applies today. It was more difficult to recover shadow detail
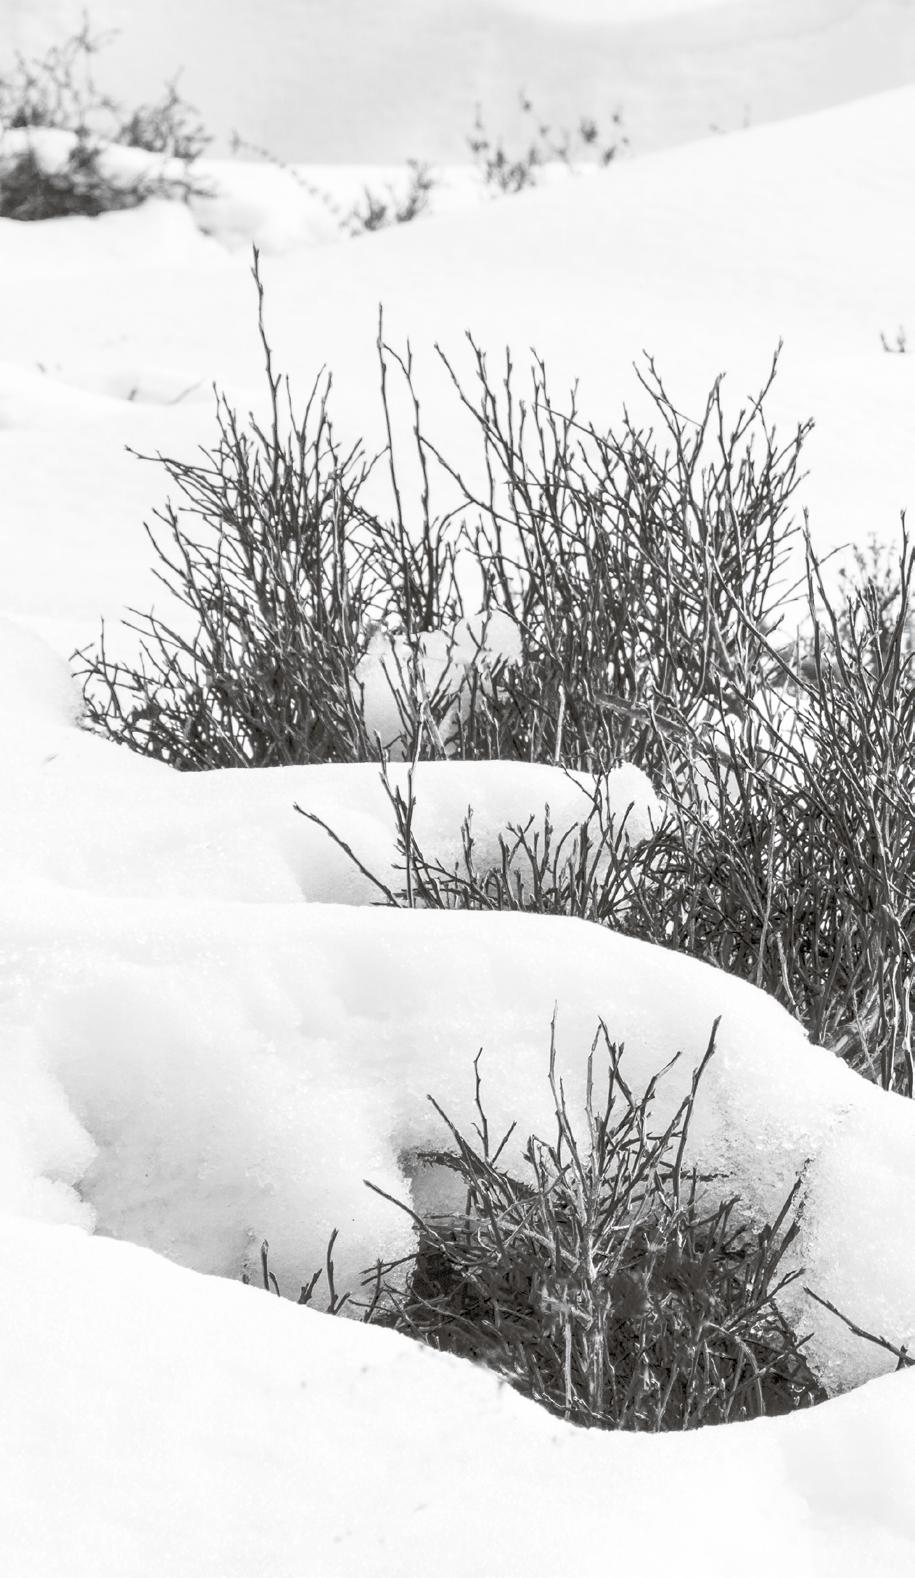
than highlights in film – the opposite to digital photography. We should now be more cautious of tones falling in zone IX, as these are most at risk of falling outside the dynamic range of the camera. For dramatic monochrome landscapes, try utilising the lower zones (I and II) for deep blacks, while safely retaining highlights.

KEY HISTOGRAM

The classic exposure assessment scale applied to modern digital imaging 78
HIGH OR LOW KEY?
Look for aspects that could spoil a high or low-key effect. If you want a shadow-heavy scene, avoid unintentional bright highlights in the background. Likewise, don’t attempt a bright, airy image if there are deep shadows present.
Left Easy on the eye
The brightness of this image compliments the minimalist style of the scene and allows us to focus on the texture rather than the shape or colour of the subject
Below Light on shadows
This image has lowdensity shadows to create a bright frame. The photographer took advantage of snow and a blank sky for an effective highkey approach
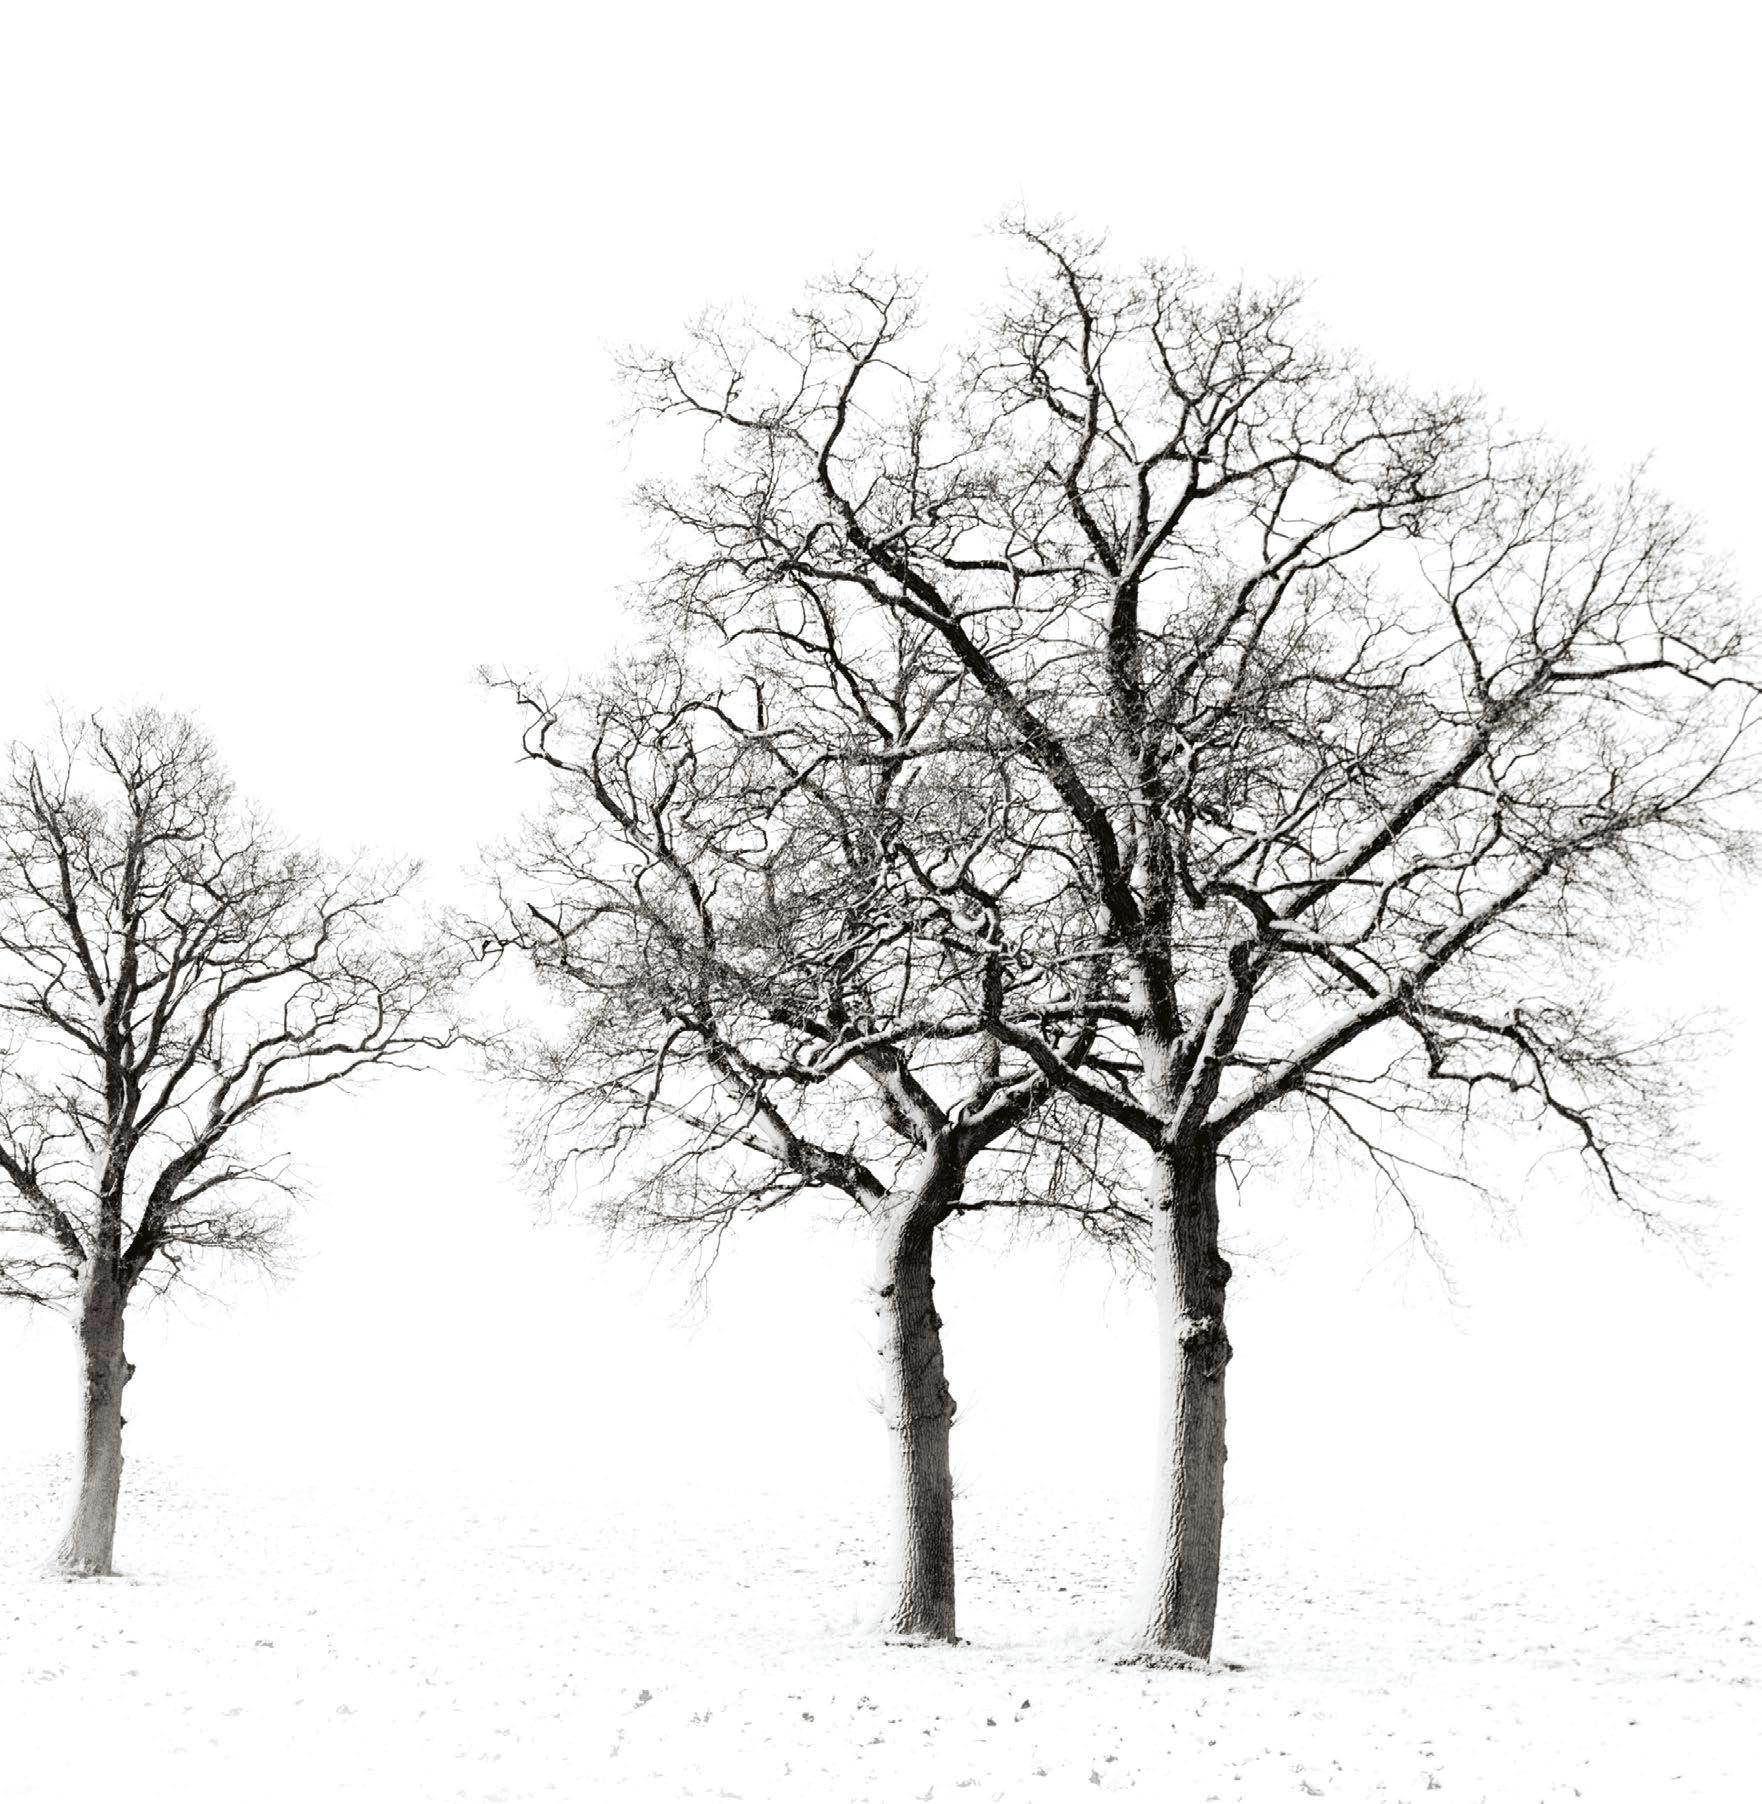
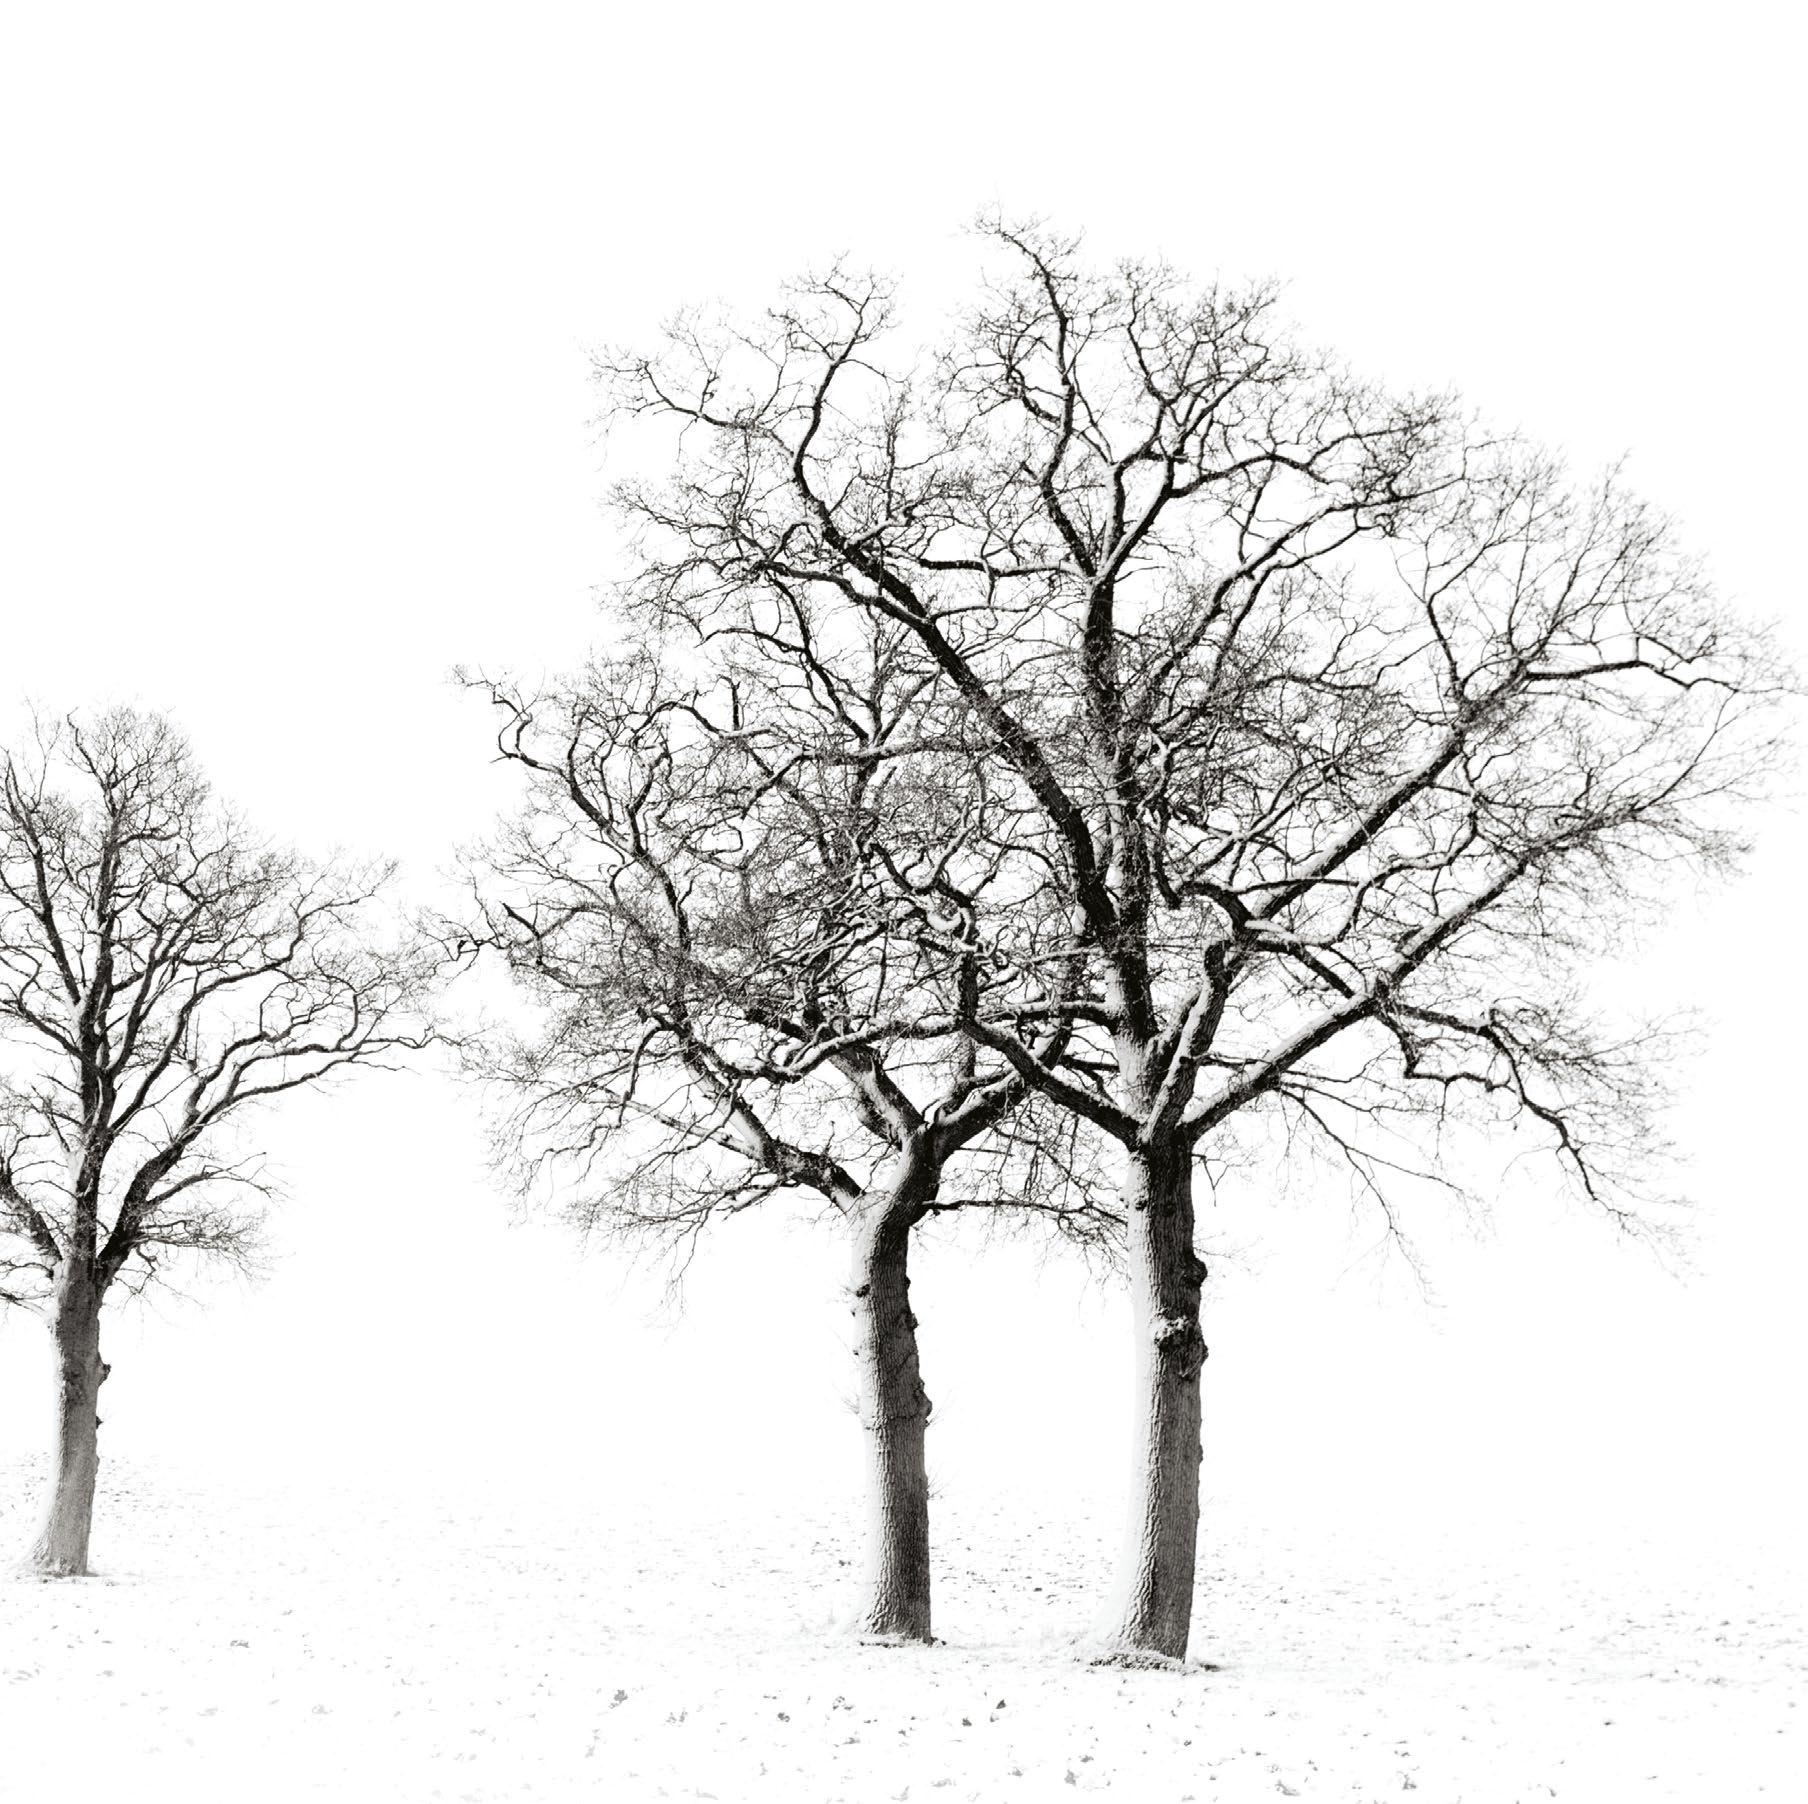
How to capture high-key shots
Push highlights for a skewed distribution of tonal values
1 Use a tripod As you will likely be using lengthened exposures to create a brighter feel, it is essential that you support your camera to minimise blur. It is especially important to use a heavy-duty model if you’re shooting near moving water.
2 Meter from the shadows
The characteristic feature of high-key images is the low-density shadows. While this may be created using flash in a studio, we can produce a similar look by getting the camera to shift all tones ‘to the right’ – towards the highlights.
3 Observe clipping Turn on the highlight alerts on your camera to visualise blown highlight detail. Try to keep this to a minimum if possible, though in some cases this is desirable for a bleached look. Ensure that no clipping occurs over key subject areas in either instance.
4 Push to the extremes
Increase exposure until you reach the point where you would usually stop when exposing ‘to the right’, then increase shutter speed or aperture further until the brightest highlights clip. As long as these are in negative space, the effect will seem desirable.
5 Adjust framing If using blown highlights as a feature – in some cases this can be widespread, depending on location and subject – vary the composition to experiment with the balance of tones. Use a blown sky as a background element, for example, mimicking the classic studio look.
6 Watch the midtones The aim of high-key photography is to control the density of the shadows, so be mindful of what is happening to the midtones. If they’re pushed too far towards the highlights, they can lose impact and contribute towards a flat image – use negative exposure compensation if needed.
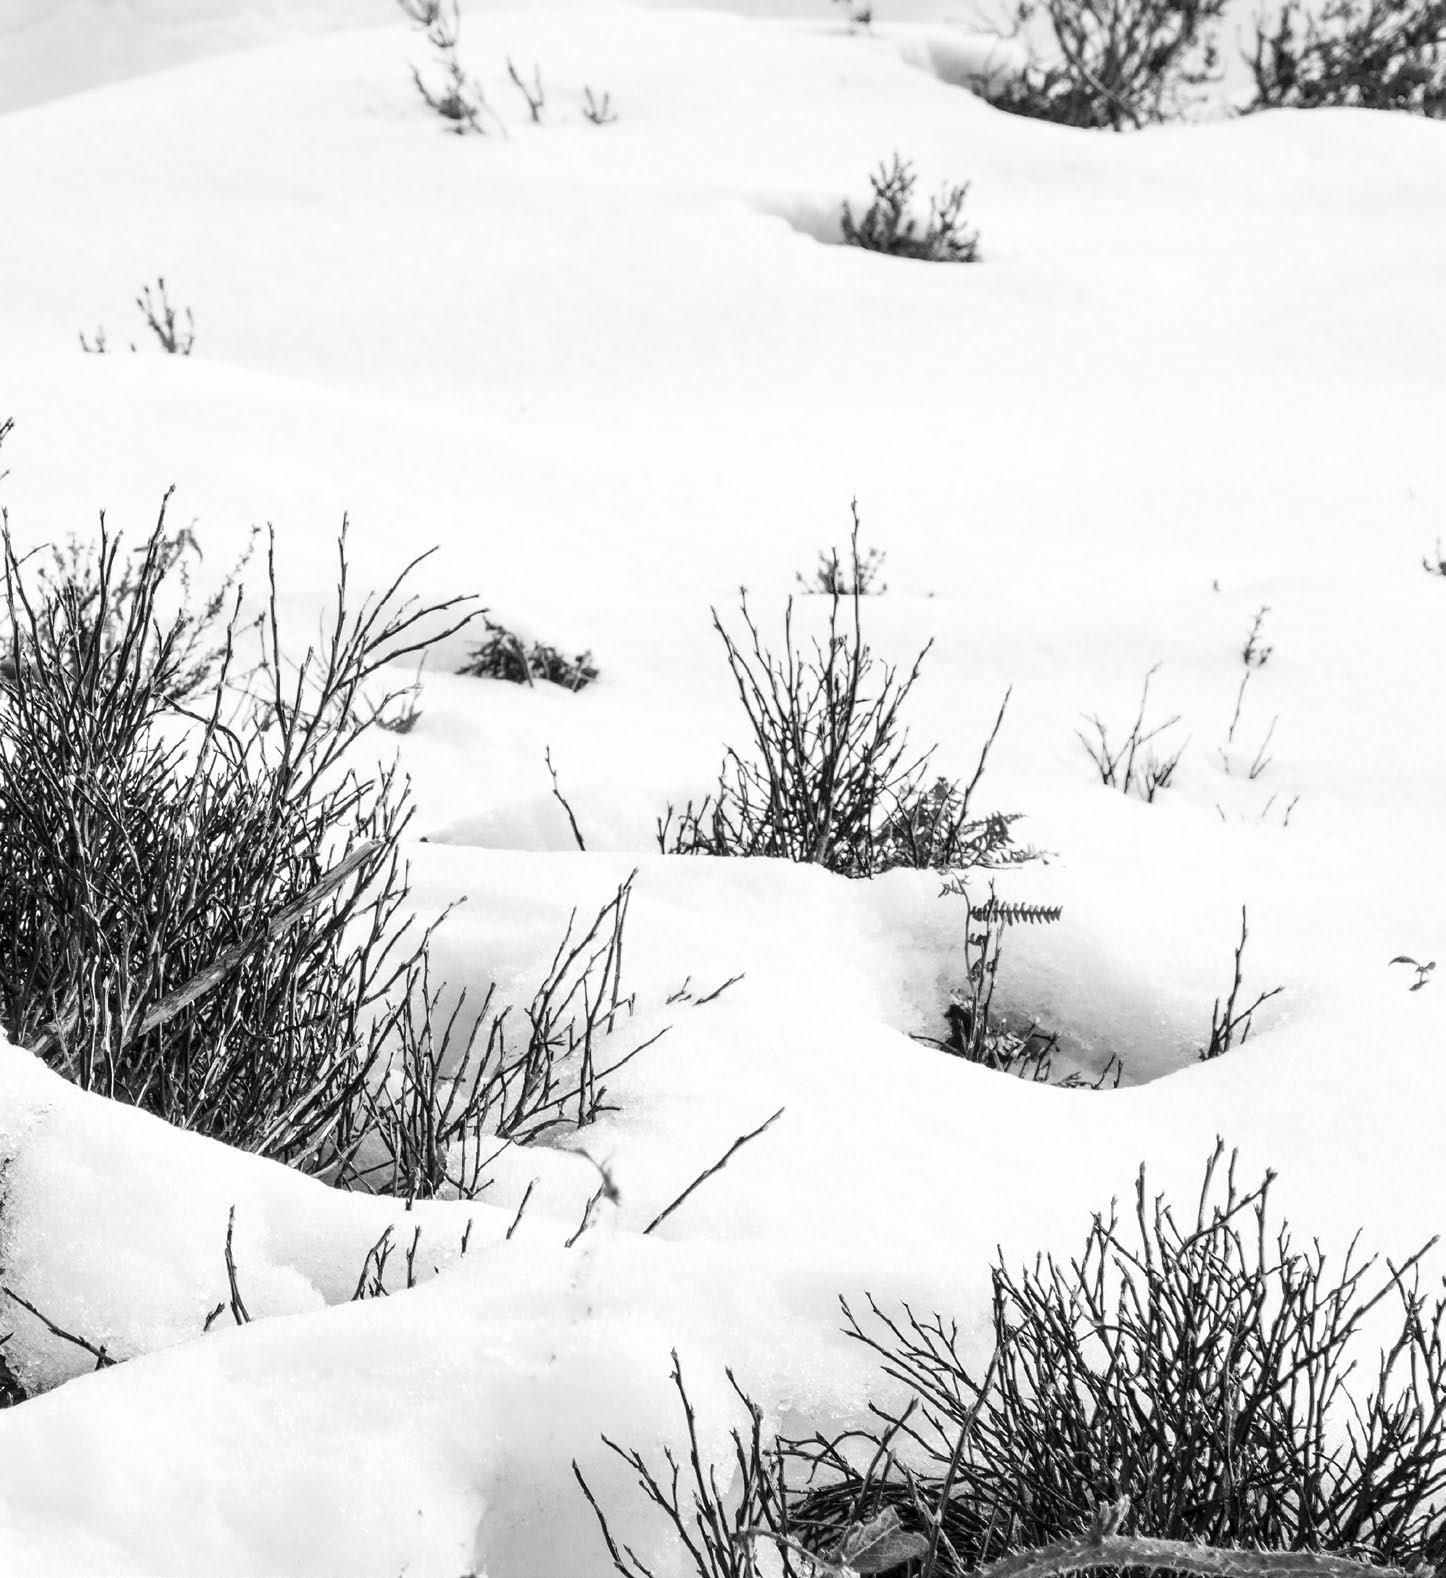 ©
Justin Minns
©
Justin Minns
79 BLACK & WHITE
© Peter Fenech
Use special effects
One of the most important things novices learn about photography is that an effect or style is not reason enough for an image to exist. Any exposure, colour, lighting or composition choice should enhance the impact of a carefully selected and positioned subject, rather than becoming the main focus of the image in its own right. If the photographer approaches a shot with the intention of making the rule of thirds, a long exposure or a colour effect the subject of the composition, then the resulting photograph will likely fail to capture the imagination.
In a similar way, black and white conversions (or the use of a camera’s monochrome picture style) must also be thought of as a means to an end, rather than the main purpose of any shot. A great way
Exposure, lighting and contrast choices all enrich atmosphere
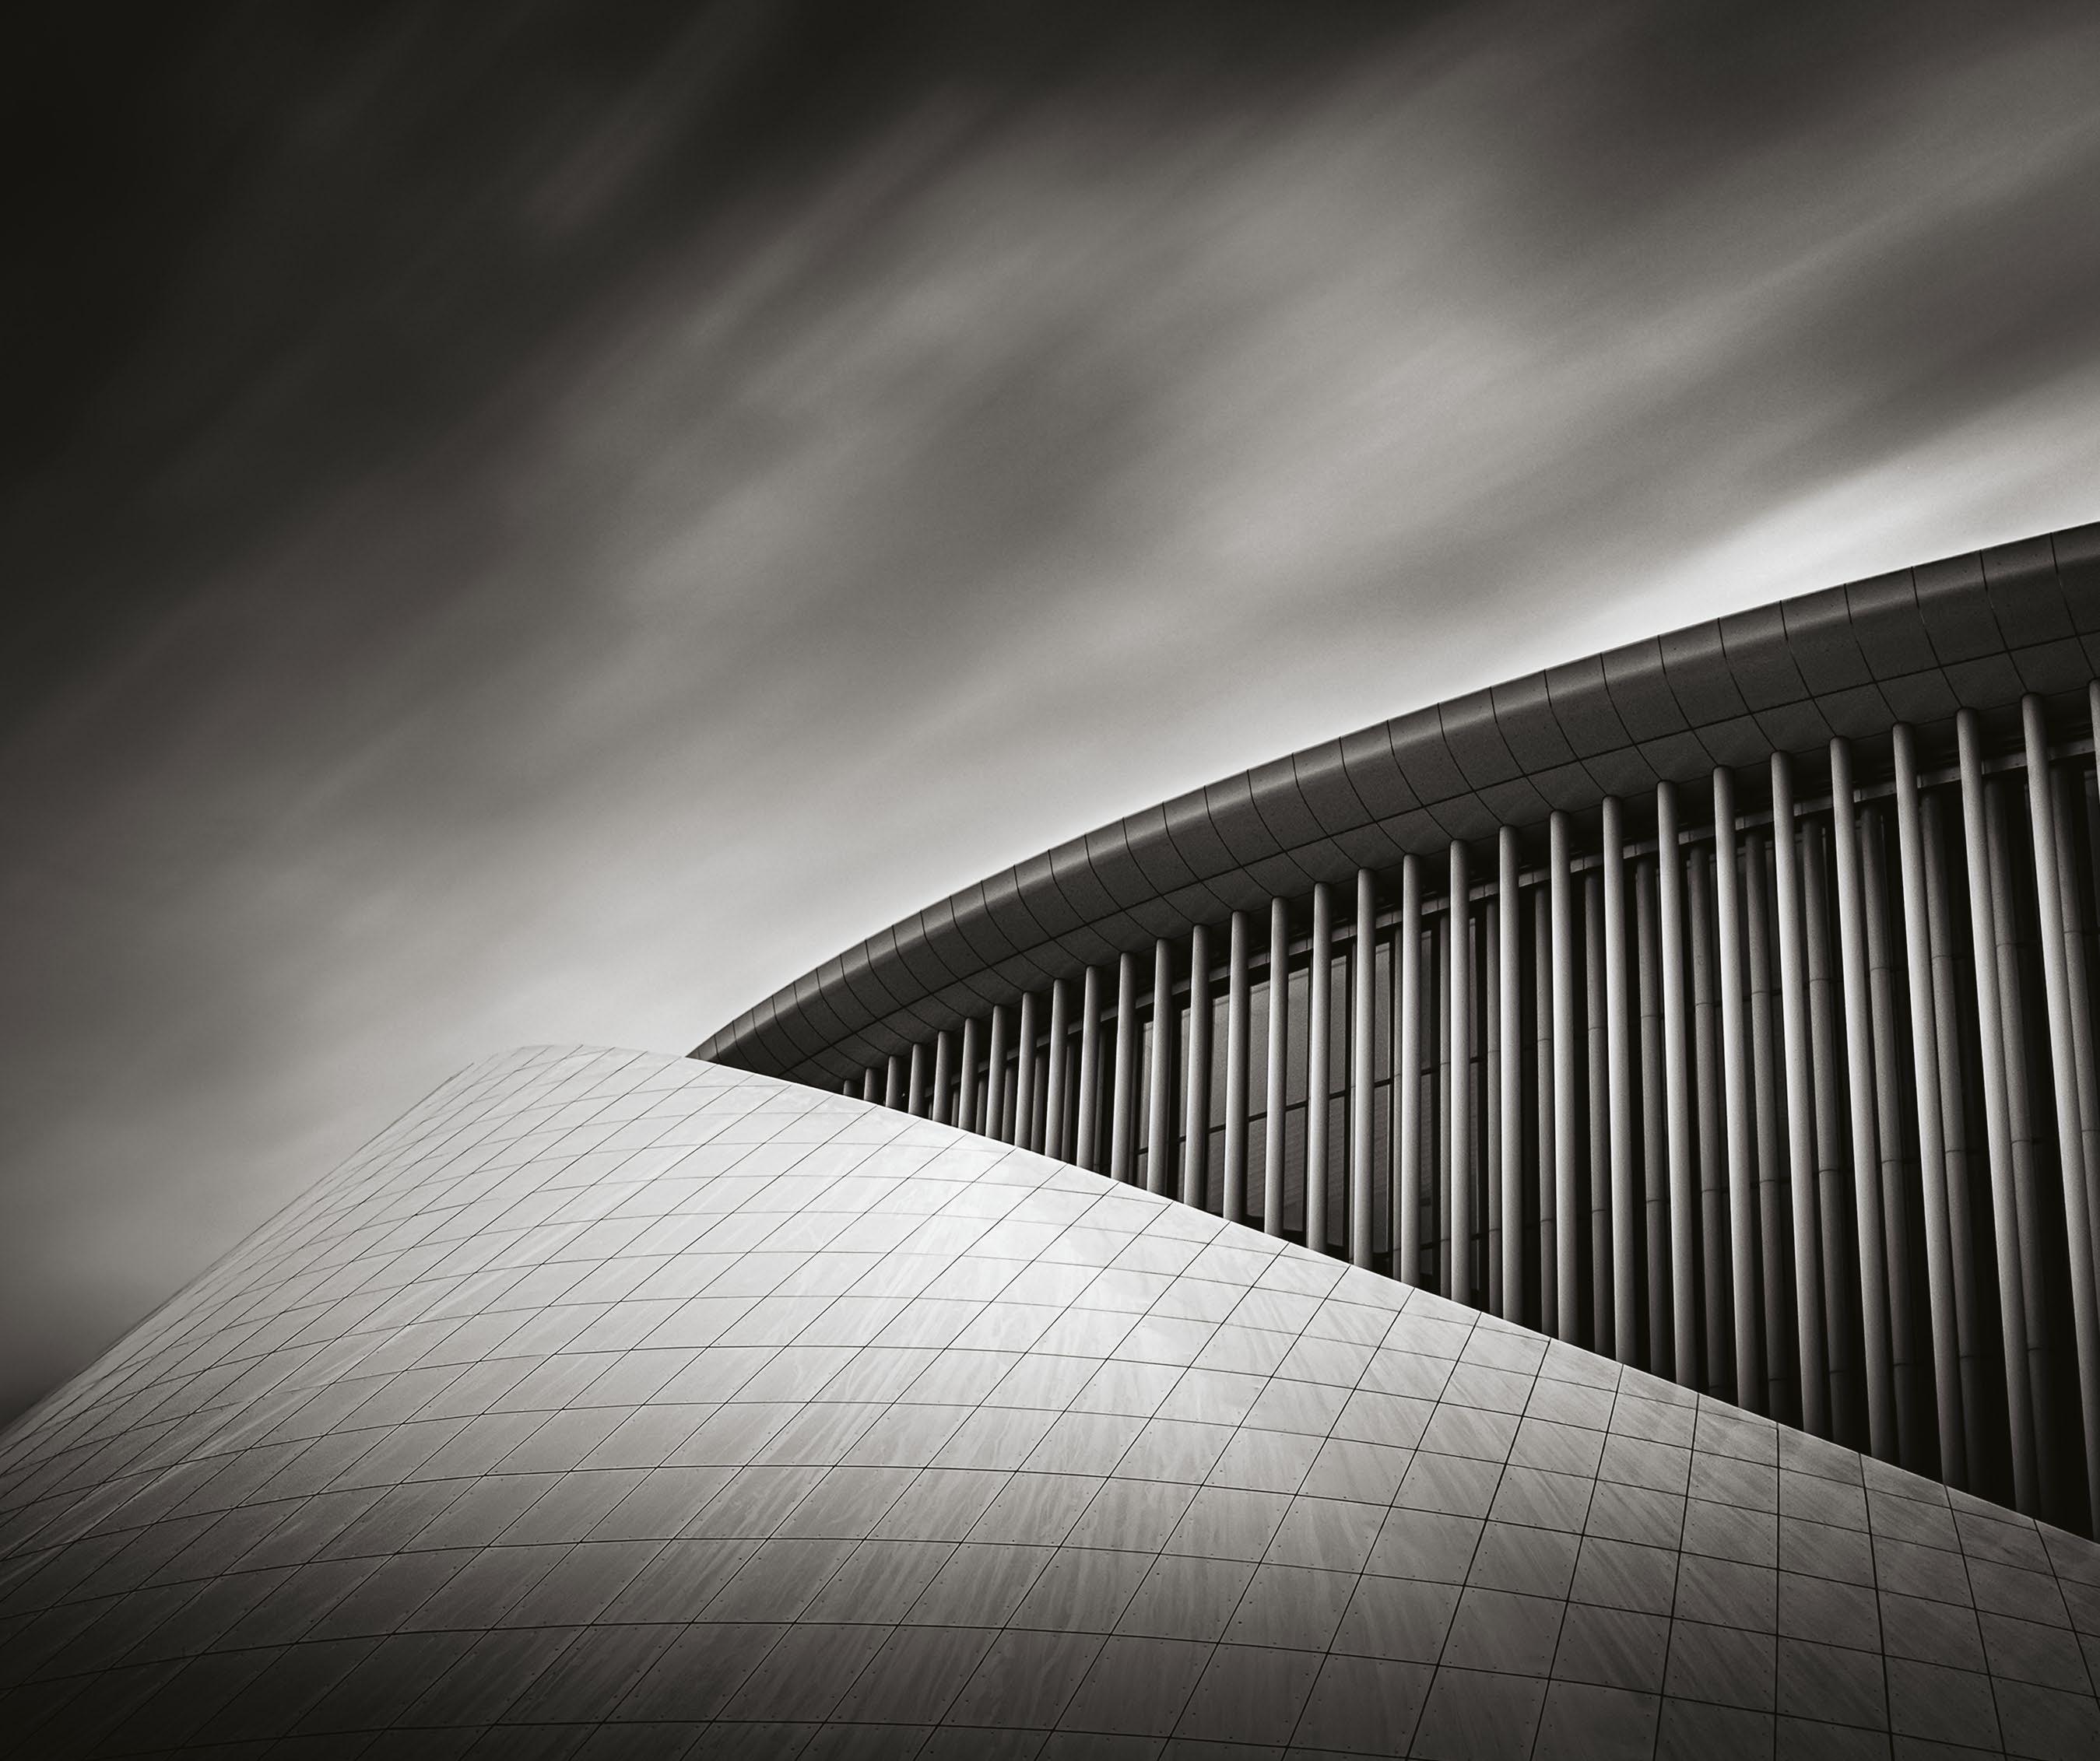
to add value to a monochrome frame is to introduce other photographic effects to the mix, which may help justify the photographer’s choice to create a black and white image. The lack of colour may then feel less jarring to the viewer, who will be encouraged to look past it as a defining feature of the composition and think of the monochrome nature of the frame as its native state. In essence we need to make modern audiences temporarily forget they are used to seeing brightly coloured photographs, so we can steer them to notice the aspects that encouraged us to make the image in the first place.
Once we have removed the colour from a scene, we can experiment with lighting ratios and contrast in ways that do not work successfully when colour information can
‘contaminate’ the balance. If we underexpose to create an ultra-high-contrast image, for example, this may increase colour saturation to unattractive extremes. In a black and white landscape, meanwhile, we only have luminance information present.
Try varying your position relative to the light source and working to enhance the most effective characteristics of a monochrome image – the cinematic feel, filmic texture and less-familiar tonal rendition, as dictated by the range of colours present.
Above Urban forms
Coastal landscapes and urban environments are two of the most conducive to ultra-long exposures, as they contain static elements in close proximity to moving features, such as water or clouds
80 TECHNIQUES f/11 90 sec ISO 200
Shoot in-camera black and white
It is often advised that all major image treatments are left to the processing stage, but while this does give full control over all parameters, shooting black and white images in-camera gives you instant feedback. You no longer have to imagine what the colour image will look like after conversion, as you have an instant preview. Since monochrome picture styles must be applied to JPEGs, consider shooting both RAW and JPEG, so you have a ‘finished’ black and white file and a RAW for software conversion – the best of both worlds.

Create ultra-long exposures


Eliminate people from the landscape and create otherworldly scenes
1 Find your composition Begin working handheld, experimenting with focal lengths and perspectives to find the frame that best suits the scene and will emphasise the properties of long exposure.
2 Deactivate Long Exposure NR
While this form of noise reduction is the most effective, it will double the duration of the creation each image, so turn off NR for the benefit of speed.
3
Set focus Calculate aperture and preset focus. This is important if the front of your lens barrel rotates during focusing, as we will be attaching filters later that must be precisely positioned.
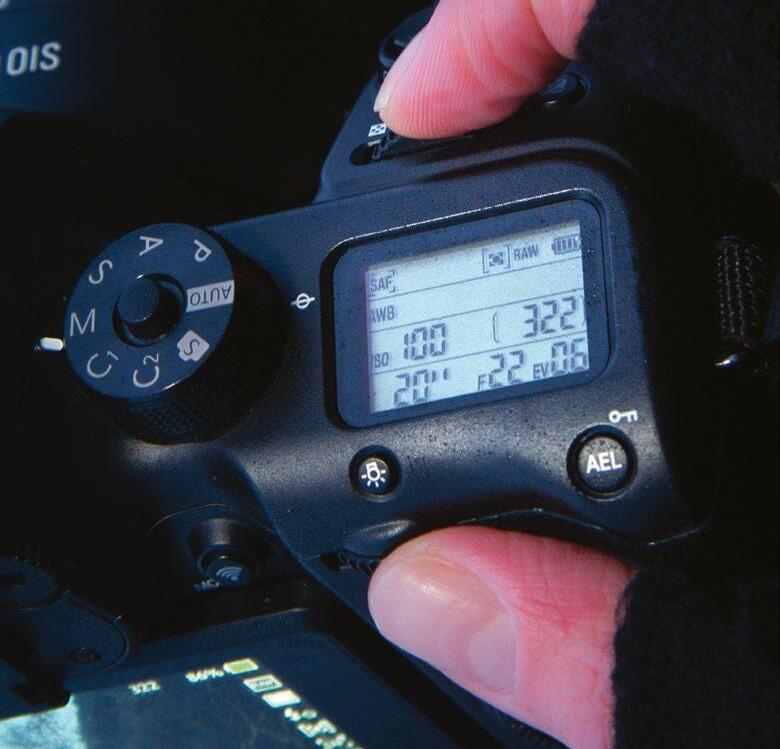

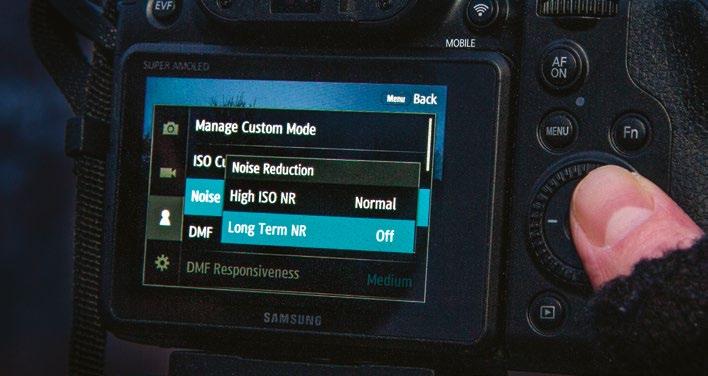
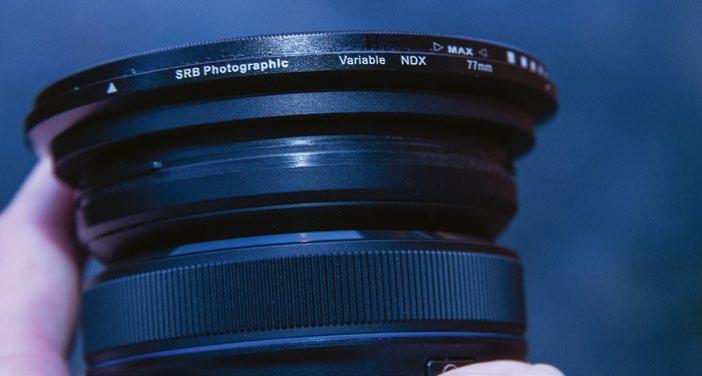
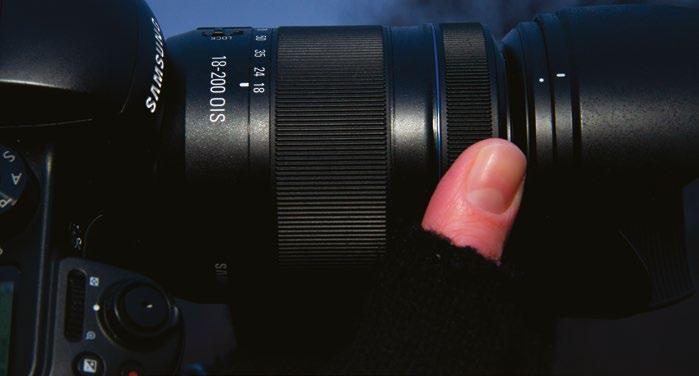
5 Attach correct filters Use a 10-stop ND filter for a long-exposure black and white look, or try a 2-8 stop variable ND for better control over the exposure time. An ND grad will help hold sky detail.
Left Creative flare
Vary your position to the sun to introduce lighting effects and alter shadow position. While colour is often the main draw, this image was made at sunset, creating a light-focused monochrome shot ©Peter Fenech
©
81
& WHITE
x2
Laurent Antony
BLACK
Process mono landscapes
Enhance the best qualities of your images
Any successful digital photographer working at a professional level understands the importance of bespoke image processing. No two images benefit from identical editing settings, and when working with genres as different as colour and monochrome photography it is even more crucial to identify how and why the processing recipes differ.
As we are working without colour, white balance correction is an area we can be less concerned about, but this doesn’t mean that colour can be ignored entirely. Depending on those present in the landscape, it will often be necessary to adjust contrast via the HSL panel in Lightroom or Camera Raw and the dedicated Black and White controls in Photoshop. These can also be used for
creative effect, to alter the balance of tones based on the distribution of colour values throughout the frame. The element that is of paramount importance when processing a monochrome file, after the basic conversion is complete, is the distribution of light and shadow, since these are all we are left with once the colour has been stripped. Dodging and burning on a local scale is a powerful method of contouring shape and form within the landscape. In a coloured scene the viewer’s eye is drawn to both areas of strong colour contrast and extremes of brightness. As the latter takes almost total control in a mono shot, with the exception of varying focus, the process of directing attention is simplified at the processing stage.
Left Flat tones (before) The misty winter conditions had potential, but in this colour image there is little in the way of contrast or depth
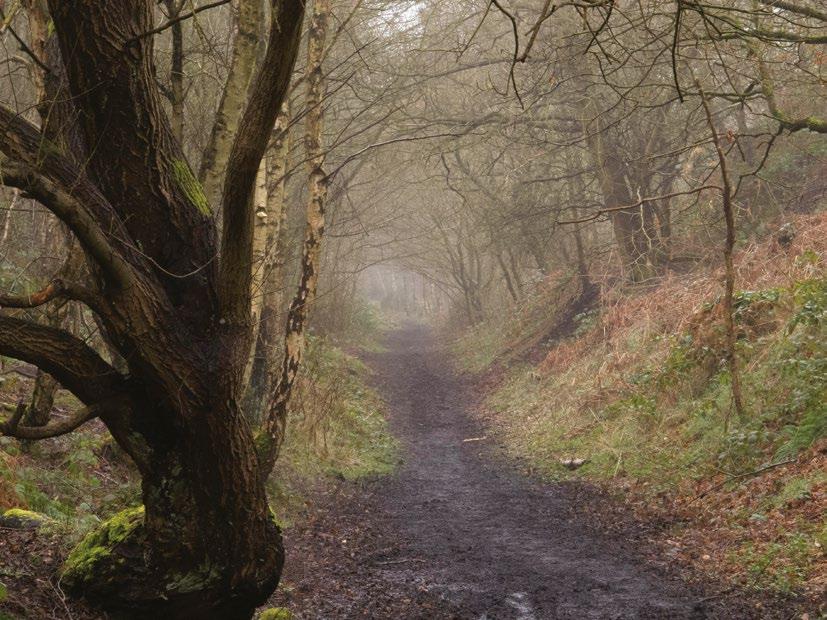
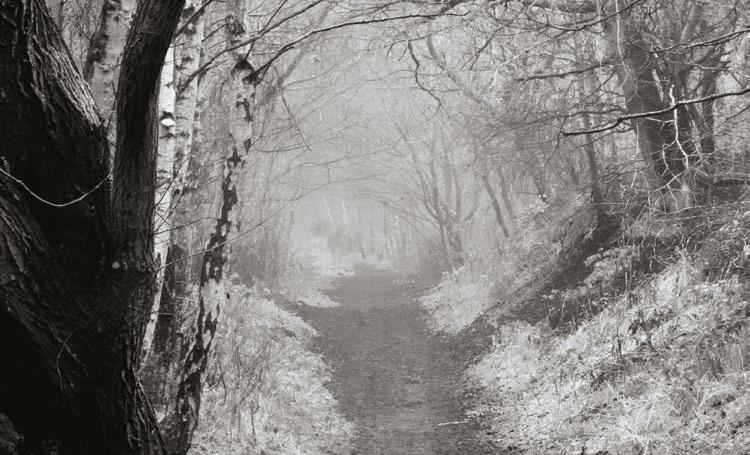
Right Instant impact (after) More than mere desaturation, the monochrome conversion process has added unique contrast to this shot, transforming a drab scene into an intriguing, otherworldly image
Perfect your monochrome conversion Use localised editing procedures across both
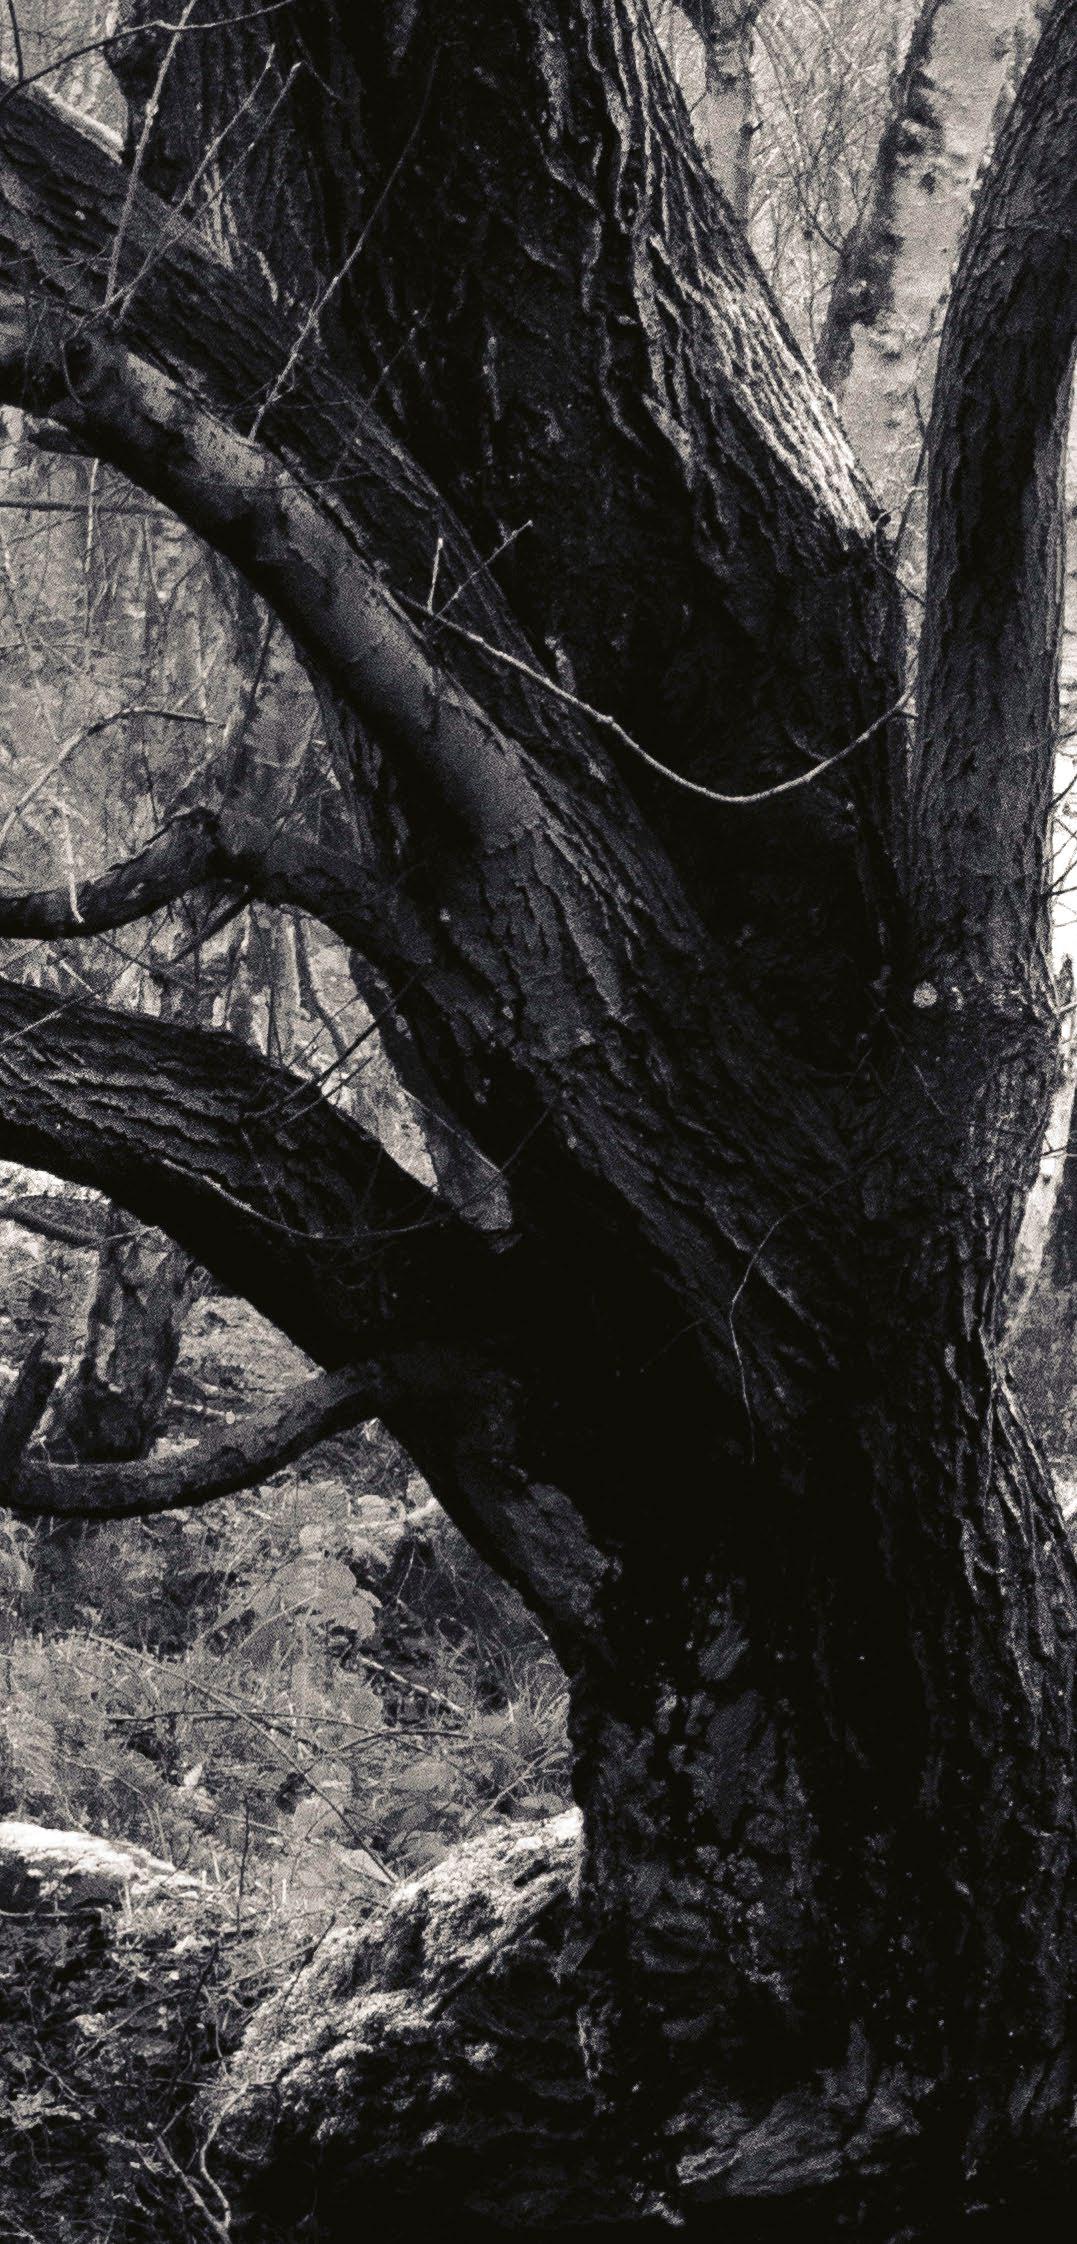
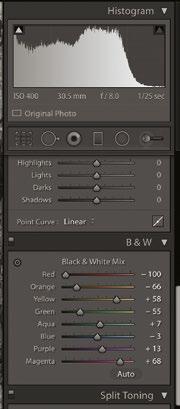
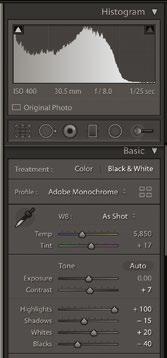
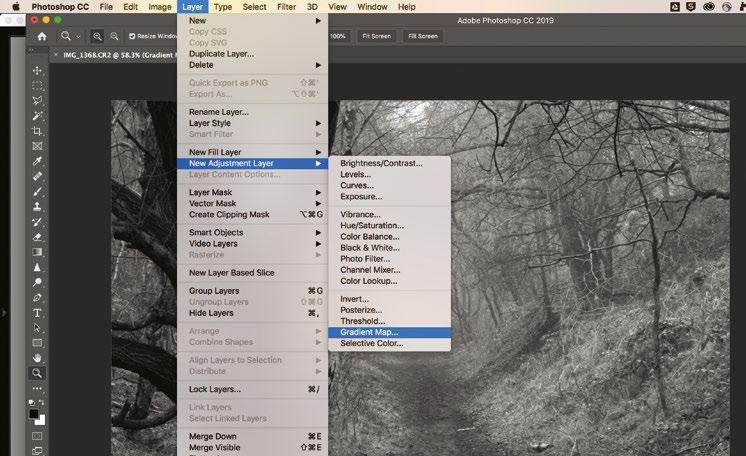
1 Convert to monochrome In Lightroom click on the Black and White tab in the Treatment panel, which will do a basic mono conversion. In Photoshop consider setting the standard black/white foreground and background colours (D) and add a Gradient Map Adjustment Layer for good default contrast.
2 Set Blacks and Whites If working in RAW, add contrast by setting the Black and White points. Hold down Option/Alt while dragging and stop just before clipping occurs. Next, increase Contrast and adjust the Highlights and Shadows sliders until satisfied. Here we want to keep all tones in range.
3 Adjust HSL Manage the relative balance of each colour by using the sliders in the B&W Panel in Lightroom (named HSL/Color when Colour Treatment is selected). Move each slider to brighten or darken colours –here lowering red darkened the path, and increasing yellow brightened the foliage.
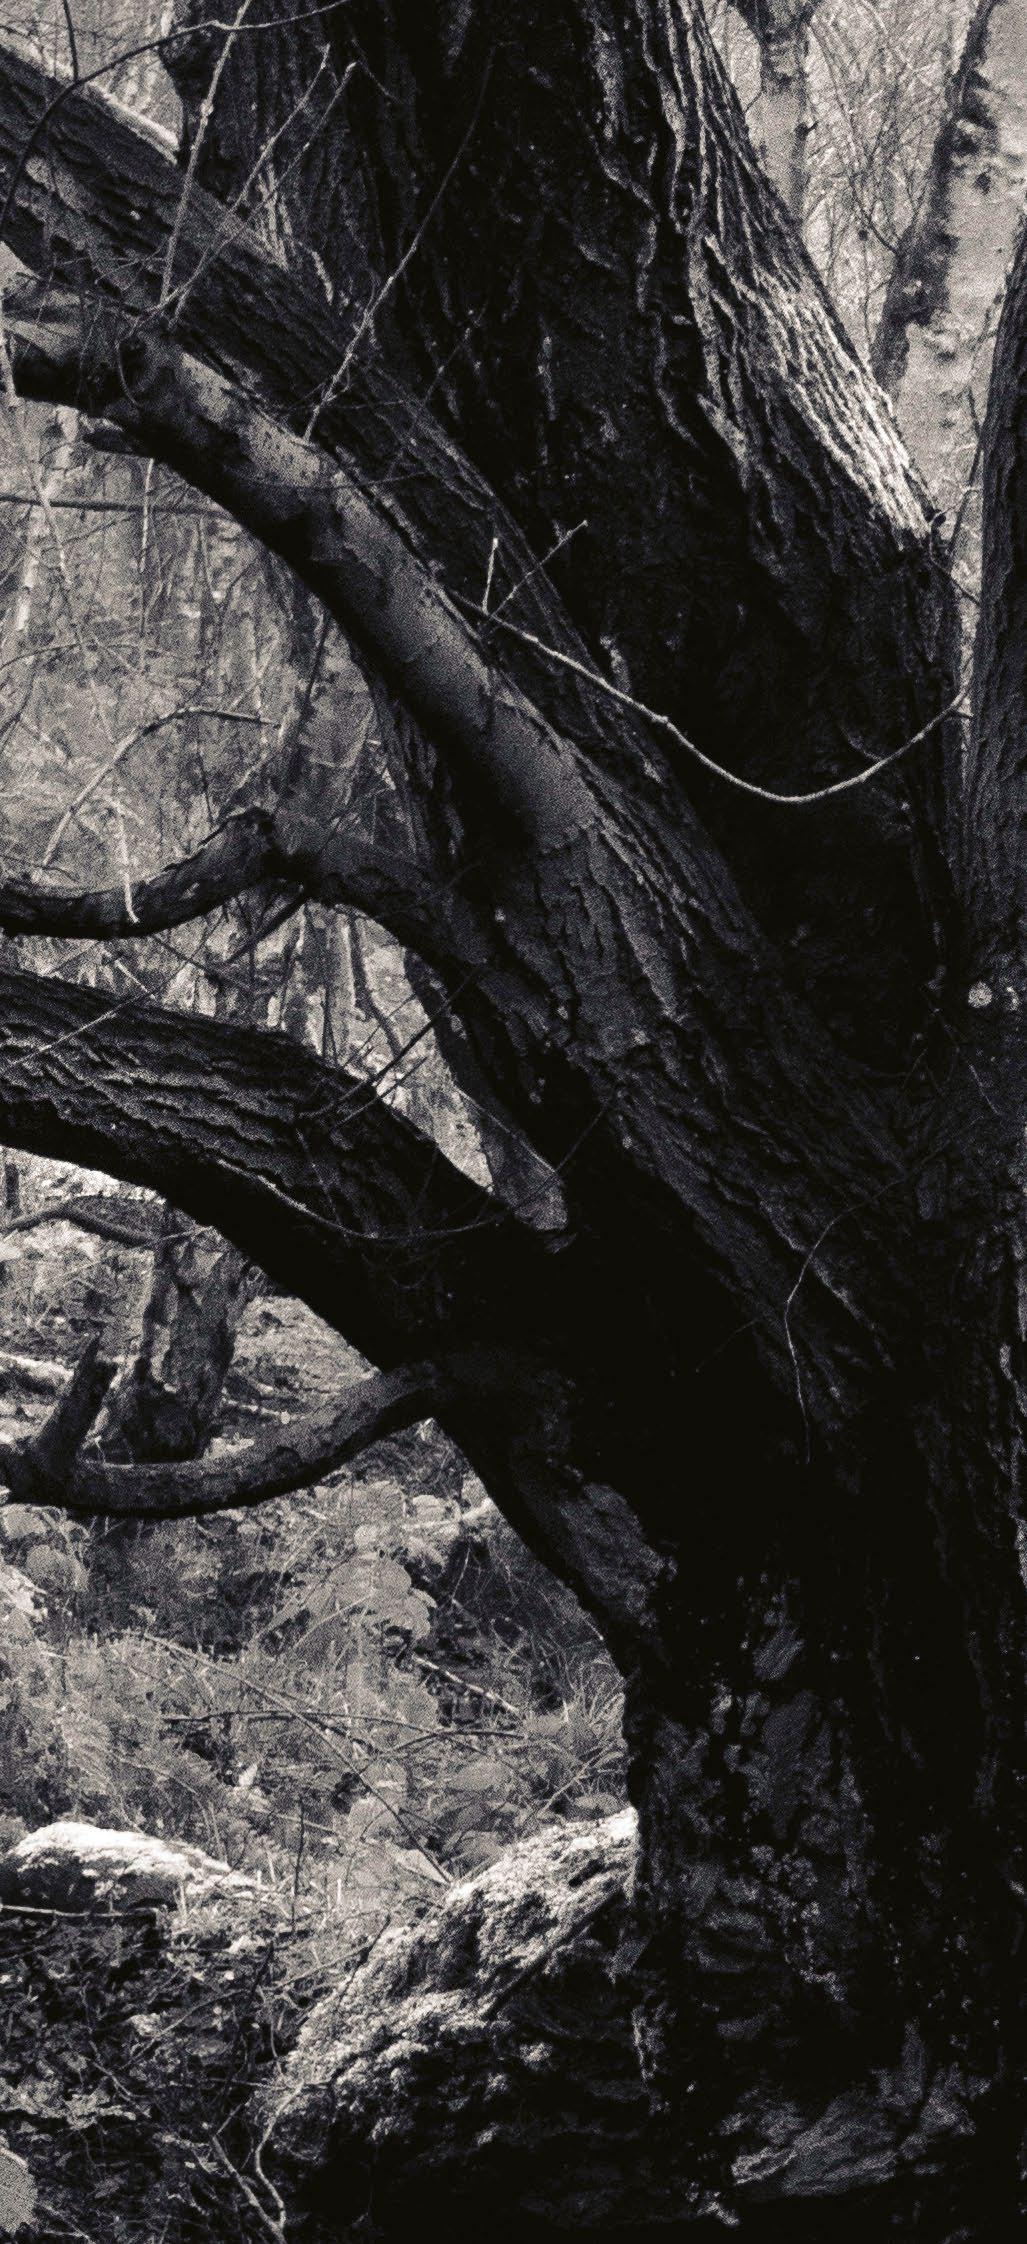
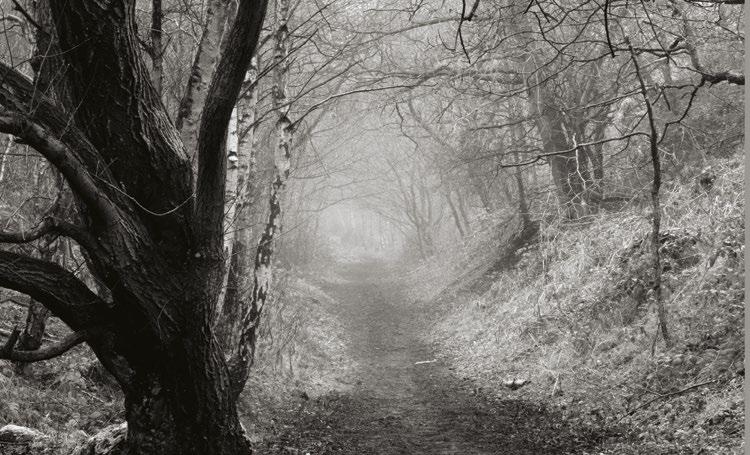
82 TECHNIQUES
©Peter Fenech
RAW and Photoshop workflows
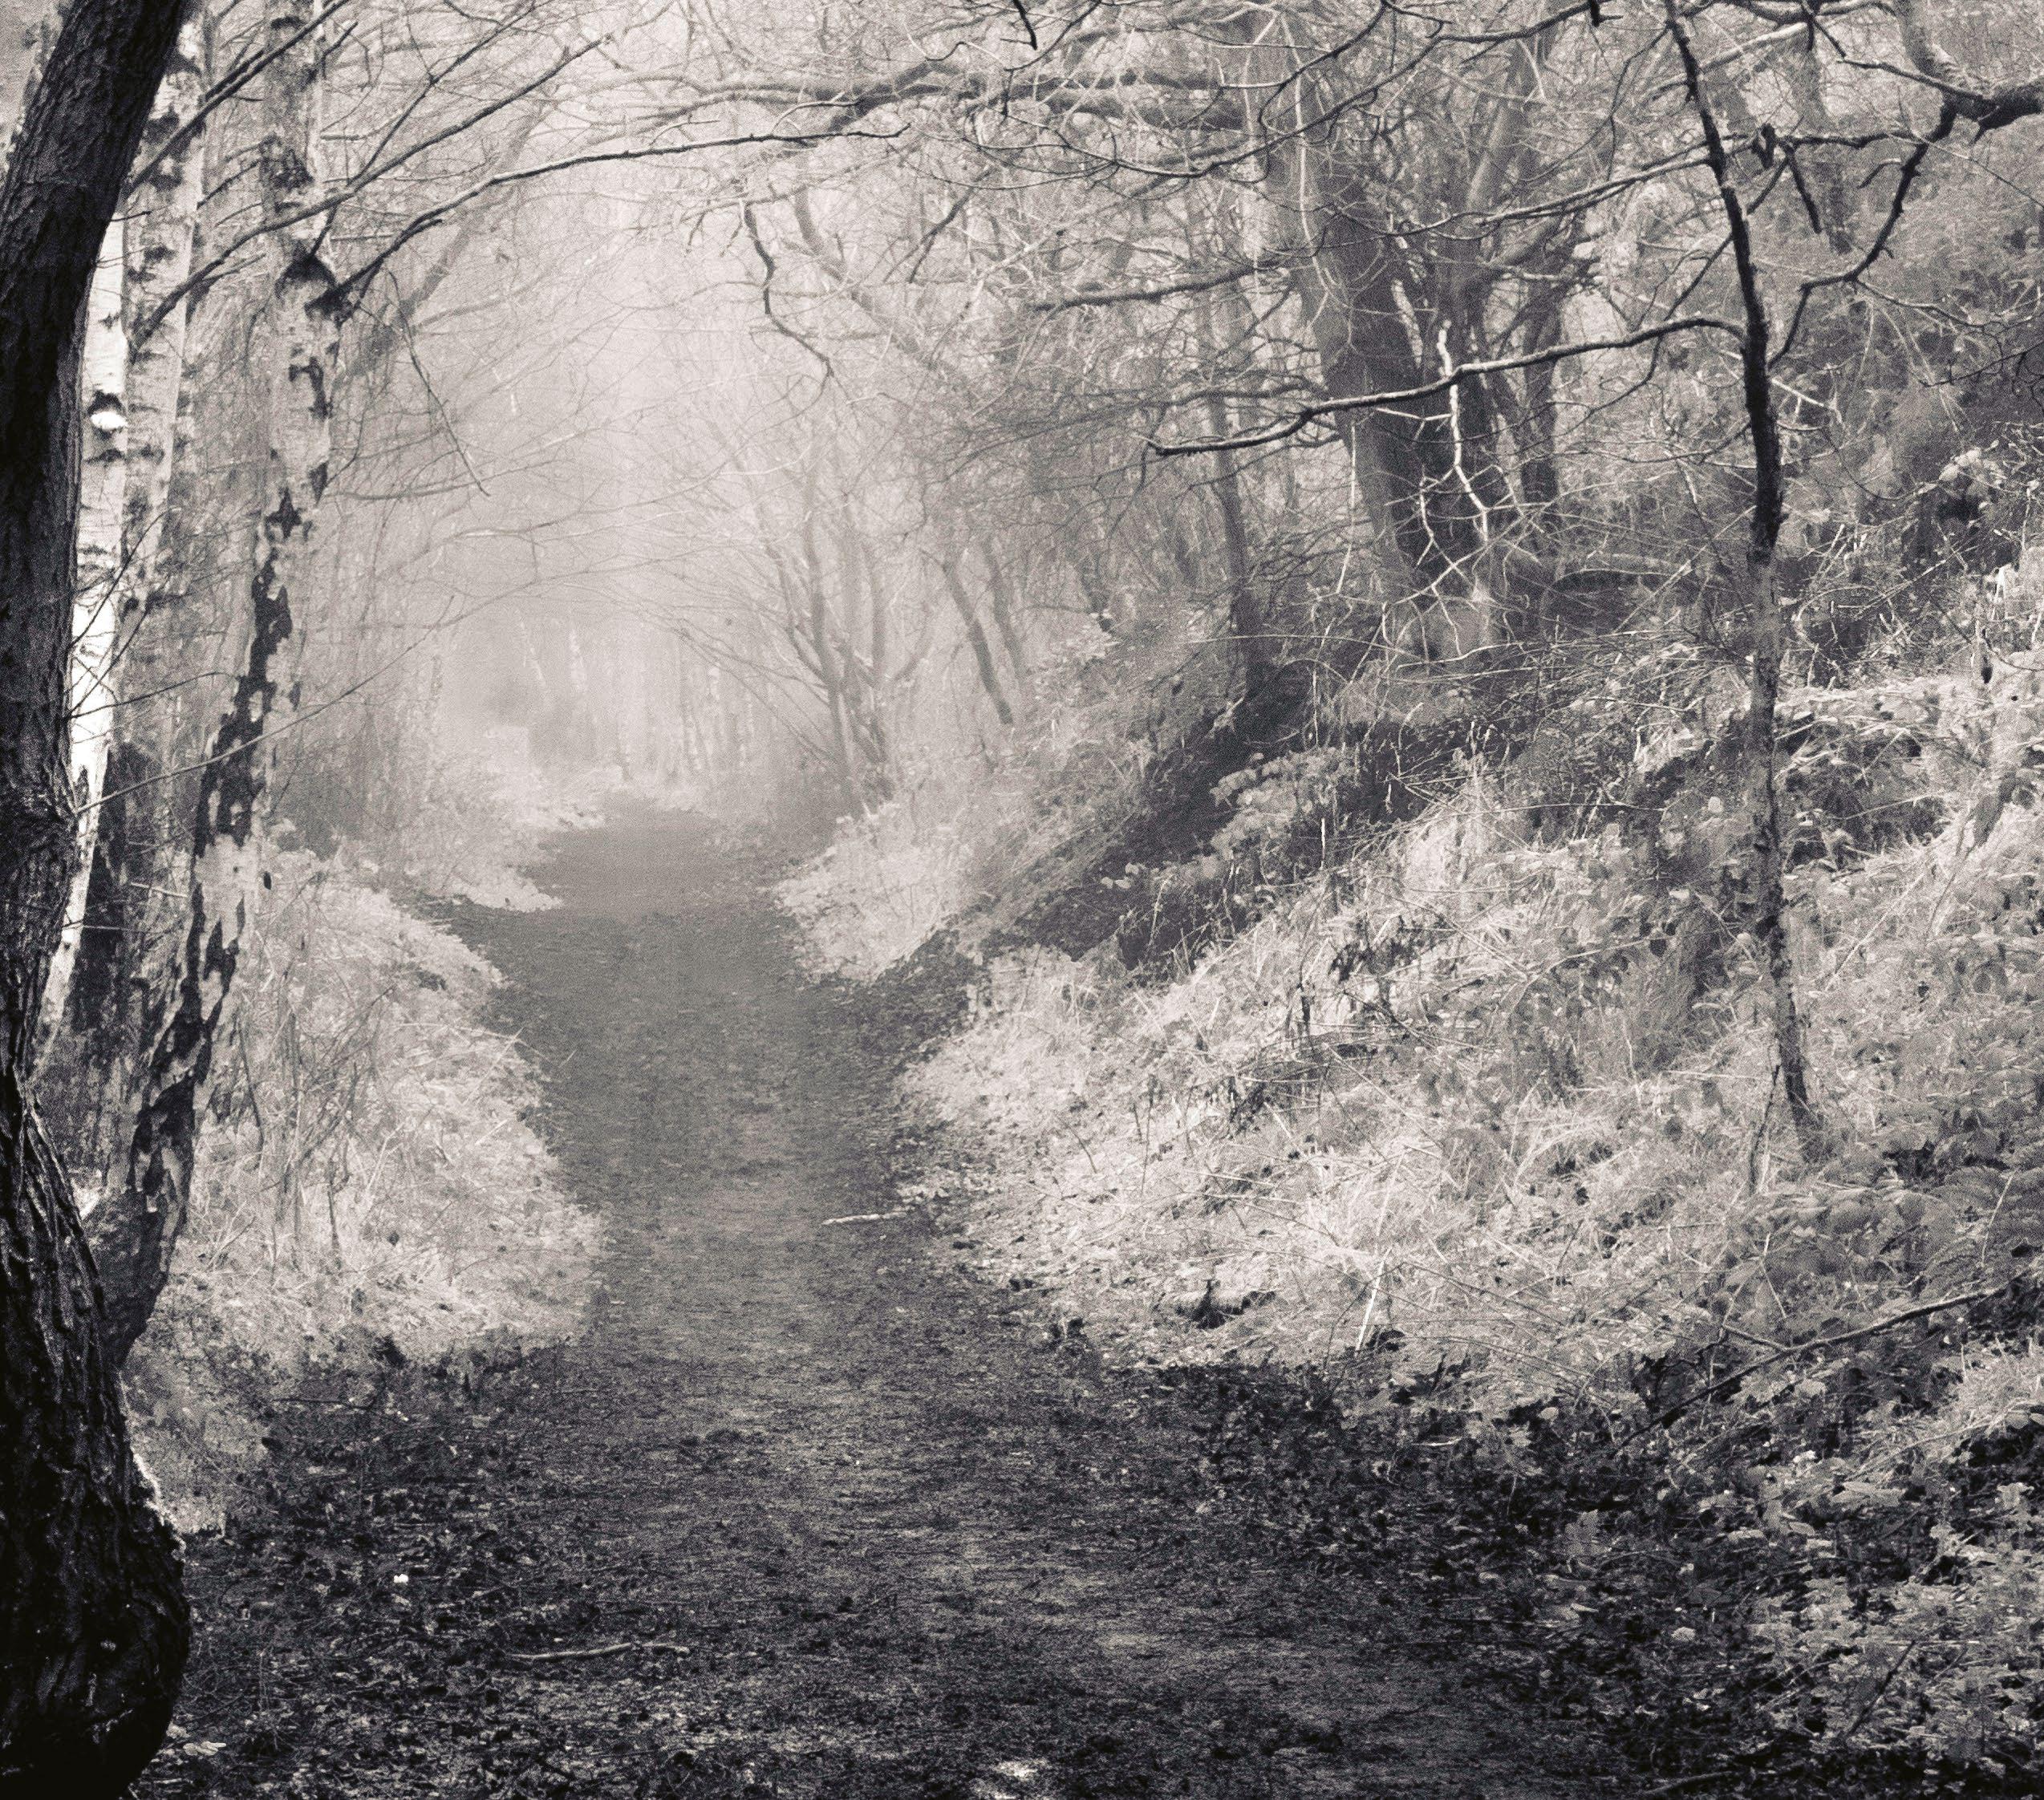
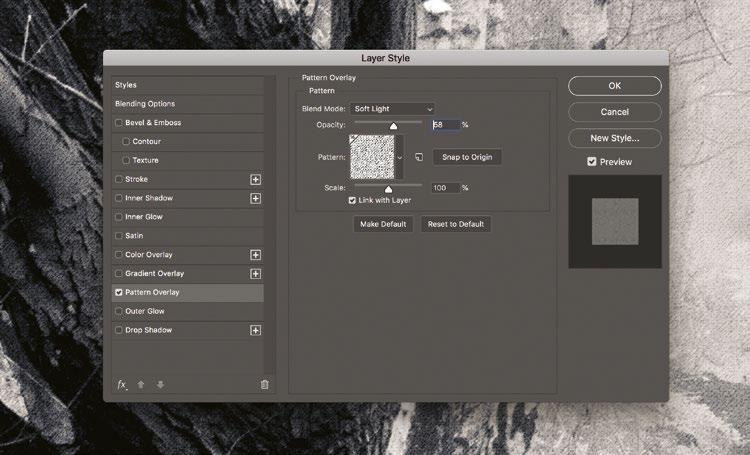
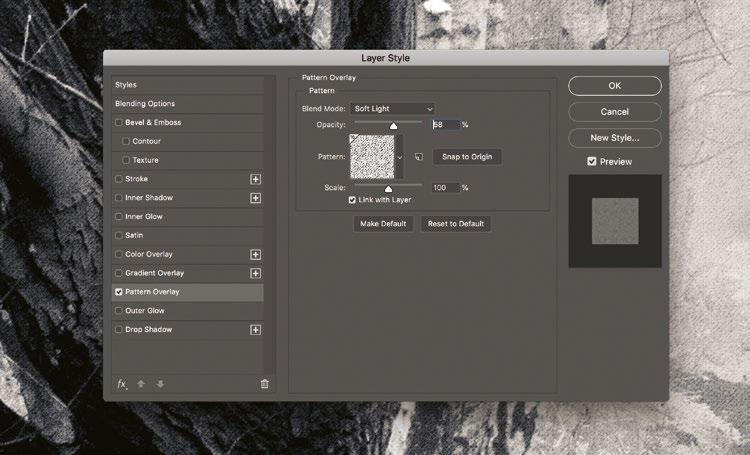
4 Dodge and burn Use the dedicated Dodge and Burn tools in Photoshop or manipulate the highlights and shadows using the Adjustment Brush in Lightroom (K). Subtly brighten highlight areas and darken the shadows to introduce local contrast and better outline the form of subjects.
5 Customise colour theme Try working with colour toning to add bias to the shadows and highlights for a stylised look. Here the Split Toning control has been used to slightly warm the highlight areas and add a cool tone to the shadows. This gives a richness to the tonality of the scene.
6 Add texture If your image is destined for print it will pick up some of the texture of the paper, but if the file will be used primarily for screen viewing you can try adding some fine grain noise or a pattern overlay. This will help to give the landscape a more classical, filmic quality.
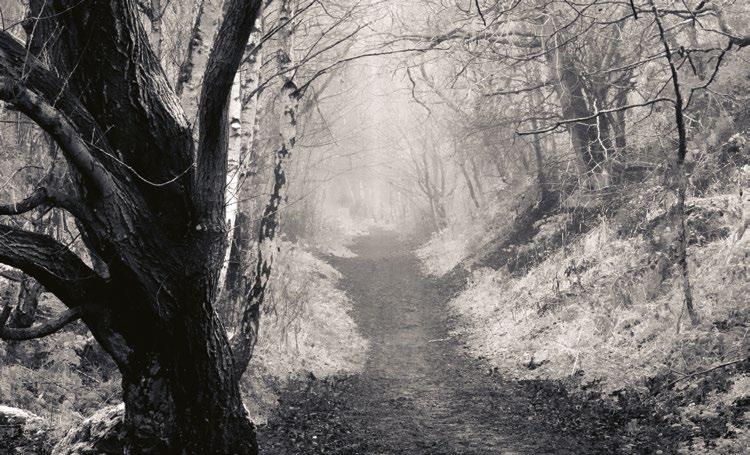
83
Thinking in
monochrome
Five top tips for powerful black and white shots
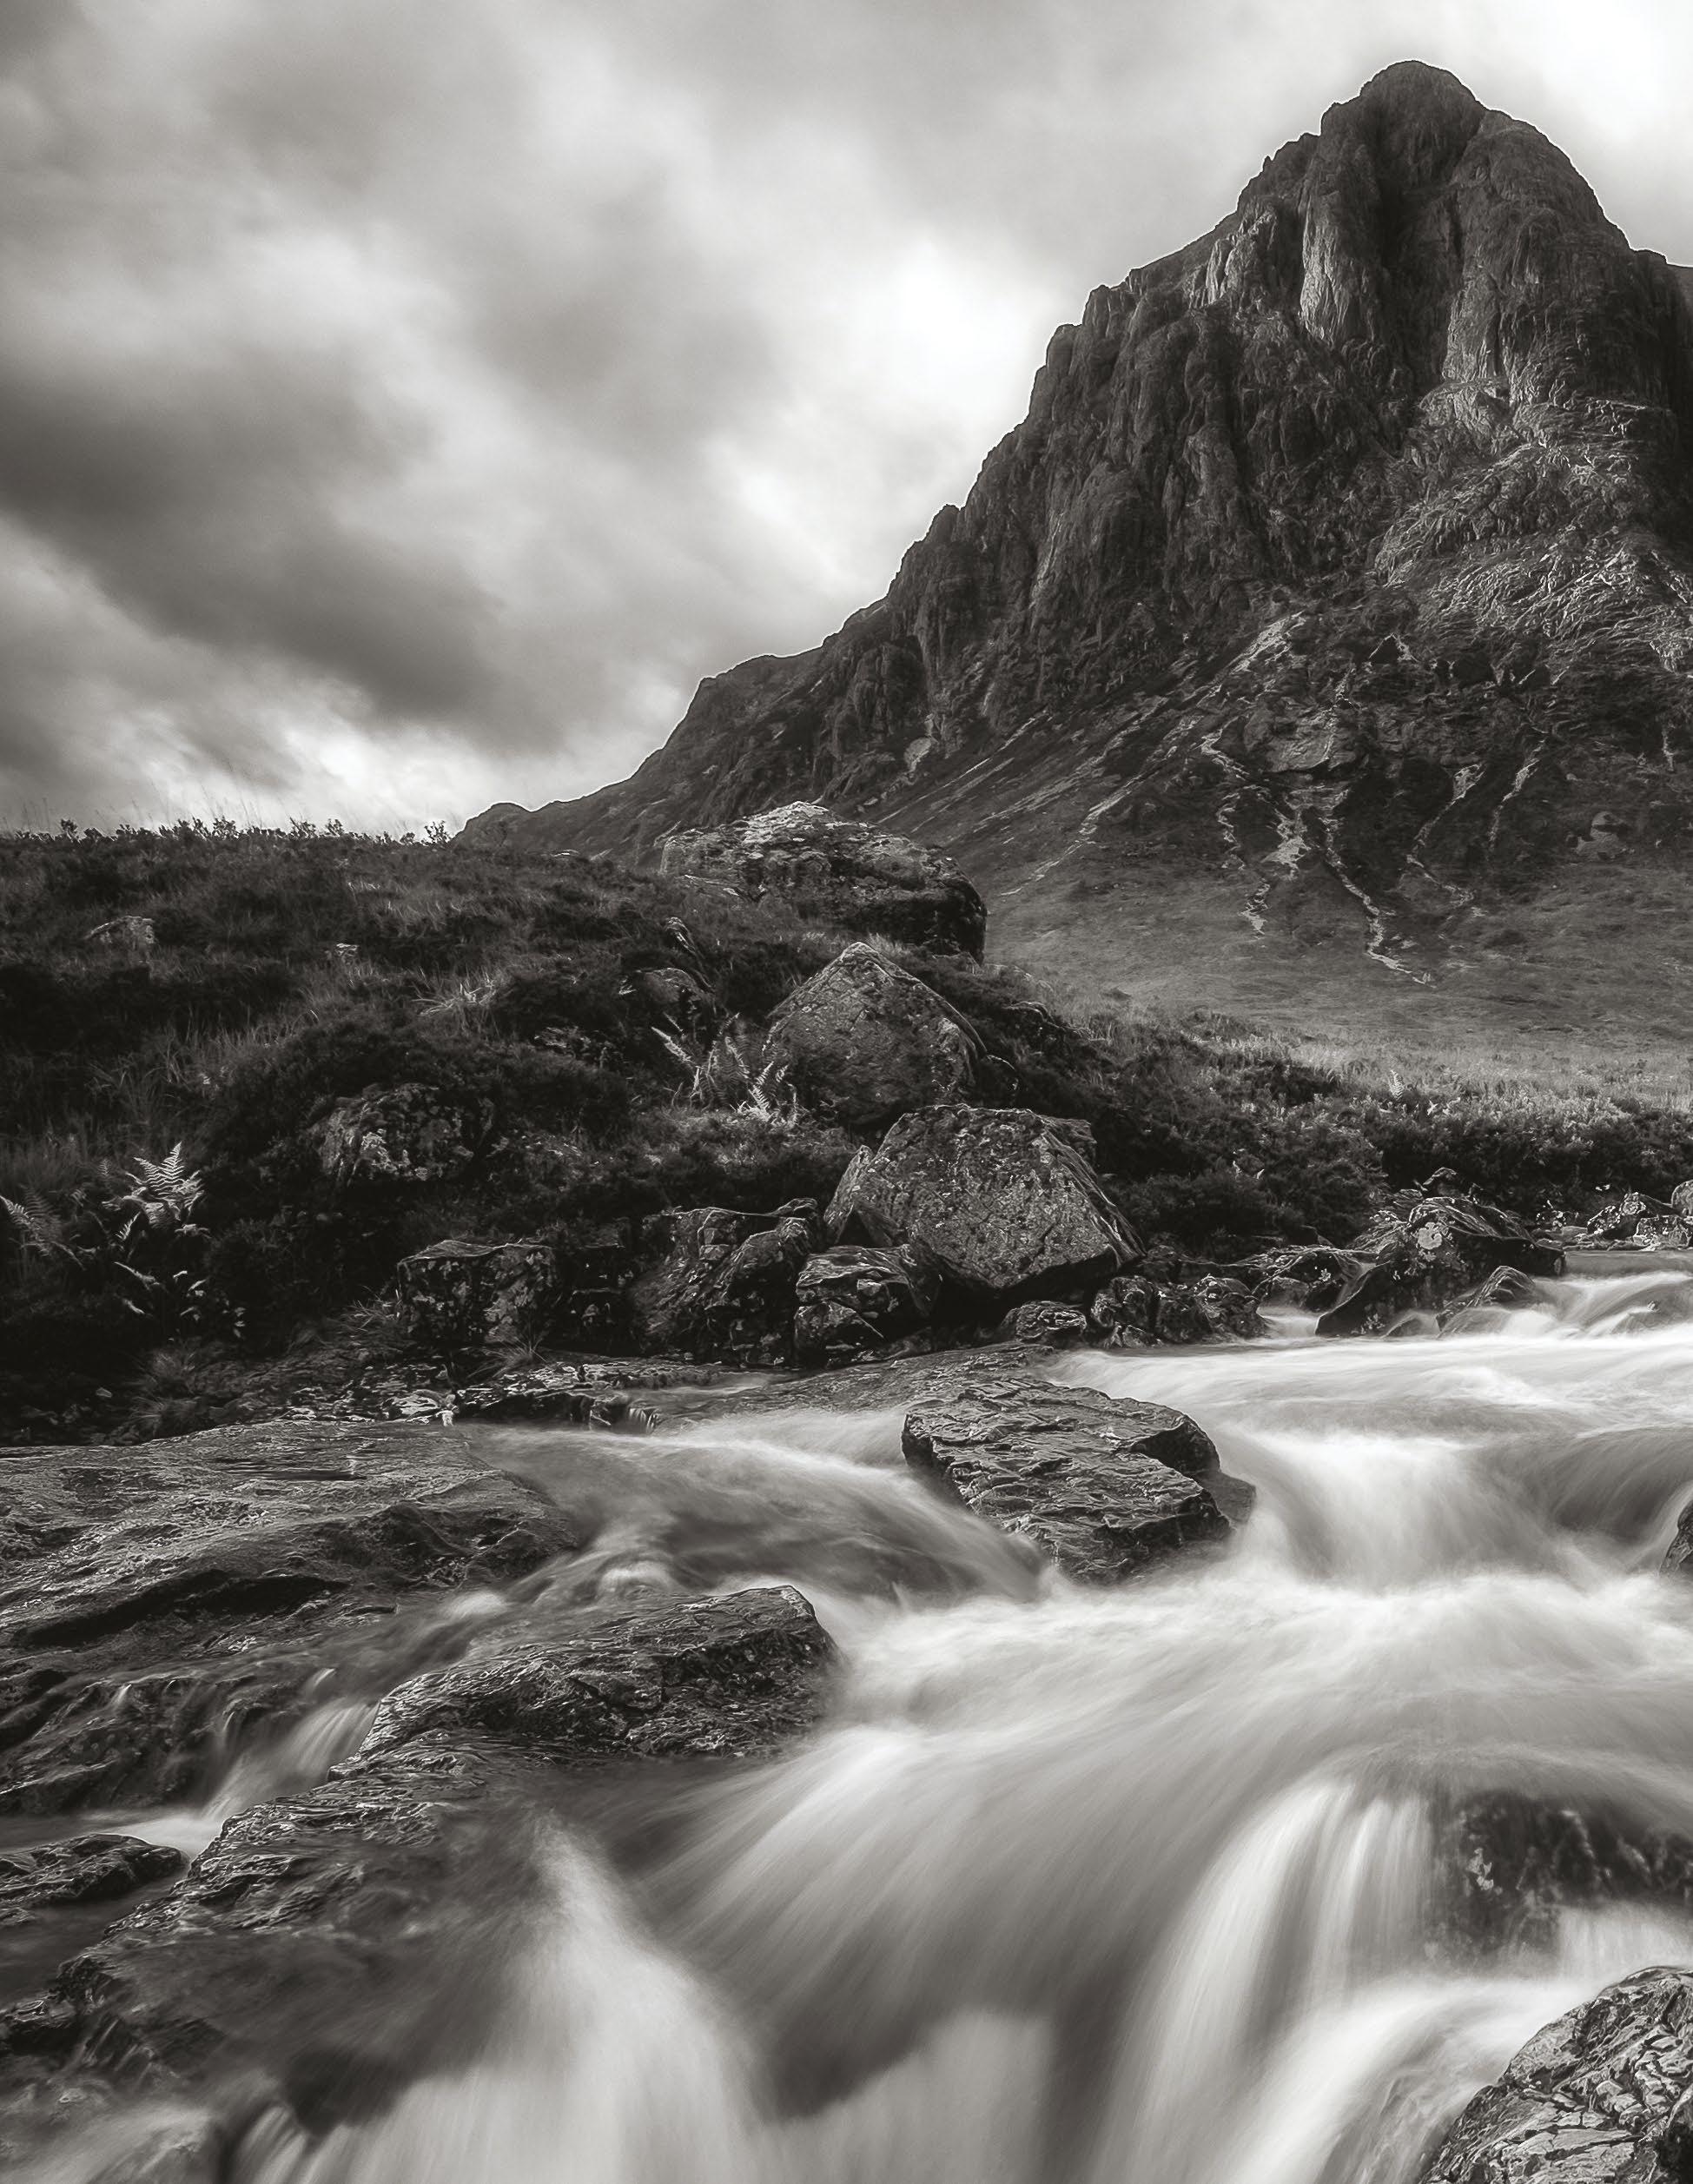
1 Shoot in mono Try shooting in-camera black and white images to think of every frame in monochrome, rather than as candidates for later conversion. Shoot in JPEG format to apply B&W picture presets.
2 Change aspect
Consider altering the native aspect ratio of your images in-camera. A 5:4 ratio or 1:1 square more closely resembles classic film and is conducive to minimalist or unconventional framing.
3 Coloured monochrome While black and white is a clear definition, ‘monochrome’ is open to interpretation. Technically images dominated by single colours are monochromatic, so try blending coloured midtones with pure shadows and highlights.
4 Black and white cameras If you’re dedicated to black and white landscapes, consider getting your camera converted to infrared or even buy a mono-only camera such as the Leica M Monochrom for maximum detail capture.
5 Focus on light Black and white is photography at its most basic. Create simplified landscapes by looking for abstract detail emphasised by strong lighting. Use shadows to push depth and form rather than colour.
84 TECHNIQUES
©Gettyimages
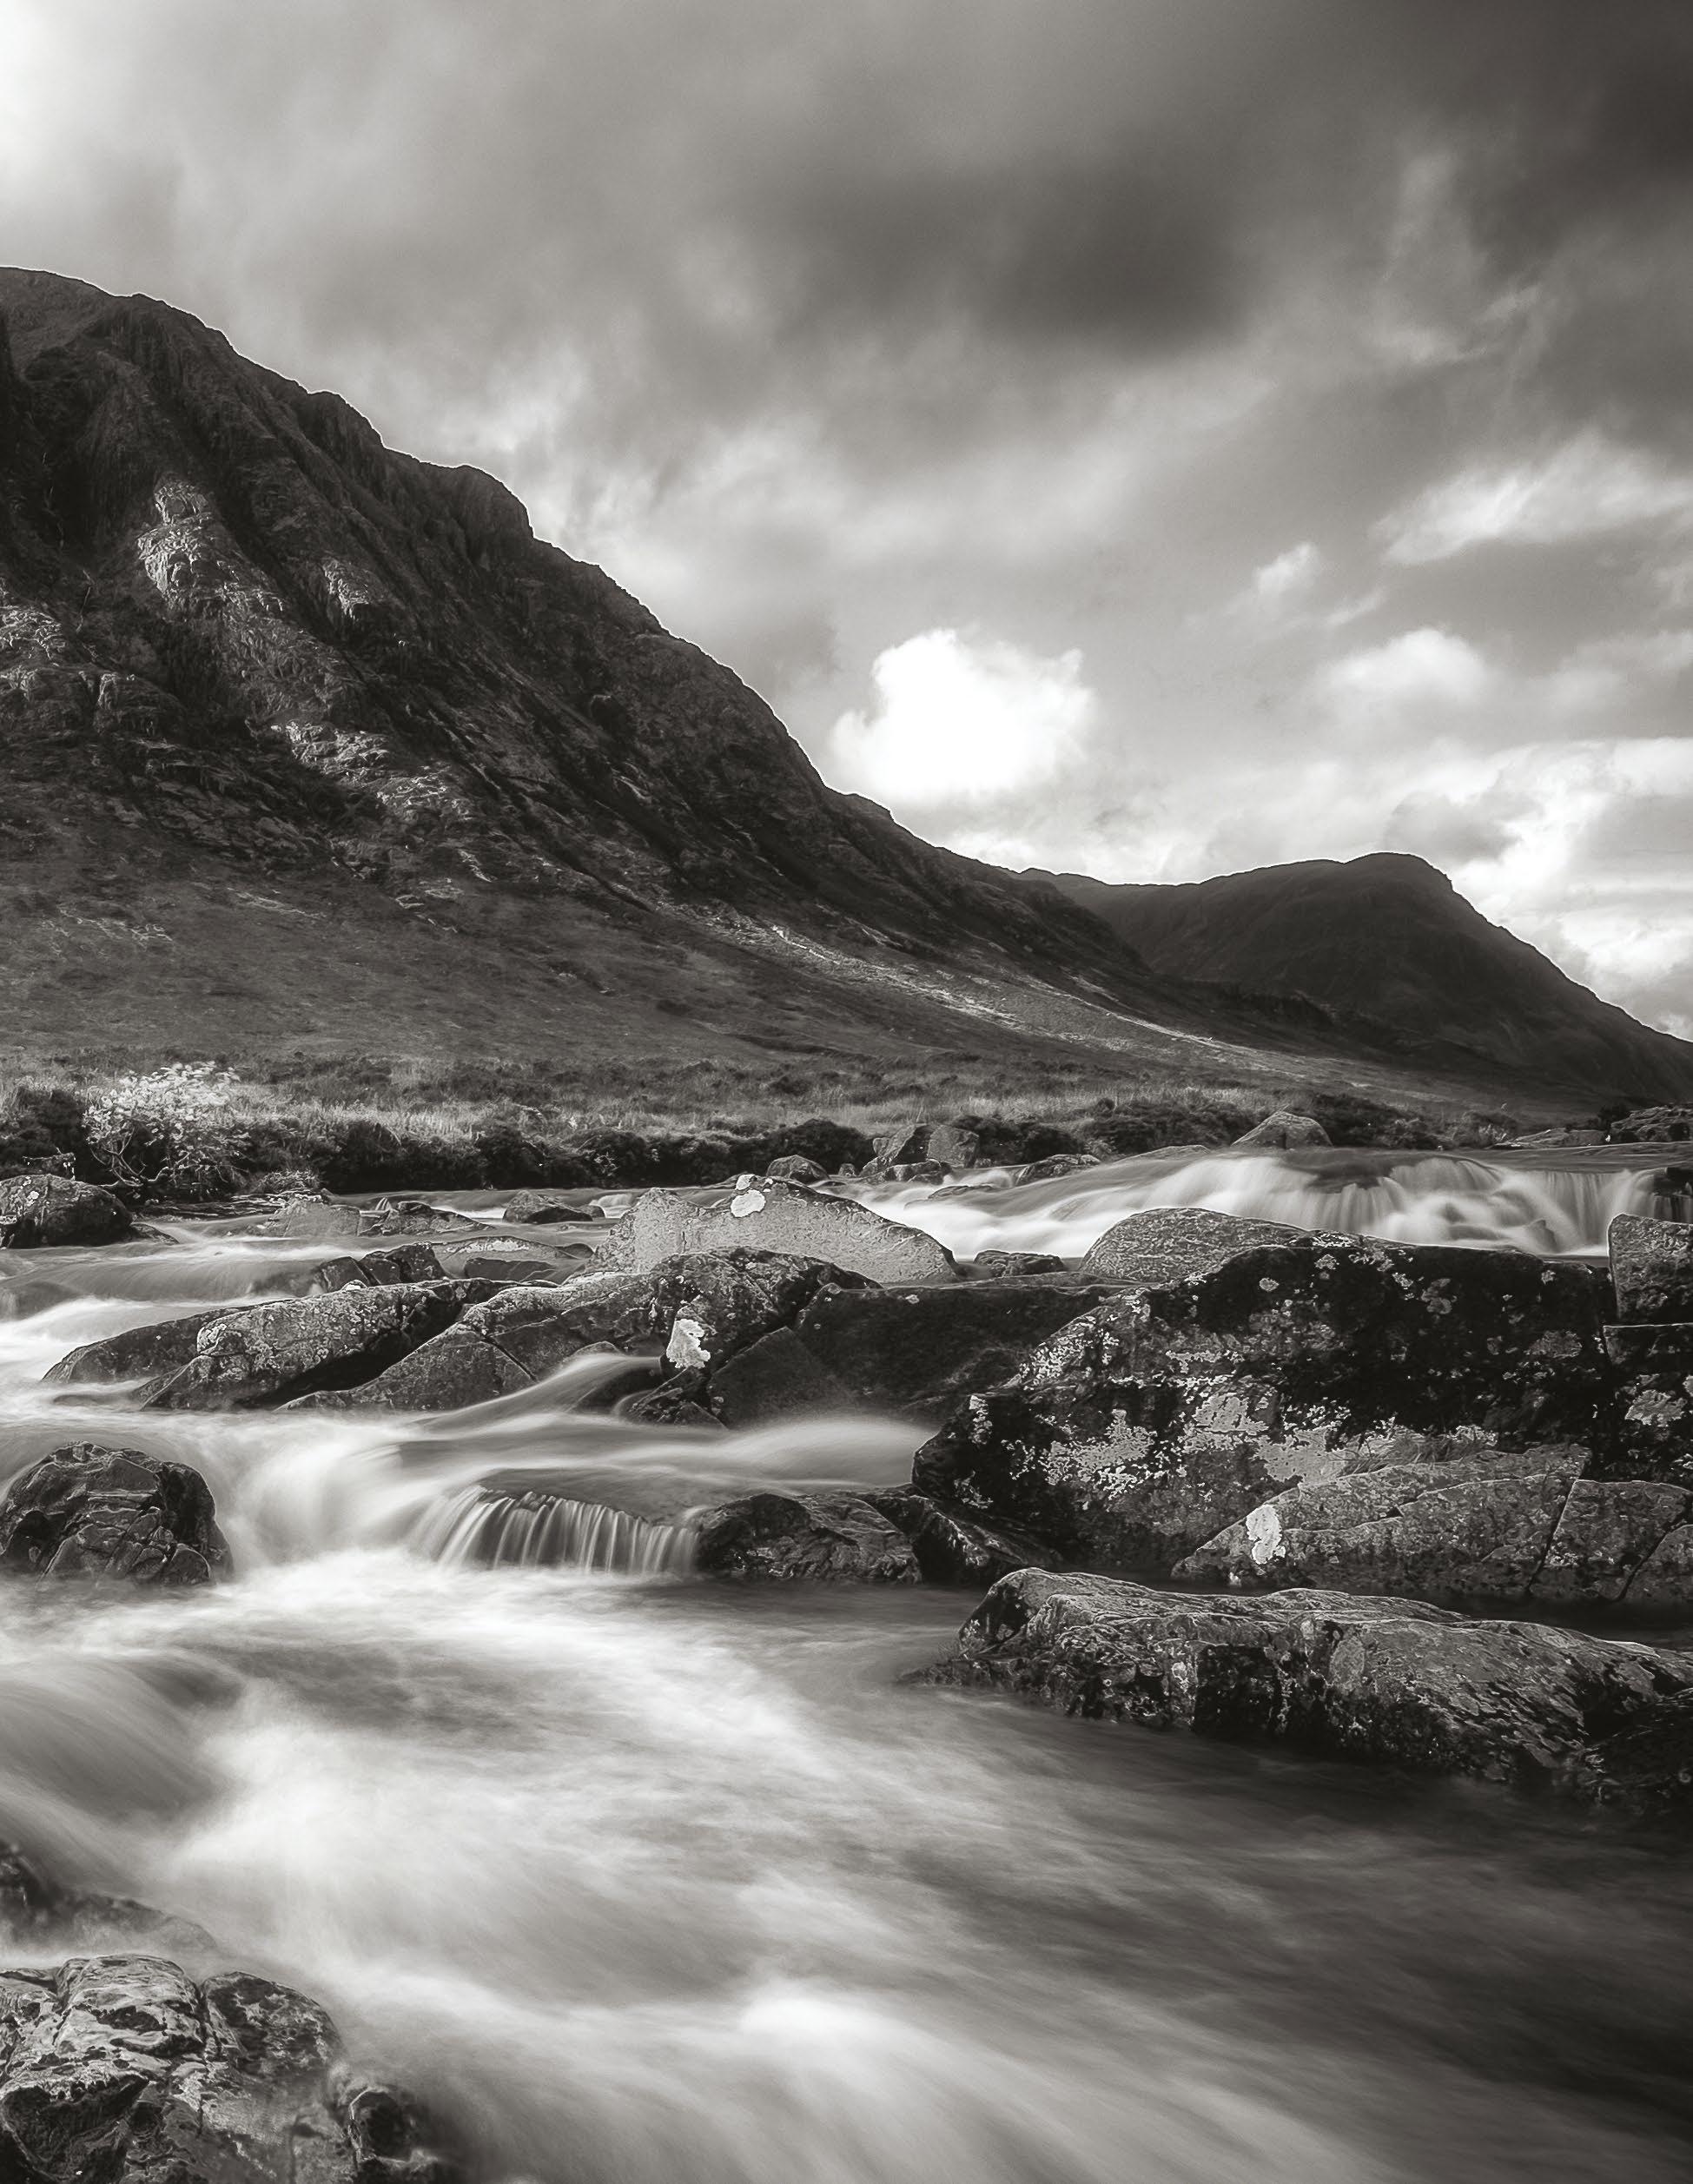
85
WHITE
BLACK &
landscapes coas Shoot professional
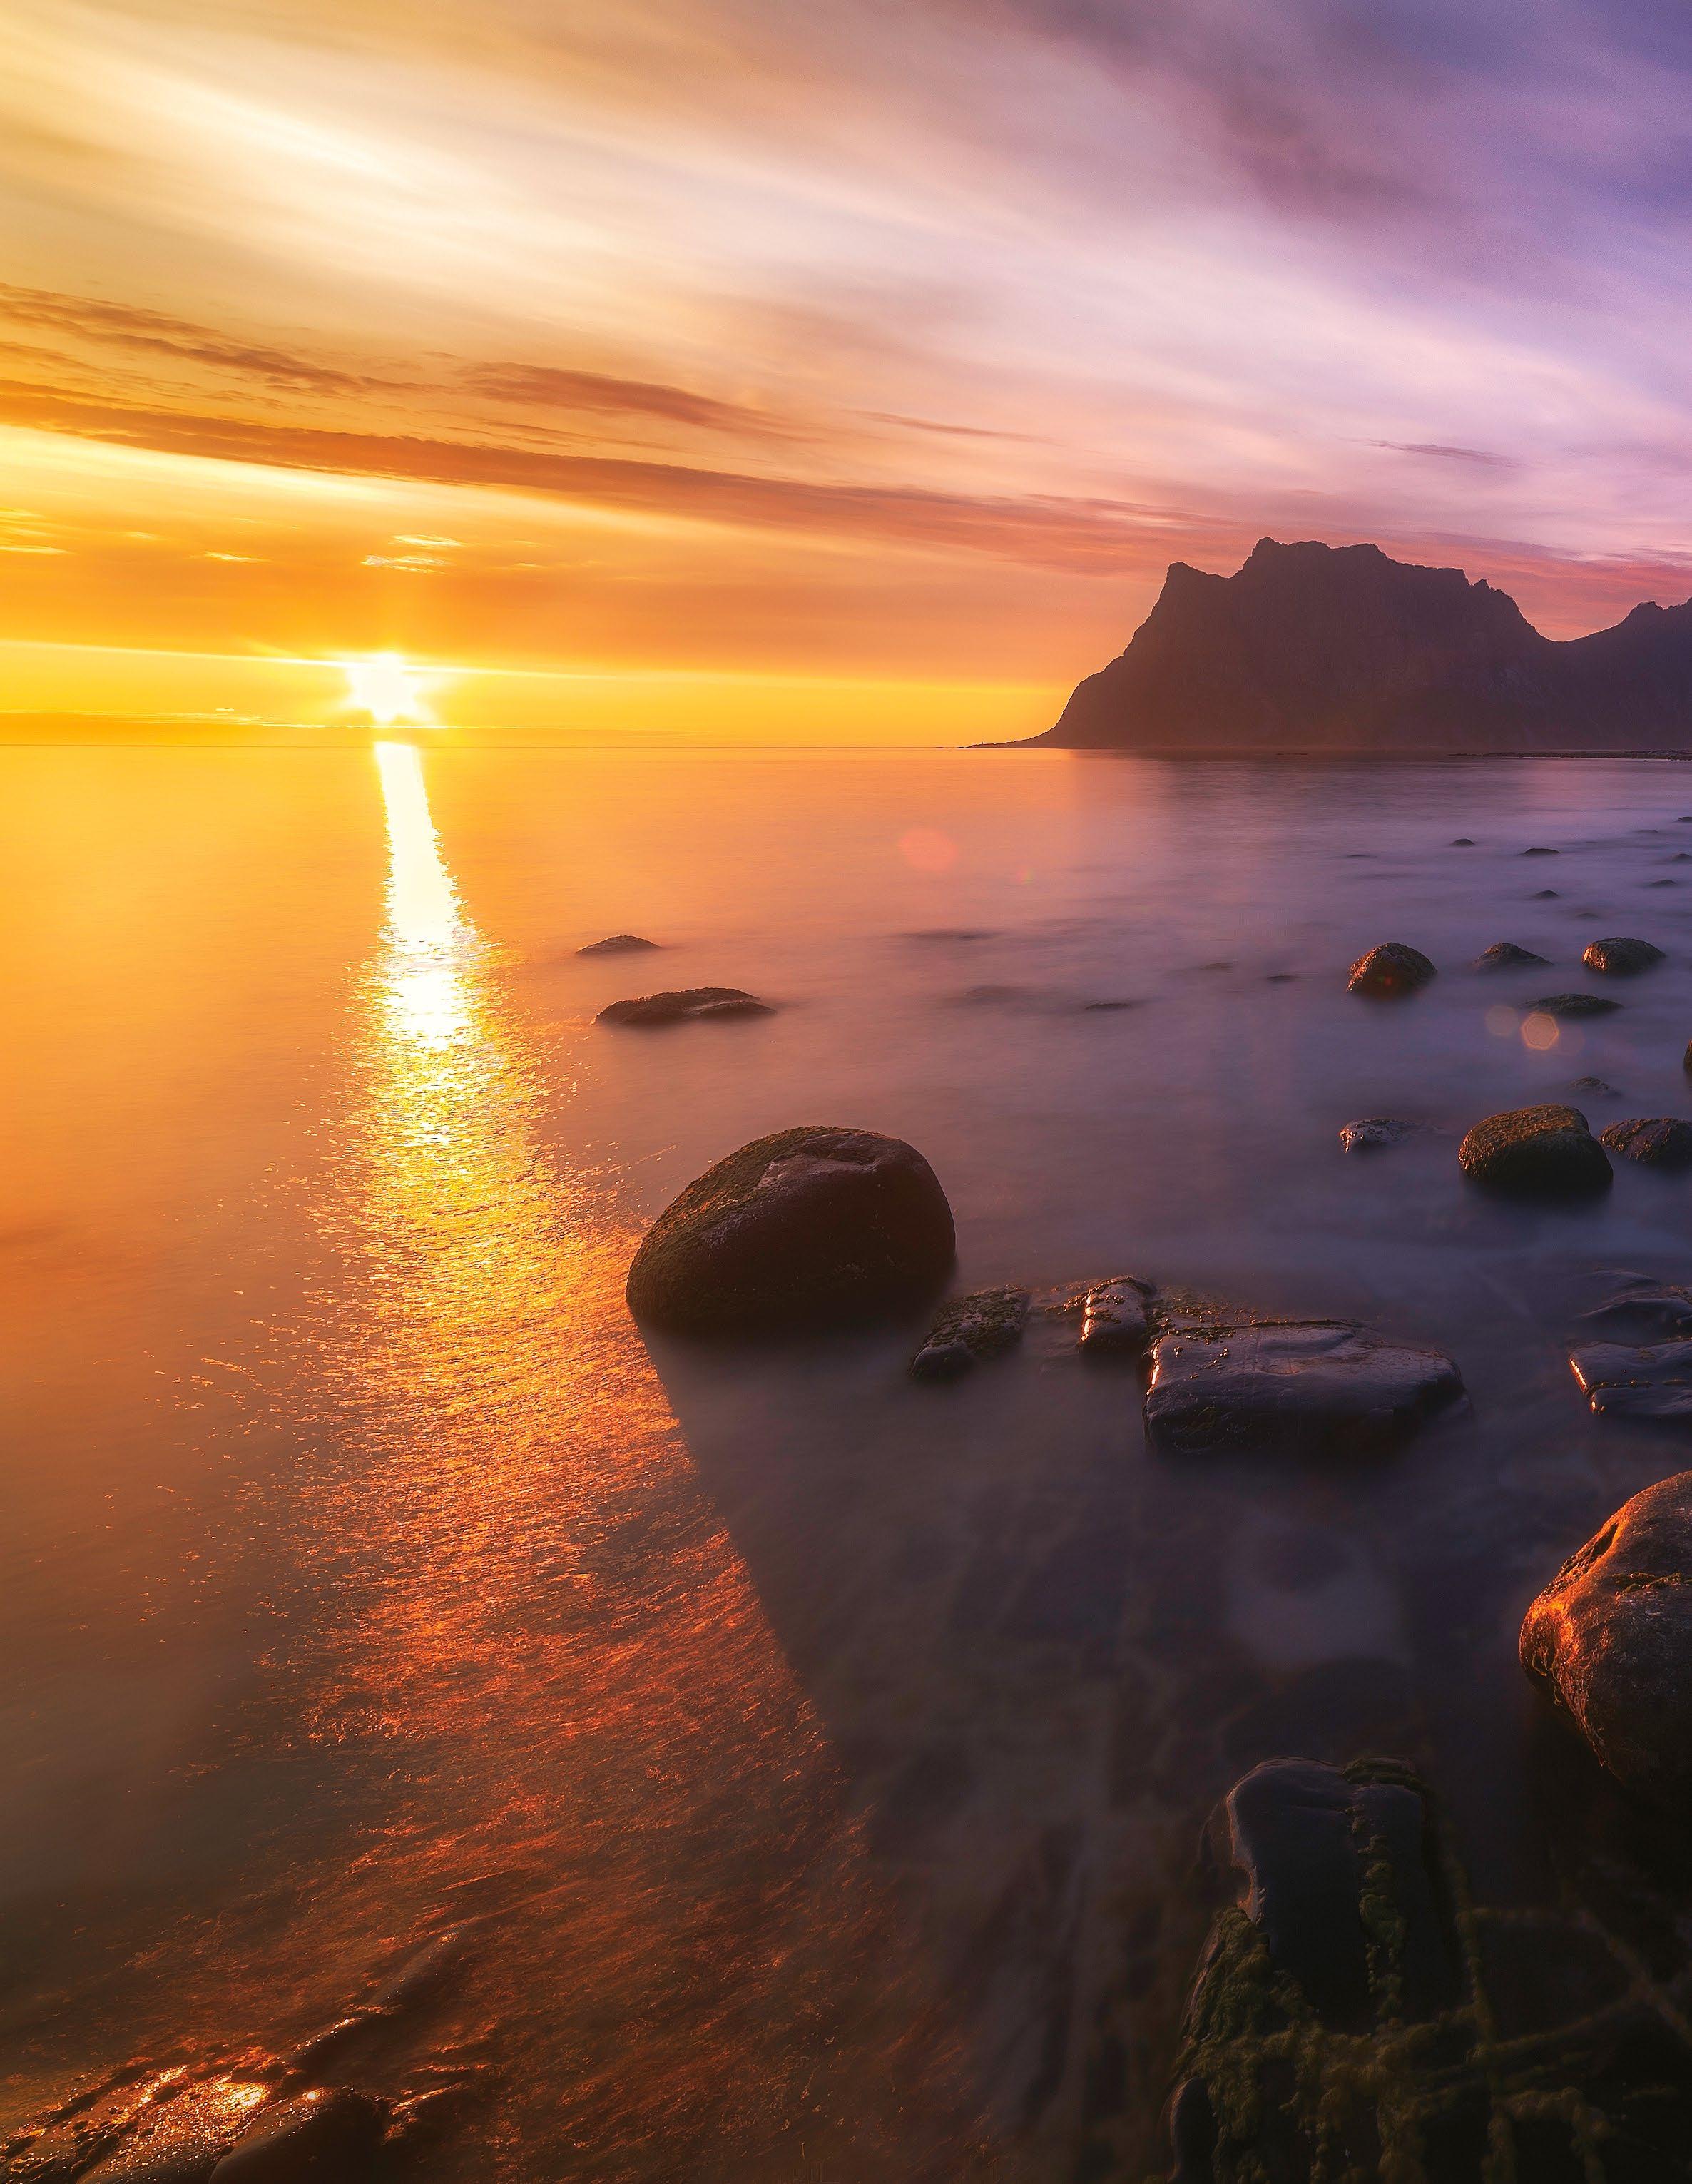
86 TECHNIQUES
Midnight sun
A perfect harmony of moving and static elements can produce the ultimate coastal images, utilising the characteristic interplay of water and land
©Cristian
The ocean is a constant draw to photographers all over the world. There is the special appeal of the boundary between the sea and land that lends coastal scenes a dramatic tone, scarcely experienced at inland locations. The movement of the waves, the way in which the water flows over and around foreground elements, and the quality of the reflected light from the ocean surface contribute almost all of the aspects we look for when shooting a landscape image. It is no wonder that websites such as Flickr, 500px and social platforms like Instagram are awash with photographs of seaside locations.
As with all popular subjects, however, this focus can often result in a formulaic approach that generates hundreds of similar images, displaying little in the way of creativity. You’ll often see coastal scenes shot using a long exposure to reduce water to a smooth impression, while the time selected will most likely be sunrise or sunset. All of these choices are effective and produce beautiful imagery, but without a clear intent on the photographer’s part, it’s a challenge to make frames stand out from their competition.
The professional landscape photographer is able to recognise when the ‘safe’ composition and exposure choices are the most effective and when it is best to stray from convention and experiment with framing, shutter speed and lighting. Our goal over the following pages is to learn how to use commonly experienced coastal conditions for maximum impact by selecting the best kit and employing creative techniques.
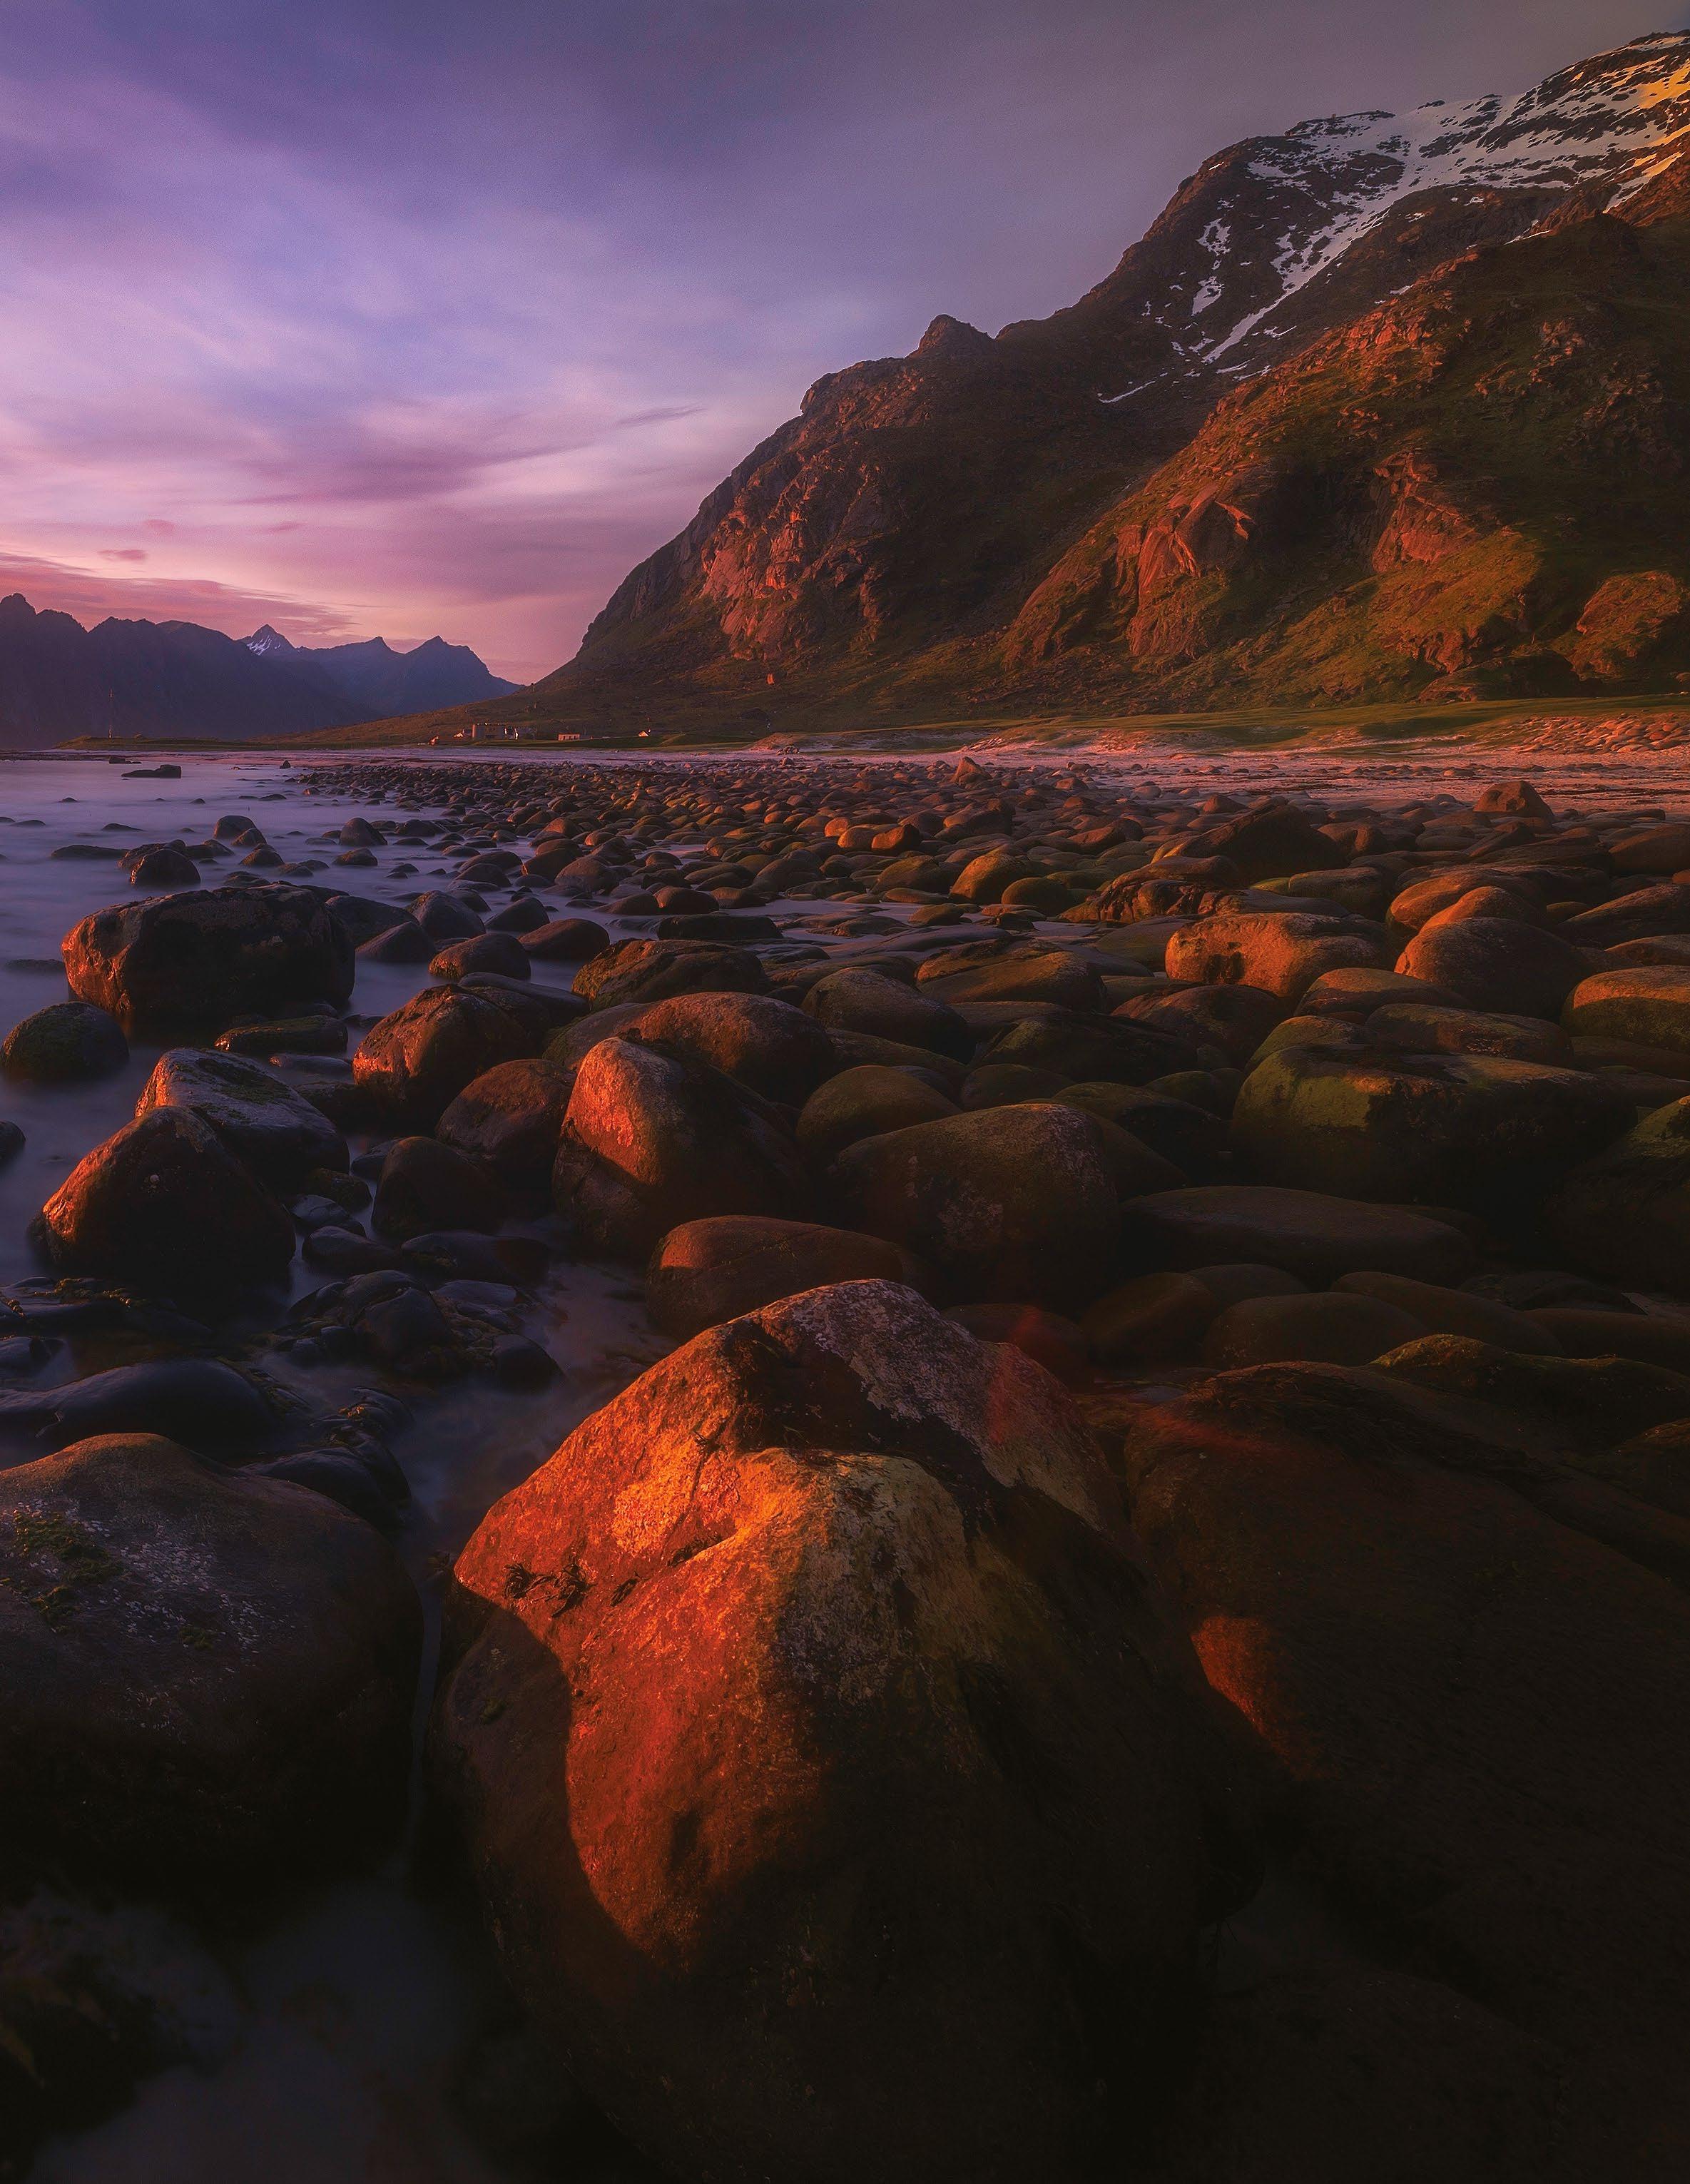
Take your seascapes and beach scenes up a step by using these creative techniques
tal 87 COASTAL LANDSCAPES
Kirshbom
Identify essential kit
Gather the cameras, lenses and accessories you need to create masterful studies of seaside locations
‘Essential’ is a relative term in the context of photography. While there are times when certain pieces of equipment cannot be substituted to create the same effect, in many cases the importance of a product is defined by the photographer’s willingness or ability to function without it.
In some circumstances it is better to work with minimal gear, as this can inspire a creative approach to the subject. On other occasions environmental conditions mean that taking a large amount of photographic equipment would be impractical – setting the definition of ’essential’ as an inventory
Pick the most suitable lenses
The best lenses for coastal shots
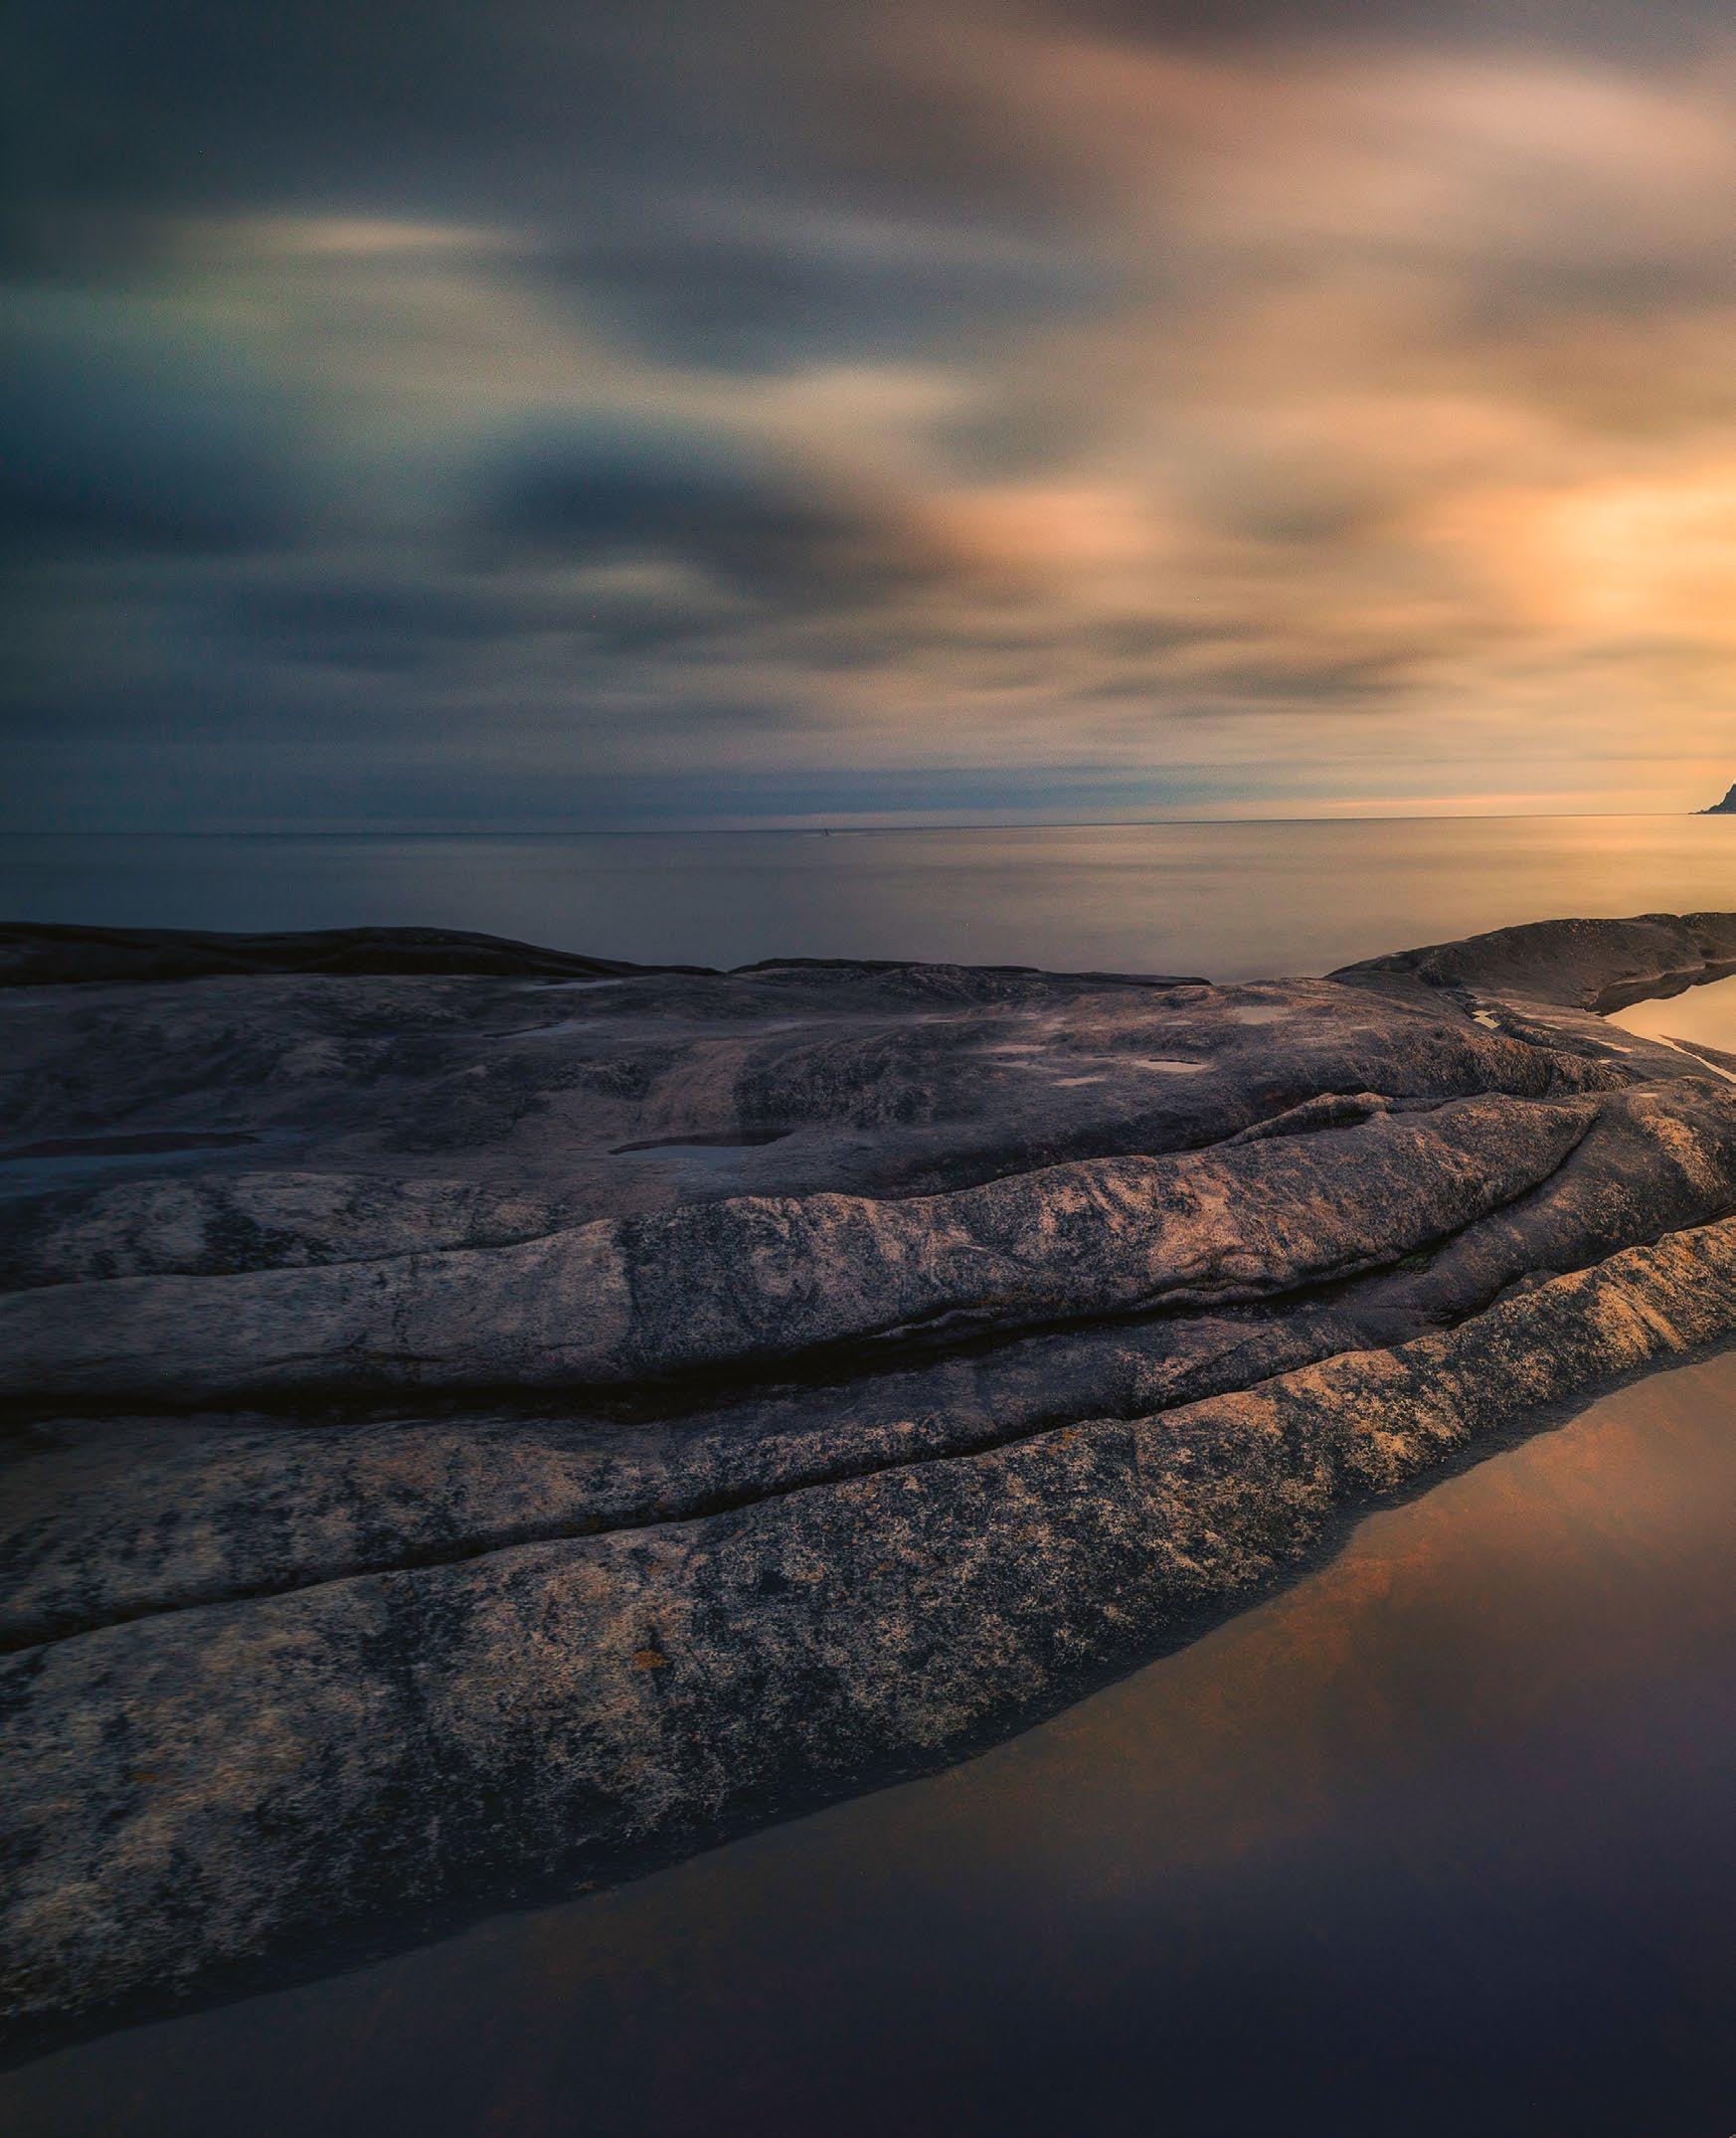
STANDARD ZOOM
A good all-round lens is one that allows framing experimentation. A 24-105mm on a full-frame camera, or a 17-85mm on APS-C bodies, offer similar angles of view and flexibly open up multiple framing options when trying to find the best composition.
ULTRA-WIDE ZOOM
While care must be taken with empty space in the frame, a 10-20mm or 14-24mm optic enables foreground detail to be exaggerated, adding depth to beach scenes. A model with a focussing distance of 30cm enables extreme perspectives for a three-dimensional feel.
MEDIUM TELEPHOTO
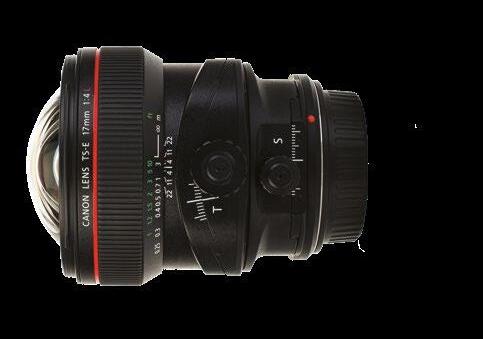
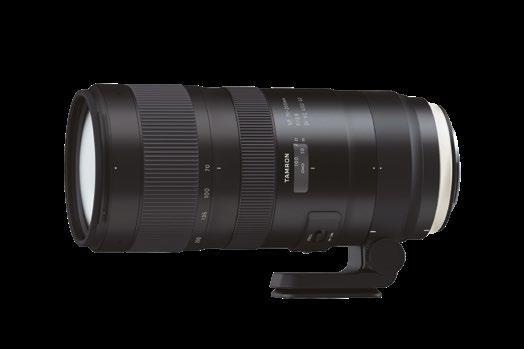
A 70-200mm zoom enables perspective compression without adding too much weight to your kit bag. It also enables empty or distracting foregrounds to be cropped, so smaller scene elements can be isolated for abstract shots.
WIDE TILT/SHIFT
The stretched vertical profile of many coastal scenes can cause problems with converging verticals at wide focal lengths.
A perspective control lens of 24mm or wider enables cliffs to be captured, by shifting the lens up instead of pitching the camera.
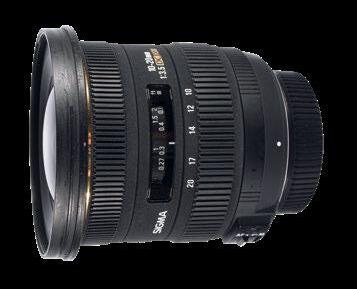

that unlocks the maximum number of image possibilities with the most streamlined, workable setup.
Coastal landscapes are not often seen as extreme environments, most likely because of their accessibility, but this is an underestimation of the dangers beaches and other seaside environments pose to photographic technology. Once we are aware of these safety issues, it is clear that our choice of kit for a given shoot is heavily influenced by the location we will be shooting. Durability is an important characteristic –and resistance to water and saline corrosion
in particular. The potential risks posed by sand and water often means that changing lenses during the shoot is not recommended, causing further implications for gear choices. It is often better to bring multiple camera bodies, each with a different lens mounted – one with an ultra-wide and one with a midtelephoto, for example.
If budget doesn’t allow for this, be sure to scout your location before the shoot to work out which optic will be most useful for the images you hope to capture. That will enable you to fit the correct lens before heading into the field, removing the need to change.
88 TECHNIQUES 88 TECHNIQUES
Deciding early if a change to your setup is needed – including accessories such as filters – will help you to conduct effective risk assessments and make the shoot as smooth, safe and stress-free as possible.
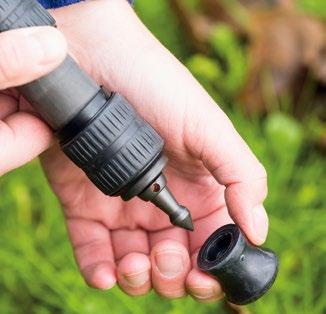

Photographically, the nature of beach scenes also poses some unique and characteristic compositional challenges. These are often predictable, enabling you to anticipate the right focal lengths and camera support options. However, as we will discuss, it is useful to be prepared for the unexpected.
Below
Rough terrain
Safety is as important as creativity in the process of selecting core equipment. A sturdy tripod is critical when shooting in the uneven terrain that’s found in a coastal landscape
Right
Flexible framing
Having a structured, concise inventory of equipment enables you to rapidly choose the best tools to capture the best elements of the coastal scene
Add essential accessories
Enhance your kitbag inventory by including these optional yet effective extras
10-STOP ND
A popular choice for creating other-worldly long exposure shots, this filter cuts ten stops of light, so a 1/60sec exposure would be extended to 15secs, smoothing the sea’s surface detail.
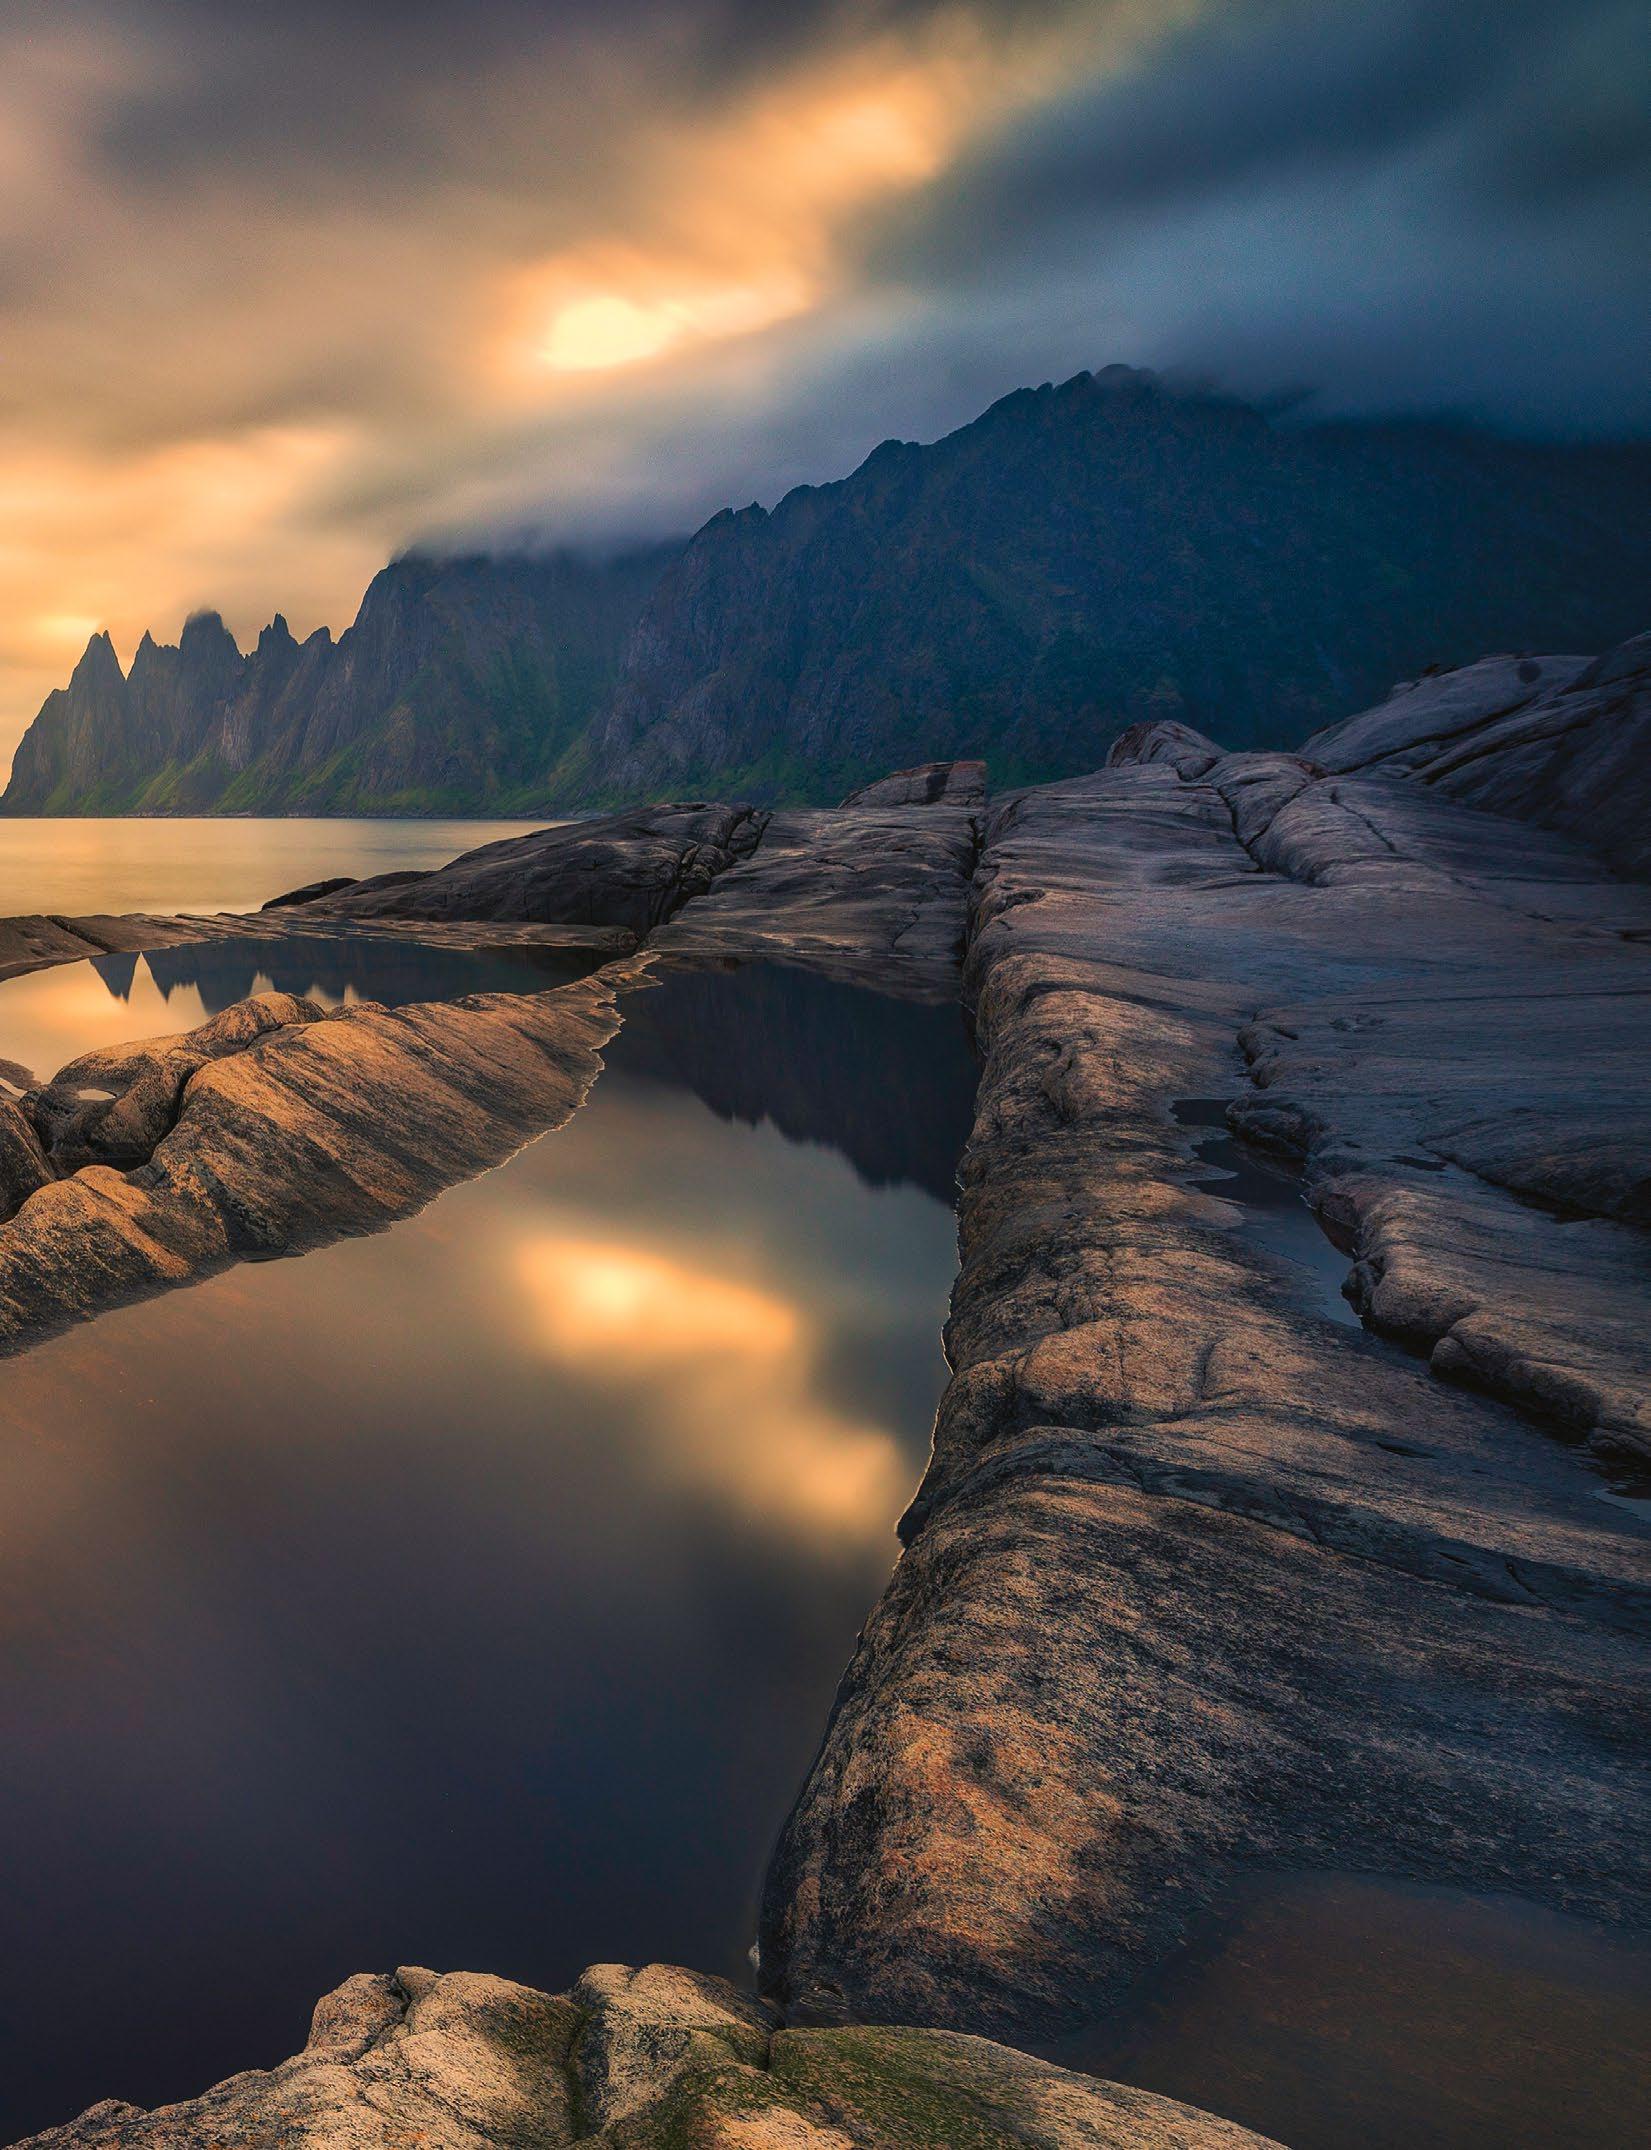
VARIABLE ND


The challenge with a 10-stop filter is that it renders the viewfinder useless. A variable ND usually allows 2 to 8 stops of reduction, but with easier, quicker composition.
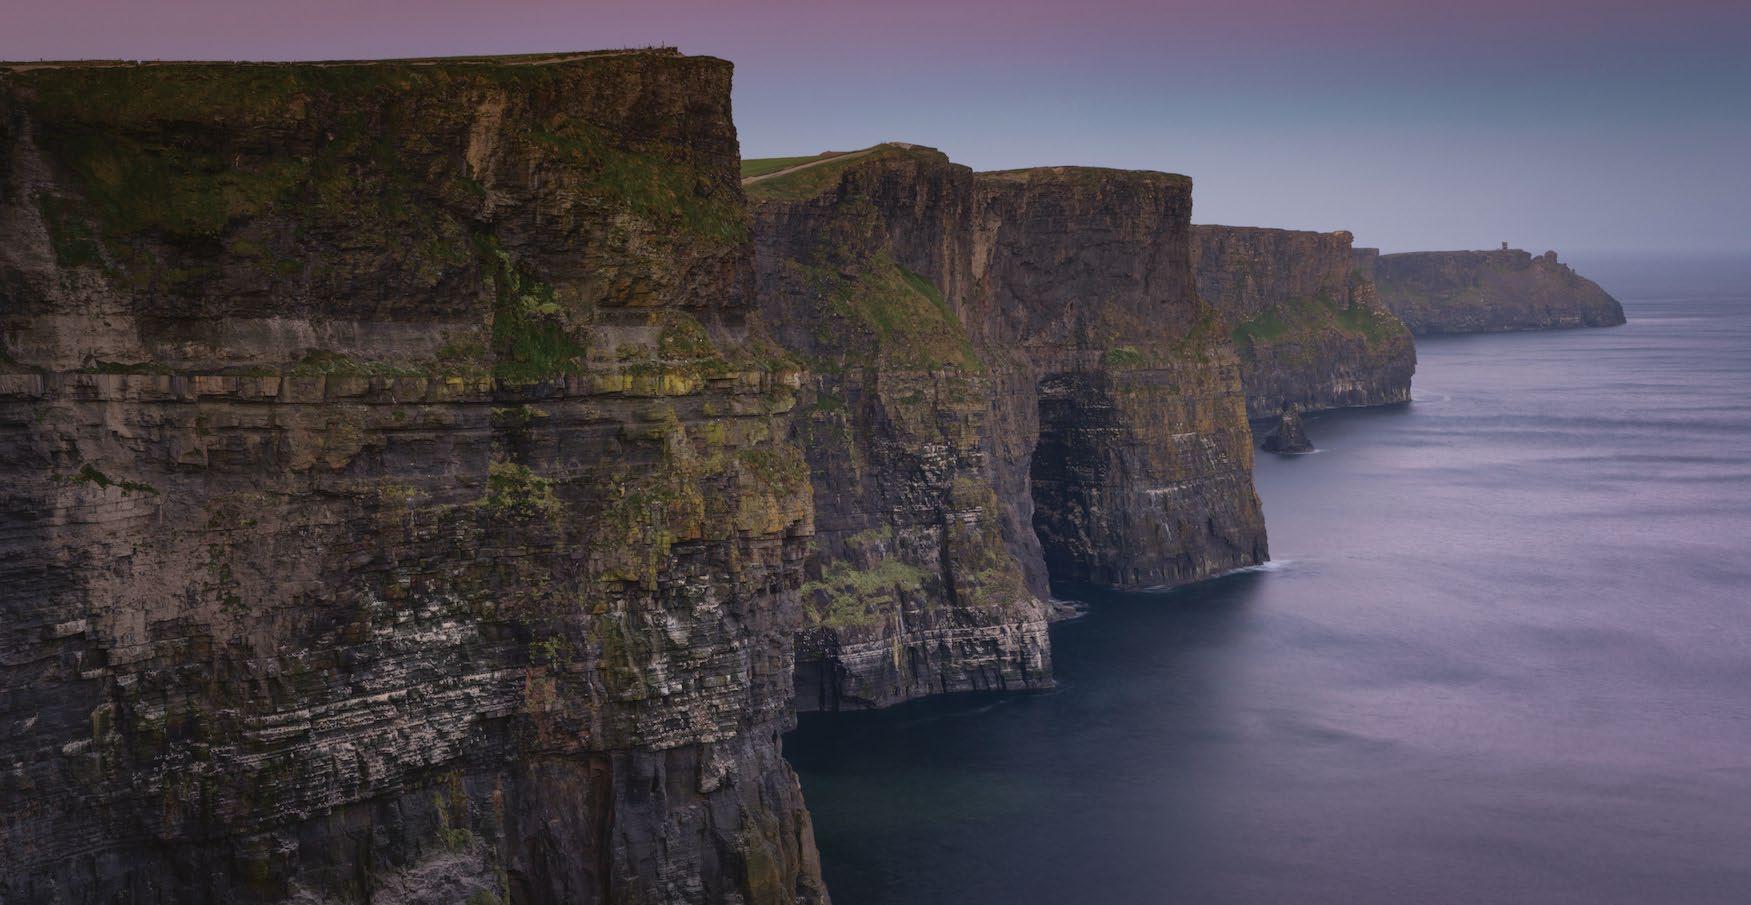
HARDWARE GRADS
When using a strong ND the sky will still be brighter than the foreground. Taking bracketed multisecond exposures is timeconsuming, so physical ND grads can speed up your workflow.
SECURE TRIPOD (WEIGHT HOOKS, FEET)
The best tripods for coastal photography feature a hook for weight attachment, providing added stability, plus interchangeable feet –wider types for rocky shores and spikes for wet sand.
BALL HEAD
When shooting a complex environment in changeable light, have a tripod head that allows rapid recomposition and camera movement. A heavy-duty ball head enables you to make quick changes in orientation and pitch.
Your choice of kit for a given shoot is heavily influenced by the location
© Max Malloy
89 COASTAL LANDSCAPES 89
© Cristian Kirshbom
Master angles and lighting
Learn to understand the relationship between shooting angle and lighting style for shadow and highlight control
The main element of a coastal landscape scene is the way in which the land interacts with the ocean. This boundary between solid and fluid landscape features is what gives coastal shots energy and intrigue, so it is important to focus on emphasising this relationship. If it is not clearly visible or is given insufficient coverage in the frame, this can produce images that fail to engage the viewer, since their expectations are not met.
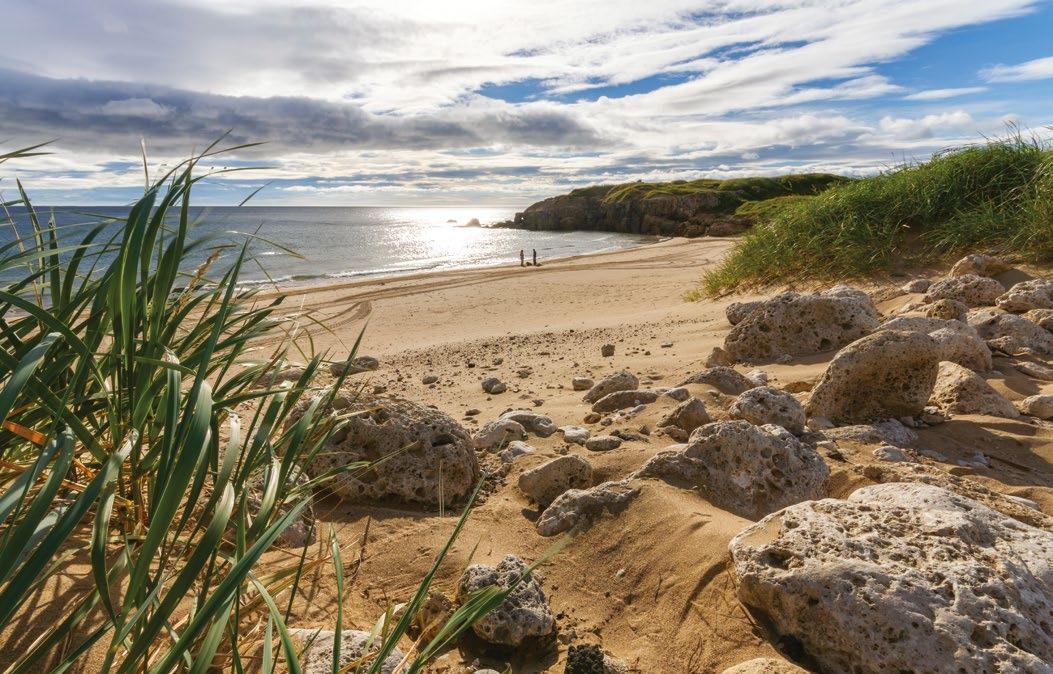
Beach scenes are also filled with textural contrasts that provide an endless variety of image opportunities. The marked difference in texture between a sandy beach, frothy waves and streaky sky adds depth to the scene and is one of the draws of coastal landscapes to which photographers flock. The success with which these qualities are captured effectively
Time your shoot Different times of day offer various lighting options– but they all come with challenges
PRE-DAWN
Pros: The first ‘blue hour’ of the day provides soft illumination, as the sun is not directly visible in the frame. This makes contrast management of long exposures easier.
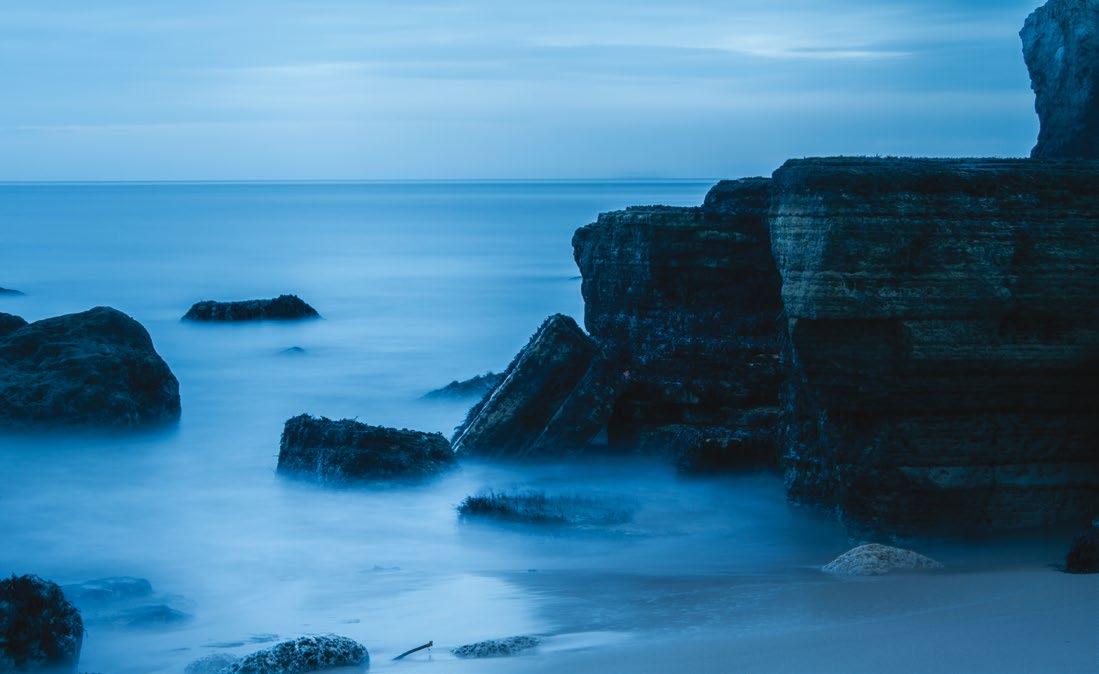
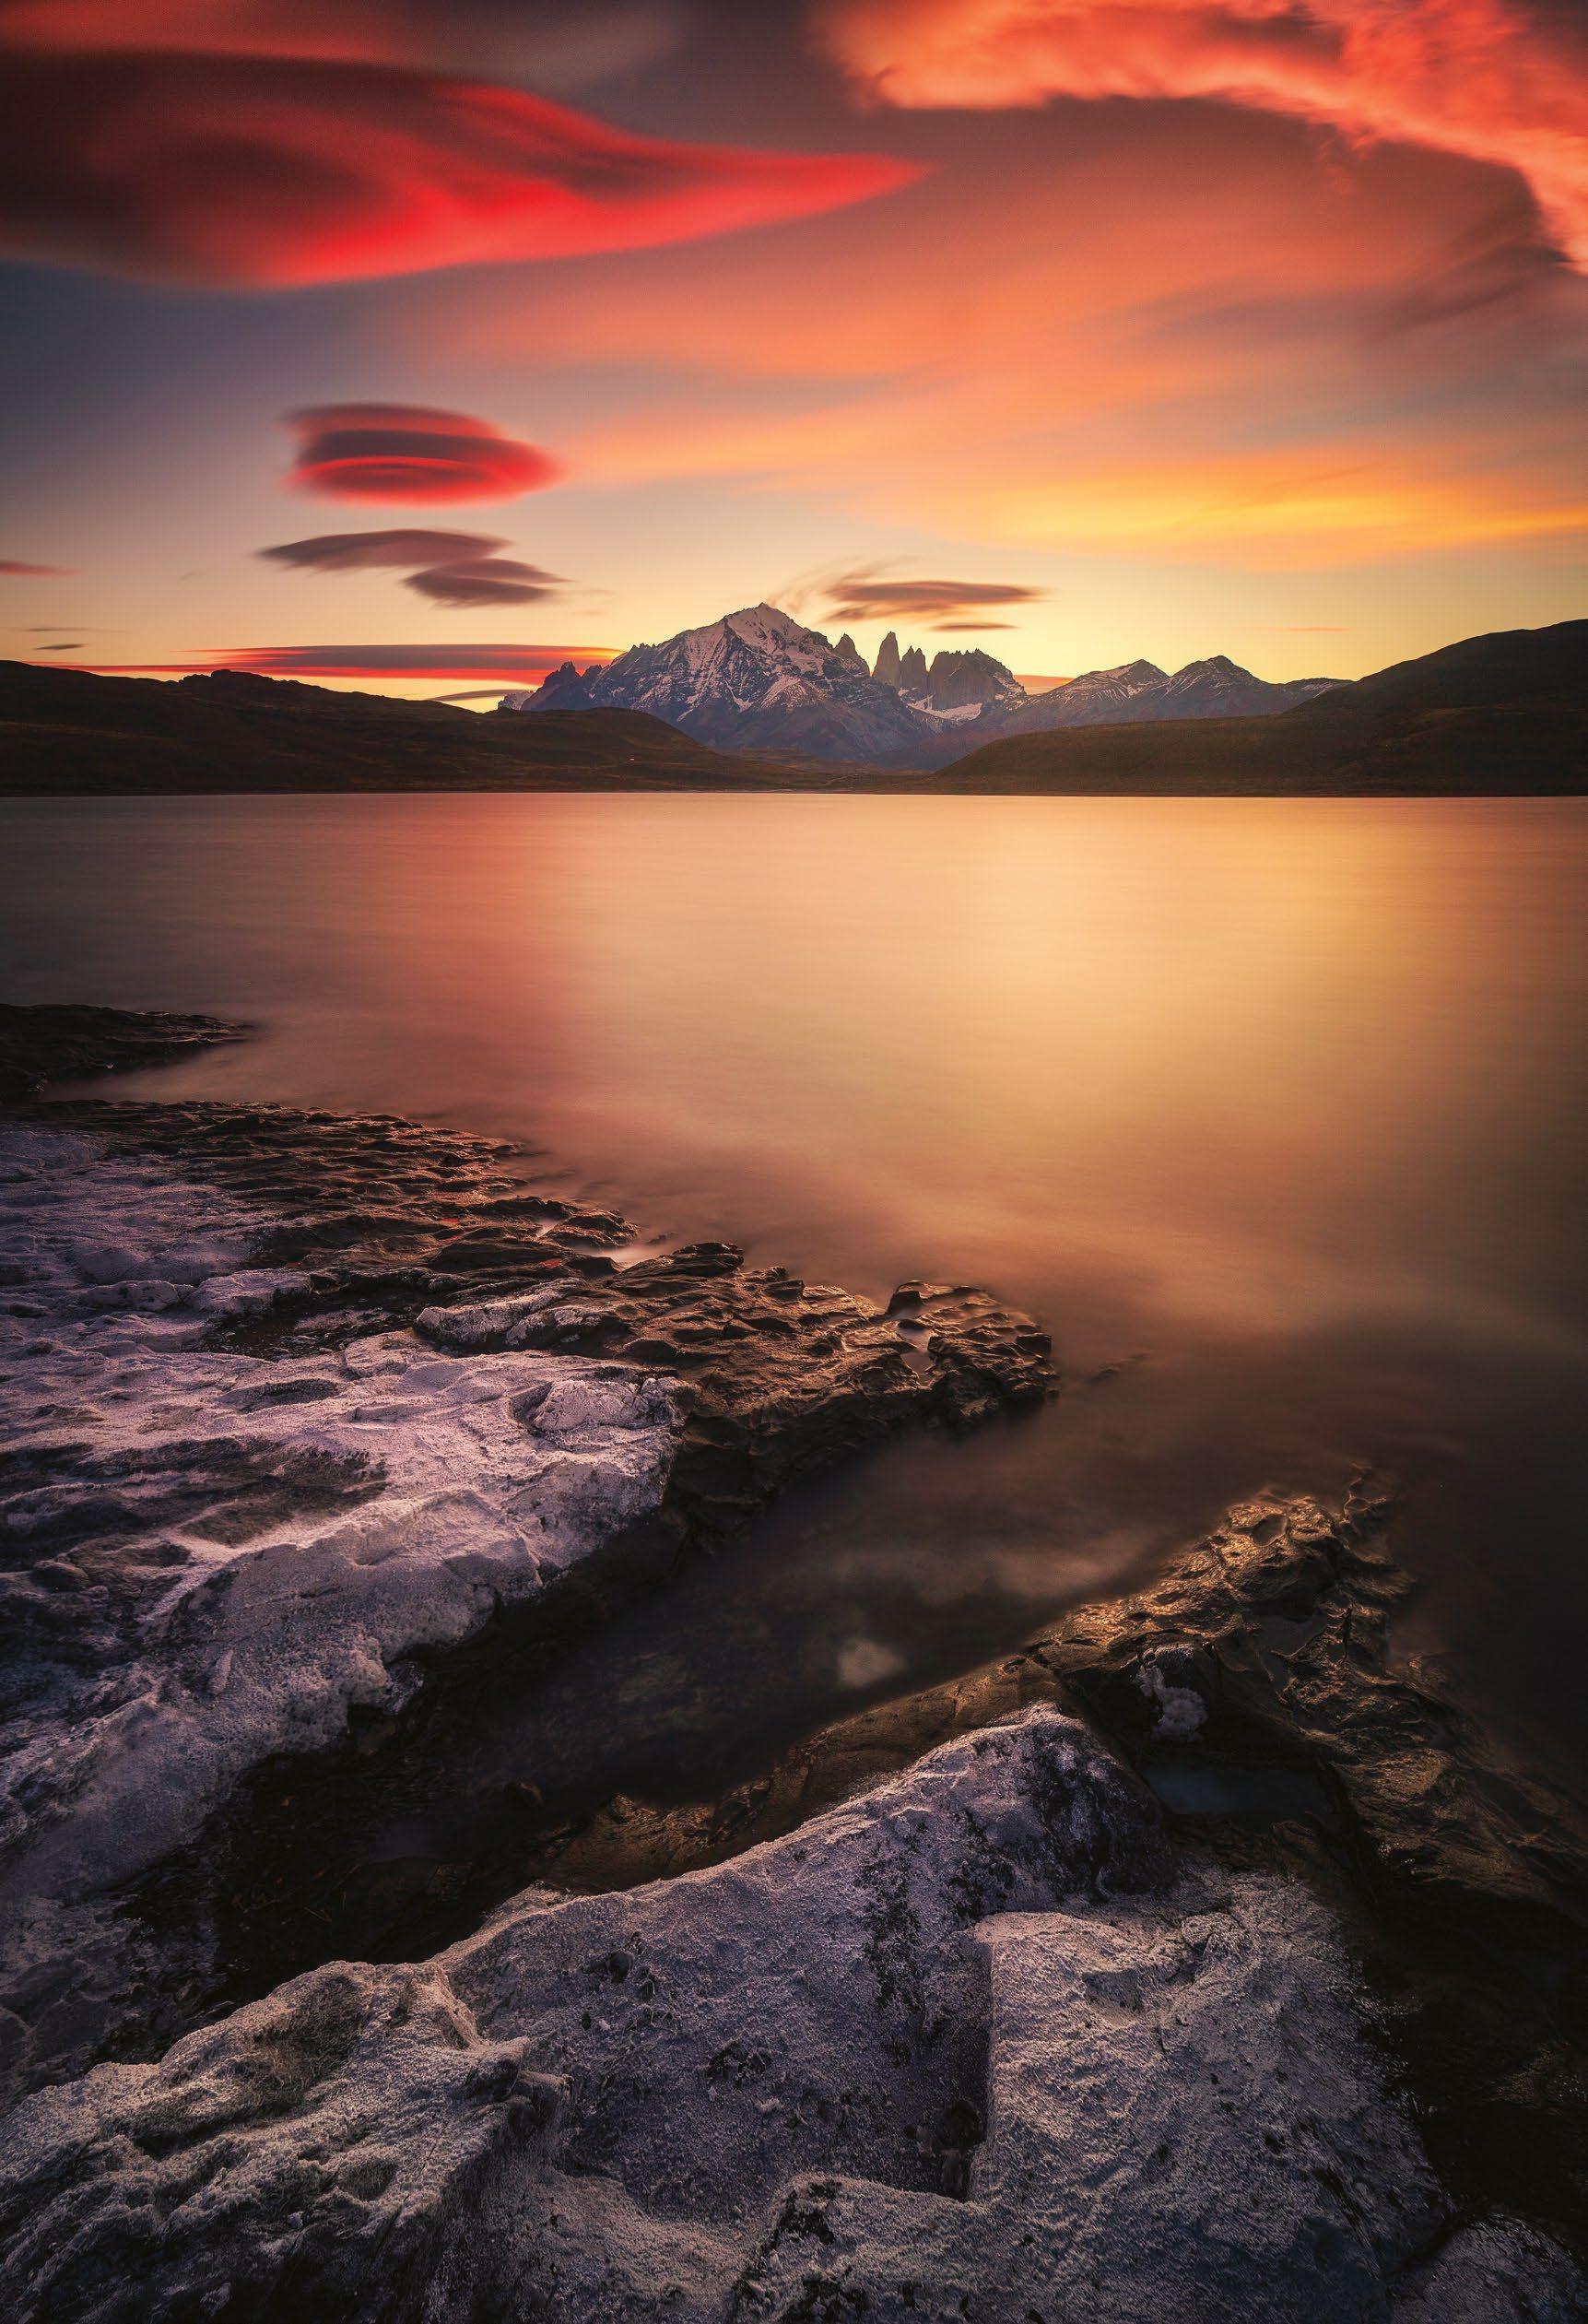
Cons: Unless you know an environment well, the low light can make composition a challenge. The softer shadows don’t pick out details effectively, potentially creating flat images.
SUNRISE
Pros: As the sun appears over the horizon the clouds and middleground pick up an attractive glow, which highlights sea spray and foam for an airy, high-key look.
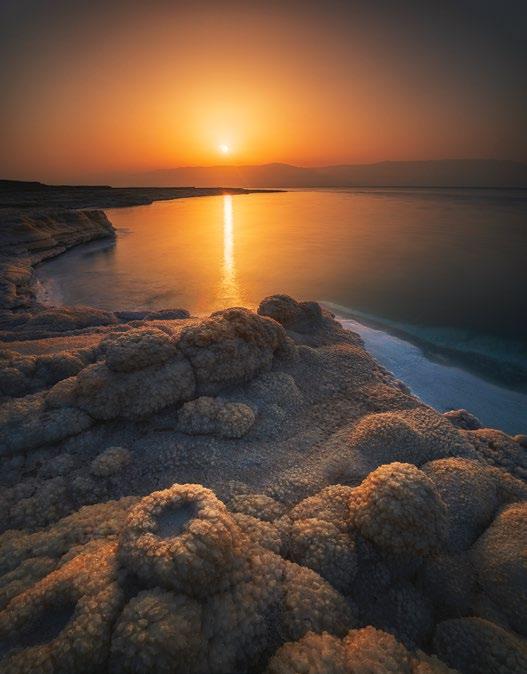
Cons: The window for capturing the directional golden light before the light intensity grows too high is limited – sometimes the light becomes too harsh after only three or four minutes.
MORNING
Pros: Depending on cloud cover, early morning light can be useful for capturing high-contrast monochrome images of coastal textures, or with the correct ND filters, black-and-white long exposures. Cons: Light from an hour after sunrise until early afternoon is often too harsh for coastal photography. Strong contrast makes highlight clipping on water a challenge, while deep shadows are unattractive.
Morning
Pre-dawn Sunrise
© Cristian Kirshbom
© Peter Fenech
© Cristian Kirshbom
90 TECHNIQUES
© Peter Fenech
depends greatly on the photographer’s choice of exposure, as this dictates how movement is rendered in the image. Shutter speed obviously plays a role in the potential for sharpness, especially in the challenging environment of a shoreline, where stabilisation is almost always required to produce a crisp texture in rocks and other foreground detail. However, the duration of the exposure also influences lighting and tonality. A longer exposure will highlight the contrasts of stationary and moving scene elements but will also introduce a softer, painterly quality to the lighting style, with a smoother gradation from highlight to shadow. This can be used to moderate how colour is reproduced, which is an essential consideration in a coastal scene. Reflected light from the ocean surface strongly influences the overall colour palette of the image, so by understanding the relationship between exposure and colour intensity we can begin to take creative control over how the scene translates into an image. Regarding compositional strategy, it is important to consider all areas of the frame – perhaps even more so than for other landscape subjects. The nature of beaches and shorelines is such that there’s a great deal of variance in the density of foreground detail, so adaptability is critical. Following a set procedure for lens choice, frame orientation and horizon placement provides a basic framework from which we can build more creative compositions.
Compose stunning beach scenes

Overcome the challenges of composing at coastal locations for clean yet impactful framing
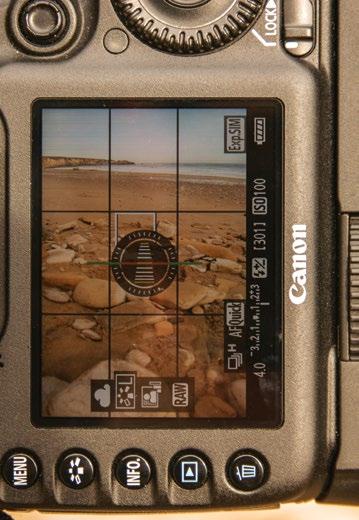
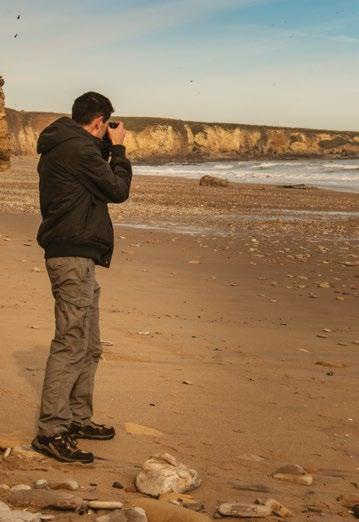

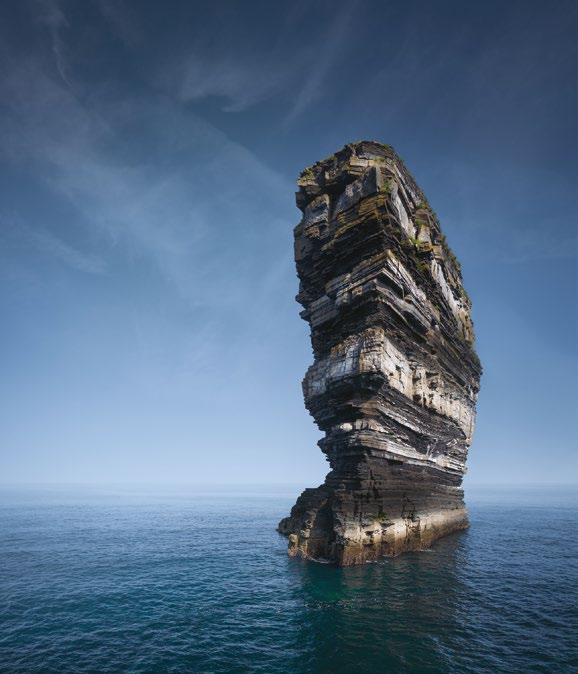
SHOOT HANDHELD
When you arrive on location, start by using a standard zoom lens to find the aspects of the scene you want to focus on. Working without a tripod at this stage gives you freedom of movement, enabling you to quickly try out the extremes of perspective.
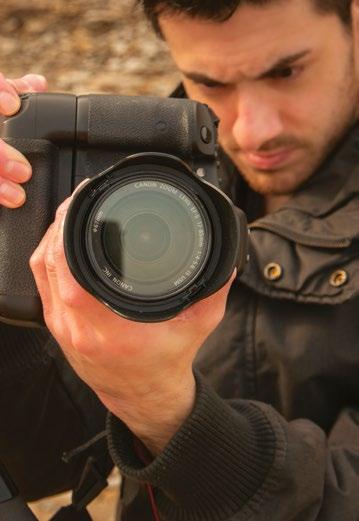
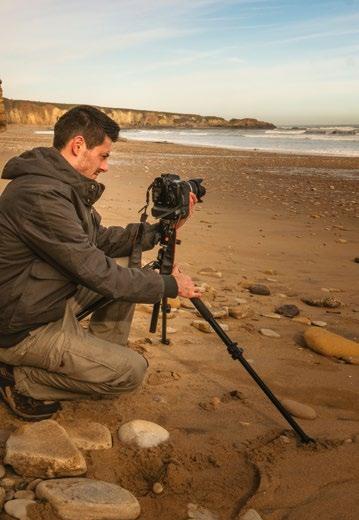
EXPERIMENT WITH PITCH
Once you’ve found a position to study your subject from, adjust the vertical angle of the camera. Pitch the lens up to exclude most of the foreground and reveal sky detail, then tilt downwards to limit sky dominance and show more close foreground elements.
EXPERIMENT WITH DISTANCE
When shooting in portrait format, take care to observe how this impacts the distribution of light and shadow across every area of the frame
AFTERNOON
Pros: When the sun is below its zenith but above the horizon, it has a more directional angle than midday so is perfect for emphasising sand patterns or rock detail, but has softer, warmer properties.
Cons: One of the biggest challenges for photographers is the prevalence of people –beaches are busier in the afternoons than the morning, making clear compositions difficult.
Vary the distance between the lens and objects in the close foreground, and see the effect on the impression of distance to background detail. This can create an inclusive wide-angle view while maintaining frame-wide interest, with no empty space.
SUNSET
Pros: An advantage of sunset over sunrise is that colours are warmer due to greater levels of particulates in the atmosphere, in certain locations. Furthermore, inverse to dawn, the light grows softer as time passes.
Cons: There’s a higher chance of wind during the later afternoon and evening than at sunrise, due to warmer ground level air allowing high level winds to descend.
LOWER THE TRIPOD

Set up on a camera support and begin by lowering the tripod to below waist level. This provides a good starting point for creative framing, as we will be shooting a view most people wouldn’t see when they’re simply standing in the scene.
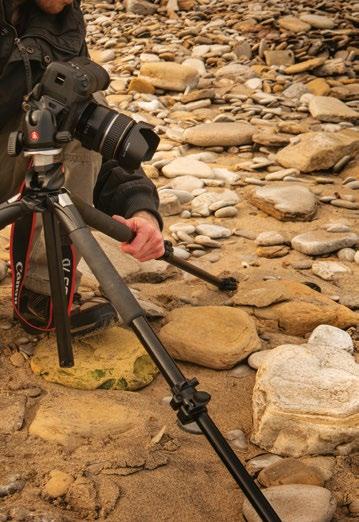
CHANGE ORIENTATION
Once the balance of beach and sky has been found, experiment with portrait format. This will exaggerate depth if the camera’s pitched down, and height if it’s pitched up. A tall frame successfully compliments any close objects.
CLEAN UP FRAMING
The final step is to ensure a level horizon. Since the actual horizon line will likely be visible in most beach scenes, this is a critical guarantee. Checking at the final stage is advisable, in case there has been a shift while composition was being perfected.
TWILIGHT
Pros: The second ‘blue hour’ follows daylight, so we have more time to plan compositions, allowing us to capture moody, cool images with easier set-up procedures.
Cons: Light can fade quickly once the sun has set. Shooting can continue for up to an hour, but this raises safety issues, especially with rising tides and slippery surfaces.
Afternoon Sunset Twilight
Left Shooting portrait
x6 © Peter Fenech
© Cristian Kirshbom © Peter Fenech
3 4 6 2 5 1 91 COASTAL LANDSCAPES
© Max Malloy
Pro focus: Max Malloy

Max discusses the difficulties of shooting coasts
Address core challenges
Learn to identify the biggest causes of failed coastal images and apply pro solutions to lift them
You’re likely to come across many inherent challenges when you shoot landscapes containing water. Beach scenes in particular stand out as problematic under certain conditions, as they often contain high levels of detail, and varying shapes and form across the the scene. Plus, there’s a difficulty in managing exposure and the ephemeral nature of elements caused by the motion of the water.
Some of these challenges are due to the nature of the landscapes themselves, especially when there are extreme contrasts of exposure between water and land elements. But others are also caused by the lighting in which we often choose to shoot. As with many outdoor scenes, the favourite times to make images at the coast are dawn and dusk, as these provide warmer, more directional lighting that really emphasises texture and shape in the scenes.
The low sun does introduce a strong light source into the frame, however, which means you have to be extra careful about using different camera settings to compensate for the reflectivity of the ocean and sand –surfaces that are in close proximity within the composition. Any steep brightness gradients, left unchecked, can push the exposure beyond
Troubleshoot images
the camera’s dynamic range, and if this happens you’ll lose detail through clipping.
The lower levels of ambient light also make it more likely that you’ll encounter camera shake, even when using a tripod. This makes capturing sharp detail very difficult when areas of the shot are continuously in motion.
This movement is the factor that arguably provides the biggest challenge. Coastal landscapes are very changeable environments – the constant shift of the sand or rocks means that a scene is rarely the same on any two days, forcing compositional adjustment. Where there may have been good lead-in foreground elements on one shoot, there may be a large expanse of smooth sand the next. Either condition can benefit or spoil a shot, depending on the choice of frame proportions, which must be decided on an individual image by image basis.
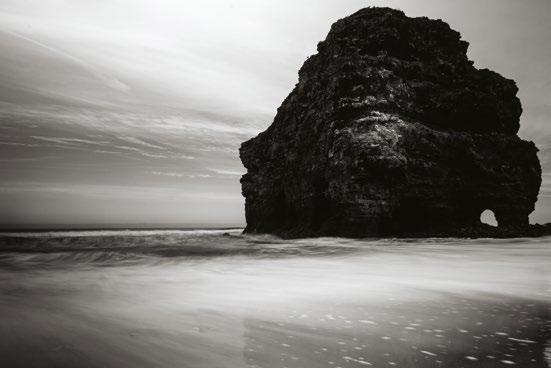
It’s important to be able to identify new obstacles and adapt your approach for each new frame, which will often change mid-way through shooting if a large wave rearranges our carefully aligned composition. Learning to anticipate these challenges and be better prepared to address them on the go will help you to produce better coastal images.
Study our image refinement workshop to improve composition and exposure
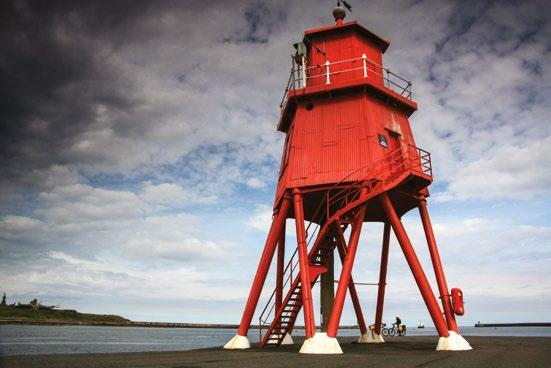
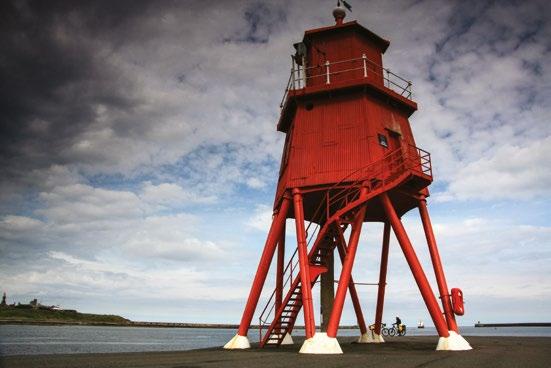
ARTIFICIAL DARKENING
Cliffs and lighthouses are two of the biggest problems when attempting to control exposure. Since they break the horizon, the use of ND grad filters is difficult, as they unnaturally darken the tall elements. A simple software gradient creates a similar problem.
NATURAL TRANSITION
Angling the gradient, either in software or by rotating the filter holder, will better align the transition with the direction of the cliff topography. Using a soft grad will make the darkening less obvious. A layer mask allows exposure blending to selectively remove software effects.
FLOODED DETAIL
A mistimed shot can result in most of the foreground being inundated by the sea, limiting composition options, since the foreground is largely missing. Conversely, at low tide the water may be too far back to show movement, creating static frames.
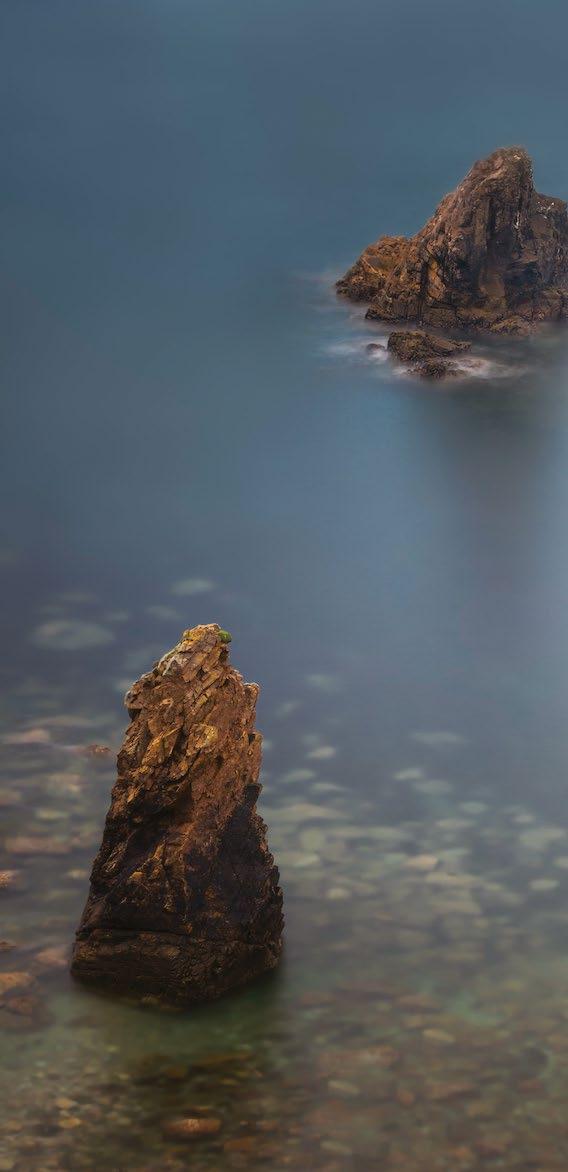
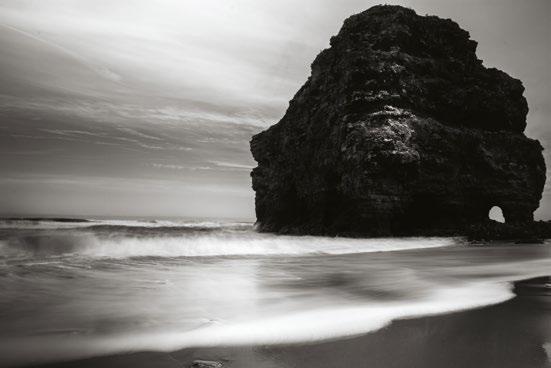
SLOW IT DOWN
In either circumstance, utilising a slower shutter speed is a potential solution. If you are unable to be on location at the ideal tide position, an extended exposure will make the most of water motion or make a bigger feature of cloud movement.
92 TECHNIQUES
How long have you been a photographer? Tell us a bit about yourself.
I only started around seven years back, so I’m quite new to the industry, but I have a background in arts so I suppose the roots for this have been there for a long time. I am Latvian-born and moved
to Ireland 15 years back. For the first few years, I was travelling a lot in search of all the magical landscapes – the west coast was occupying all my evenings and weekends. Then, in the early stages of Instagram emerging here in Ireland, I thought other people might enjoy it too – locals and
internationals – and that’s how it all started. In time, it made me create a wonderful community, a network of friends, and I also got me to meet my future wife!
What do you find most challenging about shooting coastal scenes and seascapes?
After all these years, having been to many places, both popular and hidden gems, I think that it has become challenging to find new locations and bring something unique. However, I always think that every location changes between days.
Joaquín Sorolla, a wonderful ‘master of light’ painter, used to start a painting, and if the day would finish, he would wait as long as it took to find the same light again to finish the painting (it’s why some of his paintings are still unfinished). I try to see the landscape with different eyes all the time, and I quite enjoy that, but I guess all other photographers are doing the same.
How is your photographic approach different when shooting coastal scenes to shooting inland locations?
I suppose it’s about the composition more than anything, and how inspired I am at the time of shooting. I usually go to a location (it could be coastal or inland) for a whole weekend and only have one photo at the end of it, but I am still very happy. I love to shoot coastal scenes with a drone – it’s a bit like sitting on a cloud and then looking down!
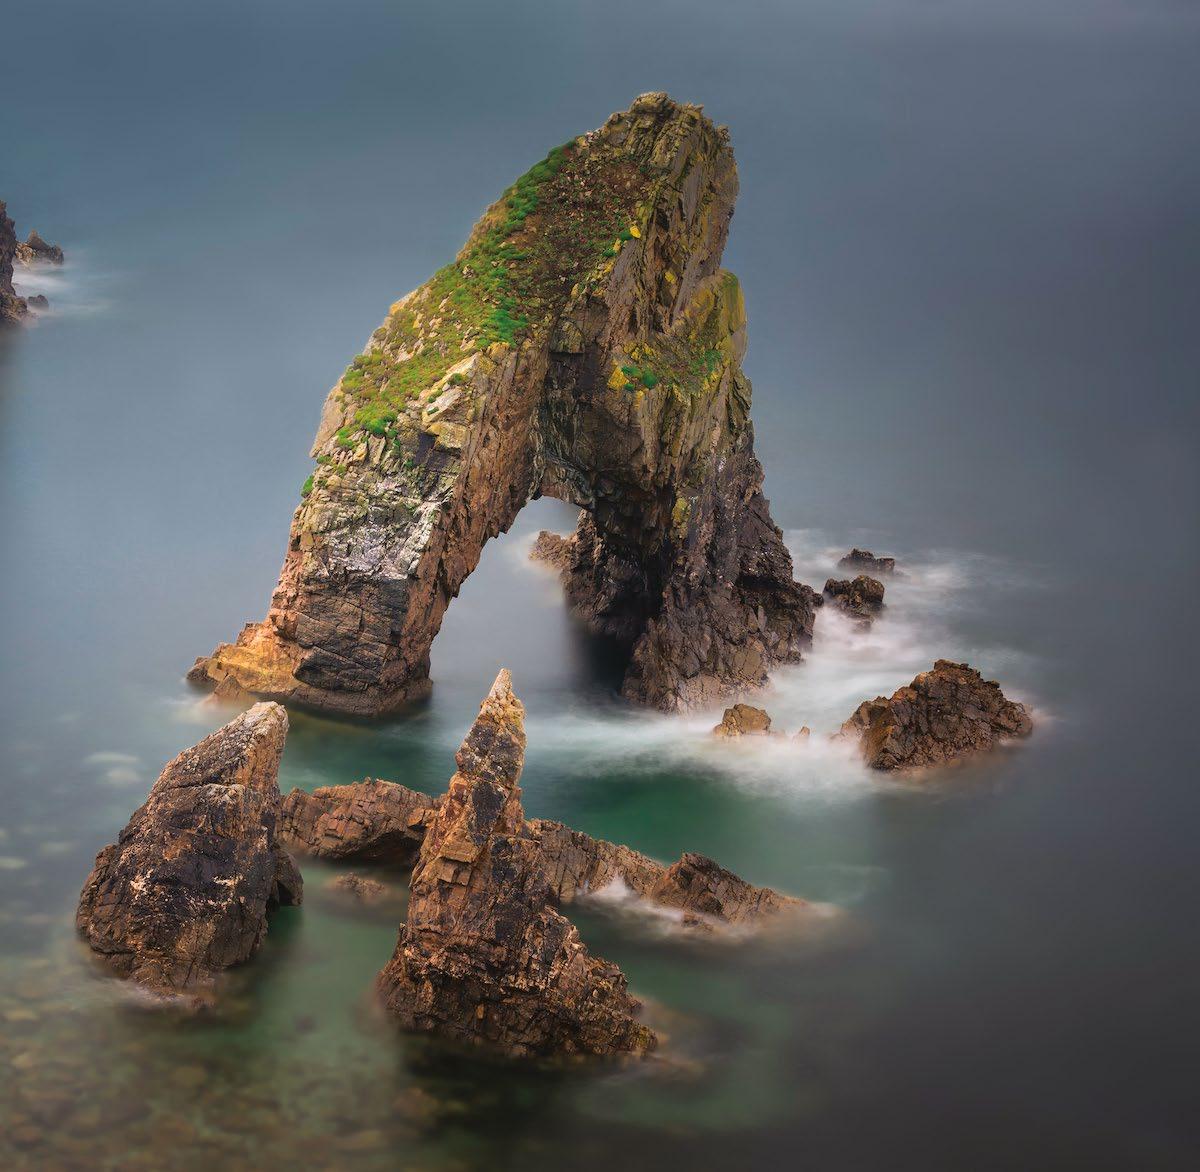
To find more of Max Malloy’s photography, go to ihaveadarksoul.com
Left Creative context
One of the challenges of coastal photography is the flat nature of the landscape. By shooting down on a subject, more depth can be introduced while minimising distractions © Max
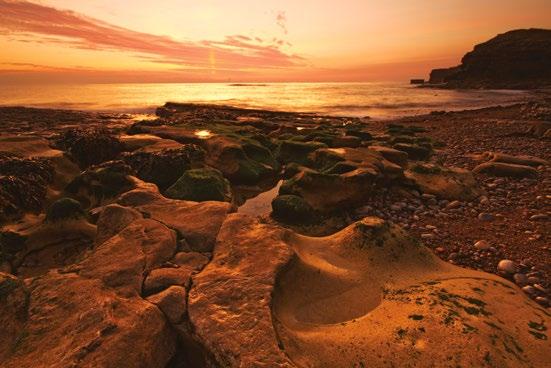
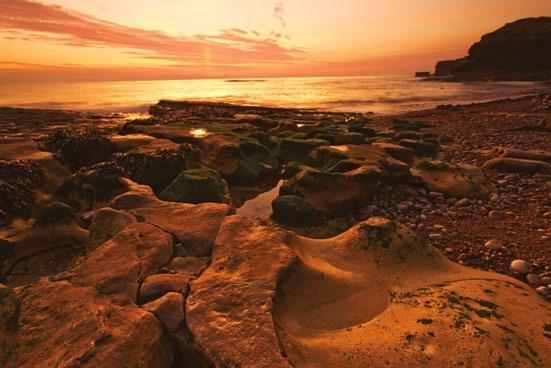
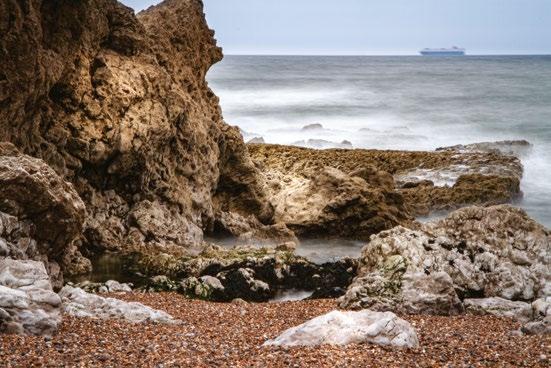
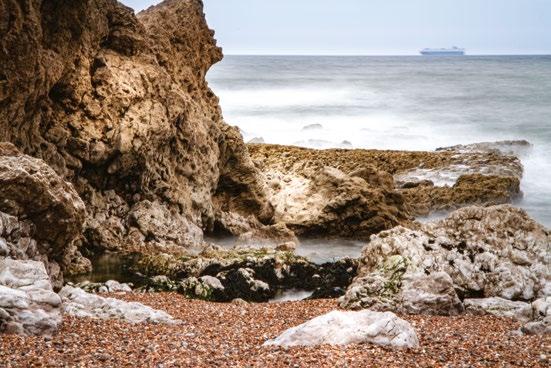
CROOKED COMPOSITION
While it might sound like an obvious error for a professional, the contrast of vertical and horizontal lines in a coastal scene can cause confusion. In coastal scenes the horizon line is often visible, making unlevel camera setups challenging to hide.
LEVEL ALIGNMENT
Turn on the guides on your camera’s rear LCD and use these to ensure the horizon line is level. In addition, make use of the virtual horizon or electronic level to gauge the pitch and yaw angle of the lens, in order to achieve a more level composition.
CLIPPING IN MOTION
When dealing with such wide extremes of exposure, it is easy to overlook small areas of missing detail. In this case the reflectivity of the water has not been accounted for, resulting in unattractive blown highlights on the surface.
EVEN BRIGHTNESS
By using Spot metering, taking a reading from the water’s surface and using 1/3 stop of positive exposure compensation, severe underexposure is avoided, but highlight clipping is prevented. Turn on highlight alerts or the histogram to identify problem areas.
93
Malloy x8 © Peter Fenech
COASTAL LANDSCAPES
Introduce differential motion
Use a variable ND filter to control long exposure effects
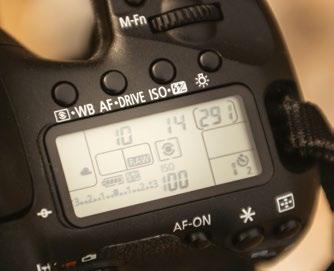
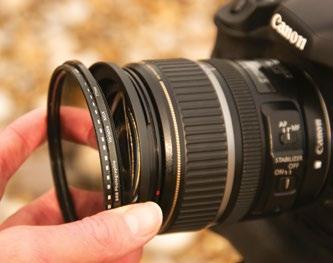
1 Attach filter Screw in the circular filter using the lens thread. Variable NDs can be expensive, so you can use stepping rings to adapt a larger model to smaller lenses. In this case a 77mm filter was adapted to a 67mm thread.
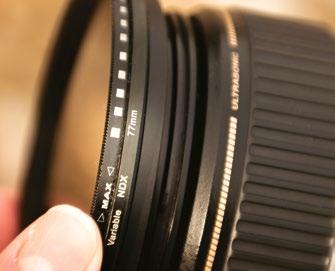
2 Set lowest strength
One advantage of the variable ND is that darkening can be set for composition. Move the outer ring to the minimum position in order to compose your image.
3 Set aperture
Rotate the filter ring to cut between 3 and 4 stops of light. This will lengthen the exposure to introduce some motion in waves without stripping all surface detail – a problem with ‘Big Stopper’ filters.
4 Increase filtration
Turn the filter to the maximum setting for the full ND factor, to provide an exposure of several seconds. This will allow slowermoving clouds to be blurred. These two images can then be merged in software.
Play to the most attractive elements
Above Go against convention
Consider breaking convention and working additional subject matter in. Here the figure adds interest with the coastal scene a backdrop
Right Desaturated backlight
Using the correct combination of aperture, exposure and angle, a low sun can introduce colour and atmosphere, even if it’s not directly visible
Shoot creative coasts
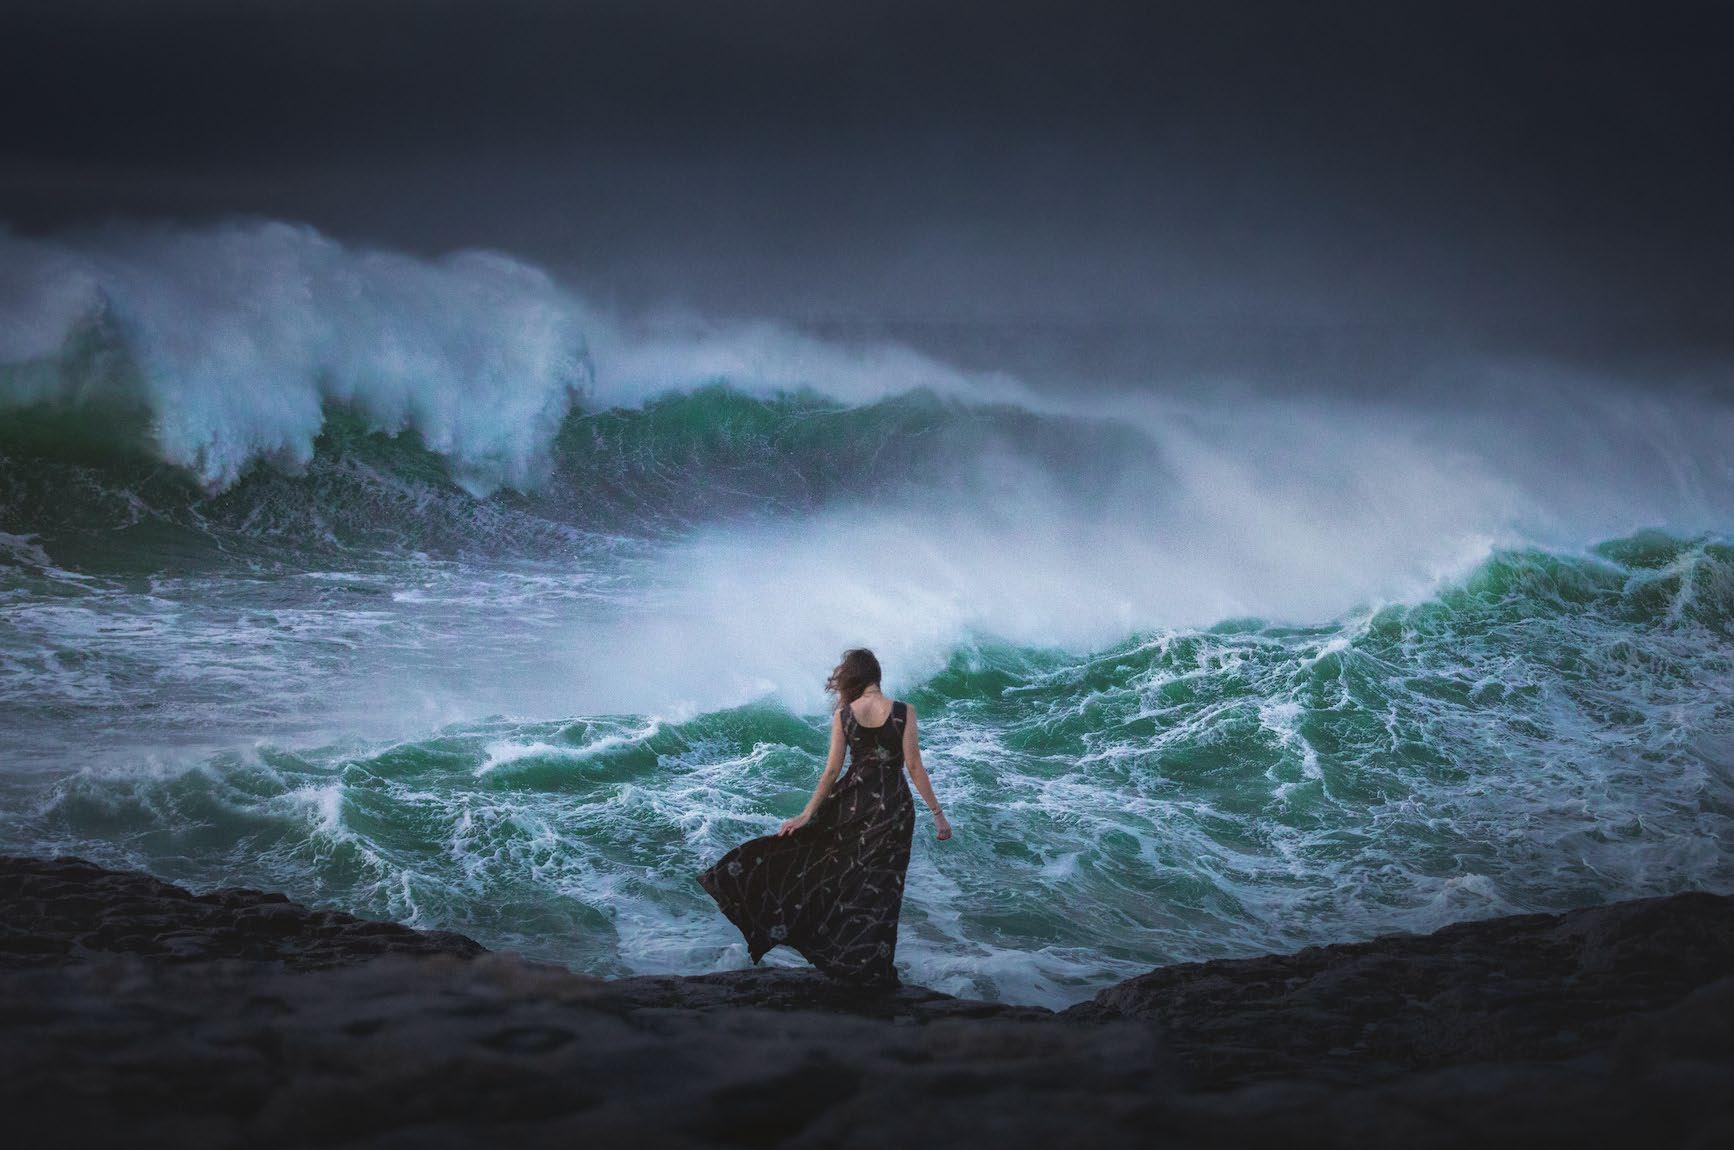

How to produce images that take advantage of a location’s environmental characteristics
As with other landscape images, coastal scenes are an often-photographed subject, so it is easy to assume there is little room to produce images that stand out as truly unique. It’s true that there is a limited number of elements the photographer is able to control in a coastal landscape – namely lighting, composition and timing (with reference to low and high tides) – which can lead us to adopt a fairly procedural approach to each shot. In many cases we arrive on location, set up our tripod, attach an ND filter and begin shooting. While this may produce attractive images, the fruits of such a formula are photos that are overly standardised in nature and serve as little more than records of a particular location.
If we are to aim for something a little more creative, we have to produce images that are less literal in their representation of the landscape or play to the most attractive elements of the scene, such as movement or depth. We must therefore make these the focus of each shot.
To start the creative process, first consider focal length choice, as this has a strong influence on viewer attention. How the scene
is cropped in-camera controls the balance of foreground and background elements, which can be used to emphasise a particular part of the wider environment. This can be effective when shooting in a well-photographed location, where it seems all of the best angles for capturing a wider view have already been studied many times. Selecting a longer lens and isolating an attractive rock, sea stack or pool to lend it greater dominance will provide a surprising, new perspective on the more recognisable elements. In this case we can use the familiarity of the location to viewers to our advantage – we can easily produce unexpected framing.
Next, try varying your position relative to the sun to alter the balance and distribution of highlights and shadows within the frame boundaries. This is where multiple visits to a coastal location are advantageous – often there are limits to where we can position our camera, due to the flat nature of beaches and presence of cliffs behind us. Visiting in different seasons will place the sun in different positions, allowing experimentation with lighting direction.
x4
© Peter Fenech
94 TECHNIQUES
© Max Malloy
Use flare creatively
Introduce attractive washes of light and colour for an airy, back-lit atmosphere
1 Choose the right optic Your lens selection will depend on the intensity of the sunlight – if it is visible in the scene itself a wide-angle lens will suffice, but if the sun is out of the frame a longer lens is needed. A wide aperture is also required.
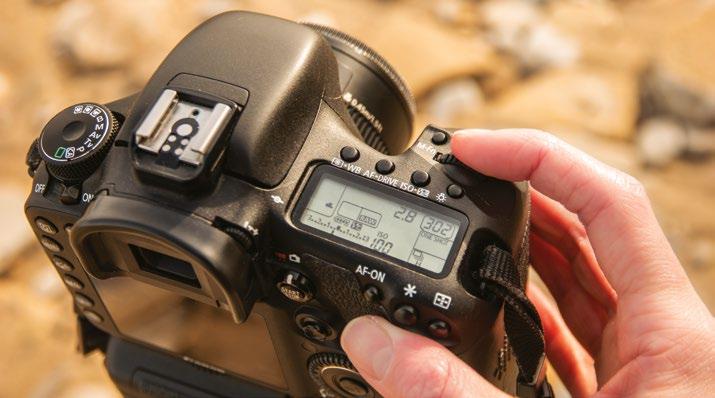
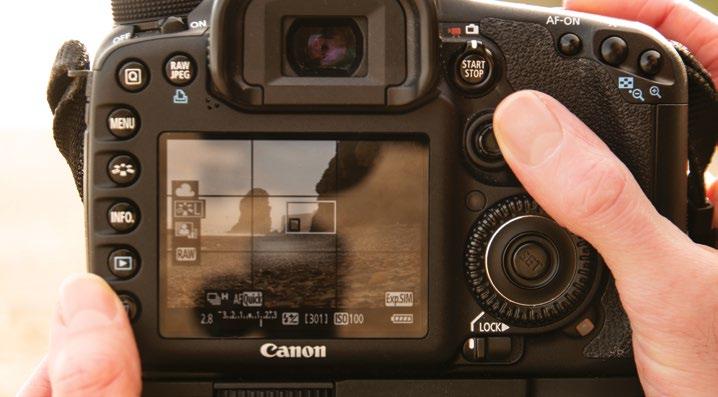
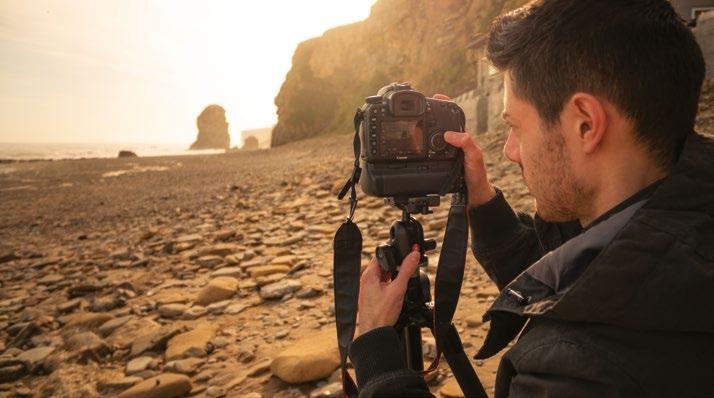
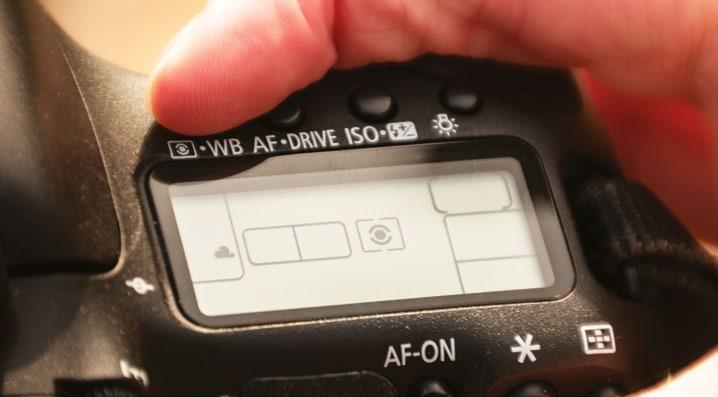
2 Select your angle Aim the camera so that the sun is positioned to one side of the frame, or just out of shot, illuminating the scene from an angle. Be sure that you consider your safety and do not look directly at the sun through the viewfinder.
3 Set the aperture Set an aperture of around f/5.6 to begin, incrementally opening up towards the maximum – f/2.8 or wider – to balance of depth of field and flare. The wider lens opening gives the light a less defined shape, for the washed-out effect.
4 Find a base exposure It’s important to avoid too many blown highlights or blacked shadows, although some clipping near the sun is acceptable. Change the metering mode to Partial and measure from foreground highlights to create a bright image, while keeping the tonality mostly in range.
5 Arrange composition It is critical to retain a strong subject in your image, so check that your choice of angle compliments the scene elements. The attraction of this effect is that the soft lighting contrasts with sharp coastal features, so look for framing that subtly balances these opposing textures.
6 Adjust exposure Use exposure compensation to brighten or darken the image. A brighter exposure will emphasise the washed-out style, but this can be at the expense of colour saturation. Use negative compensation to boost colour strength and prevent widespread highlight clipping.
©
95 COASTAL LANDSCAPES
x7
Peter Fenech
Employ essential processing techniques
Learn when and how to apply software processes to maximise the impact of detail and colour
In any challenging shooting environment, some level of post-processing will be necessary to produce a clean, sharp final image, free from distractions and with the level of image quality expected from today’s technology. Image editing is driven by personal tastes, but there are several core actions that should be considered for coastal images.
Firstly, it will often be necessary to correct uneven tonality, caused by the high contrast from the uneven terrain – cliffs often block sunlight, which casts shadows alongside bright highlights. Secondly, this high degree of light variance often results in a wide spectrum of colour temperatures. RAW processing offers the ideal solution, as many applications allow changes in temperature and tint.
Coastal landscapes are testing environments for our equipment and our technique. Dust, water spray and wind all combine to make it a challenge to capture images that are free from distractions, caused by contaminants on the sensor or lens. A standard procedure is to analyse images for water spots and then remove these in software.
When you edit images of coastal scenes, there are certain aspects you need to be mindful of. These landscapes often feature defined edges – foreground rocks, cliff tops – that are unforgiving of excessive sharpening. The same is true of highfrequency foreground detail, such as sand. Oversharpening will quickly introduce obvious halos, which may not be as visible in scenes with more varied textures –woodland being an example. A less extreme application of sharpening or localised effects is a better choice for seaside images.
Generally, global editing is less effective for these scenes, since there is such a variety of surface types visible, each with different reflective properties. An area of beach may require different treatment to a pool only several metres away.
To get the best coastal landscapes – more than for any other landscape type – it’s critical to align the shooting and processing methods to preserve highlight detail throughout your workflow, and faithfully capture colour in the final shot.
Editing in Lightroom
Learn the stepby step workflow for genera; coastal landscape images to balance exposure and colour
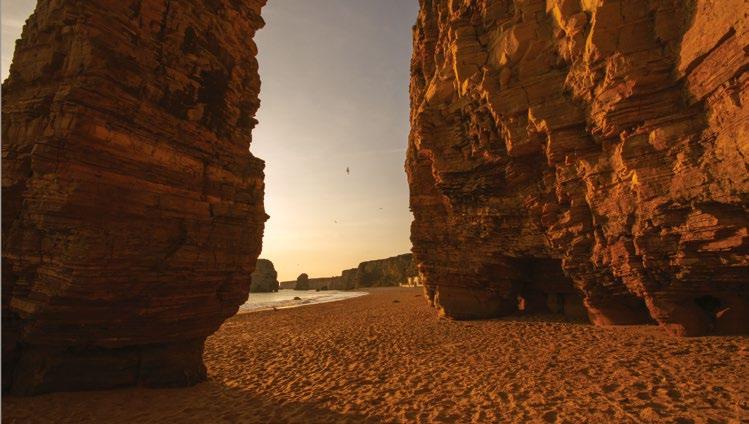
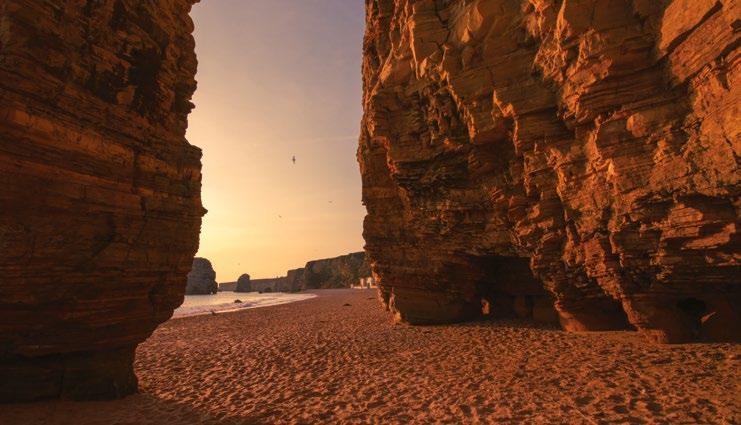
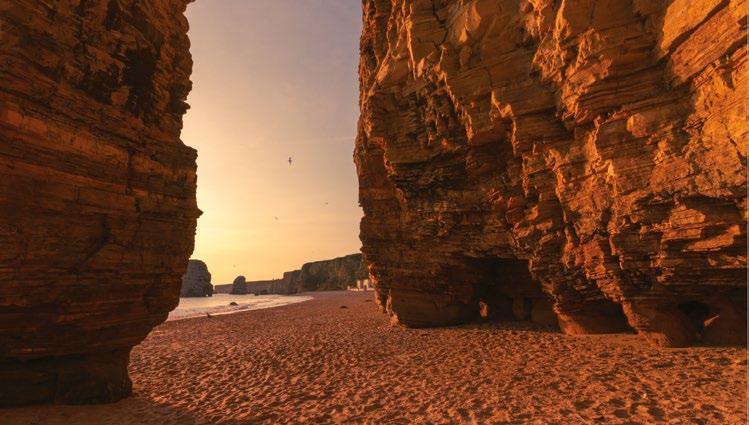
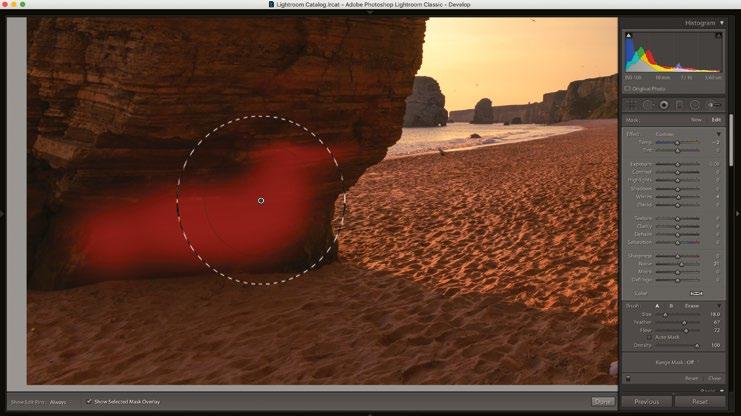
1 Adjust tonality In your RAW editor start by setting the black and white points to introduce some contrast, without clipping. Next, use the Highlights and Shadows sliders to compress the tonal range, drawing back detail in the brightest and darkest areas.
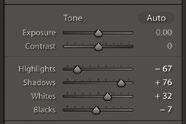
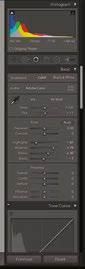
2 Set a colour theme Work on the colour in the shadows and highlights independently. Set the overall temperature and tint, then use Split Toning to warm or cool at either end of the range. This is useful for removing cool casts in the shadows.
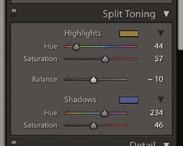
3 Apply lens corrections Apply standard lens corrections, or take manual control and remove distortion, chromatic aberration and correct converging verticals. Use advanced sliders to address edge fringing in highcontrast lighting.
The amount of sharpening and noise reduction required will vary greatly across the frame. In shadow areas, use the Adjustment brush in Lightroom to reduce noise where it is most prominent, and compensate with selective sharpening.
4 Selective adjustments
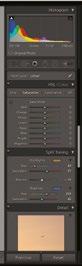
AFTER 96 TECHNIQUES
All images © Peter Fenech
BEFORE
Enhanced depth
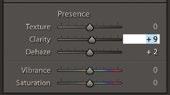

For the final image, the shadows were lifted and highlights dialled down for improved dynamic range. Increasing the whites has introduced depth-improving highlights and better local contrast
5 Adjust detail Use the Clarity slider to increase midtone contrast and bring out additional texture in rocks and sand. Next, either move the Dehaze slider to the right to create stronger contrast, or enhance a misty atmosphere by sliding it to the left.

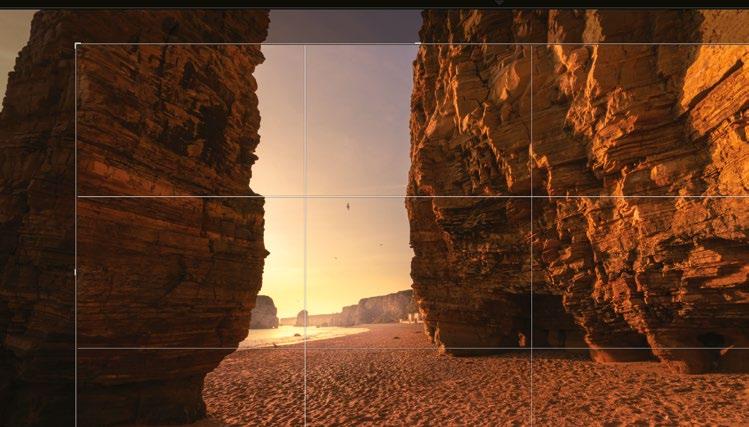
6 Enhance light Use the Adjustment brush to emphasise lighting effects. Increase temperature and exposure to brush over existing light beams or reflections, making them prominent and addding depth to the shot. Lower the clarity over glints for a dreamier style.
7 Consider crops As discussed, coastal compositions can be a challenge due to the flat nature of beaches and vertical nature of cliffs. Try various cropping choices to see which ratio best suits the scene. A 12x6 panoramic crop can exclude unnecessary sky.
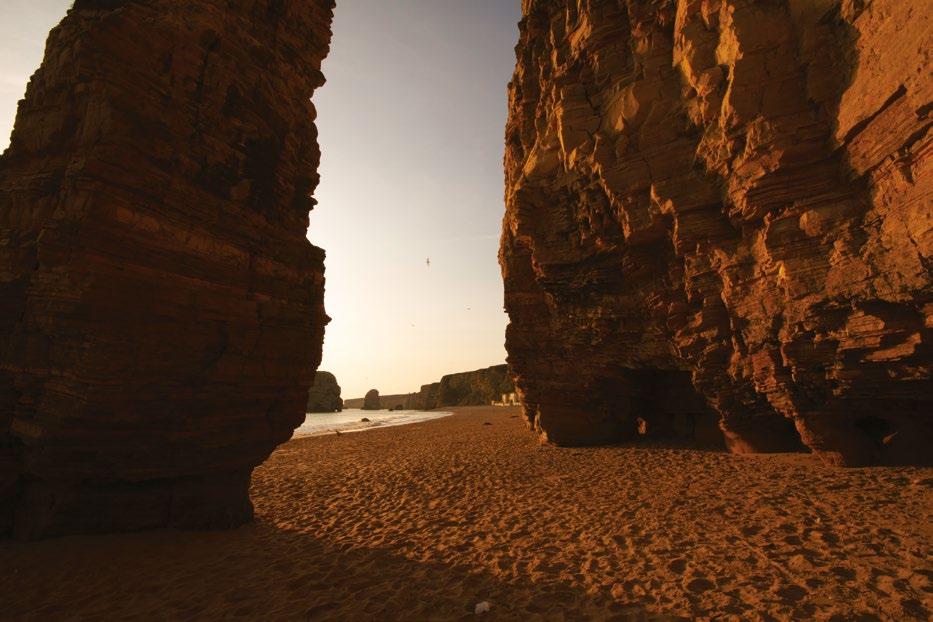
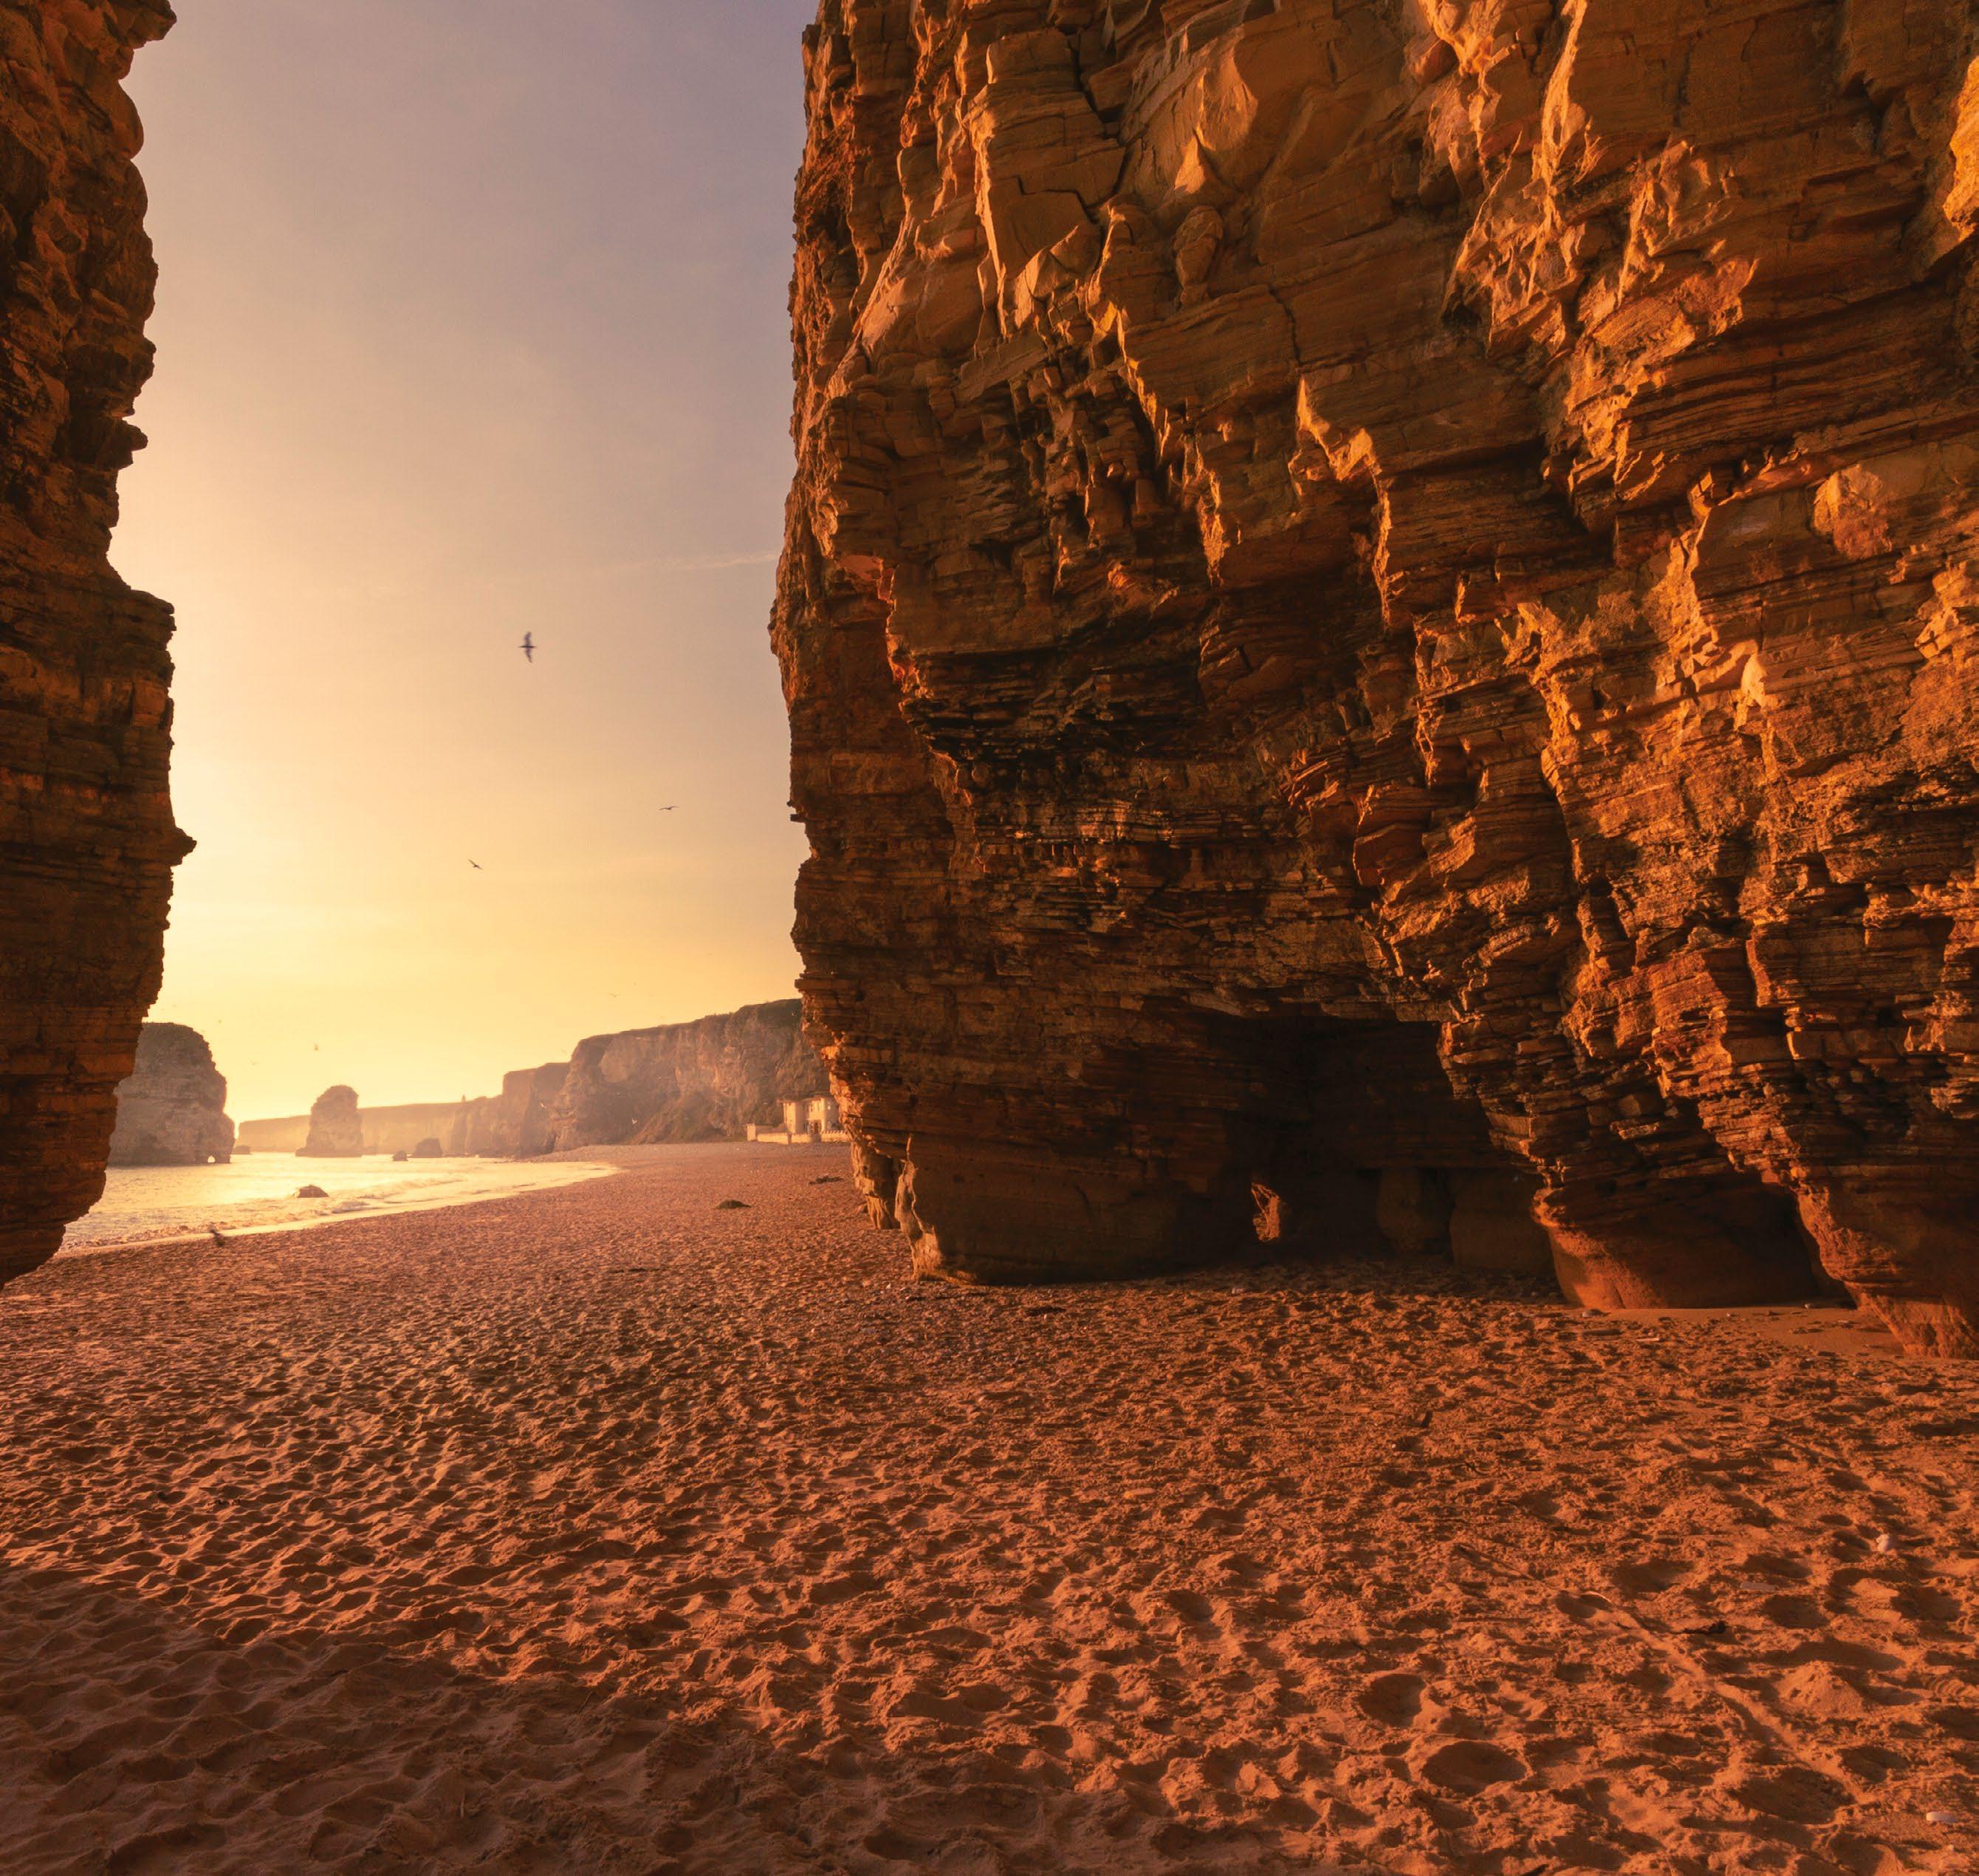
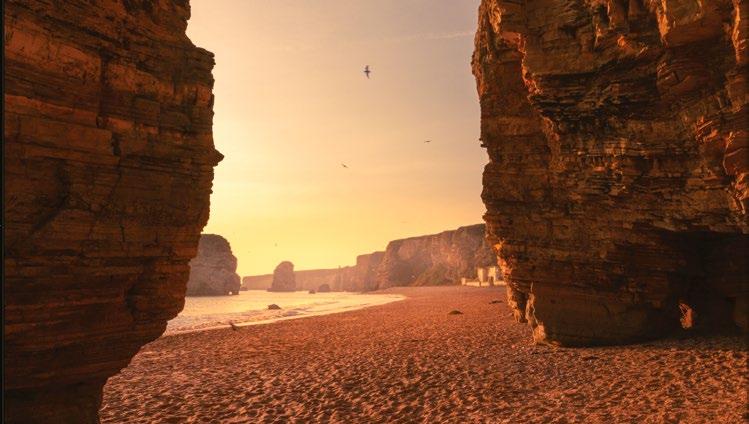

97
COASTAL LANDSCAPES
Texture and tone
For the most effective coastal landscapes it is essential to match exposure and colour themes to the visible terrain. Here, the soft lighting compliments the colour of the stone
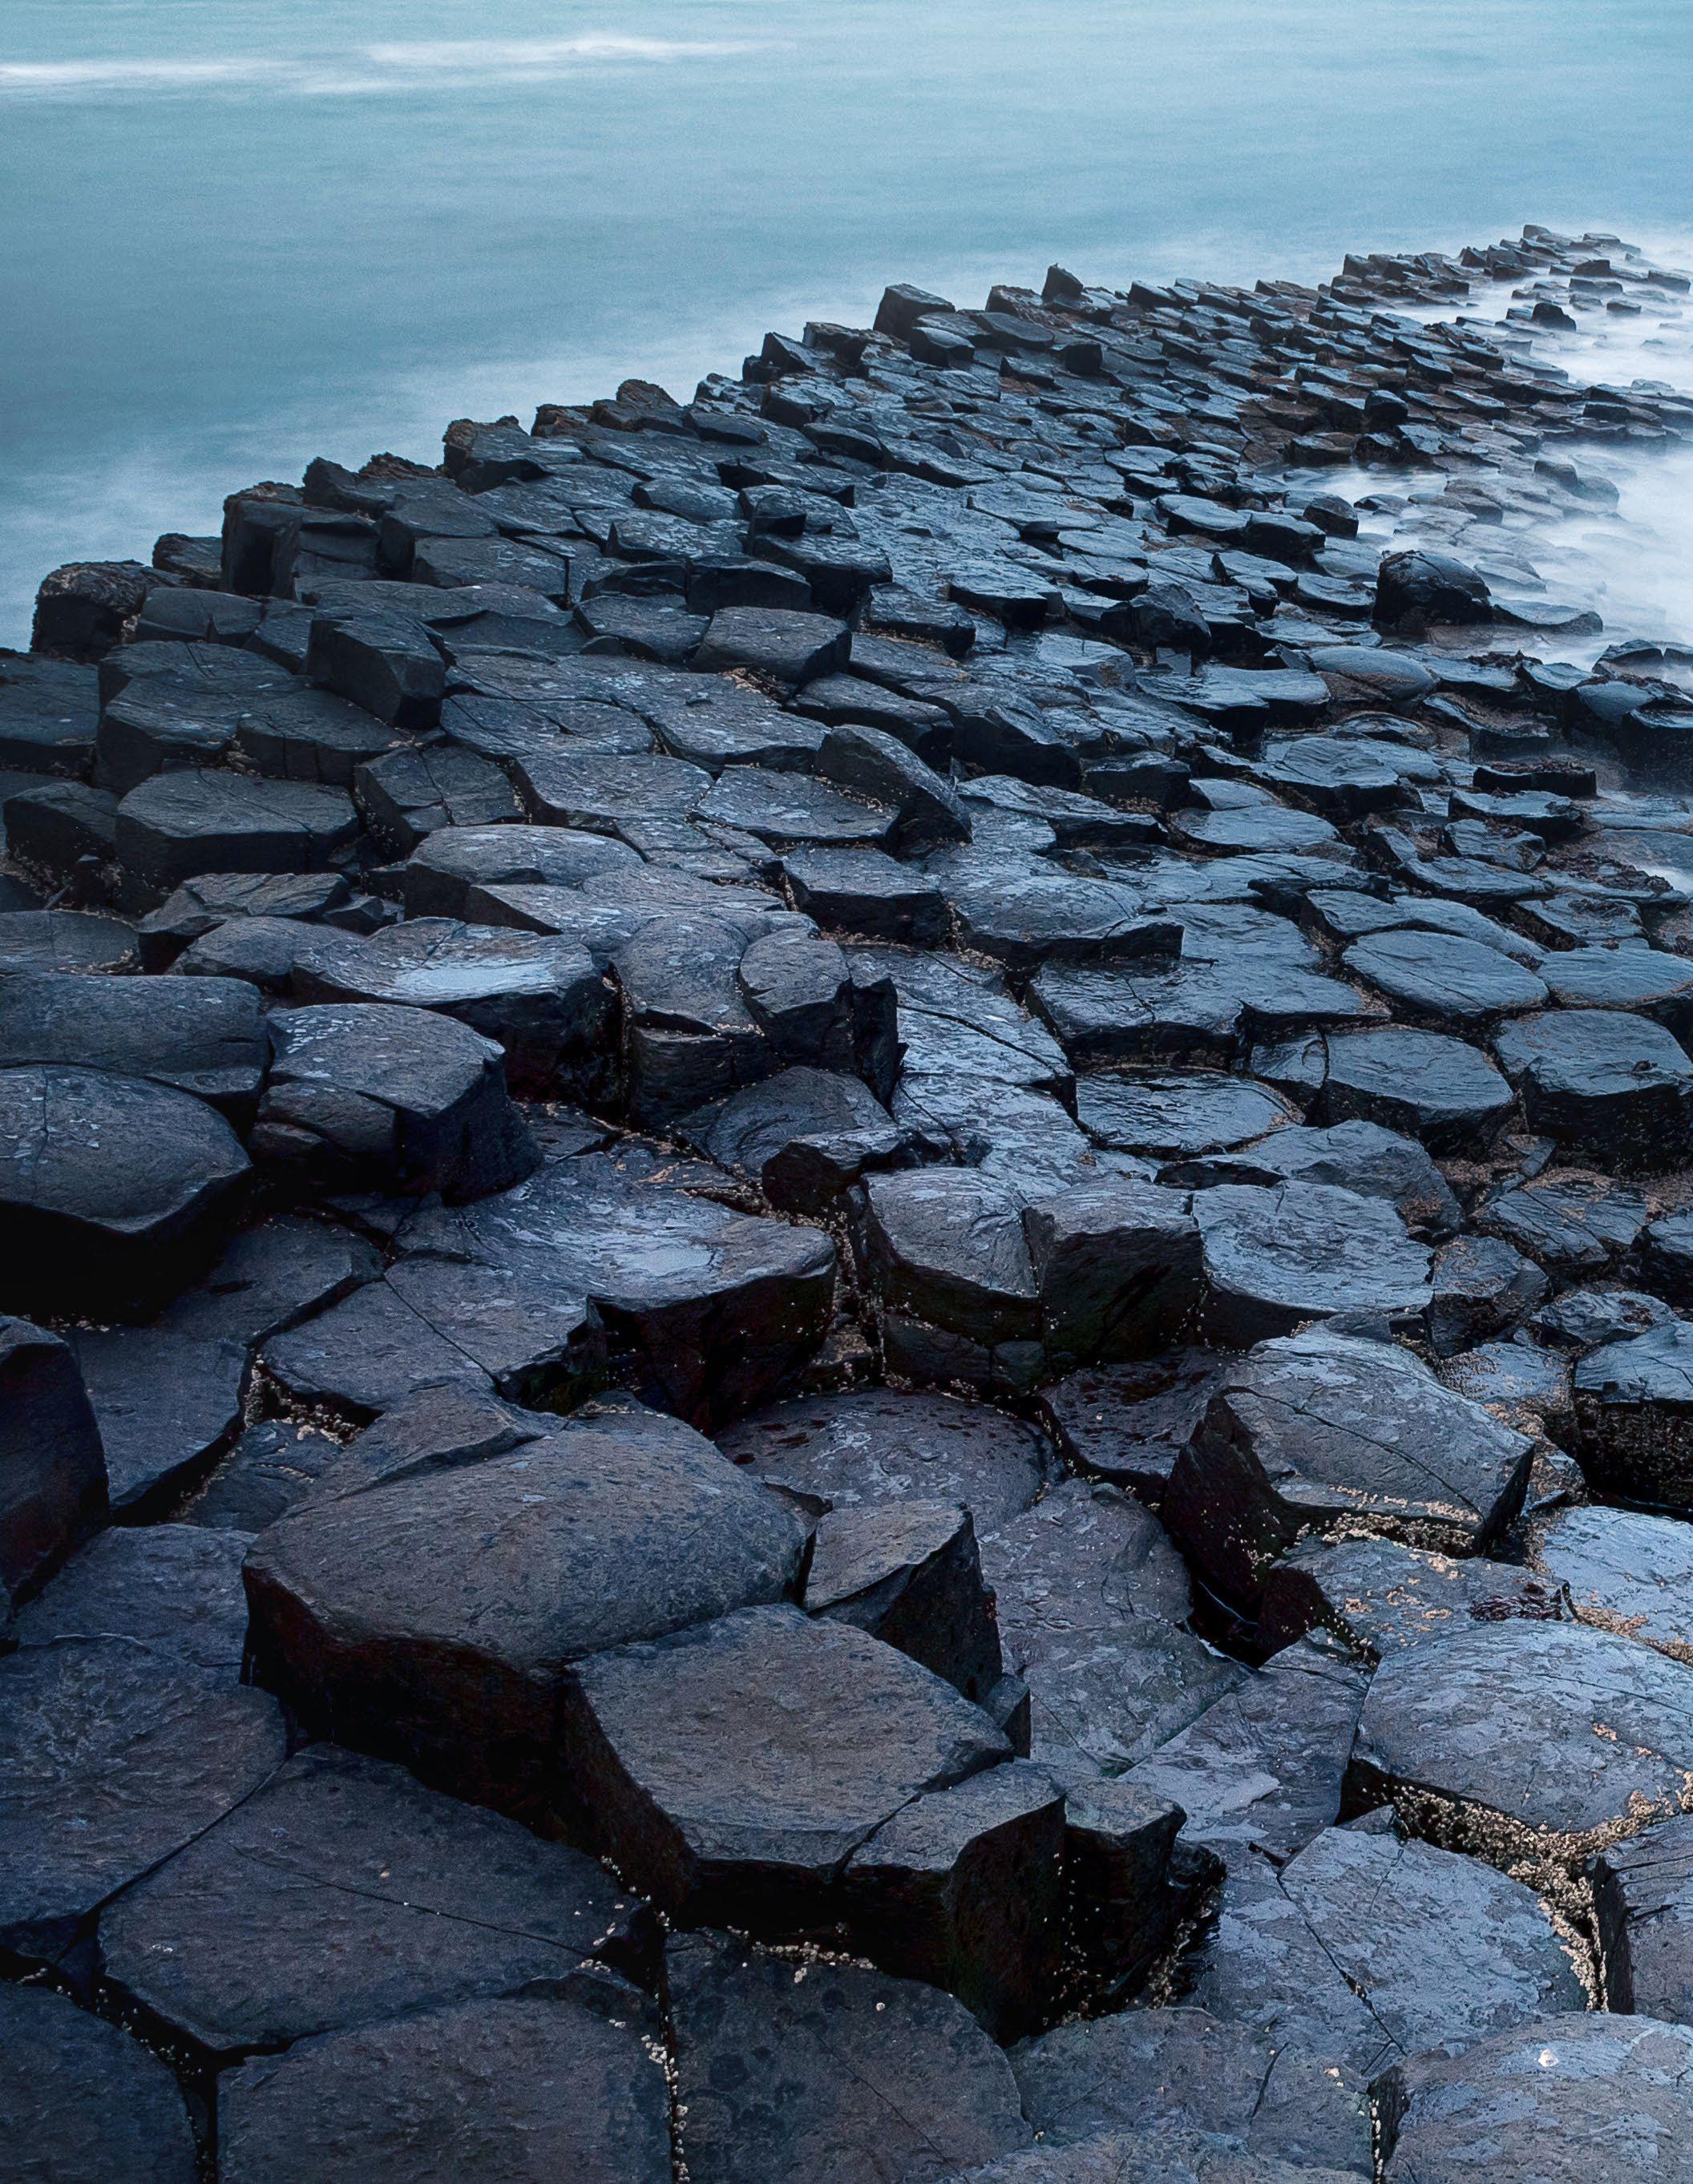
98
© Max Malloy
TECHNIQUES
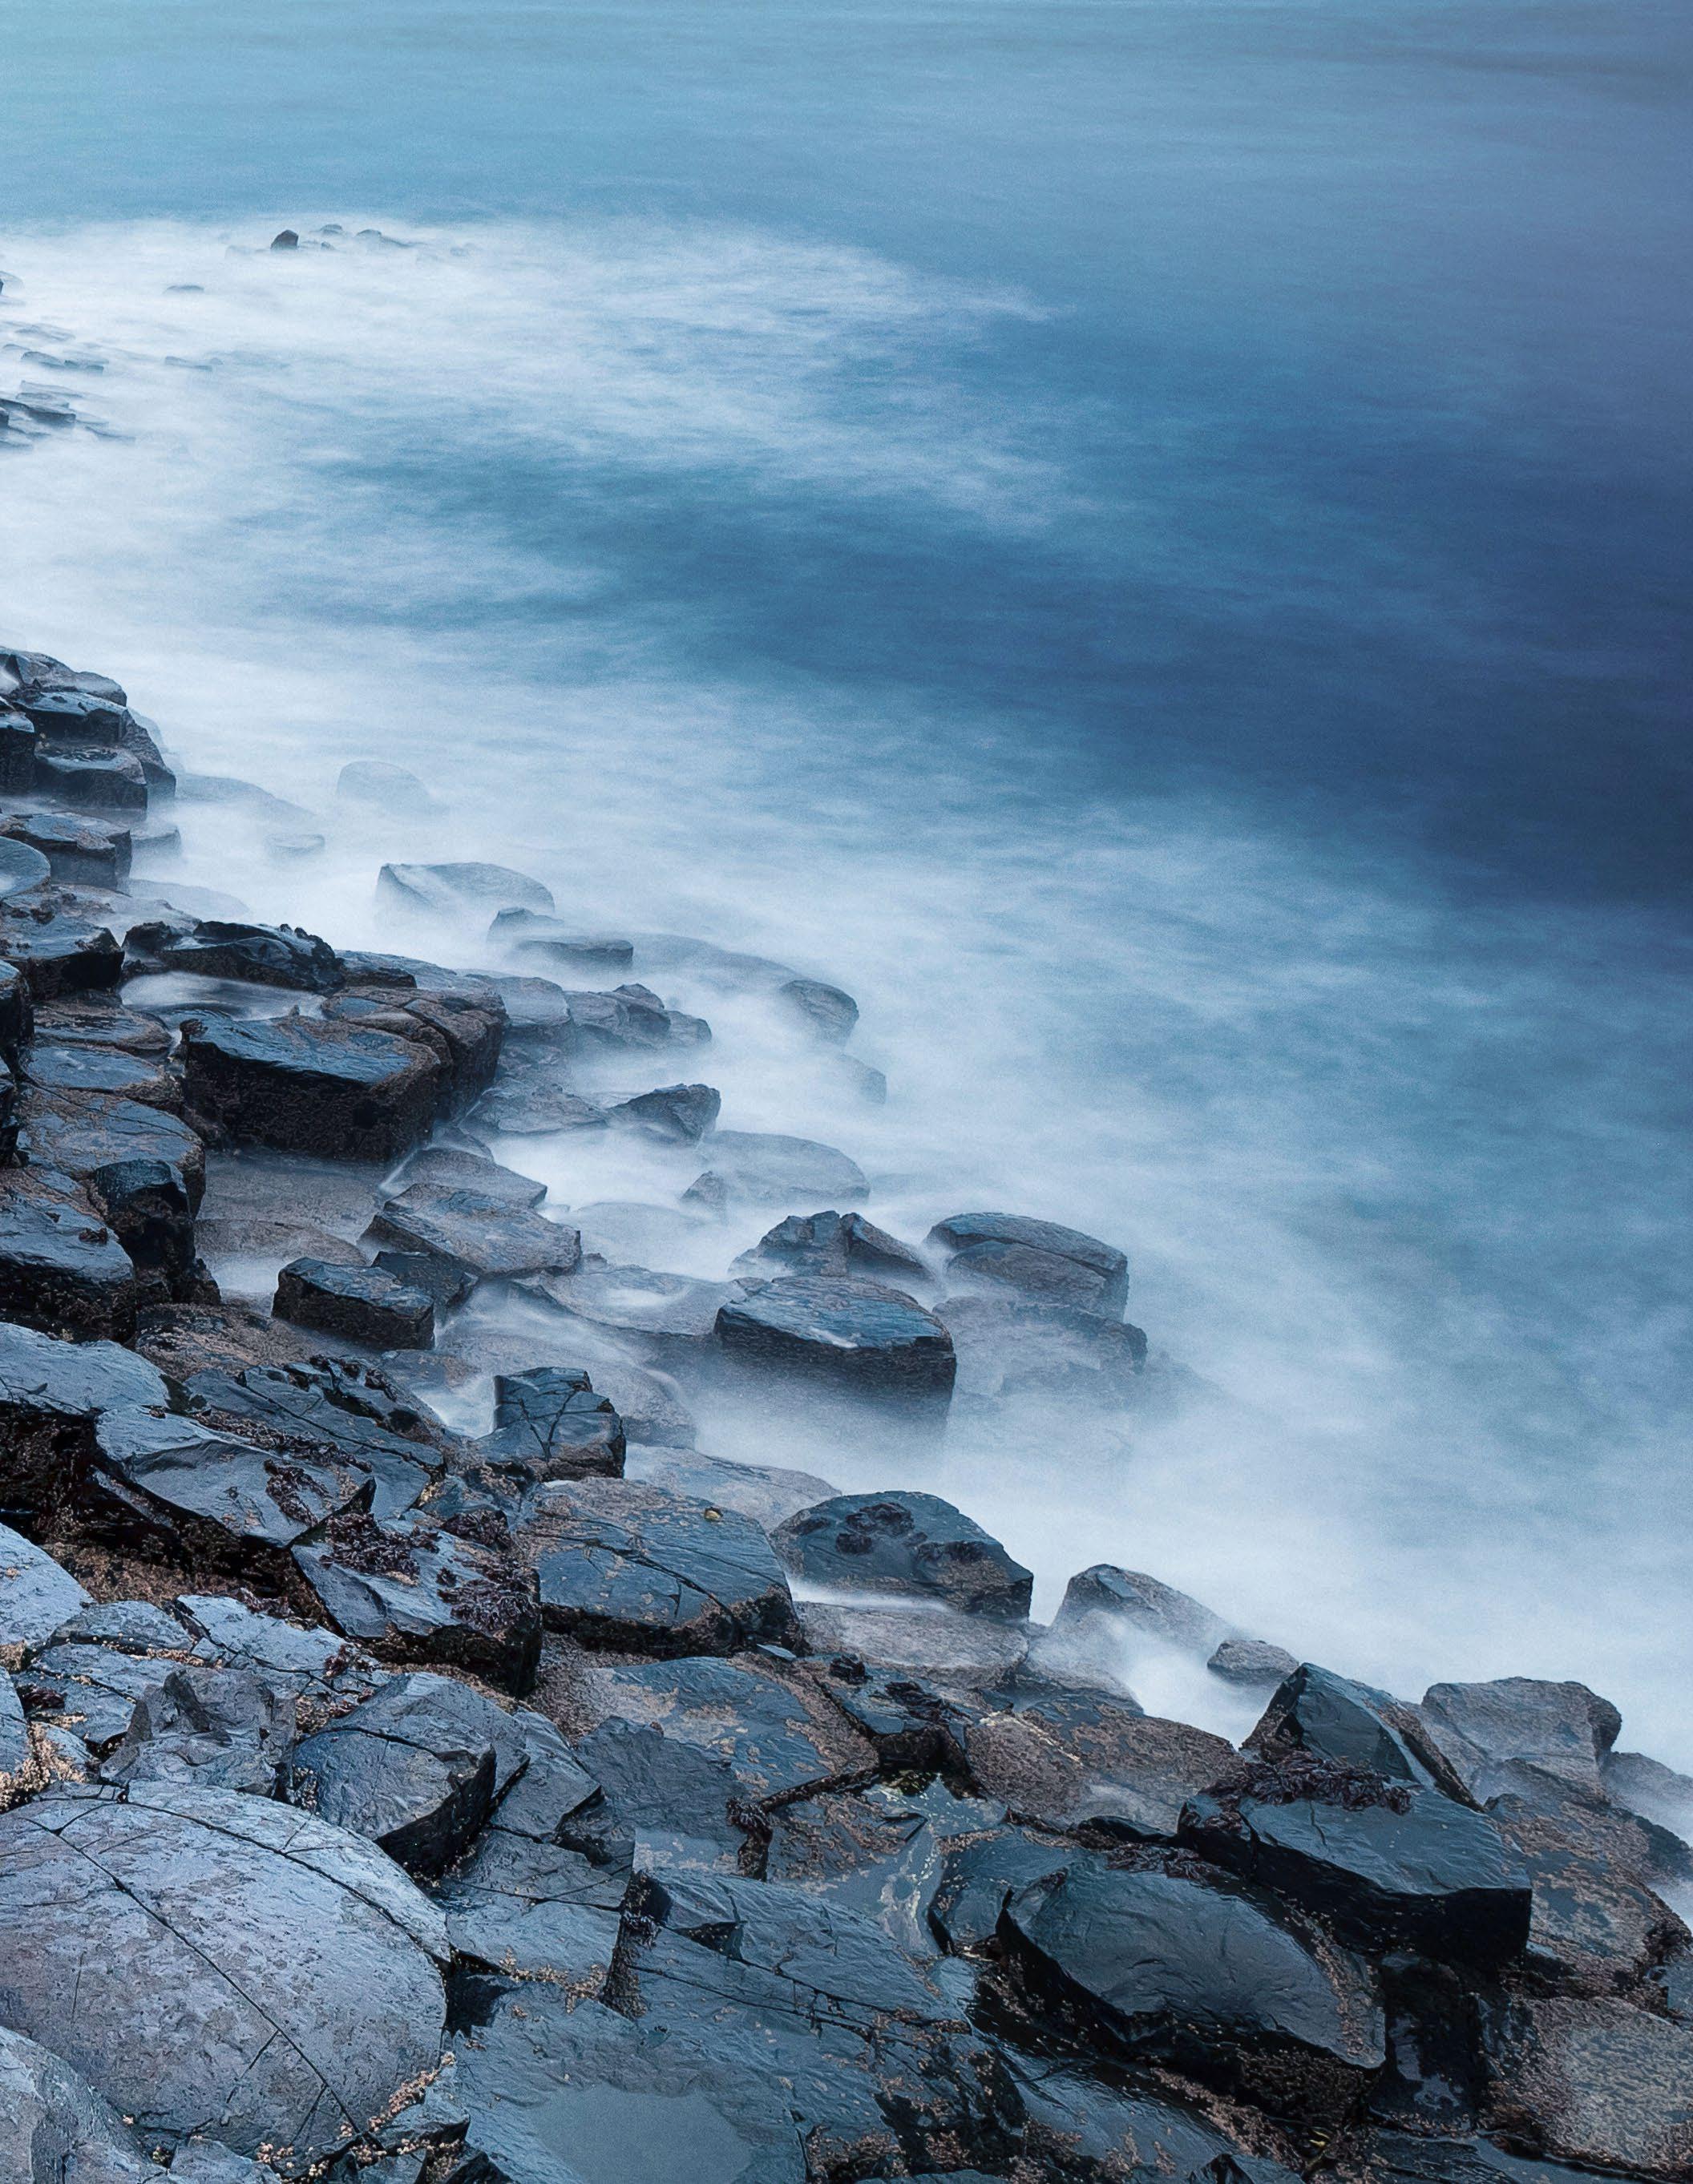
99 COASTAL LANDSCAPES
NEW WAYS TO SHOOT LANDSCAPES
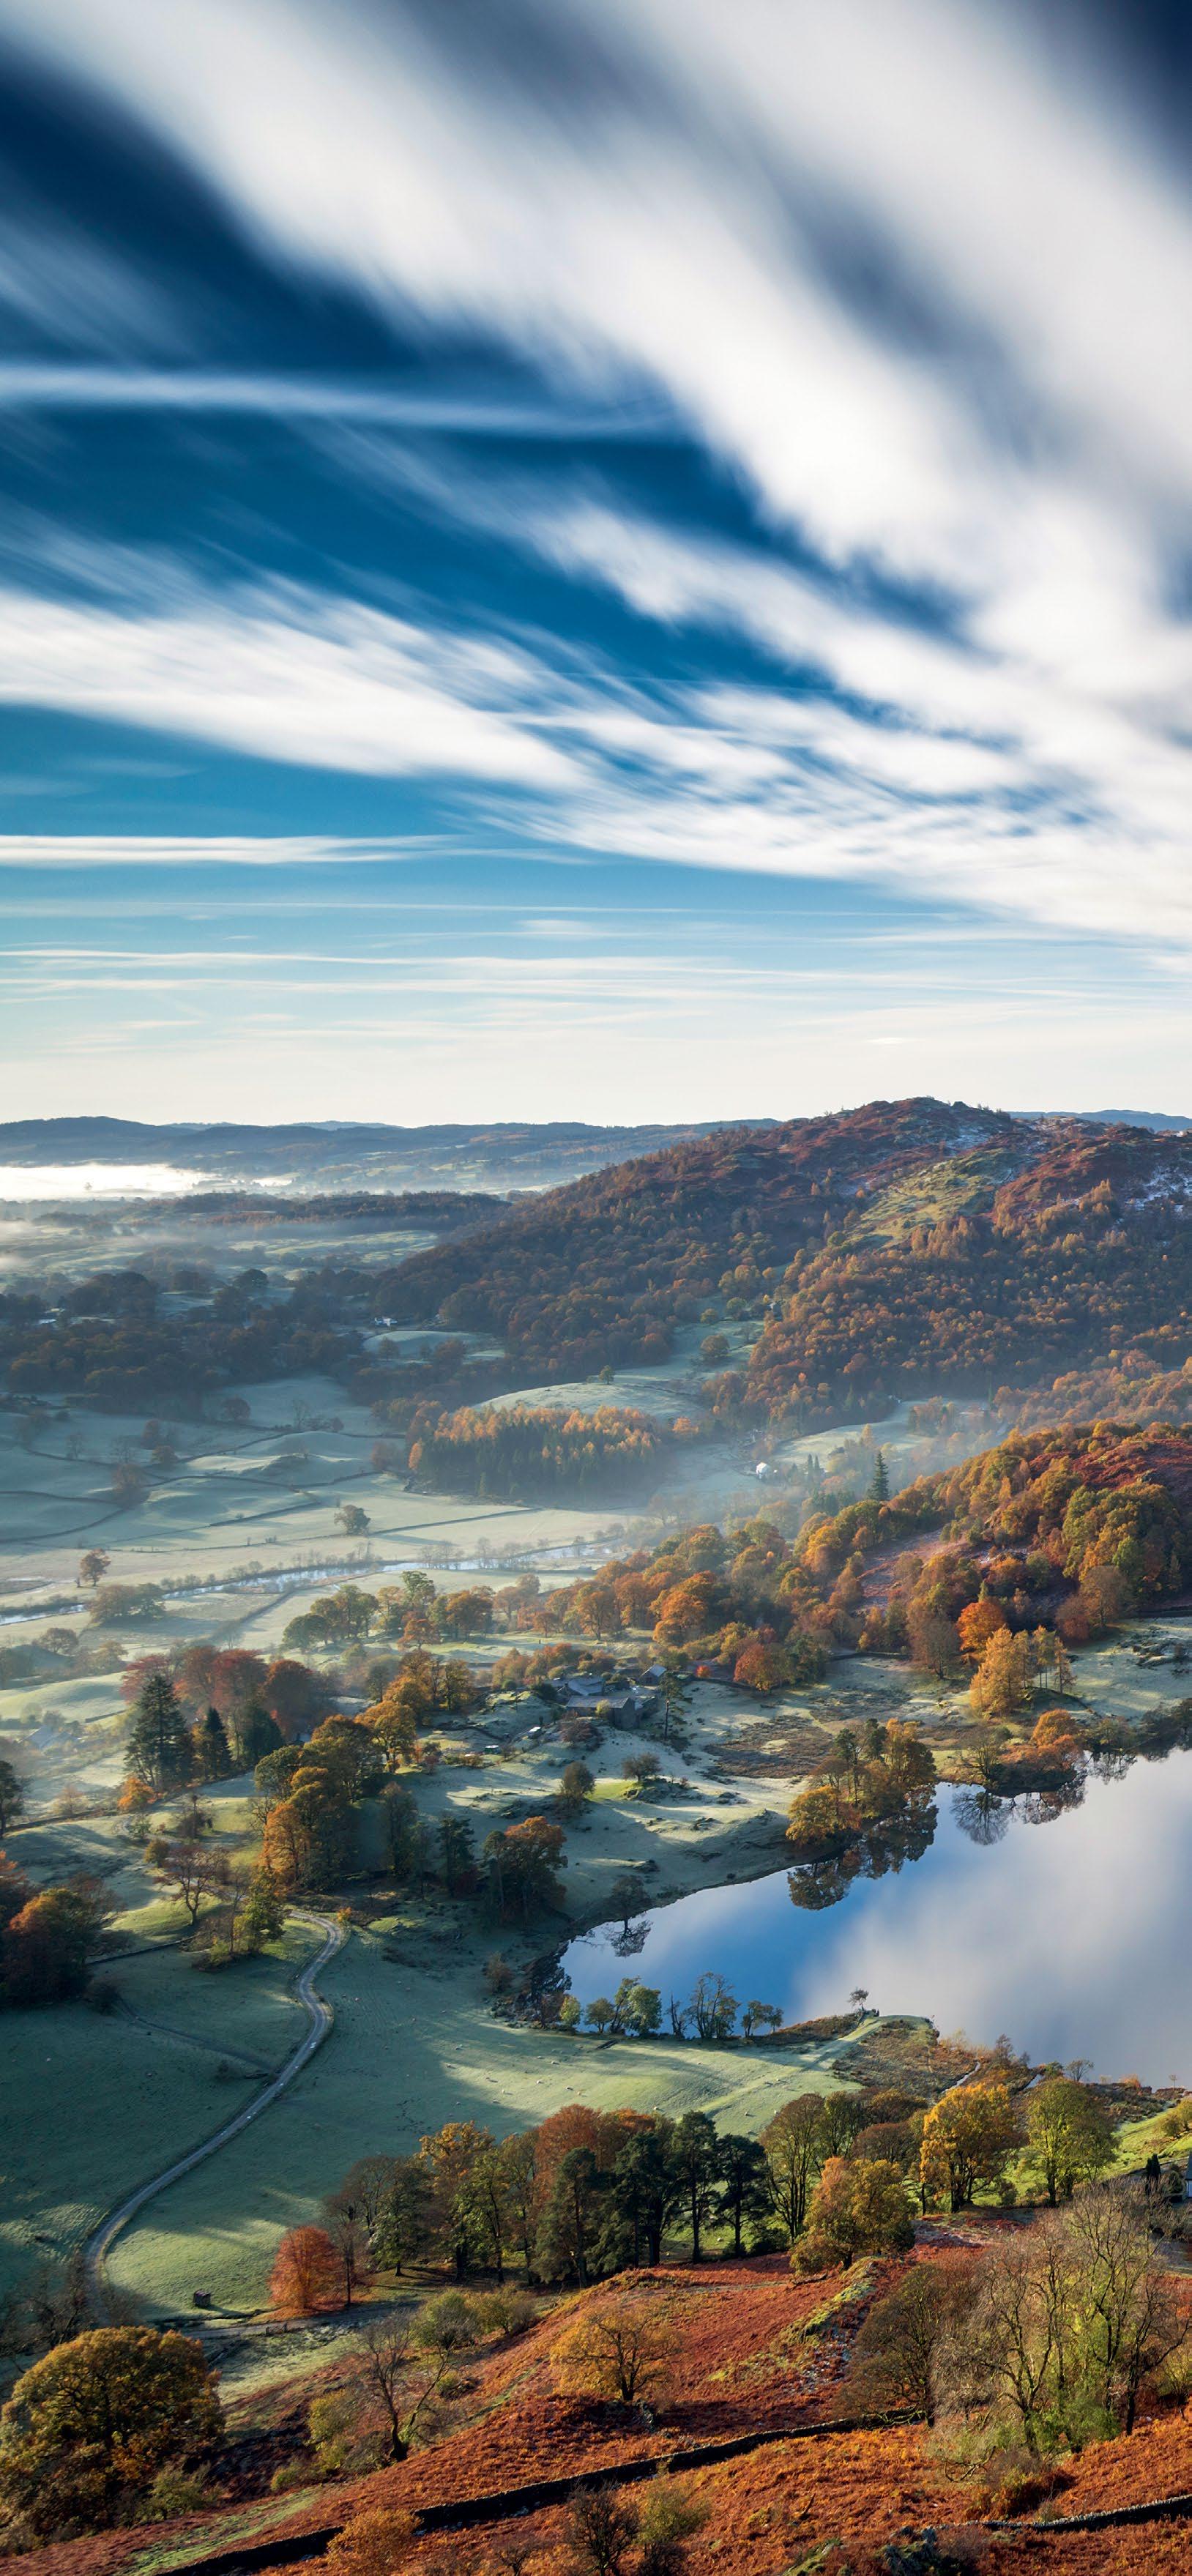
Digital
Ansel Adams, arguably the most famous landscape photographer of all time, once said: “A good photograph is knowing where to stand.” While this remains true today, it’s safe to add that a good photograph is also knowing which technique to use once you’ve found that best viewpoint – the two things go hand in hand.
There are several key techniques at the digital photographers’ disposal, and knowing what, when, why and how to use them is incredibly important. Despite having a dubious reputation, HDR photography is actually a great way of maintaining detail in high-contrast scenes, and can look so natural its use can be impossible to spot. Exposure blending is a way of merging images taken with different apertures and shutter speeds for creative effect; and focus-stacking guarantees pin-sharpness from the very front of a scene all the way to the back. So let’s explore these techniques, and more: essential skills every landscape photographer needs to know to be able to capture the natural world at its best.
landscape photography is more than simply hyperfocal distance and ND grads. James Abbott shares the modern techniques that matter
100 TECHNIQUES
STRETCHING TIME
Extreme NDs are a relatively new type of filter. They’re available in light-reducing densities of six, 10 and 15 stops. This image used a combination of a six-stop ND and a four-stop soft graduated ND filter to maintain and darken sky detail. The result is a long exposure that has captured the movement of the clouds as dynamic streaks in the sky.
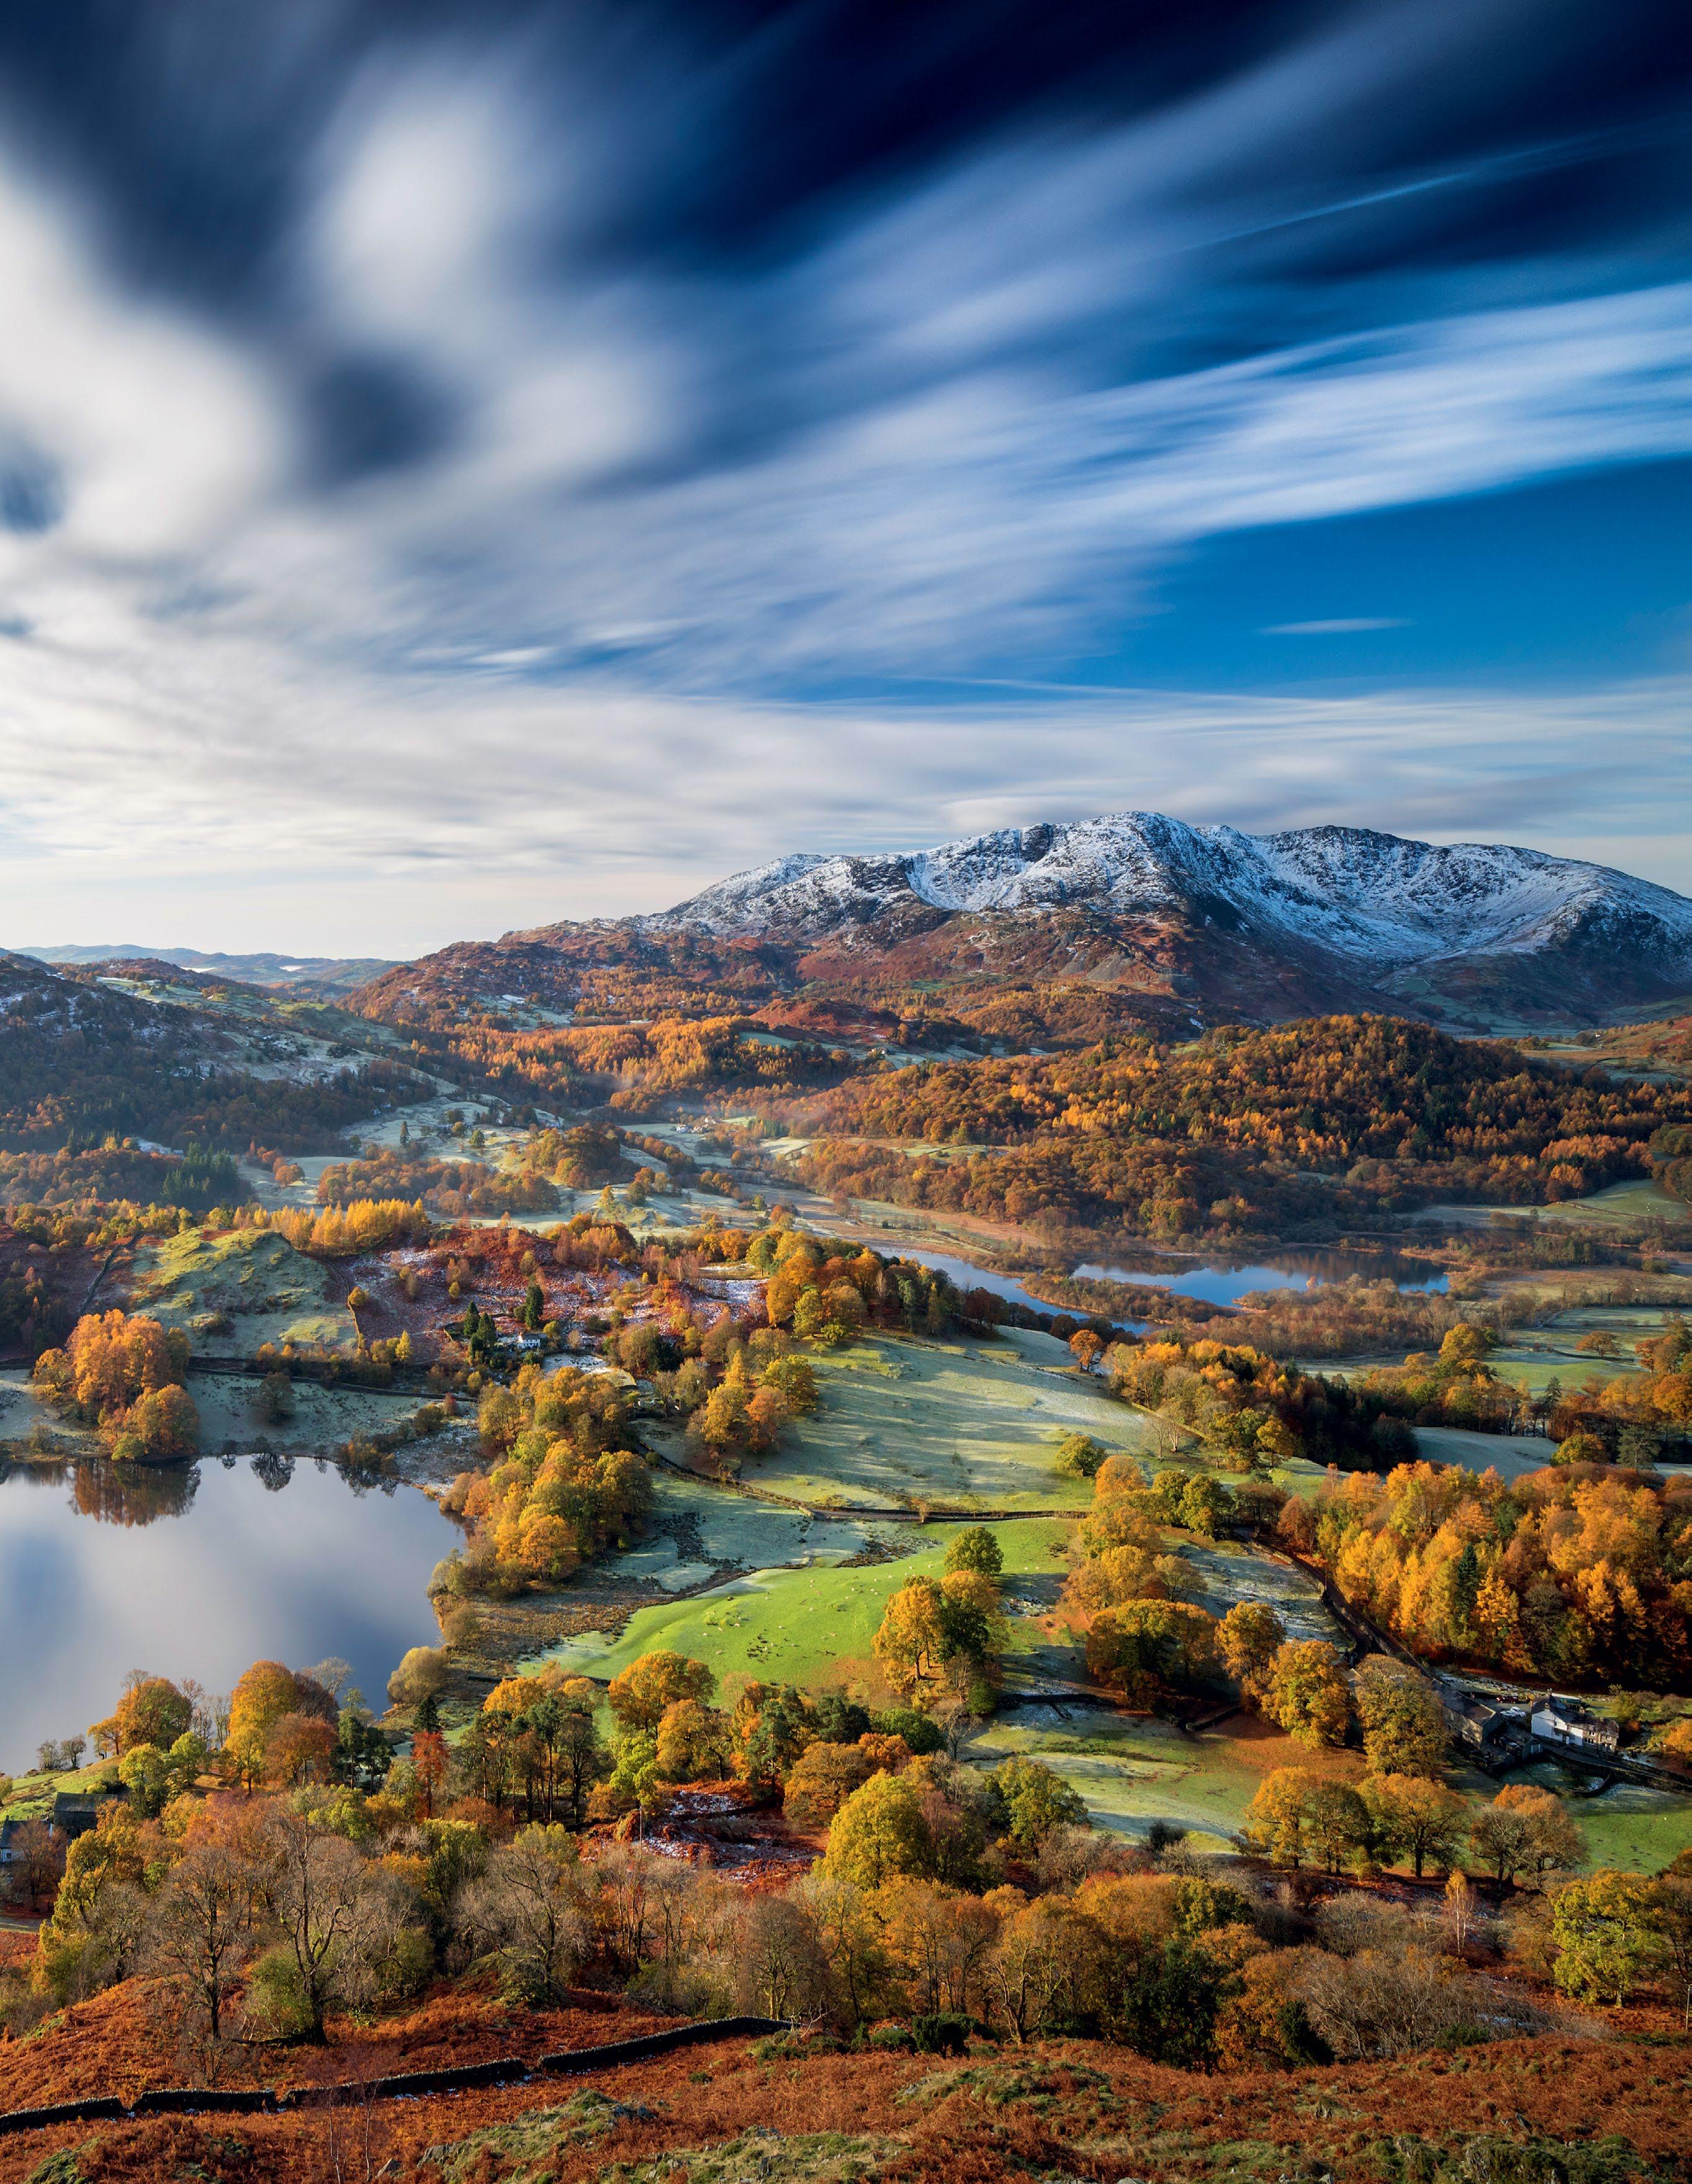 Getty
/ John Finney
f/11
71 sec ISO 64
Getty
/ John Finney
f/11
71 sec ISO 64
101 NEW WAYS TO SHOOT LANDSCAPES
1
Shoot an HDR landscape
Maximise your camera’s dynamic range for the most natural-looking scenes
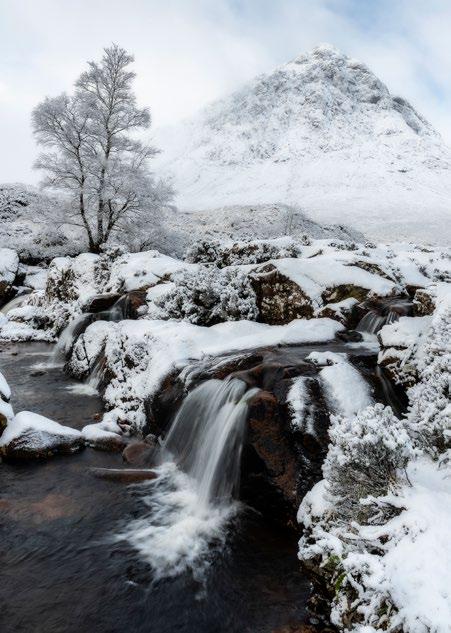
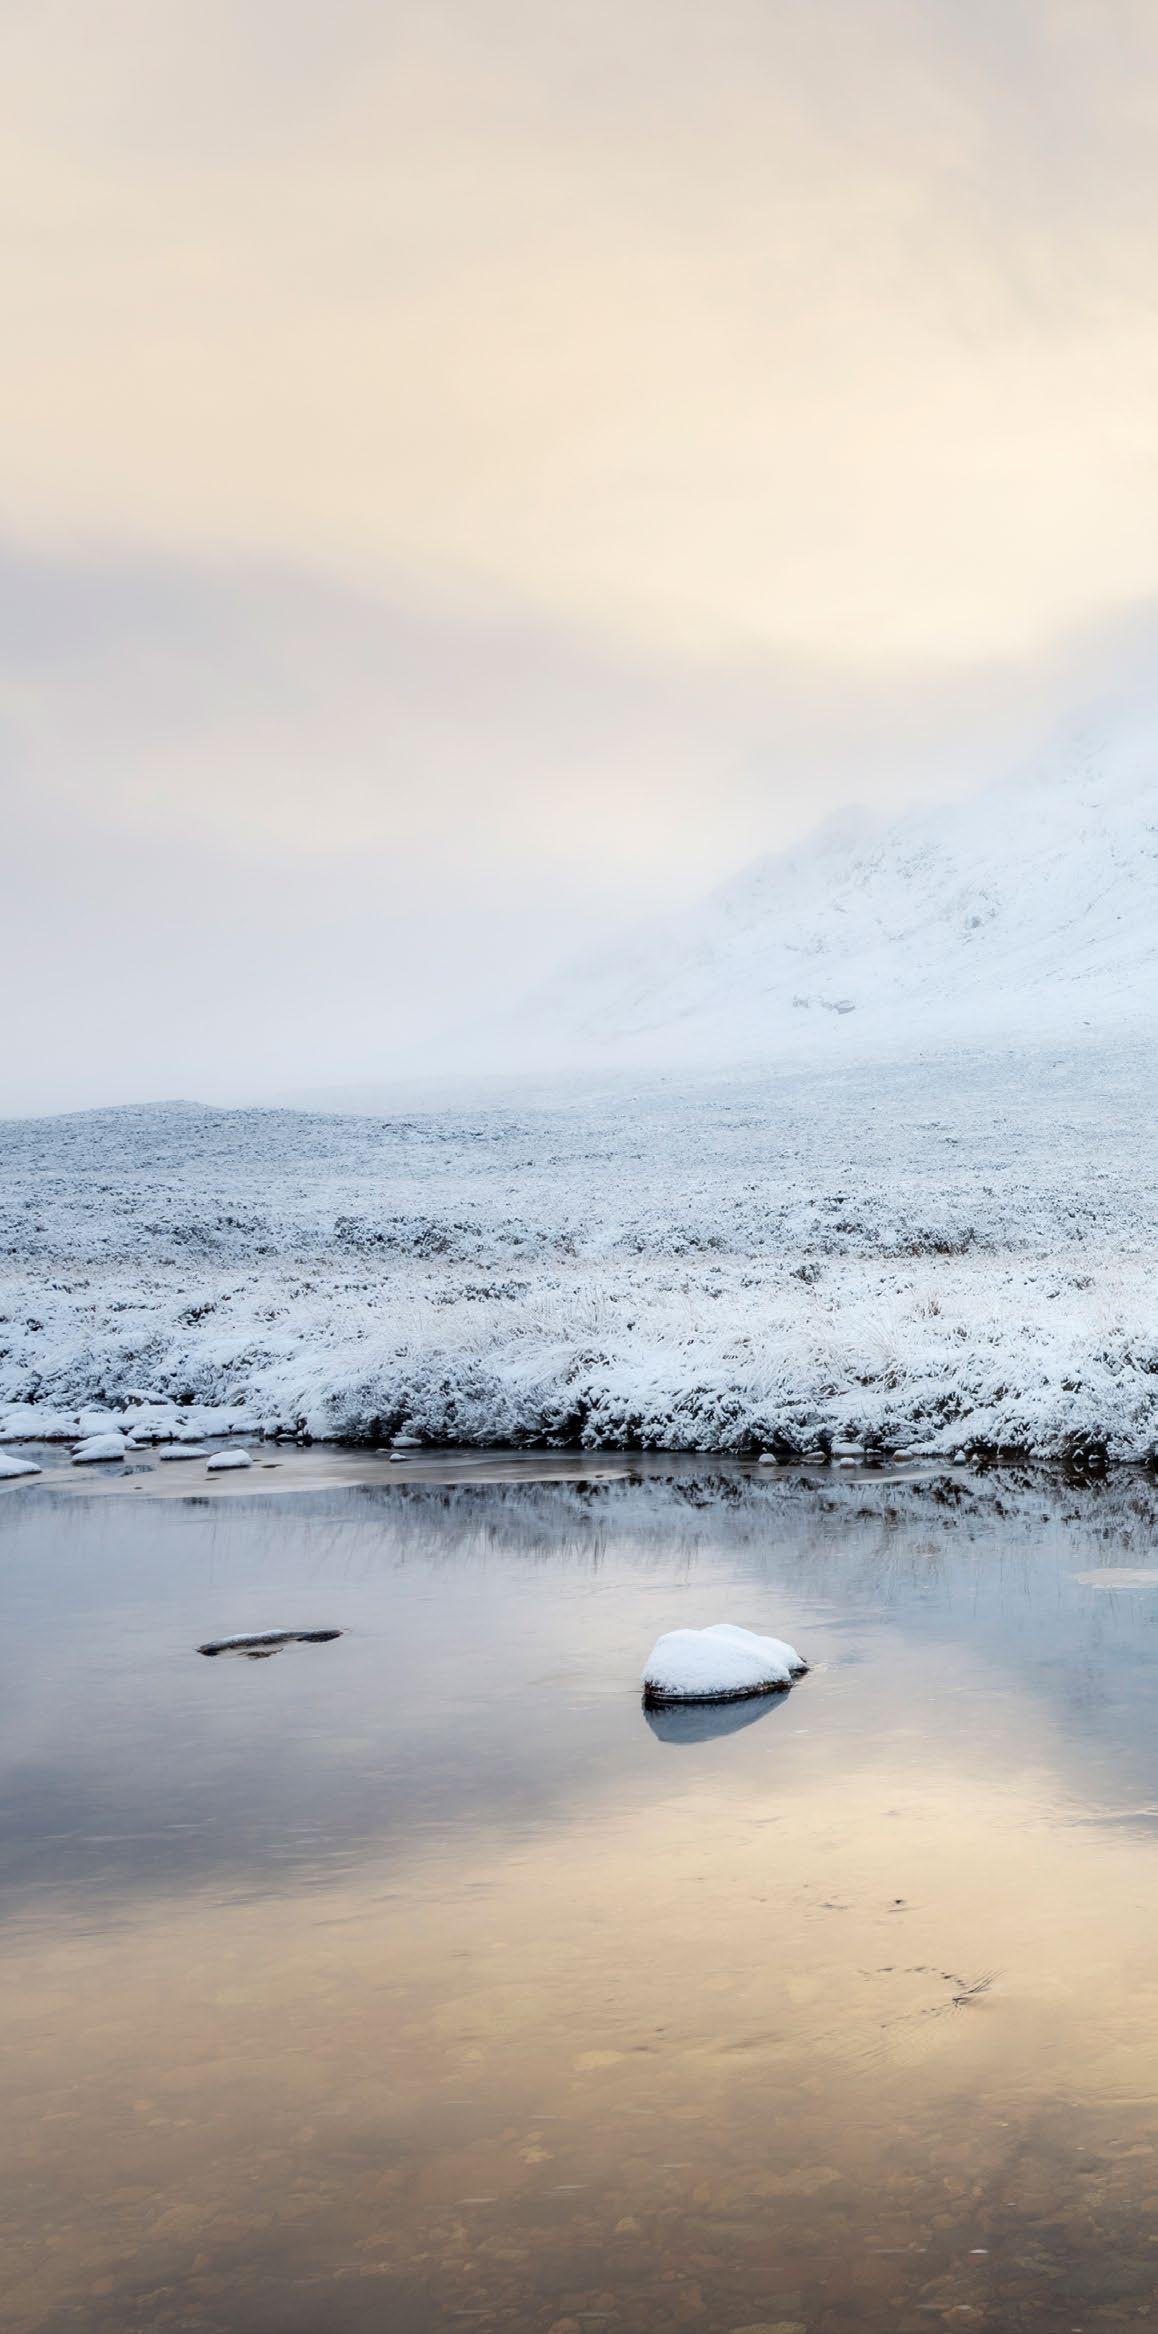
HDR, or high-dynamic-range, photography is a technique that’s used to hugely increase the dynamic range in images. If you’re not familiar with the term, dynamic range is simply the ratio between the brightest and darkest parts of a scene. When you shoot HDR, you simply take at least three bracketed exposures that are two stops apart so that the details in the highlights, mid-tones and shadows of the scene are all captured.
WHEN SHOULD I USE HDR?
In situations where the dynamic range of a scene is outside of that of your camera, when you don’t have
ND graduated filters, or even when it’s raining or snowing so using filters is like holding a magnet over iron filings, HDR is the technique you need to use to maintain detail throughout the scene – especially the sky.
WHY SHOULD I USE HDR?
HDR is an incredible technique that has unfortunately received a bad reputation due to the way some photographers have brutally over-processed their images. But taking a more subtle approach, you can easily make your images look even more natural than those taken using ND grads.
Pro Advice: Good HDR, bad HDR
Over-processed HDR images exhibit characteristics such as haloes along high-contrast subject edges, excessive texture and severely flattened midtones. There’s a common misconception that HDR images should show detail from the shadows all the way through to the highlights: allowing for more contrast creates a more realistic, almost ‘invisible’ use of the technique.
Snow-free lens
This image was taken while it was snowing and a lens hood was needed, so using filters was out of the question. Shooting HDR meant all highlight detail was maintained.
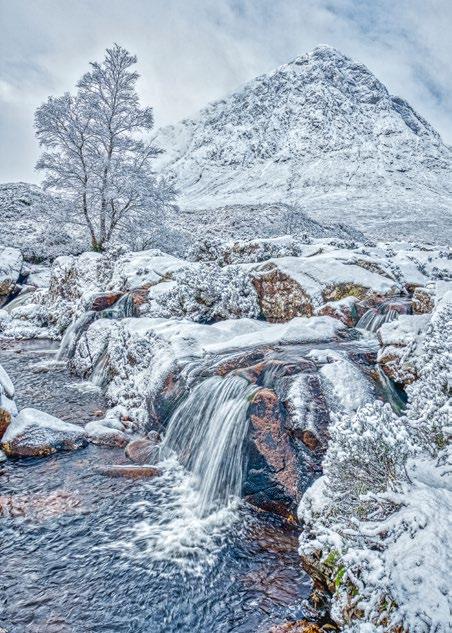
Shoot bracketed exposures
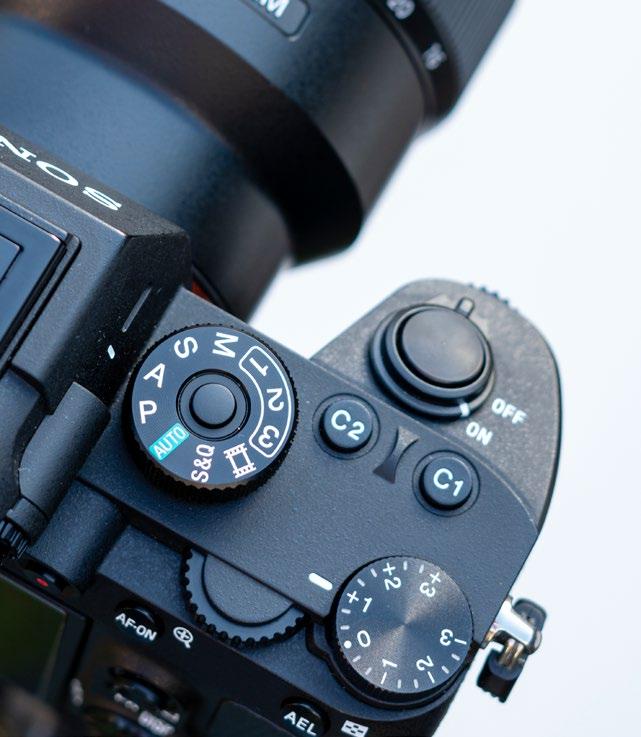
Follow these steps for the best HDR shots
1
Shooting mode
When you shoot HDR, it’s imperative that the camera is on a tripod and can’t move between shots, to make blending more successful later. All camera settings except shutter speed should also remain the same for this reason, so shoot in either Aperture Priority or Manual. HDR software can deal with variances in shutter speed, but changes in depth of field, focus and ISO are impossible to resolve.
GOOD BAD
102 TECHNIQUES
2 Camera settings
Manually focus your shot to ensure focus is locked for the bracketed exposures you’ll be taking. Next, set the aperture to around f/11 to ensure a suitable depth of field, before setting ISO to 100. If the exposure time is likely to exceed 30 seconds, increase the ISO to keep it within this duration. Use the histogram to assess the exposure, and apply exposure compensation to get balanced midtones.
2 Naturally white snow
Had this shot been taken with an ND grad filter to control the sky exposure, the snow-covered mountain would have been captured darker than the rest of the snow.
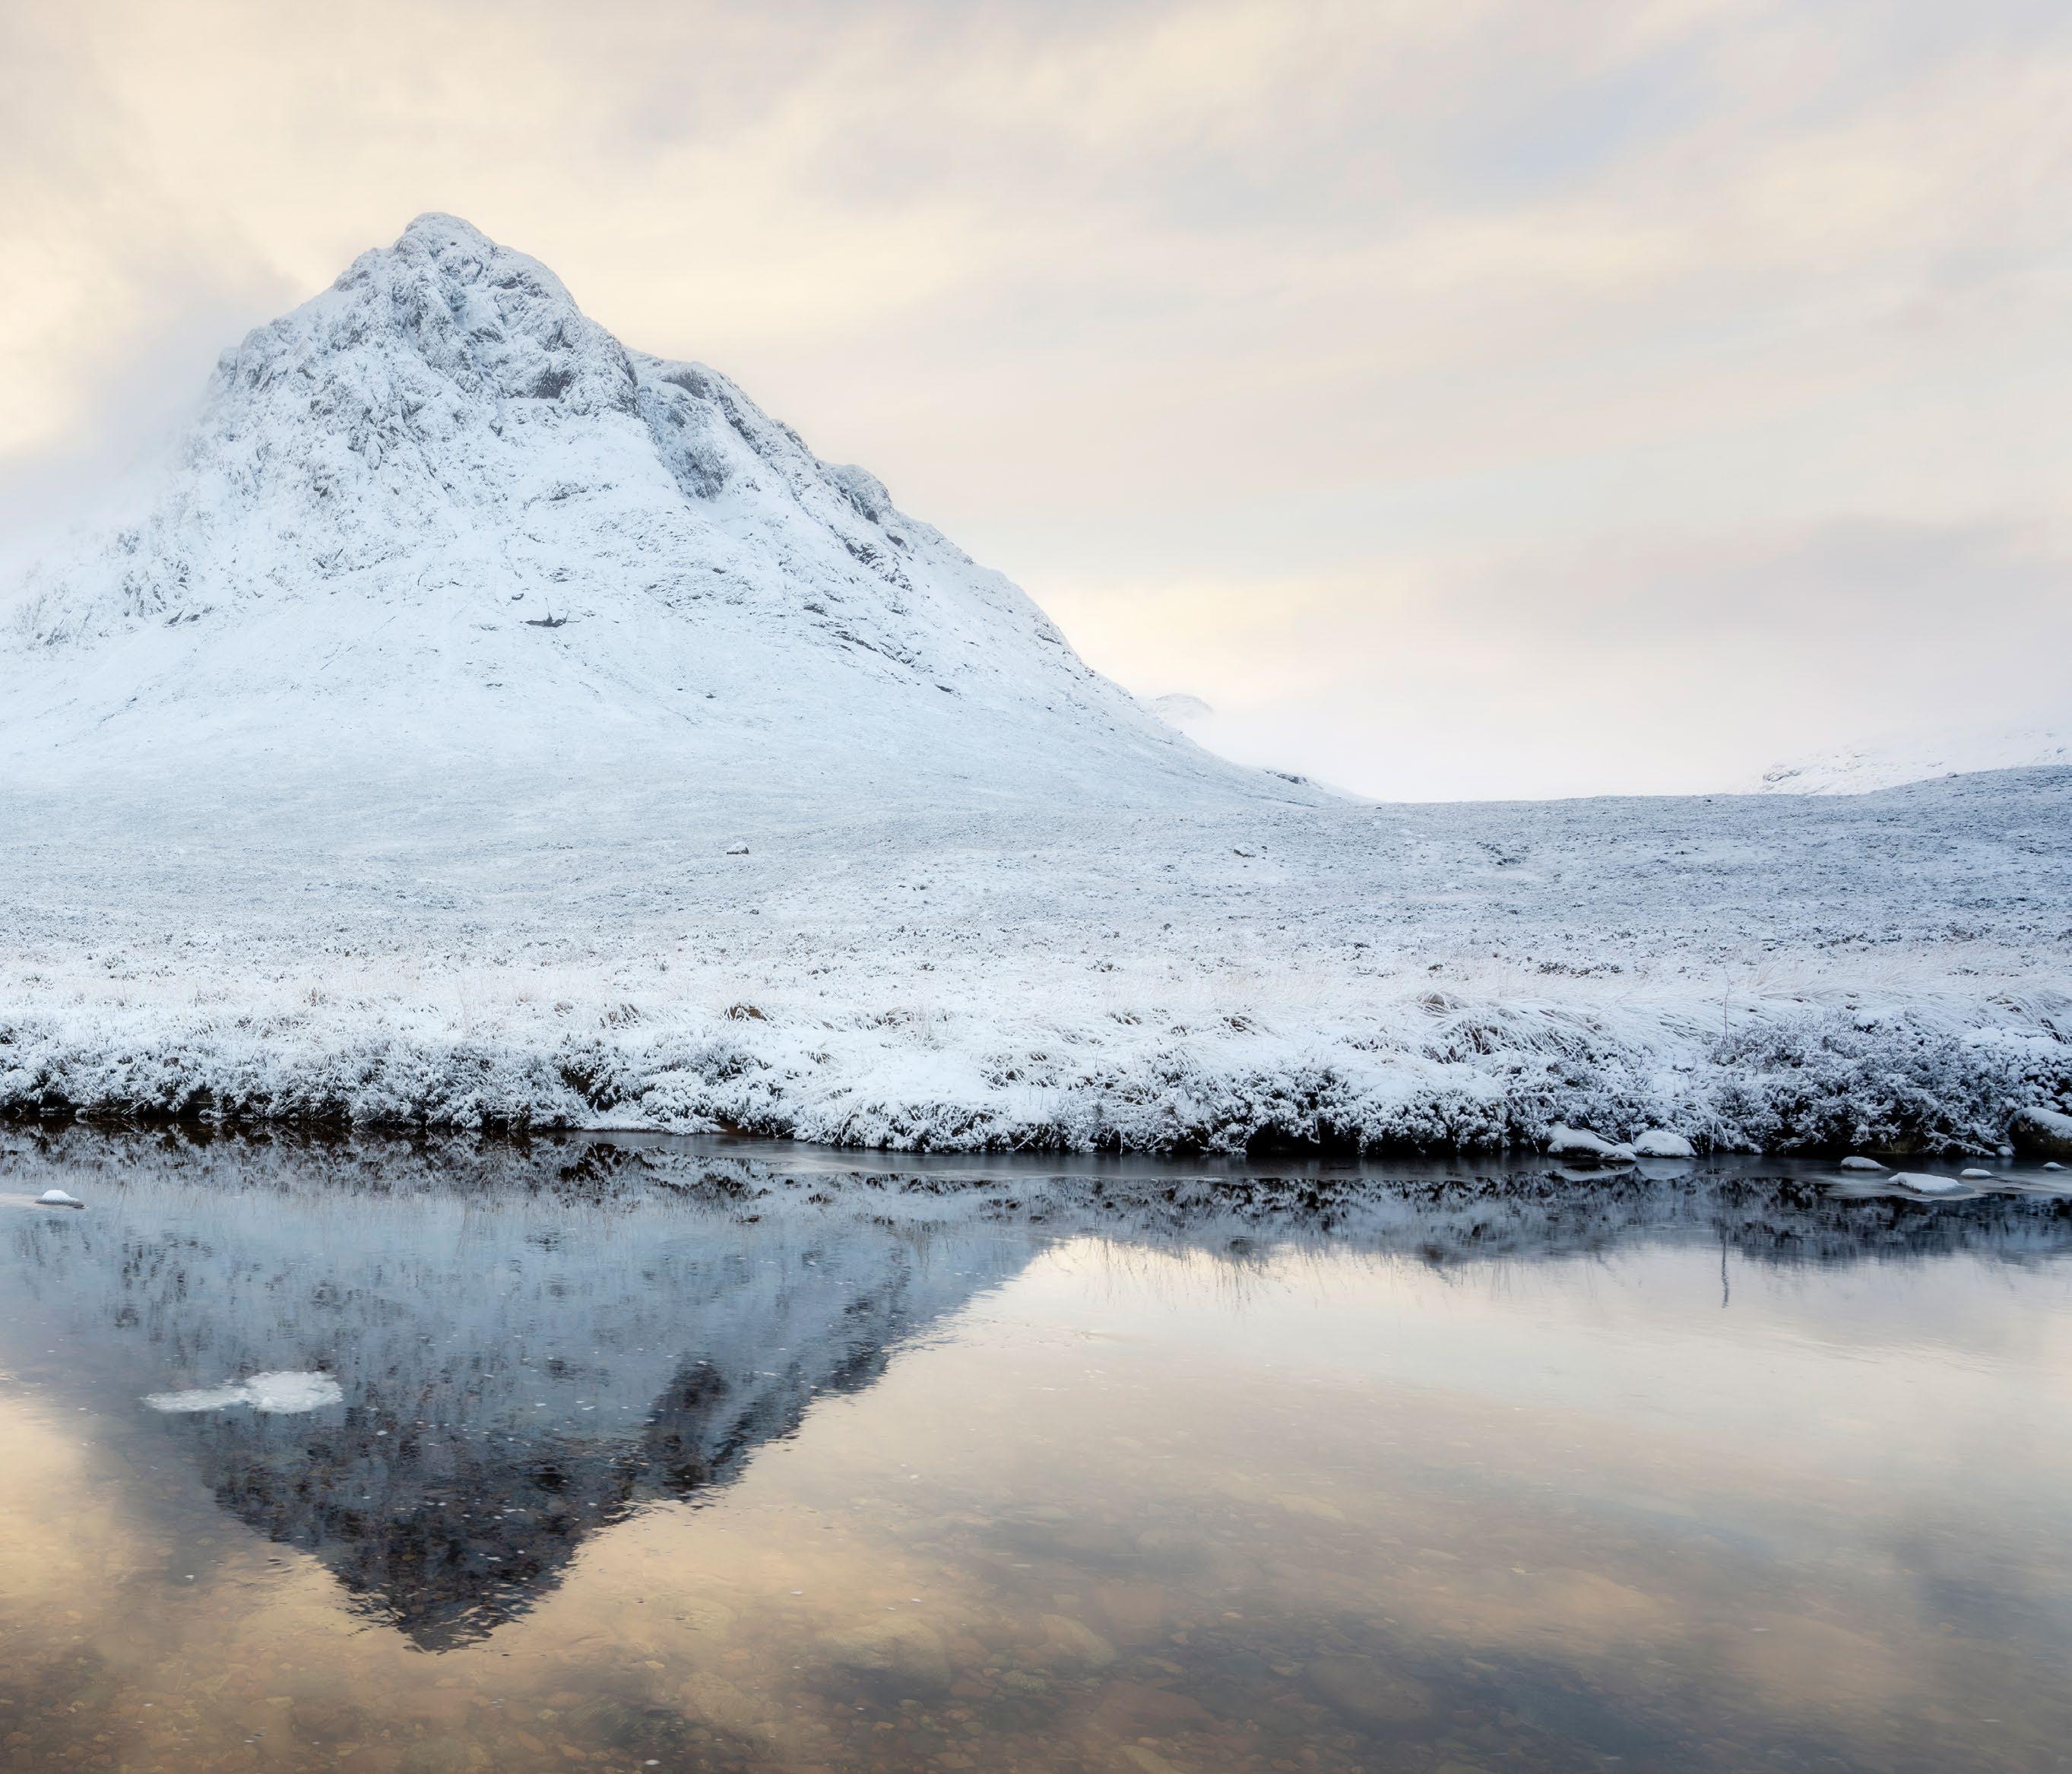
3 Fast shooting
Using auto exposure bracketing, the shutter button only needed to be depressed once to initiate the self-timer: the three exposures were then fired off automatically.
3 Exposure bracketing
Most DSLRs and mirrorless cameras offer an auto exposure bracketing (AEB) feature, and this is the easiest way of shooting HDR. This Sony camera has been set to shoot three exposures two stops apart, and the feature includes a selftimer for the shutter. Alternatively, the next best way to shoot bracketed exposures is to shoot in Manual mode and change the shutter speed for each of the three exposures.
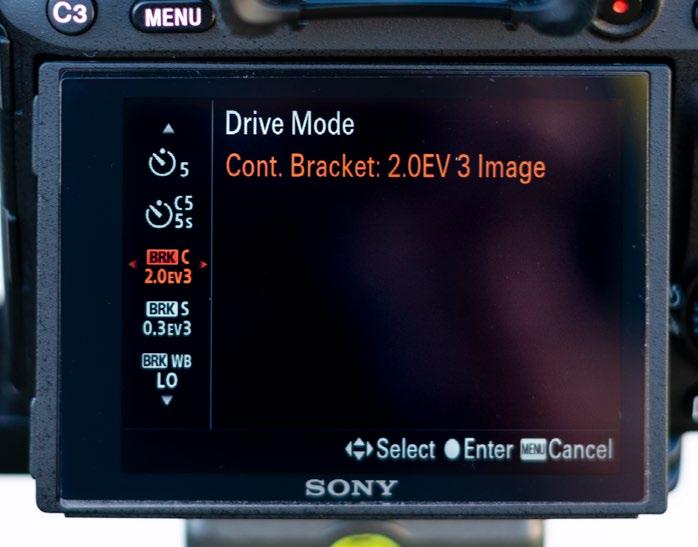
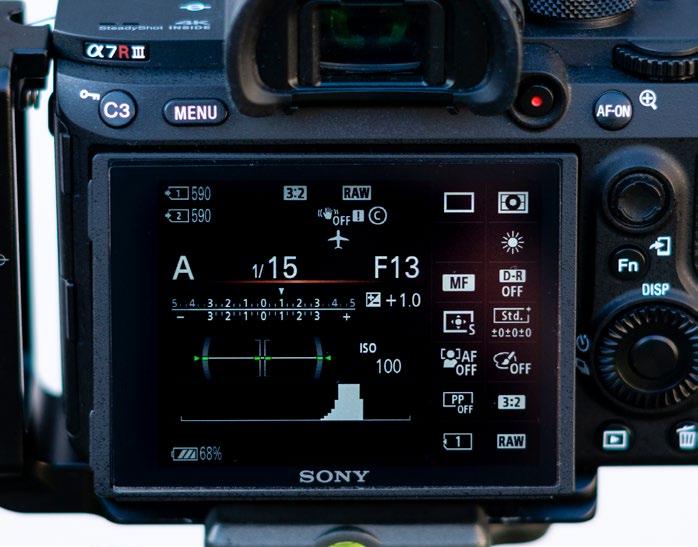
103 NEW WAYS TO SHOOT LANDSCAPES
James Abbott
Process HDR the right way
Learn how to process your HDR images properly, so they look completely natural
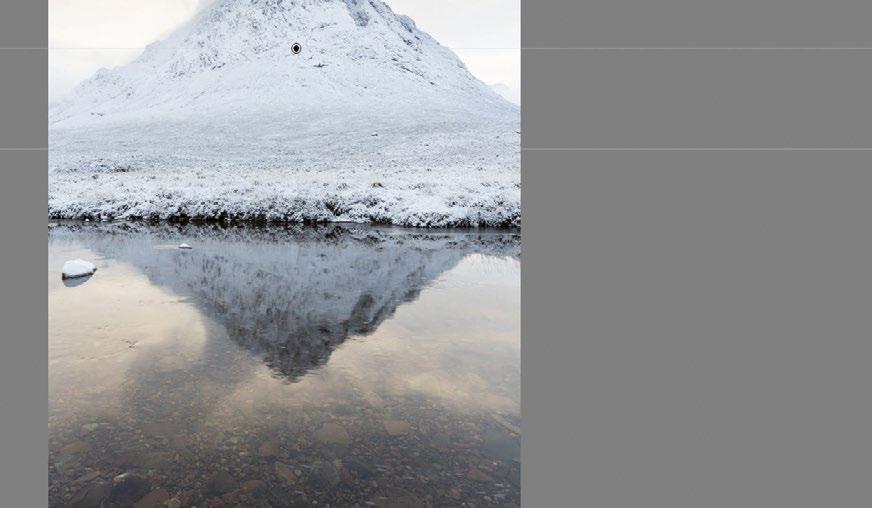

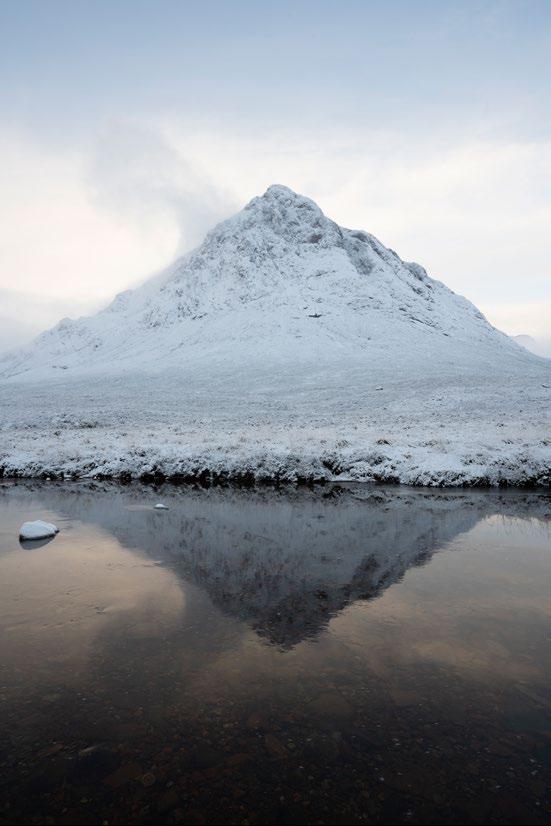

It’s often said that the devil is in the detail – and when it comes to processing HDR images, this couldn’t ring truer. With HDR software offering a number of controls that can make detail really pop, it’s tempting to throw everything you’ve got at images, but taking a more restrained approach always wins the day.
Subtle but strong
For true HDR success, the aim is to have the viewer look at images and not be able to tell that the technique has been used. And thanks to advances in HDR software, this is easier to achieve than ever before.
Editing HDR images in lightroom
Utilise the power of Lightroom to process stunning HDR imagery
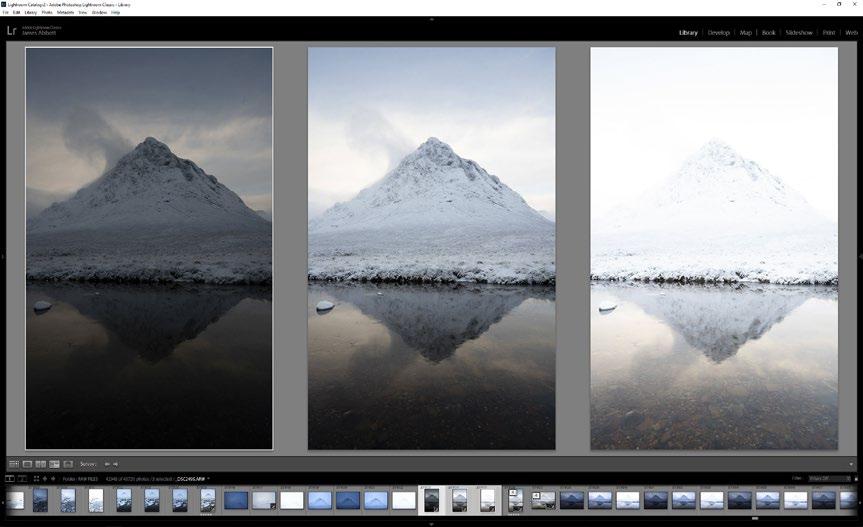
PRO KIT TRIPOD
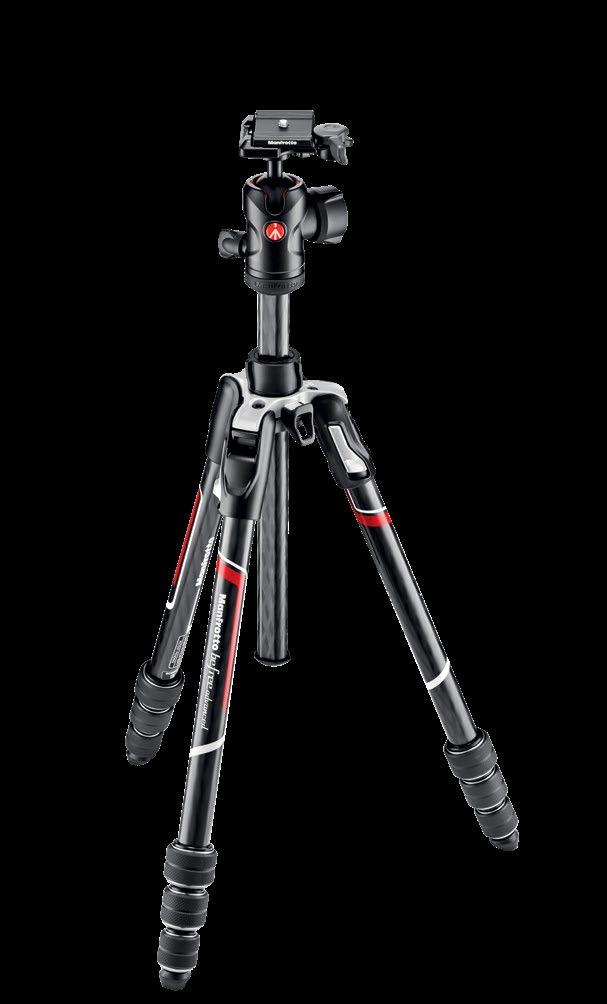
It’s possible to shoot multiple-exposure images such as HDR by handholding the camera, but you run the risk of images not lining up during post-processing – and even if they do, you may need to crop the resulting image heavily. So, whether you’re shooting HDR, focus-
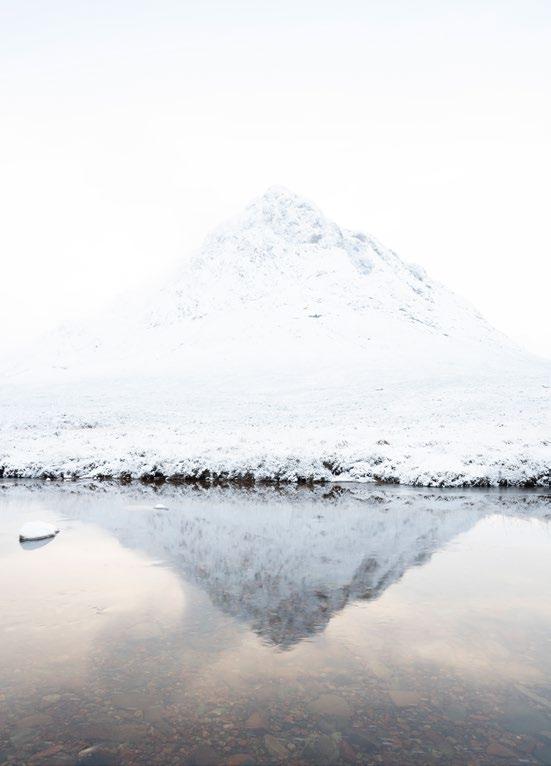
1 Select images
In Lightroom’s Library Module, select your bracketed exposures by clicking on the first image, holding down Shift and clicking on the final ones. Next, switch over to the Develop Module to apply adjustments.
2 Merge to hdr
Go to Photo > Photo Merge > HDR. In the HDR Merge dialog box, tick Auto Align and Create Stack, and untick Auto Settings. If there was movement in the scene, apply Deghost Amount at the most effective strength.
3 Apply adjustments
The most important settings here are Shadows and Highlights: set these first to recover detail, but don’t push the sliders too far. Whites and Blacks can now be increased and decreased to avoid muddy tones. Now, all normal basic adjustments can be applied.

4 Add
local settings
Use localised tools such as the Graduated Filter and the Adjustment Brush to apply further Brightness, Contrast, Shadows, Highlights, Whites and Blacks adjustments to specific areas of the shot, for fine-tuned processing.
BEFORE
104 TECHNIQUES
2 Sky detail
The sky has been subtly darkened, using Lightroom’s Graduated Filter to enhance the blue area of sky above the mist.
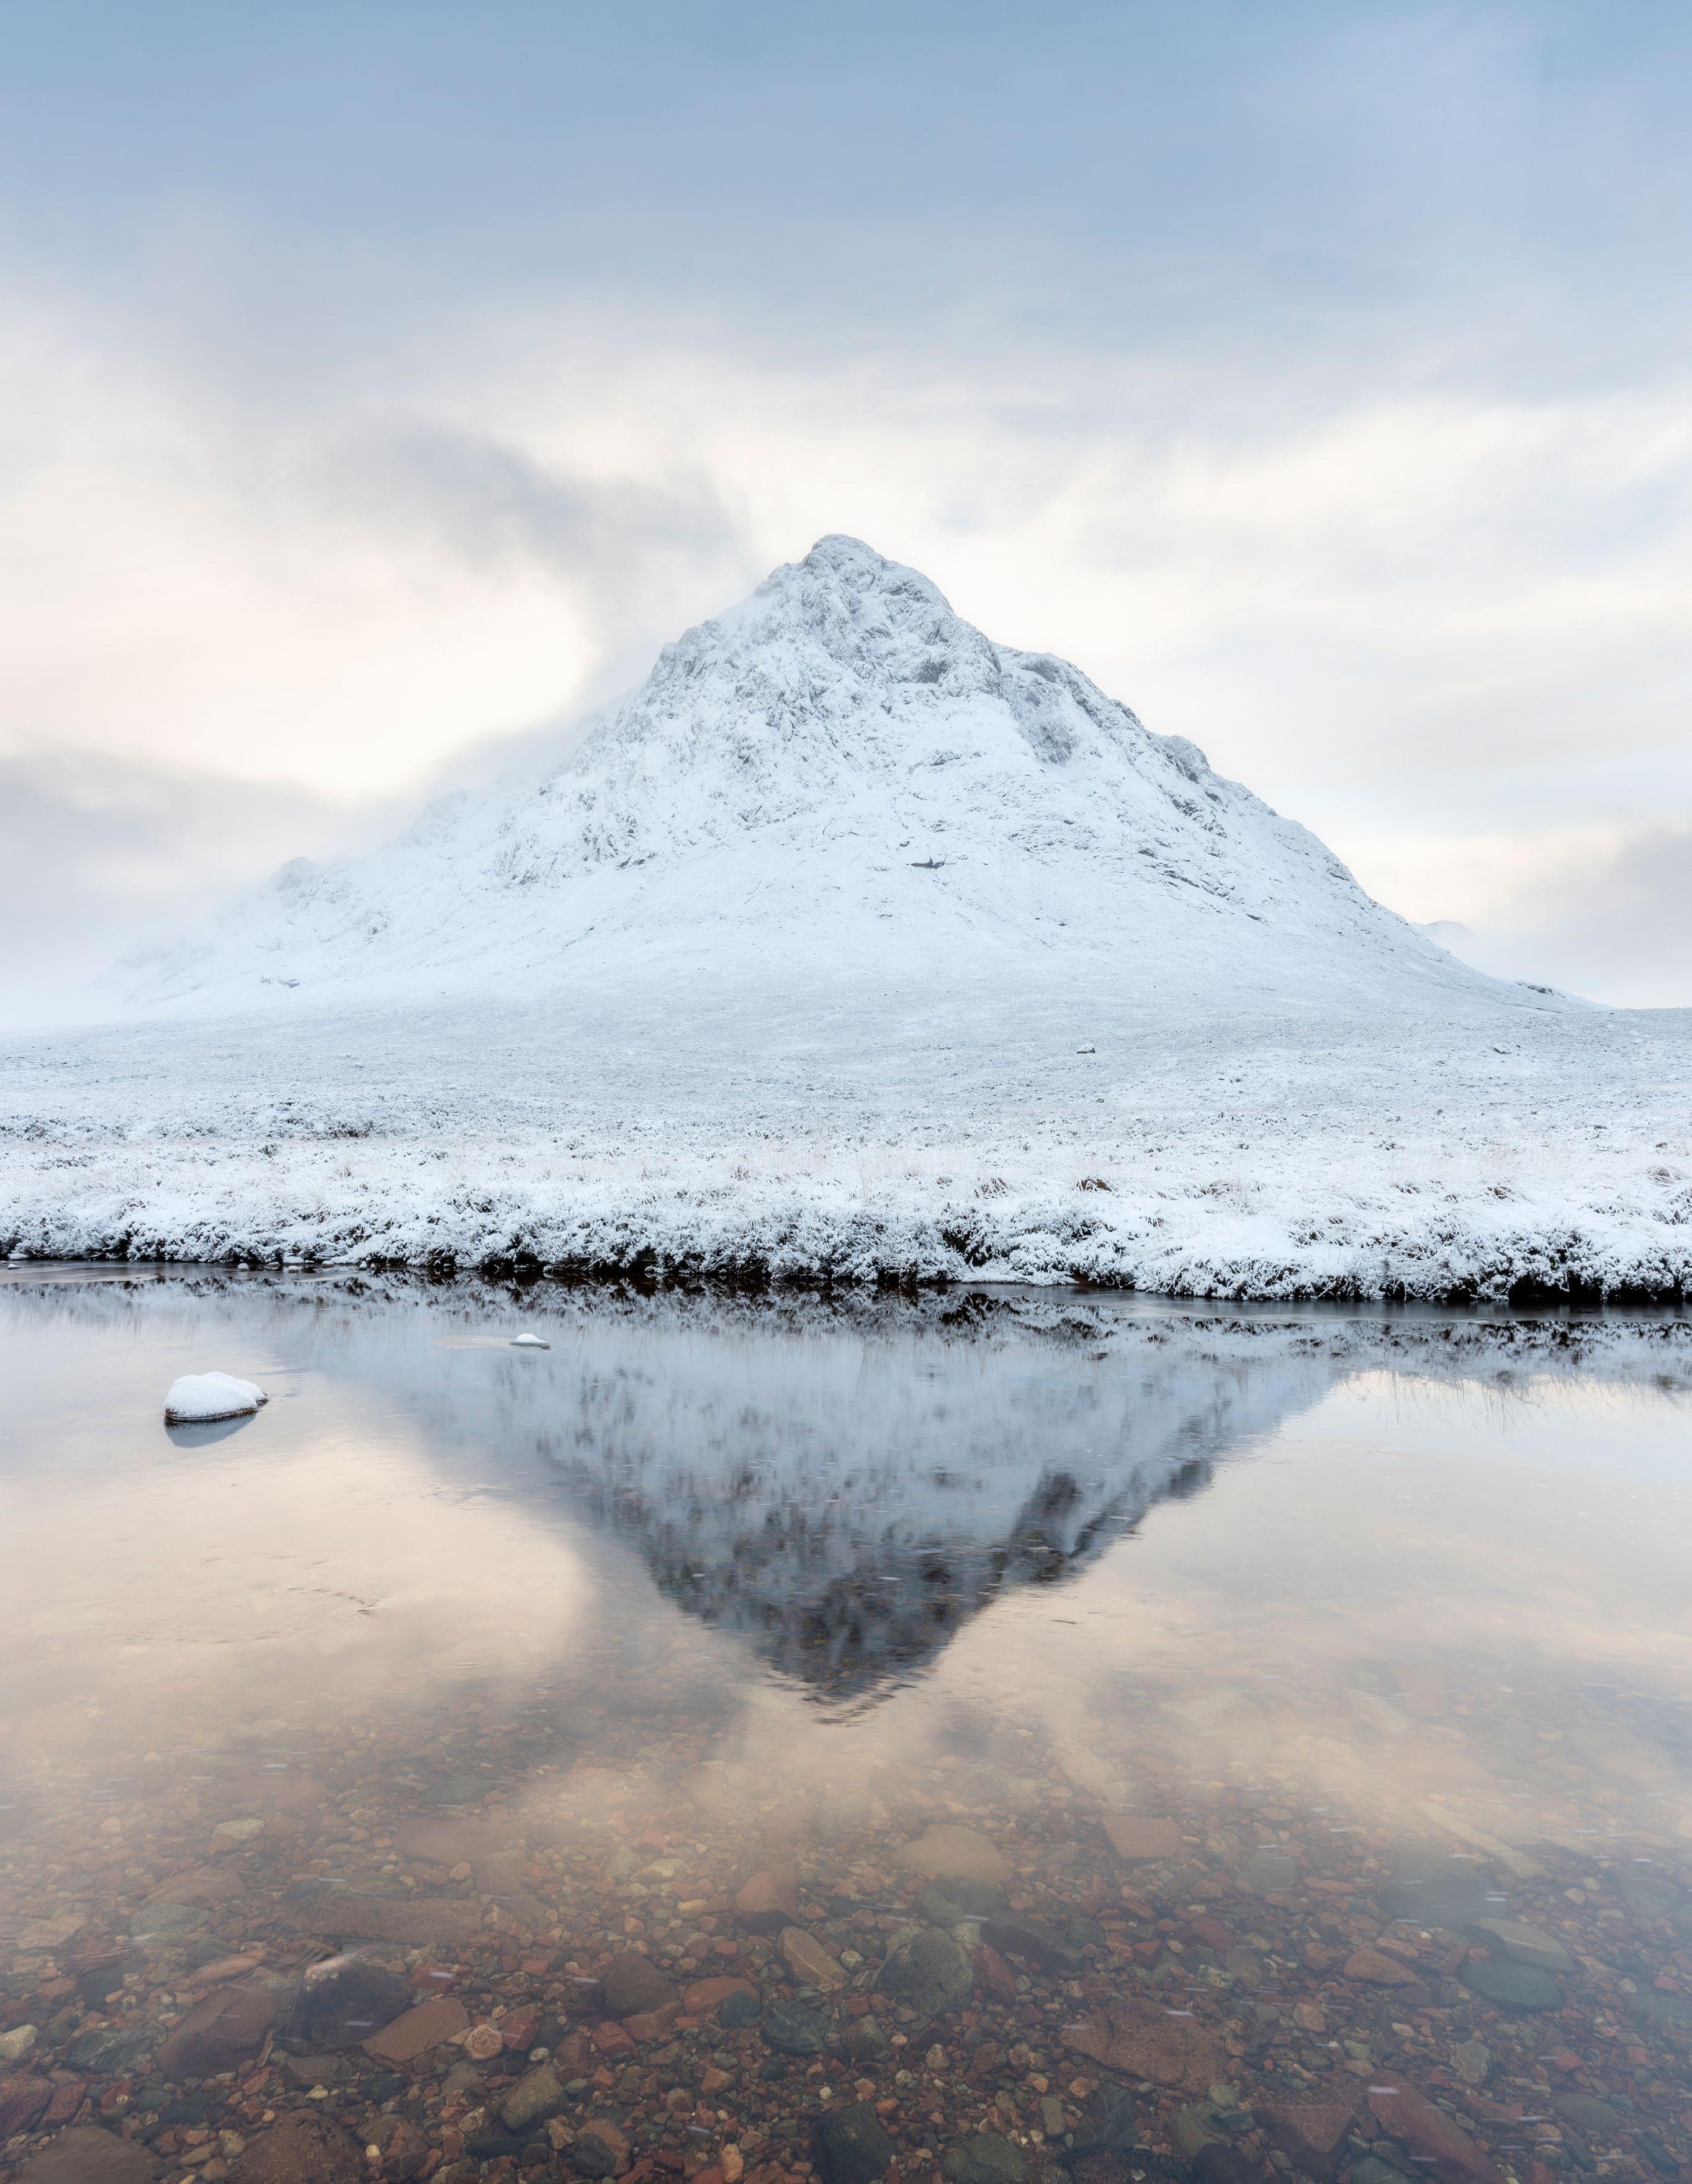
1 Realistic shadows
Allowing some of the darkest shadows to clip, in the same way you’d expect with a standard shot, makes the overall HDR effect much more natural-looking.
3 Soft highlights
Highlights in the image have maintained all detail; with subtle contrast in these areas, the colours present have remained natural with no increase in saturation.
105 NEW WAYS TO SHOOT LANDSCAPES
James Abbott
Exposure blending
Merge images using different exposure settings and take creative control of your shots
One of the most exciting aspects of shooting digital photography for landscape photographers is the ability to blend multiple exposures. This technique is all about achieving different shutter effects while maintaining a large depth of field, without the need to increase ISO to levels that are too high for this type of photography. This technique is most useful in low-light conditions, where ND filters can’t be used to lengthen exposure time, as they can in brighter conditions, but you need a faster shutter speed to achieve a specific effect.
Maintaining quality
When this image was shot, the first exposure was taken at f/16 to ensure a large depth of field, but this resulted in a 15-second exposure. So, afterwards, while shooting in Aperture Priority, the aperture was set to f/4 and focus set to the front of the wreck – this resulted in a 0.6-sec exposure with more texture in the water.
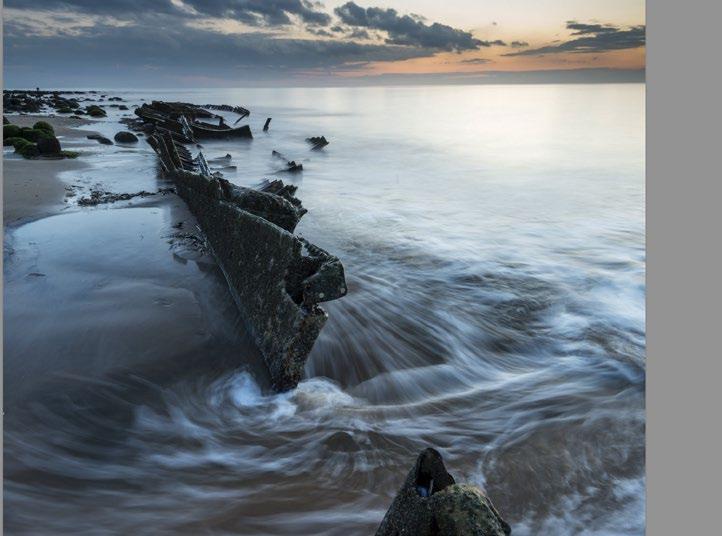
The reason for this approach was to keep ISO low: to raise it from ISO 50 to achieve 0.6 sec at f/16 would have required ISO 800, which would mean a reduction in overall image quality.
PRO TIP BEACH SHOOTING
When you shoot long exposures in the tide, it’s common for the tripod feet to sink as the tide ebbs and flows. The easiest way to combat this is to push the legs into the sand until they stop. Another is to carry three CDs to place the tripod feet on.
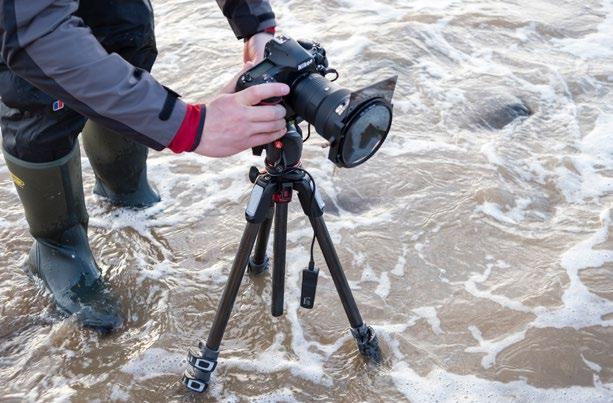
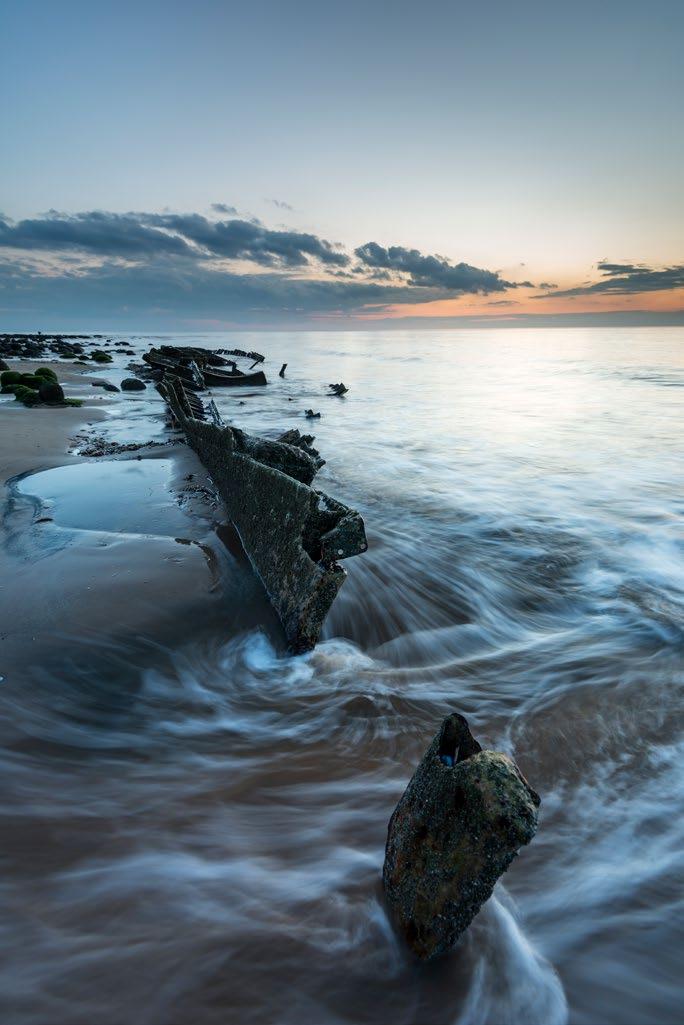
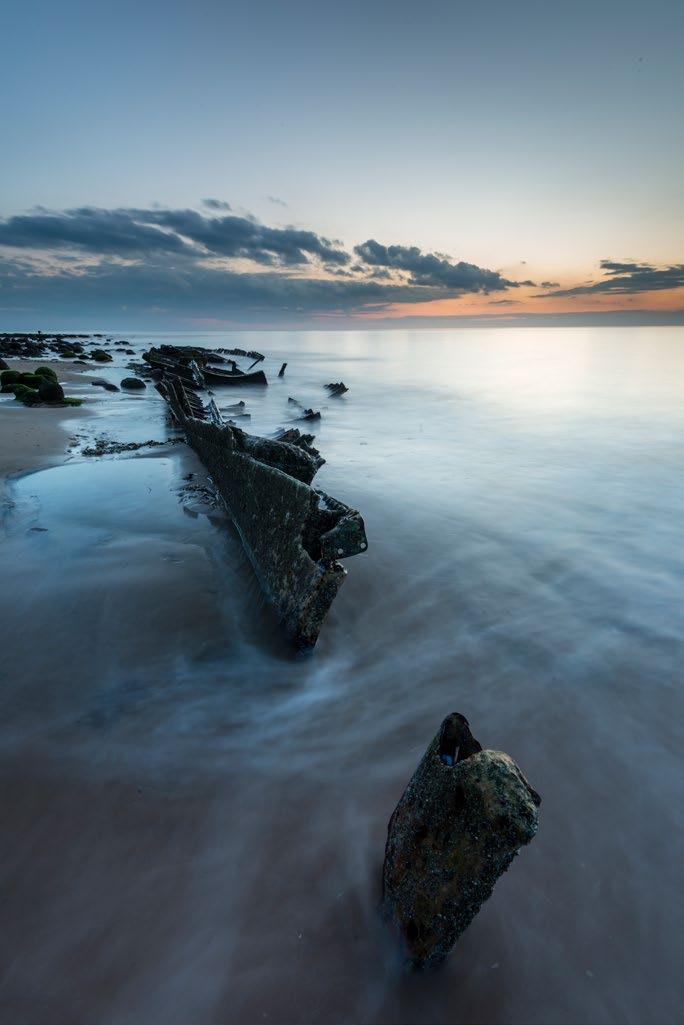
Blend your multiple exposures
Use Lightroom and Photoshop to merge your shots
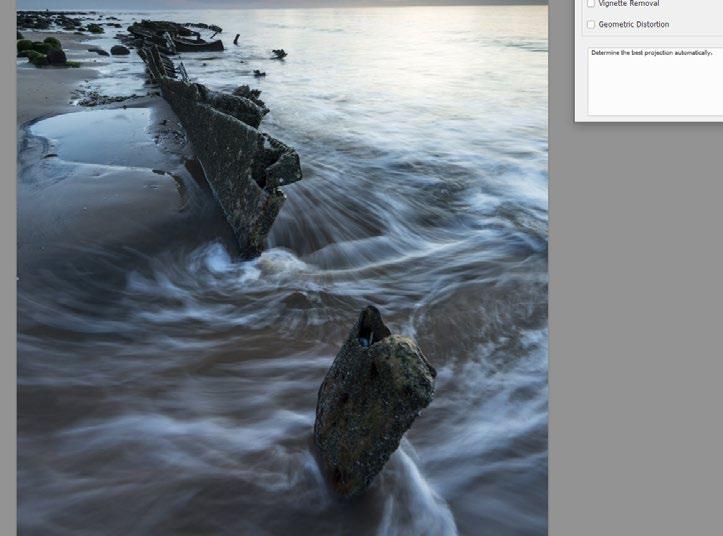
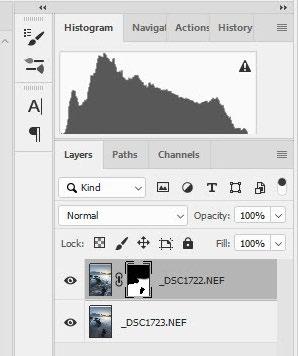
1 Sync settings
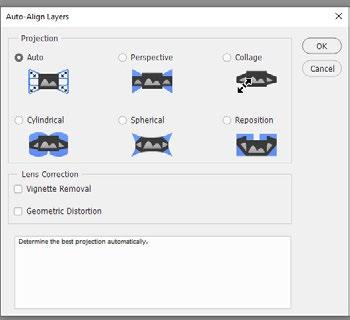
In Lightroom, apply all the necessary adjustments to the first image. Then hold down the Shift key and click on the second image before pressing the Sync button on the right. Click on Check All, then click OK to apply the settings from the first image to the second so that both are processed identically.
2 Export and align
Right-click on the selected images and go to Edit In > Open As Layers In Photoshop. When the images open as layers, select both, then go to Edit > Auto Align Images and select Auto. Once the images have aligned, you’ll need to crop out the empty space that appears around the image edges using the Crop Tool.
3 Mask together
Click on the top layer to make it active, then click the Add Layer Mask button at the bottom of the Layers panel. Next press D to set the palette colours to black and white, and press X to toggle between the two. Use the Brush Tool (B), and paint black to reveal the layer below; paint white to hide any mistakes.
f/4 f/16 0.6 sec 15 sec ISO 50 ISO 50
BEFORE
106 TECHNIQUES
The water taken with a faster shutter speed shows more texture than the long exposure, and makes for more dynamic and interesting foreground interest in the image.
1
Shooting at f/16 provided a large depth of field that ensured the whole shipwreck was sharp, as well as providing a long exposure of 15 seconds to smooth the water.
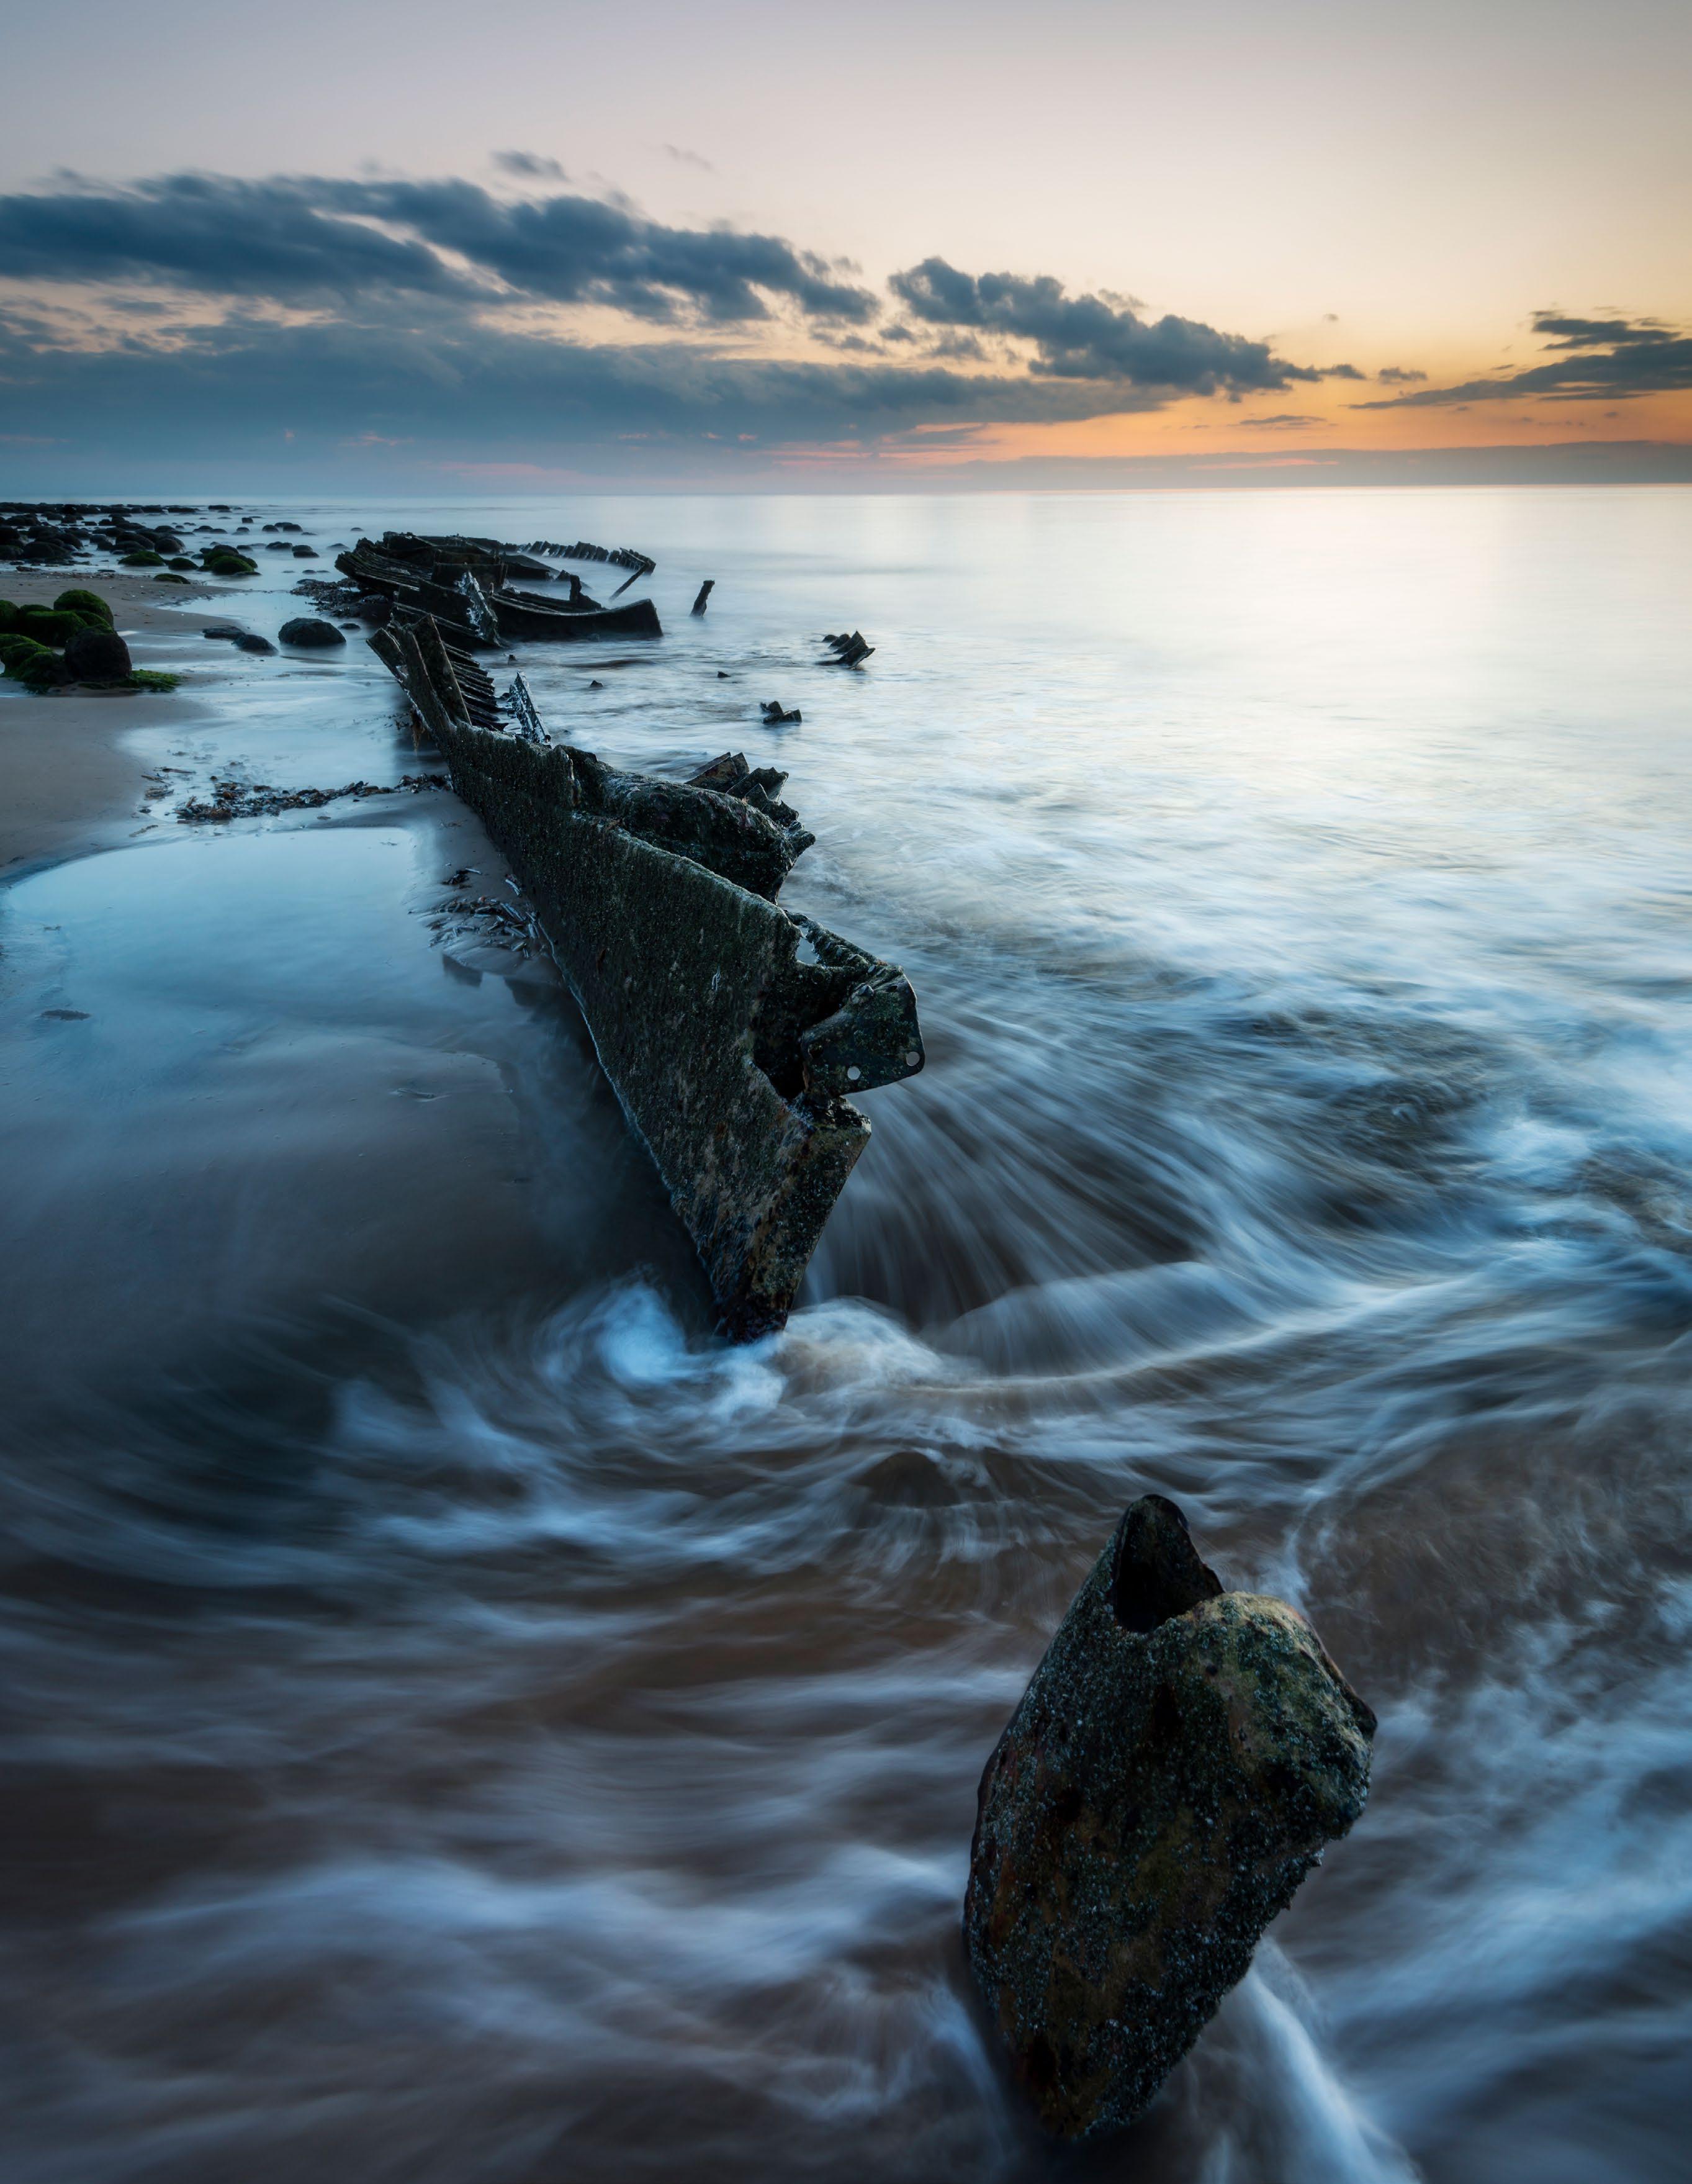
2
The smoother water of the f/16 image was blended into the midground and background because it works visually, and it was much easier to mask the underlying layer this way.
Large depth of field
Smooth midground
3 Water texture
107 NEW WAYS TO SHOOT LANDSCAPES
James Abbott
Learn how to focus-stack
Imagine an image that’s absolutely pin-sharp from less than a metre in front of the lens, all the way to the background that’s several miles away. Sounds impossible, doesn’t it? But the good news is that it’s not only possible, but it’s also actually a fairly easy technique to shoot and edit.
Why should I focus-stack?
The advantage of focusstacking is that it allows you to shoot at the sweet spot of your lens, which is the aperture that produces the sharpest image it’s capable of. This is usually f/8 or f/11, which won’t produce the largest depth of field possible, but by focusing at several points within the
PRO ADVICE
scene then merging them together in post-processing, you can achieve a depth of field much larger than would be possible with any lens at f/22, and without the loss of overall sharpness brought about by diffraction.
How to focus-stack
The simplest way to focusstack is to use AF and change the focus point on your camera’s LCD screen back through the scene as you take a series of shots. You then open all the shots in your image editor; once they’re merged together, you can enjoy supersharpness in your landscapes.
POINTS OF FOCUS
Learning where to focus to ensure that the depth of field from one shot overlaps the next is imperative to the success of this technique. Any gaps, where blur is present, will mean that Photoshop or other software will be unable to blend the images successfully. Knowing exactly where to focus takes practice. Depth of field extends a quarter of the way in front of the point of focus compared with the depth of field behind this point, so keep this in mind while setting focus points.
FOCUS POINTS
2 The sweet spot
The images used for this stack were taken at f/11, which is one of the sharpest apertures on the lens that was used here – a Nikkor 16-35mm f/4.
1 Front-to-back sharpness
The foreground was less than a metre in front of the camera, but everything from here to the hills in the background is sharp and in perfect focus.
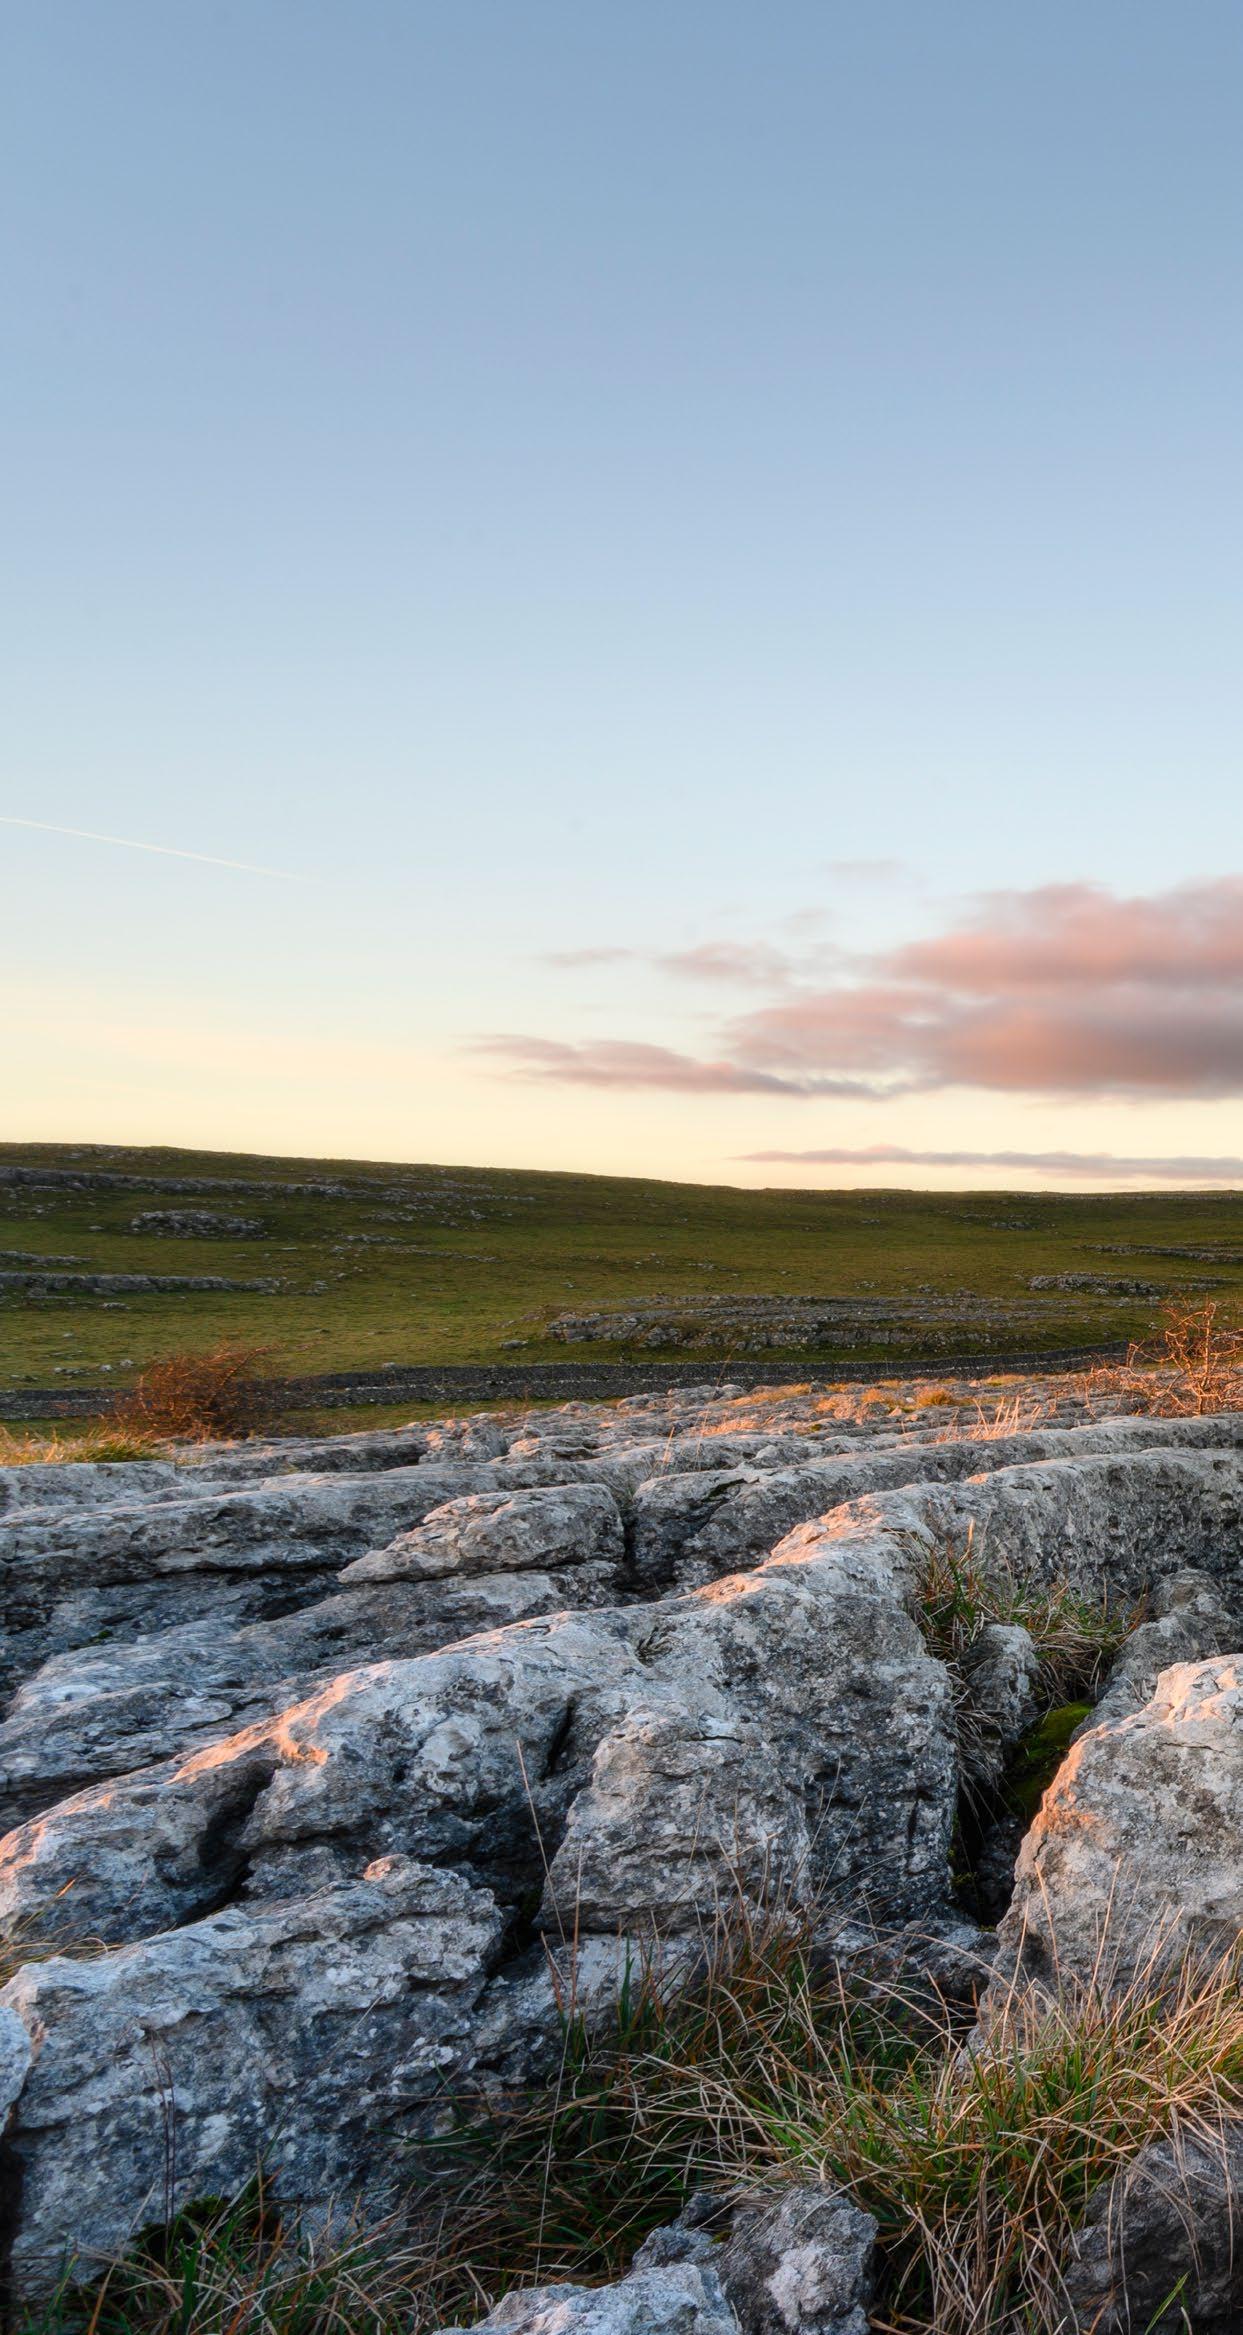
Shoot images to stack
Follow these simple steps for focus stacking
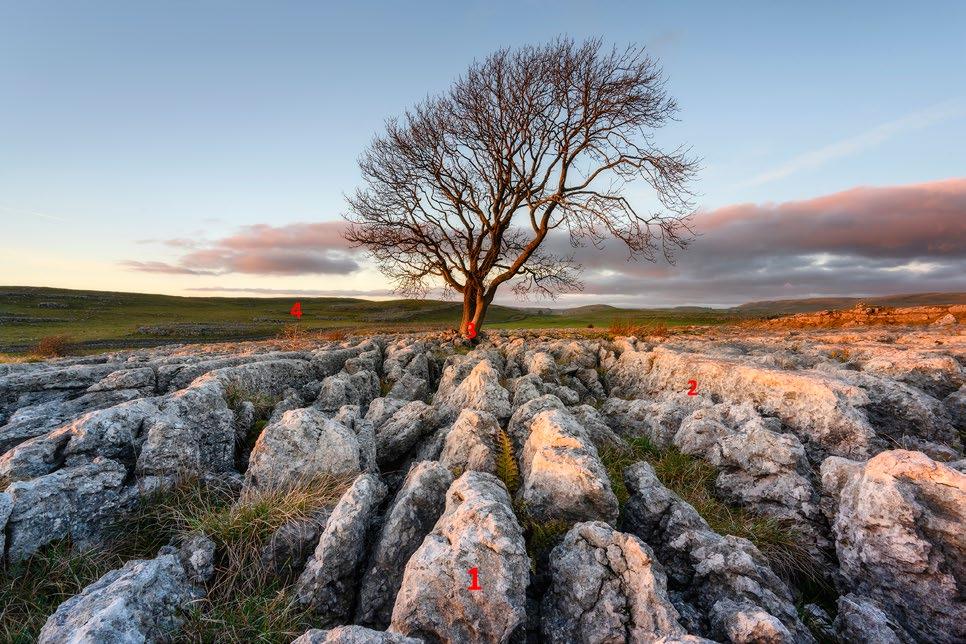
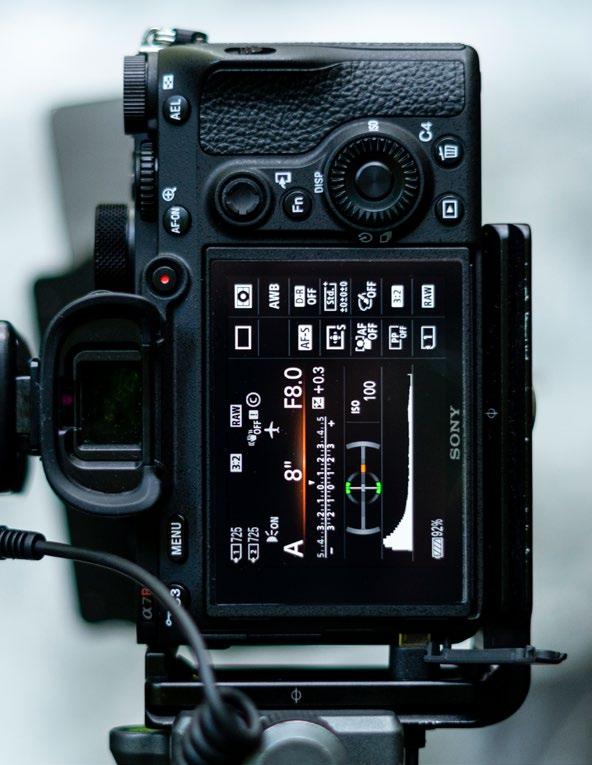
1
Camera settings
Attach your camera to a tripod. Set it to Aperture Priority at f/8 or f/11. If you would like to increase the exposure time to blur water, for instance, stop down to f/13 but don’t stop down any more than this. Set ISO to 100. Use the histogram to make sure shadows and highlights haven’t been clipped, and only then add any filters you need to the lens.
1 2 3 4
Maximise sharpness in every way using this advanced focusing technique
108 TECHNIQUES
2 Set focus points
For the points of focus, begin at the bottom of the frame, which will be the closest subject to the lens. Take a shot, then move the AF point to a position behind and so on until you’ve taken three or four shots at different focus points. Don’t simply move the focus point up the frame: assess depth in the scene and position the point accordingly.
3 Working with movement
The clouds in the background were moving across the sky quickly and the light was constantly changing, so the four images had to be shot in quick succession.
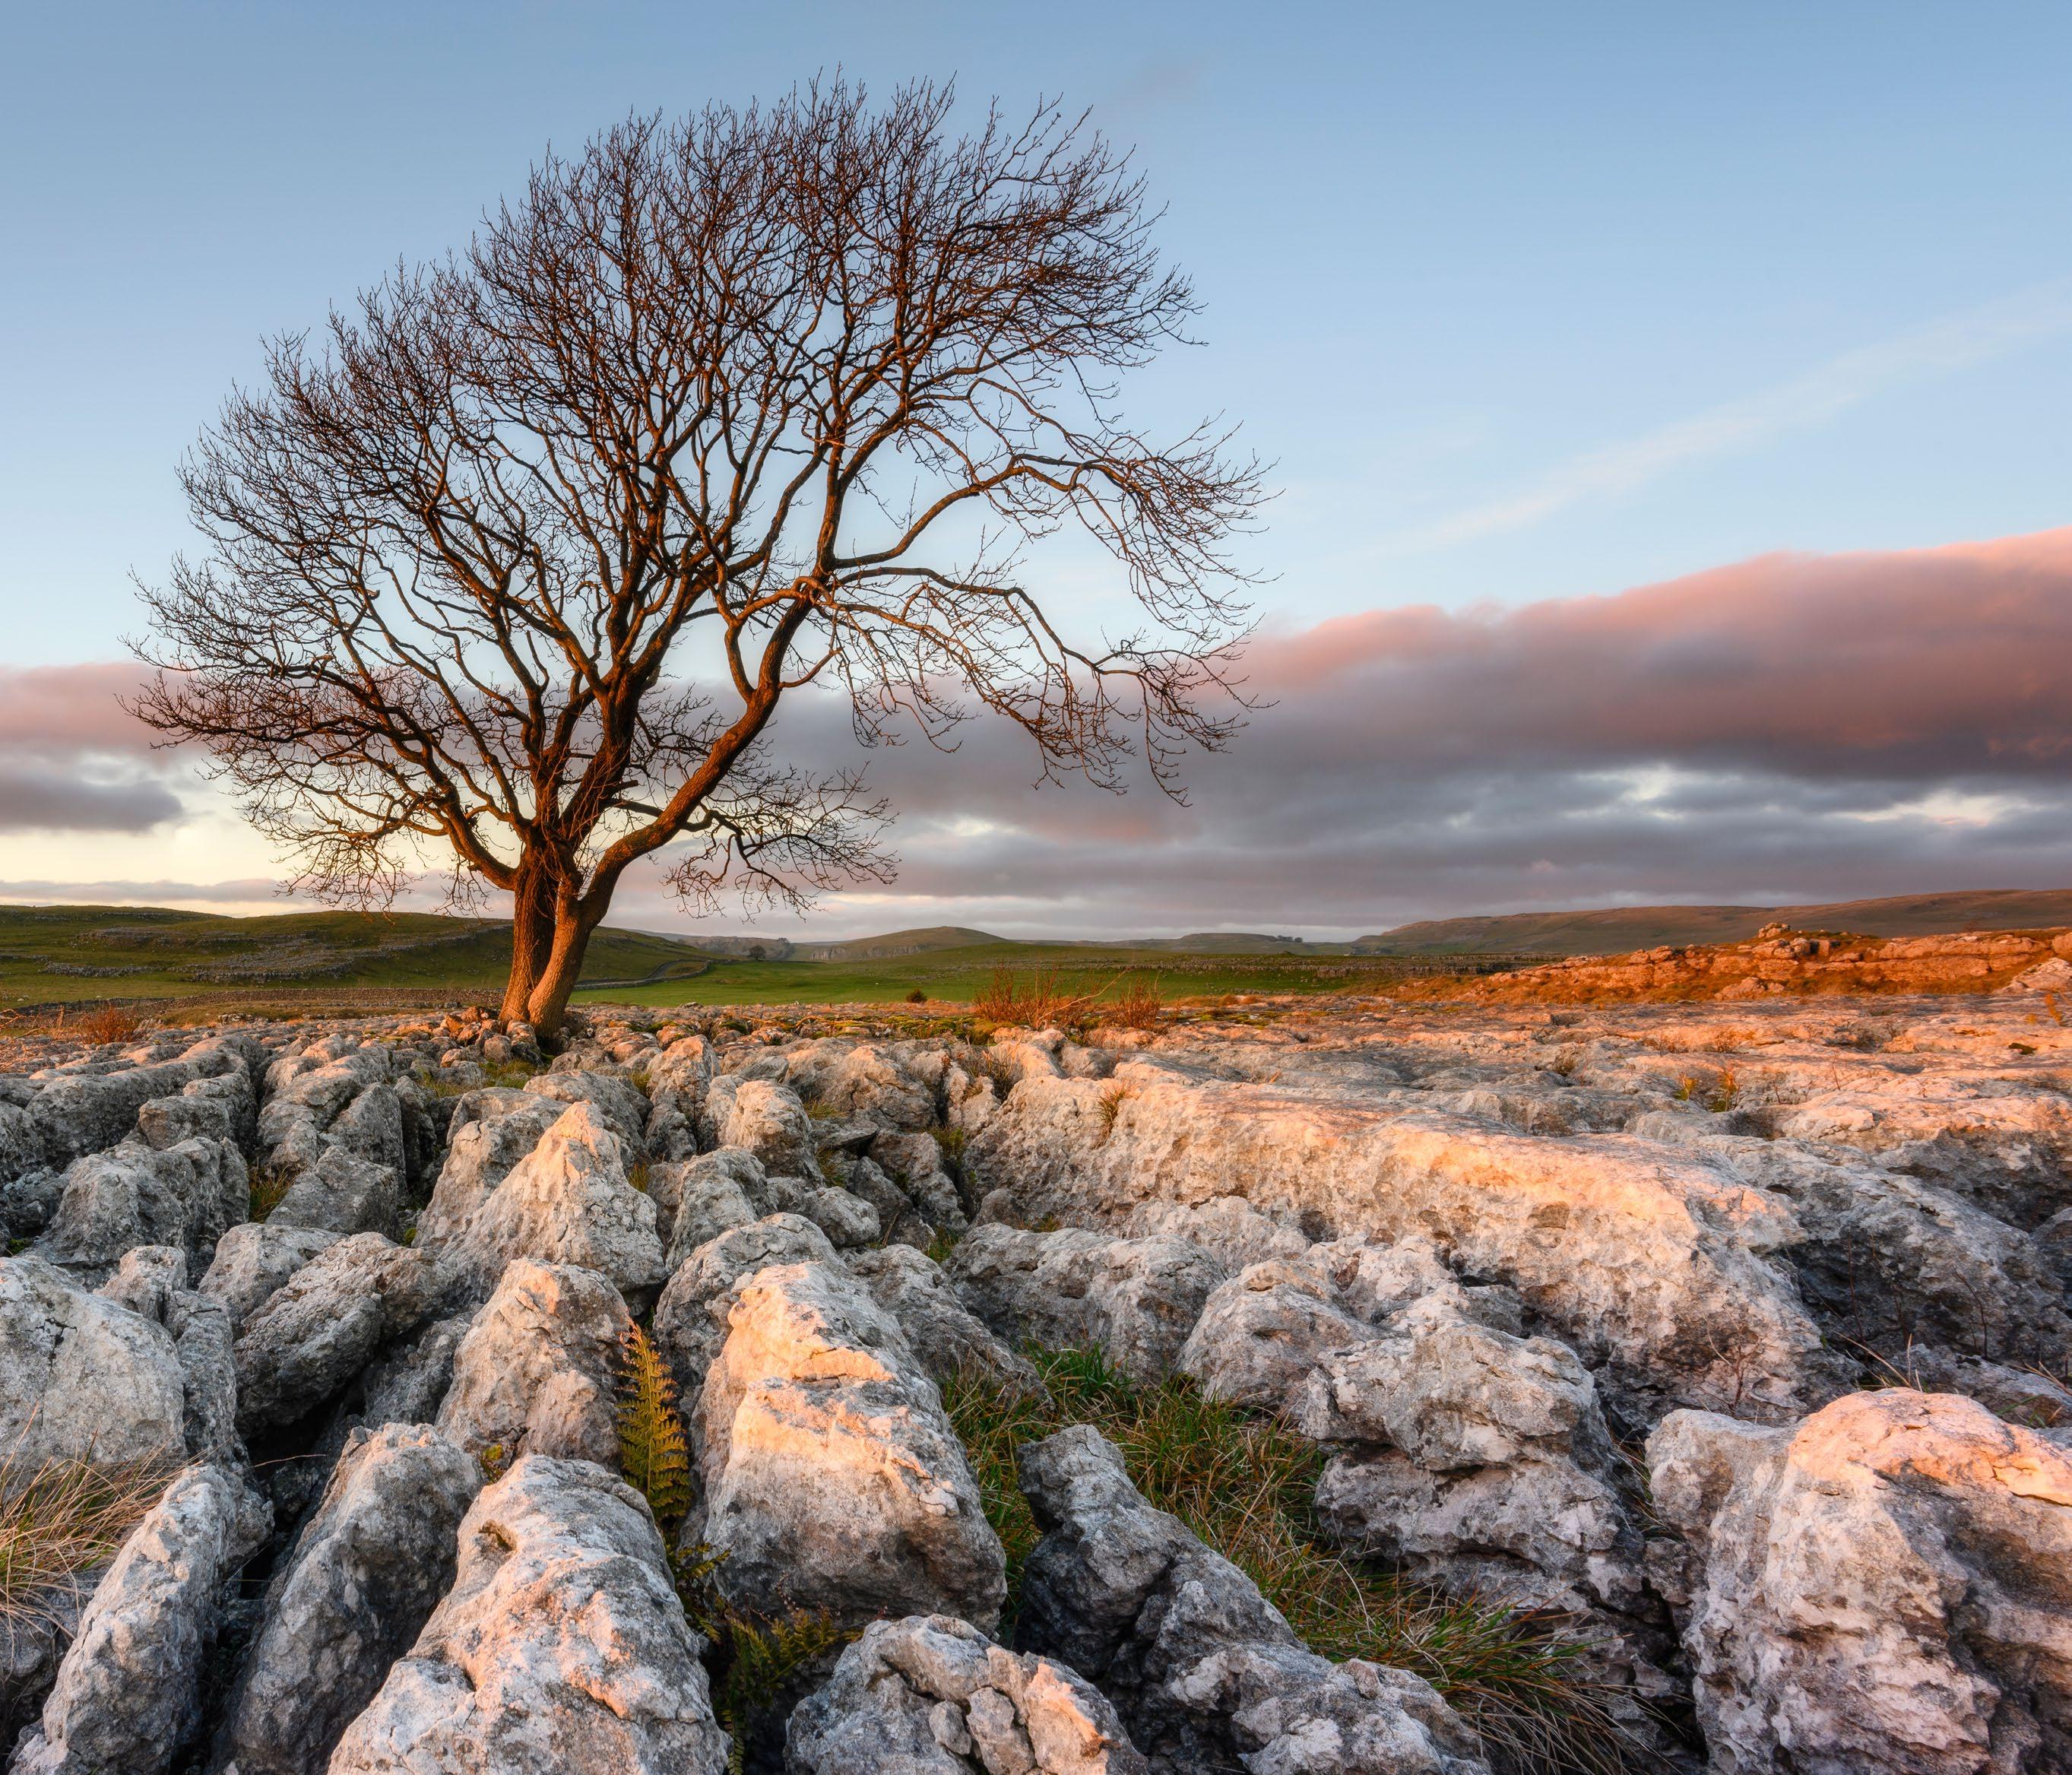
3 Use a remote

After setting the focus point for each shot, wait for a second before releasing the shutter. A cable release or the camera self-timer are sufficient, but the best option is a wireless remote. A remote means you don’t have a delay between shots as you would with the self-timer, and there’s less chance of camera shake from a cable release.
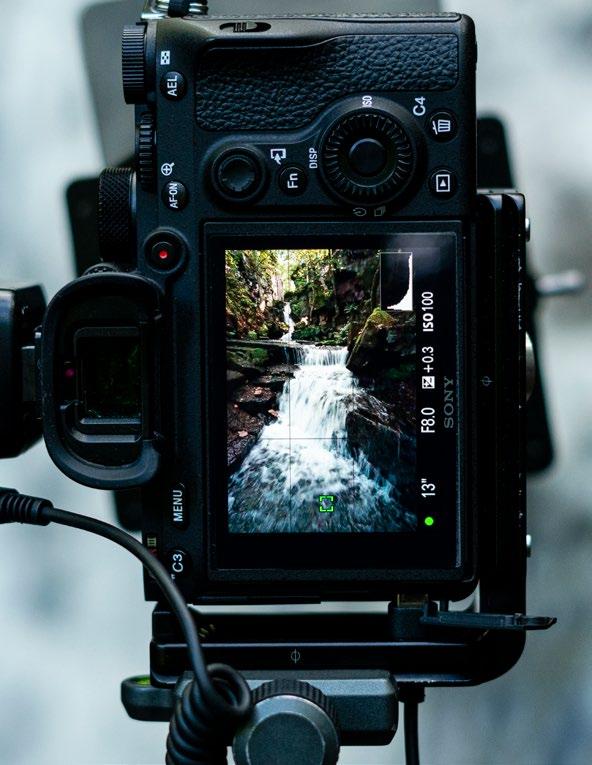
109 NEW WAYS TO SHOOT LANDSCAPES
James Abbott
Edit focus stacked images
Use automated processes in Photoshop for quick and clean edits to create your ideal deep-depth shot

Blending a set of focus-stacked images in Photoshop really couldn’t be simpler. In fact, the whole process relies on a series of automated tasks, so all you have to do is select the relevant processes in the main menu, and the software takes care of the rest on your behalf. Just as when you shoot exposures for HDR processing, it’s
important that all camera settings apart from shutter speed remain fixed during shooting, and that settings are identical during processing. The only time you might change raw editing settings is if the brightness in the scene changed from one shot to the next, so you may need to match exposure – but that’s all.
Blend your focus-stacked images
It is easier than you think to focus-stack images
PRO TIP IMAGE EDGES
During the editing process – once the images have been blended in Photoshop –you have to crop empty space from around the edges where images were aligned. Also, look out for blur along these edges by zooming in close-up: missing it could easily ruin an otherwise perfectly focus-stacked image.
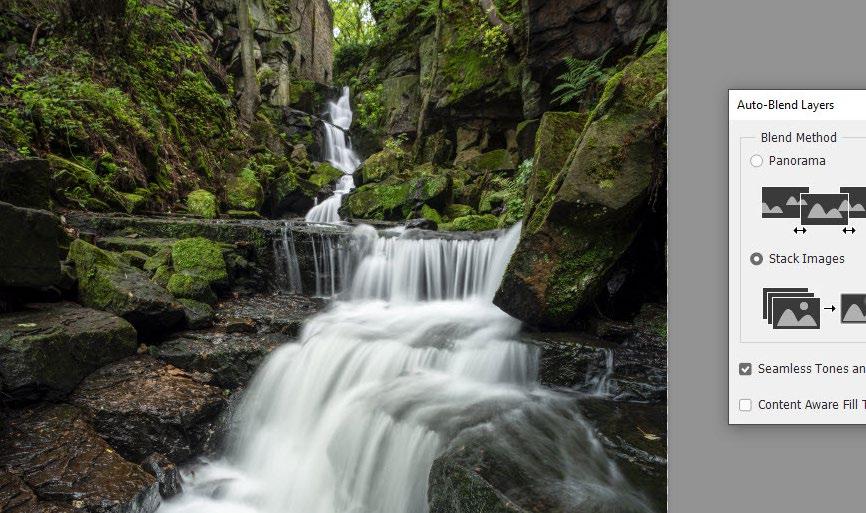
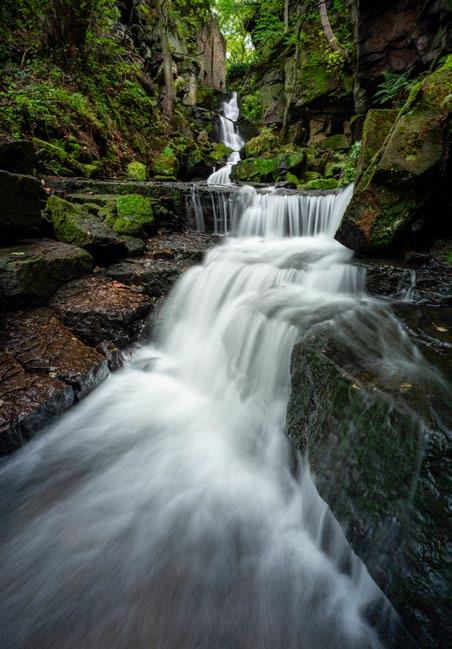
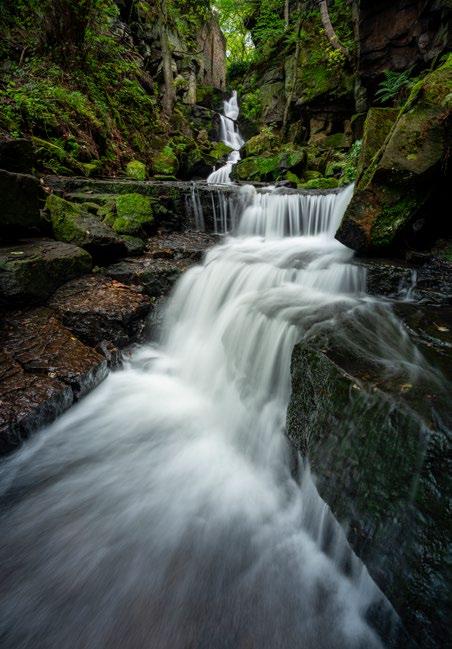
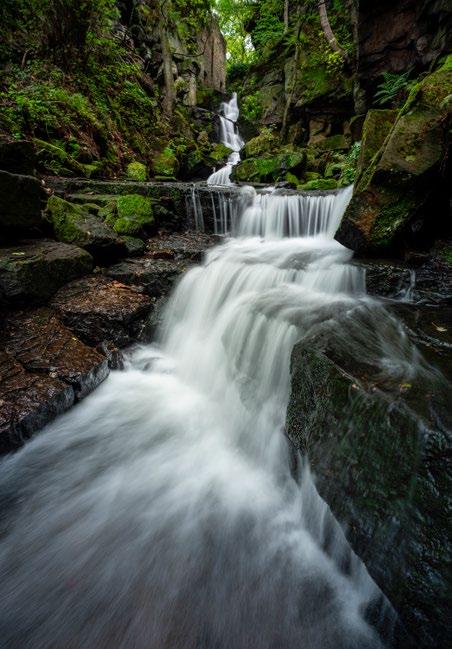
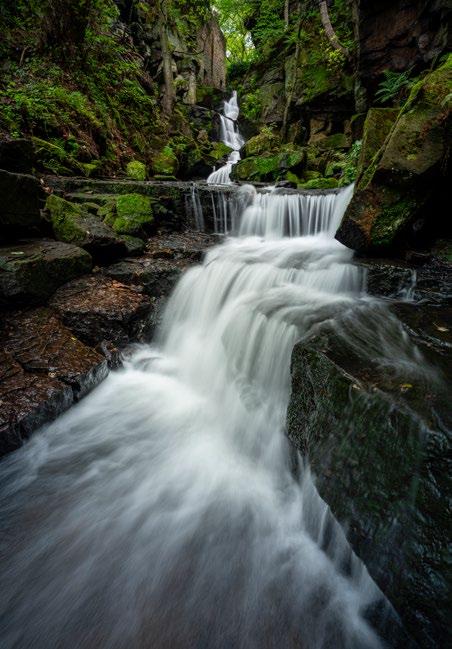
1 Sync settings
In Lightroom, apply all adjustments to the first raw image, then hold down the Shift key and click on the final image in the series before pressing the Sync button on the right. Click Check All, then click OK.
2 Load images
Export the images as TIFFs. Go to File > Scripts > Load Files Into Stack. In the dialog box, set Use to Folder and locate your image folder. Tick Attempt To Automatically Align Source Images and click OK.
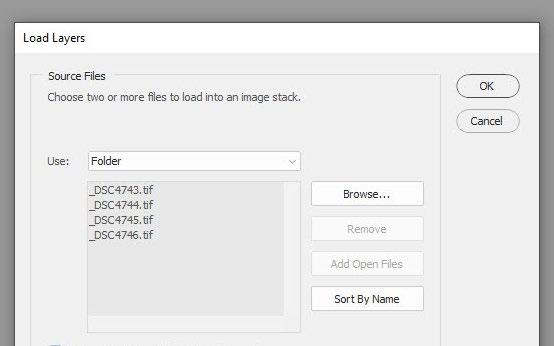
3 Auto-blend layers
Click on the top layer in the stack on the Layers panel, hold down Shift and click on the bottom layer so all are selected. Next, go to Edit > AutoBlend Layers and Photoshop will know it’s a focus stack. Make sure Seamless Tones And Colors is ticked, then click OK.
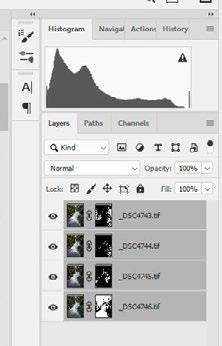


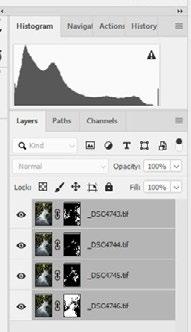
4 Crop the image edges

There will now be space around the image and possibly blur at the edges, so check this and crop the image accordingly. Finally, go to the menu at the top-right of the Layers panel, which is represented by four horizontal lines, and select Flatten Image.
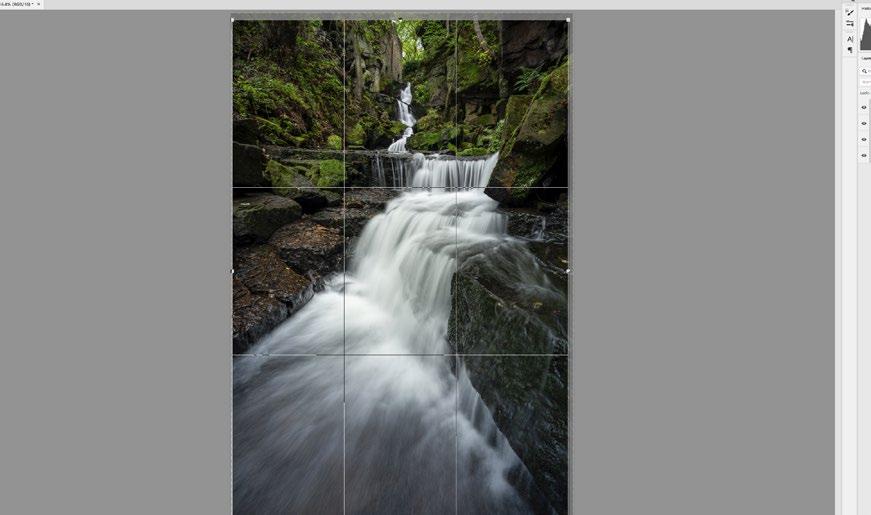
BEFORE
110 TECHNIQUES
Despite being made up of four separate shots, the final focus-stacked image shows no indication of it being a blend, apart from the huge depth of field.
Focus-stacking can work with long exposures, but the longer the exposure, the greater the risk that the light will change from one shot to the next.
Appreciating the full effect of focusstacked landscapes is difficult with small images, but printed large and framed on the wall is where this technique can truly amaze.
f/11 1.3 sec ISO 100
3 Made for large prints
2 Long exposure
1 Seamless blend
111 NEW WAYS TO SHOOT LANDSCAPES
James Abbott
New ways of approaching landscapes
Photography is a constantly evolving medium, and the advances in digital camera technology and the capabilities of editing software are constantly bringing new and exciting landscape techniques to the table. While many of these rely on technology, such as HDR and focus-stacking, and others on kit such as ND filters to achieve ultra-long exposures, some are more in tune with how
you see and respond to the landscape itself. Whether it’s the time of day, the viewpoint you choose to shoot from or where you position yourself in relation to the rising or setting sun, new ways of seeing and shooting landscapes can come from within yourself –you simply have to look for them. So here are a few additional ideas for how you can breathe new life into your landscape shots…
LONG LENSES
The most commonly used lens for shooting landscapes is a wide-angle such as a 16-35mm full-frame, or a 10-15mm APS-C. While these will remain the most popular options, a less obvious but equally useful lens for landscapes is the 70-200mm.
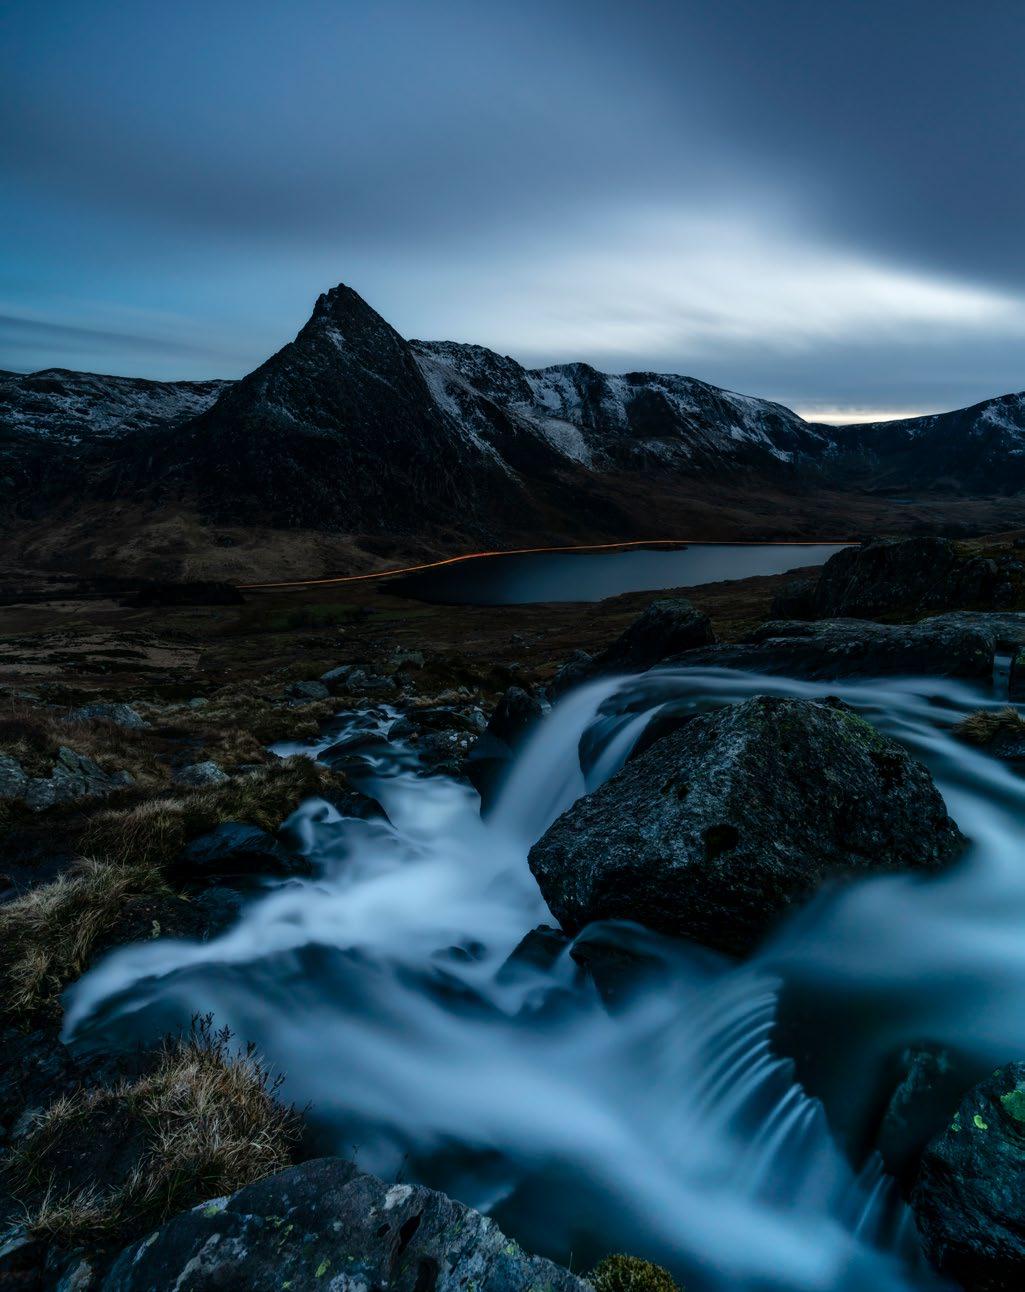
CREATIVE SHOT 1
1 Natural long exposure
We all aim to be out during the ‘golden hour’ for the best light, but it’s often worth being on location up to an hour before sunrise and an hour after sunset.
Under the faded light levels of these ‘blue hours’, light can look incredible and exposure times often run into minutes without the need for any filters; nothing more than a polariser was used for this 4.5-minute exposure.
CREATIVE SHOT 2
2 Shoot from the ground
The most comfortable shooting position is admittedly from standing height, but slavishly shooting from this position doesn’t always allow you to take full advantage of what the landscape has to offer. This image was taken with the camera almost touching the ground using the tripod’s articulating centre column, which was essential for incorporating the cotton grass into the shot successfully.
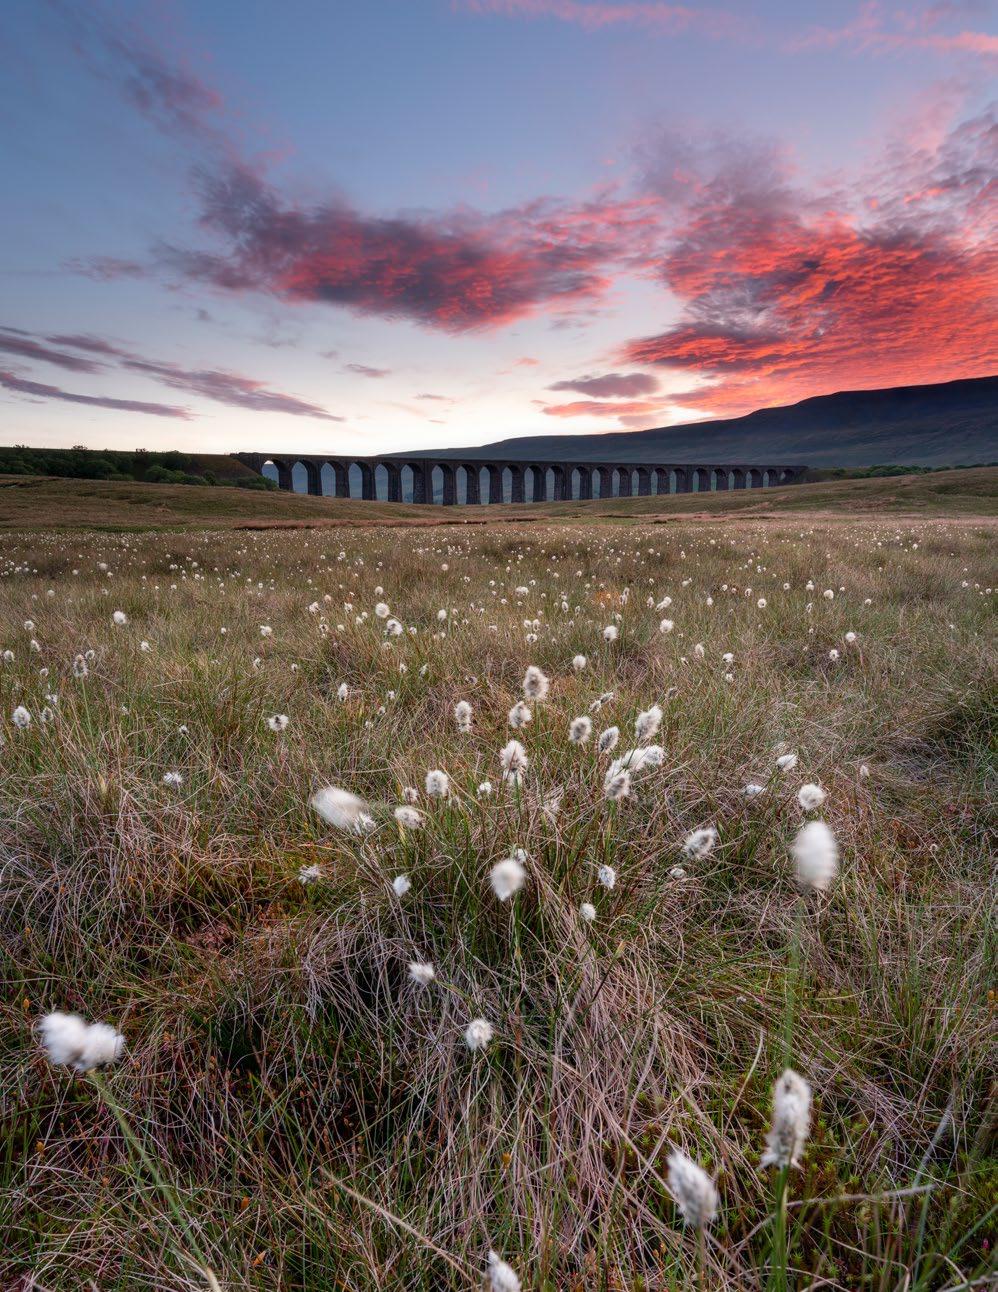
f/13 253 sec ISO 100 f/11 5 sec ISO 100
112 TECHNIQUES
Think outside of conventional approaches and you’ll be rewarded with more distinctive images
CREATIVE SHOT 3
3 Side light in the golden hour
The most common way to shoot a sunrise or sunset is by shooting into the light, because this often creates the most spectacular and dramatic results. It’s an understandable approach for these reasons alone, but simply approaching every location in this way is like wearing creative blinkers. Even with a spectacular sunrise or sunset, it’s still worth looking behind you to see if things look even better, and also to look for dramatic side-lighting, like in this shot.
5 quick tips & tricks
Unconventional approaches to composition that work

COMBINING FILTERS This image was taken with a 10-stop ND filter attached to extend the exposure time; to further enhance sky detail, a hard ND grad was also used. Mirrorless cameras can ‘see’ through extreme NDs, making it easy to position ND grads afterwards.
1 Dominant foreground
Foreground interest is usually a small object, but including more prominent objects here can also balance well against distant subjects, and still create a step into the image.
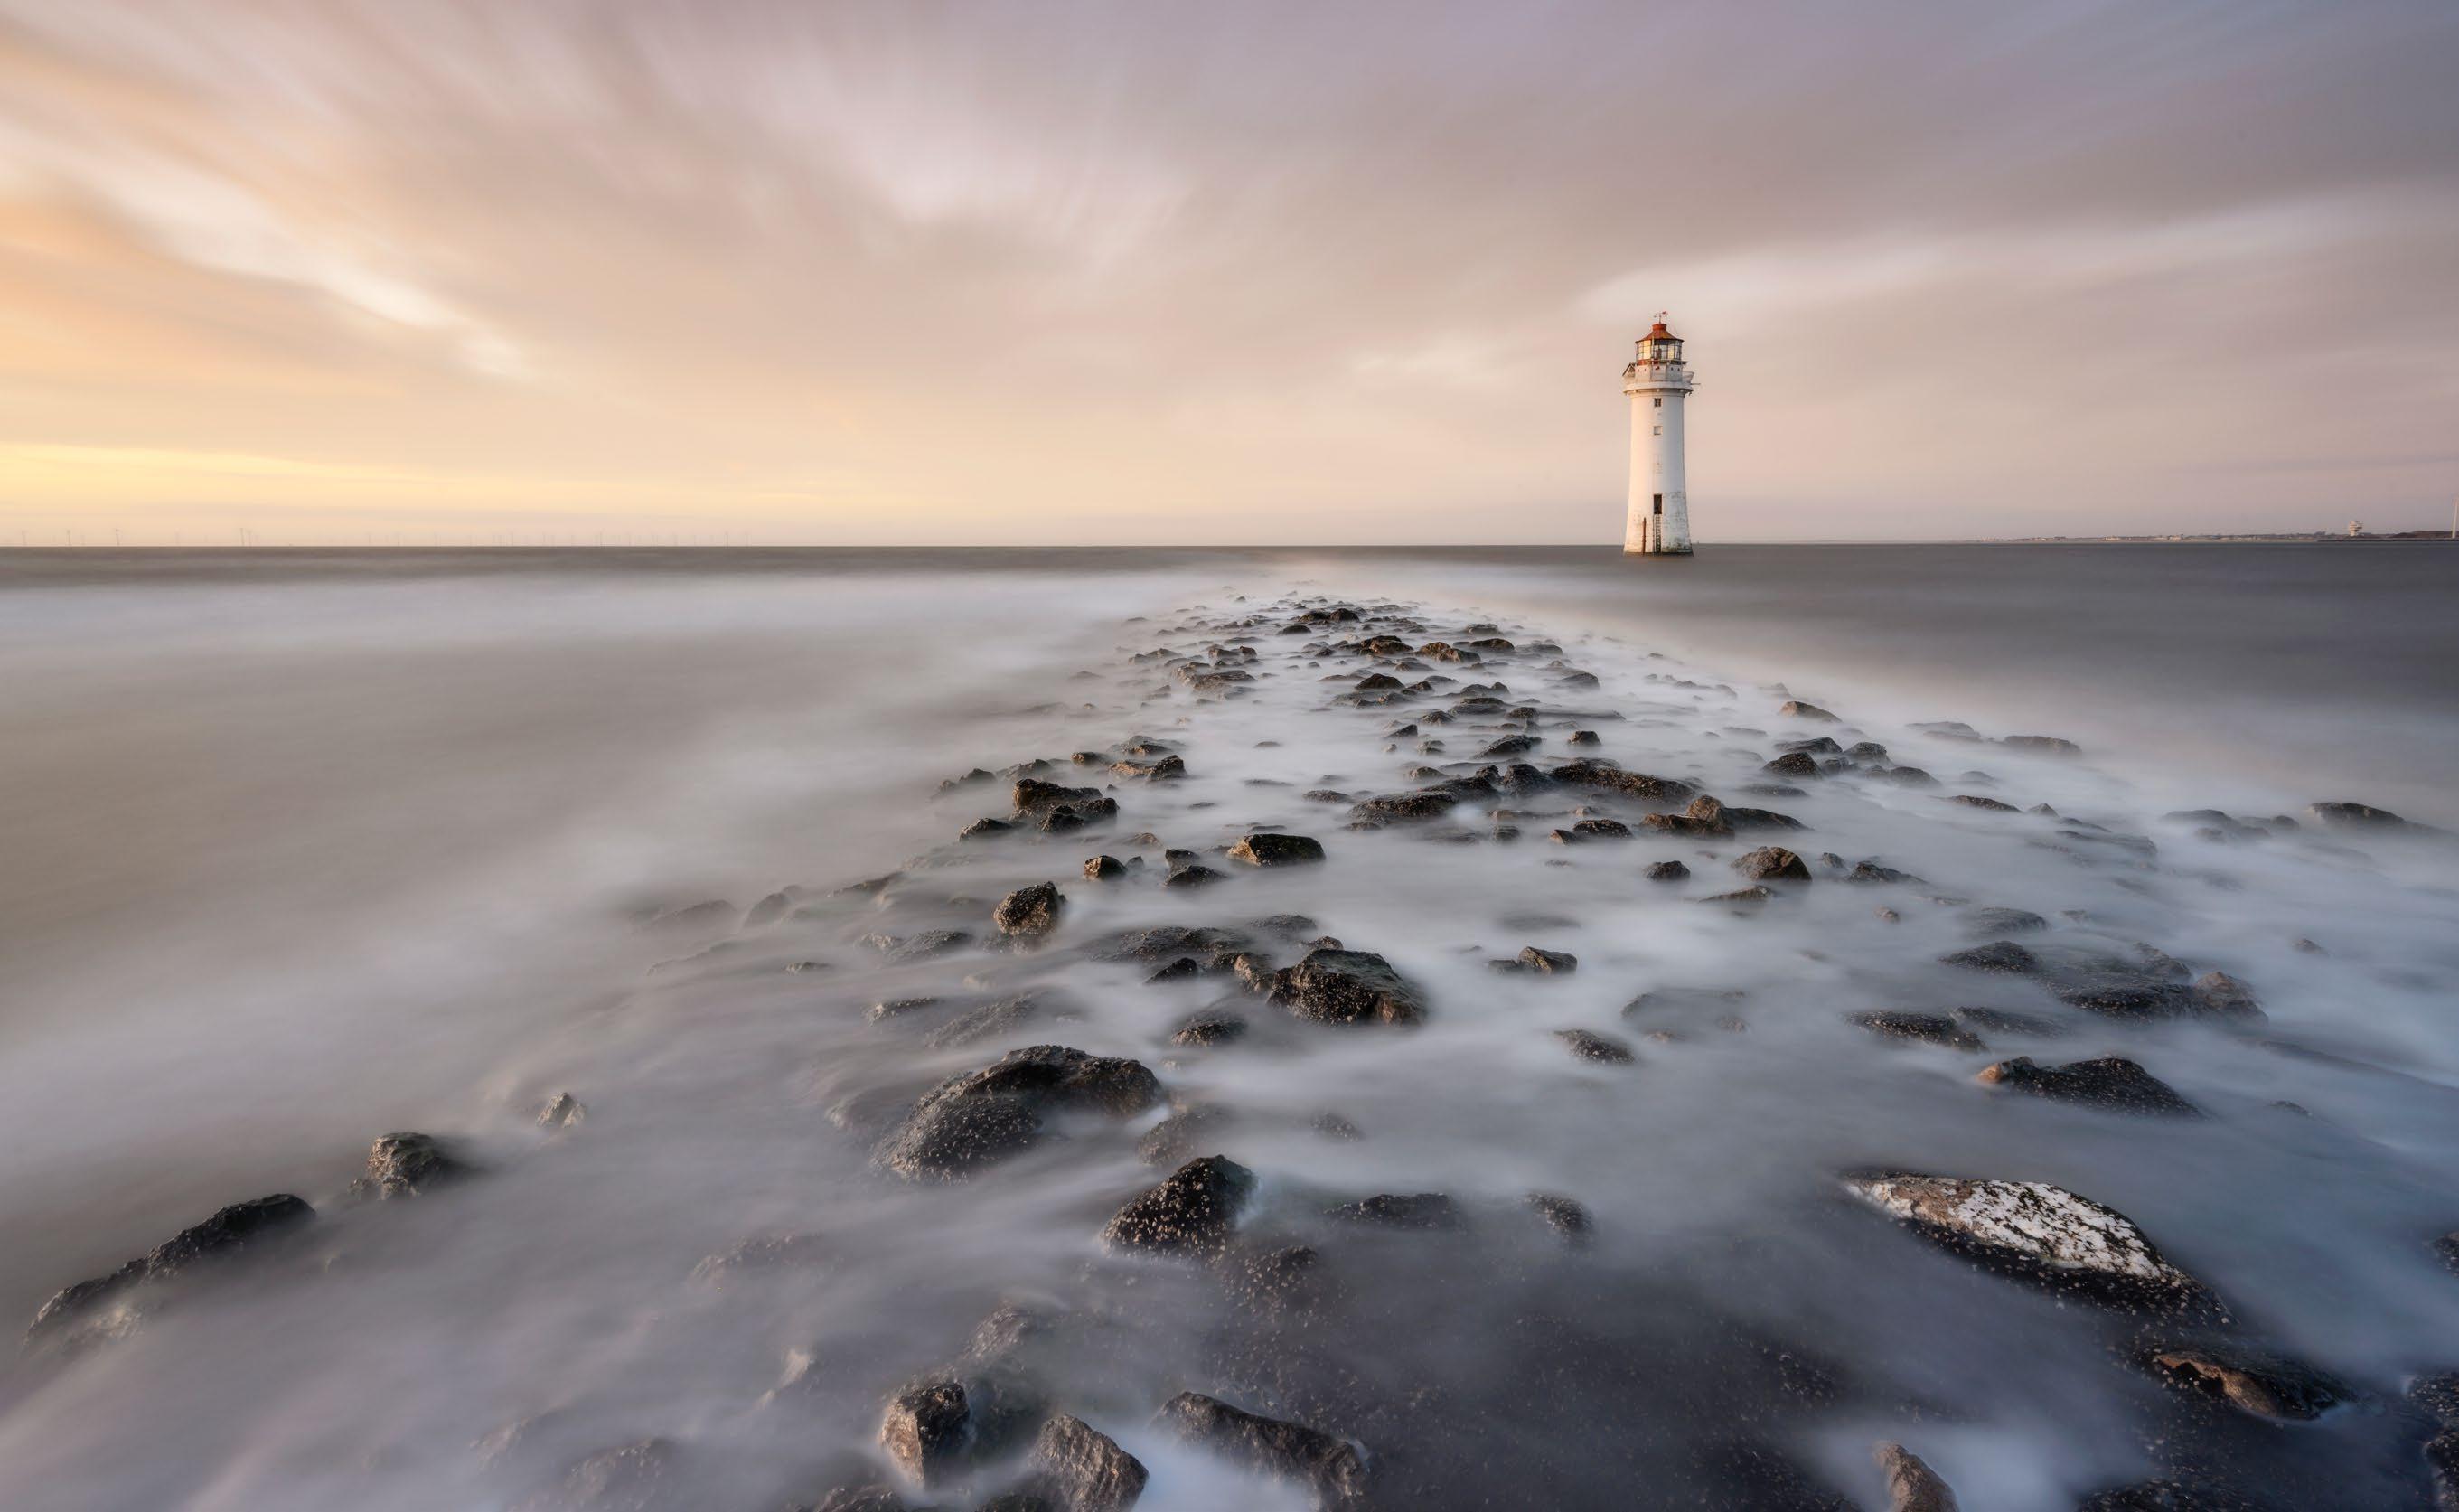
2 Fill the frame with interest
The traditional landscape has four parts – the foreground, middle ground, background and sky. But locations with strong shapes can be used to fill the frame for a better result.
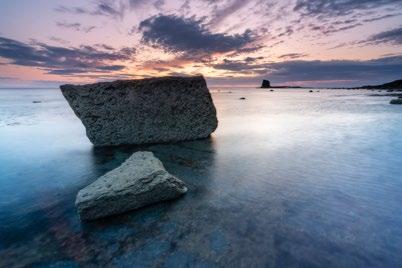
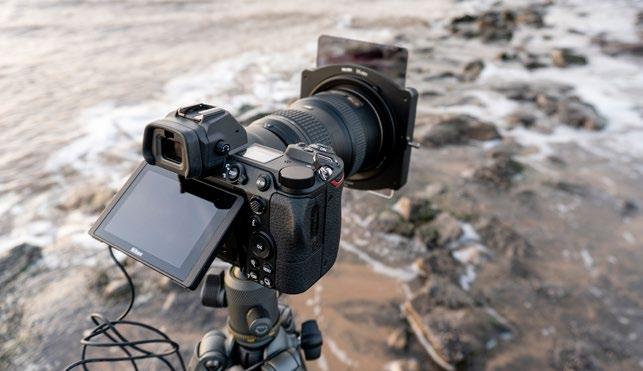
3 Use symmetry to amaze
Symmetry in nature never fails to look good. Reflections in lakes are the perfect subject for classic symmetrical shots, where the subject occupies the centre of the frame.
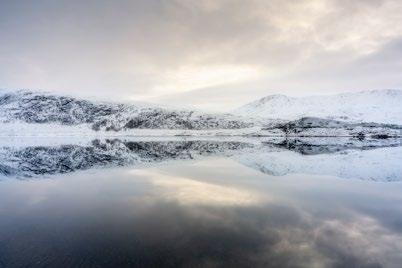
4 Try a small focal point
The most prominent element in this shot is the bridge, but the focal point is the smaller building on the right that’s strong enough in itself to make this visual balance work.
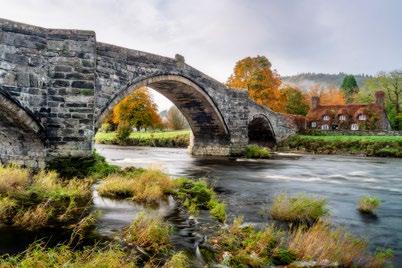
5 Compose with light
This image doesn’t conform to the rule of thirds and there’s way too much foreground, but the strong misty light at the back of the image is still able to command the viewer’s attention.
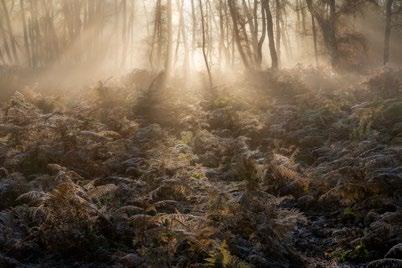
f/13 122 sec ISO 64
Images: James Abbott
113 NEW WAYS TO SHOOT LANDSCAPES
landscapes Shoot creative
Expand your range of artistic techniques and create next-level landscape images
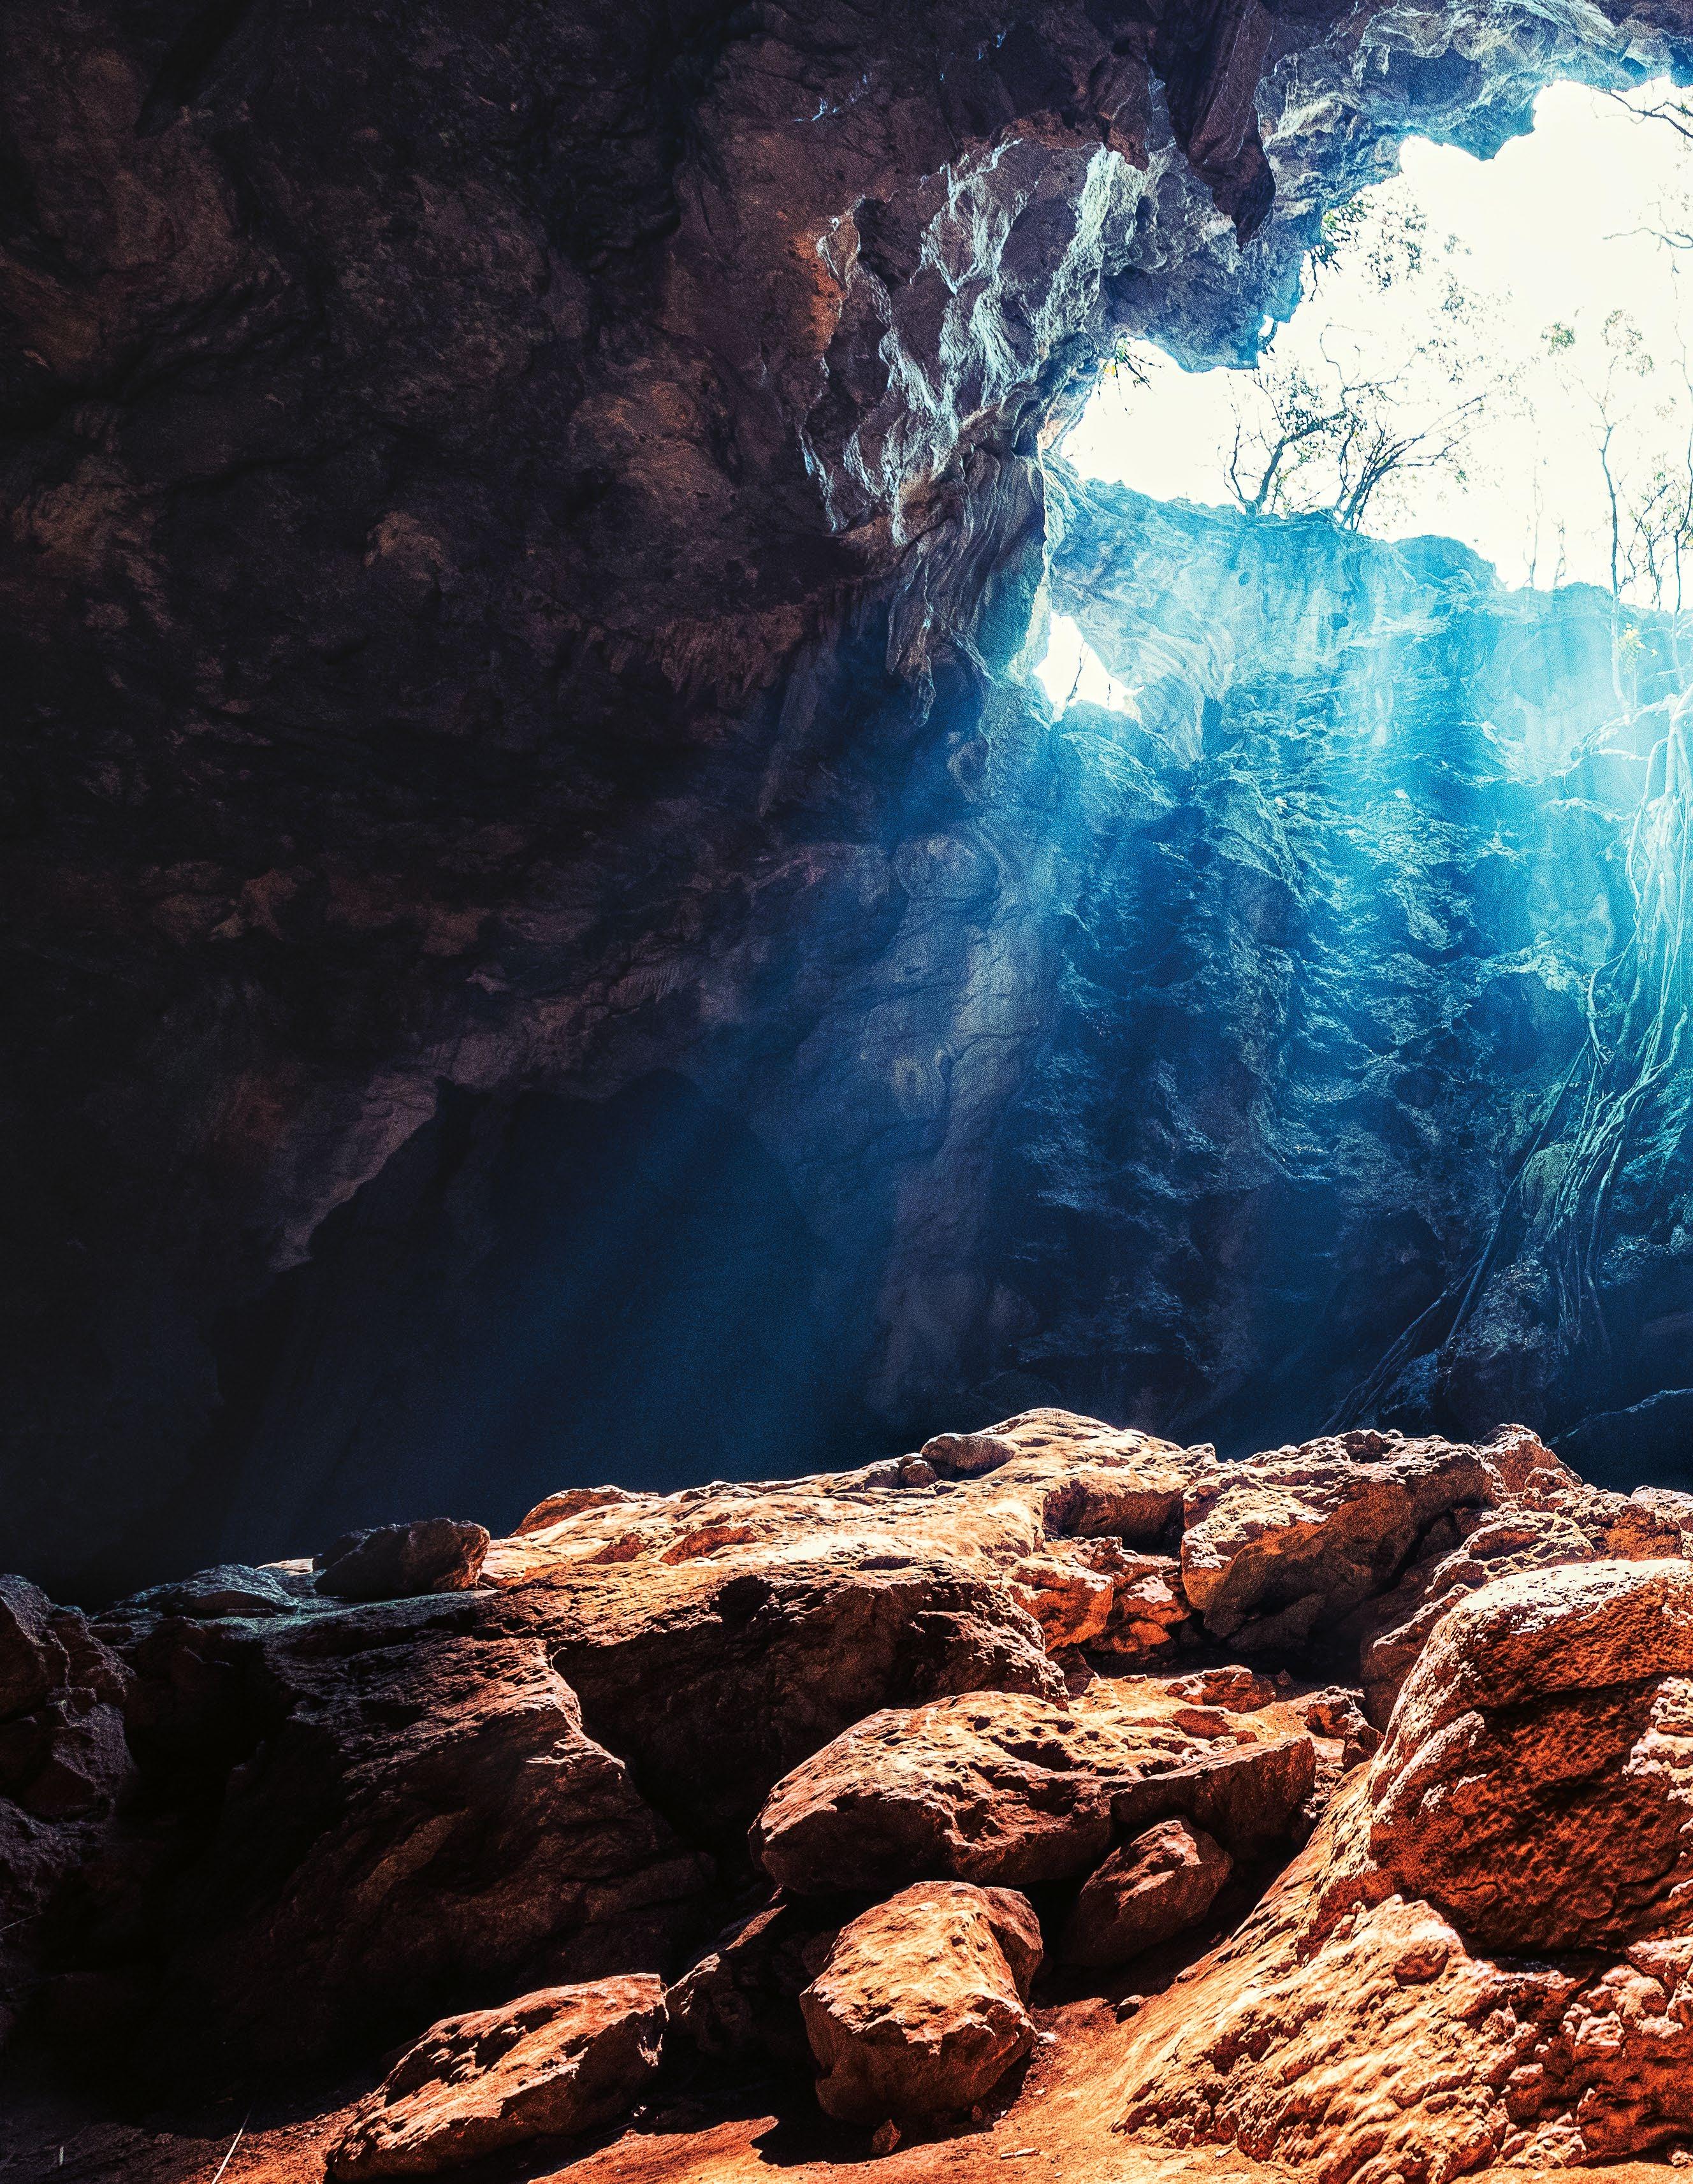
Landscapes are sometimes viewed as over-photographed subjects, with little room for true creative flare and individuality. While some photographers have become known for their images of other-worldly scenics, the majority of images we see produced tend to follow a standardised formula, so it is understandable why many people believe the genre is quite static. A major reason for this is the functional approach photographers often apply to landscape photography. Scenic images sell well, especially
to calendar and postcard publishers, though mainly these clients require mere record shots – literal representations of popular locations, framed to show maximum detail and colour. As any experienced photographer will recognise, these characteristics are not often catalysts for creativity, and the result is a global pool of similar images, few of which stand out.
The good news is that with even a small measure of innovation, it is possible to produce images with a unique atmosphere. By revisiting the
accepted norms of landscape imagery and reassessing how these impact the look and feel of each photograph, we can start to explore how detail, colour and light can be used for alternative purposes. As with any of the ‘rules’ we frequently encounter as photographers, those applying to landscapes are simply templates for successful images.
Over the following pages we’ll look closely at methods of adapting or breaking these rules to shoot images that go further to convey the mood we experienced out in the field.
114 TECHNIQUES
SHOOT CREATIVE LANDSCAPES
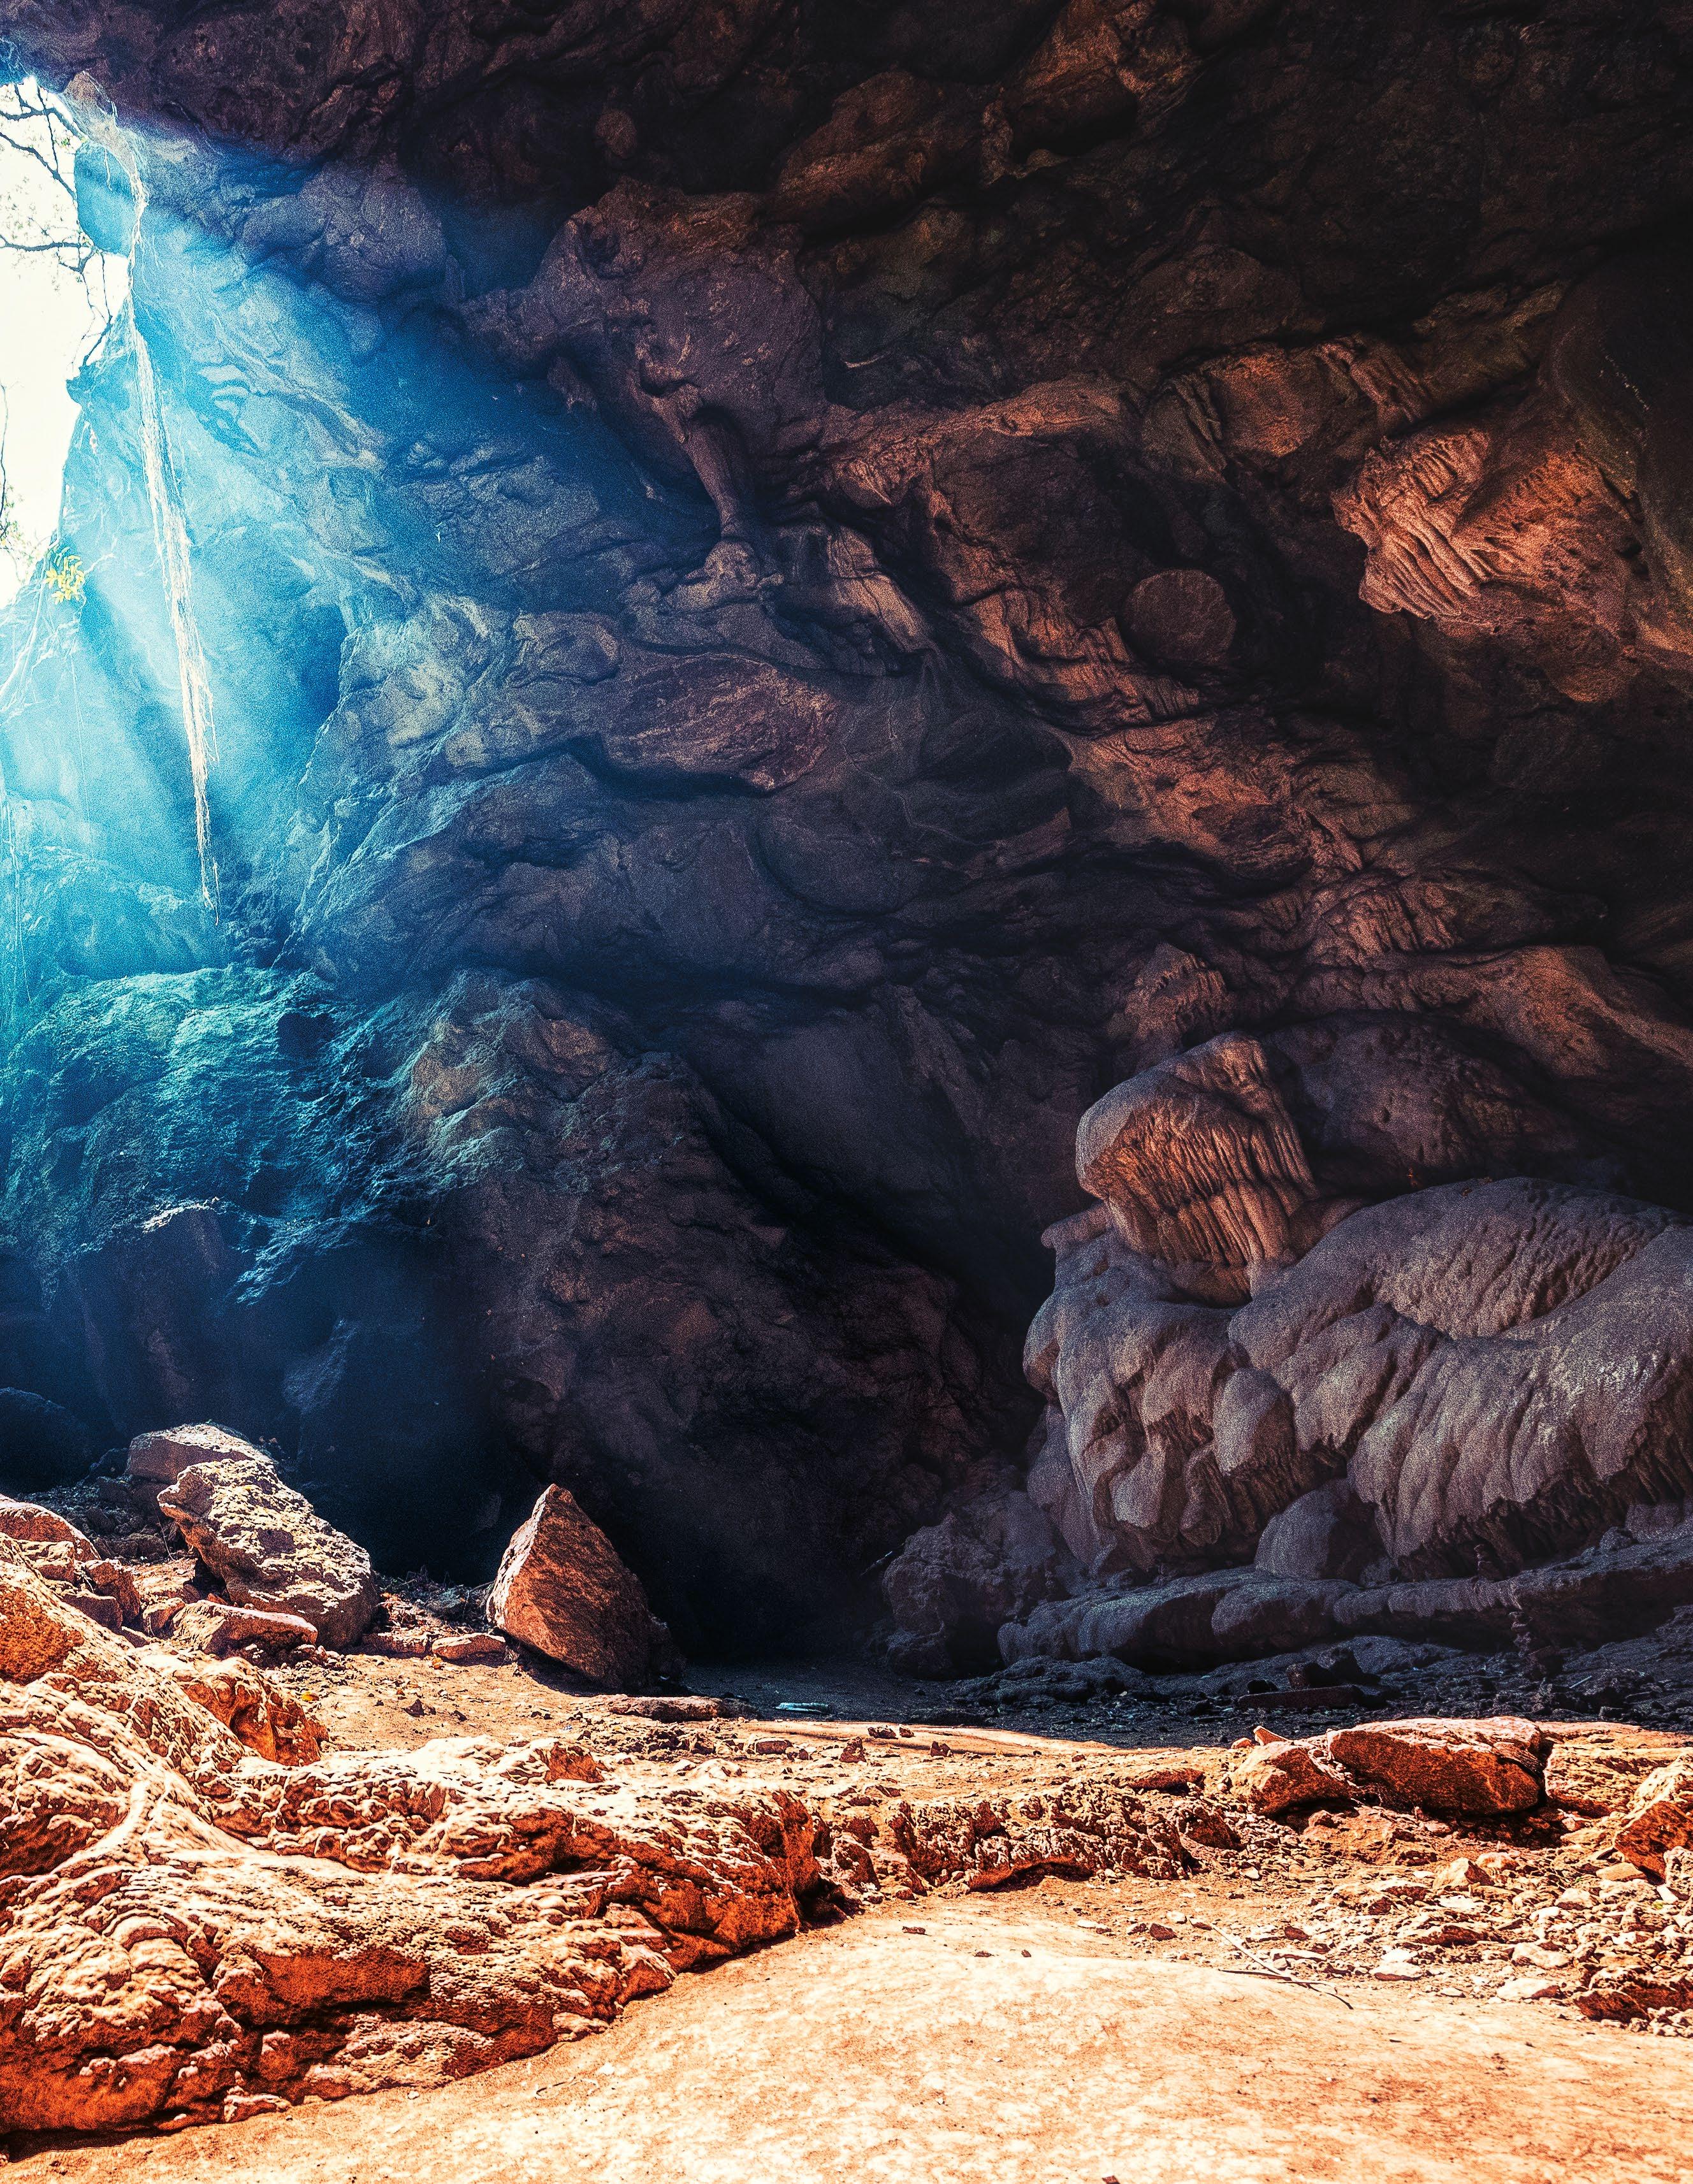
Familiar difference
Landscape photography is often regarded as static and unadventurous. However, original thinking on the photographer’s part can yield exciting and imaginative shots © Gettyimages
115
Work with aperture
Experiment by varying f-stops to control sharpness and light in landscape images
One of the first techniques we learn is the control of depth of field via the aperture setting. We quickly accept that, for landscape photography, this means stopping down to at least f/11 to produce a deep DOF that will render the scene sharp from near-foreground to the far-background. This rapidly becomes our main goal when shooting any landscape image – capturing perfect sharpness in all areas of the frame. However, this in itself is not a guarantee of an engaging shot, as in many scenes interesting detail is not evenly distributed throughout the composition.
A potent method to control where the viewer looks, and simultaneously introduce artistic character, is to invert our settings and use minimal focus to guide audience attention. By opening up the lens to f/5.6 or wider, focus will either fall off as the eye moves further into the scene from the camera position, or the close foreground will be blurred, as the focus point is placed towards the horizon. This produces a filmic look similar to when shooting with a large format analogue camera.
Beyond depth of field, the use of a wider aperture also helps to shape a scene’s lighting. At smaller f-numbers, points of light appear less defined, allowing light to spread across the frame. This can be used to produce an airy mood, popular in the lifestyle and stock images of today. Similar to reduced focus depth, this technique obscures portions of the composition for a less clinical reproduction of the scene in front of the camera.
At the other extreme, a narrow aperture has greater effects than widening DOF. As low f-numbers allow light to bleed, higher values create stronger definition to sources, so at f/16 and above the sun and any reflections or artificial lights diffract into starbursts.
There are some key considerations to remember when experimenting with aperture in landscape images. A strong subject is always of paramount importance, but even more so when tightly restricting where your viewer is looking. Light direction and lens choice will also influence the impact of different aperture settings.
Using flare
Allow sunlight to add a wash of colour to your images for an attractive mood
Understand lens coatings
Older lenses can sometimes be better for creative imagery
Right Wide and shallow
The Brenizer method makes for a fantastic creative landscape technique. Aligning the styles of two opposite lens types, the process creates a similar look to images shot on large format film
Many new lenses come equipped with special optical coatings, designed to minimise internal reflections and flare when shooting strong light sources. In the majority of cases this is beneficial, but when looking to intentionally introduce special effects it can pose a challenge. If flare is something you want to use for creative effect, consider using an older generation of optic that lacks super spectral or nano crystal coatings, for a stronger effect.
Combine wide angle with bokeh Add shallow focus to wide-angle images
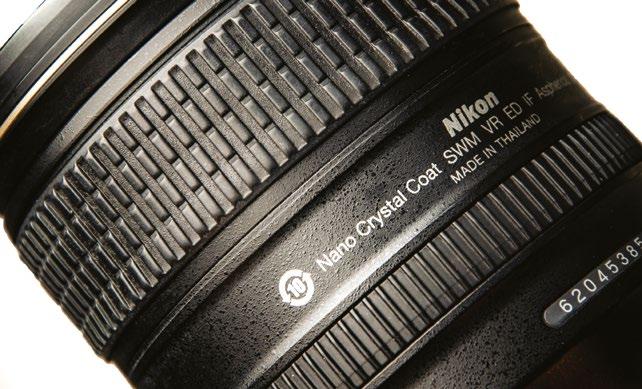
The Brenizer method enables us to combine two effects. While longer lenses have a shallow DOF, wider focal lengths render more of the scene in focus. By locking the focus position and stitching multiple shallow DOF shots, we can minimise background details and maintain a wide perspective.
1 Choose your lens Select a zoom lens such as a 70200mm f/2.8, or a mid-range prime like an 85mm f/1.4 to compress the scene and give you a telephoto perspective, complete with a shallow depth of field. Open up the aperture to near the lens’ maximum.
Set focus Take an exposure reading and lock these settings by switching to Manual. Next, focus on the key area of the scene and turn off autofocus, or press and hold the focus lock button on your lens or camera. This keeps parameters constant between shots.
2
3
Compose first frame
Decide on the borders of your final shot and compose the top-left segment. Do a practice pan across your scene, to check how many images will be required to cover all of the desired areas at your chosen focal length.
116 TECHNIQUES
GLOBAL CONTRAST
The strong illumination creates tonal variance across the frame to maintain depth.
SHOOT CREATIVE LANDSCAPES
LIGHT SOURCE
Place the sun at 45° to the camera for brightness gradients across the frame and engaging composition.

SHADOW DENSITY
The wash of light reduces local contrast by adding colour to shadows for an airy feel.
4 Shoot the sequence
Pivoting around as small a point as possible to minimise parallax error, pan and shoot the first image row. Pitch the camera down to shoot the centre and bottom rows. Shoot a marker frame before and after the first and last segments for reference.
5 Merge and crop Load the images into Lightroom or Camera Raw, synchronise the settings and correct lens aberrations and basic colour defects. Use Photoshop’s Photomerge to stitch segments, then crop to eliminate empty space along the periphery.
LOW ANGLE Minimise separation between sky and land to allow sunlight to spill into the foreground.
117
All images © Peter Fenech
Centre sharpness
Use rotational movement to draw focus to the centre of the image
Work with shutter speeds
Break the rules of sharpness in landscapes and work with colour and tone
Landscape photography is a genre that rarely benefits from fast shutter speeds. While there are occasions when short exposures do find a use – when looking to freeze a cascade of water flowing over a waterfall, for example – in the majority of circumstances photographers choose extended exposure durations.
A fast shutter speed will often create an unnaturally static scene that lacks energy. In some ways this approach generates images that recreate the scene exactly as our eyes see it, which is far from inspiring, but equally a deficit of any visible motion is unsettling. By lengthening the exposure to several seconds we can produce a blur of movement that is beyond what we usually see, adding drama and dynamism. Shutter speed will determine how realistic the blur effect becomes.
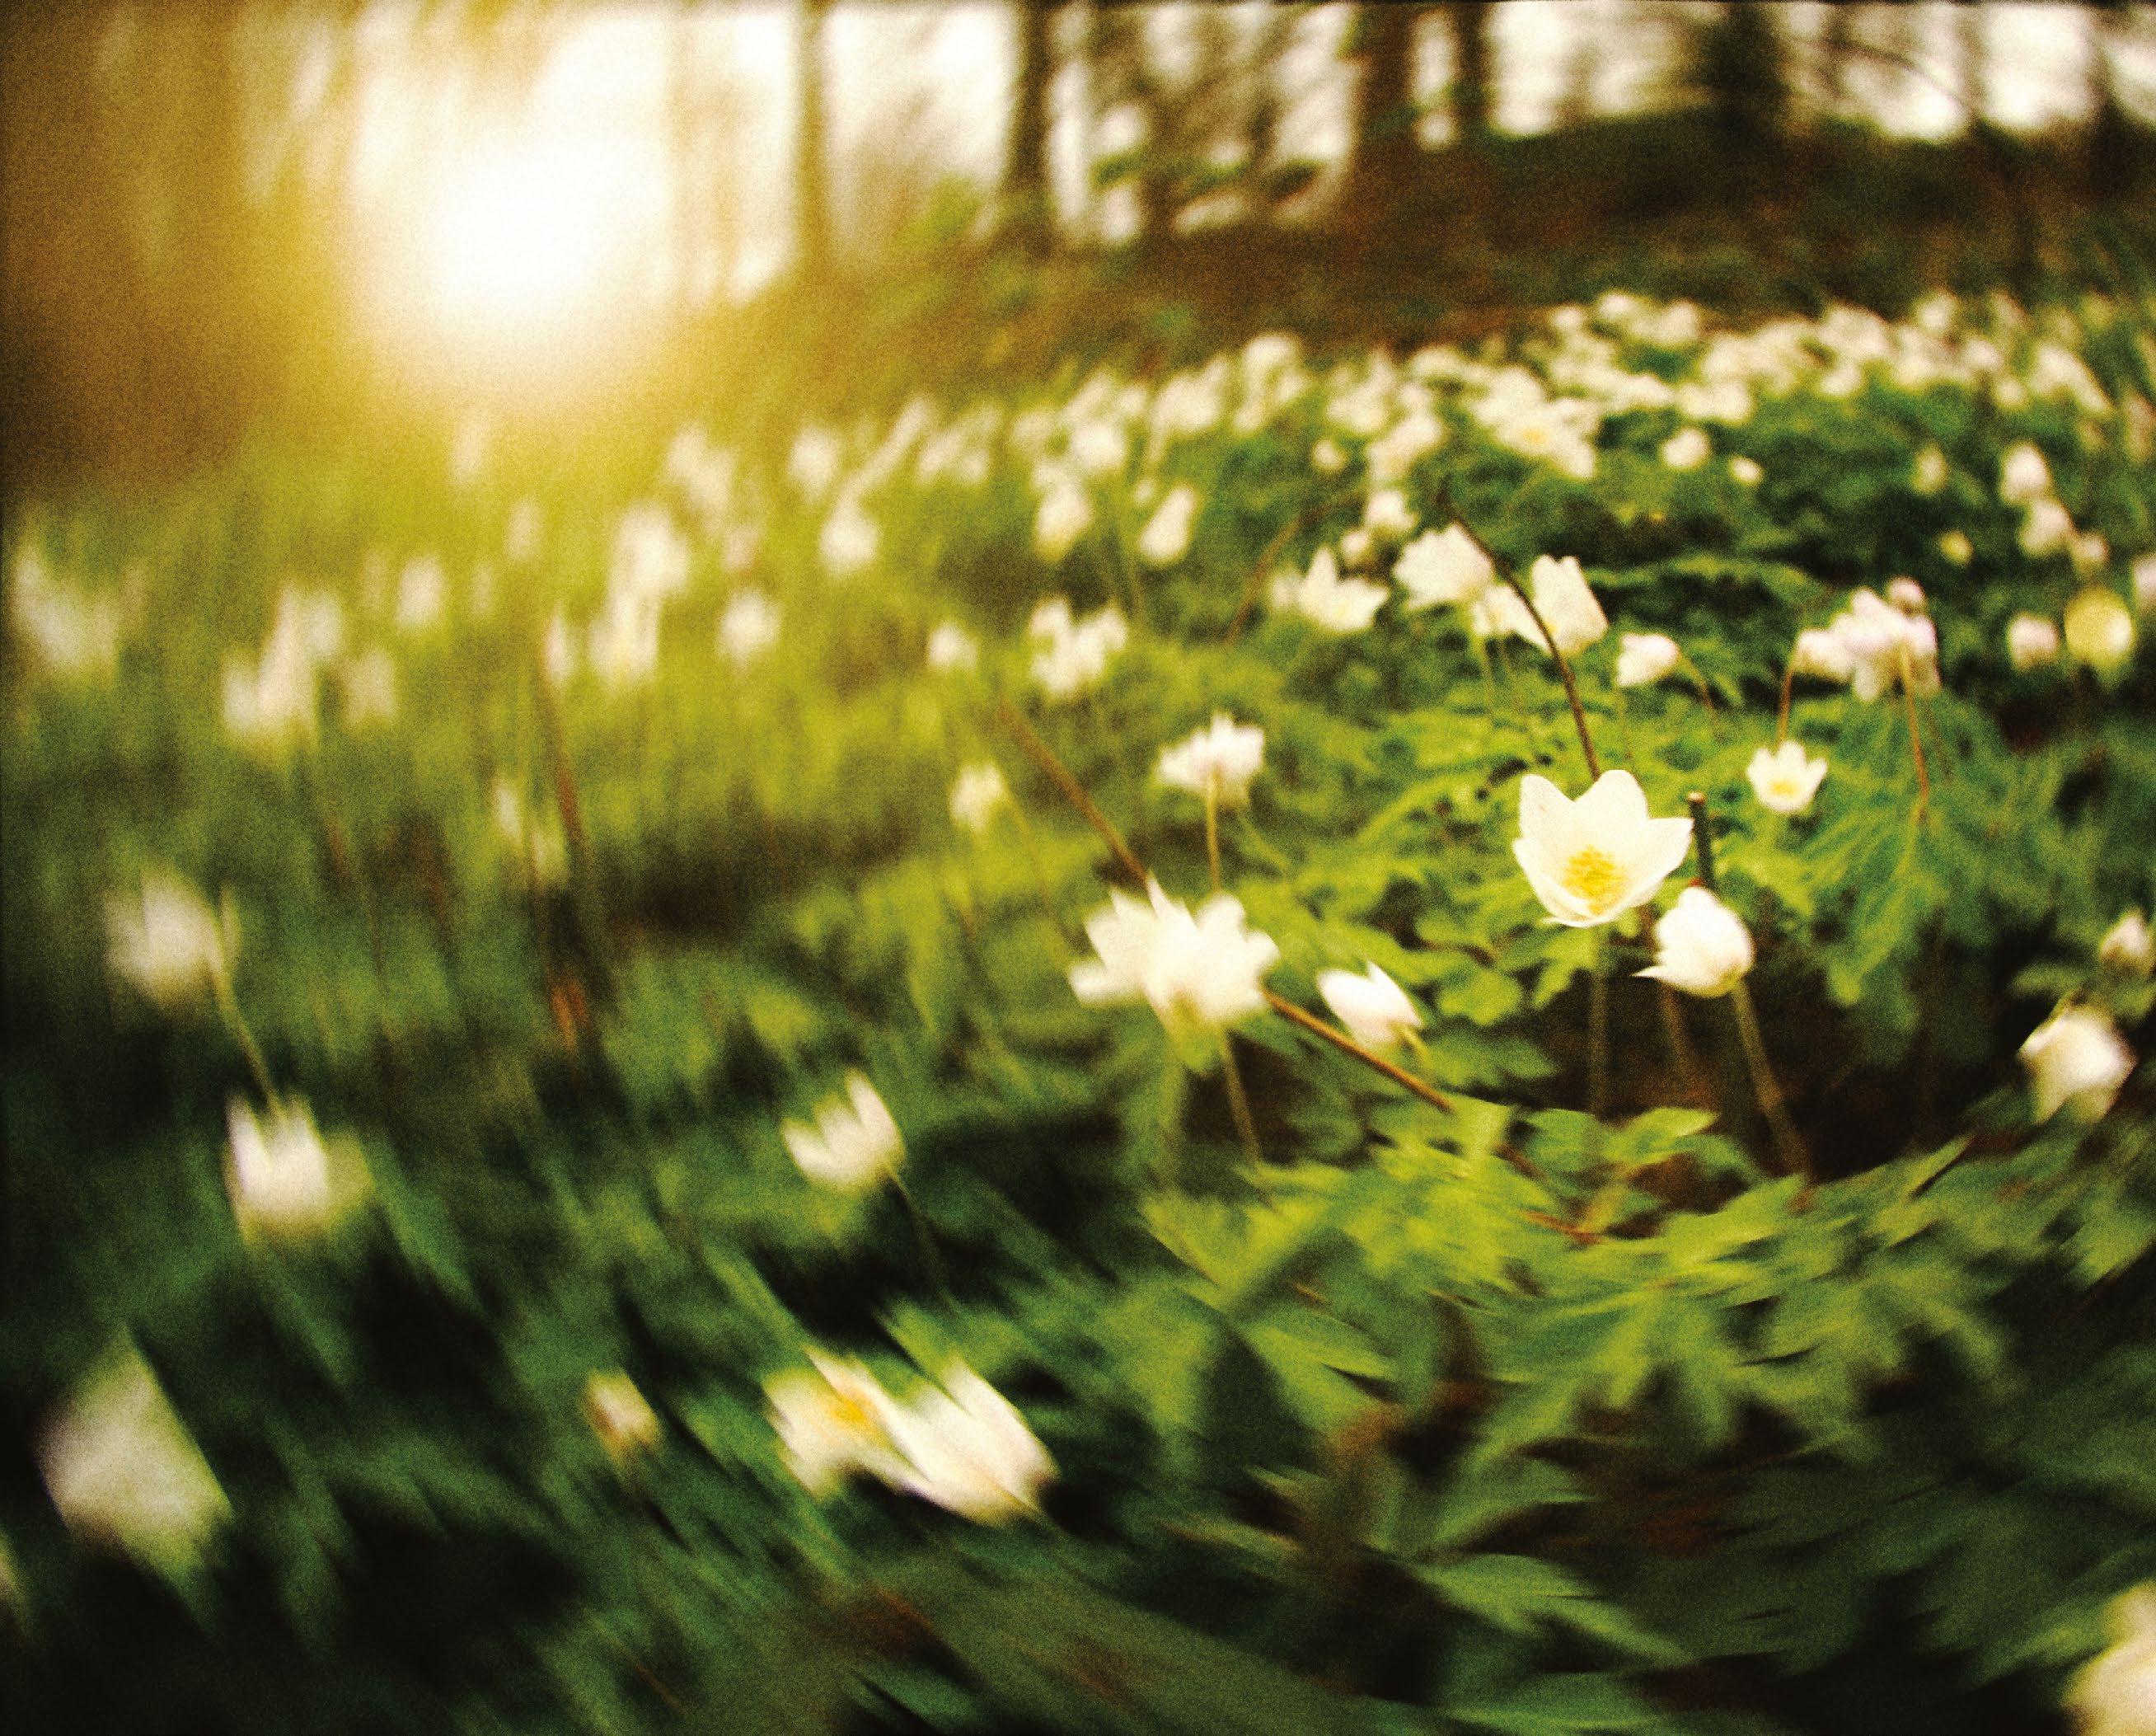
Although long exposure techniques are now synonymous with landscape imagery, with filters such as Lee’s Big Stopper becoming a staple of the photographer’s kit, the effect of keeping the shutter open while elements of the scene are in motion opens up much unexplored potential. The process of shooting a long exposure does not have to involve setting up the camera on a tripod and waiting for movement in the landscape, which is a commonly encountered problem in the field on days with little wind. With some creative thinking it is possible to introduce unique blurring of detail to reduce the scene down to its basic components – light and colour.
A quick way to be different is to move the camera instead of the subject. Intentional camera movement (ICM) is an increasingly
popular technique, whereby the photographer shifts the camera position during the exposure to draw streaks of colour across the frame. ICM is not only highly flexible, but it’s fun, freeing and has an almost limitless scope for experimentation with movement direction, speed, uniformity and subject choice. Put simply, there is no right or wrong way.
When attempting to achieve absolute sharpness is no longer the photographer’s aim, we can be free to make images in any and all conditions, even when the use of a tripod is not possible. There are multiple approaches to ICM, but whichever is selected it is critical to make the effect on the image strong enough to appear intentional, or the viewer may assume any lack of detail is due to camera or photographer error.
COLOUR FOCUS
At the periphery of the frame, detail focus is replaced by a dominance of colour and tonality.
CENTRE SHARPNESS
Unlike other ICM forms, rotational movement maintains sharpness close to the centre of the image.
118 TECHNIQUES
The edge rotation forms a tunnel-like effect that draws attention to the centre subject.
SUBJECT FOCUS
If your scene lacks a satisfying main subject, this technique can emphasise smaller aspects.
Master handheld long exposure
Above Low light abstract Handholding an eight-second exposure has blended the colours in this woodland scene, while a burst of flash has maintained recognisable shape in the nearby trees
Go further with the effects of longer shutter speeds and shoot movement on multiple axes
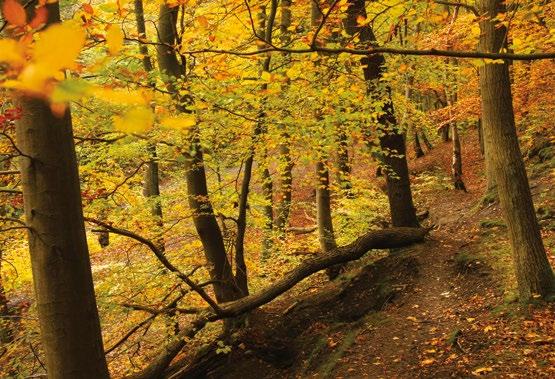
1 Find a suitable scene
Pick a landscape with good contrasts of colour, which will blur together to form an attractive abstract palette. While a strong subject is not always critical for intentional camera movement images, ensure you have some detail for the viewer to focus on, even as abstract shapes.
2 Change shooting mode Switch to Shutter
Priority mode to take control over the exposure duration. This will enable you to finetune the balance of detail and blurring for the current lighting and environmental conditions such as subject movement and cloud cover.
3 Perfect your stance
While sharpness is not our goal in this case, adopting a standard handheld stance will give you maximum control over blur direction and strength. Keep your elbows close to your body as usual, but adapt for ICM by leaning forwards slightly, to vary the effect.
4 Modify exposure
Lengthen and shorten the shutter speed to alter the visible movement. Consider adding fill flash and using rear curtain sync to produce an overlay effect, which maintains some solid structure in nearby objects, overlapping with streaked motion. This introduces a layered effect.
TUNNEL VISION
All images © Peter Fenech
119 SHOOT
Intentional camera movement is a highly flexible, multi-faceted area with an almost limitless scope for experimentation
CREATIVE LANDSCAPES
Use creative lighting
Work with natural and artificial light to produce unique blends
For landscape photography, the beginning and end of the day offer the best quality of light. The so-called golden hours, when the sun is low in the sky, provide a softness and richness of tone not seen during the rest of the day, so for many scenes sunrise and sunset are the times of choice. While this light is directional
and so enhances texture and detail, the greater diffusion by the atmosphere reduces contrast for softer shadows and highlights.
Retaining digital information in these tonal extremes is often seen as a cardinal rule, forcing photographers to employ hardware filters or exposure blending software
Capture Infrared drama
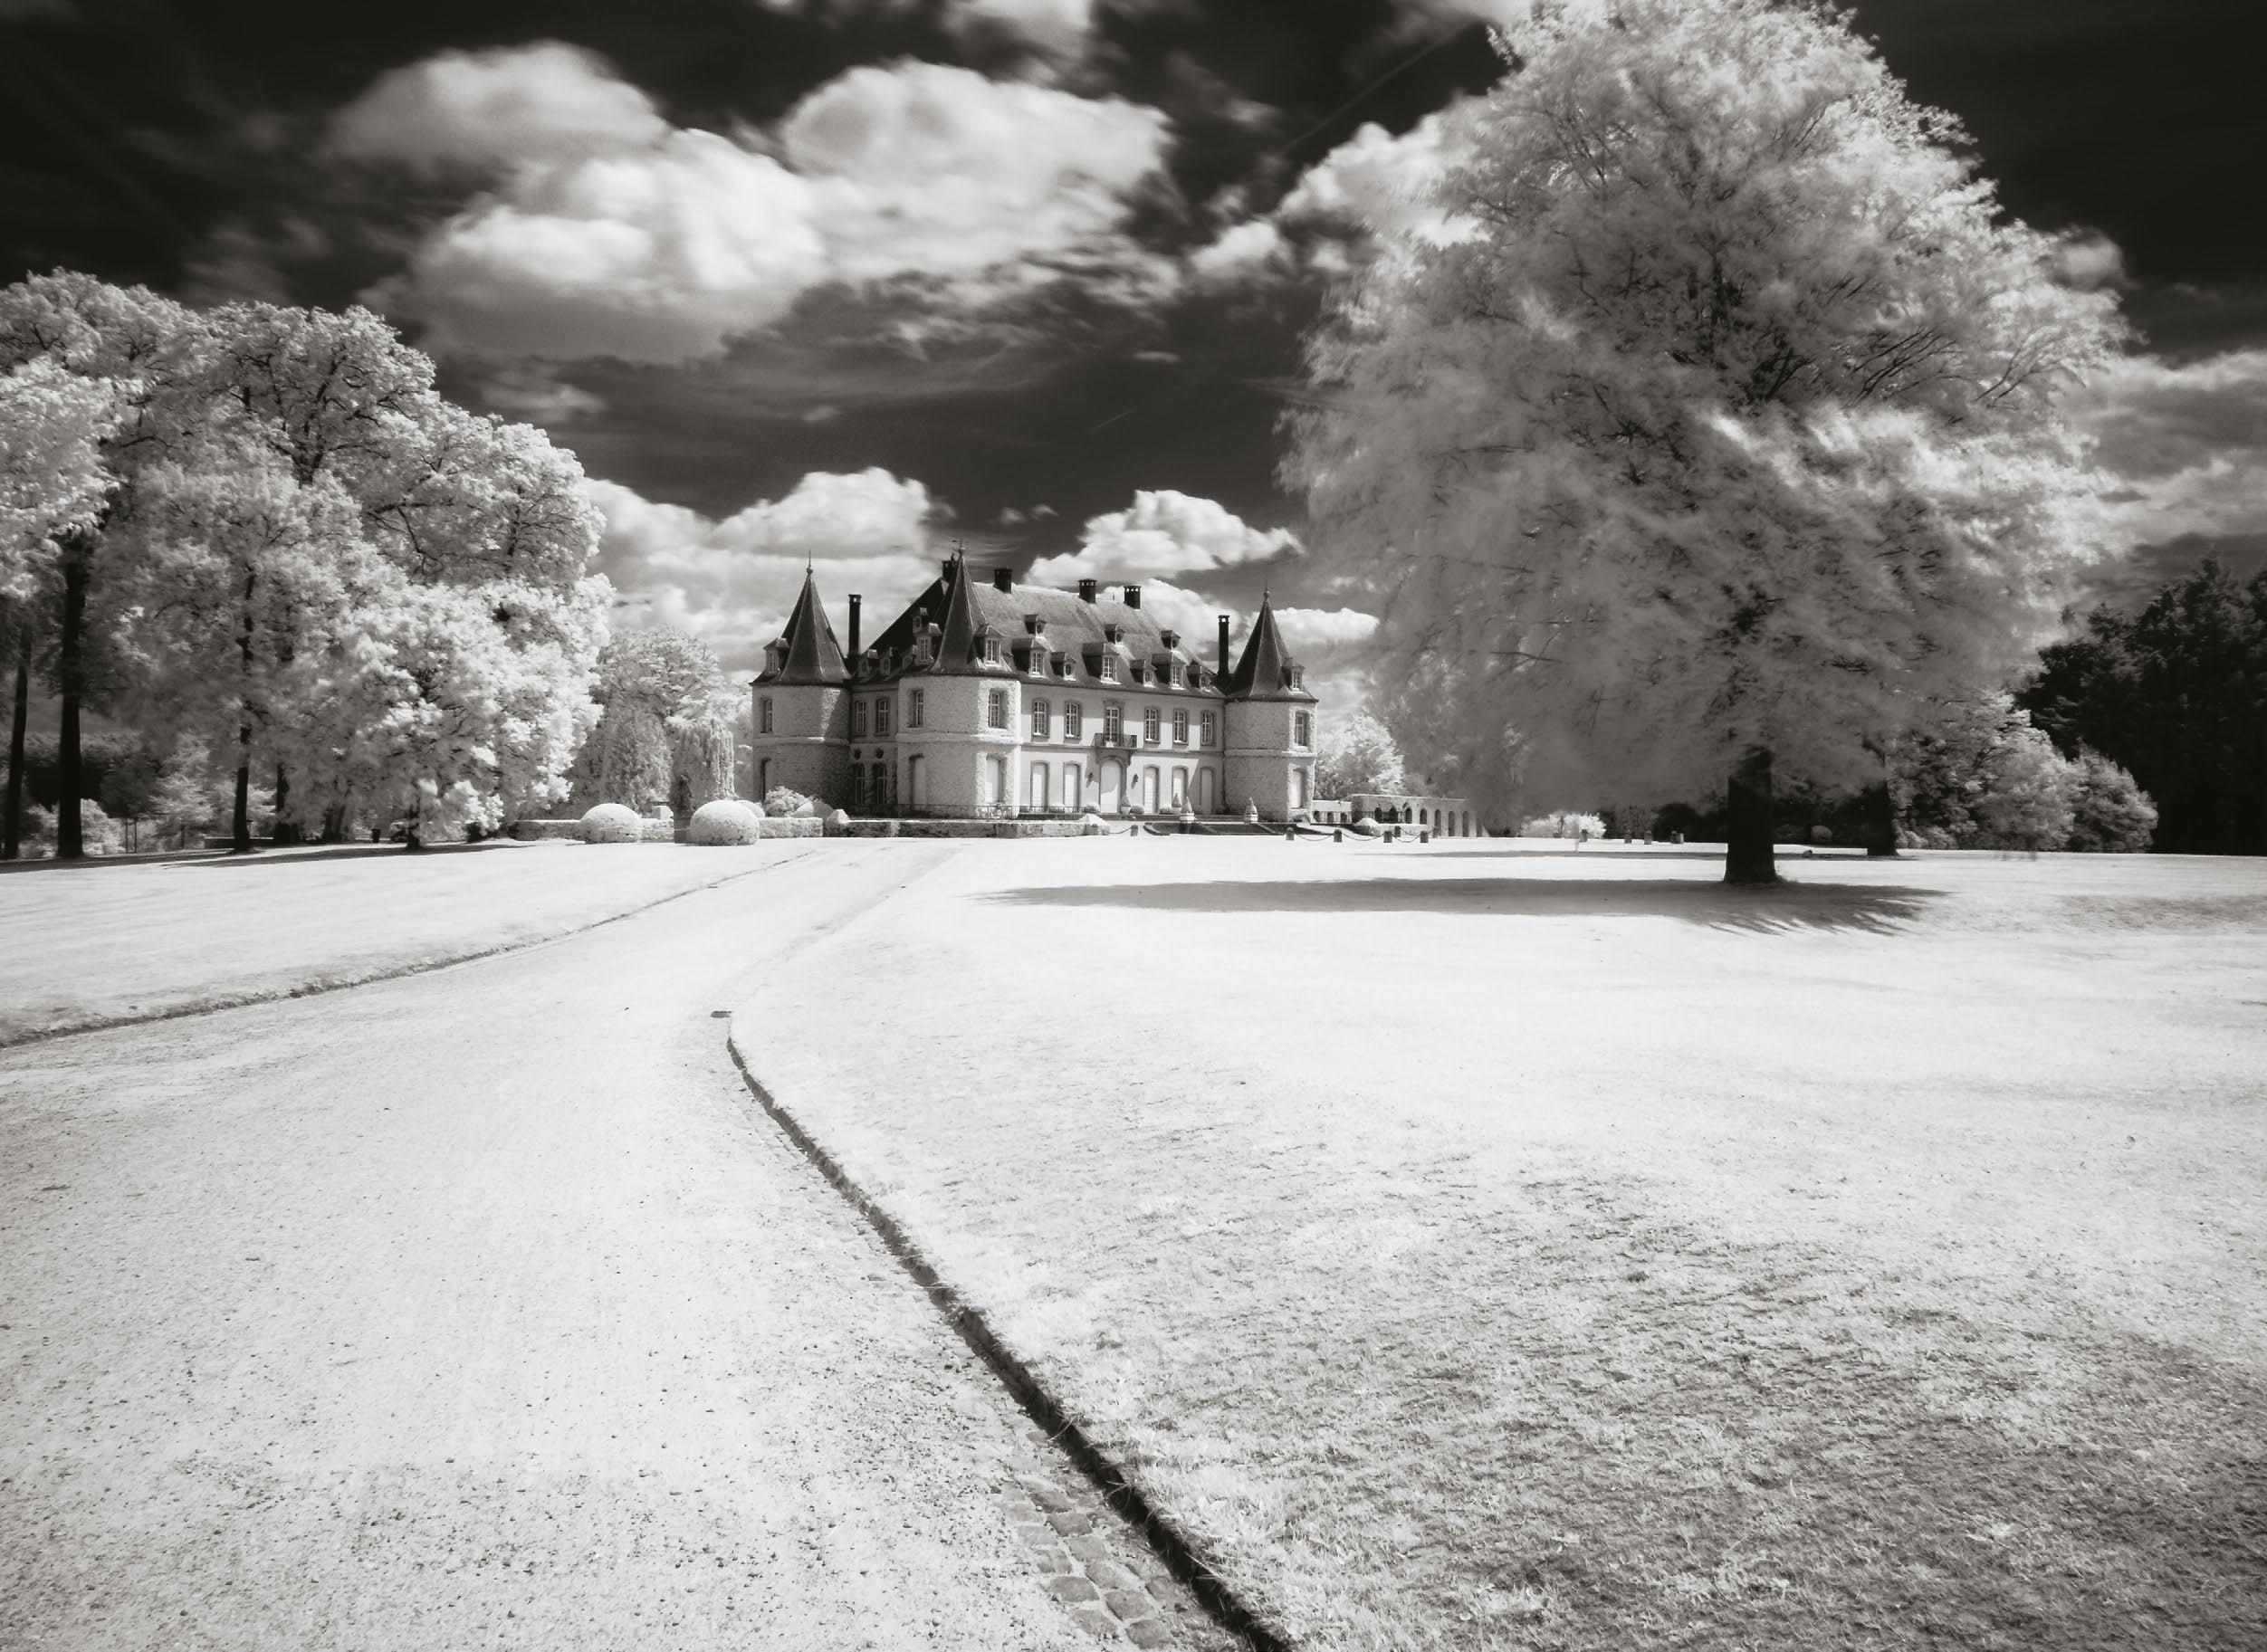
1 Understand IR light Infrared (IR) photography shows you an otherwise invisible world. If you could see with IR light, you’d see in black and white. Strikingly, blue sky and water would appear dark. Puffy clouds, grass and leafy trees would be bright.
2 Check camera sensitivity Your camera’s sensor is sensitive to IR light, but an IR block filter is present in front of it. Photograph the IR LED in a TV remote control while pressing a button. If the LED is bright, you can do IR photography.
techniques. When seeking creative ideas, however, ignoring established concepts can give us images with unusual lighting styles. Shooting under high-contrast lighting allows us to play with exposure choice to emphasise graphic properties. It enables us to make more of tonal extremes to create depth. It is for this
3 Lens IR hotspot
Camera lenses are optimised for visible light. The inner coating of the lens can create a bright IR hotspot in the middle of the frame. This database will show you the IR performances of many lenses: kolarivision.com/articles/lens-hotspot-list
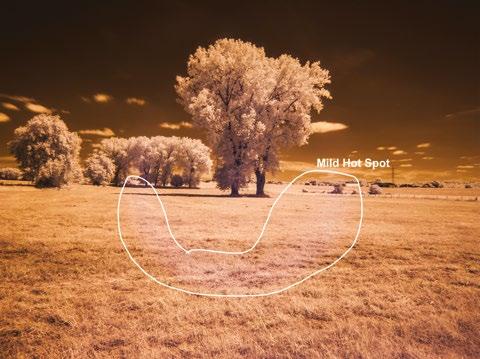
(inquadrato.net) explains how to make the most of highAbove Unique tonality Infrared photography provides a method of shooting black and white images with a difference
120 TECHNIQUES
Andrea Minoia
© Andrea Minoia
SHOOT CREATIVE LANDSCAPES
Use artificial lighting John Gerlach explains how to add energy by lifting foreground detail with flash
1
Use a tripod If the flash is mounted on the camera, often the lens hood blocks the light emitted. Holding the flash to the side, the tripod supports the camera while maintaining the composition.
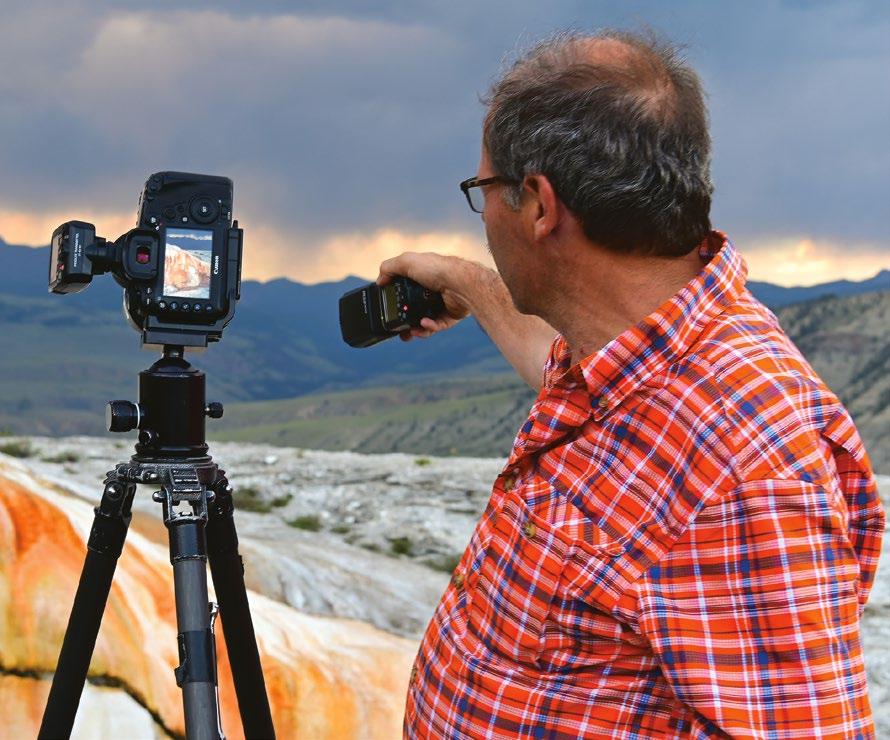
2
Use a wireless flash trigger
These provide flexibility with regards to the placement of the flash unit. I use the Canon Speedlite 600EX-II and the ST-E3RT radio master combination to allow the flash to be taken off-camera and triggered.
3
Underexpose ambient light
Determine the ideal ambient exposure using highlight alerts. I manually adjusted the shutter speed until the first blinks appeared in the clouds, then set it two stops faster. When I shoot the double exposure, that brightens the ambient by one stop.
4 Manual flash and full power Point the flash at the area where light is desired, and shoot. If the flash adds too much light, reduce the output. I shot the double exposure in Additive mode, to fire one flash twice at full power.
5 Get more light Often when using flash to light foreground elements, due to distance a single flash can’t illuminate a large enough area. A solution is multiple exposure control. With my Canon 5D Mark IV I fired one flash at full power twice to make a single in-camera double exposure.
purpose that infrared photography is useful, as IR images often look their best under harsher lighting. Whether you choose to shoot with an IR filter attached to your lens or commit to the genre by having a DSLR converted for it, IR adds a unique styling. If you’re unable to visit at one of the golden hours, using IR will play to the strengths of midday lighting, focussing the viewer on detail and texture.
A less common technique is to work artificial lighting into your landscape photography repertoire. Flash is not something commonly associated with the genre but has the potential to add an engaging element to low-light scenes or in other contrasty lighting conditions. Whether you utilise strobe light, small off-camera speedlights or torchlight, artificial light sources are fully controllable,
contrast light by shooting infrared images
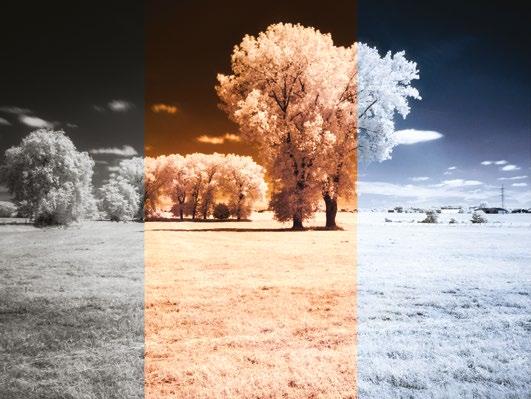
4
Settings for IR
Non-modded cameras see little IR light: you must do long exposures. Use a tripod and the self-timer. Turn image stabilisation off and long exposure noise reduction on. Shoot in RAW, focus manually and bracket the exposure for better results.
5 Use infrared filters
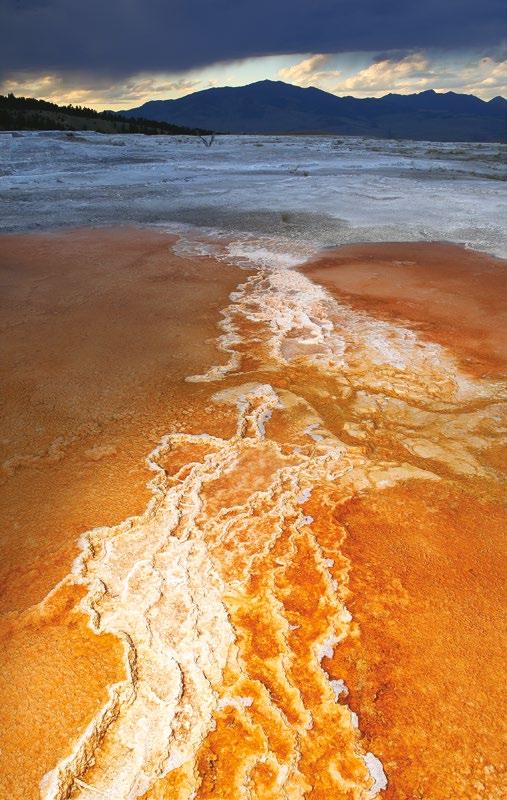
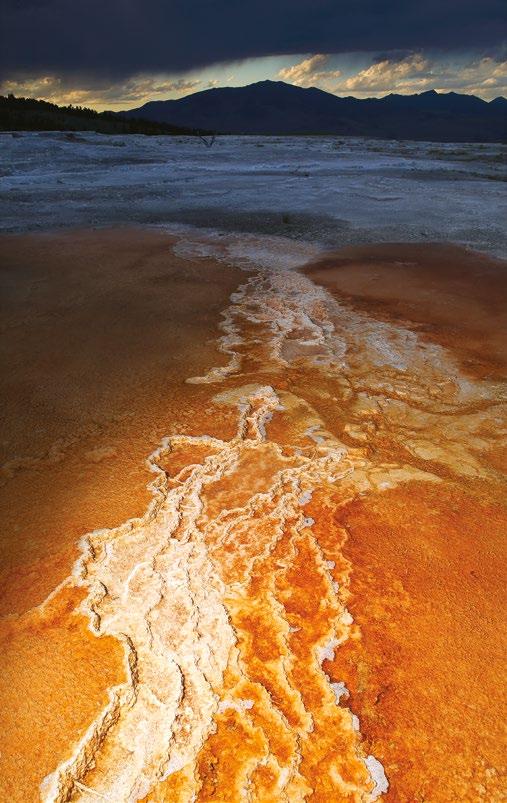
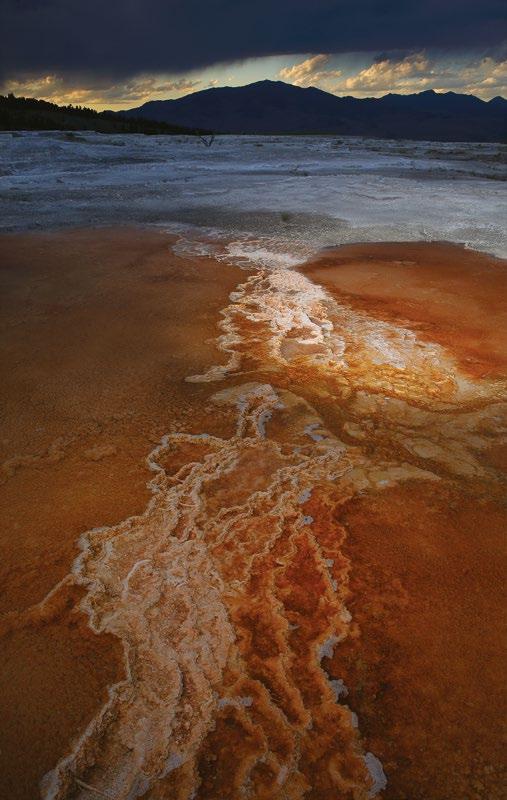
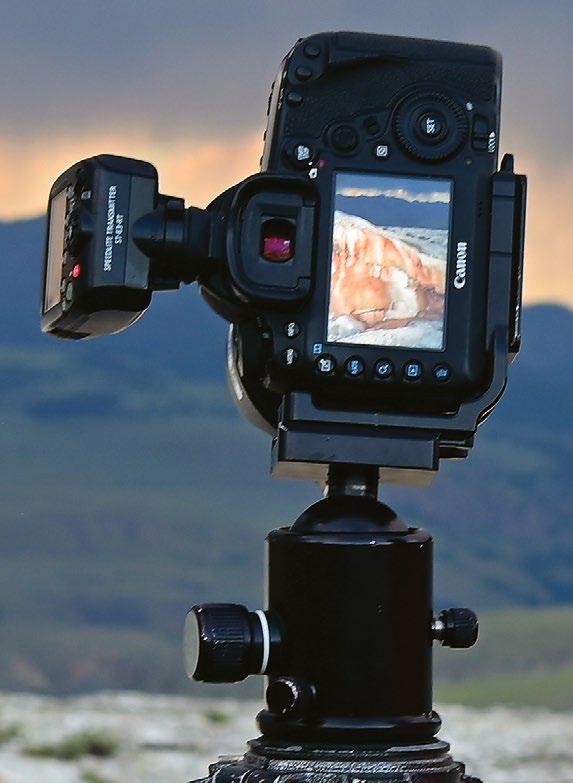
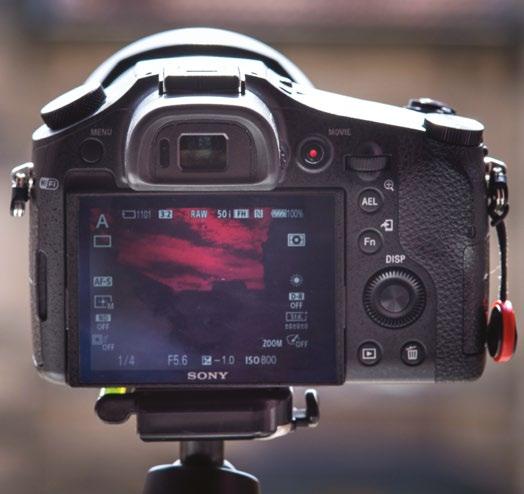
A 720nm IR filter is a good one to begin with. It will let enough red light pass to allow you to frame the shot and focus. Hot summer middays offer plenty of IR light: keep shooting interesting landscapes other than at sunrise or sunset.
unlike natural illumination. Each characteristic can be easily manipulated – intensity, colour and direction – enabling you to craft a light structure in the same way you would with a portrait image or a product shoot. This artificial light can then be blended seamlessly with natural light for a shot with an extended dynamic range, without any of the tell-tale signs of software intervention.
6 Edit IR images
Set the white balance and convert the image into black and white. A creative editing option is to introduce false colours. Either way, as the world looks different under IR light, you will turn any image into something unique.
1 4 5
See more of John Gerlach’s photography at gerlachnaturephoto.com
x5
121
x5 © John Gerlach
© Andrea Minoia
Create unique compositions
Rethink your approach to framing landscape scenes and discover new ways to control visual information
One of the likely reasons many landscapes seem standardised is that landscape photography is often used to demonstrate compositional technique. In the majority of books on composition, you’ll find landscape images illustrating the rule of thirds, golden ratio, leading lines, emphasising the formulaic approach many of us apply to scenic images. This conveys the impression that any image straying from these well-established conventions cannot be successful visually.
We learn this misconception early in our development as photographers and it’s difficult to forget, even as experienced enthusiasts or seasoned pros. For example, it is often discussed that every landscape shot requires a strong subject. While this is true, it is vital not to ignore the rest of the frame and the potential each zone may have photographically. In some circumstances a photographer may even intentionally choose to exclude an interesting detail from all of
Above 7/8th framing
If the sky or foreground has superior interest, concentrate on that by weighting the frame accordingly. Place the horizon 1/8th into the composition
their images, believing a prominent landmark, such as a lighthouse, must be the justification for the shot. If we reassess the benefits of being different, however, even landscape composition has room for experimentation. A first step is to attempt to shift the balance of the foreground and sky in the frame, pushing this to the extremes in order to refocus viewer attention. This has multiple functions, from simply re-weighting distribution of detail in the image to excluding


122 TECHNIQUES 122
Use the foreground
Add interest to compositions by using a low angle and blurred foreground
In a two-dimensional image it is challenging to convey depth and make the viewer feel as if they are within the scene. In no other genre is that more necessary than in landscape photography. By lowering the camera to the height of foreground detail, and shooting through this to the scene beyond, we can bring the audience into the frame. Open your aperture to between f/2.8 and f/8, use a focal length of 70 to 200mm and overlap the foreground and background for your shot.
SKY DETAIL
Portrait orientation allows aspects of the sky to be included in the composition.
UNUSUAL PERSPECTIVE
Shooting wide and tall maintains the wide-angle feel, but the reduced horizontal coverage produces an intimate framing.
Vertical ultra wide
less inspiring areas for a cleaner image that is less populated with objects. Next, we can consider varying the camera elevation, either by moving to a higher position, or by increasing or decreasing camera height from ground level. This can be used for several functions, namely frame structure and audience experience.
For the former, changing the camera level alters the separation of the foreground, middleground and background areas, so that the photographer can control how much of each the viewer can observe. With the latter aspect, an elevated perspective creates a more sweeping feel, lending the impression of hovering above the landscape, whereas a lower, ground-level point of view produces a more immersive sensation, as if the audience are within the scene themselves.
RESTRICTED ENVIRONMENT
Limited horizontal detail reduces edge distractions and allows a focus on one area of the horizon line.
COLOUR GRADIENTS
Portrait format enables us to make a feature of chromatic transition moving away from the horizon.
Where landscape orientation reveals too many distractions, switch to portrait and use extreme wide-angle focal lengths
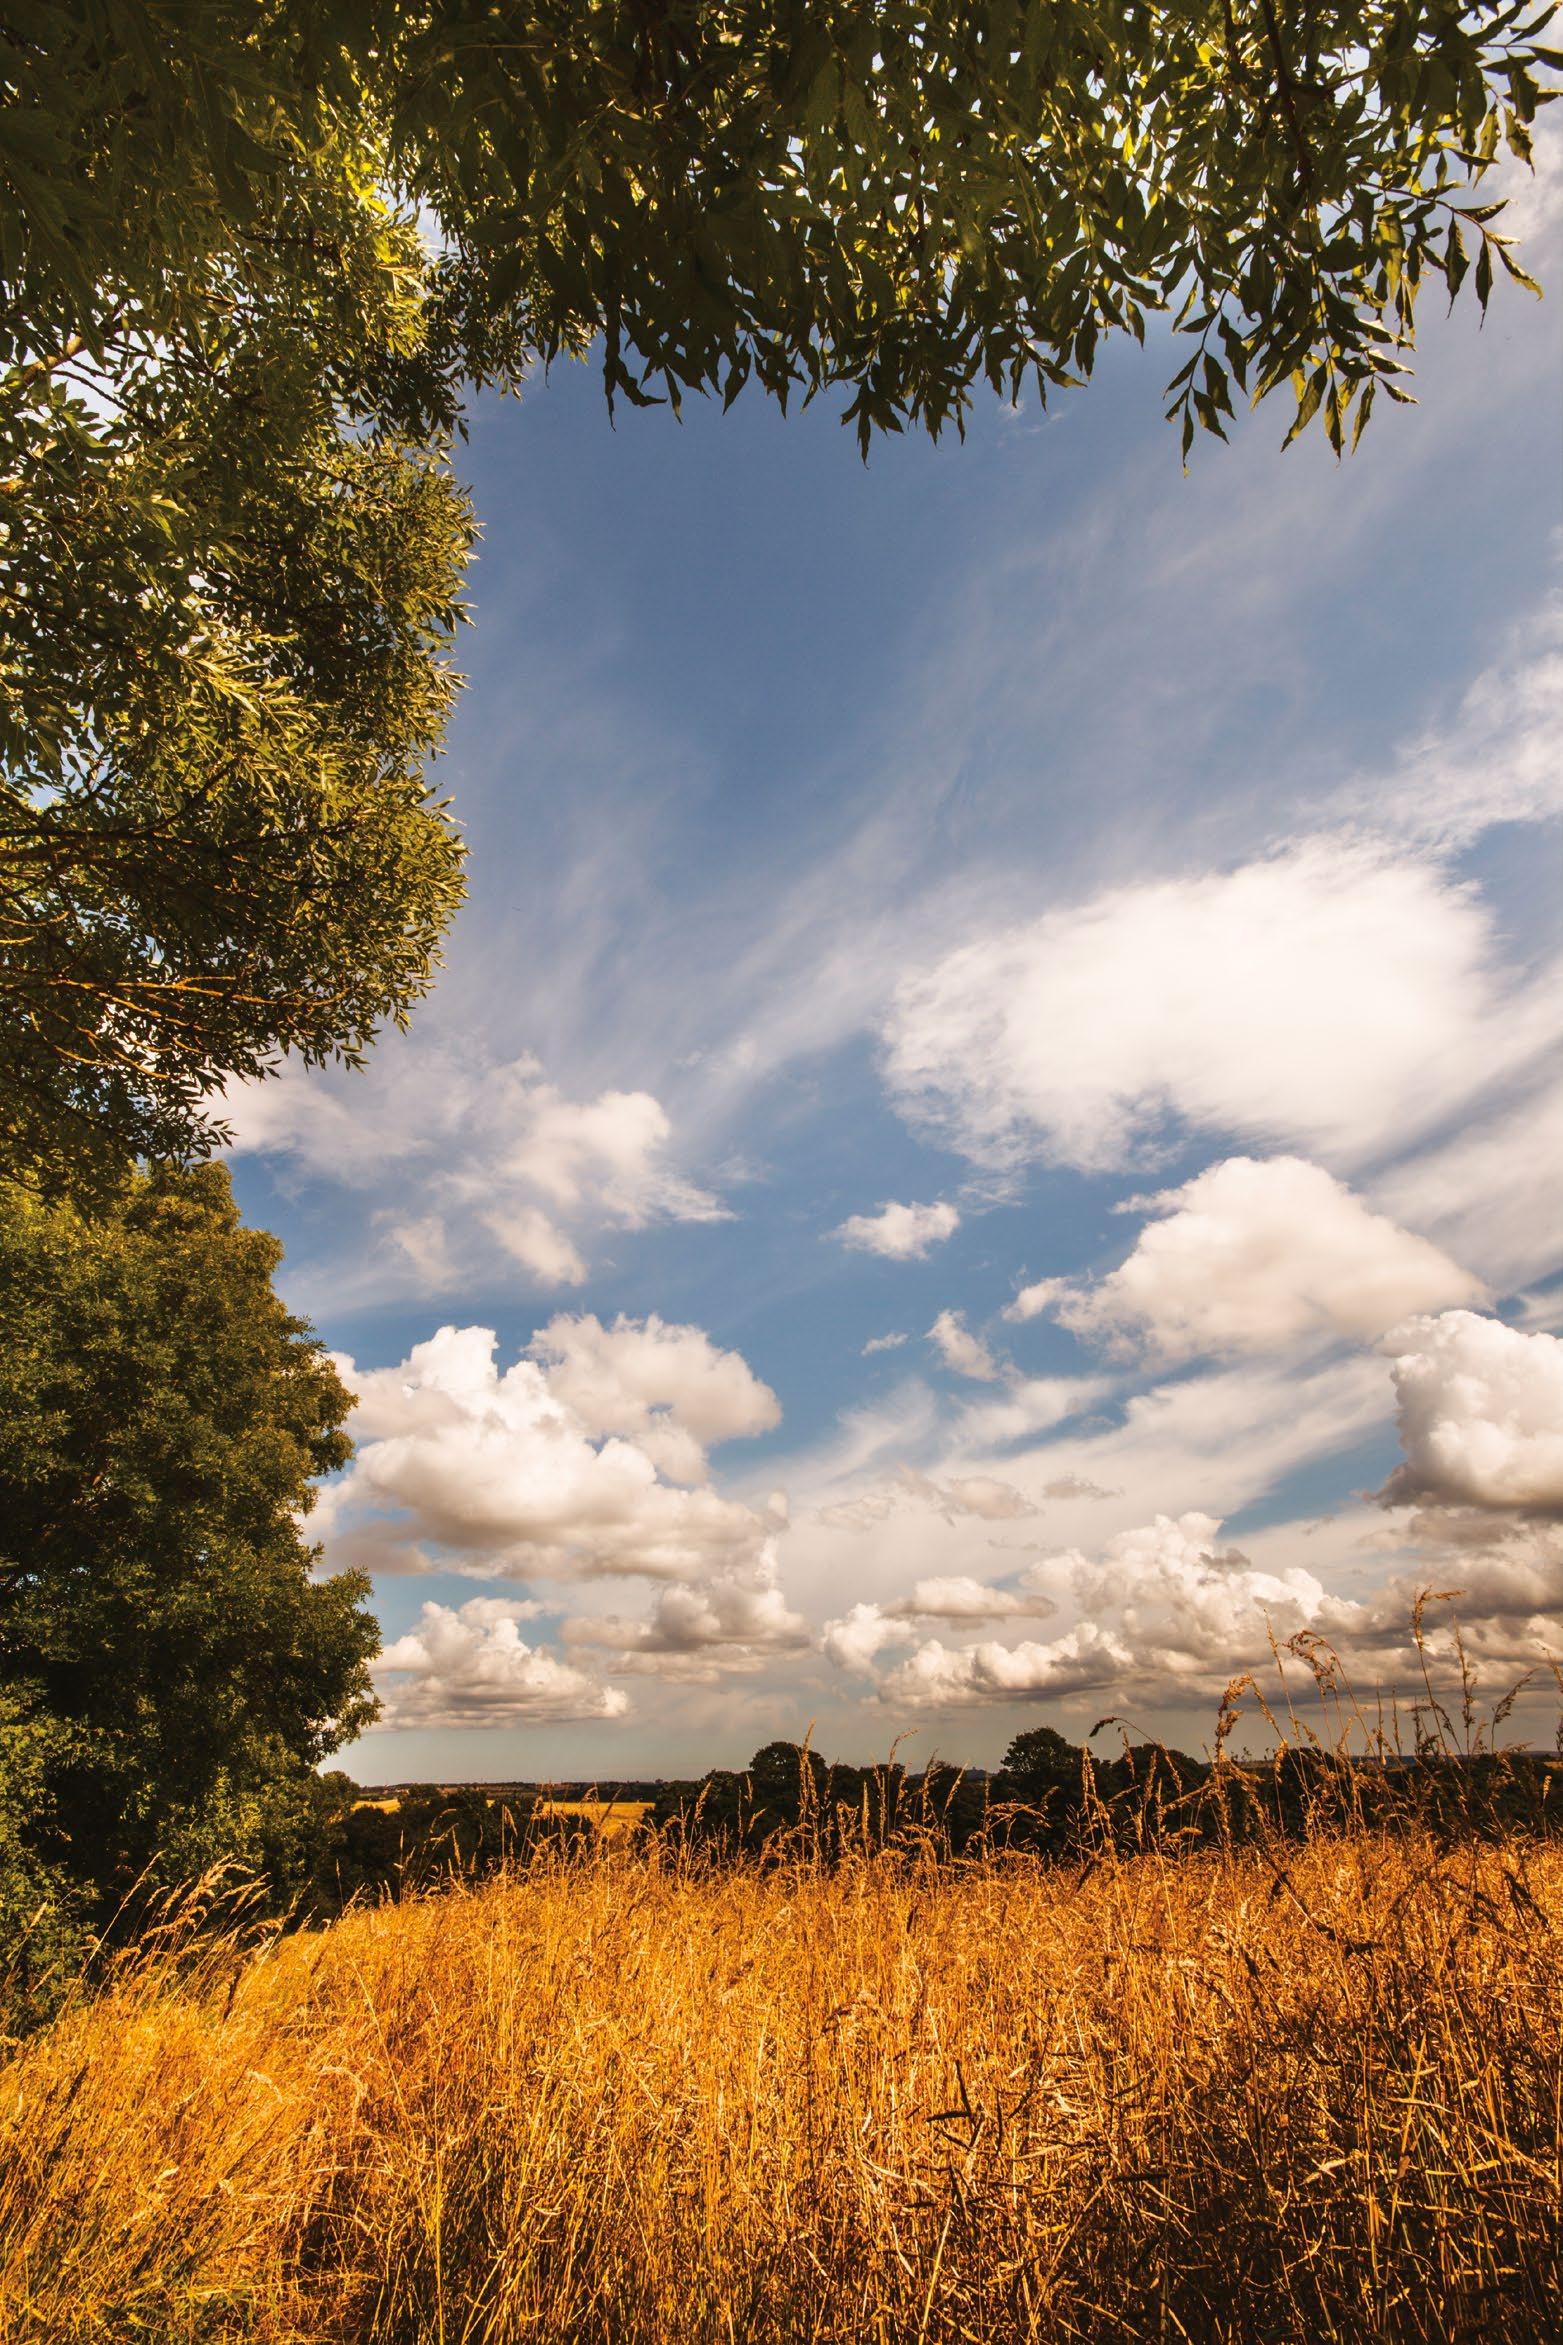
Choose your aspect ratio
Differentially crop your image in-camera by changing the frame shape


While cropping can be easily done in post-processing, changing the native aspect ratio in-camera can help focus your mind and reveal overlooked composition options. In the menu select a 4:5 ratio or even 1:1 for a square frame. If you don’t want to change the dimensions at the shooting stage, cut out a cardboard mask at a selected aspect and attach this over the LCD to approximately compose the shot in-camera.
 All images © Peter Fenech
123
123
SHOOT CREATIVE LANDSCAPES
Apply creative post-processing
Take your images a step further by introducing special effects in software
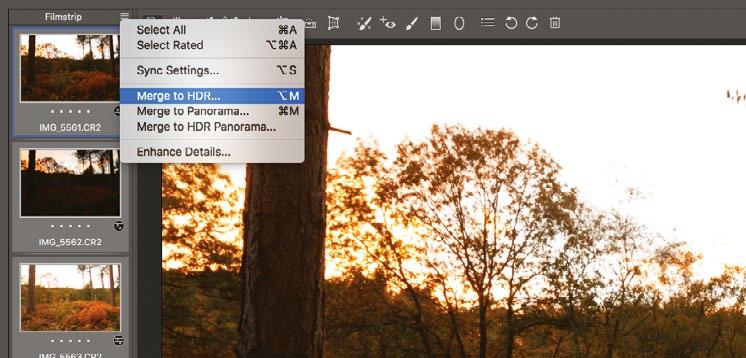
The standardisation of landscape photography extends to post-processing. While there are a huge variety of tools in Photoshop and other similar photo-editing packages, including a great choice of plugins, photographers often rely on the same ones for every image they shoot. The usual workflow will often include general lens corrections, tonal adjustments and sharpening to correct obvious aberrations and enhance colour – nothing especially creative. This is unfortunate, as the range of colour and tone found in landscapes varies tremendously, allowing us the confidence to try manipulating tonality and hue to taste,
to find unique grading themes for a more engaging atmosphere.
This is unlike wildlife or portrait photography, where these aspects are relatively fixed across all people or specimens of the same subject. In these genres it is often seen as critical to maintain colour accuracy, since any variation in skin tone, for example, is obviously unnatural and noticeable.
By exploring how to introduce false colour, lighting effects and textures into your images, it is possible to craft fascinating new styles that can be applied to breathe new life into any landscape scene.
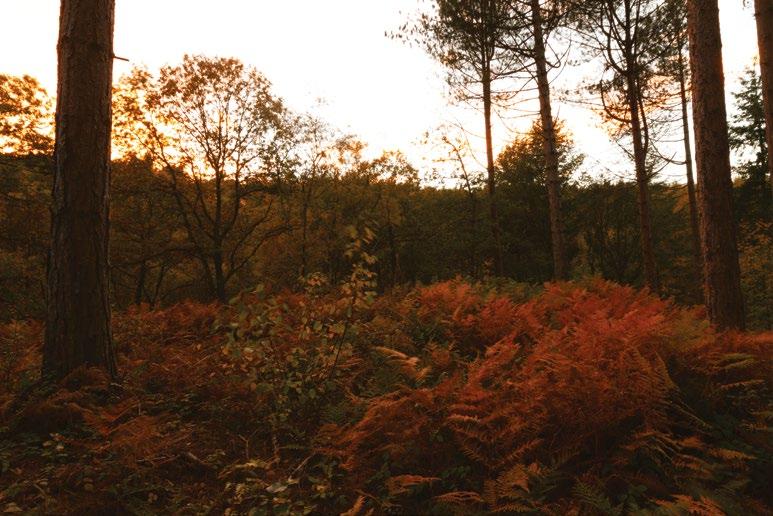
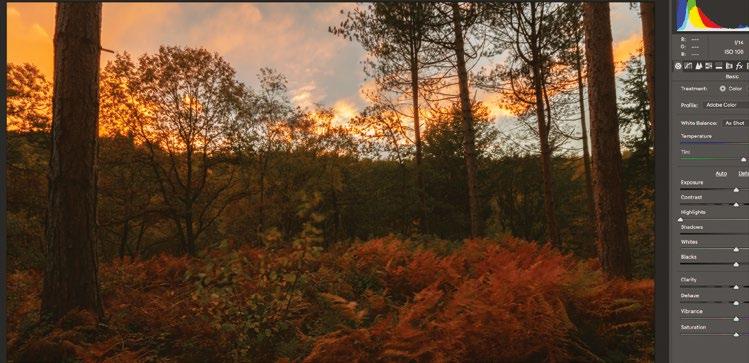
It is possible to craft fascinating styles
Add a wet plate-like effect for better impact from simple scenes
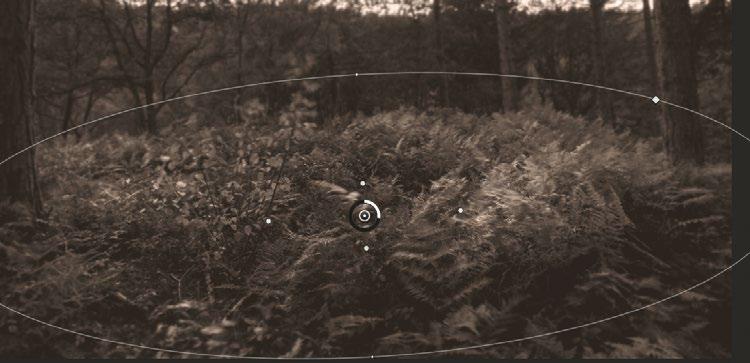
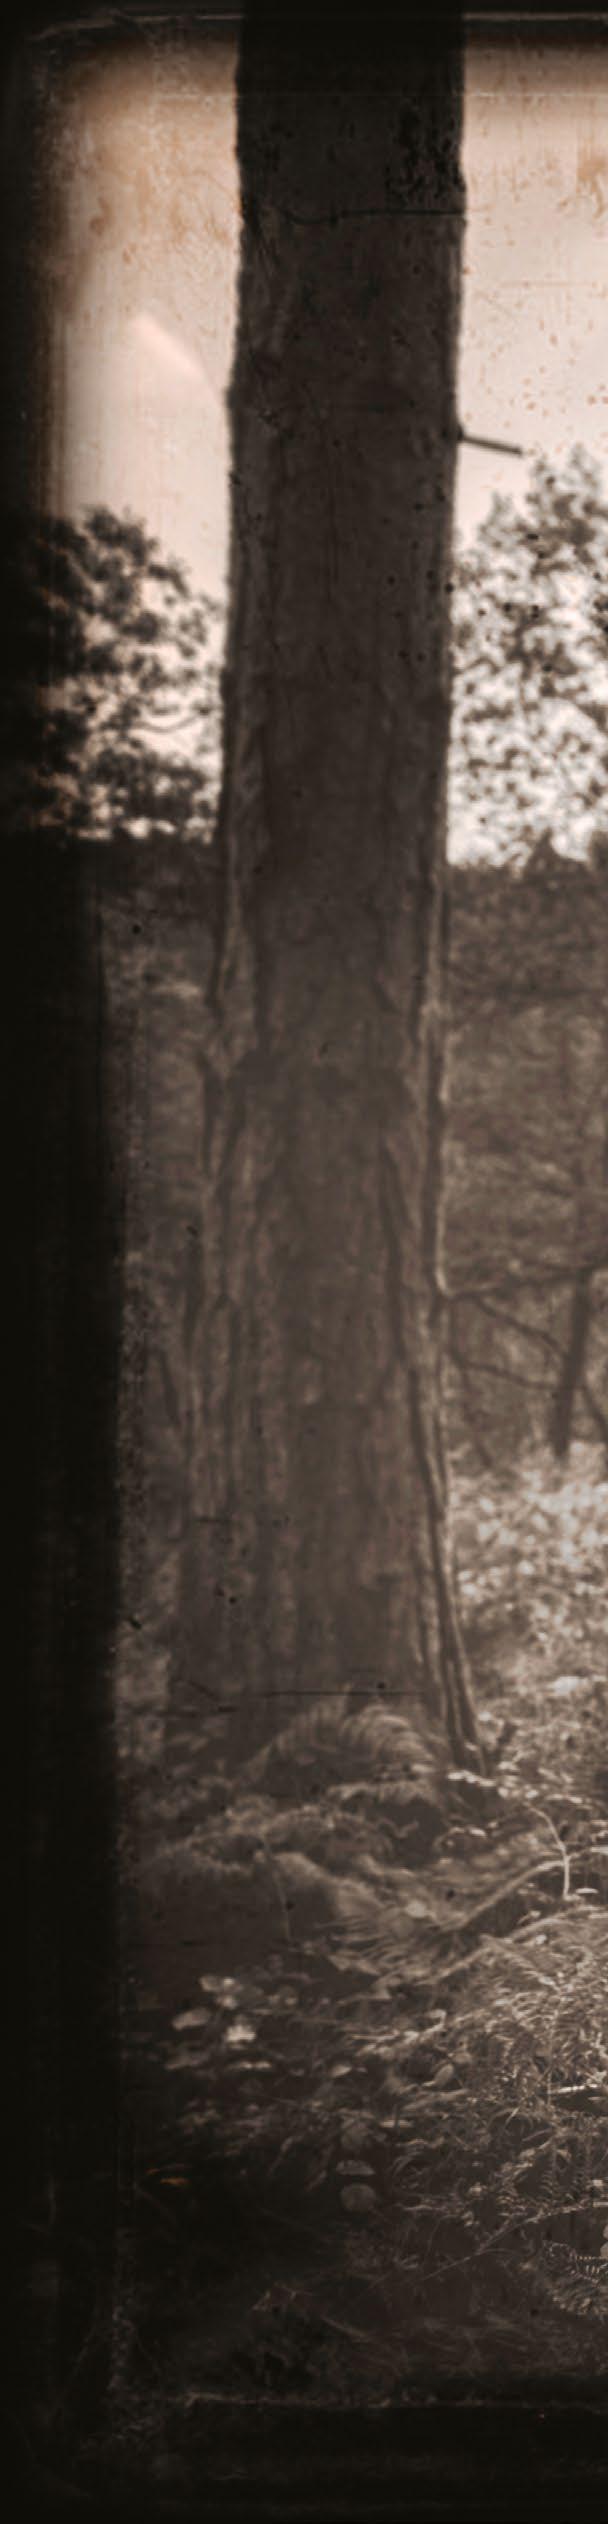
1 Extend dynamic range Since we will be experimenting with layer styles later in the editing process, it is important to protect any delicate tones. In Adobe Camera Raw or Lightroom, open a series of bracketed images, select all and choose Merge to HDR to create a file with greater tonal information.
2 Make tonal adjustments Select the created HDR file and increase the dynamic range. Increase the Shadows and pull back the Highlights slider to compress range. This will make the file more forgiving of later contrast boosts applied by mono conversion and Overlay or Softlight blend modes.
3 Convert to monochrome Open the image in Photoshop and add a Gradient Map Adjustment layer, ensuring foreground and background colours are set to black and white respectively. Click on the gradient and drag the bottom stops inwards to add overall contrast. Add sepia toning with Photo Filter.
4 Reduce focus Choose the Iris Blur filter (Filter>Blur Gallery>Iris Blur) and drag out a guide over an area of the foreground. Then, move the internal points closer to the centre to feather the blur effect, and drag the radial slider around the circle to vary strength.
5 Sharpen the centre Duplicate the background and add a round of High Pass sharpening. Set an appropriate radius for the resolution of your image, then change the blend mode of your duplicate layer to Soft Light. Next, you can mask out the areas that received Iris Blur.
124 TECHNIQUES
All images © Peter Fenech
Above The new old
This image recreates a similar look to a wet plate collodion process, but modern-day exposure blending and colour filters add a contemporary twist for an eyecatching creative landscape scene
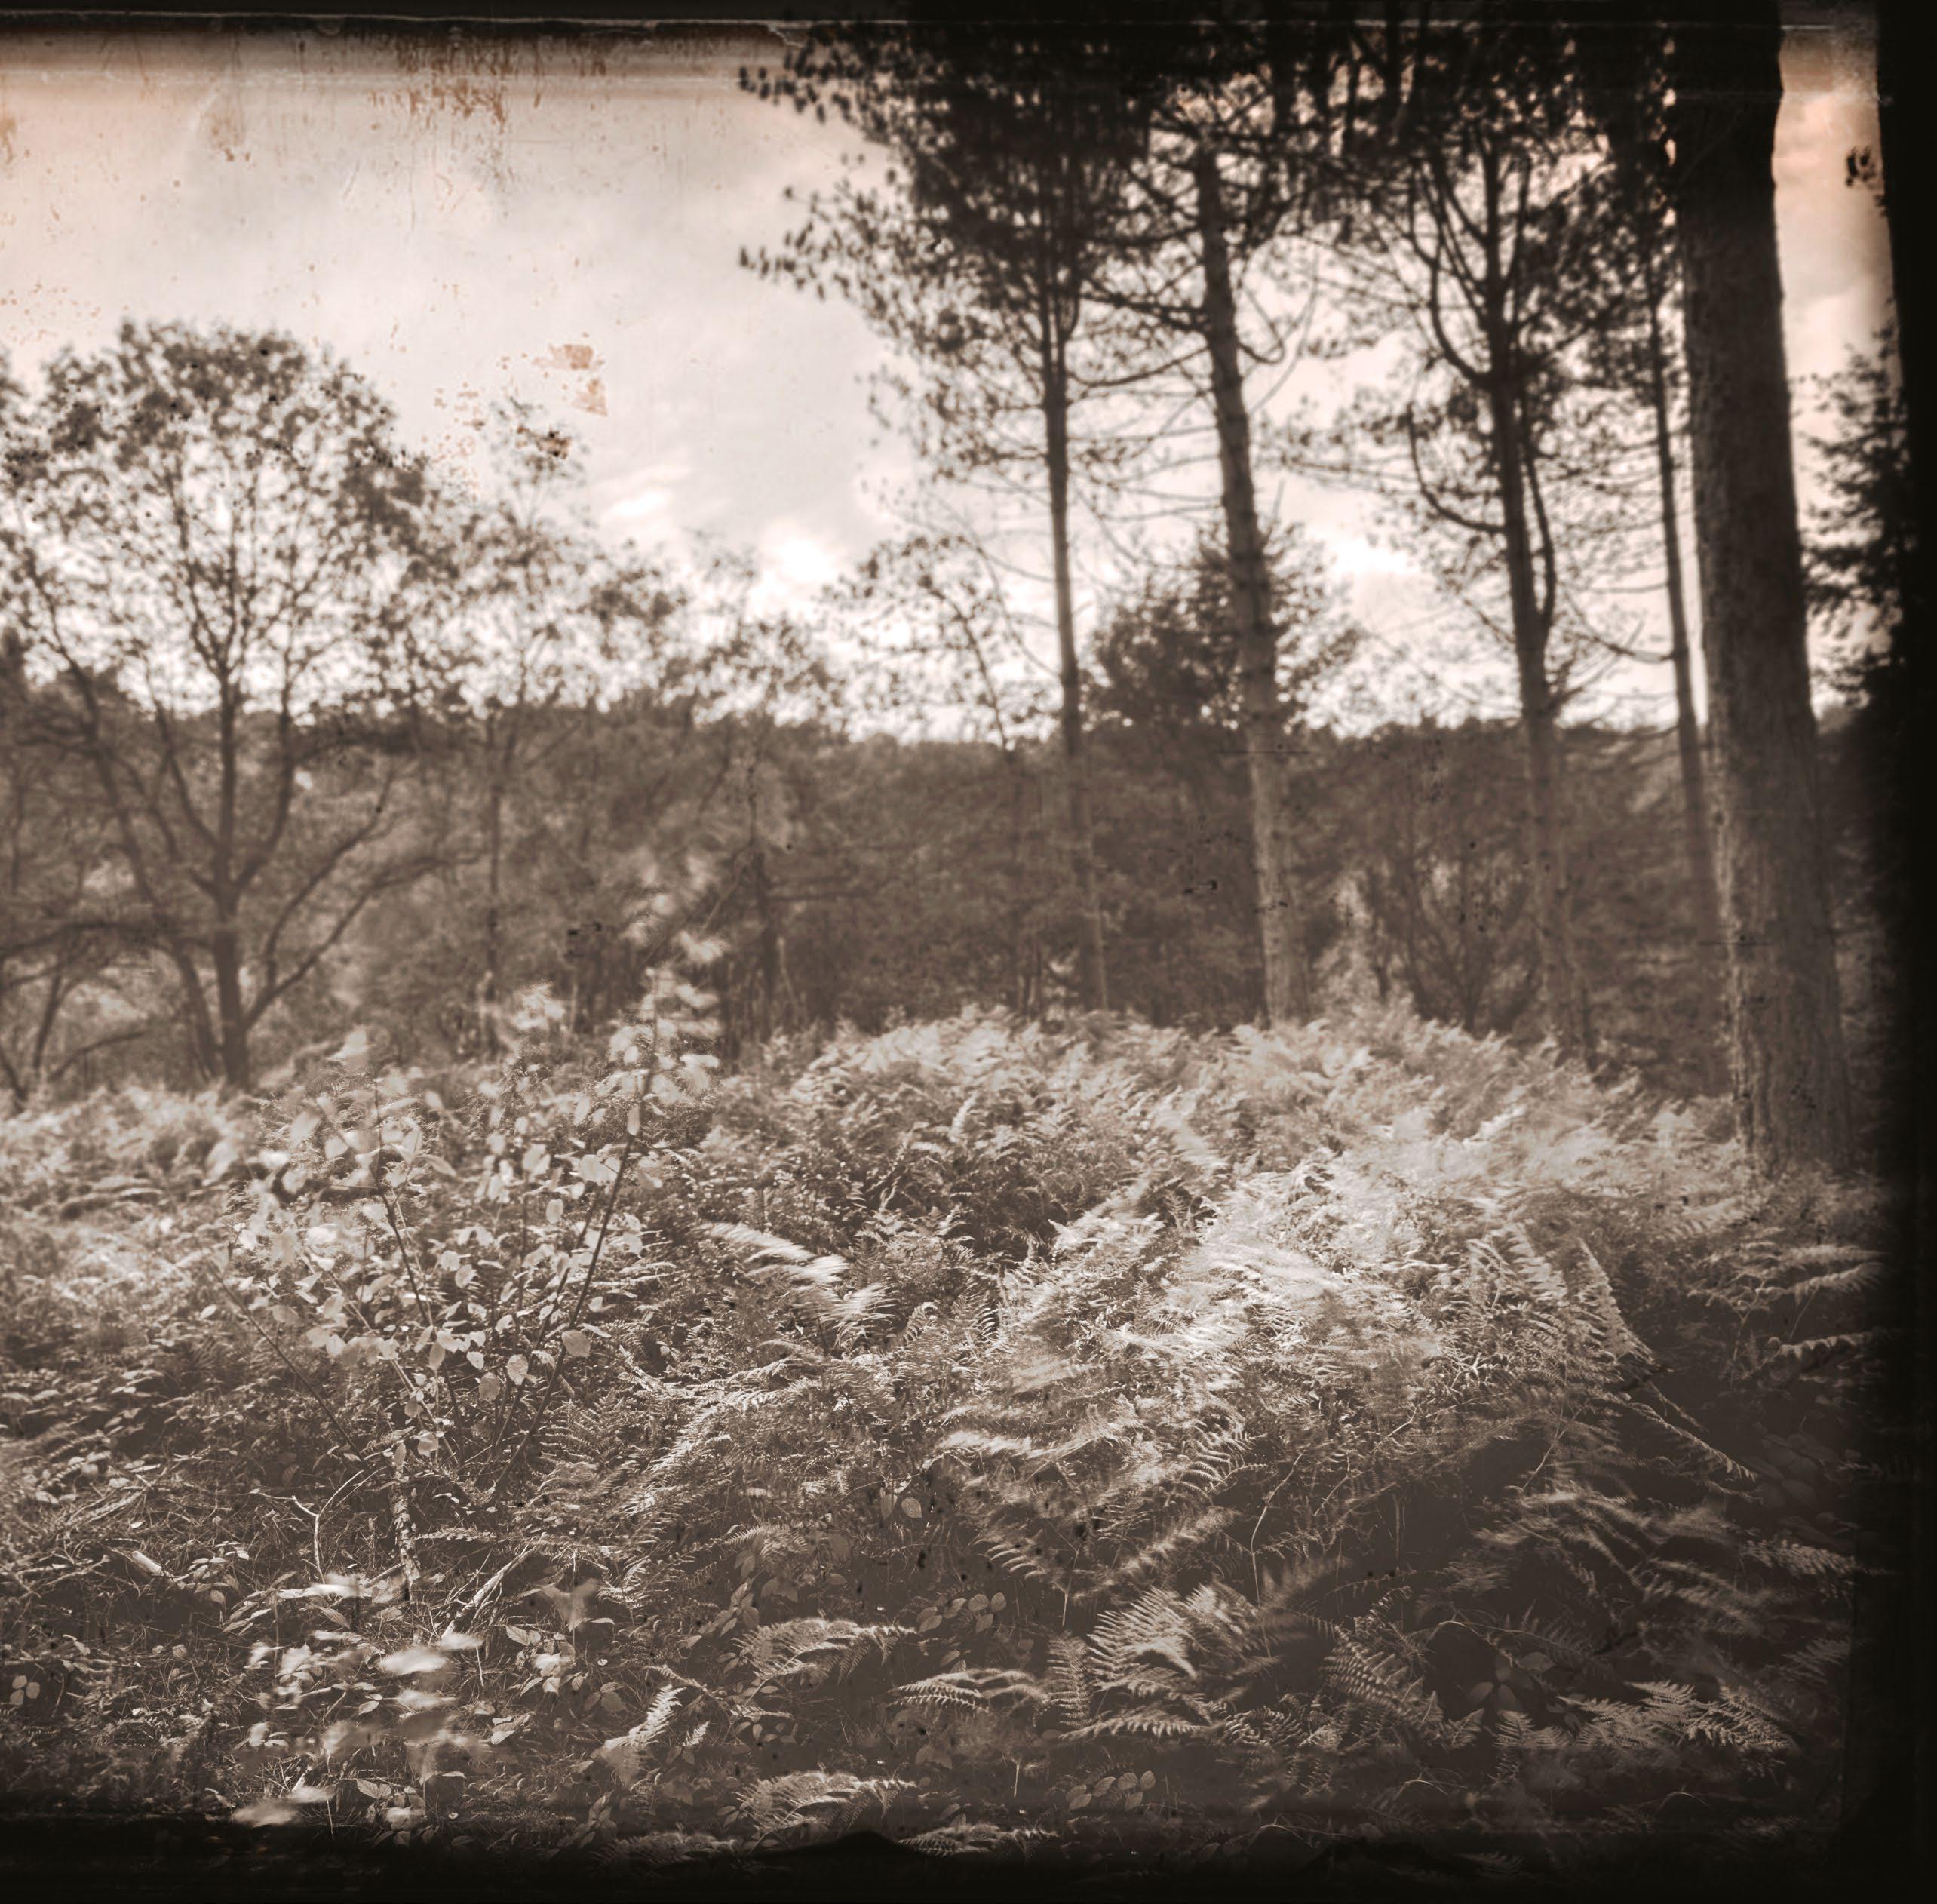

6
Overlay texture Download a plate texture from a stock site or one of the many free resource banks online. Drag this texture image onto your document, resize as necessary and select the Overlay blend mode. This will give the image a glass plate texture for an analogue feel.
7 Darken frame edges An optional step is to add an edge vignette, focussing attention on the image centre and pushing the aged look. Stamp visible layers (Cmd/ Ctrl+Option/Alt+Shift+E) then add an Inner Glow to the new layer. Choose a dark colour and multiply blend.
Inset left
Original RAW
A frame from a bracketed sequence, this image can be processed in multiple ways. A standard ‘correctional’ edit felt lacking in drama, so we will look at alternative processes
125 SHOOT CREATIVE LANDSCAPES
Dos and don’ts
Identify the best and worst approaches to experimentation in creative landscape photography
Do Use the extremes
Push camera settings to the limits of their range to introduce the maximum effects from longer shutter speeds or wide apertures.
Do Rethink composition
Try unusual framing options to portray scenes from novel perspectives, adding creativity to the standard landscape formula.
Do Use everyday scenes
Look to get more from the landscapes in your local area, creating stunning images without the need for extensive travel.
Do Combine effects
For even more artistic flair, try putting more than one technique to work to see what styles you can create.
Don’t Use intermediate settings
Without care, a partial effect can appear unintentional, creating neither a record shot nor a particularly successful experimental image.
Don’t Over-apply effects
While combining effects can be a good way to find new looks, merging too many can detract from the image content.
Don’t Forget the basics
Throughout your experiments with composition and exposure, remember how your choices can impact viewer reaction.
Don’t Make effects your subject
Creative strategies can make the most of minimalist scenes, but don’t allow photographic techniques to become an image’s reason for being.
Above Perspective control
A creative landscape image can be as simple as a frame that focusses on colour contrasts and minimal detail. As a popular genre, any image that surprises the viewer is an engaging result
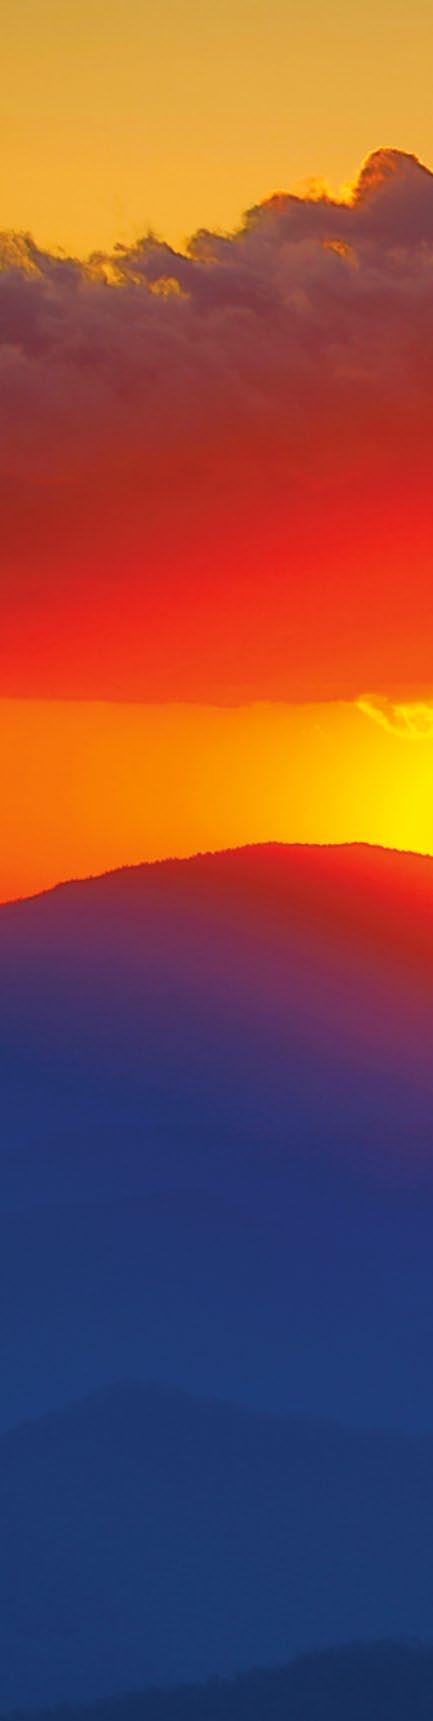
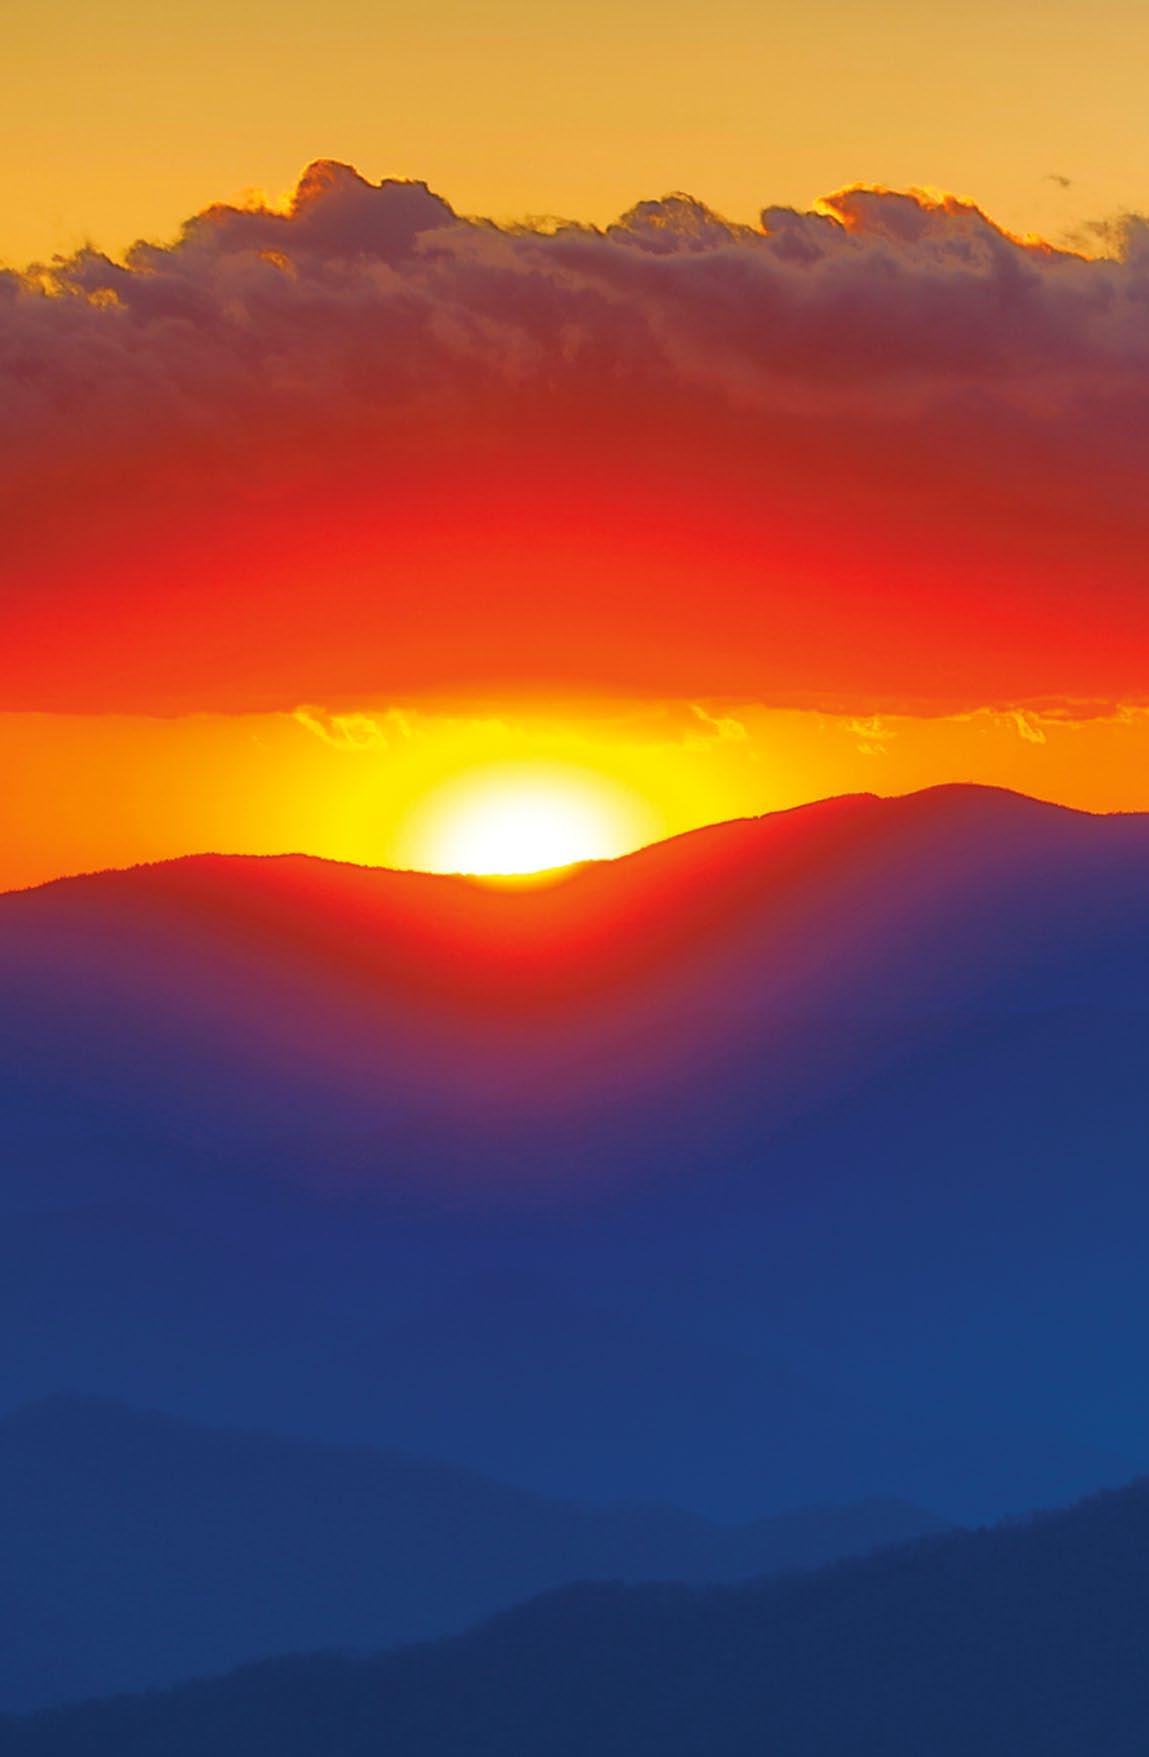 © John Gerlach
126
TECHNIQUES
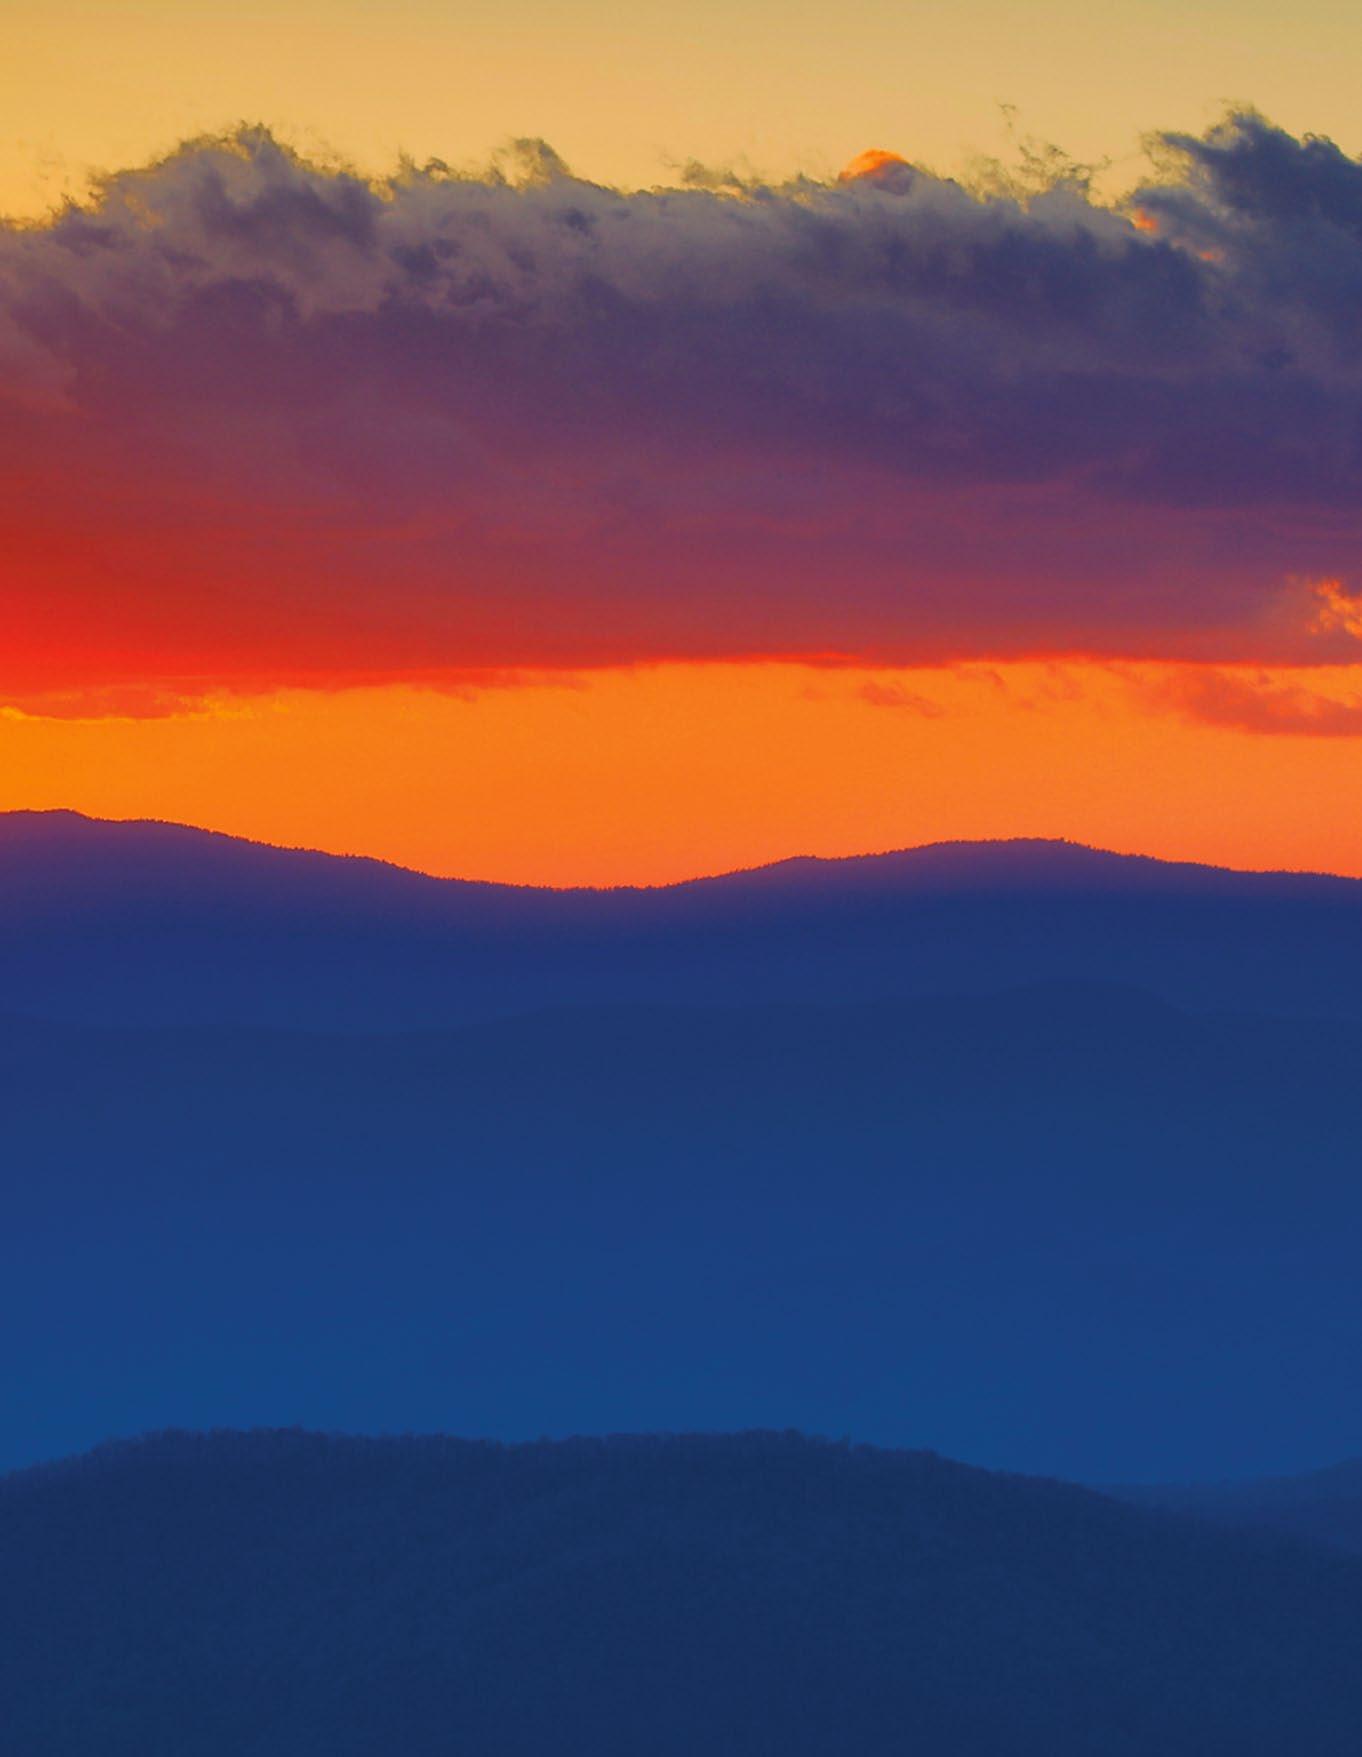
127 SHOOT CREATIVE LANDSCAPES
BEFORE Landscape EDITING
Professional photographer Peter Eastway explains his approach to editing landscape photographs – how far do you want to go?
Should a landscape photograph depict reality, or can a landscape be imaginary? There are two schools of thought, and in both cases using post-production to best represent your creativity is necessary.
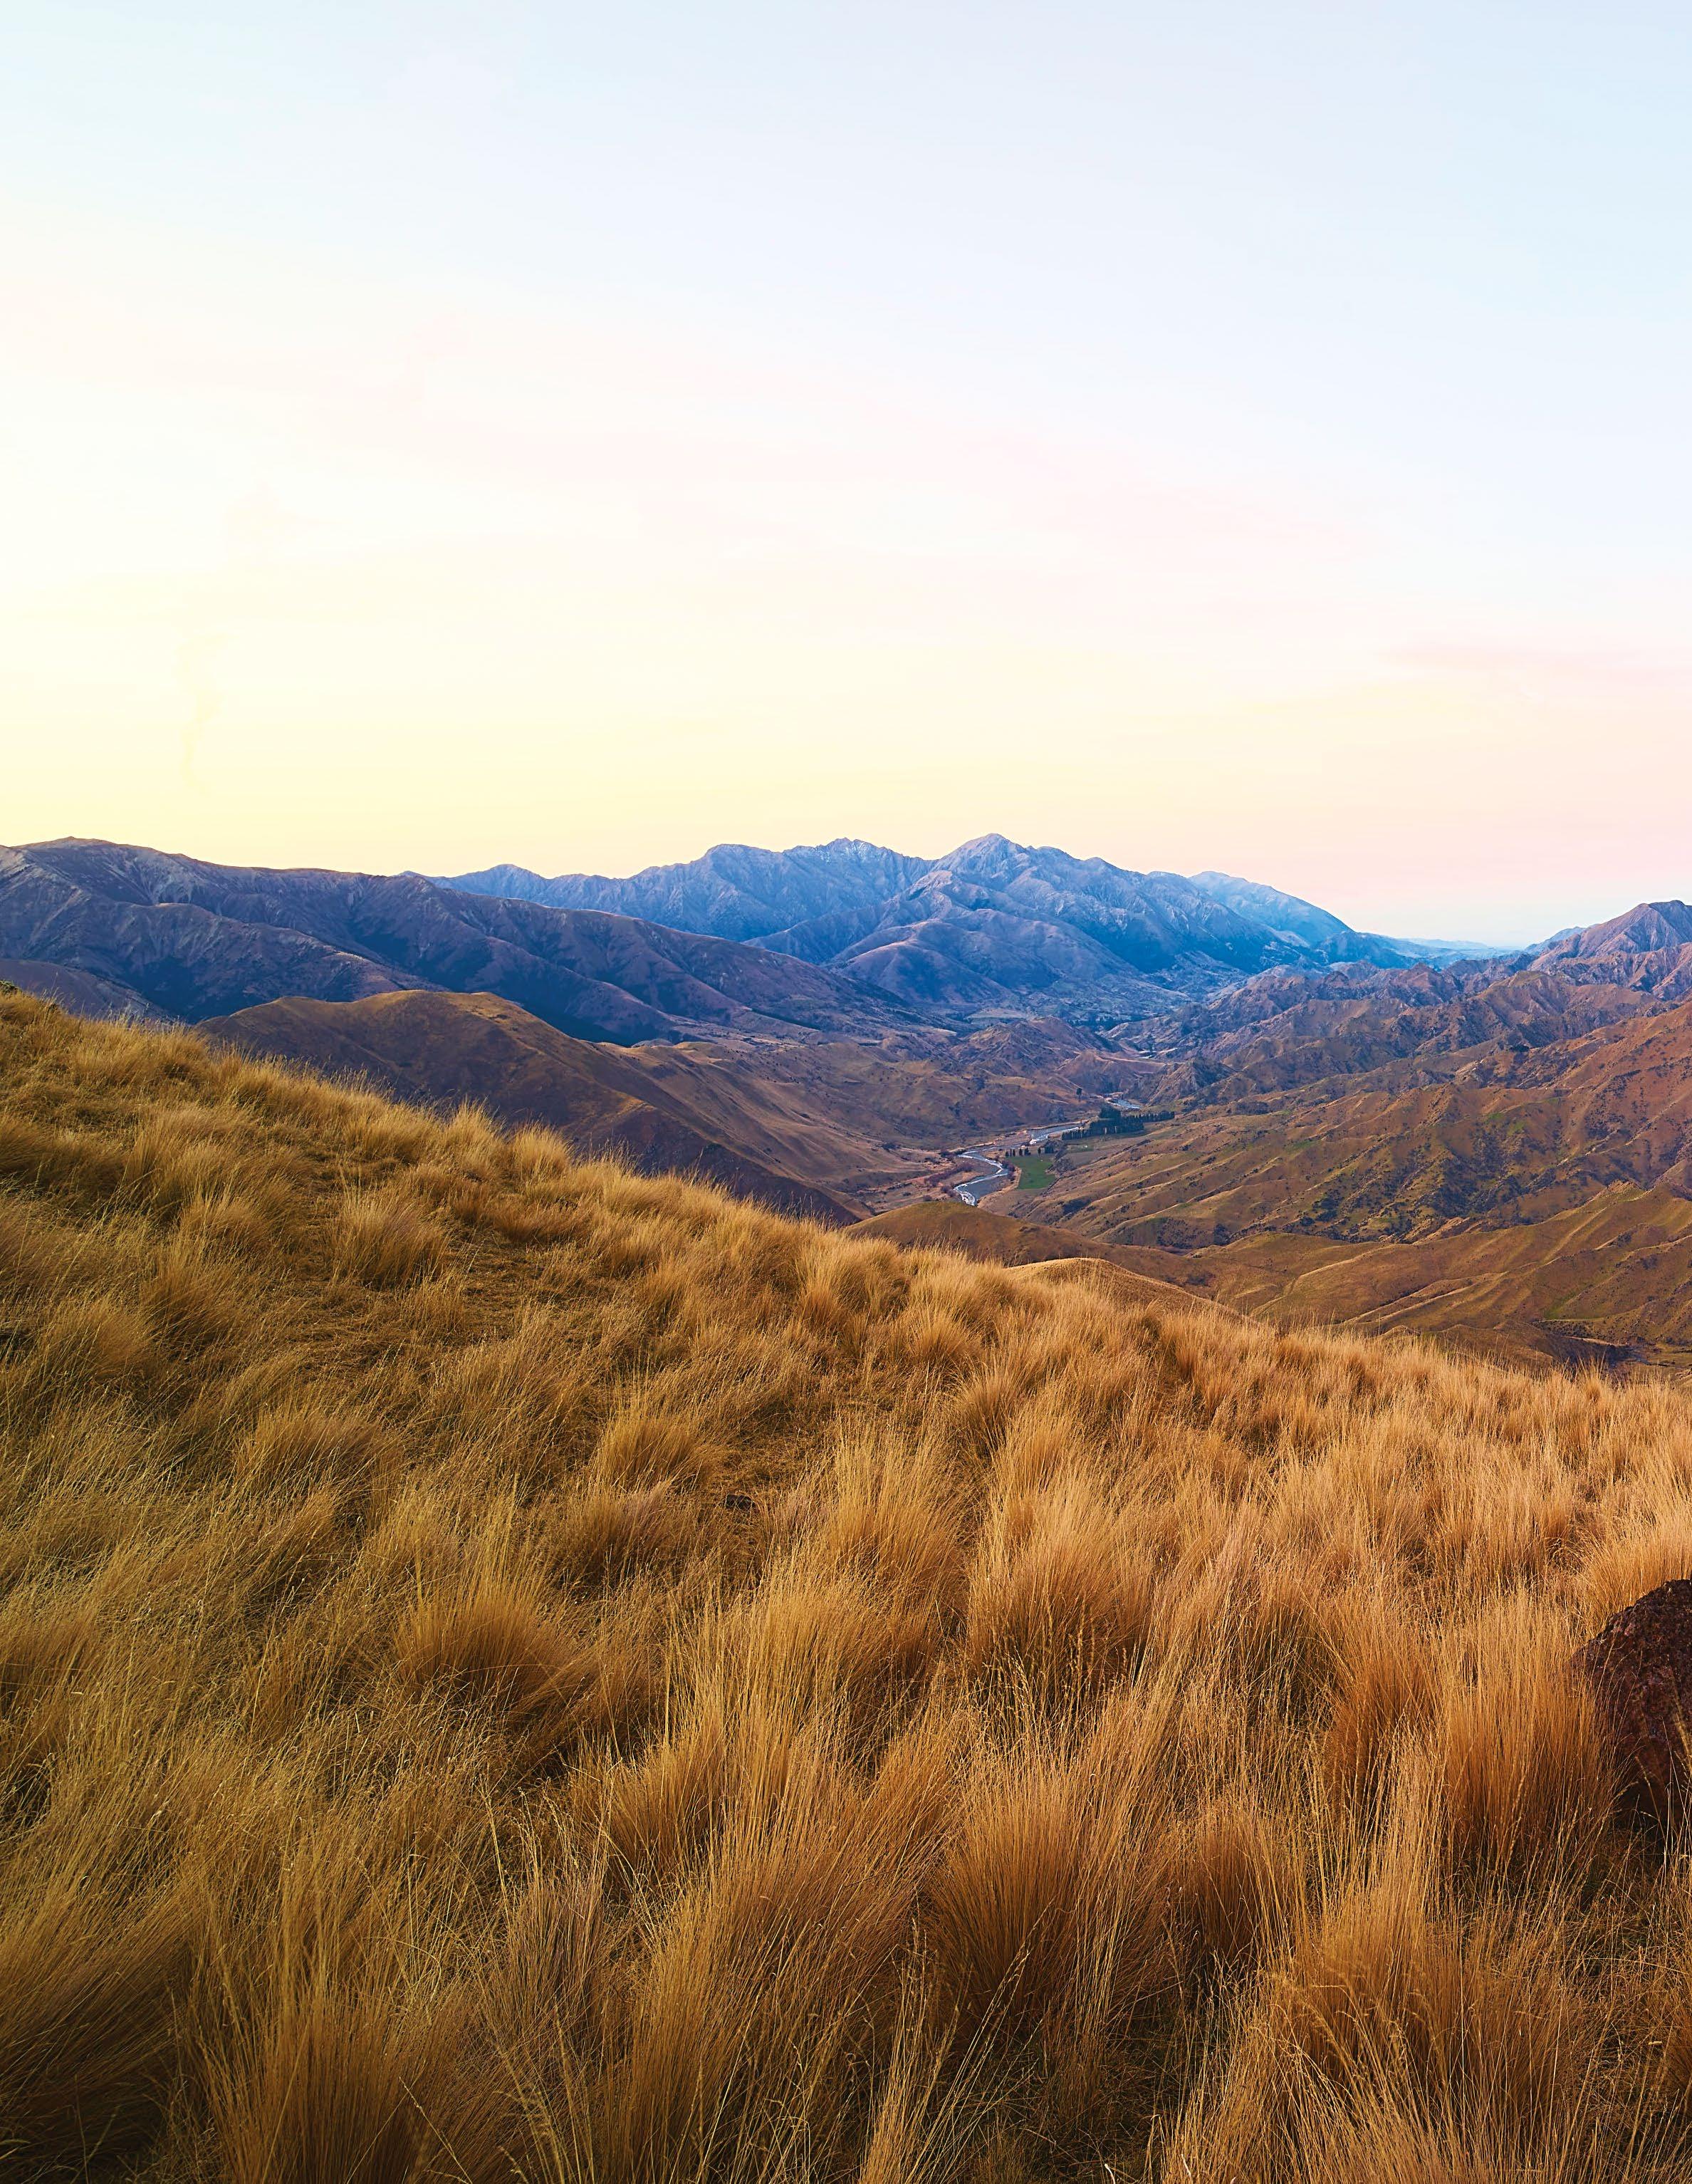
In the days of film, after the negative was exposed and processed, a print would be made as a second stage of creativity. It was a two-step process – capture followed by post-production. With digital photography, the process is the same. We can think of our RAW files as our negatives, while our post-production is the making of a file for printing or social media.
For me, it’s the post-production that gives us the opportunity to be different, to express ourselves, to explore different ideas of seeing and ways of thinking. Cameras do one thing only: make an
exposure. But post-production gives us numerous creative avenues.
In the early days of digital photography, Photoshop was the king of post-production, and being a successful landscape photographer meant mastering the software. However, Lightroom arrived and made processing our files quicker and easier, even if it wasn’t quite as powerful as Photoshop. But for most landscape photographers, it didn’t need to be more powerful, especially if you weren’t into creating imaginary landscapes with composites.
Today, Lightroom and Capture One will enable you to master most aspects of landscape photography, and from there it’s a smaller step to engaging with Photoshop. On the following pages, we’ll take an overview look at what you need to know about post-production in order to be a creative and successful landscape photographer.
All images © Peter Eastway 128 TECHNIQUESTECHNIQUES
AFTER photography MASTERCLASS
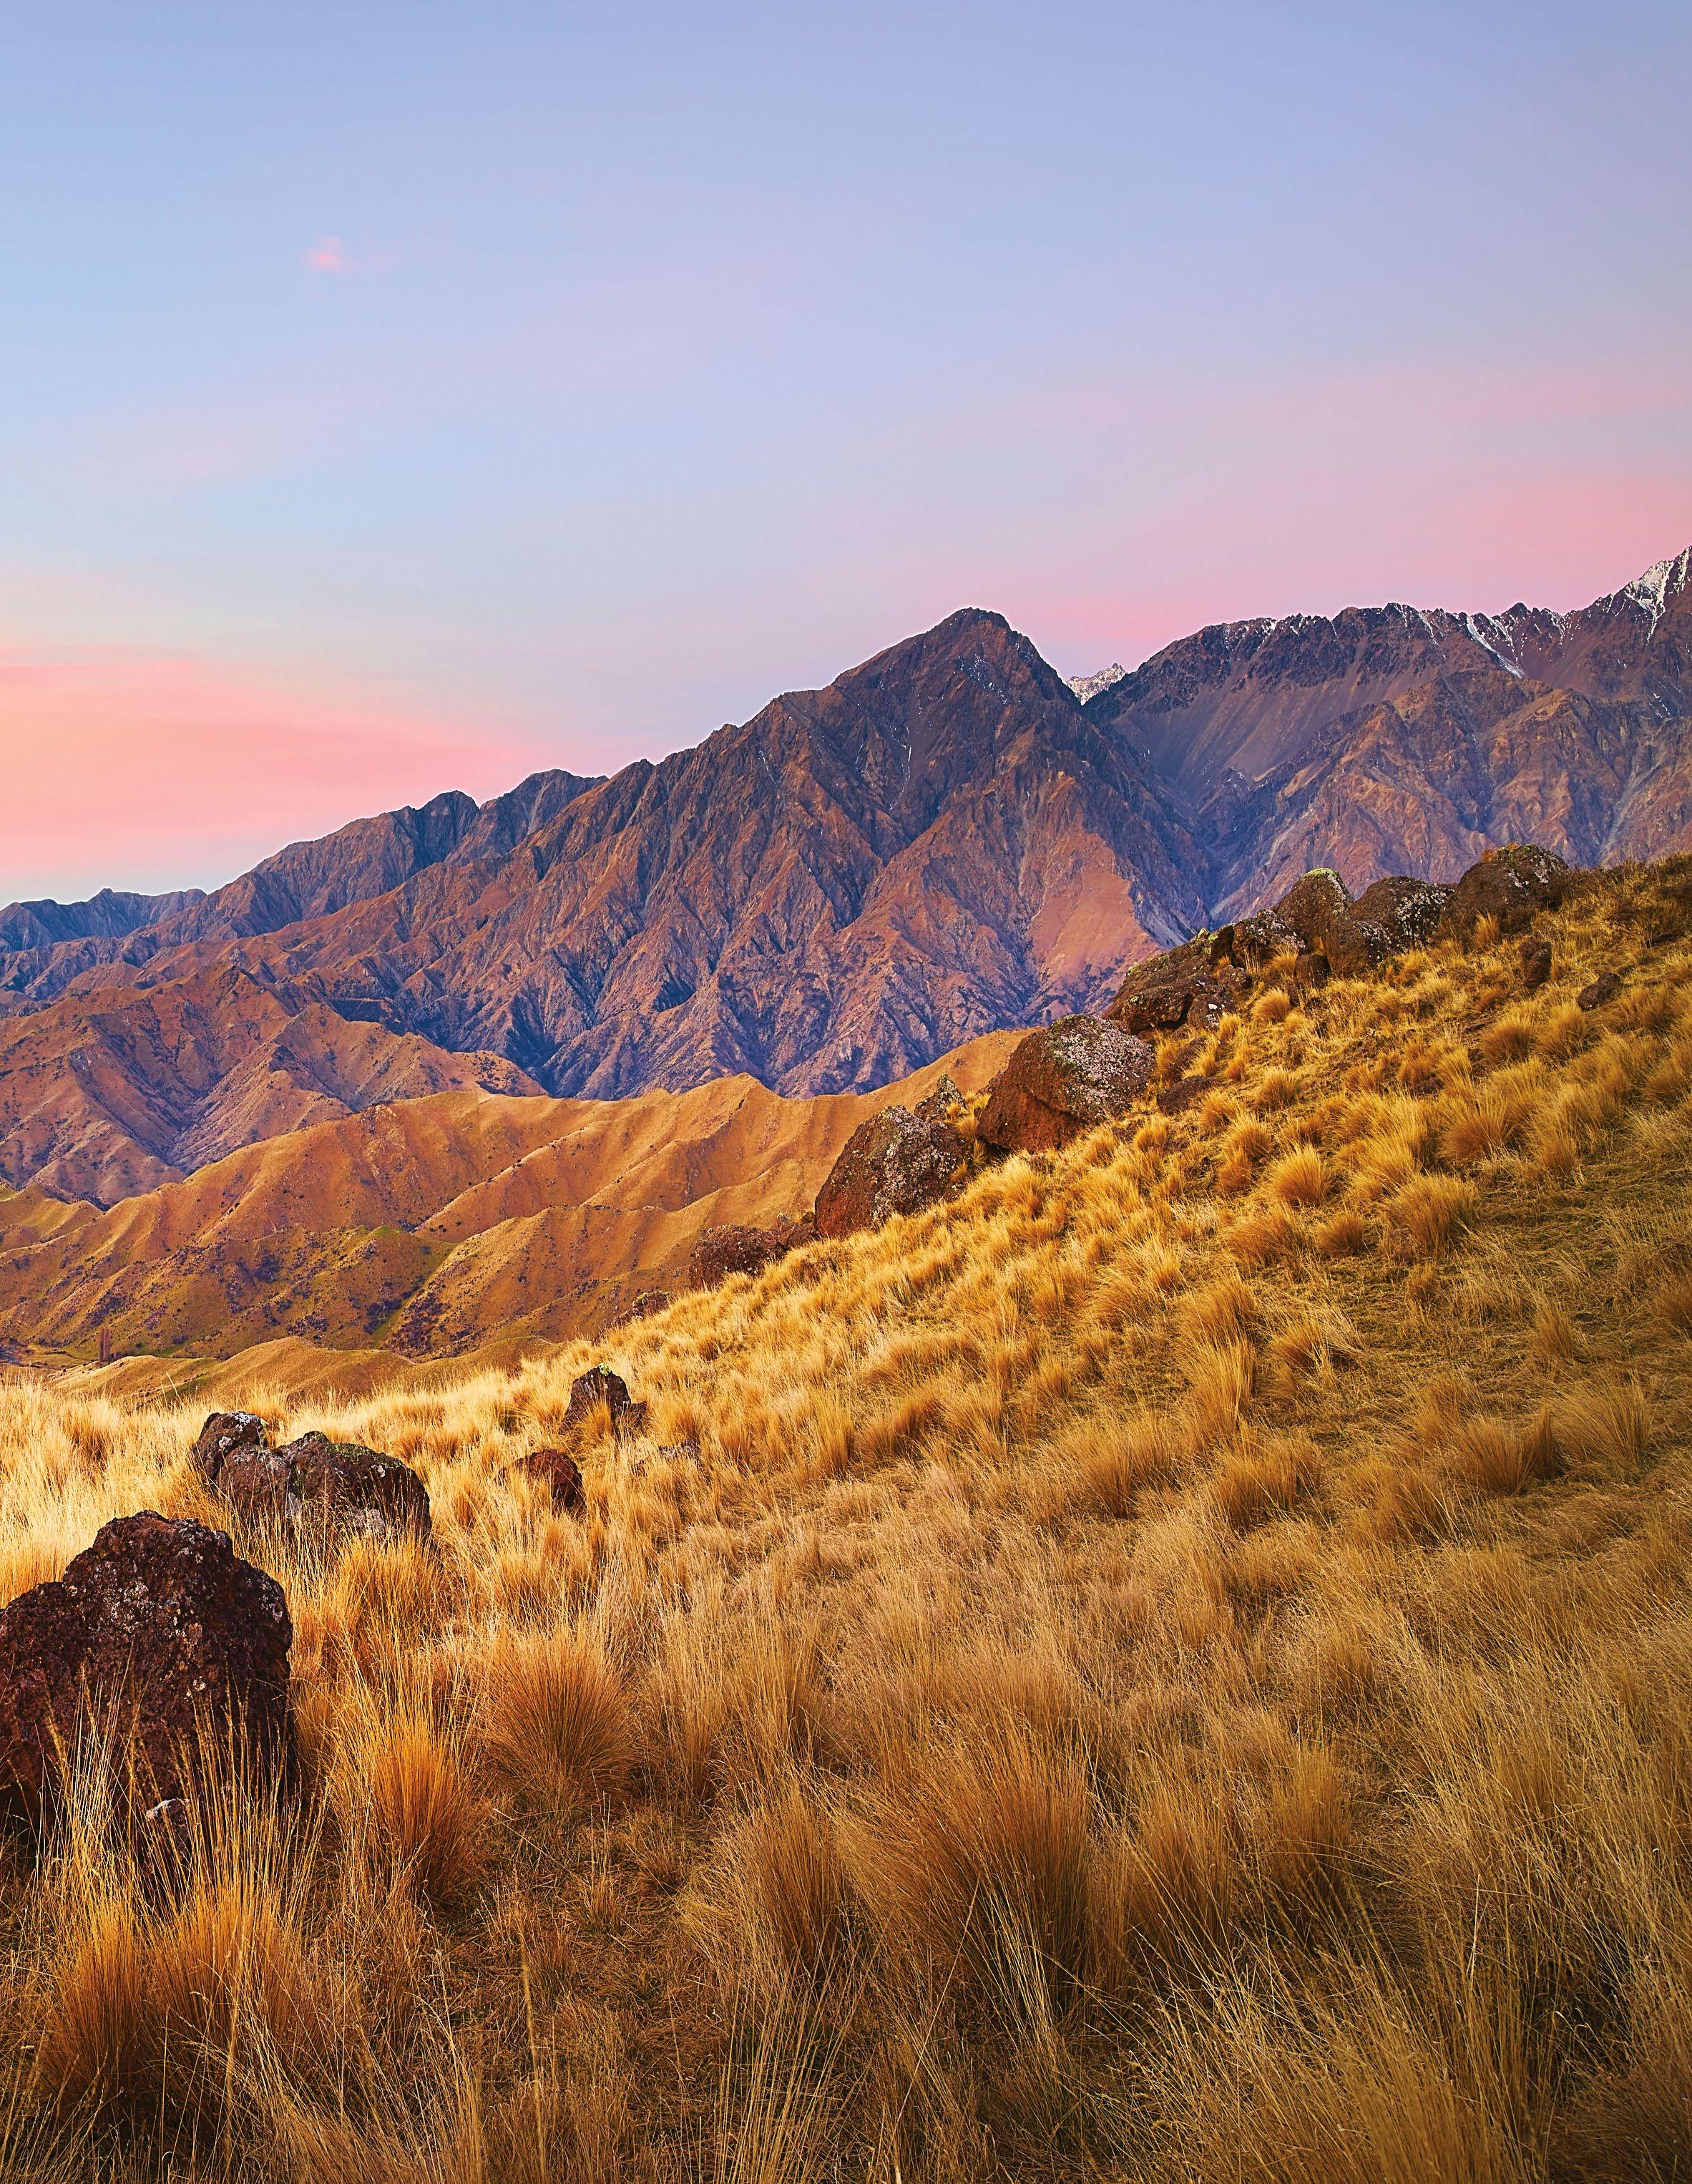

EDITING LANDSCAPES 129
Best practice for landscape shots
For some photographers, post-production is all about fixing problems that happened at the time of capture. A better approach is to optimise your exposures when you take the photograph and then use post-production to further interpret your images. This isn’t to say we don’t use post-production to fix our
There’s a reason we shoot RAW files for landscapes, but even more important is the shot itself
landscape photos, but if you can improve a poor-quality file with post-production, imagine how much better it could be if you started with a good-quality file.

So before we move into processing and editing landscape photos, how do we ensure that we capture the best possible files in
Making perfect landscape shots
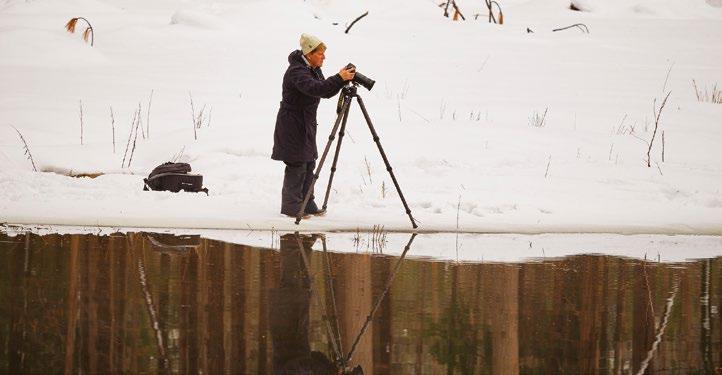
the first place? Use the camera to maximise image quality at every step, from the file format (RAW, not JPEG) to the exposure settings that are appropriate for the subject. And while not always possible, location, weather, season and lighting all assist us in capturing that optimum image file.
The best post-production results start with the best in-camera shots, so optimise the location, light and camera settings
1Turn on RAW capture If you’re not already shooting in RAW, check your camera’s menu and select RAW. Most cameras also enable you to capture both JPEG and RAW files at the same time.
2 Use the histogram To check you have a good exposure, use your camera’s LCD or EVF display to show the histogram. You don’t want the graph touching the right side, and preferably not the left side either.
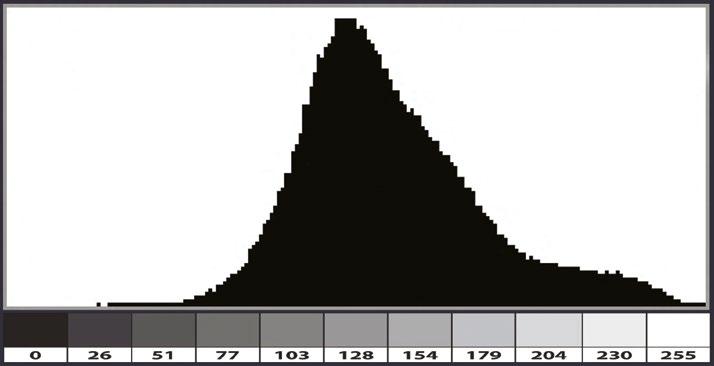
3 Use a tripod To ensure there is no camera movement and you maximise subject detail, use a tripod (with a remote control) to take your photos. It’s essential for long-exposure techniques too.
The right light
We should never forget the importance of good light at the time of capture. The image with better light (right) was much easier to process because most of the hard work was done in-camera
BEFORE 130 TECHNIQUESTECHNIQUES
Opening RAW files
No matter what your camera is, there’s a RAW converter for it
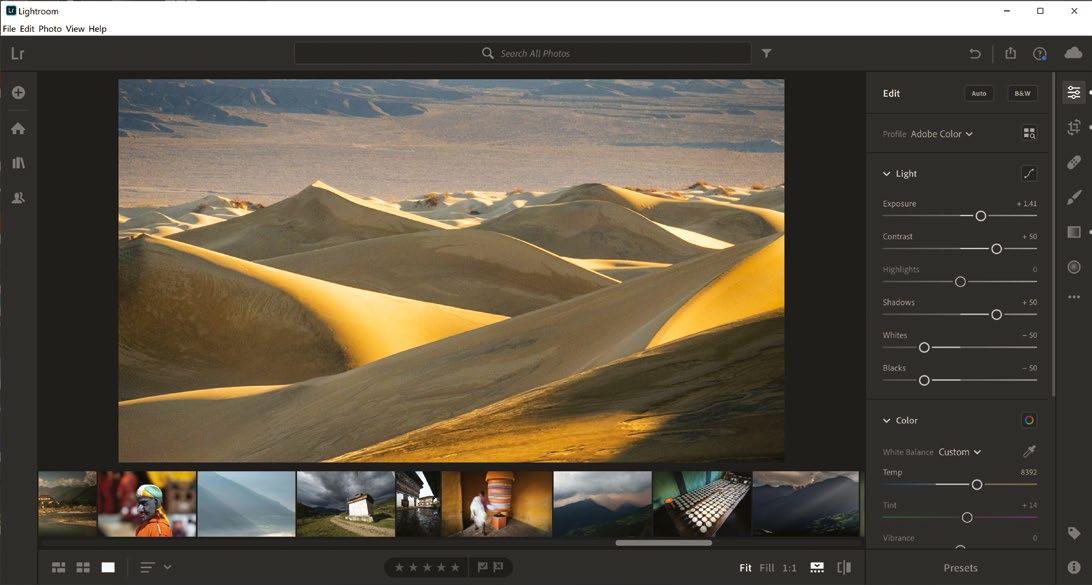

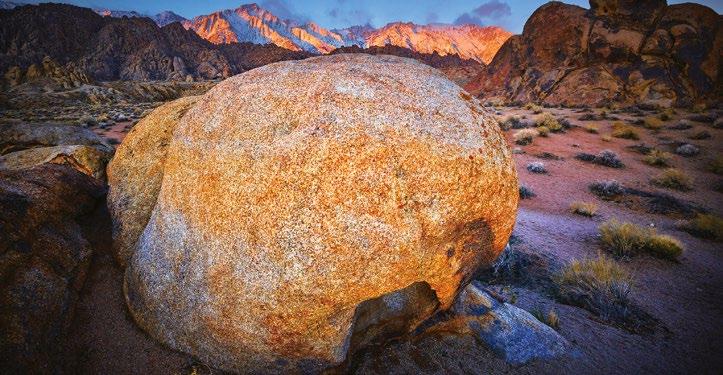
RAW processing apps used to be quite rudimentary, but today’s leading converters are incredibly sophisticated and are almost guaranteed to process your camera’s RAW files. So how do they open? For Photoshop, use the Open command on the RAW file and Photoshop’s Adobe Camera Raw will automatically open. In Lightroom and Capture One, import the photos and then open the file. Processing RAWs is no more difficult than JPEGs – and the results are far superior.
4 What’s the shutter speed? If you handhold the camera, ensure the shutter speed is fast enough to avoid camera shake, or use long shutter speeds, as blurry clouds are easier to get in-camera.
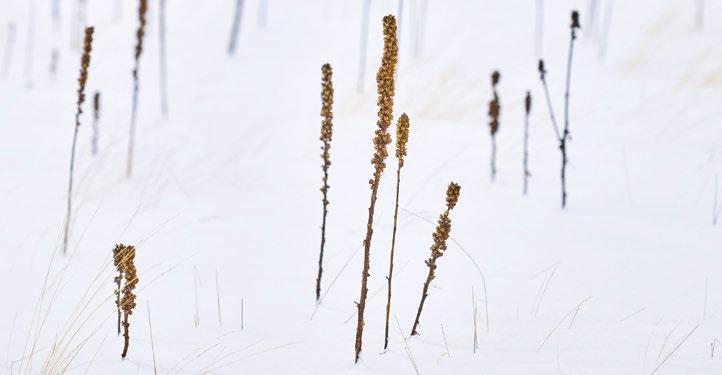
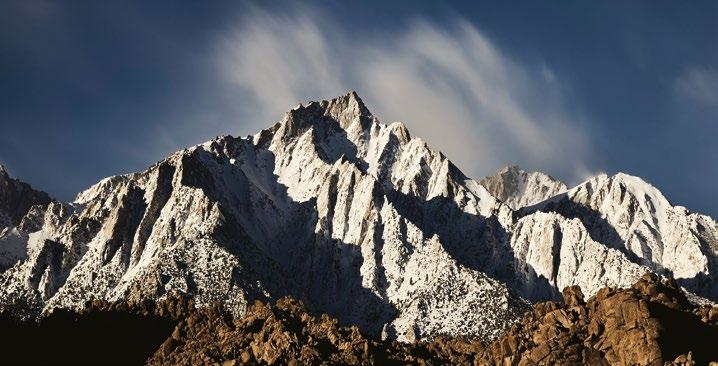
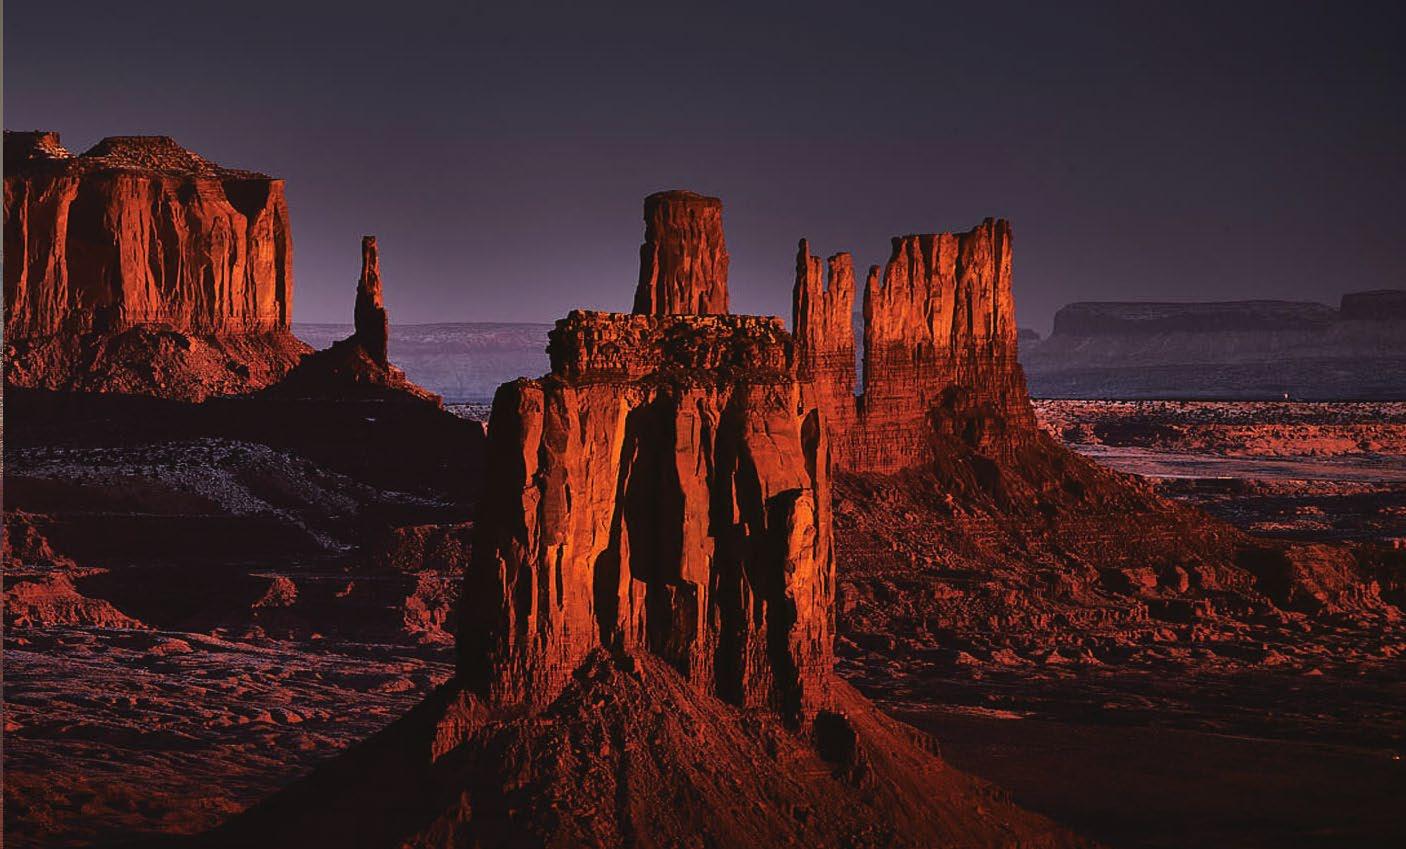
5 Optimum aperture Setting the correct aperture will give you control over the depth of field and image sharpness. Don’t use f/22 or smaller, as diffraction is likely to be a problem.
6 Low ISO settings To get clean image detail, try not to use higher ISO settings, which may introduce unwanted noise or ‘grain’ to the image (although modern cameras are remarkably good).
Why shoot in RAW?
Don’t throw image quality away with JPEGs
Cameras initially capture RAW files with excellent colour and exposure information, only to throw lots of it away to create a JPEG file. While JPEG files are great for sharing and printing, they are not nearly as good as RAW files for capturing landscapes. To get the best image quality, there really is no option but to shoot in RAW. You can also set your camera to capture both RAW and JPEG files.
AFTER 131 EDITING LANDSCAPES
Processing RAW files in Lightroom
Lightroom and Capture One are now so powerful that many landscape photographers don’t use anything else
Processing a RAW file to completion can take as little as 20 seconds or as long as several days! It depends on the photo itself and what you want to present to your audience. It also depends on what you want your landscape photograph to say – and that’s often where the time is spent, experimenting with different approaches. Does the photo look better when it’s lighter, darker or with less contrast? Should you lighten the subject or darken down the surroundings? There are many subtle things you can consider – if you want to.
EDITING STEP
SET GLOBAL EXPOSURE
COLOUR BALANCE
GLOBAL CONTRAST
HIGHLIGHTS & SHADOWS
CROP
TONAL MAPPING
COMPOSITES & MERGES
SPECIAL SAUCES
SPOTTING & RETOUCHING
SHARPENING & ENHANCING
Some photographers like to keep their photographs as close to reality as possible, so the number of edits they will need is limited. Other photographers delight in exploring the creative possibilities with perhaps hundreds of changes. However, while there isn’t a ‘standard’ workflow, there is a number of steps all photographers should consider when editing their photos.
Today, powerful RAW processors like Lightroom and Capture One can do most of the processing chores we used to do in
BEST IN LIGHTROOM OR PHOTOSHOP?
LIGHTROOM
LIGHTROOM
LIGHTROOM
LIGHTROOM
LIGHTROOM
WHY IS IT IMPORTANT?
Sets the overall tonality of the image.
Can remove unwanted colour casts and produce a more natural colour rendering.
Contrast can help to define the mood of your landscape –serene or dramatic.
Return detail to shadow and highlight areas that the exposure can’t do alone.
Strengthen the composition and eliminate unwanted elements.
LIGHTROOM / PHOTOSHOP
PHOTOSHOP
LIGHTROOM / PHOTOSHOP
LIGHTROOM / PHOTOSHOP
LIGHTROOM / PHOTOSHOP
Selectively lighten and darken parts of the image to create a stronger whole. This is the creative part!
Some landscapes need a better sky or an improved foreground –compositing can help.
Using effects and filters can enhance your image and help to create your own style – there are too many to list here.
Unsightly dust spots and unwanted highlights should be removed.
Tools like clarity and sharpening can bring the details in your photo to life.
Photoshop, so you may never use Photoshop at all. And if you do open a RAW file in Photoshop, then you automatically go through Adobe Camera Raw, which uses the same ‘engine’ as Lightroom.
One of the benefits of working with Lightroom or Capture One is that editing changes are non-destructive, meaning the photo file you’re working on isn’t changed directly so you never lose or write over the original. Think of it as always working on a copy image.
COMMON PITFALLS TO AVOID
Ensure you have a monitor that’s correctly calibrated so you can make good decisions about how light or dark your photos are.
Don’t be too clinical about setting ‘correct’ colour balance. What you want is colour that’s appropriate.
Too much contrast can block up shadow details and create white highlights. Too little contrast can make your photo look flat.
Too much shadow or highlight recovery can create an unnatural rendering.
Don’t ignore the importance of cropping – most photographers believe appropriate cropping is essential.
Think of ‘invisible editing’ so that viewers can’t see your technique or where adjustments start and finish.
Again, think of ‘invisible editing’. If you use composites, your technique should be invisible.
Effects and filters should be used because they suit the subject, not just because you want to add something to your photo.
Don’t let people think you don’t care about your work – spotting is essential and is generally quicker in Photoshop.
Don’t overuse, as you can create unsightly haloes around your subjects.
132 TECHNIQUES 132 TECHNIQUES
Left Improve results
In a perfect world, the photographer would have camped at this location and waited for the ideal light, but since that wasn’t possible, simple editing steps in Lightroom have greatly improved the result
Can I use automatic?
Use automation if it gives you a good result
Applications and plugins (like Luminar, Affinity Photo, Nik Software, ON1) can make processing your photos very quick and easy, but who is creating your work –you or a software programmer? Many photographers think the best approach is to use the automatic features to start the editing process, and then to fine-tune the result with manual edits so they ‘own’ the final creative result themselves.
Using Lightroom
There are several workflow steps that all images require
1 Use auto settings While auto settings may not give you a perfect result, it often produces a pretty good starting point for exposure, contrast and colour. If you don’t like the result, you can undo it and start again.
2 Adjust exposure and contrast Now that you’ve seen the auto result, make your own changes. Does your image look better with more or less exposure, more or less contrast, and can you improve tonality with Shadow and Highlight sliders?
3 Correct colour balance Colour and white balance can be thought of interchangeably for post-production. Settings include As Shot, Auto or your own custom settings to achieve the overall colour cast or colour neutrality you want.
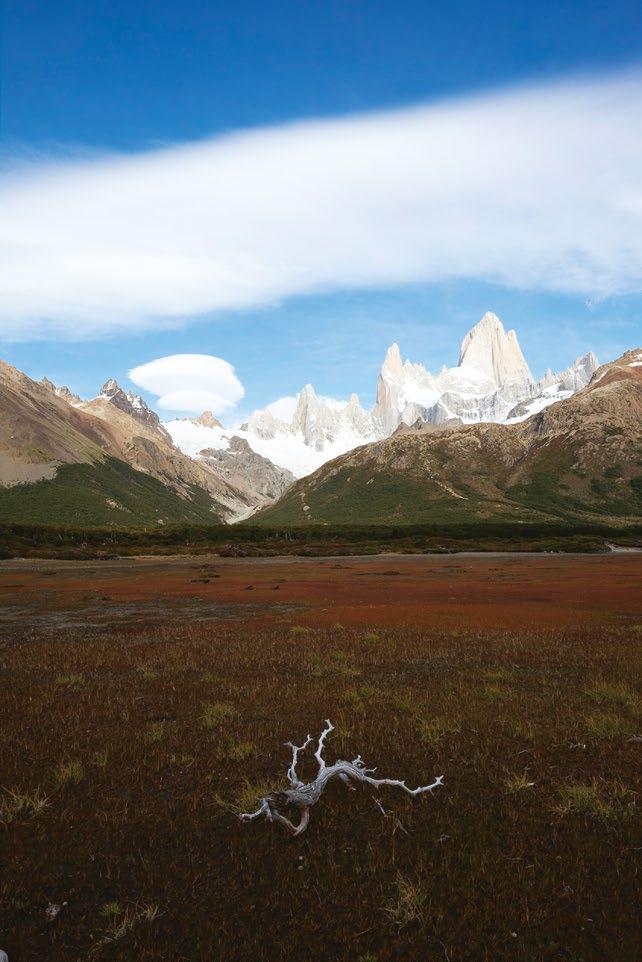
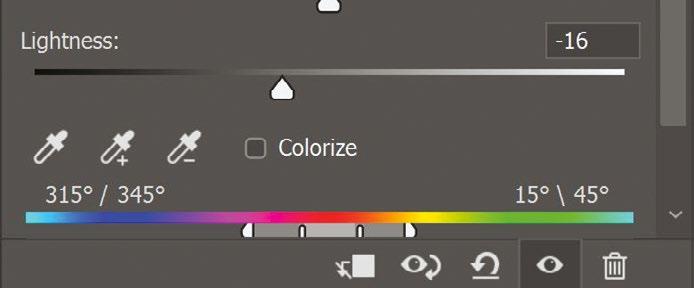
4 Crop for impact Just as important as what is included in the photograph is what you leave out, so cropping out unwanted elements is an essential step. There’s also a matter of compositional balance, which a good crop can improve.
5 Use tonal mapping Lighten or darken specific areas of a photo (to re-map the tonal values), so that they look better or make more sense. This is where your creativity begins. Use adjustment brushes, linear and radial gradients.
6 Finish off There are so many options for finishing your images. Removing spots and dust is essential, and maybe a little sharpening is needed, but don’t forget to consider using texture, clarity, dehaze, vignetting, grain or black and white!
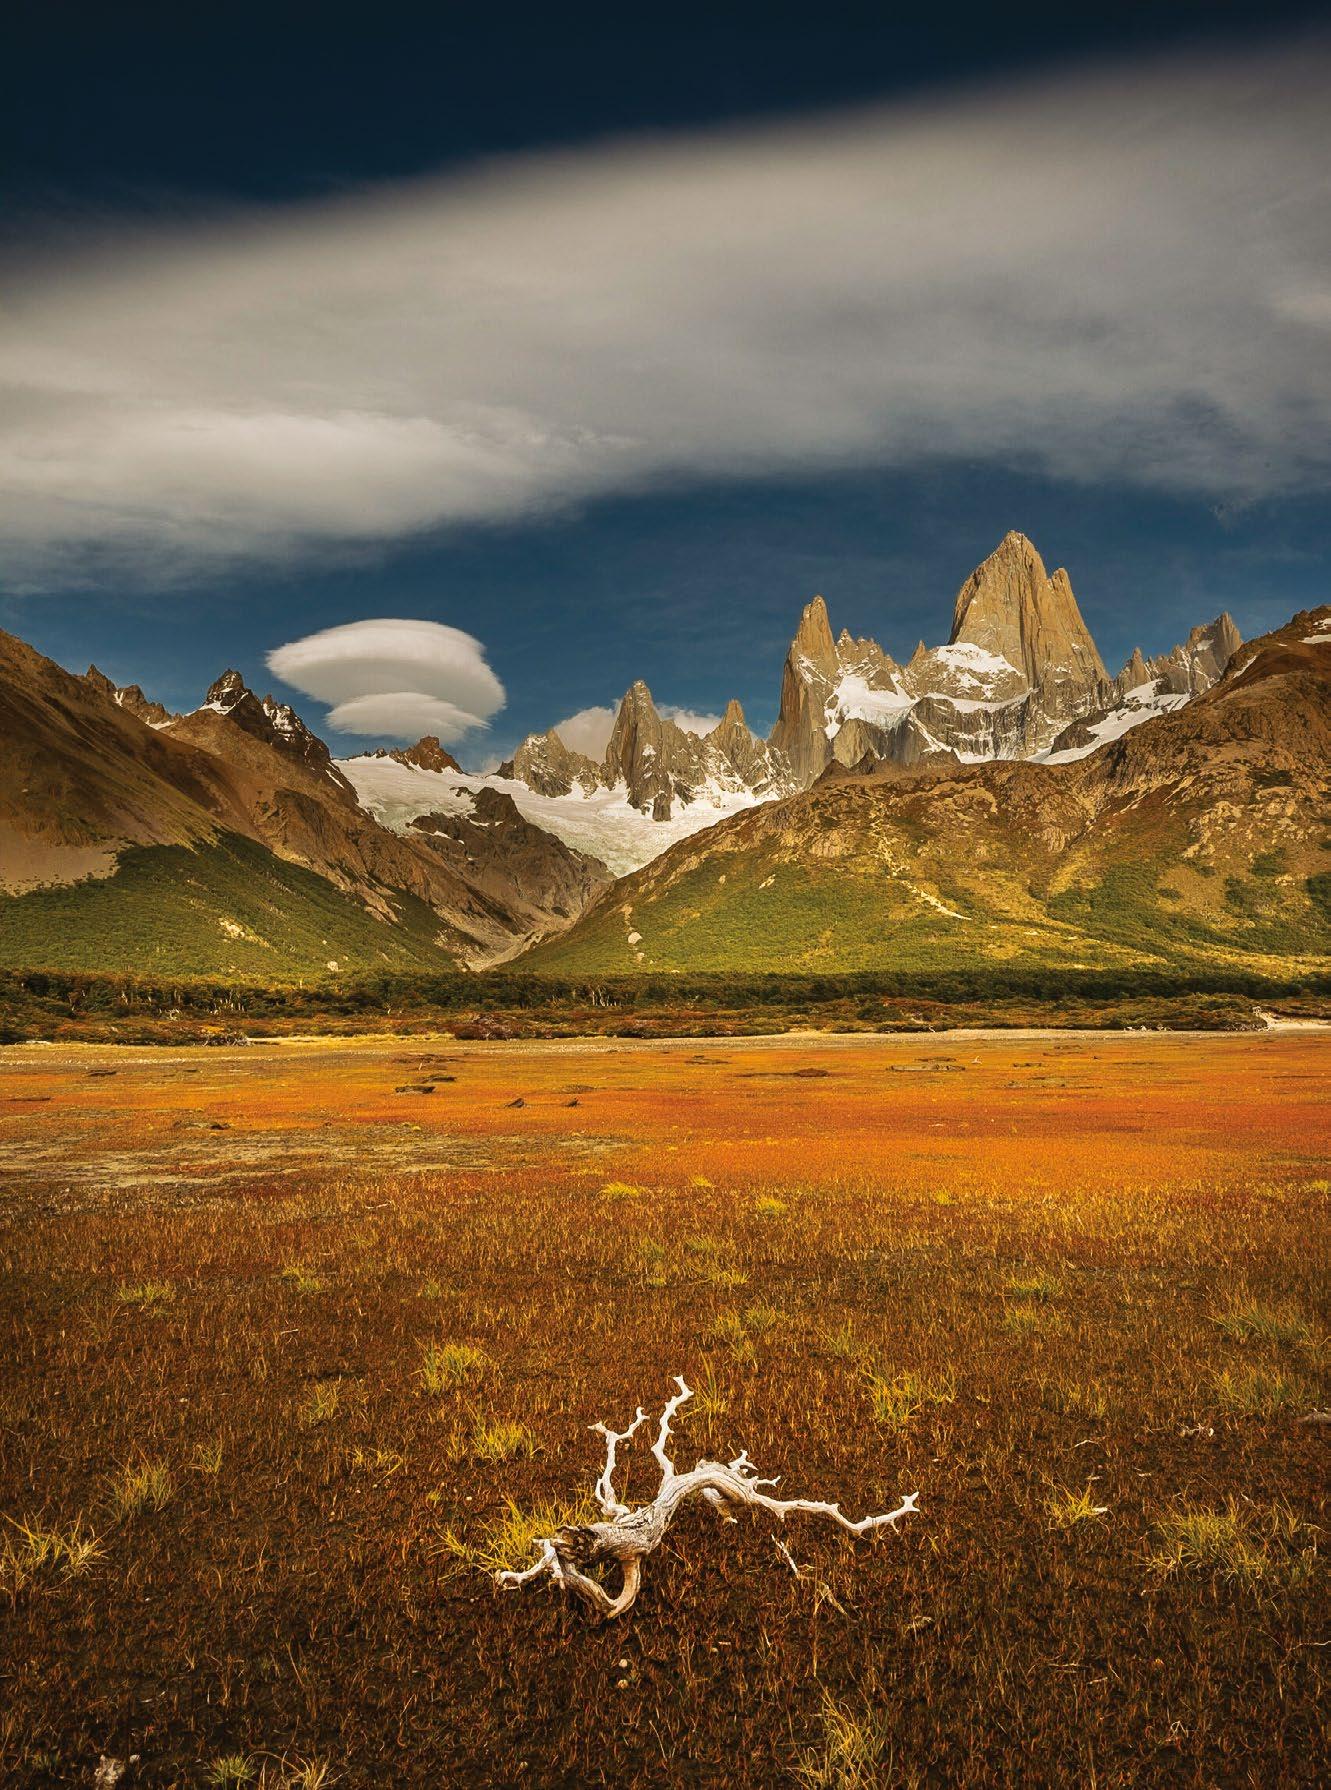
AFTER BEFORE 133 EDITING LANDSCAPES 133 EDITING LANDSCAPES
Moving into Photoshop
Tweak exposure, contrast and more with local adjustments and layers
If Lightroom and Capture One are so good at processing RAW files, why do we need Photoshop? In practice, many landscape photographers don’t use Photoshop unless they need to do specific tasks, and perhaps the most obvious of these is creating composite images.
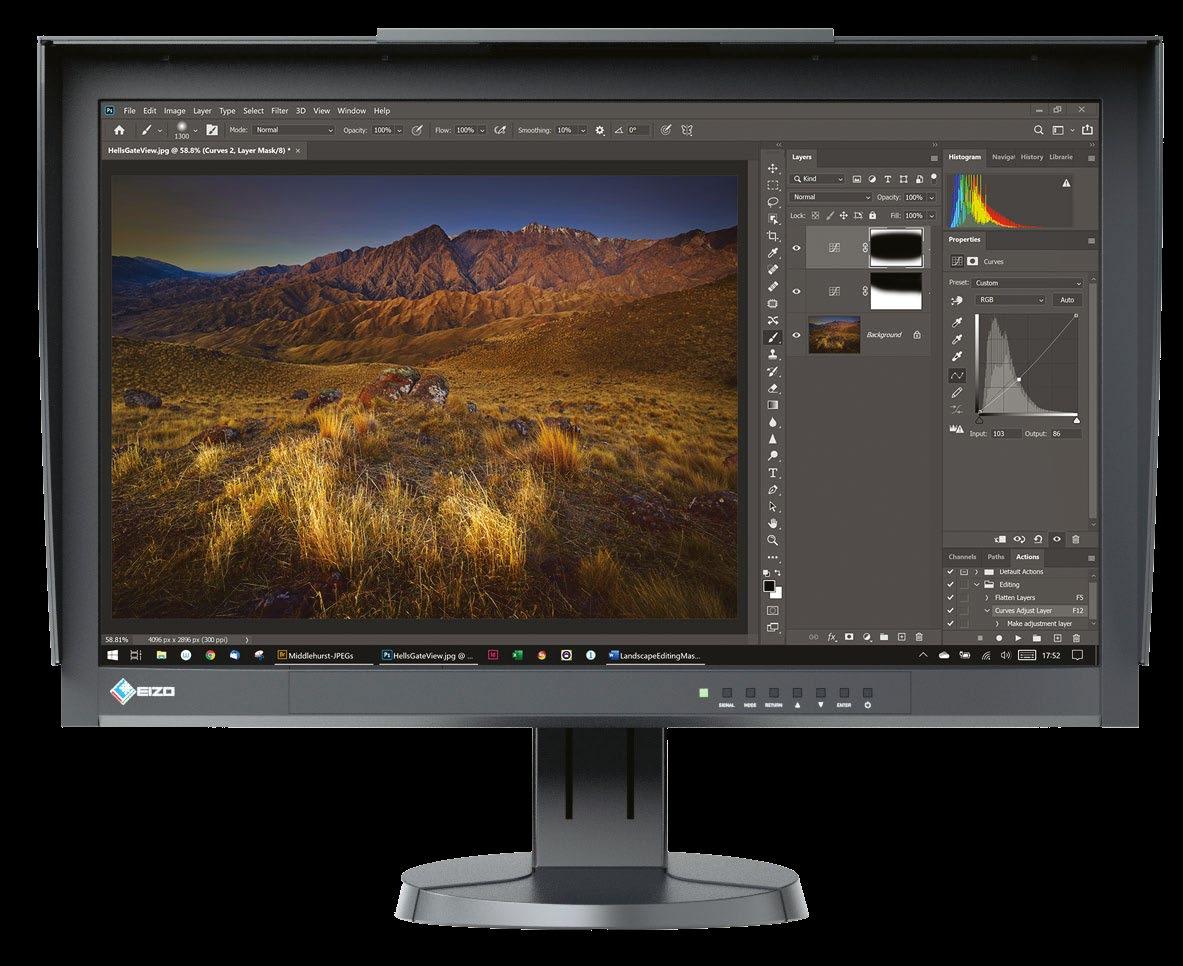
Unlike RAW processors, Photoshop can’t work directly with RAW files. Instead, when you open a RAW file in Photoshop, it automatically takes a diversion into Adobe Camera Raw (ACR) where the file can be converted into a format like TIFF, PSD or JPEG. You can make many of the same adjustments in ACR as you can in Lightroom, so this stage will feel quite familiar.
In ACR, you can save the edited photo, and this is something you need to remember to do. While Lightroom and Capture One will automatically keep all of your adjustments, Photoshop won’t unless you save them. Furthermore, editing your photos in Photoshop can be ‘destructive’. Destructive editing means that when you save changes to your photo, they are saved forever and can’t be undone. Sometimes this is okay, sometimes it’s not,
so photographers generally prefer to work non-destructively.
Photoshop’s non-destructive solution is layers. You open up your photo in Photoshop, and then instead of changing the photo directly you add adjustment layers on top, which hold all your edits. The original photo is left untouched at the bottom of the layer stack, so it is a nondestructive workflow.
While Lightroom and Capture One can do selective edits with their adjustment brushes and layers, many photographers find that Photoshop’s adjustment layers and masks are more powerful and easier to use. This is especially the case if you’re doing more
Photoshop’s key features
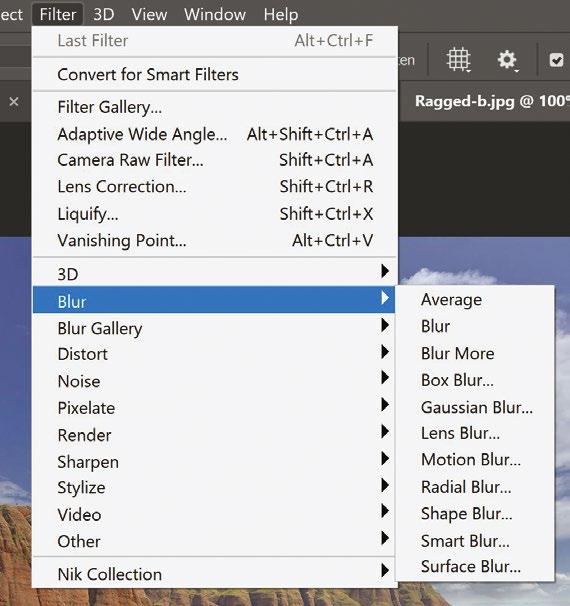
2 Adjustment layers
than just a few selective adjustments. In these moments, the Layers panel becomes the hub for editing in Photoshop.
1 Adobe Camera Raw Photoshop takes RAW files into Adobe Camera Raw to convert them. If you’re in doubt about how to save a converted file, save as PSD, 16-bit, AdobeRGB colour space.
4 Blend modes
Blend modes are a different way of editing your photos and are used instead of tools like curves and levels. Although advanced, using blend modes is very easy to do.
The key to Photoshop’s non-destructive workflow is to use adjustment layers. The best part about adjustment layers is the attached mask, which lets you limit the adjustment to specific areas of your choosing.
5 Filters & plugins
In addition to sharpening and blurring filters, Photoshop has lots of textures and special effects filters, plus you can also use plugins like Nik Software (although many of the plugins are also available in Lightroom).
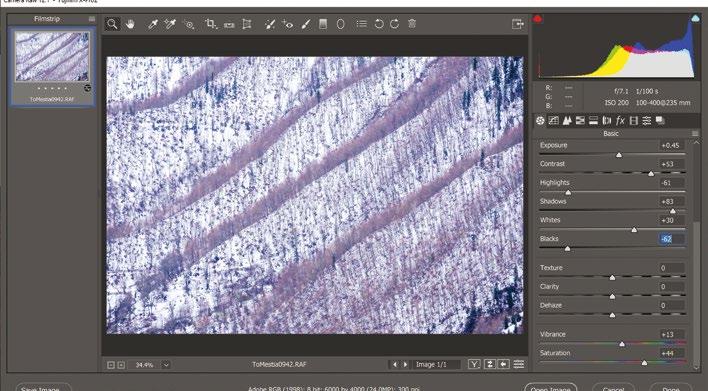
3 Composite layers There are two types of layer in Photoshop: adjustment layers and image layers. When you add an image layer into the layers panel with a mask, you can merge or ‘composite’ two images together.
6 Channels & luminosity masking When creating precise masks or selections, so that you can edit one part of the image independently, Photoshop excels with both channel and luminosity masking. These are quite advanced techniques.
134 TECHNIQUES 134 TECHNIQUES
Left Ultimate control with Photoshop
While Photoshop isn’t essential for landscape photographers, as you gain editing experience you will enjoy the extra power and control afforded by Photoshop’s Layers panel and masking system
Above inset
Straight from the camera
Using a classic landscape composition, with the foreground grasses and rocks leading the eye into the middle and background, the sky is too bright and the light on the landscape a little flat
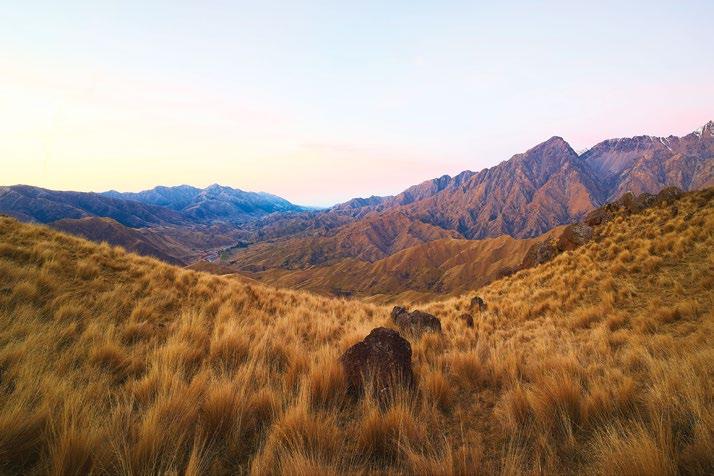
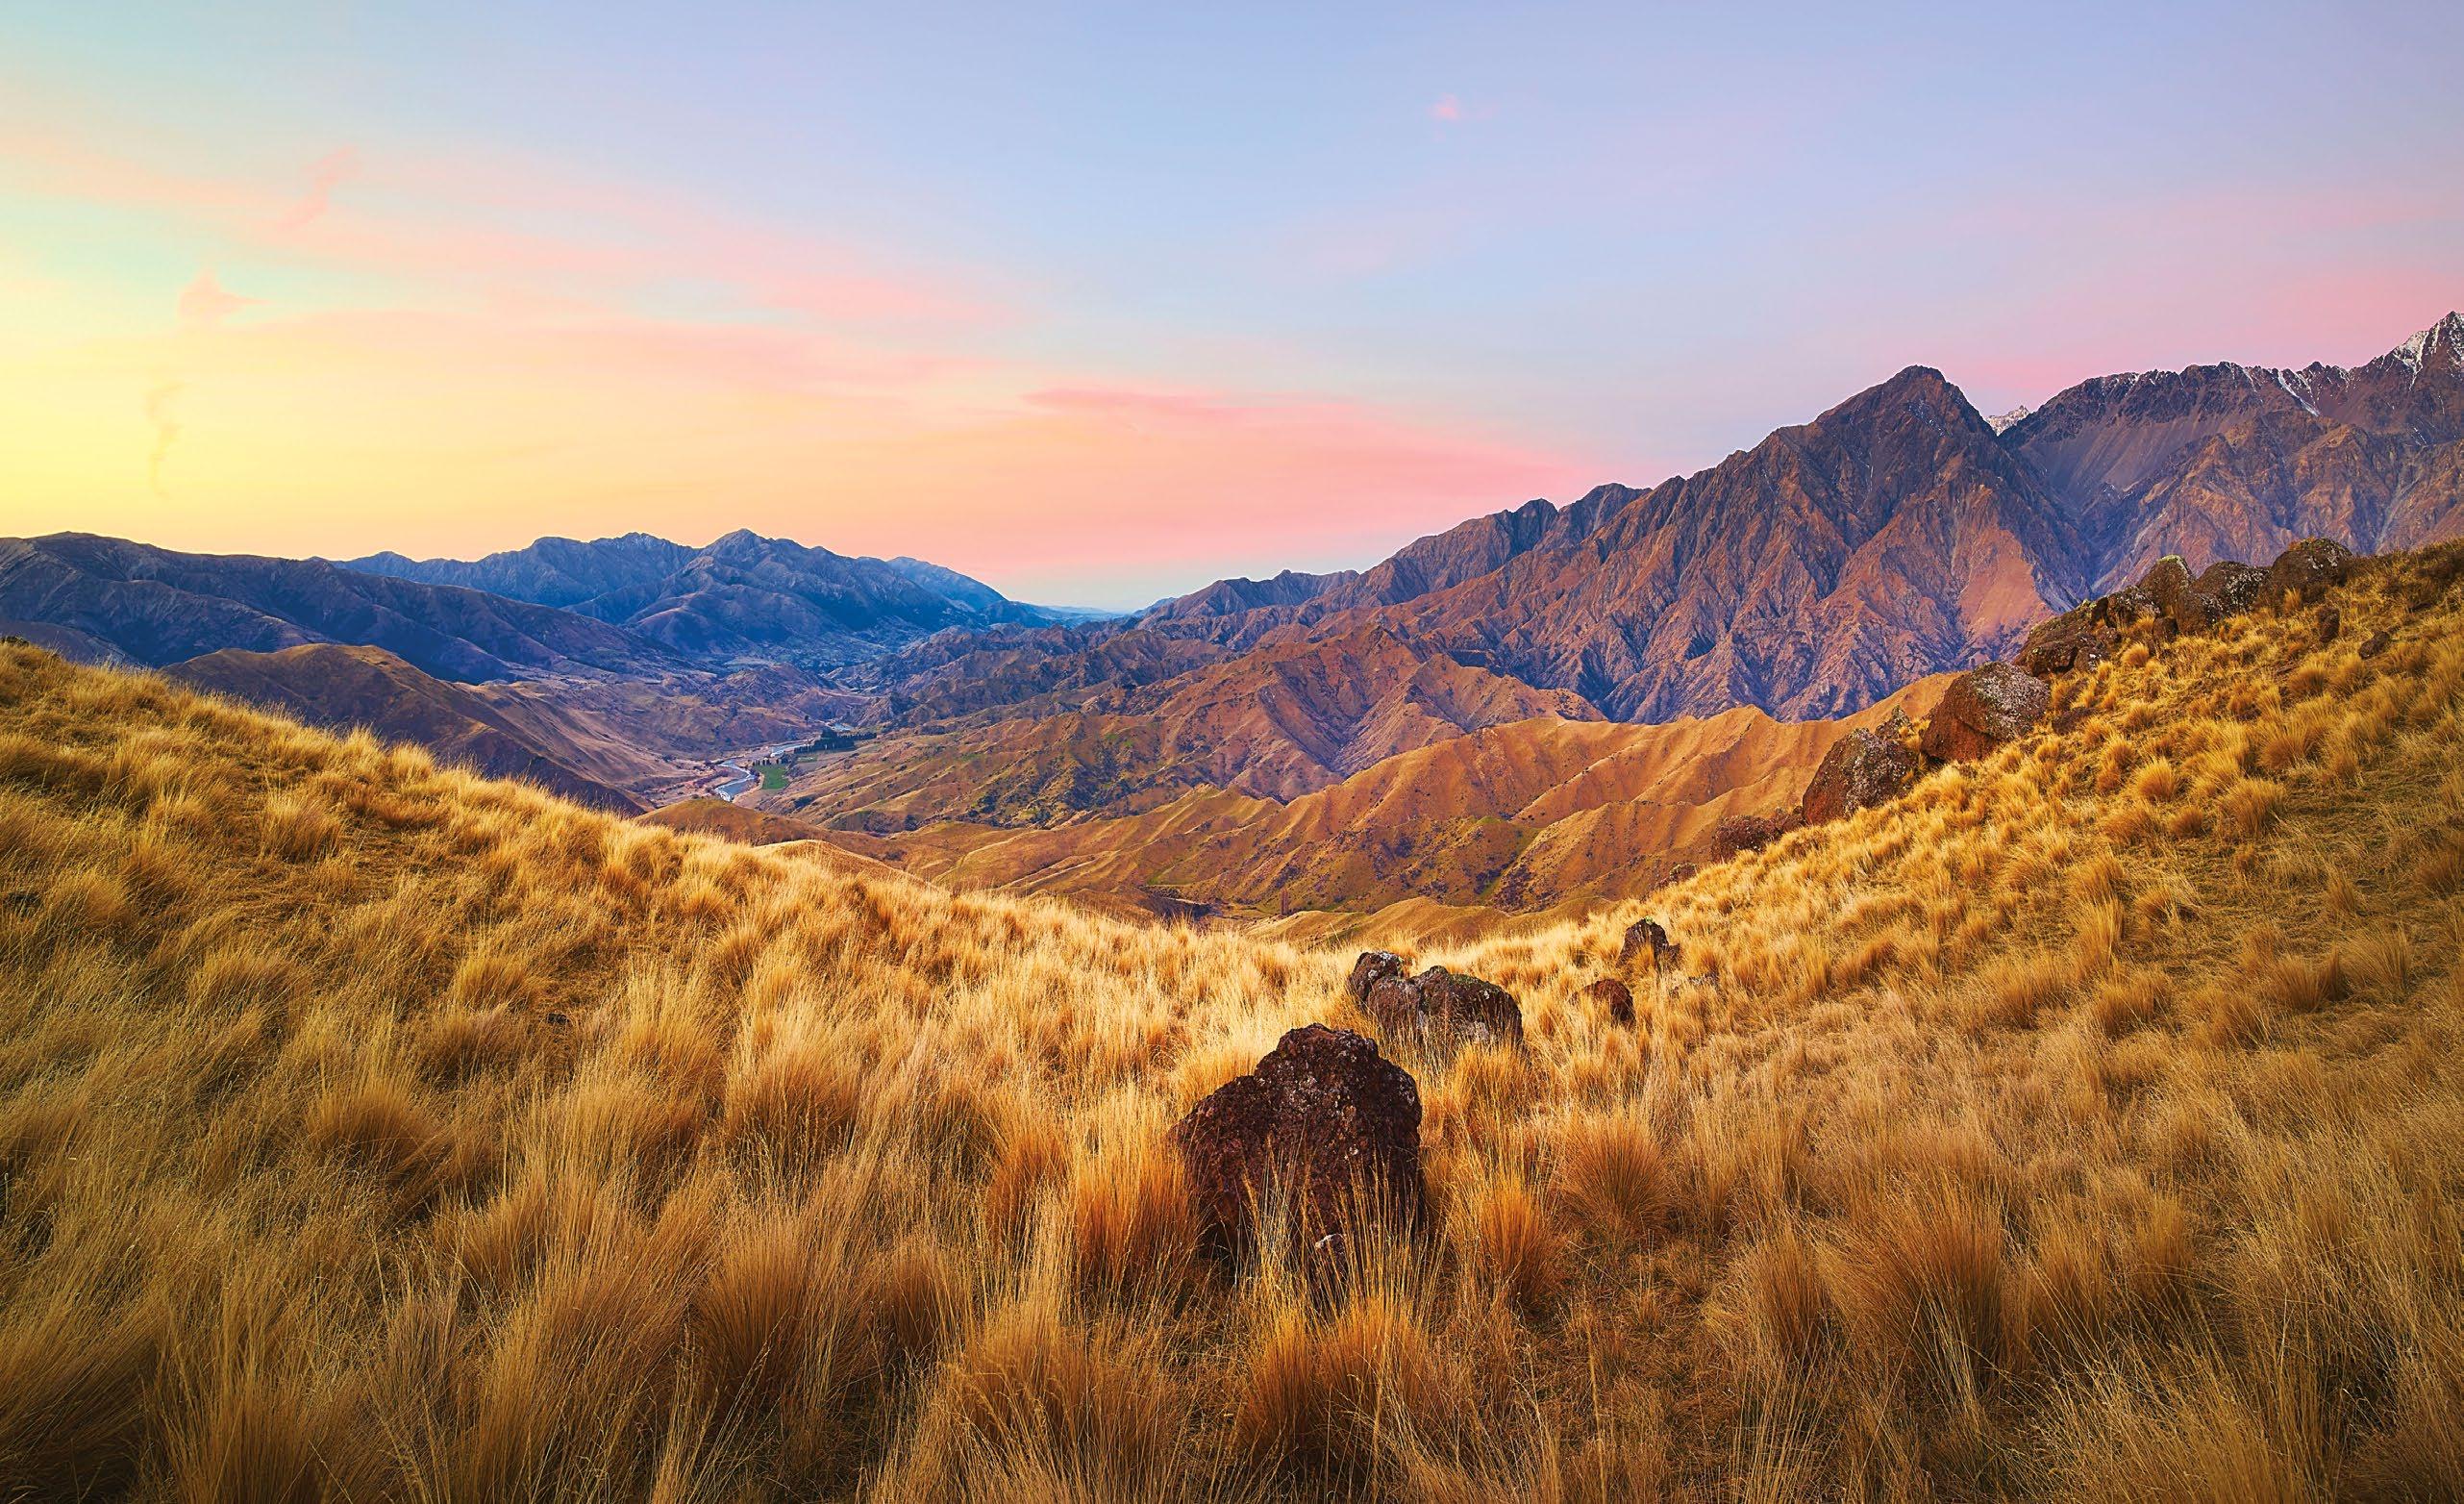
Adjustment layers In Photoshop
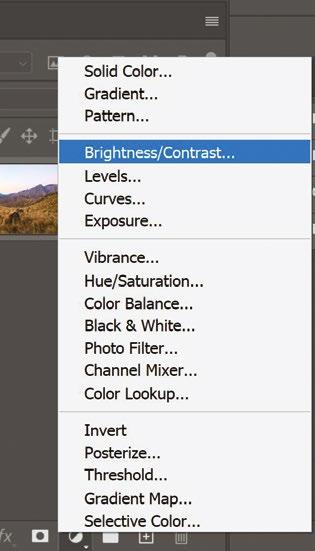
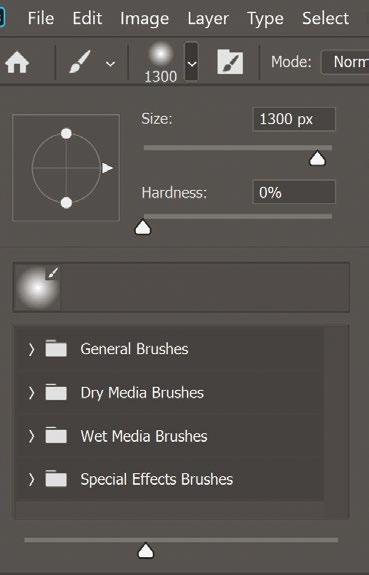
1 Ask what’s important Open your file and ask; what’s most important?
What do I want the viewer to look at?
Where do I change the tone and colour to focus attention on what’s important? Here, let’s darken the sky and brighten the middle.
4 Mask out the foreground We don’t want to darken the foreground area, so mask it out to stop the darkening here. Click on the layer’s white rectangle (this is the mask). Select the Brush tool, ensure that its colour is black, and paint on the image to brush out the foreground.
2 Add an adjustment layer
Open the Layers panels (Window>Layers) and you’ll see your photo as a layer, called Background. At the bottom of the panel, click on the black and white circle to add an adjustment layer. Select Brightness/Contrast.
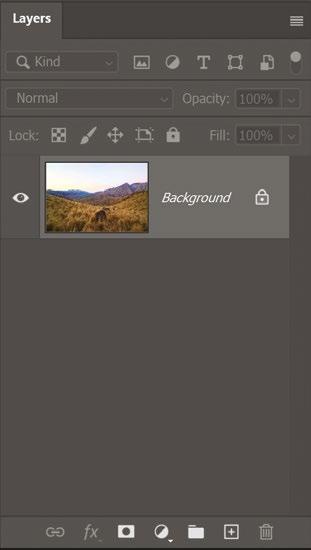

5 Refine the mask A large brush with a hardness of 0% (a ‘soft’ brush) can produce an invisible gradation, hiding the edges of the strokes. To change your brush work, change the brush colour to white and paint over.
Above
Interpreting with Photoshop’s layers
The key to creative editing in Photoshop is using layers to selectively adjust areas of the image. In other words, we can darken the sky without also darkening the foreground. And we can add light to the centre without adding it to the edges
3 Darken the sky This is just one way of working in Photoshop: on your monitor, looking at the sky and ignoring the foreground, move the Brightness slider to the left until the sky is sufficiently dark. Next we’ll work on the foreground.
6 Have multiple layers To lighten the middle of the image, repeat the process, this time increasing both brightness and contrast, then brushing back the sky and foreground so that just the middle shows the effect. You can add as many adjustment layers as you like.
AFTER BEFORE 135 EDITING LANDSCAPES 135
Use adjustment layers to lighten and darken your image
Colour interpretations
Landscapes sing when you apply the right amount of colour – or none at all
When it comes to processing landscape shots, there are many different options. In fact, it seems that every photographer has a special technique or plugin that creates the magic for them. While these techniques and plugins are great, there isn’t a single approach that will work for every photo. But that’s good, because creative photography isn’t about using someone else’s presets, it’s about exploring a photograph yourself and producing an image that means something to you.
For instance, when it comes to colour, some people like a desaturated, almost faded colour palette, while others are happier with strong, vibrant colours that will knock your socks off! It’s not that one approach is right or wrong,
How does HSL work?
but different approaches can communicate different feelings to your viewers. And that’s the magic we’re playing with.
One of the first adjustment tools we meet when playing with colour is HSL (hue, saturation, lightness), but the main reason HSL is used is to control colour saturation. However, tucked away in the HSL dialogue is the ability to control colour channels independently, so you can enhance just the reds without affecting the greens – even adjusting the precise hue and lightness at the same time.
However, colour isn’t the only game in town. There’s a wonderful history of landscape photography in black and white.
By removing colour from our compositions, landscapes become all about shape and form, concentrating on the graphic nature of our subjects – as we discovered in Issue 223
The challenge for black and white photographers is how the different colours are converted into monochromatic tones. If you simply desaturate your file (as you can in the HSL dialogue), you get a default conversion that might not be particularly exciting. This is why the multi-channelled black and white converters are so popular, because they enable you to set different colours lighter or darker, giving you full creative control. There’s a lot of potential in the worlds of colour and black and white.
Hue, saturation and lightness can change the tones of landscapes
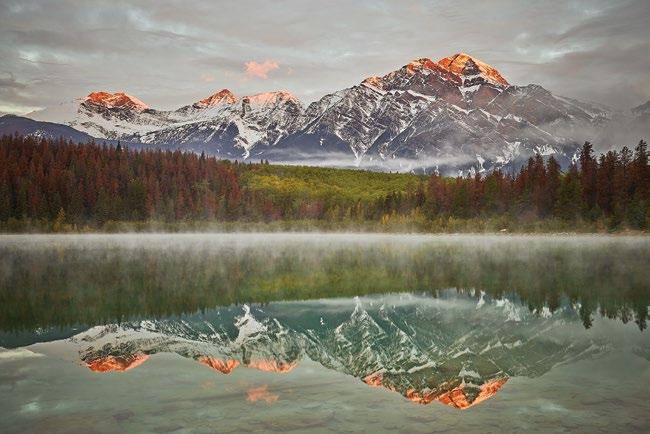
1 Use master or channels Much of HSL’s power is in its channels. While you can make HSL adjustments to the whole image (with the default master channel), you can adjust colours individually using a channel. You could make reds more saturated, without affecting other colours.
2 Use saturation For landscape photographers, saturation is the most-used slider. Pushing it too far will make things look unrealistic, but a moderate increase will give the landscape more vibrance. Or you can saturate or desaturate one channel at a time.
Above Needs something more
If you want to change the colour balance of an image, HSL is not the right tool, but if you want to add some colour saturation, HSL can edit both individual channels and overall colour
Left HSL to the rescue
The master channel was used to increase the overall colour saturation, followed by adjusting the red channel alone, where the reds on the mountain peaks were made more scarlet and darkened down slightly as well

3 Hue and lightness Hue and lightness aren’t always so useful for overall changes to landscapes, as all the hues can get mixed up. However, these sliders can be useful when changing single or similar colours (channels), either adjusting the hue or its lightness.
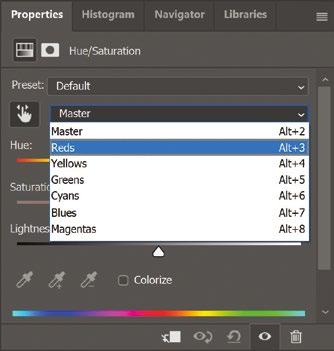
AFTER BEFORE 136 TECHNIQUES
The power of B&W
There are many ways to create B&Ws in Photoshop – this is just one!
1 Open your colour photo To make a great black and white image, many people believe you should have a great colour one to start with. If you’re processing a RAW file, make sure the colour version looks its best.
2 Add black and white adjustment layer
While working non-destructively in Photoshop, add a B&W adjustment layer. This enables you to convert different colours (channels) to different values. Similar approaches can be taken in Lightroom and Capture One.
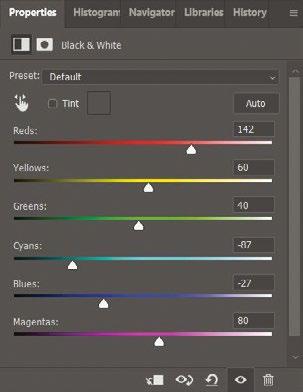
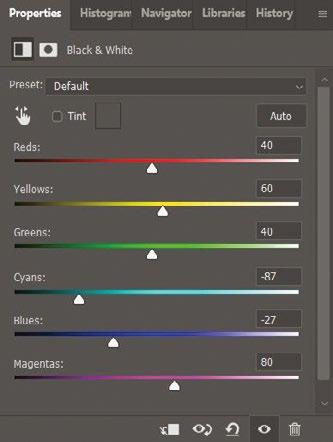
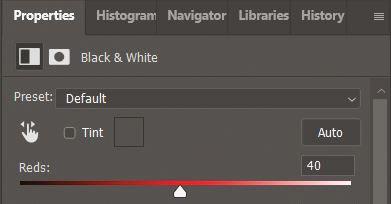
3 Use default or presets Photoshop starts off with its default settings, which you may not like very much. You can also choose one of the presets from the drop-down menu. The red filter is always a favourite with landscape photographers.
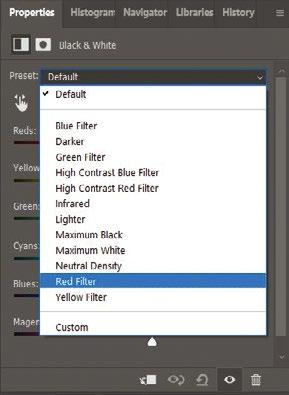
4 Darken the sky
Dramatic black and whites often have dark skies with fluffy white clouds. This is best achieved by darkening blue and cyan channels. Don’t go all the way to zero. And yes, you need to use both blue and cyan channels.
5 Lighten the foliage
To make the image pop, create some interest in the foreground foliage, so use the red channel slider to lighten up these areas. The pixels with red values are lightened. Red and yellow channels work well with many landscapes.
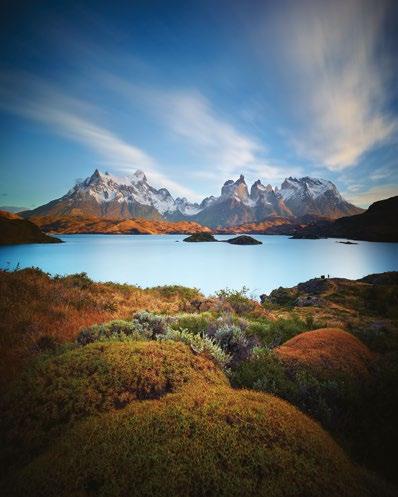
6 Make finishing adjustments
You can add any number of further adjustment layers to enhance your monochrome image. For a dramatic effect, add in contrast with a brightness/contrast adjustment layer.
Right inset
The colour original
A classic black and white landscape will have a rich, near-black sky and fluffy white clouds. We have a lot of control over how colour is converted to black and white
Right
The B&W convert
There are many different ways a colour image can be converted to black and white. This example was made with a B&W adjustment layer and set to produce a high-contrast result
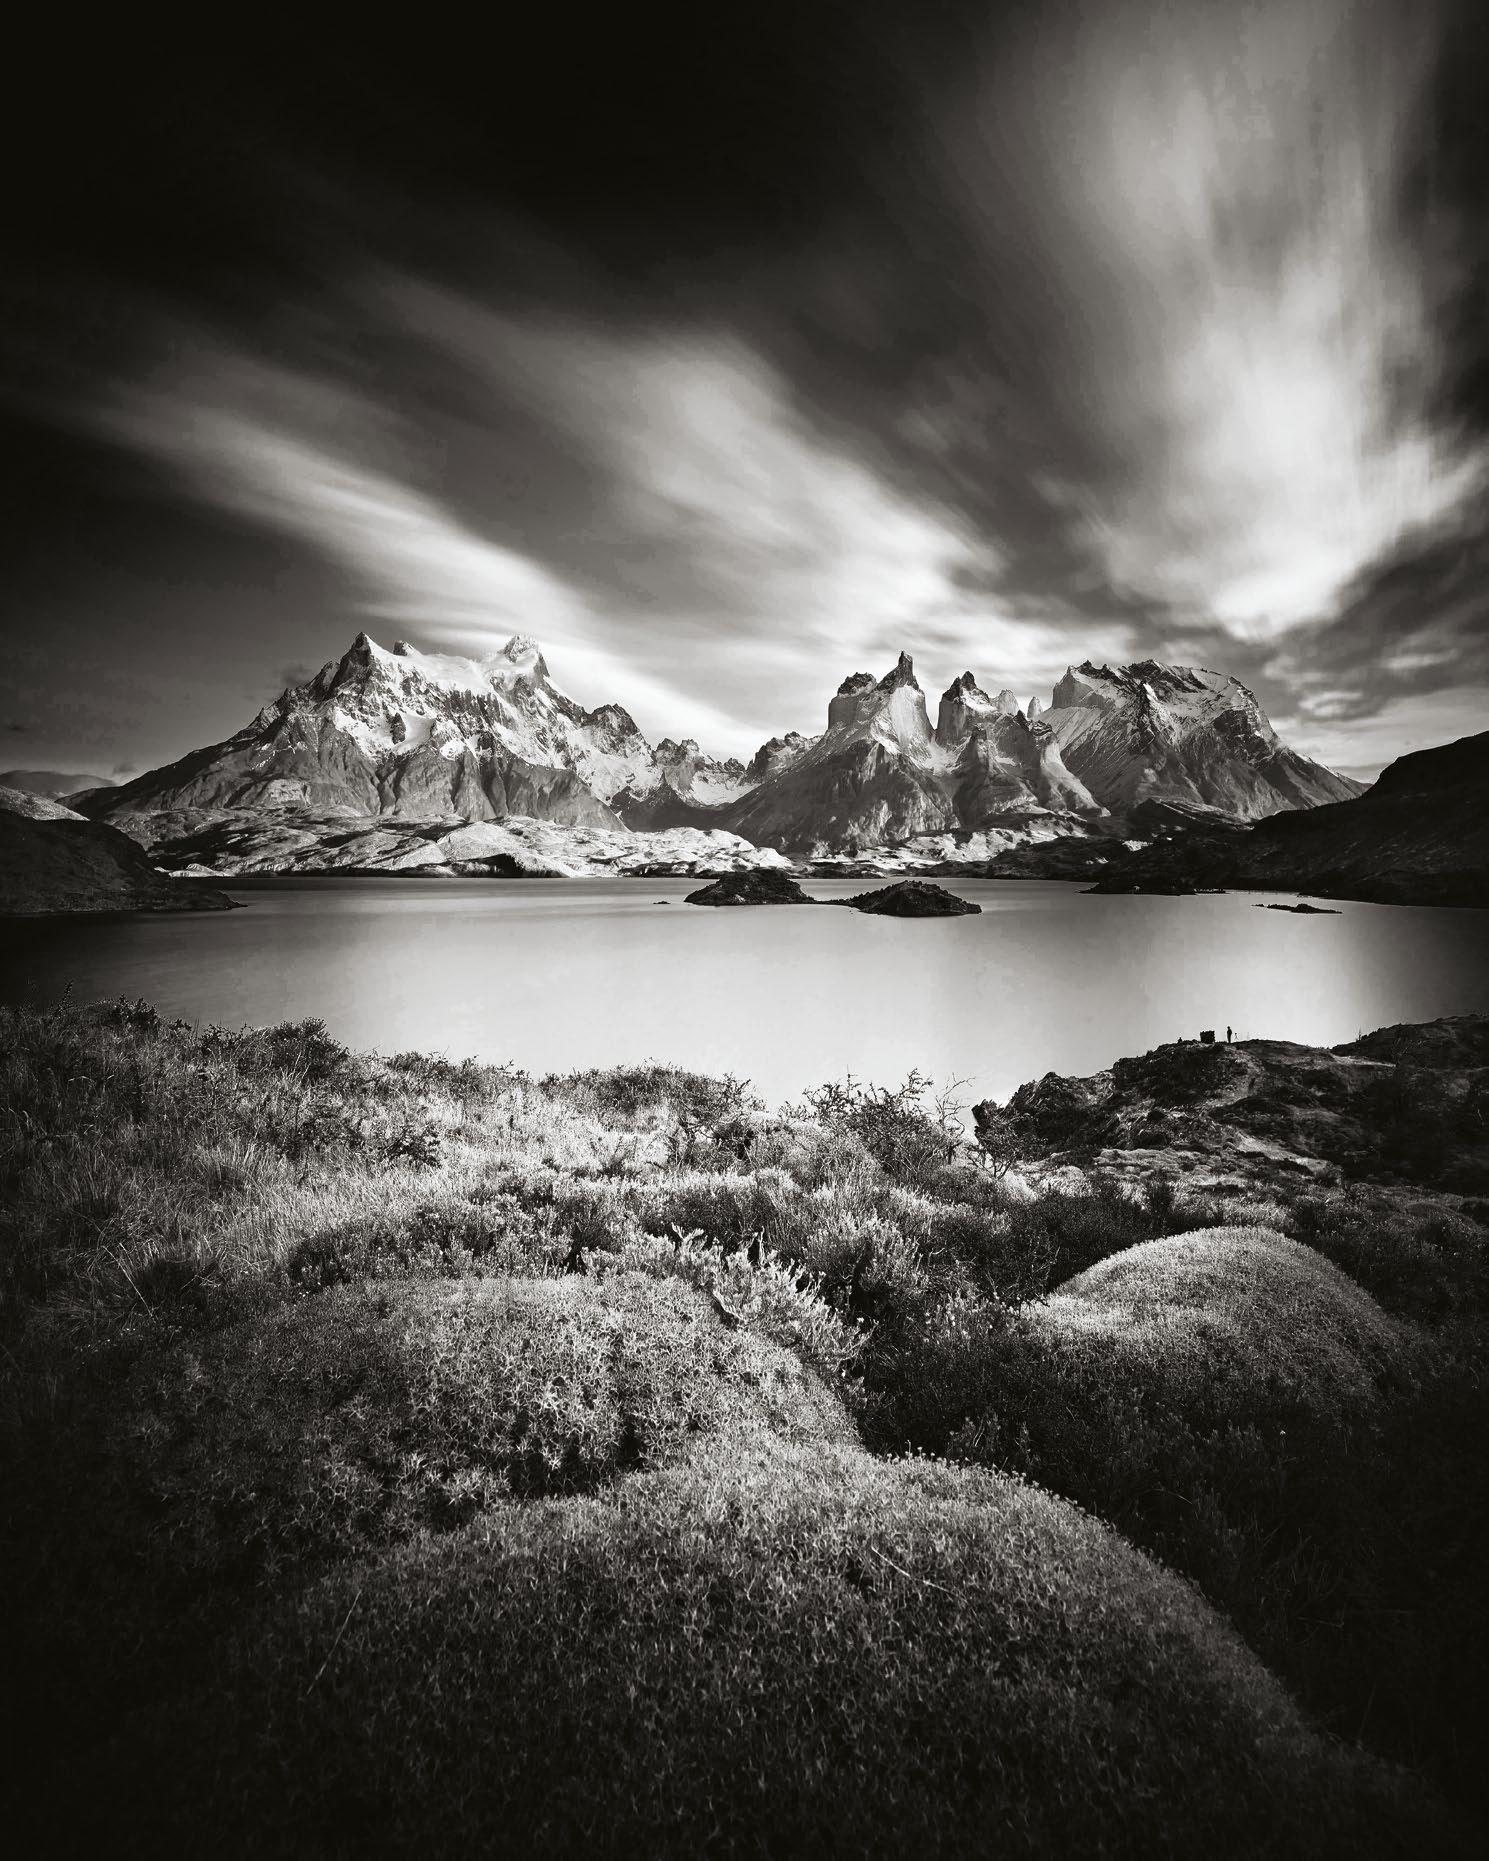
O
137 EDITING LANDSCAPES
To make the image pop, create some interest in the foreground foliage
AFTER BEFORE
Advanced Photoshop
Be more creative with luminosity masks and composite images
We’ve seen how Photoshop can be used to make exposure adjustments, both globally and selectively. It can also be used to make colour and tonal adjustments, but to some extent these techniques can similarly be achieved in Lightroom and Capture One. So, what can Photoshop do that can’t be done in a RAW processor?
Until recently, luminosity masking was only available in Photoshop, although now it is also available in Capture One. The idea behind luminosity masking is to create very accurate masks using the values of the pixels, rather than manually drawing a mask, which can be time-consuming and inaccurate.
For example, instead of drawing a lasso around an object, like a rock (which may or may not be completely accurate), you can
create a luminosity mask based on the tonal values of the object (how light or dark it is). You can end up with a very accurate mask around the object.
Of course, this approach isn’t always perfect because other areas in the photo that are of similar tonal values will also be selected, or maybe the subject you are selecting has a varied range of tonal values, so some areas won’t be selected. It is quite usual to manually adjust a luminosity mask to get the precise outcome you want, but nevertheless, luminosity masking is an incredibly powerful tool because it is using the actual pixels in the image itself to create the mask. Luminosity masks can be very accurate.
So the key remaining preserve of Photoshop is found in composites or ‘merging’ two
or more images together. For landscape photographers, composites are commonly used for replacing a sky, but they can also be used for dropping in a tree, a rock, a person or a building. We no longer need landscape photographs to be literal, they can be created first in your imagination and then in Photoshop using layers.
Image layers can have masks applied to them, just like adjustment layers. The mask is drawn around the element to be dropped in, so only that element and nothing else is visible. To be effective, the mask needs to be very precise. Of course, instead of using masks, elements can be cut out and left on a transparent background before being dropped into place – there are many different ways to achieve the same result in Photoshop.
Luminosity masking is a fancy name for a very practical technique
Luminosity masking can be achieved in Photoshop manually, but there’s a lot of steps involved. Many photographers instead choose to use a specially designed luminosity masking plugin, such as those from Tony Kuyper and ADP LumiFlow. This makes the process of creating the masks quick and easy.
Above Clouds needing a lift

The idea behind luminosity masking is to select all the tones of a similar value and create a mask. With this approach the mask can be pixel-accurate. Here we want to lighten the clouds
1 Create the mask
Using the ADP LumiFlow panel, choose from a number of different ways to create a luminosity mask in the top section. The result is shown immediately in Photoshop, so keep selecting an option until an appropriate-looking mask arrives.

2 Add to adjustment layer
The ADP LumiFlow panel lets you add the luminosity mask to an adjustment layer by clicking a button – choose the adjustment you want. Here, a curves adjustment layer was added.
Left Clouds with excitement
The final image has lightened the foreground clouds, creating more interest and life. However, the top of the image remains unchanged by manually adjusting the luminosity mask
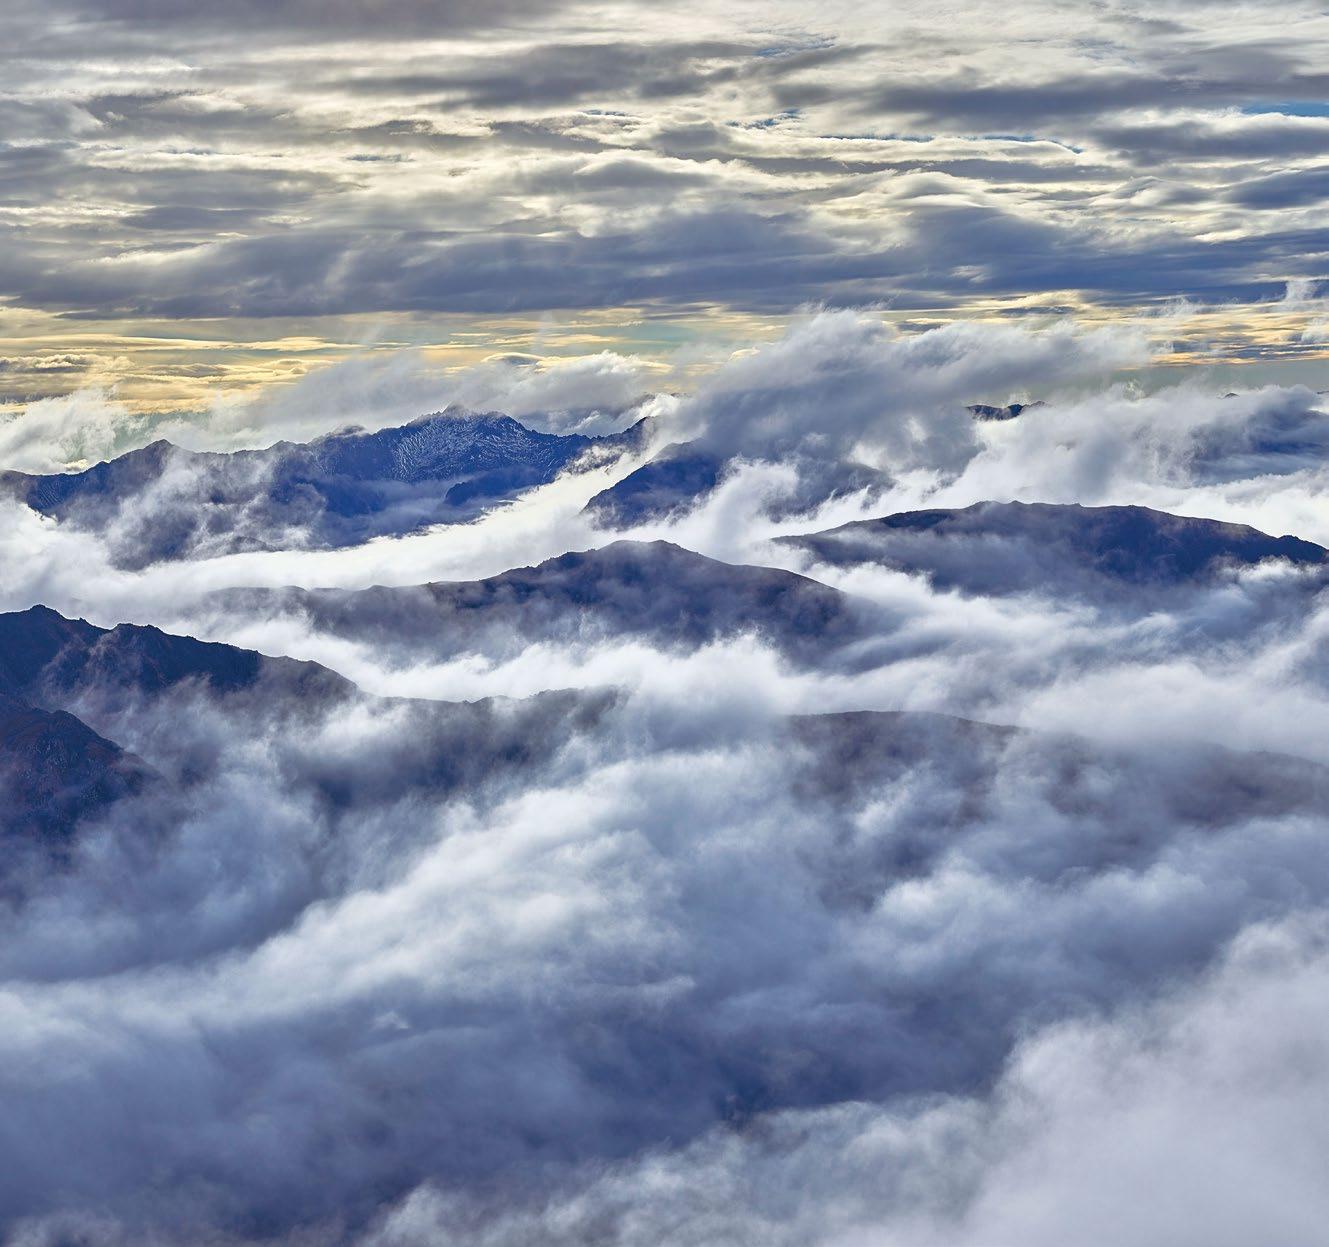
3 Work the layer
Adjust the luminosity mask like any other mask. Here the top of the image has been masked out completely, so the lightening of the exposure with the curve adjustment will only affect the edges of the clouds in the bottom of the frame.
Luminosity masking made simple
AFTER BEFORE 138 TECHNIQUES
Dropping in a sky
If your scene doesn’t have a great sky, maybe you should add in a better one!
Photoshop has always been known for its ability to composite images together –like adding flying pigs over a lake! New programs like Luminar will add in skies automatically, and to be frank these are an easier solution. However, learning how to use composites in Photoshop means you will be able to do much more than just skies, because the principle is the same for all types of compositing.
Left
Would you ever know?
Without reading this tutorial, hopefully you’d never know that this black and white is a composite created from two colour images. Successful compositing requires good technique and what we could call ‘invisible Photoshop’
1 Open your sky It doesn’t really matter whether you start with the sky or the landscape at the bottom of the Layers panel, but for this example let’s use the sky. Naturally, your sky should suit the landscape that will be below it.
2 Size the canvas To fit the landscape below the sky we need more room, so the Canvas Size dialogue should be used, anchoring it at the top to create more space below. Don’t worry about adding in too much space – you can crop it out later.
3 Drop in the landscape Open the landscape image in Photoshop. Select the image (Select>All) and copy it (Edit>Copy). Switch to the sky photo. Paste it on top (Edit>Paste). You’ll see a new image layer on top of the sky in the Layers panel.
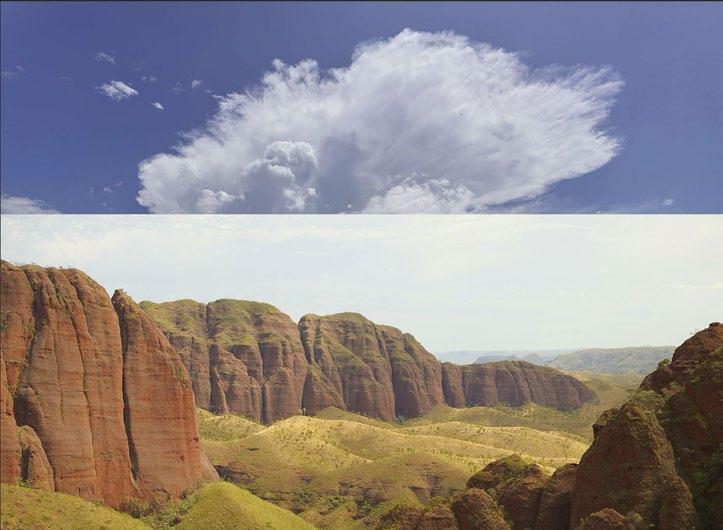
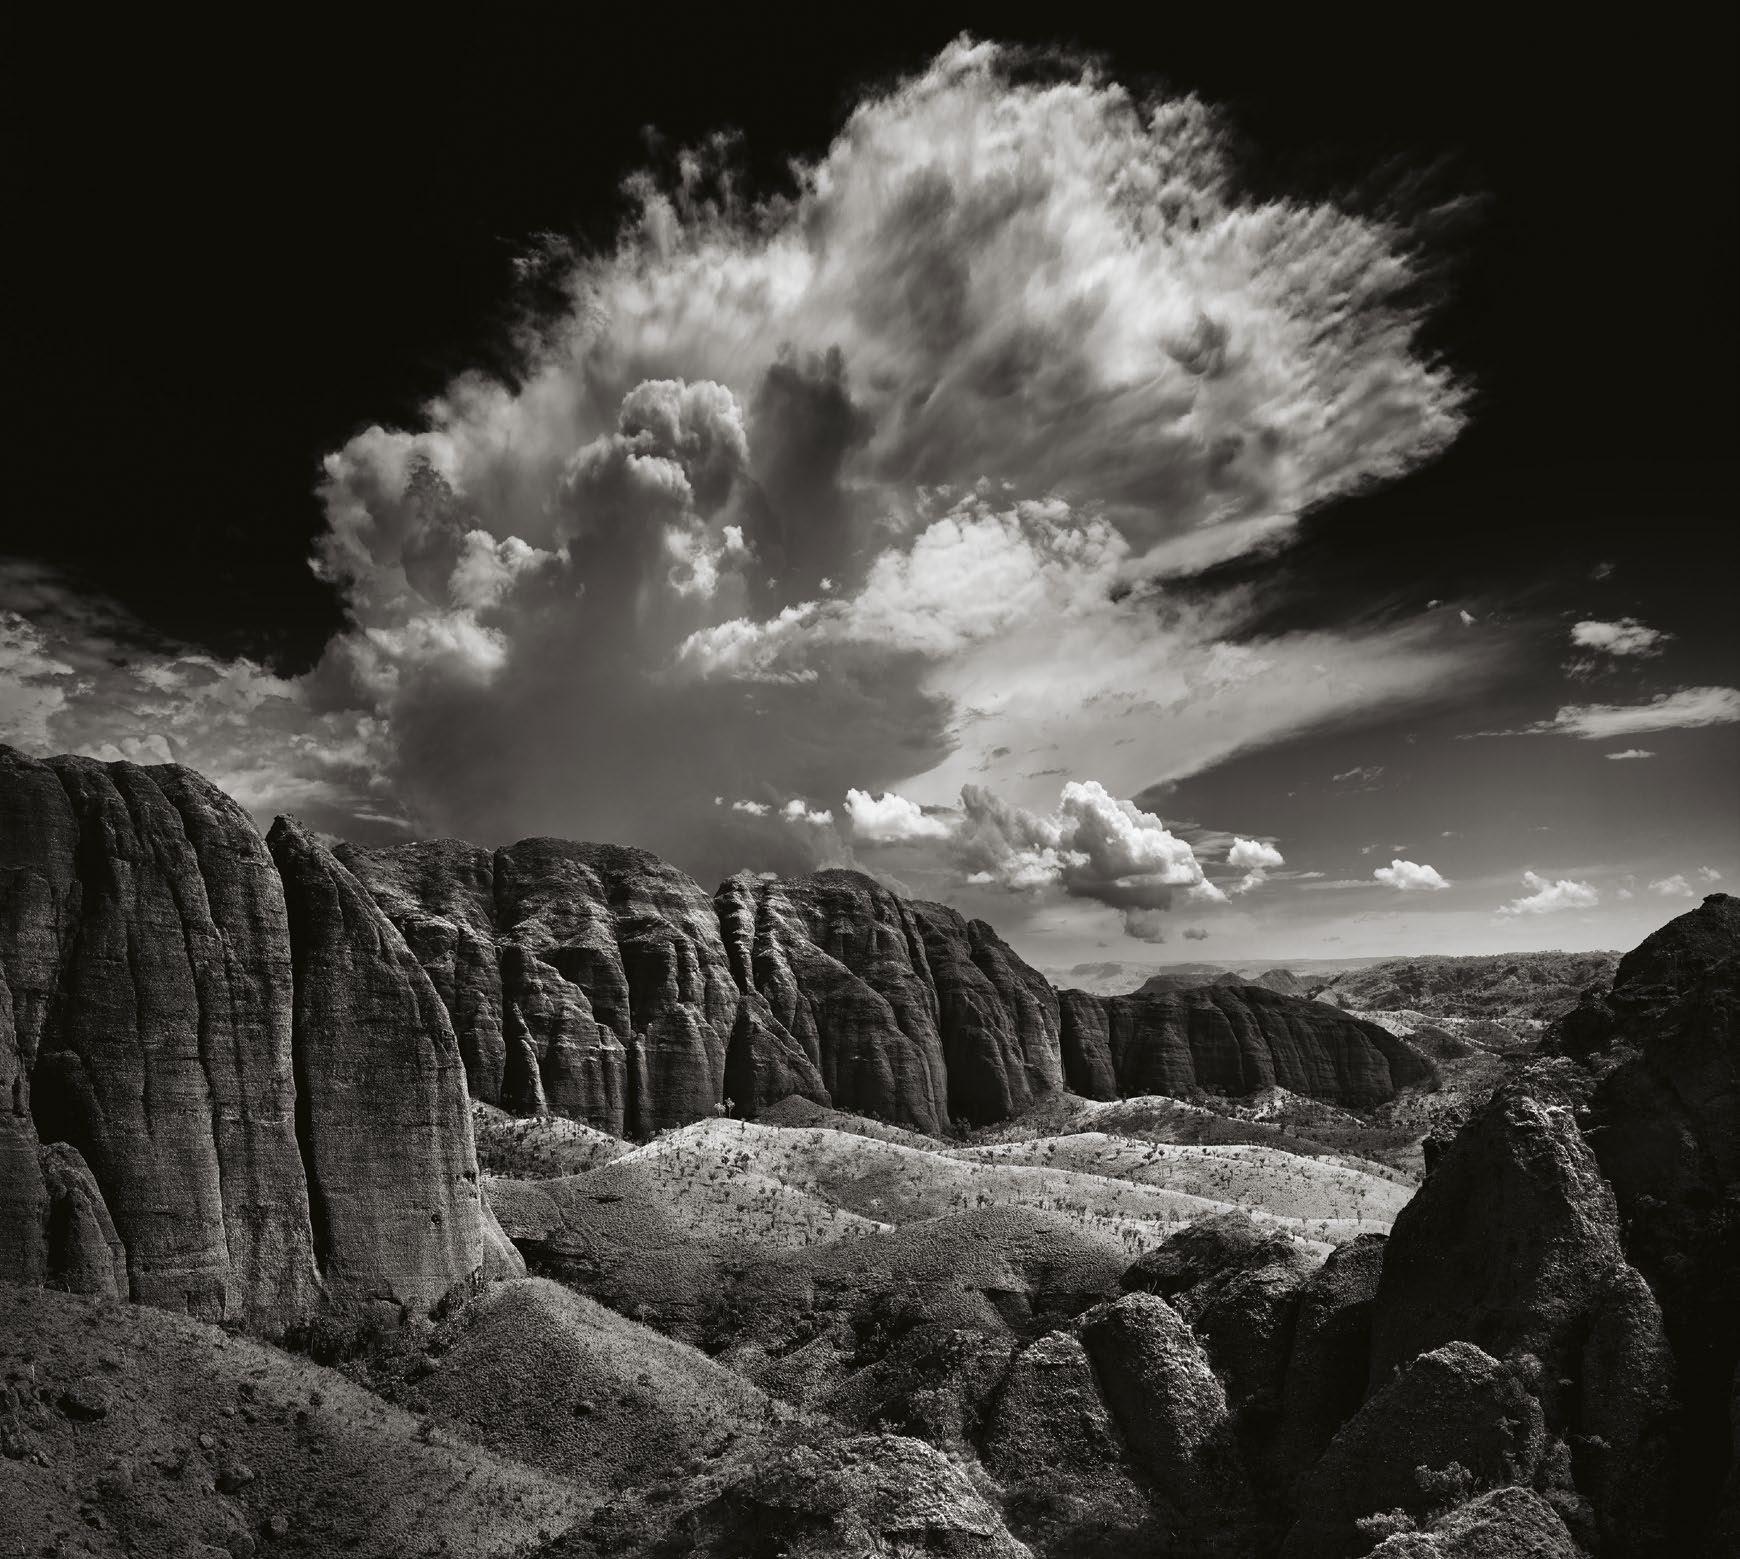
4 Mask the sky Whether dropping in a sky, a person or a building, the trick is to create a selection that ‘cuts out’ the element so that it looks natural when it is dropped in. This is done using selections and masks.
5 Finesse the joins It is rare for everything to work out just right, so be prepared to use the Move tool to shift your sky or landscape into a better position, and to manually adjust the mask so that the two images fit together seamlessly.
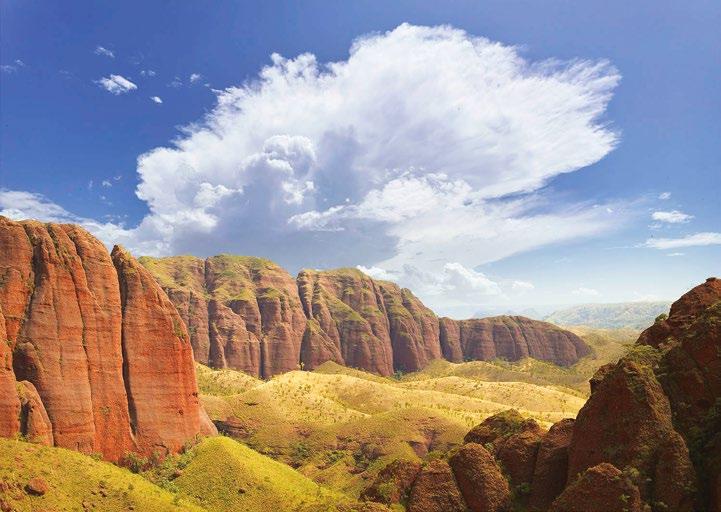

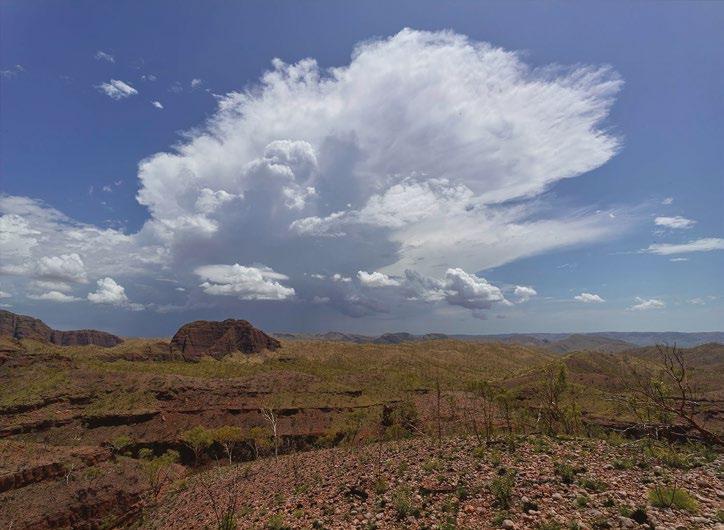
6To flatten or not At this stage, you can choose to flatten the layers into a single image. And you can also add further adjustment layers to refine the image’s colour and tonality, just as you would a single capture file.
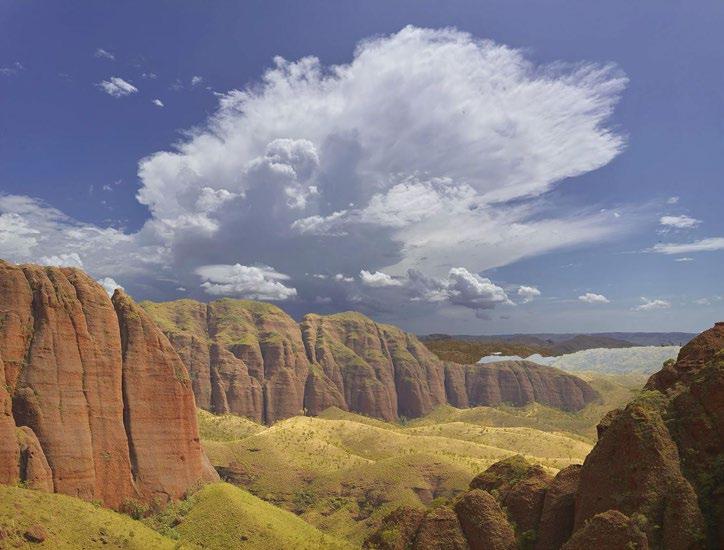
AFTER 139 EDITING LANDSCAPES
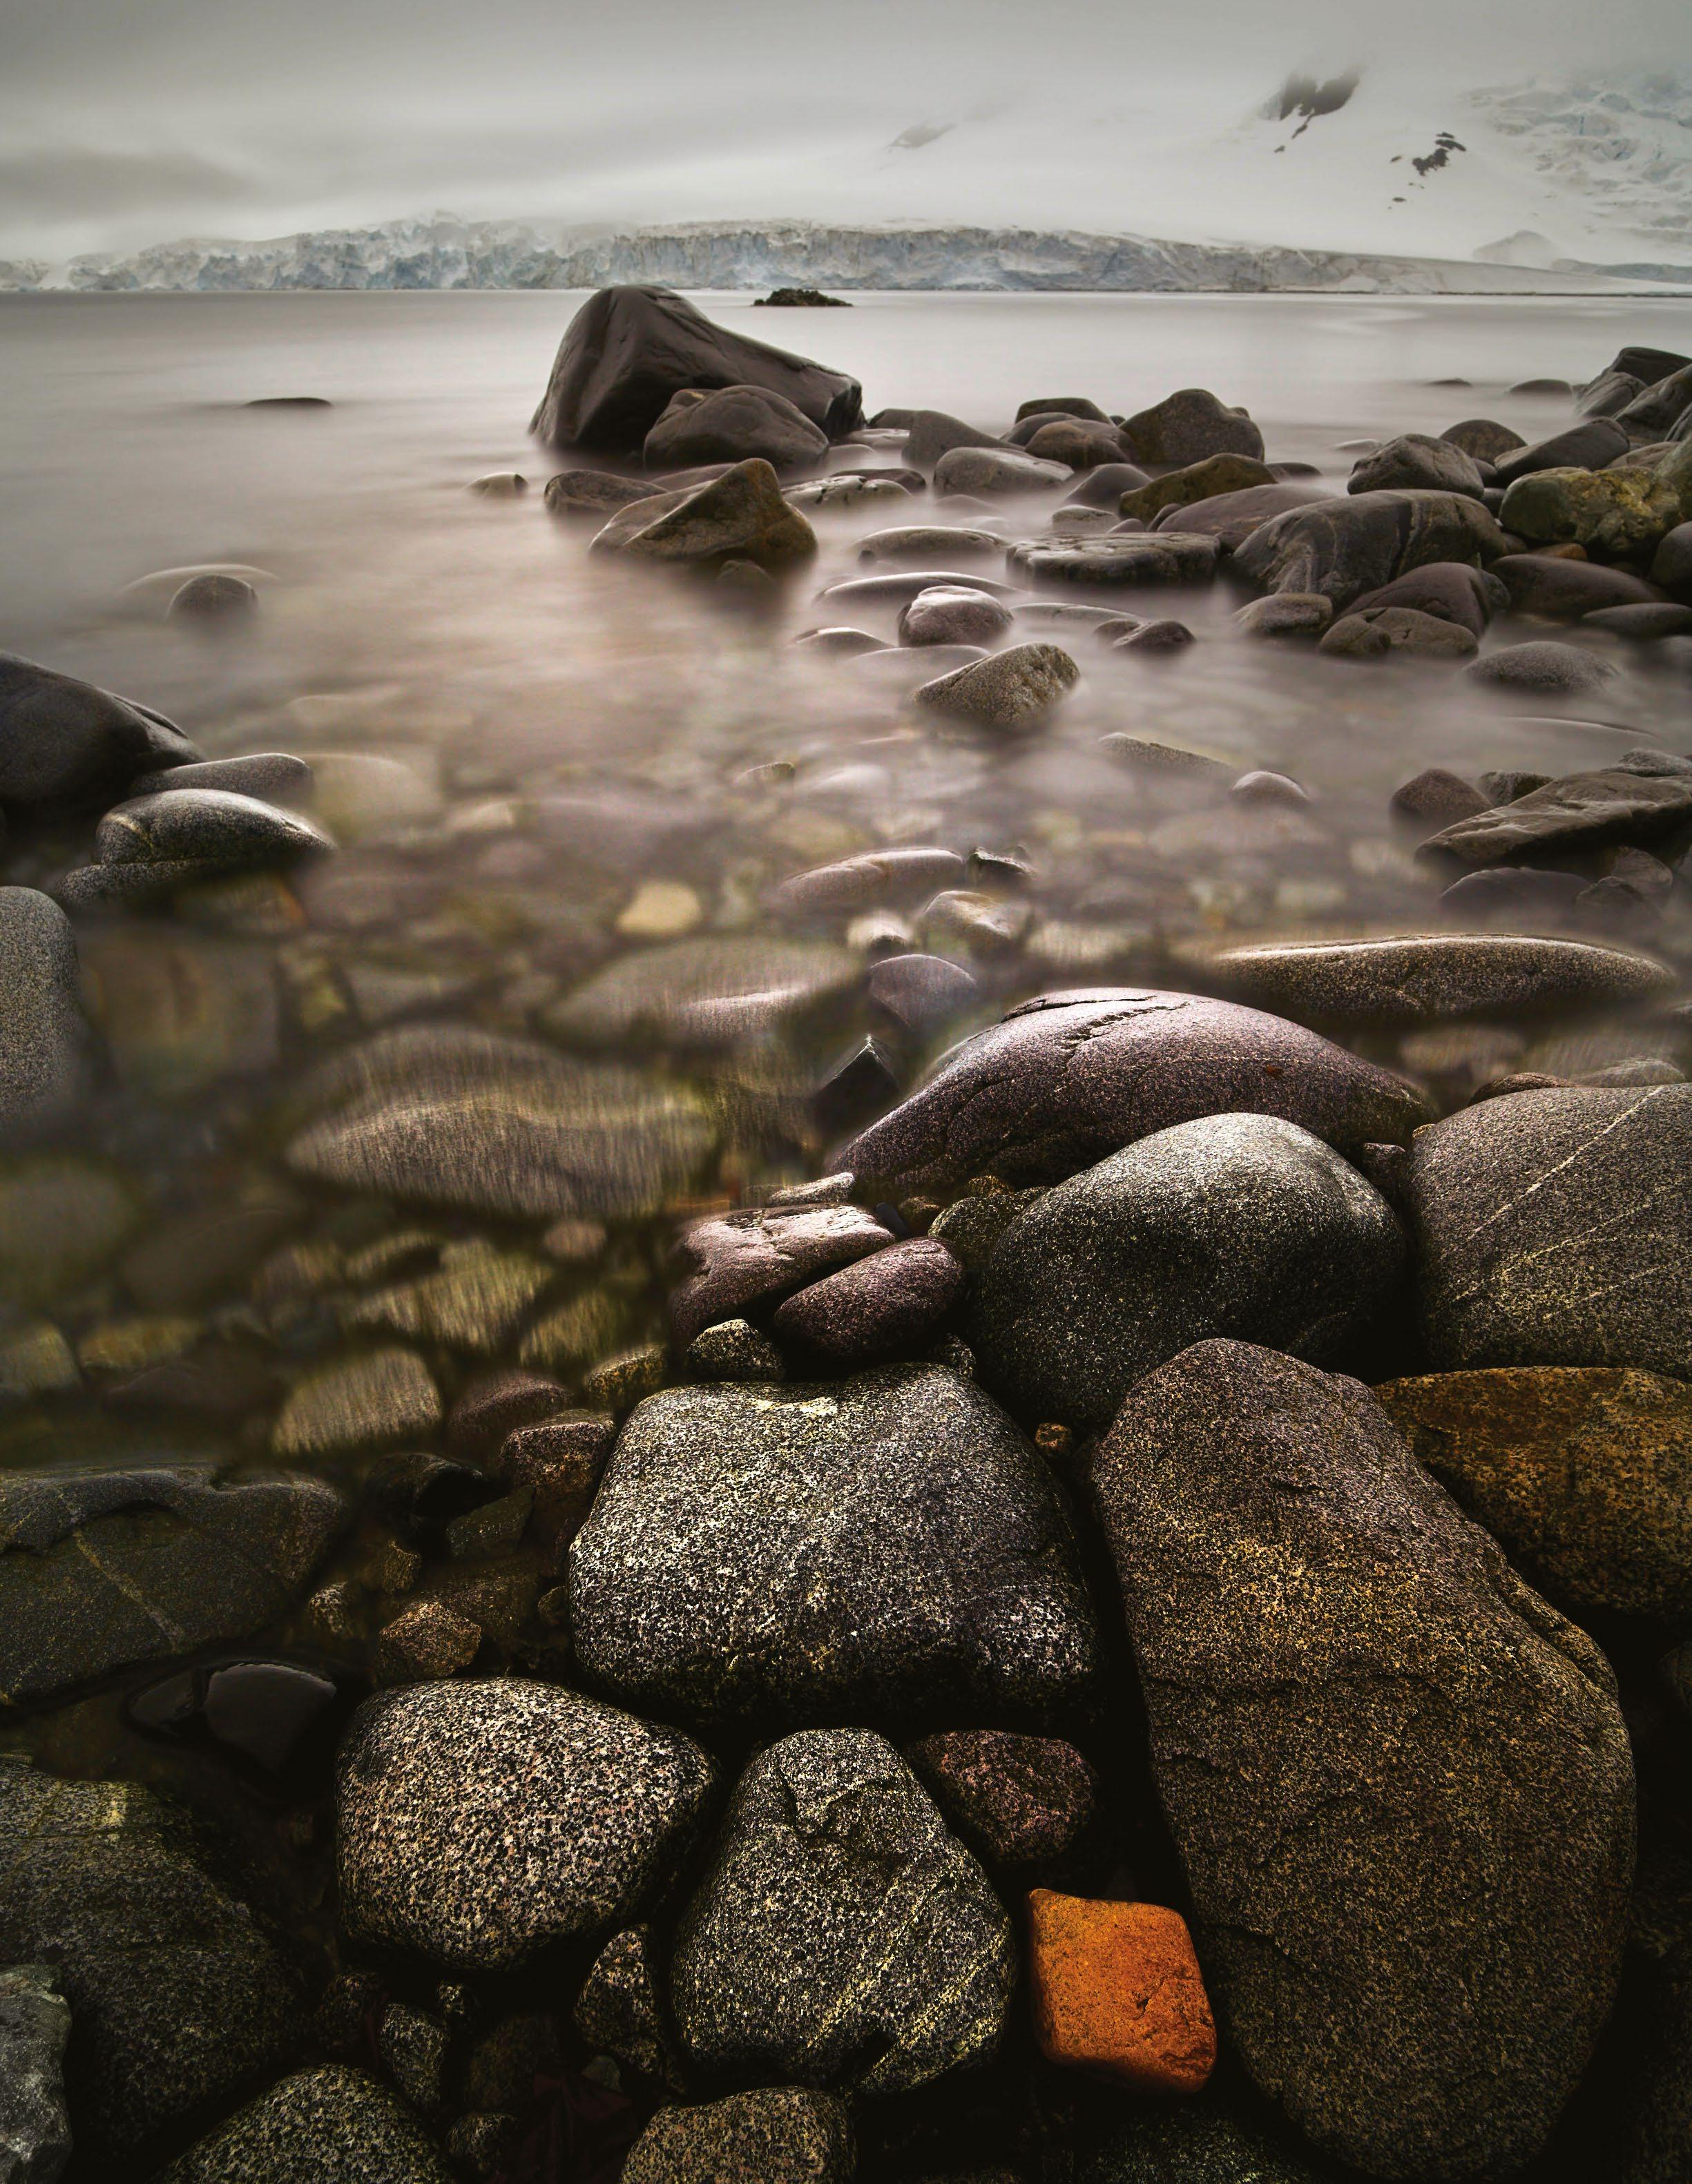
140
TECHNIQUES
Left Is this too much?
These show part of the same file with no sharpening, low, standard and also high sharpening
Sharpening landscapes
Do you need to sharpen your files? If so, here’s an easy way how!
The idea behind sharpening is to make our photographs appear to have more detail, to make them look ‘more real’. The danger is that in applying too much sharpening, the photo can be ruined with unsightly white haloes along subject edges. And in between no sharpening and too much sharpening, it’s a matter of taste.
Some landscape photographers don’t feel the need to sharpen their images, because the cameras and lenses they use produce a sufficiently sharp or clear result. However, for photographers who do like to sharpen, there are lots of techniques and plugins designed to produce the perfect result.
1 Flatten your file If you’re working in Photoshop with layers, save the file, then flatten it (Layer>Flatten Image) and save it as a JPEG (setting 9 or higher), a TIFF or PSD. Import this into Lightroom.
There are three moments when an image can be sharpened, beginning when your RAW file is processed. This is usually done automatically by your RAW processor (although you can override the settings if you wish). The second is ‘corrective’ sharpening when, during post-production, you enhance the image with sharpening. Often contrast and clarity give a better result because of the unsightly haloes sharpening can produce.
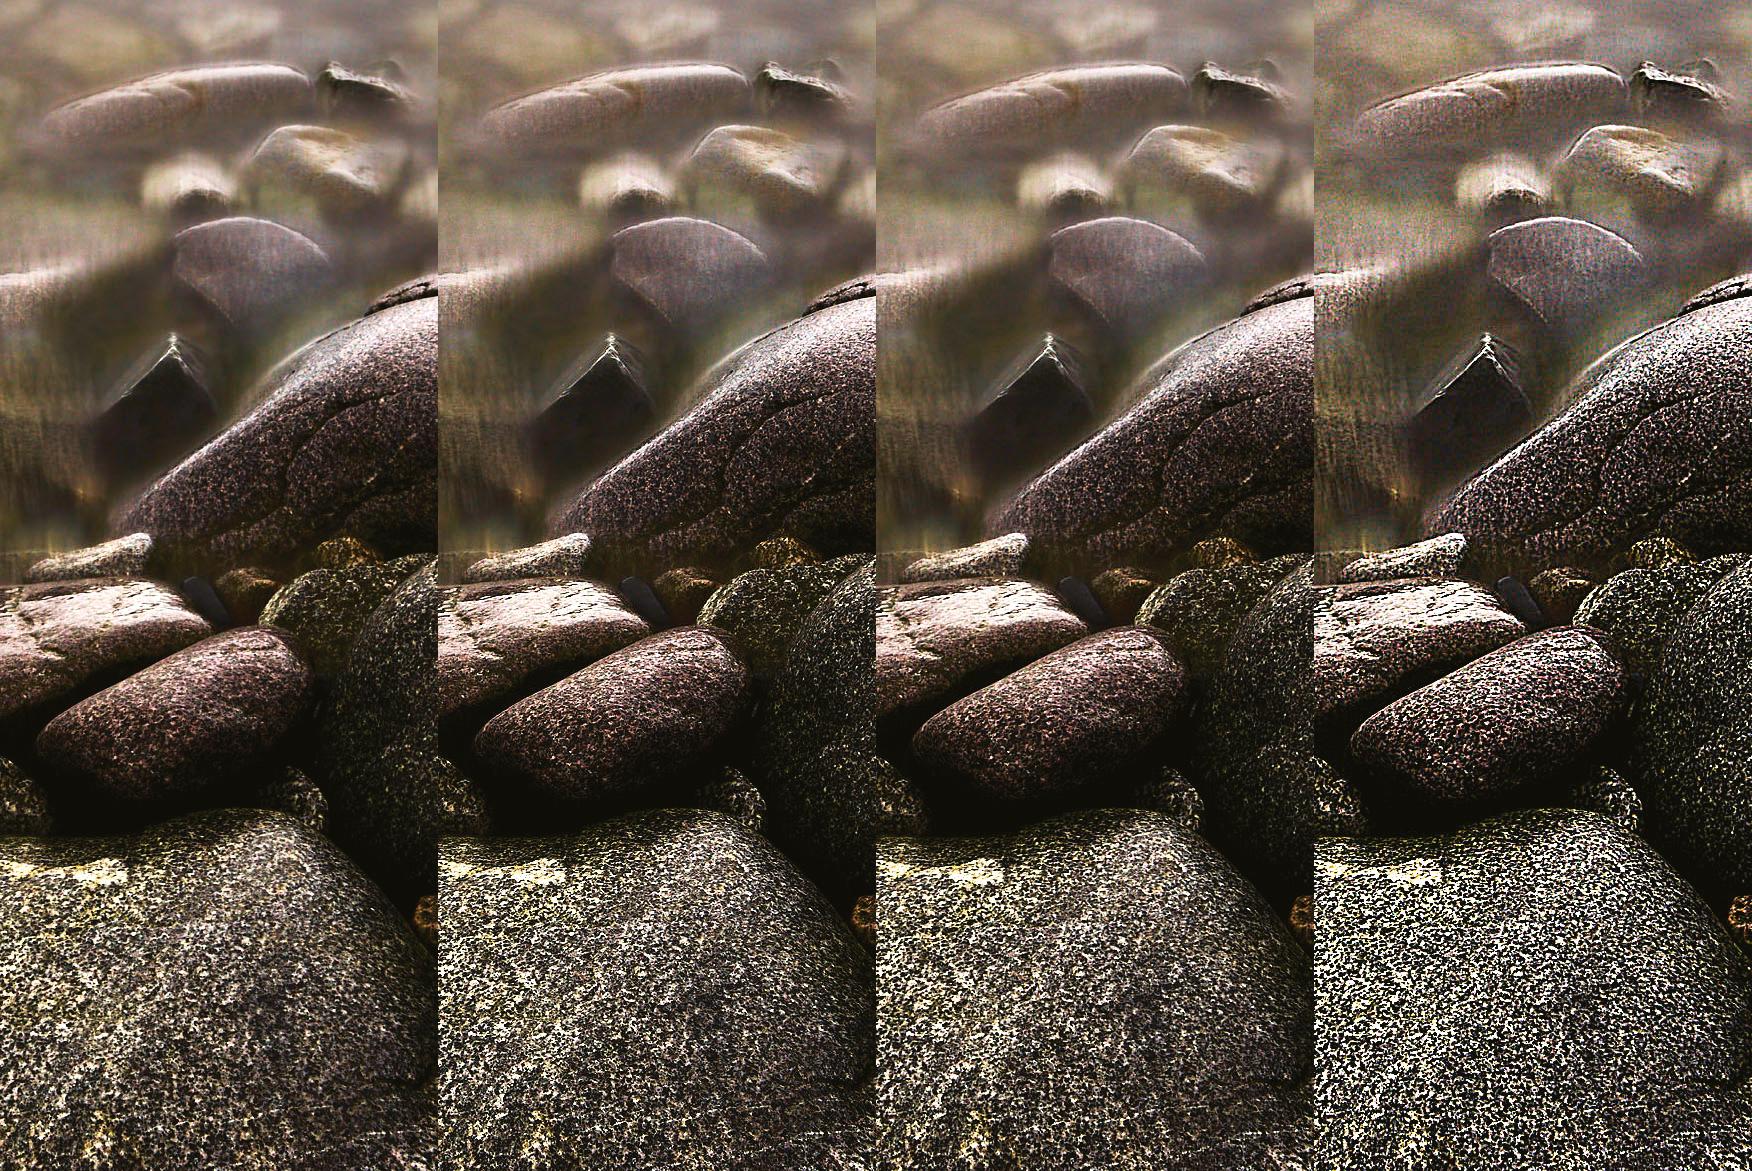
The third time we sharpen is when making a print or a file for screen. The amount of sharpening required is different depending on the size of the reproduction (the print or screen size) and whether you’re printing on
matte or glossy paper. However, the good news is that a lot of ‘sharpening intelligence’ is built into Lightroom.
So rather than agonising over how to sharpen your photography, simply export your files from Lightroom. You can choose low, standard or high sharpening.
If working in Photoshop, you can save a TIFF or JPEG file and then import it to Lightroom for sharpening, or you can use one of Photoshop’s sharpening tools – such as Unsharp Mask and Smart Sharpen. Enlarge the image to 100% to assess how much sharpening is required (smaller enlargements will hide what you’re doing to the file).
2 Size your image In Lightroom, go to Export (File>Export), choose Export To Hard Drive, and under Image Sizing set the size the output is going to be. Use pixels for a screen output, but centimetres or inches for a printing file.
3 Print or screen? In the same Export dialogue, drop down to the Output

Sharpening dialogue and tick the Sharpen For box, then select whether you’re outputting for screen, or either a glossy or matte print.
4 Low, standard or high sharpening? Next, you will need to decide and select how much sharpening you want to apply to your image. This is a matter of taste, so if in doubt you can choose Standard. If you don’t want your images to look very sharpened at all, the Low option will be your best bet in these instances.
5 Photoshop options If you don’t use Lightroom, then Photoshop has a range of options, from a standard sharpen filter to Unsharp Mask and Smart Sharpen filters, where you can choose how much sharpening you desire. Capture One also has sharpening options.
6 Output the file After the sharpening has been set or applied, set the other parameters and output the file. While we might not like capturing JPEGs, they are fine for output purposes.
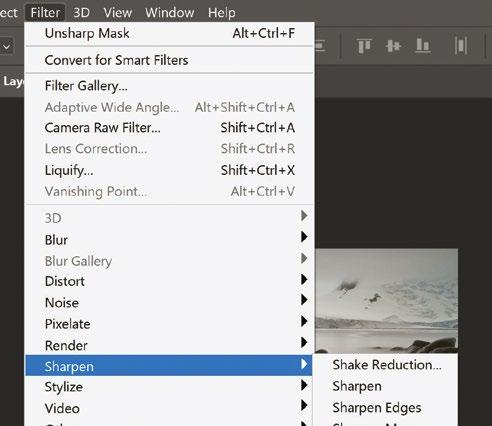
141 EDITING
NO SHARPENING LOW SHARPENING NORMAL SHARPENING TOO MUCH SHARPENING
LANDSCAPES
PROJECTS
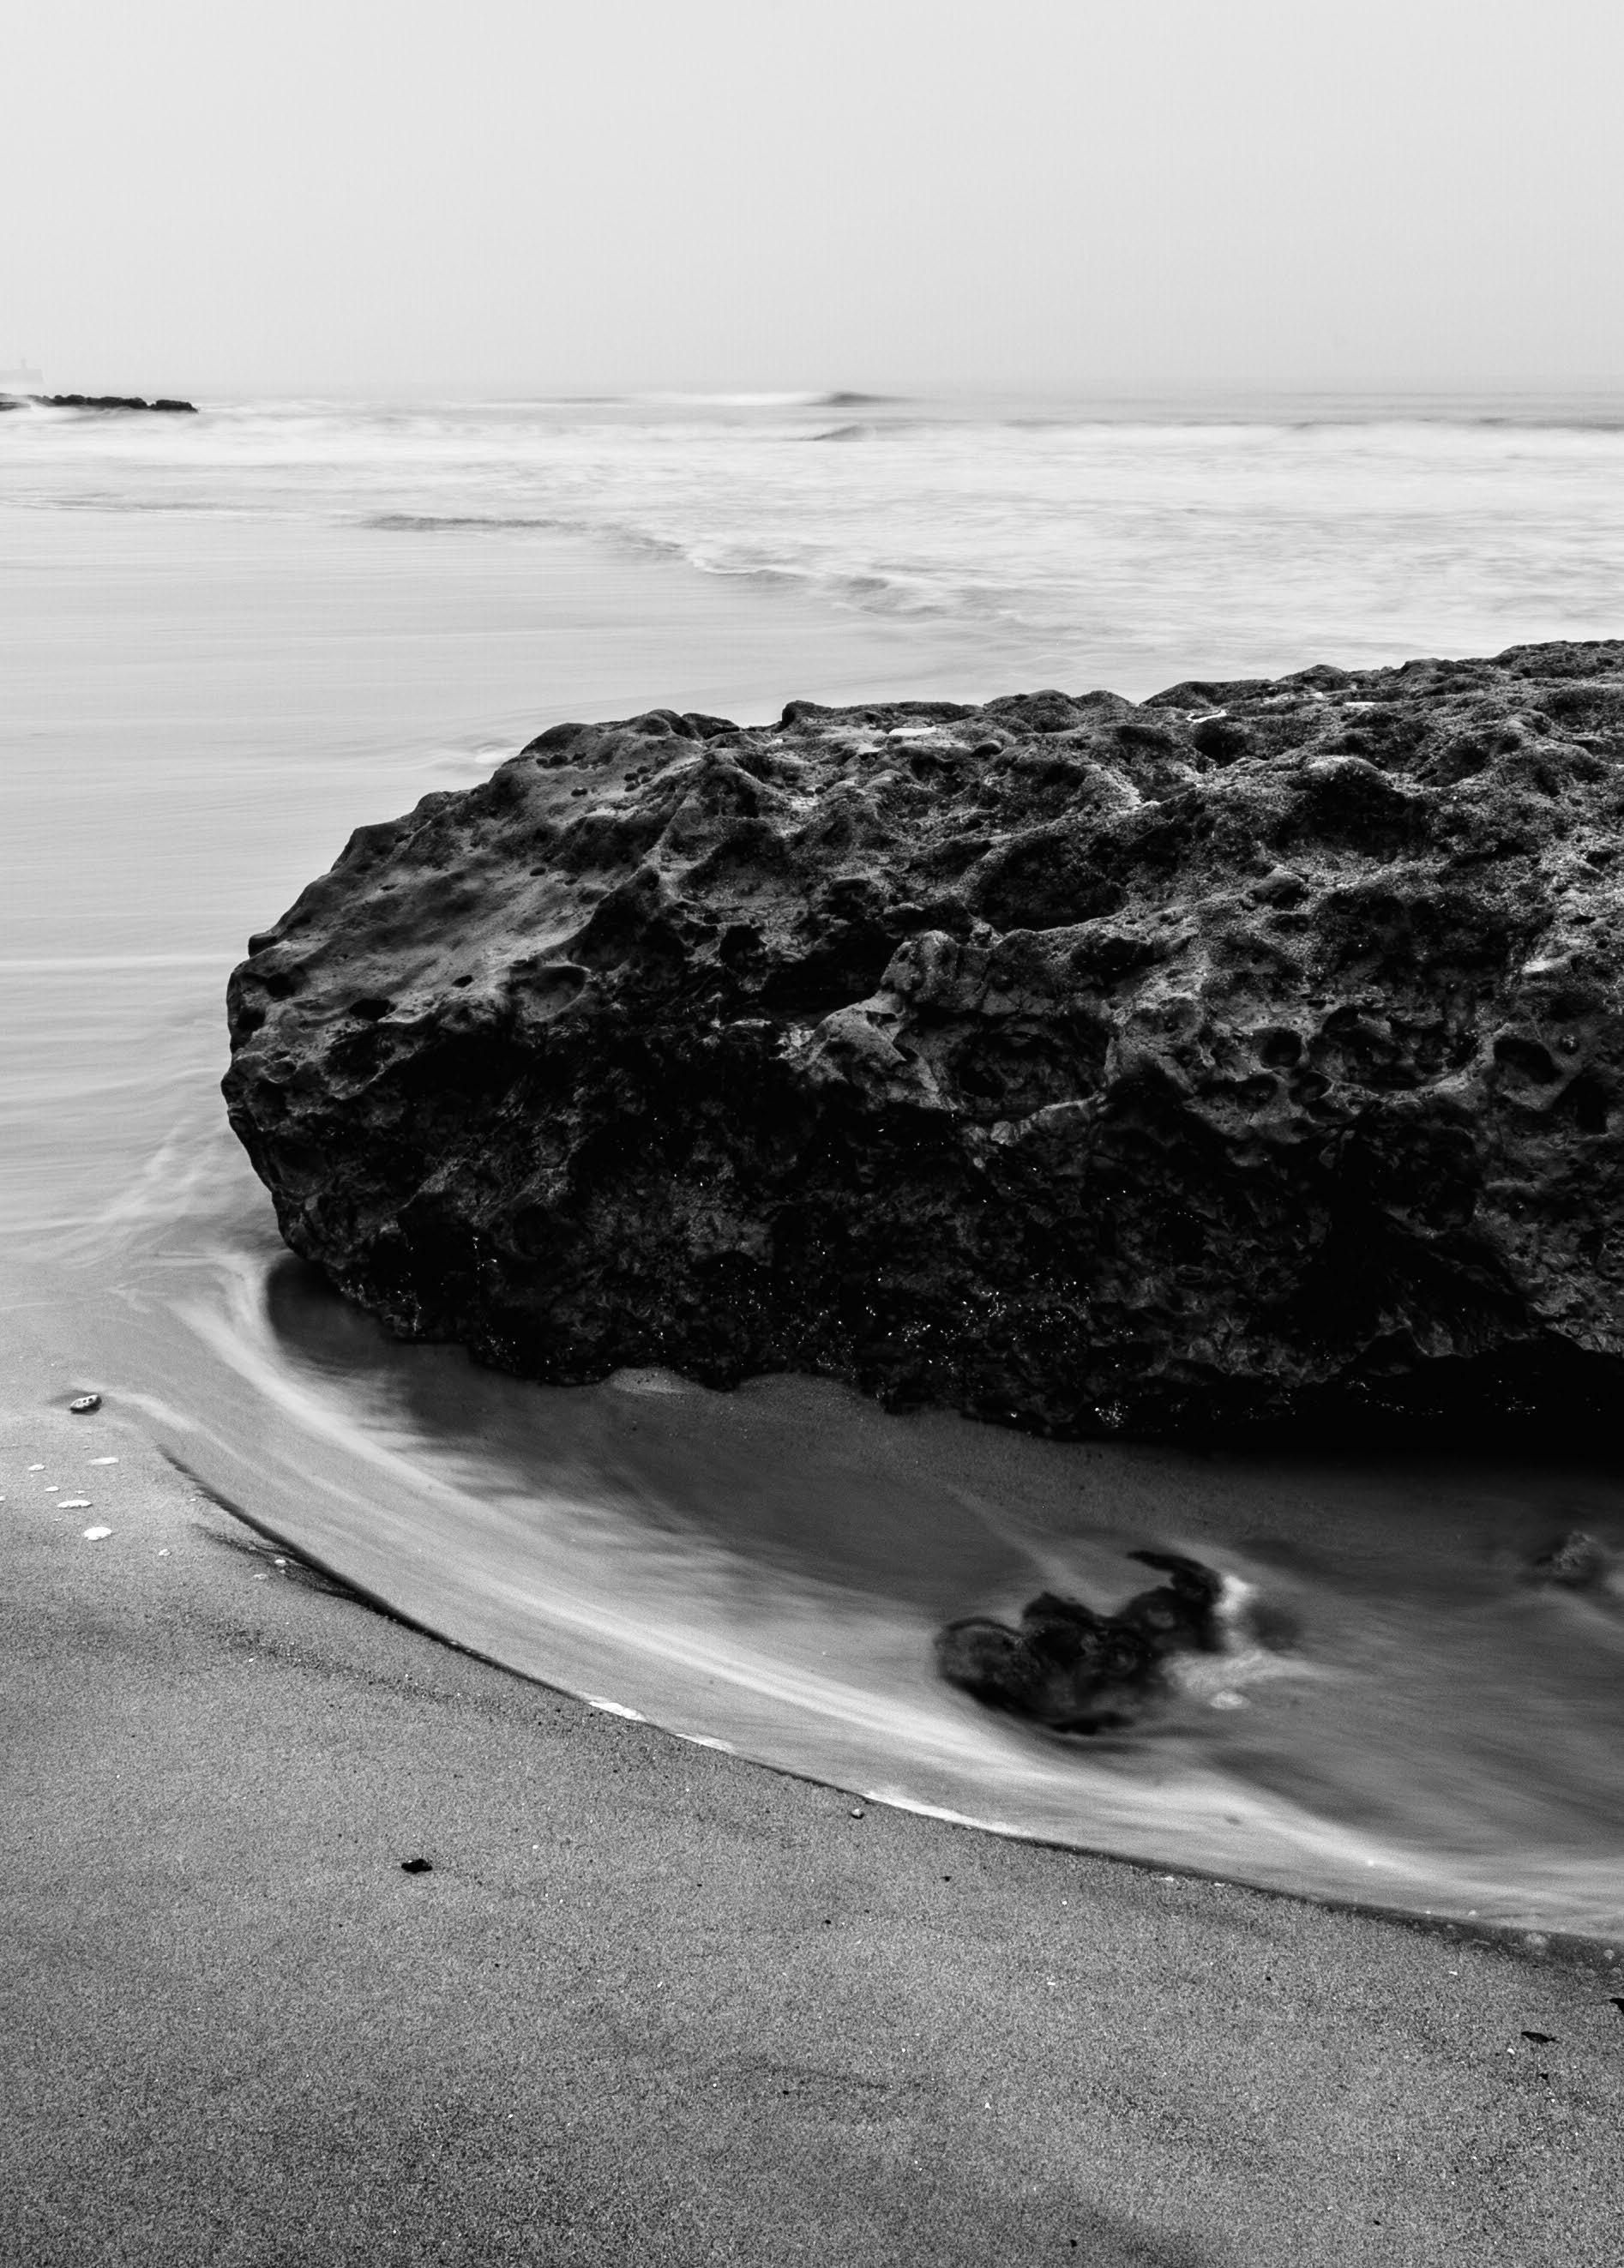
144. MASTER SHUTTER DRAGGING
Rebecca Greig shows you how to achieve abstract results with this relatively simple technique
146. WORK WITH MULTIPLE FILTERS
Overcome the practical challenges of stacking optical filters when working in the field
148. FINE-ART MONOCHROME LANDSCAPE
Create a striking black and white scenic shot
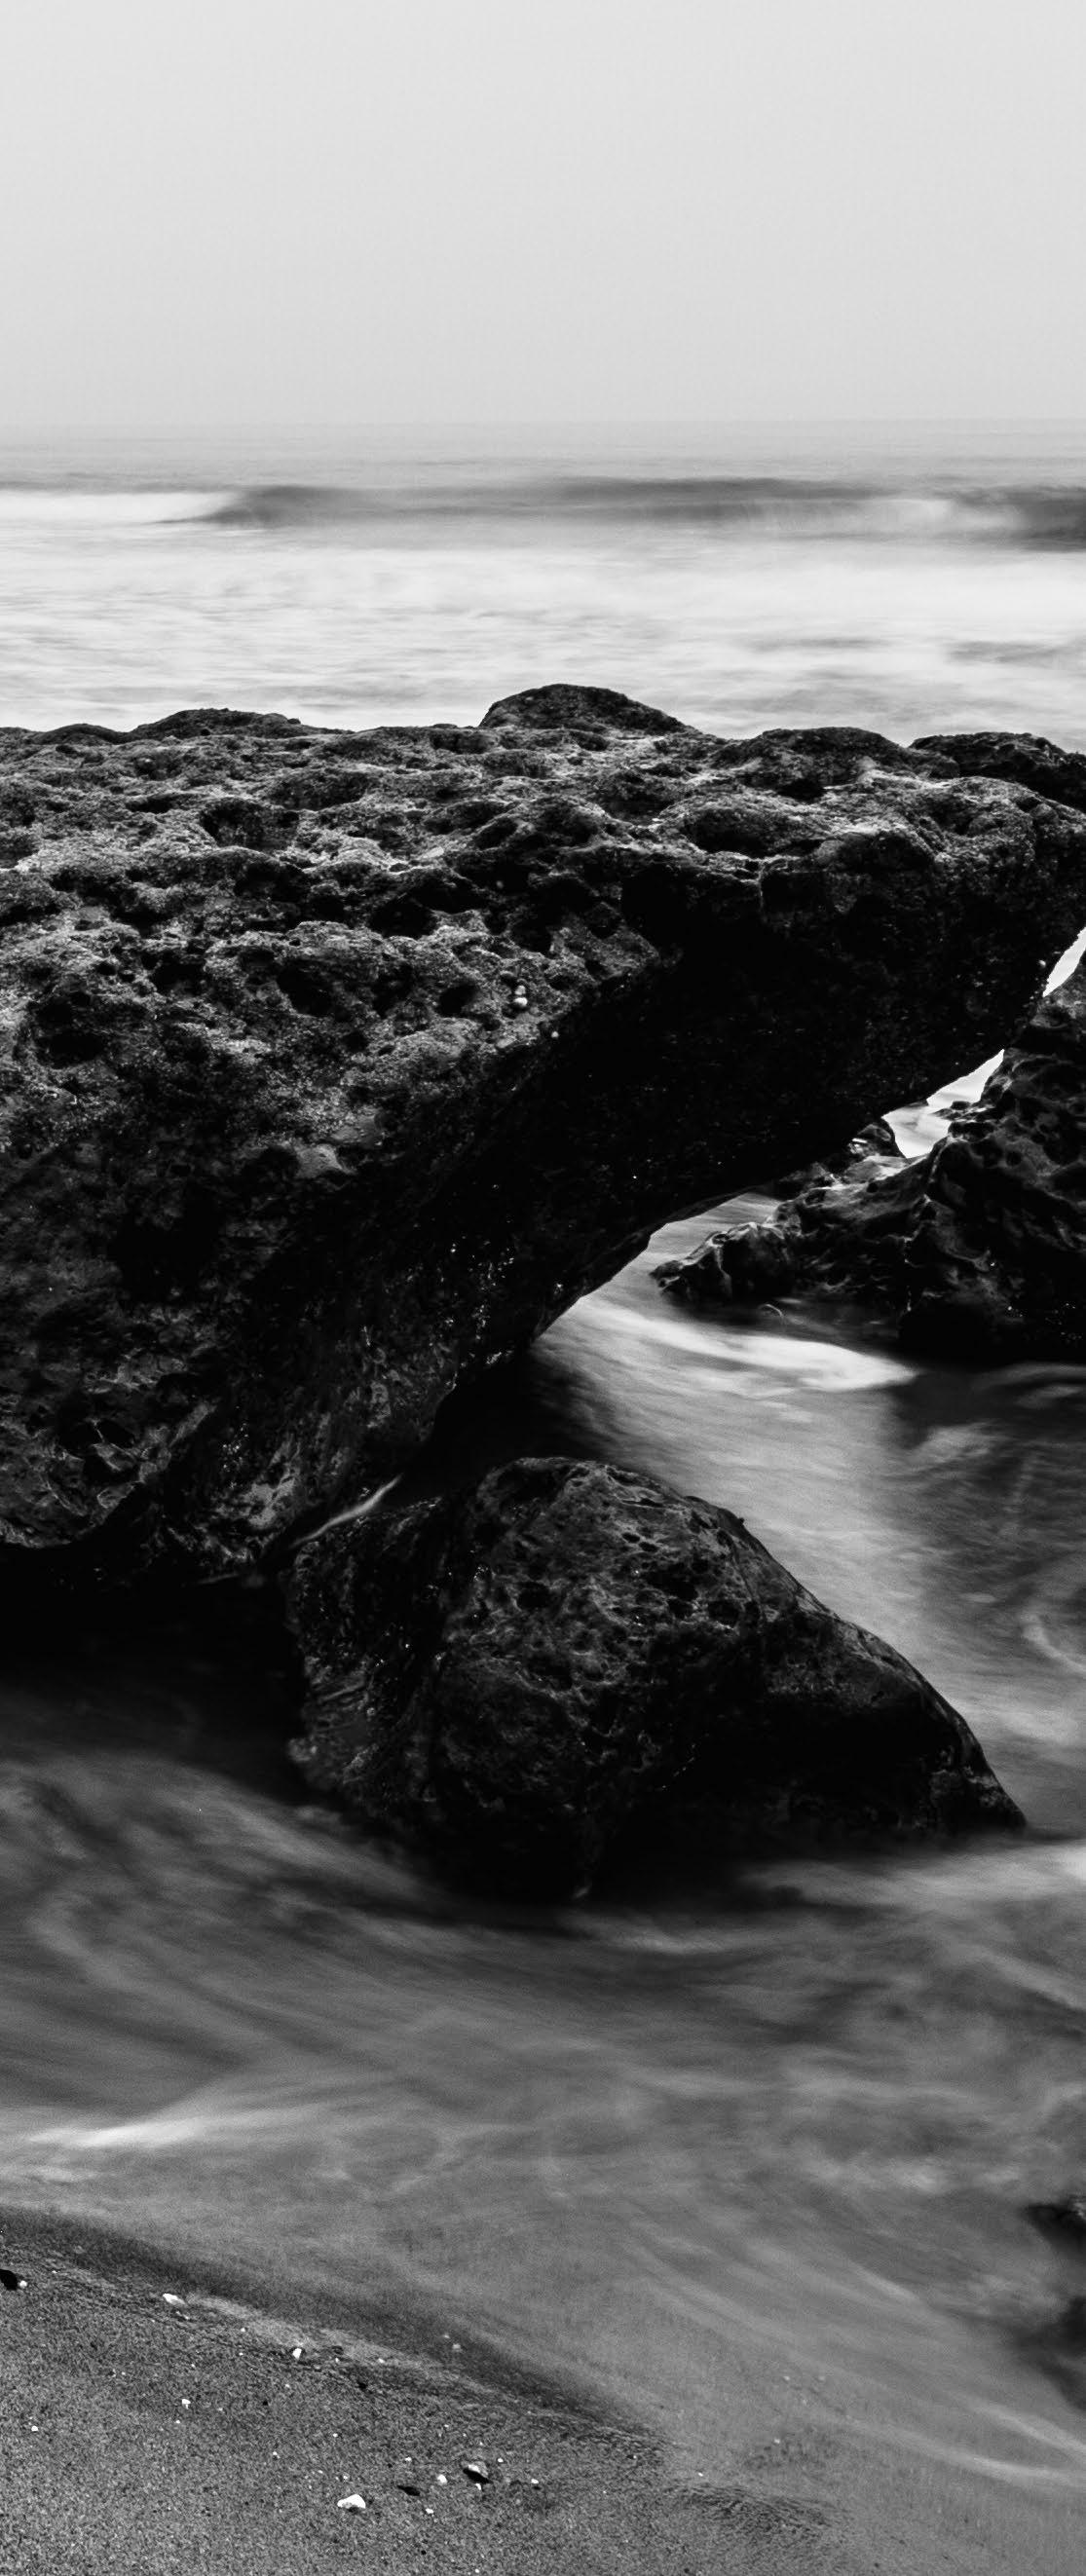
154. WORK WITH LENS ADAPTERS
Give old hear a new lease of life with a manual or electronic lens mount adapter
156. USE A FISHEYE FOR LANDSCAPES
Gain a new, unique perspective by shooting ultrawide compositions with a fisheye lens
158. GET LOW THE EASY WAY
Use a simple trick with your tripod to get a worm’s eye view of a scene
162. SHOOTING THE WAVES
Tom Ormerod shows you how to plan and execute soothing wave motions
168. FOCUS-STACKED LANDSCAPES
Louise Carey captures pin-sharp images from front to back with a manual focus stacking technique
174. THE ORTON EFFECT
Give your landscapes a dreamy look with this modern take on an established technique
180. CREATE A STITCHED PANORAMA
We show you have to create a stunning widescreen landscape using multiple images
186. CAPTURE MOVING WATER
Experiment with shutter speed to capture motion in the water
Master shutter dragging
Rebecca Greig shows you how to achieve abstract results with this simple technique
Sharp imagery is the goal sought by most photographers, but a purposely blurred image can often look quite intriguing and be far more evocative as a result. Shutter dragging is a technique that involves combining motion with a slightly longer exposure.
Wedding photographers use it to capture more of the atmosphere of the first dance or the couple walking back down the aisle, but landscape and fine-art photographers can
employ it for impressionistic effects. Find a scene with strong lines – either horizontal or vertical – and bold colours, then simply move the camera during the exposure.
The results can be very striking, and depending on your technique and chosen scene, will either be wonderfully abstract or minimal and painterly. Experimentation is key here. You don’t necessarily have to use a tripod for this technique, but one has been employed here in order to achieve a level horizon.
Creative blur
The resulting image is beautifully blurred, creating an abstract scene that looks almost painterly
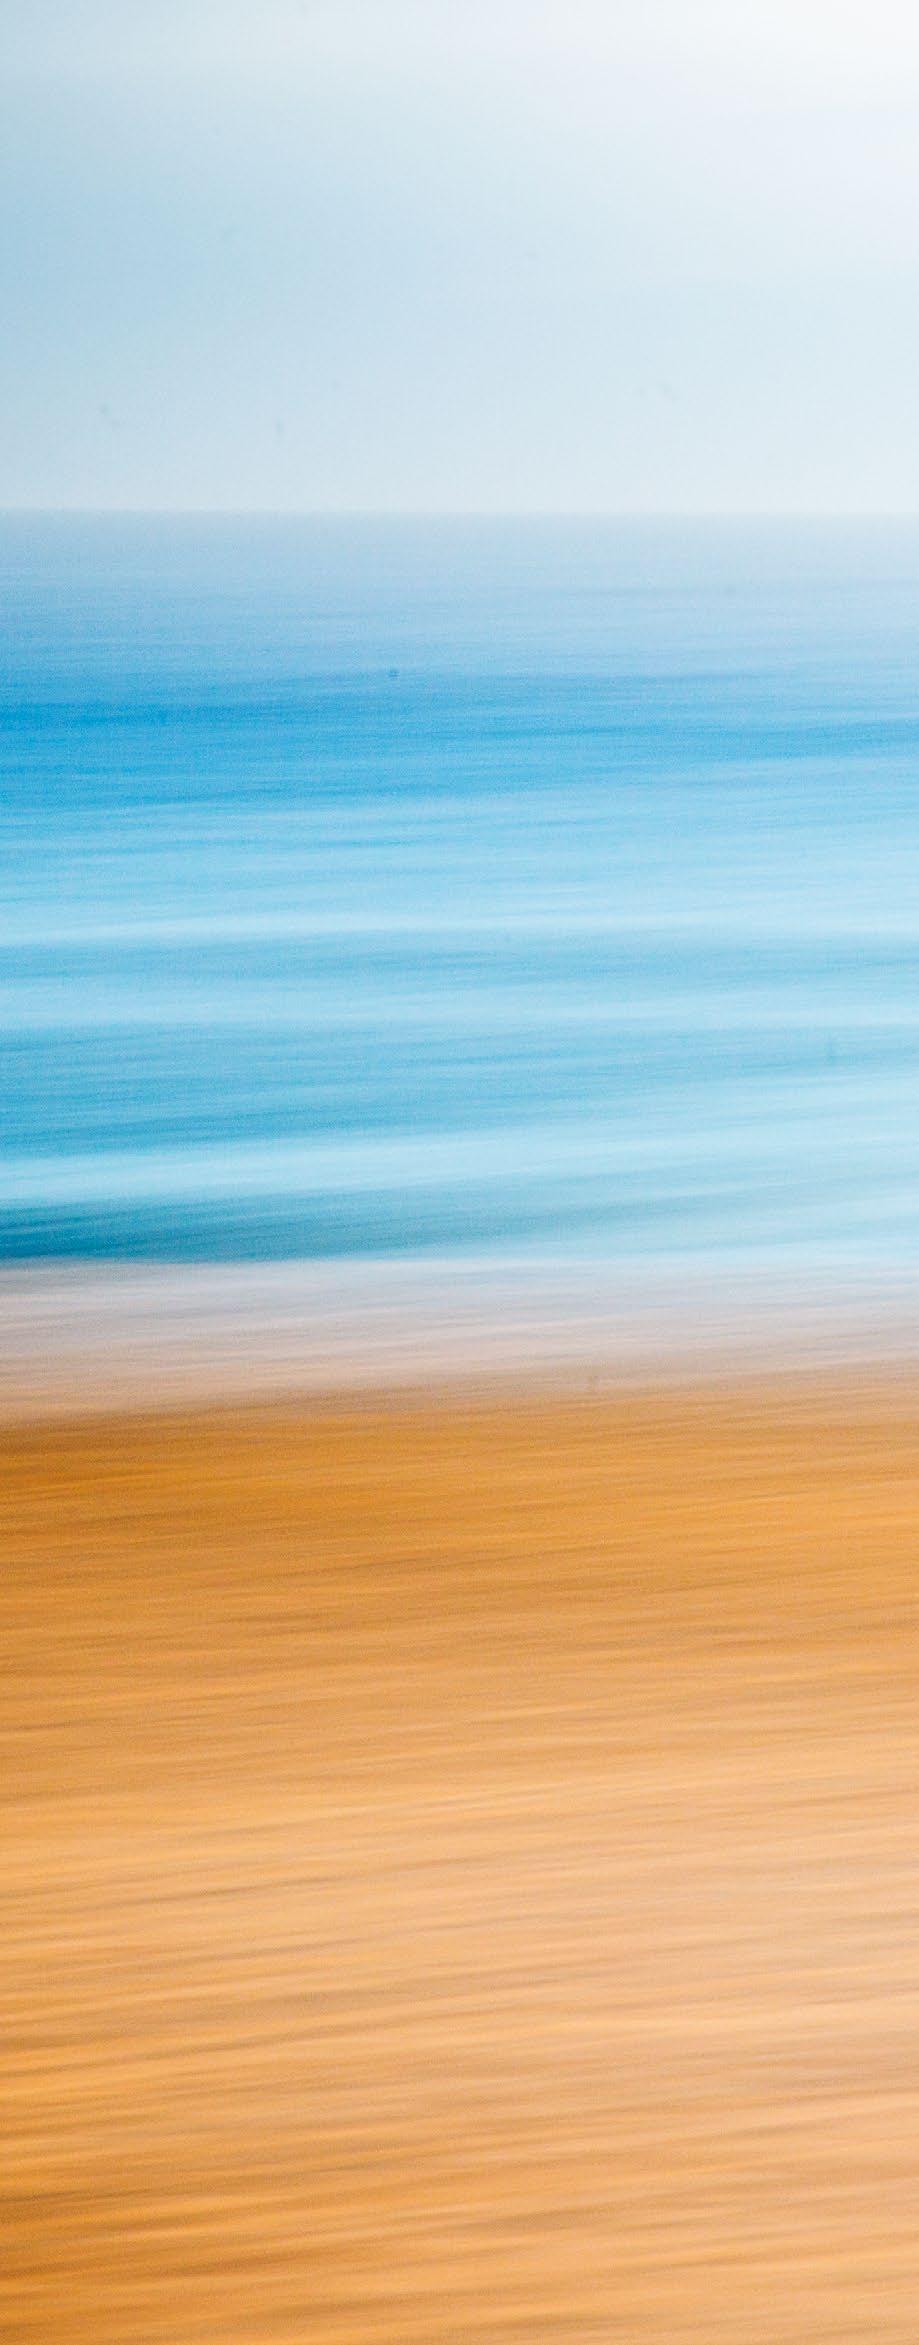
1
Select a location This technique is most effective on subjects with strong lines and colours that will streak through the final image. This quiet beach scene with its strong horizontal lines is an ideal choice.
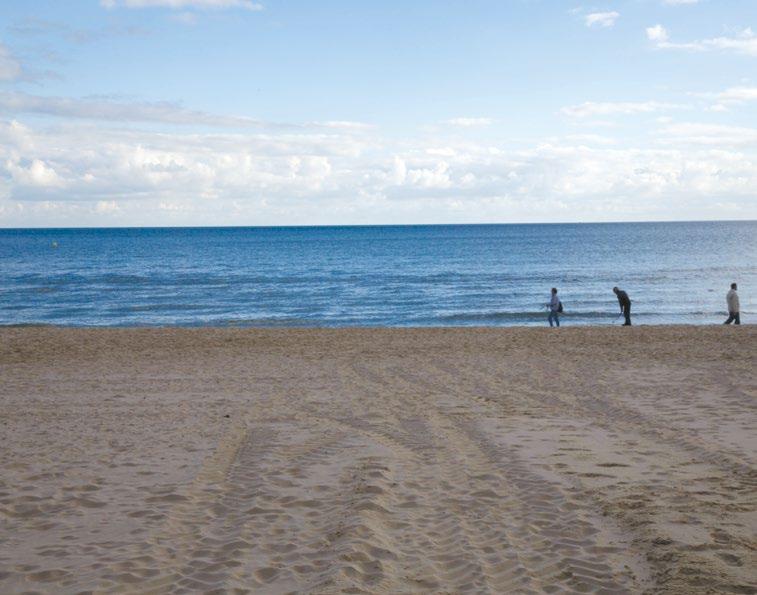
Set up a tripod Secure the camera to the tripod and decide whether you want the blur to be horizontal or vertical. For this scene, horizontal blur is the aim, so the camera needs to panned left to right.
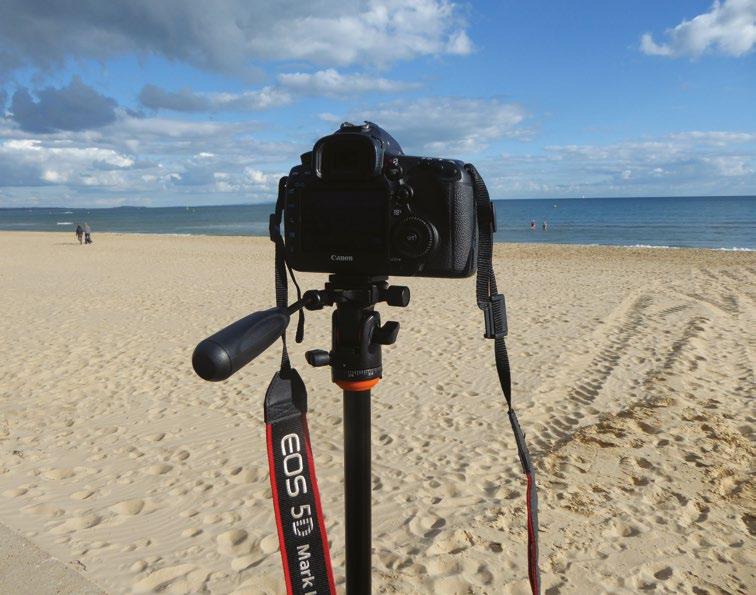
2
3Set a slow shutter Select Shutter Priority or Manual mode and set a shutter speed between 1/15 sec and 2 secs, depending on how much blur you want. You may need to attach a neutral density (ND) filter in brighter light.
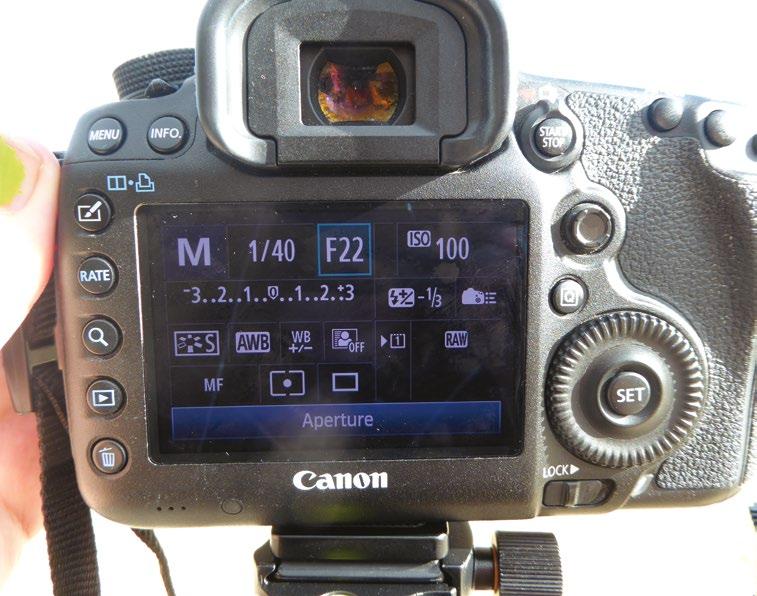
FINAL IMAGE PROJECTS 144
4
Choose manual focus Select Live View to see what is happening in your composition without looking through the viewfinder. Set your camera to manual focus so it won’t hunt for focus every time you hit the shutter button.
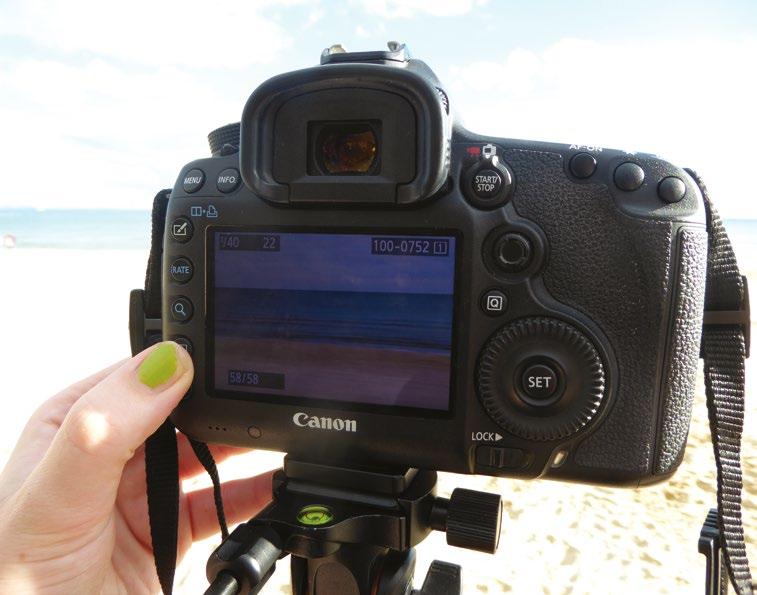

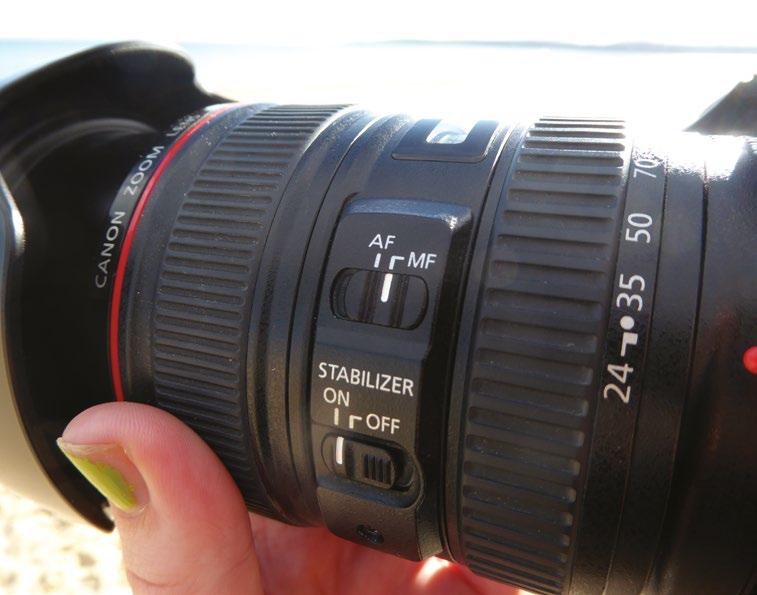
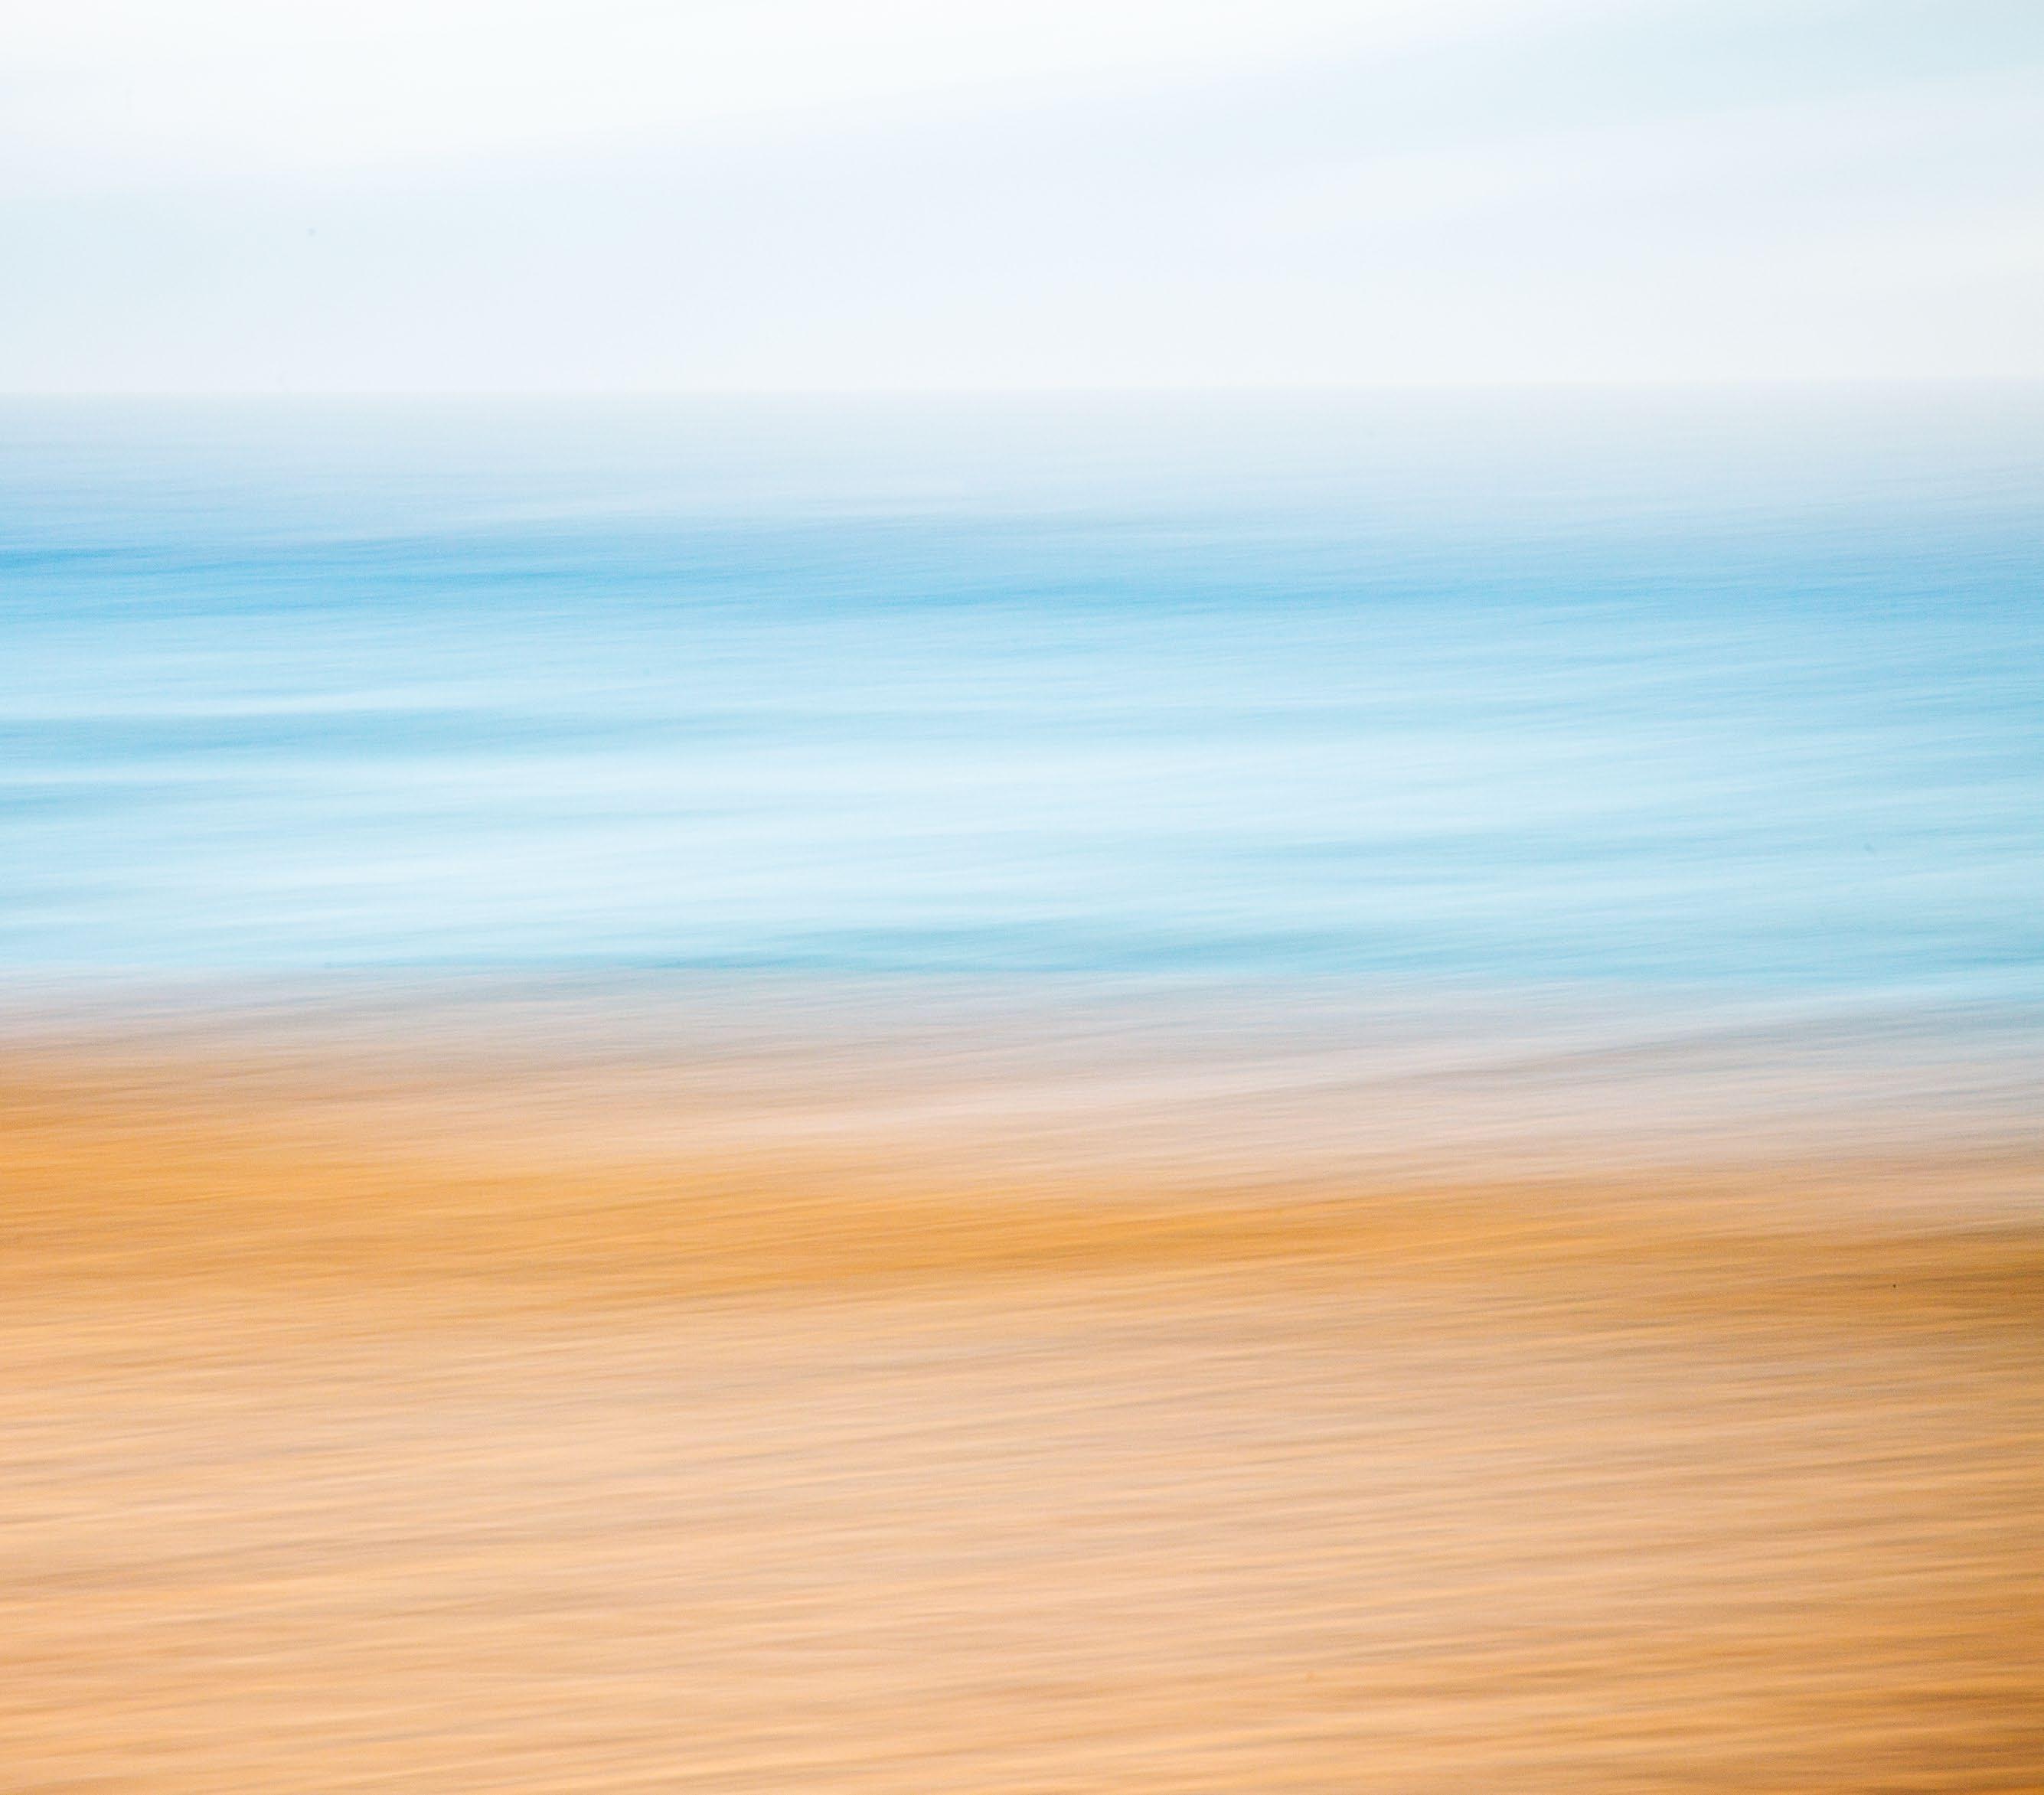
5 Move the camera Practise moving the camera up and down or side to side depending on the direction of blur desired. Move the camera before you press the shutter and keep it moving until after the exposure.
6Take the image You might have to take quite a few test shots with this technique in order to get it just right. Take a series of images then change your settings or technique if you have to.
MASTER SHUTTER DRAGGING 145
© Rebecca Greig
Work with
multiple filters
Overcome the practical challenges of stacking optical filters when working in the field
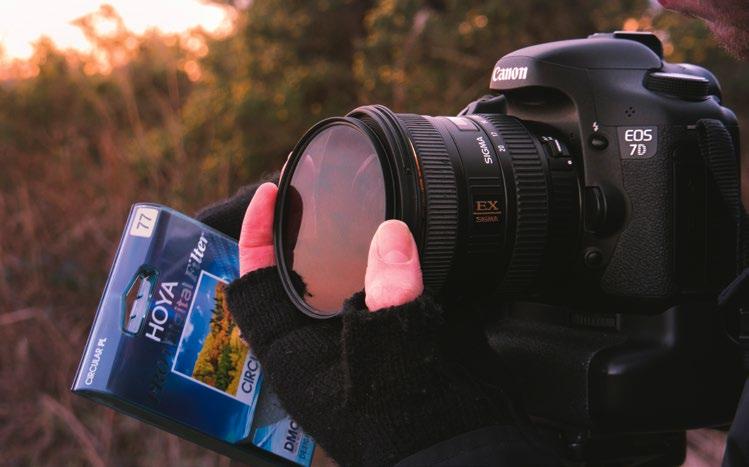
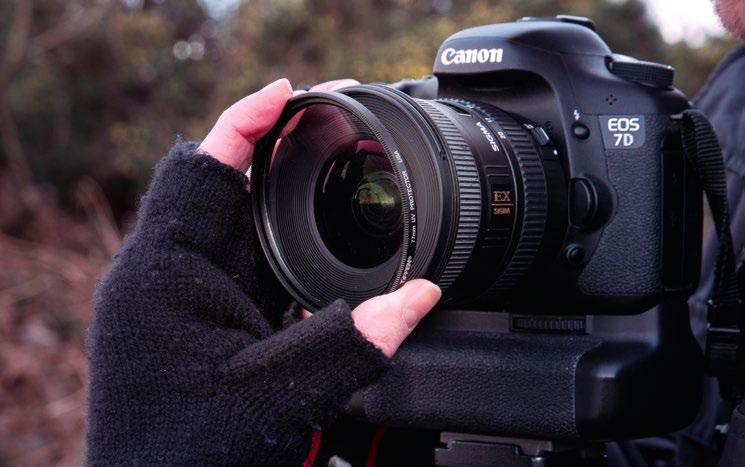
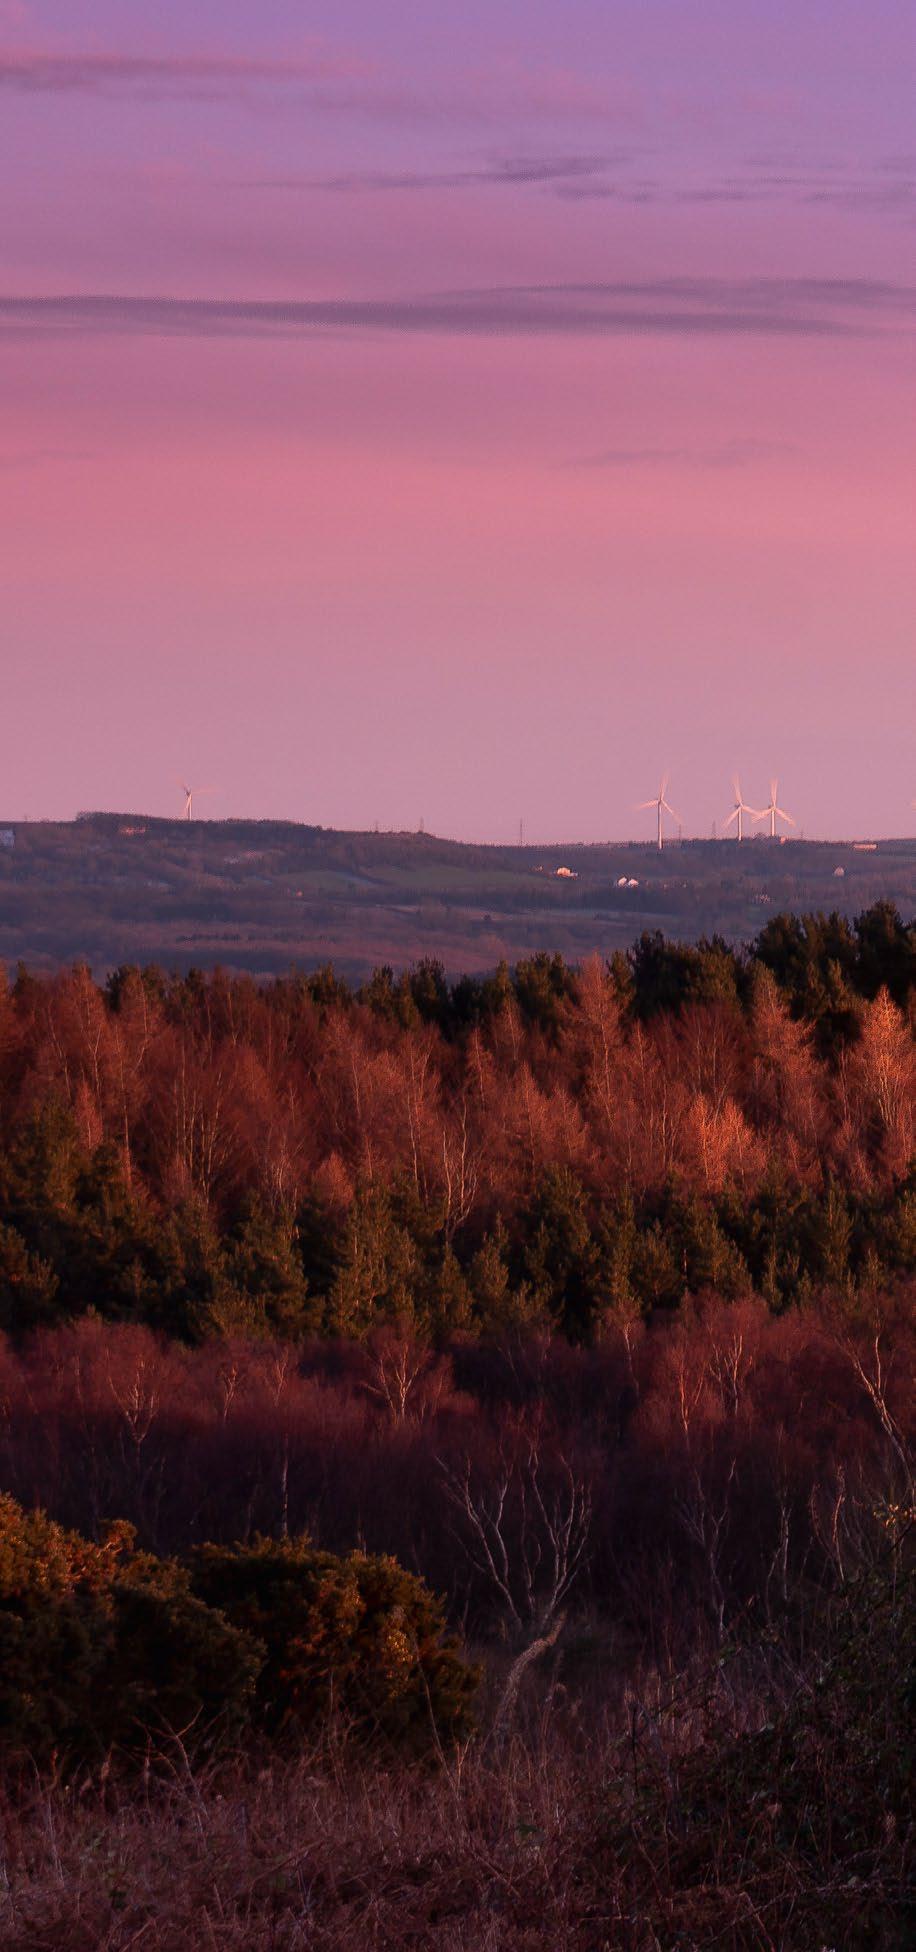
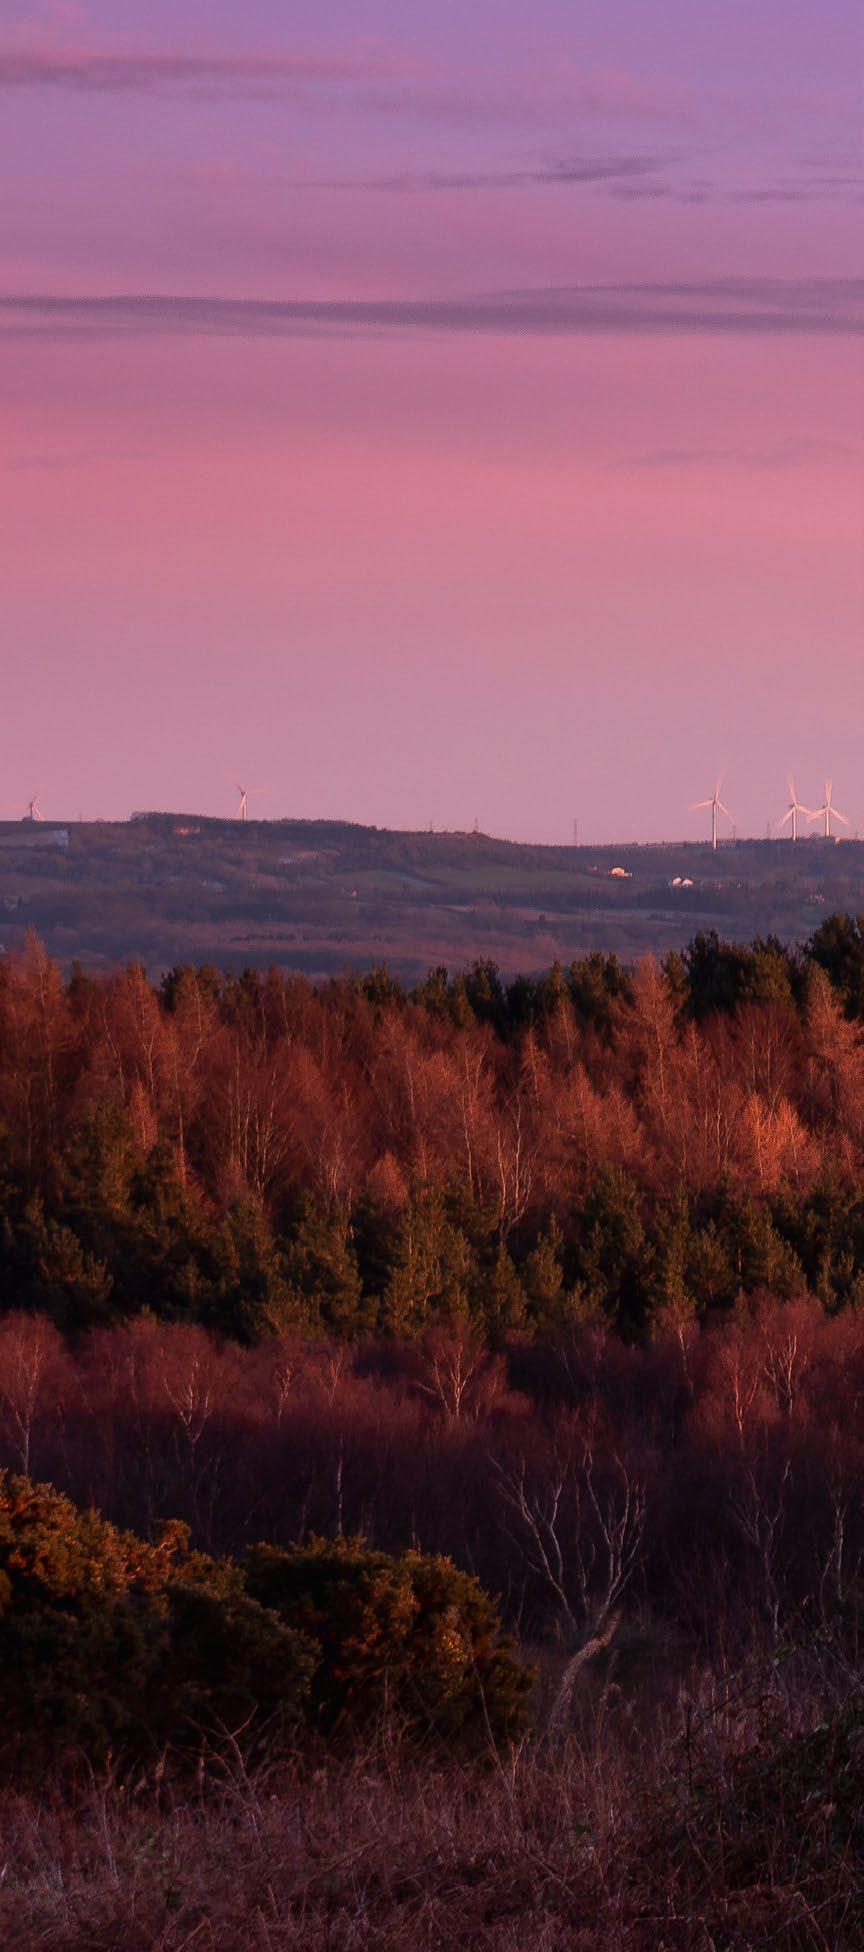
When using hardware filters, it is often best to minimise how many we place on the lens at any given time. Each filter is another layer for light to pass through before it can reach the sensor. Even with the best-quality filters that cost hundreds of pounds, this has the potential to reduce sharpness and introduce optical aberrations.
However, there are moments when we need to use more than one type of filter at a time, such as when shooting landscapes or cityscapes. While we need a polariser to remove reflections and increase colour saturation, we might also need to add an ND filter or a grad to extend exposure duration, or balance the exposure between the ground and sky. In these circumstances stacking filter types is unavoidable, so mitigating any resulting quality loss becomes the order of the day.
Luckily there are some easy ways to benefit from the best characteristics of each filter, while reducing any negative impacts on your image. These involve the careful consideration of your selection of filter types, as well as the
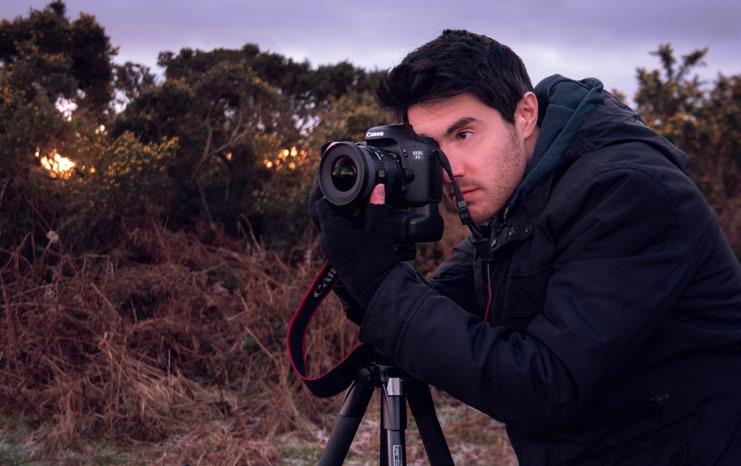
filter order, which also makes the workflow more practical in the field. It is important to ensure consistency between all of your images, and arranging filters correctly plays a crucial
Inset
Incomplete filtration
In order to maintain the highest possible sharpness, the decision was taken not to stack filters. However, this meant unbalanced exposure or desaturating polarised light
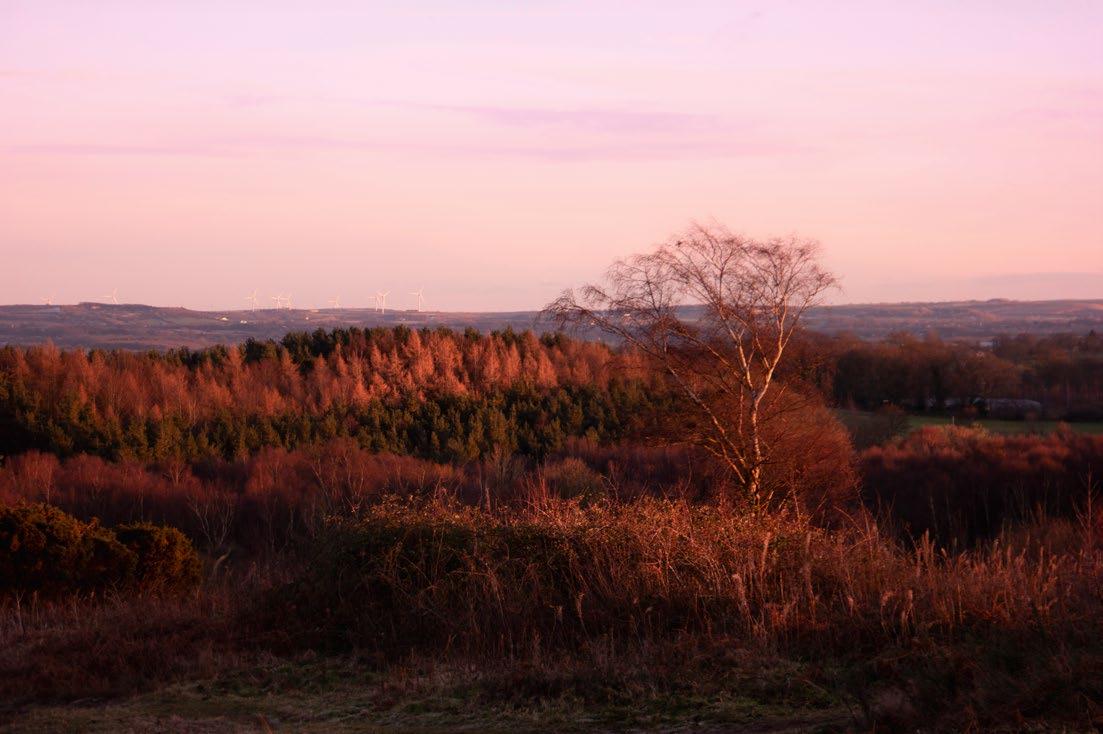
BEFORE
1 Shoot the scene Before you do anything else, take an unfiltered shot to identify problem areas and help determine which filters are most necessary. There is no point attaching a filter if it is not critical to the shot.
2 Remove protectors Often we keep a UV filter on our lens to protect the outer element from damage, but unless absolutely required, remove this before attaching other filters. A polariser will often do a similar job.
3 Add a polariser On a larger square-filter system, the standard holders will often have a polariser slot at the front. Use this if possible. Otherwise, place the filter on the lens first, unless your ND has a front thread.
146 PROJECTS
All images © Peter Fenech
AFTER Correct usage
By carefully pre-planning a filter order, not only were the filters guaranteed to be most effective, but functionality, image quality and ease of use were also maximised
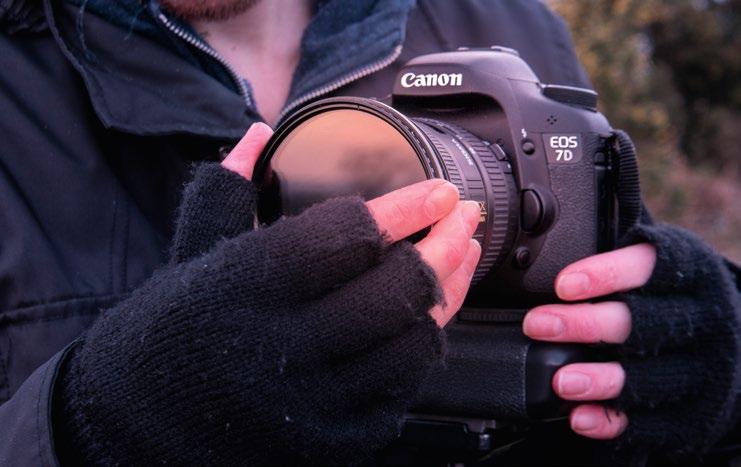

Add full NDs It is best to fit an ND filter as close to the lens as possible to reduce exposure-spoiling light leak. If no polariser is needed, fit the ND directly on the lens, but otherwise place this next in the stack.
5 Attach ND grads Since grads require precise placement, fit these at the very front. You should only use one grad, unless absolutely necessary – fit a single 0.9 grad rather than two 0.3 NDs to maintain quality.
6 Shoot and remove Take your images, checking that the effects are correct, and zoom in to check sharpness. When stacking filters, try to shoot at the sharpest f-stop. Then, remove filters incrementally from front to back.
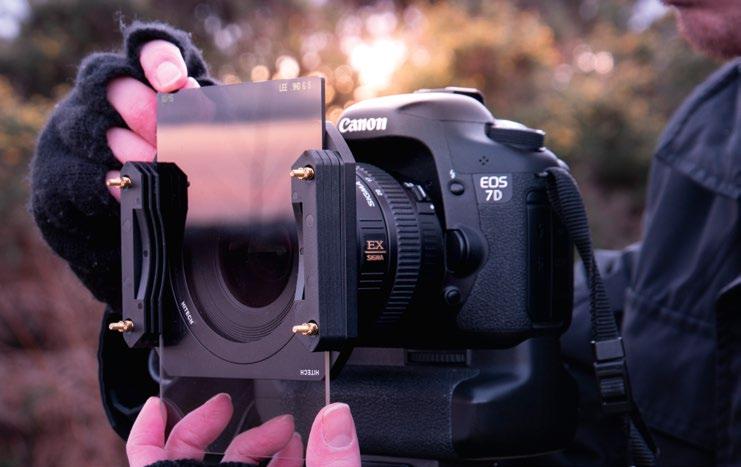
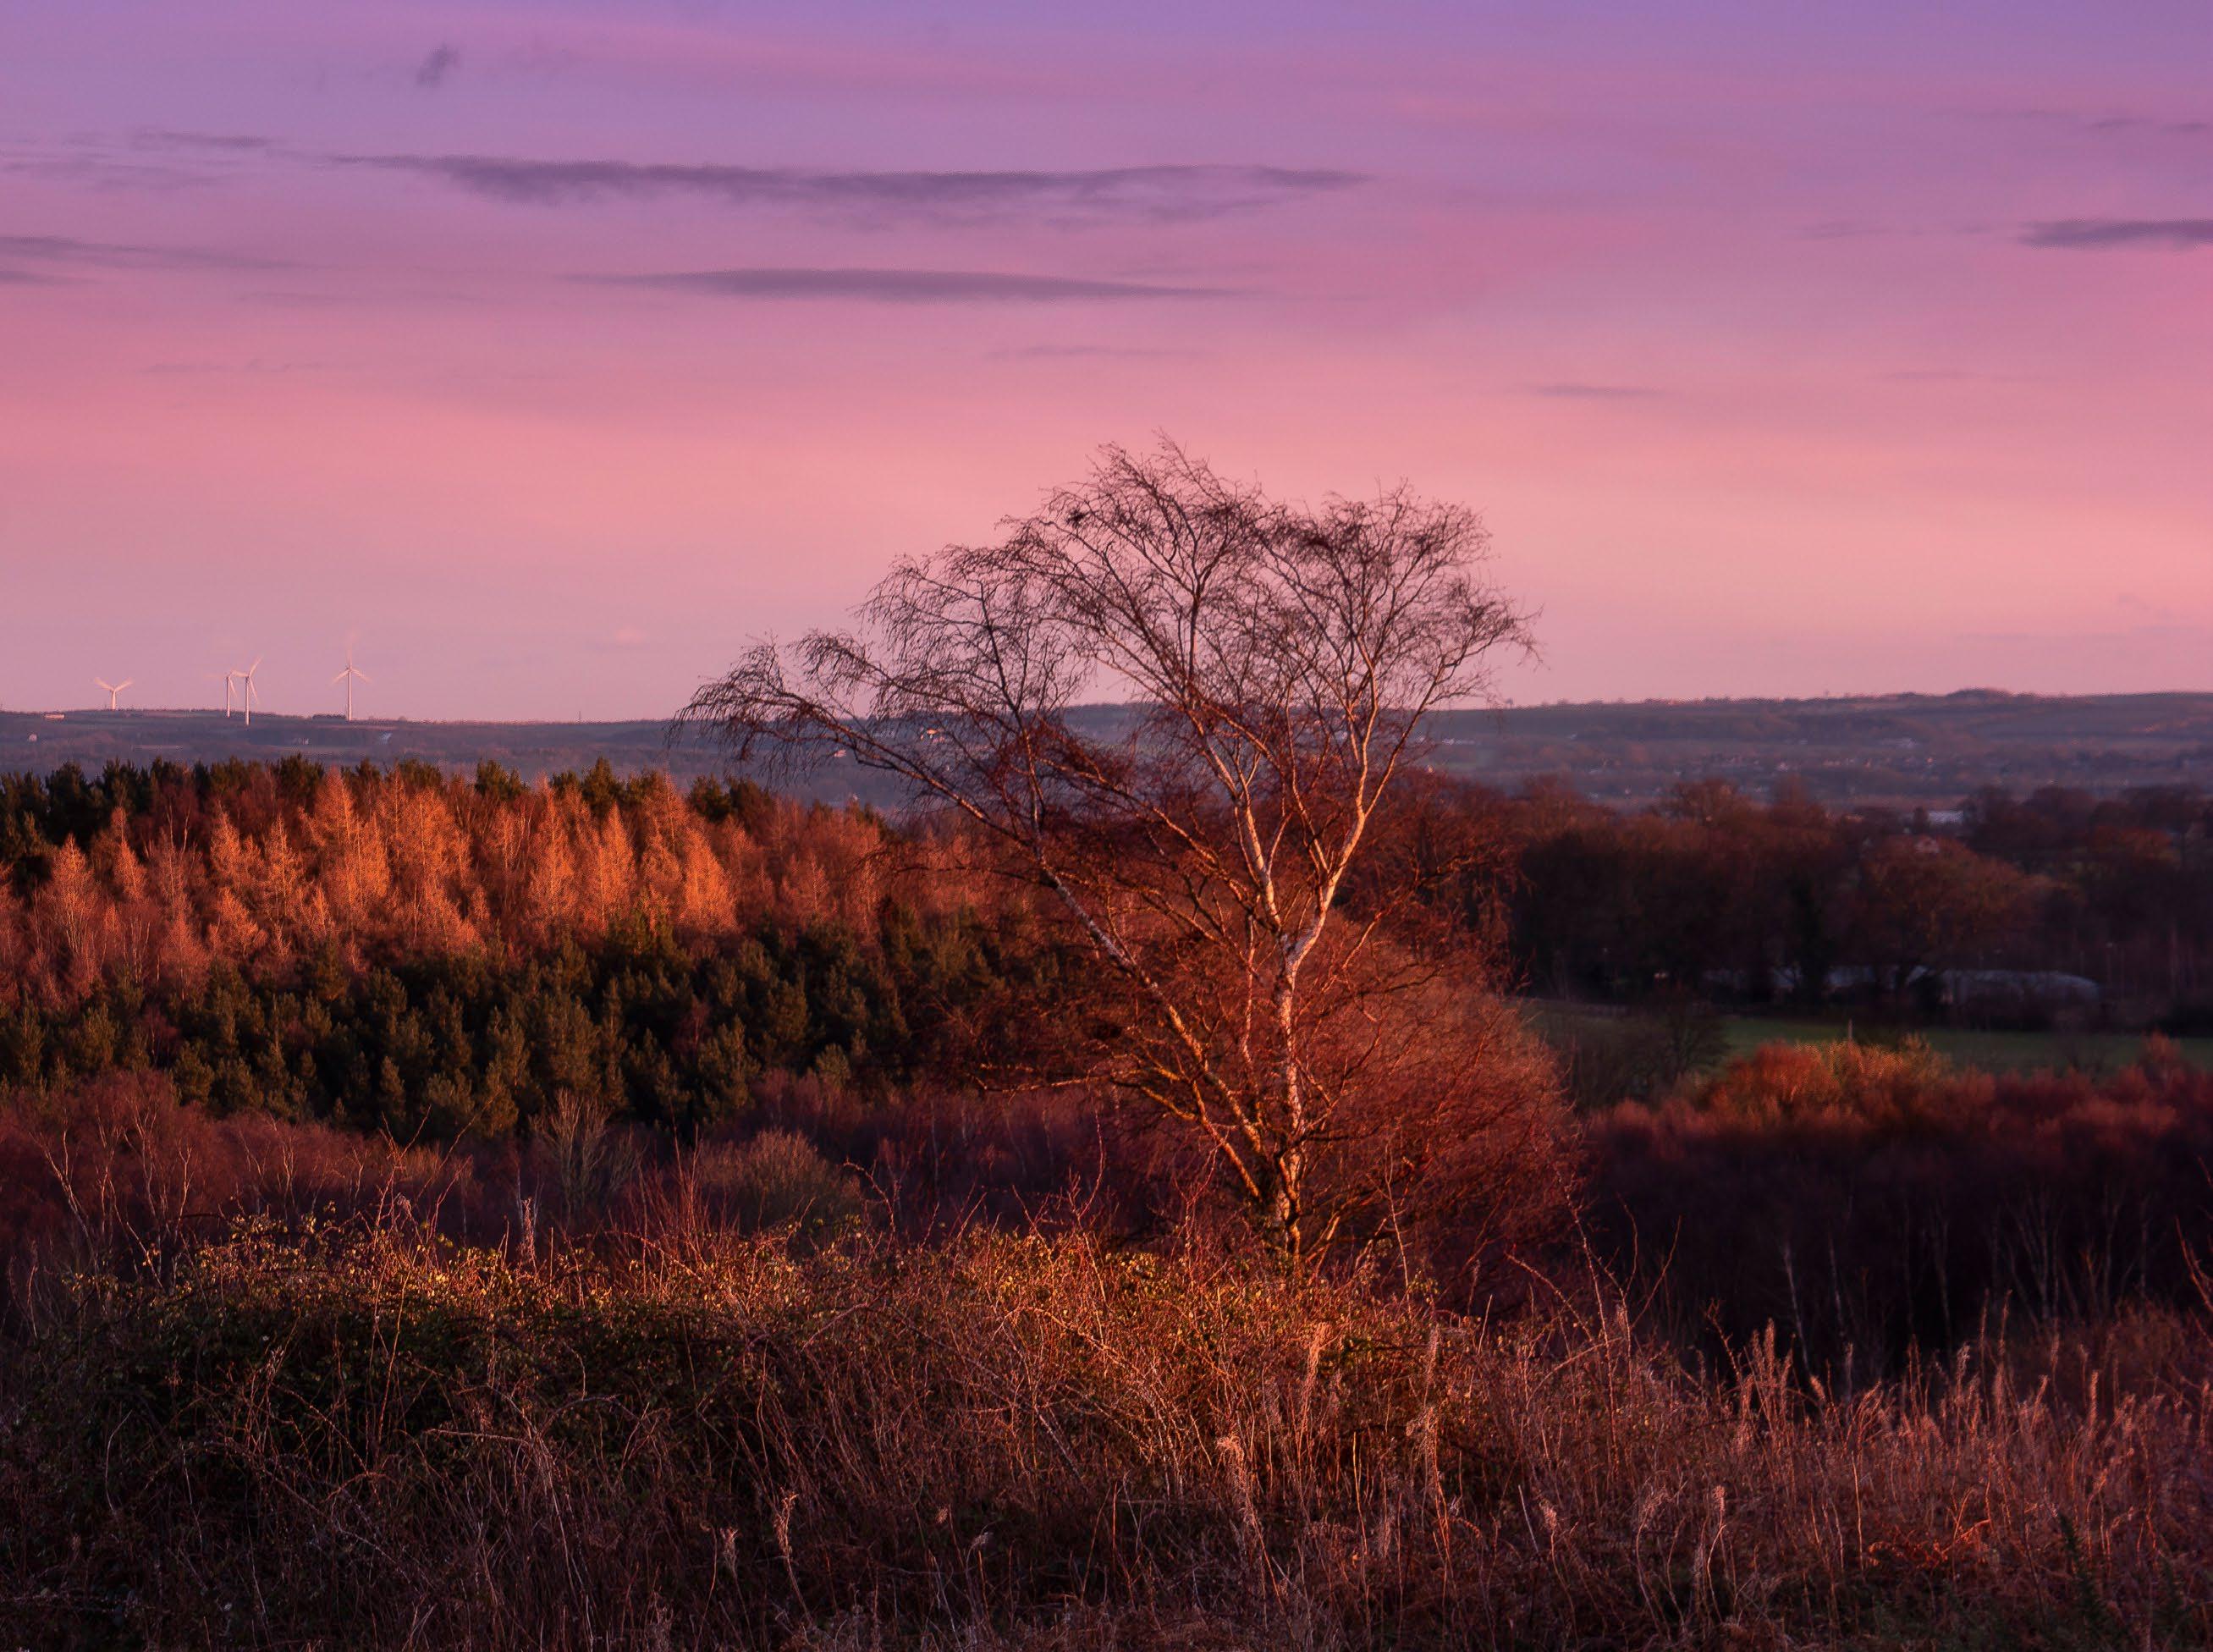
4
147 WORK WITH MULTIPLE FILTERS
Difficulty level: Intermediate Time taken: 1.5 hours
Create a black and white scenic shot with a vintage style
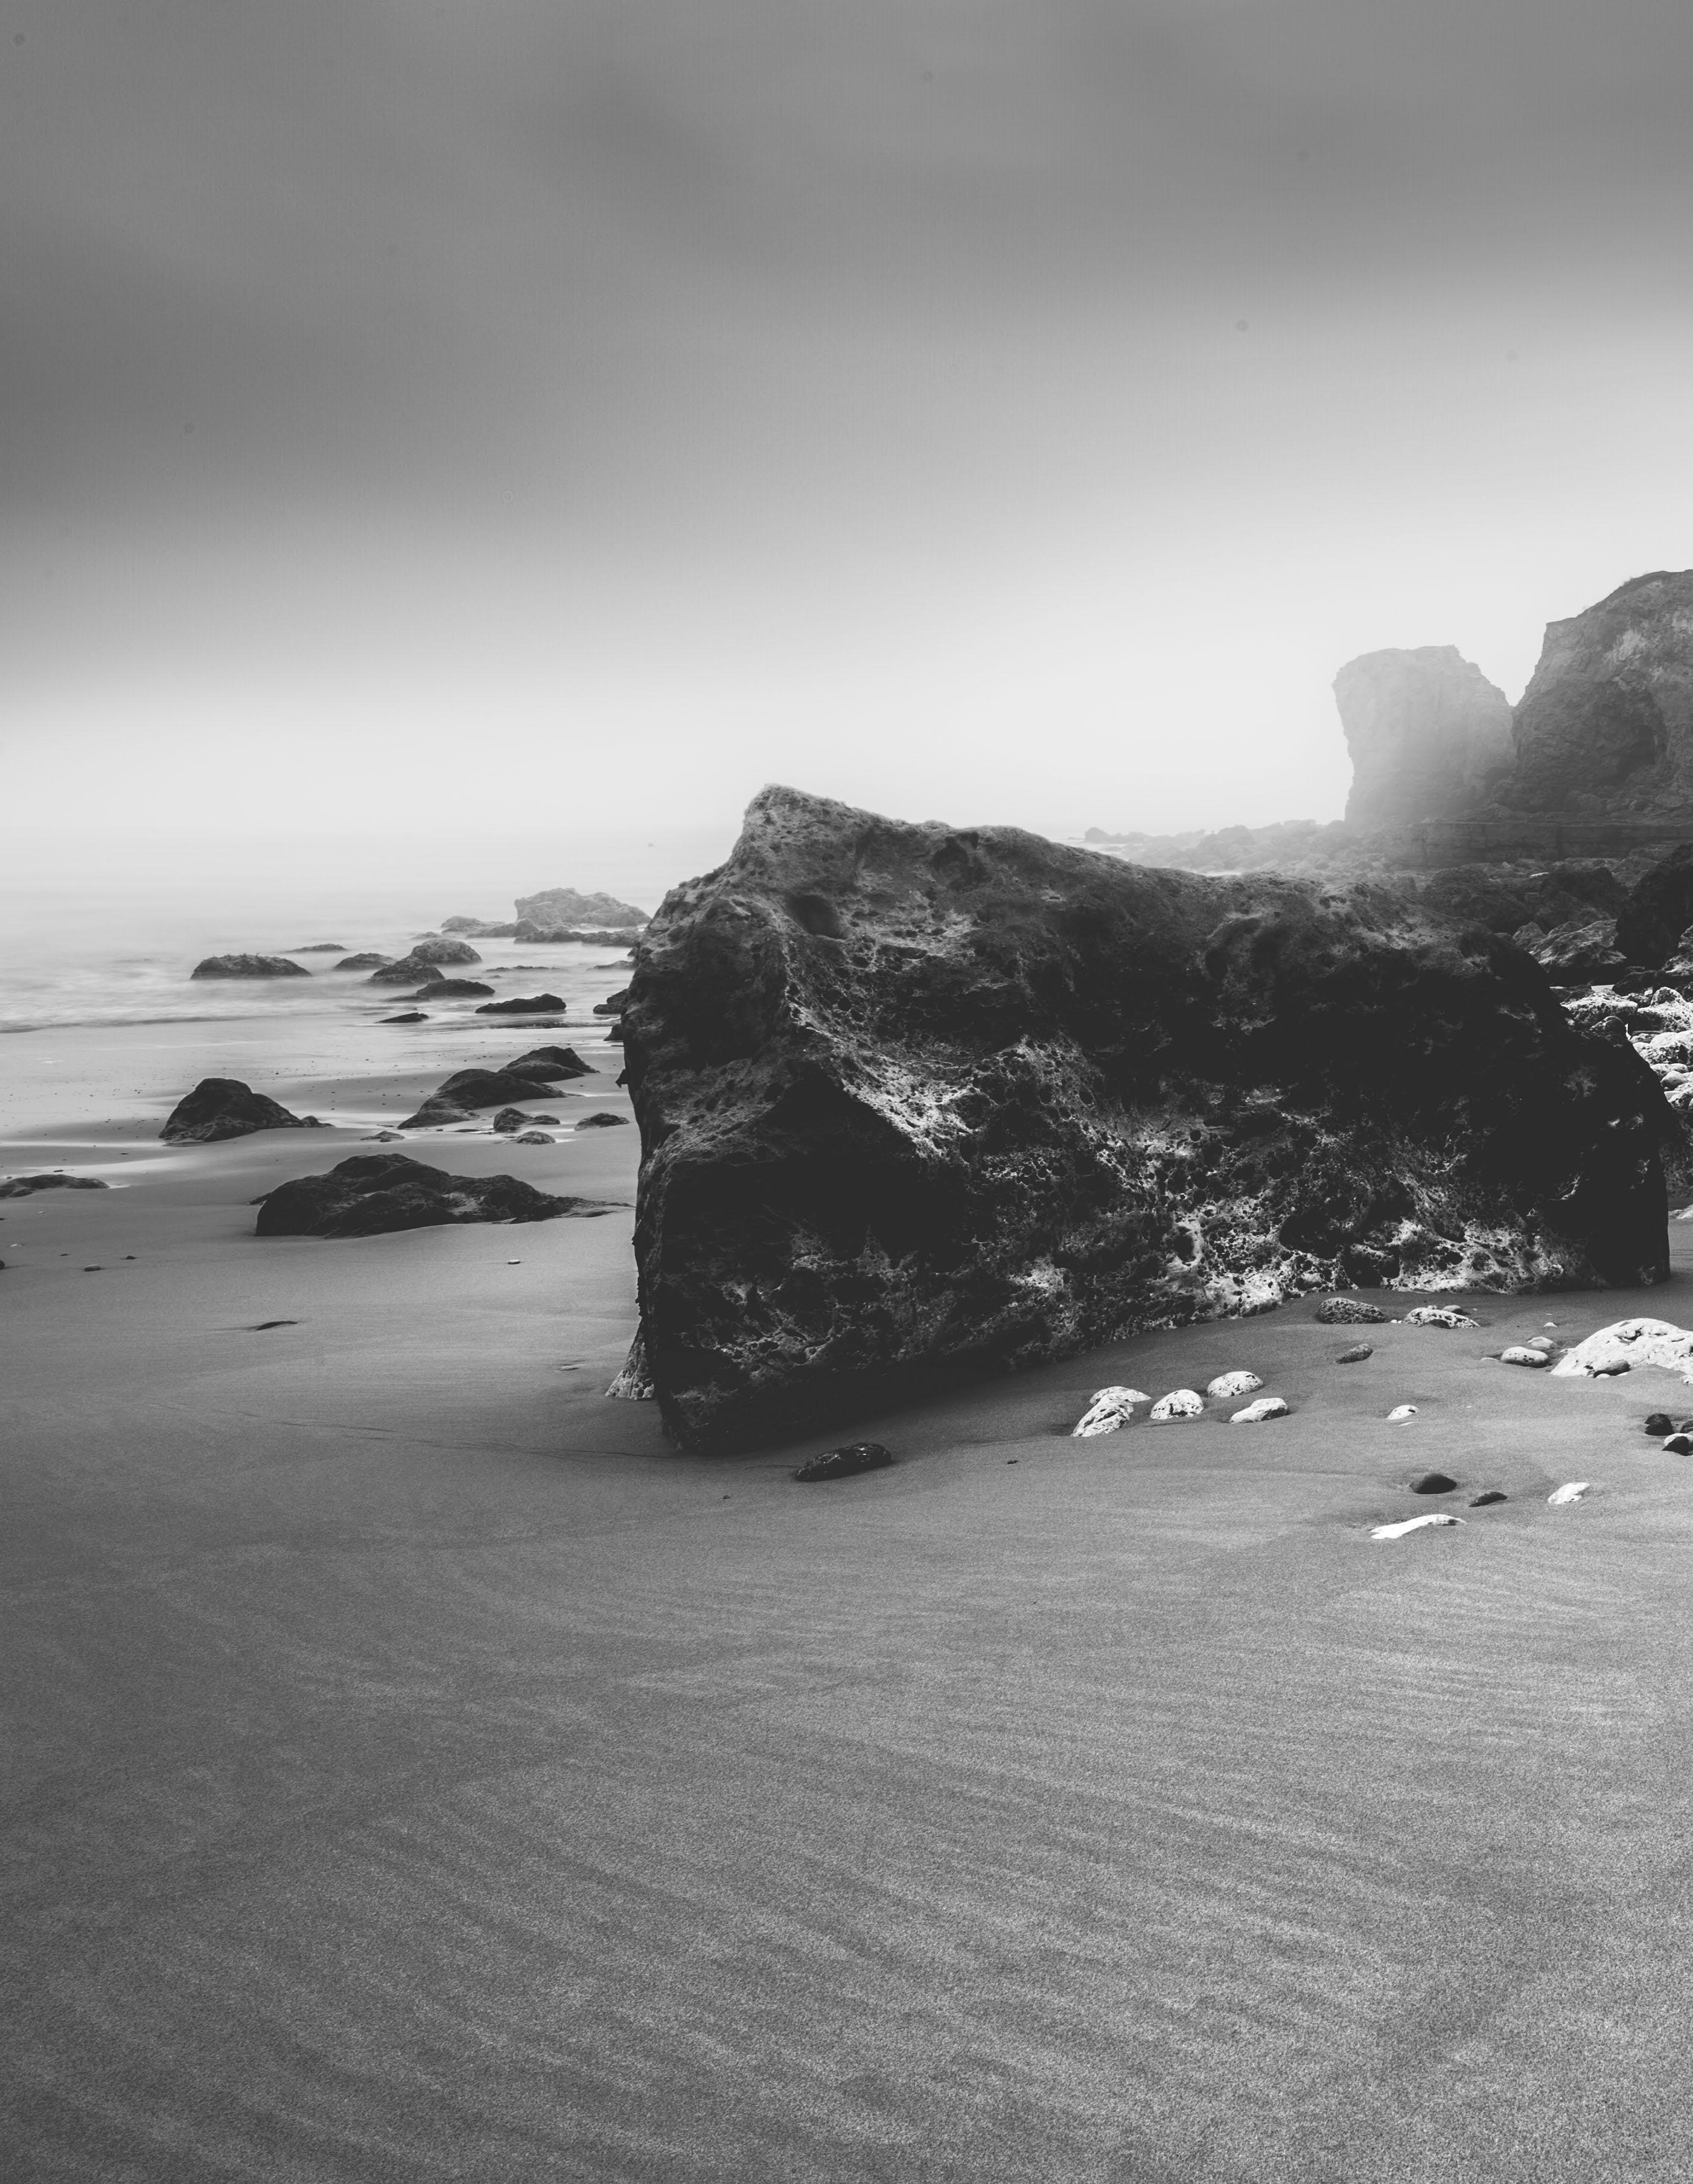
monochrome landscapes Fine-art
148 PROJECTS
Landscape photography is a genre that benefits greatly from monochrome treatment. Black and white landscapes conjure up images of the work of Ansel Adams and others experimenting with photography in earlier days of the medium.
While many landscape scenes are all about colour, there are occasions when monochrome is a better option for conveying the atmosphere of a location. Sometimes an absence of colour enables the viewer to appreciate the weather conditions that were present at the shoot, by calling on their other senses. A colourless image can encourage the audience to imagine
the texture of a rock, the cold air on their face, and the sound of water lapping at a shoreline. However, as we have explored elsewhere this issue, the best black and white images can only be achieved when the photographer commits to a monochrome way of thinking.
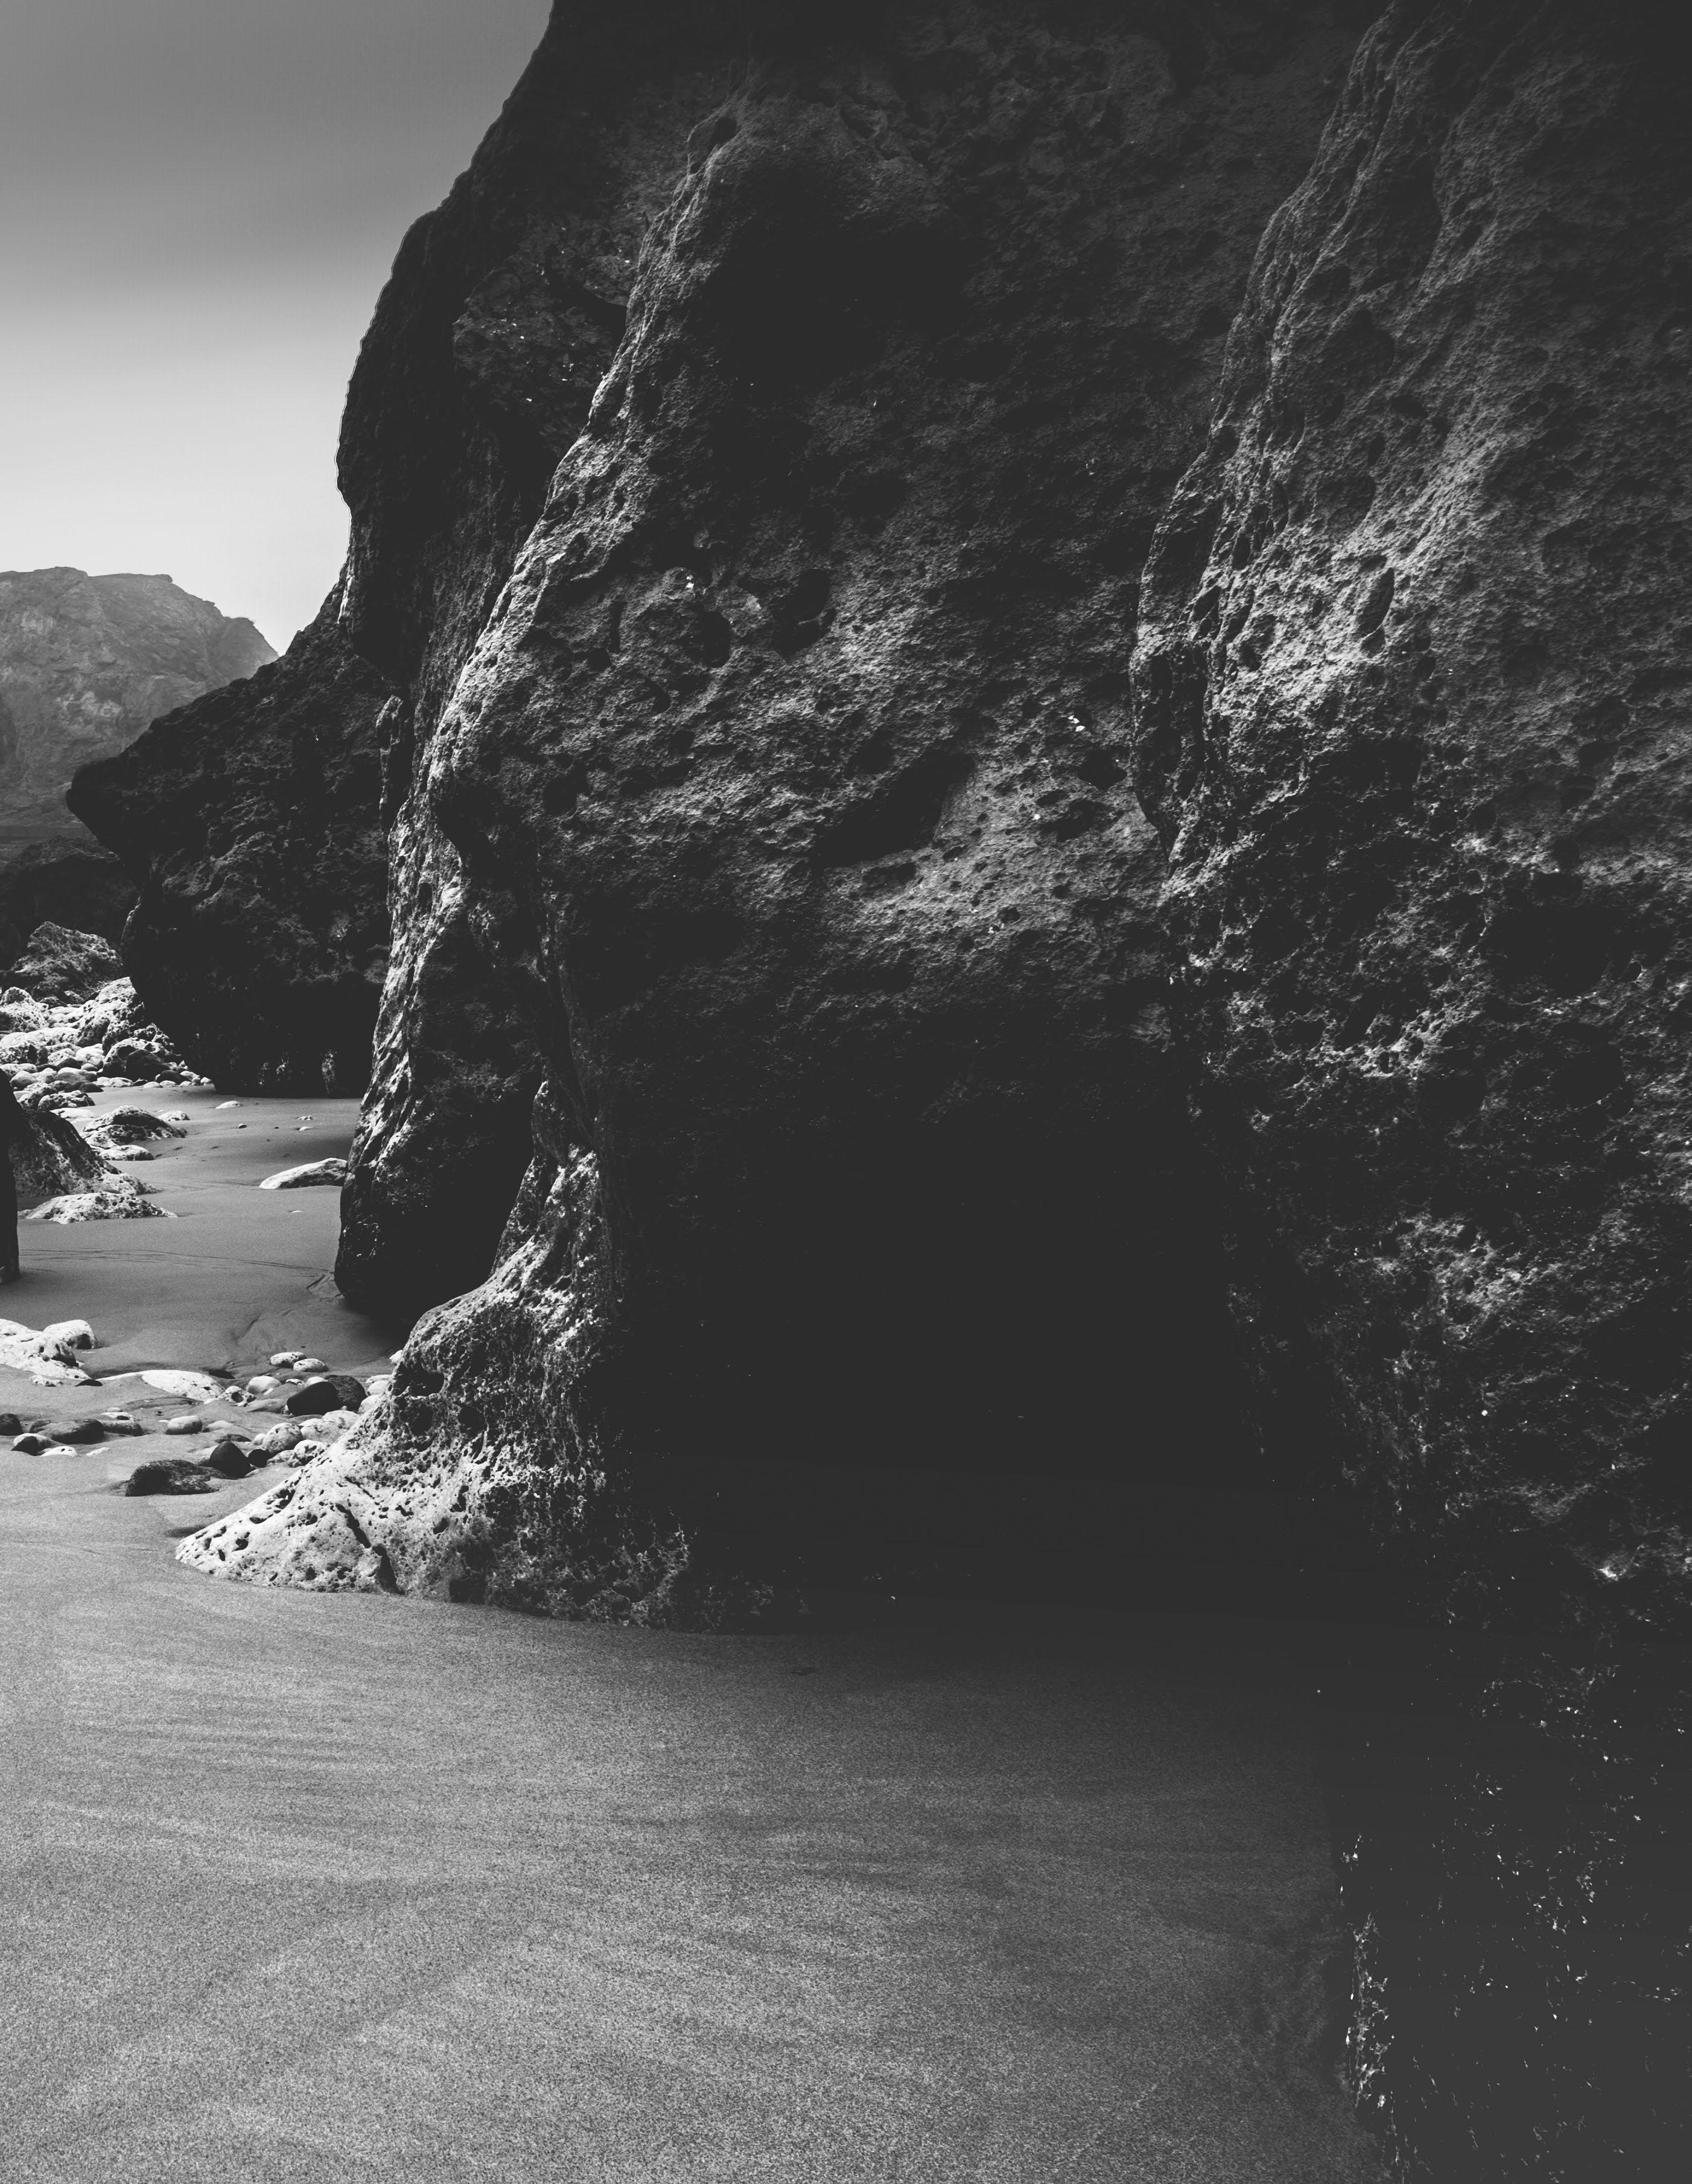
In this project we’ll explore how you should adjust your camera work to optimally distribute the tones when capturing a black and white image. Then we’ll consider a post-processing option that works to enhance the timeless feel of a landscape scene and helps to capture the natural atmosphere that the location has to offer. Let’s get going!
Timeless tonality
By capturing an image with black and white processing in mind, the optimal shadow density and highlight intensity can be captured in the field, making the conversion more successful
All images © Peter Fenech
What you’ll need
Camera with PASM control
Rugged tripod
ND filter
Software with curves function
149 FINE-ART MONO LANDSCAPES
Shooting steps
1 Explore the scene For this type of image you want a clean composition, so walk around the location to explore multiple angles. Alter the camera height and pitch to experiment with perspectives, and look for a clear fore, middle and background, with defined shapes.
2 Alter focal length Fine-tune the composition by altering either the focal length setting or the camerasubject distance. Look to arrange the elements to create a strong sense of direction, or to divide the frame into identifiable zones – an approach that suits contrasty monochrome images.
3 Slow things down For a subtle introduction of movement, add a neutral density filter to lengthen the exposure. Here a two-to-eight stop variable ND was attached to the front of the lens to precisely control the shutter speed, adding motion while retaining detail.
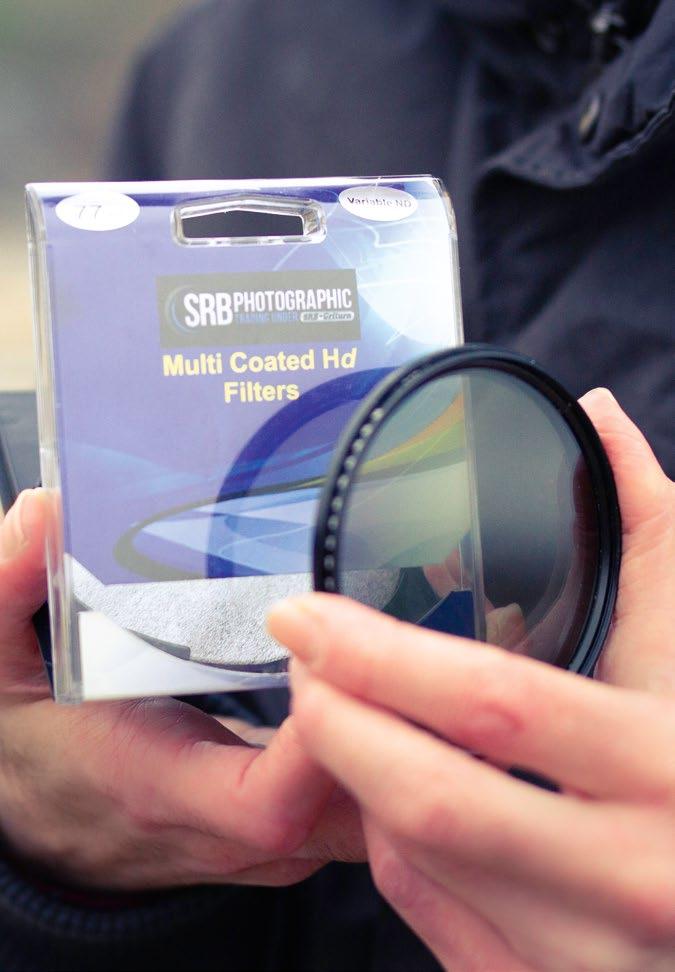
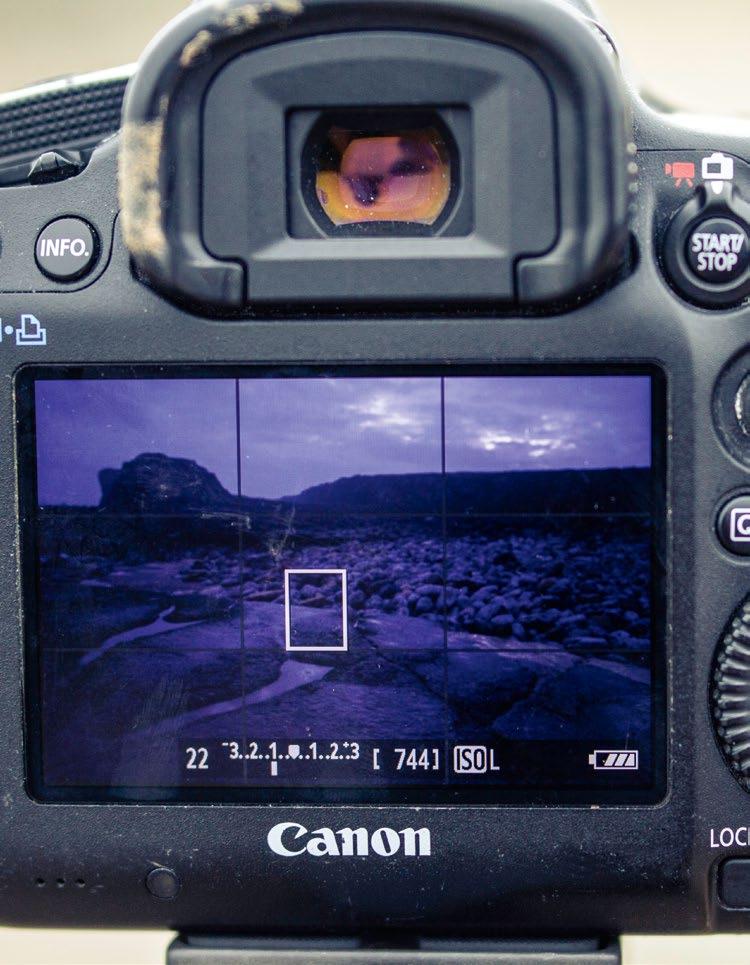
4 Control using aperture Adjust the shutter speed by setting the aperture in Aperture Priority mode. This enables you to alter the style of your image quickly, by adjusting two parameters simultaneously –motion blur and depth of field. This helps to find the balance between sharpness depth and water motion in the scene.

5
Use lowest ISO Early films were not very sensitive, so to emulate a similar shooting process set the lowest ISO possible. This helps to slow the exposure and create a fine grain, guiding the composition process. Take care of highlight clipping at extended low ISO settings, however.
Vary exposure For this image I want bright highlights to glow against dense shadows, for a more potent filmic quality. To achieve this, push the exposure as high as possible without blowing highlight detail – it is better to darken shadows than to brighten them. Metering in this shot has been done from the ocean surface.
6
1 3 4 5 6 2 150 PROJECTS
WIDE-ANGLE ZOOM
A zoom lens offers more framing options. A 15-30mm was used here to emphasise the foreground.
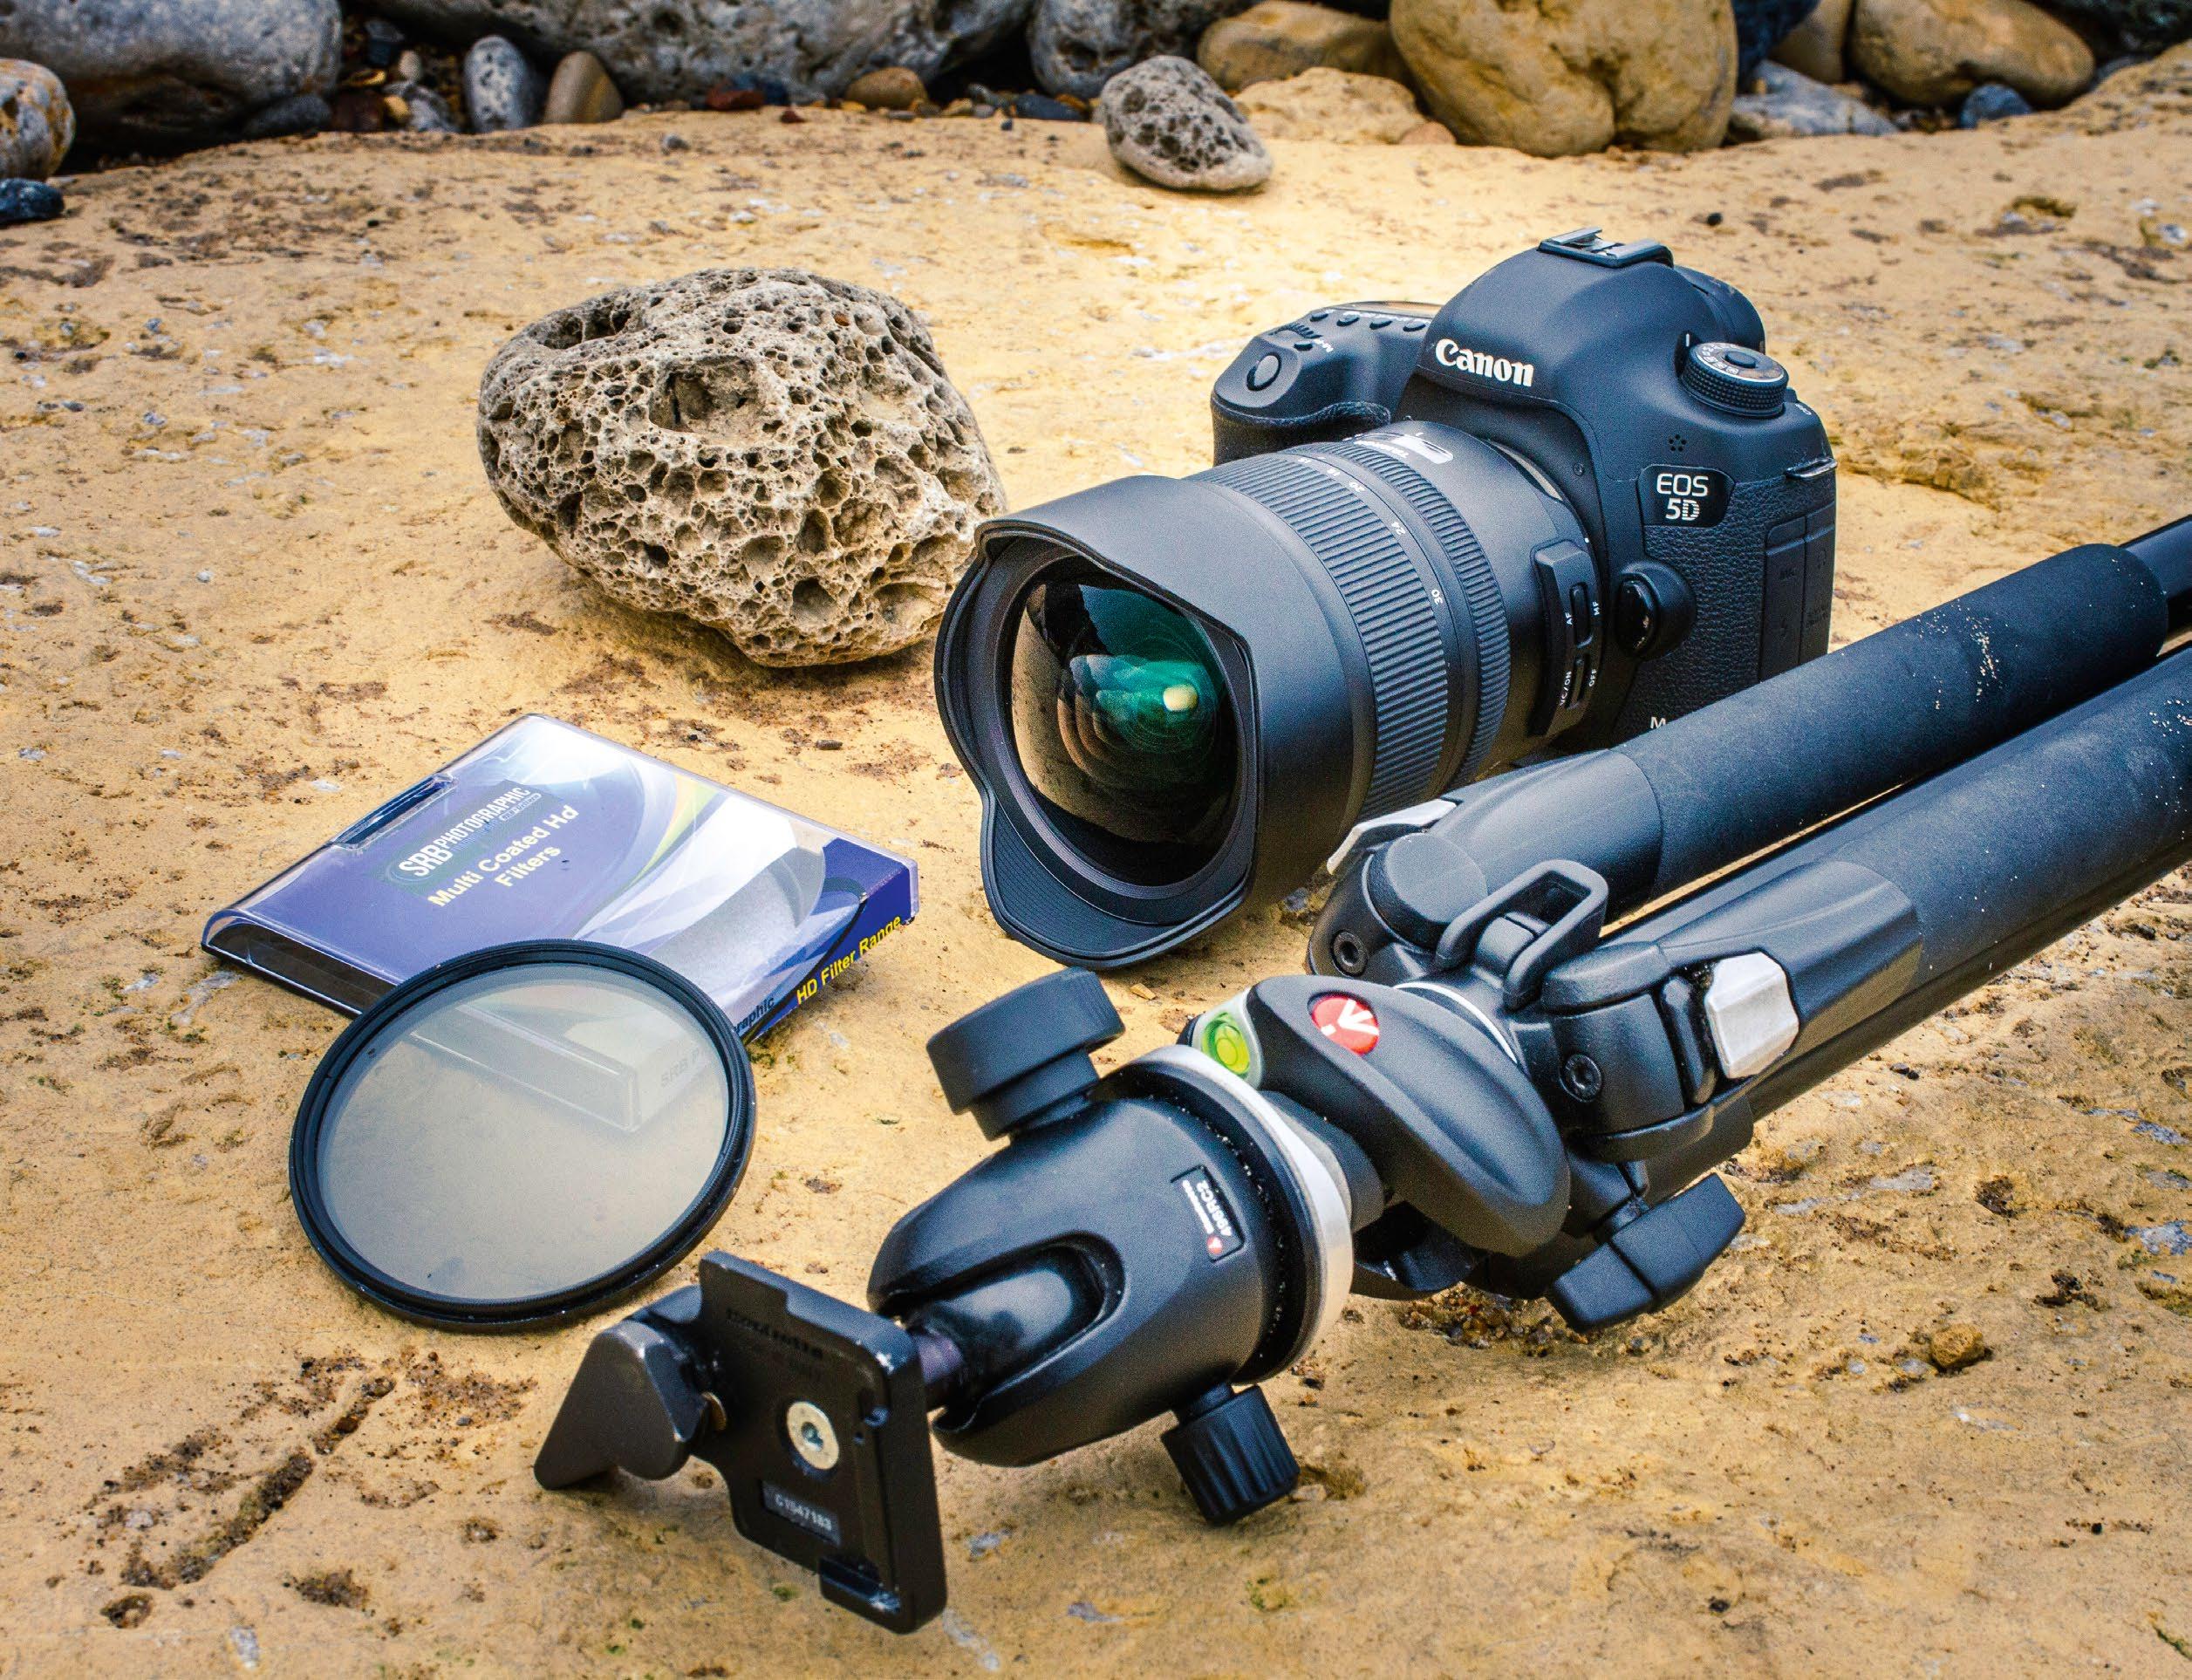
VARIABLE ND
Cut light by custom amounts to control the shutter speed as required for the scene in front of you.
The setup
Cropping options
Add to the impact of your shot by changing the aspect ratio
An often-overlooked image parameter is aspect ratio. Beyond simply being the shape of the sensor in the camera, the format of an image is an important choice for the photographer, and it can greatly impact the look and feel of a photo. While most sensors today have a native 3:2 aspect, for black and white images it can sometimes be more effective to crop to an extreme shape. A panoramic (extreme wide) frame can help the viewer focus on the horizon in a landscape and the horizontal layers radiating from it, while a square aspect can offer a minimalist view.
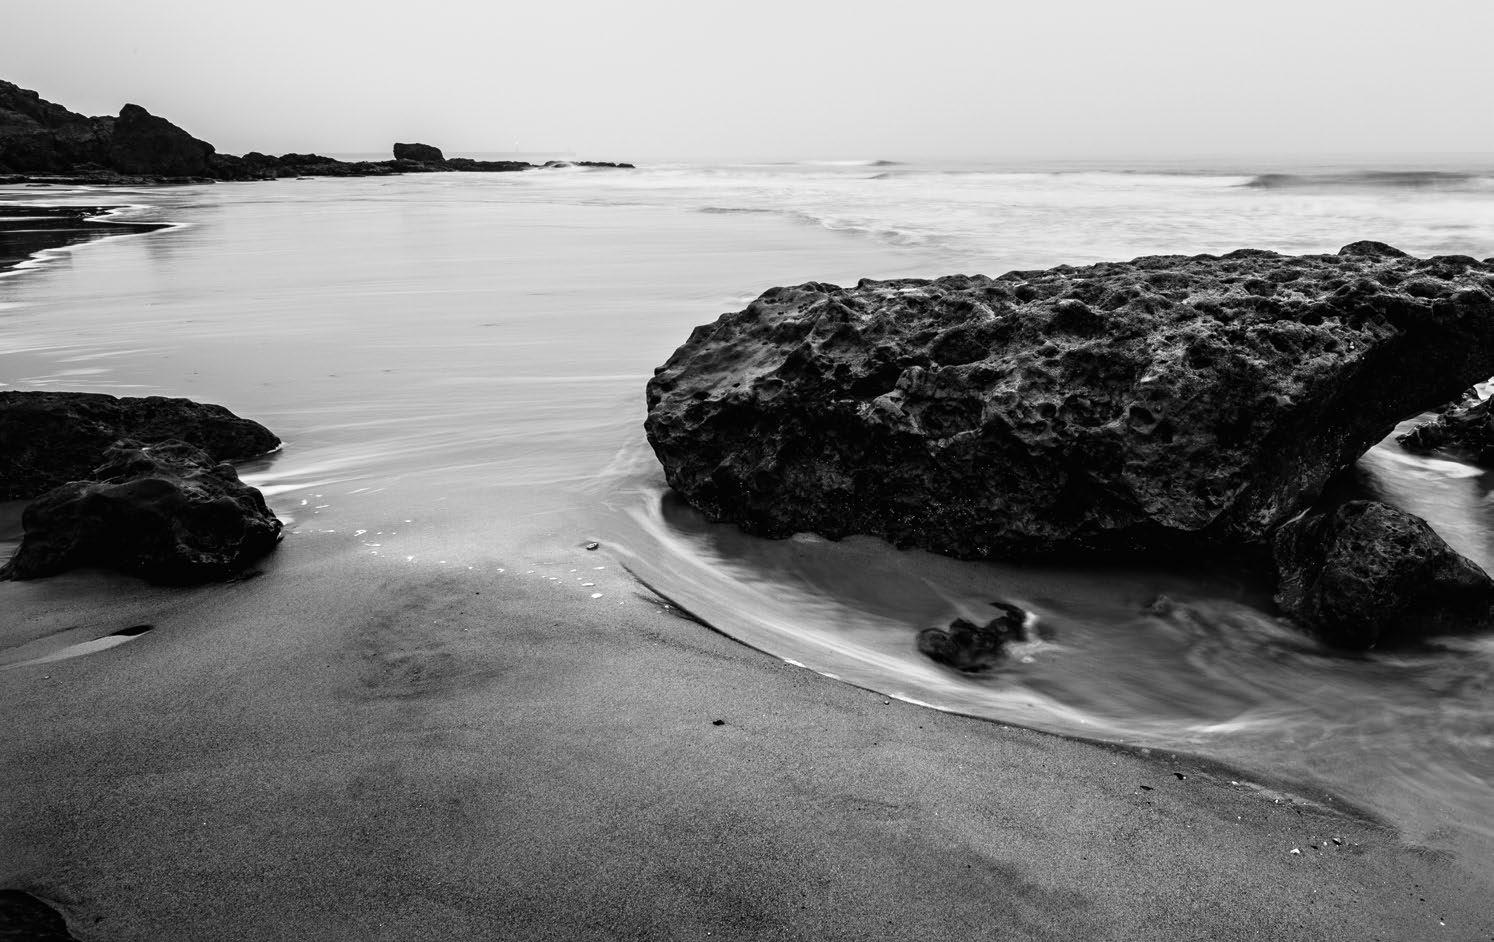
FULL-FRAME CAMERA
While not essential, a fullframe sensor offers better depth-of-field control, ideal for moments when shallower focus is desirable.
PRO TRIPOD AND BALL HEAD
A sturdy tripod with low-level capabilities in a range of environments is an advantage, while the ball head enables more dynamic framing.
151 FINE-ART MONO LANDSCAPES
Edit the shot
1 Standard adjustments Start by correcting any tonal imbalances and setting the black and white points. This will ensure a good amount of contrast before moving on to the monochrome conversion.
2
Mono conversion If working in Lightroom or Camera Raw, toggle the Black and White button to convert the image to monochrome. By default the image will likely be a little flat, so finalise the global tonal adjustments to ensure good overall contrast.
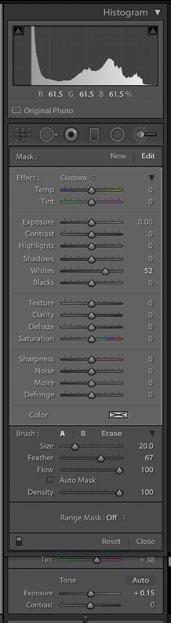

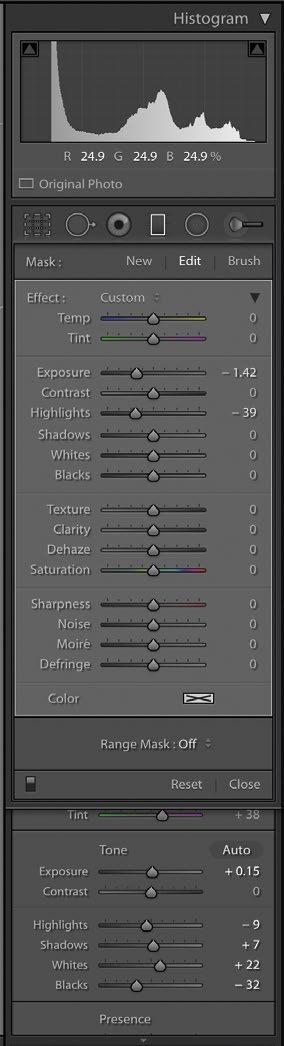
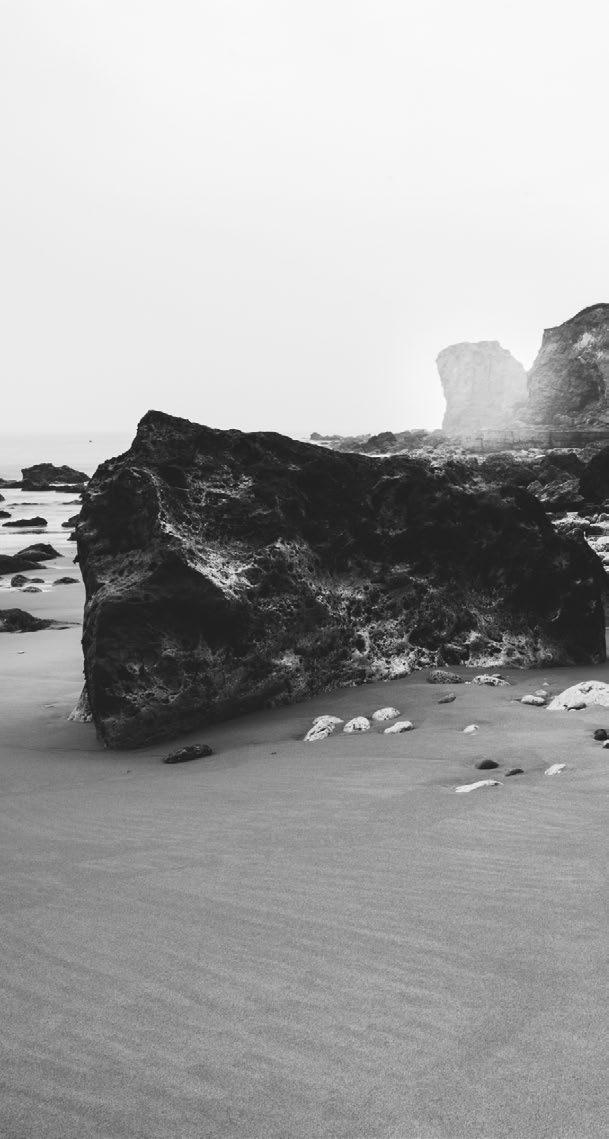
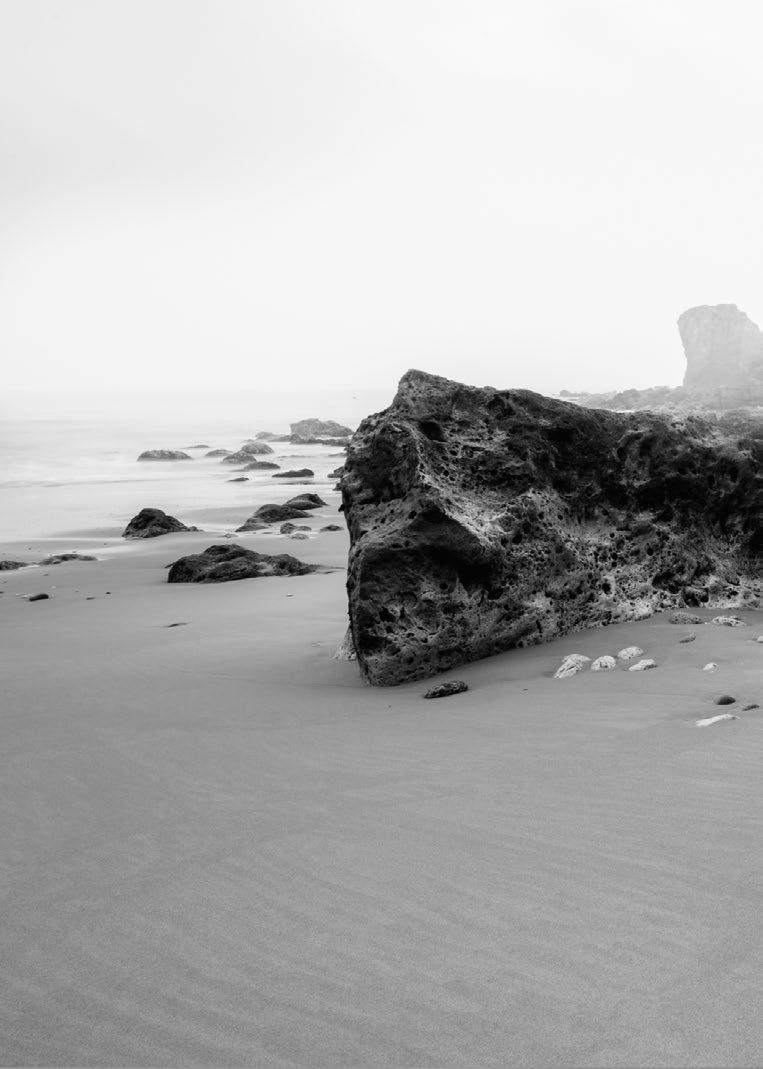
3
Curves Let’s introduce a faded look to enhance the misty atmosphere, while adding overall contrast. Lift the bottom of the curve up, while spacing the lower and upper midtones. Add a highlight ‘dip’ to hold sky detail.
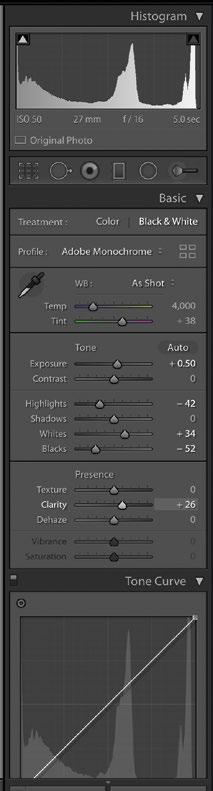
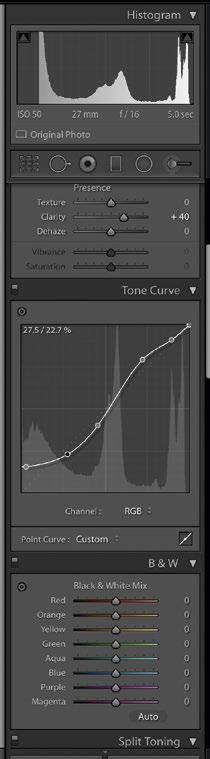
4 Darken the sky A fog bank is partially obscuring the horizon, but above this there is some detail in the sky. To add back some structure here, the Gradient Filter tool (M) has been used to drag in a darker tone at the top of the composition and add weight.
5 Dodge and burn In Photoshop, use the Dodge and Burn tools to brighten areas of upper midtones, and darken some lower midtones. We’ve used the Adjustment brush (K) here to selectively add back some negative blacks and positive whites, to create some local contrast and shape the rock and sand.
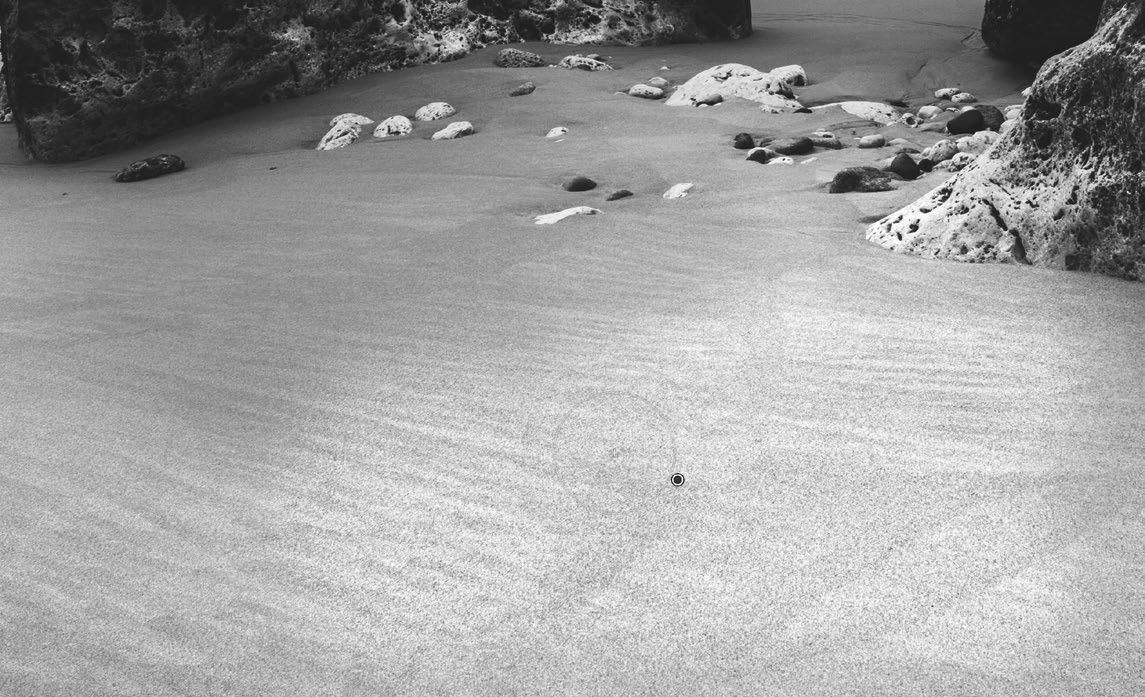
6
Extract texture In a RAW editor, use the selective adjustment tools to introduce some clarity and texture. Here the Lightroom Adjustment brush proved useful for bringing out more of the beach patterns, with Clarity set to +33 and Texture at +24 on a soft brush.
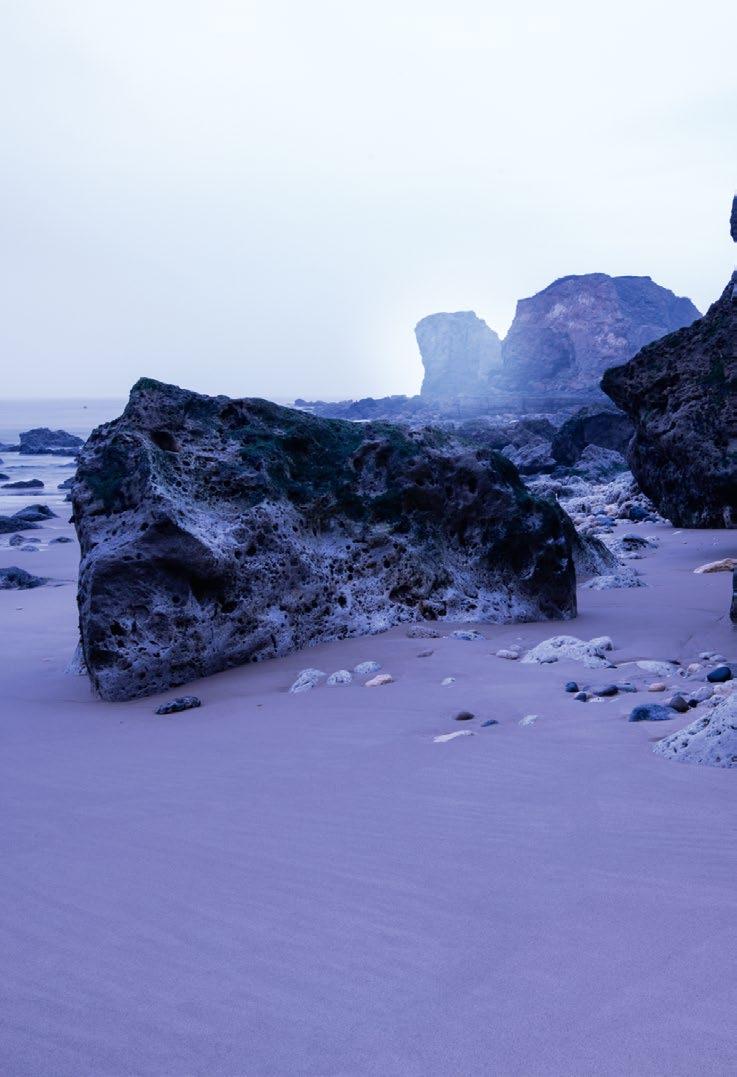
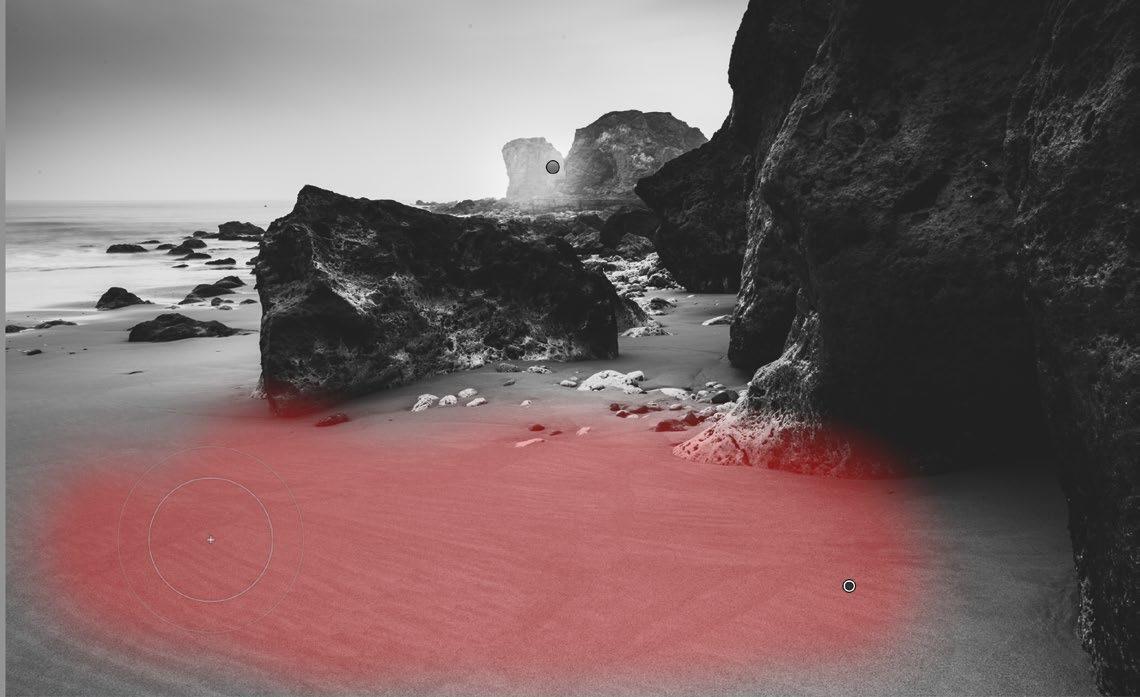
The final shot is more like the atmosphere of the real scene. By shooting for mono conversion, a timeless style is achieved without any special filters or extreme manipulation
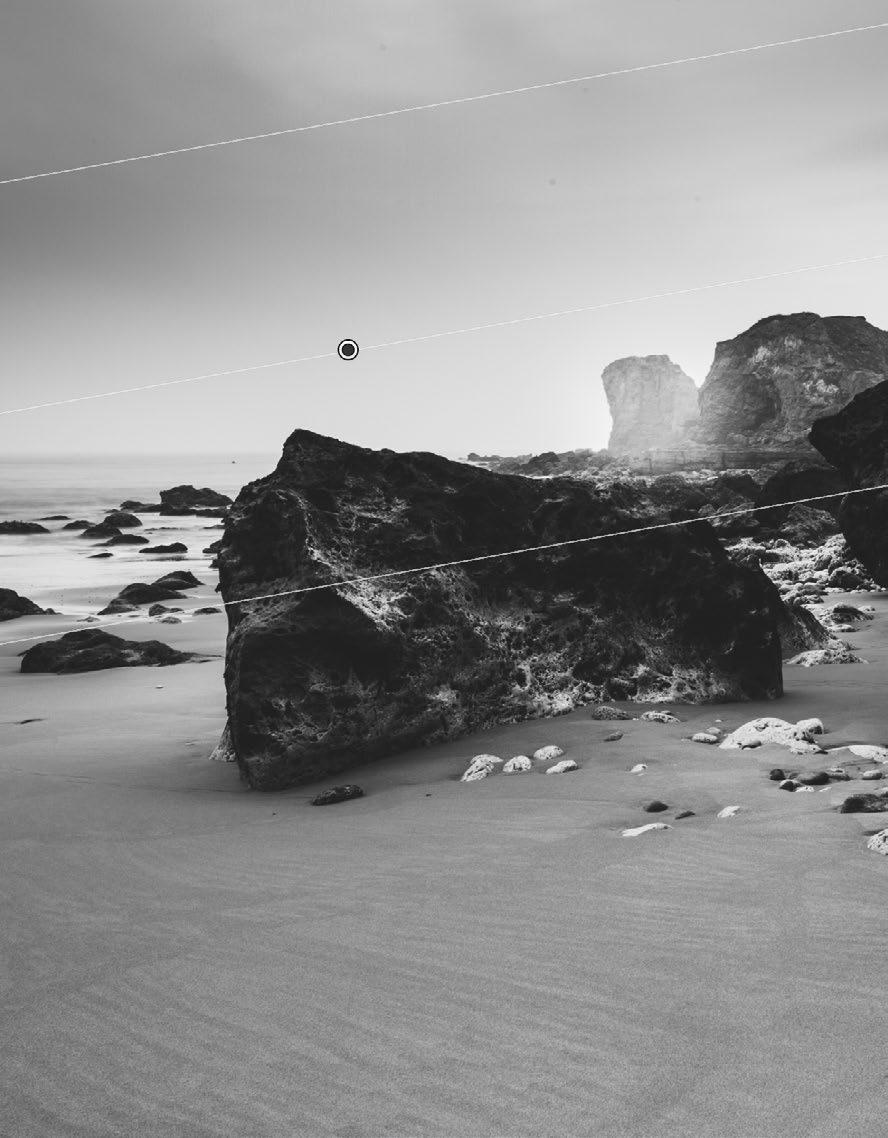 Right True atmosphere
1 3 5 2 4 6 152 PROJECTS
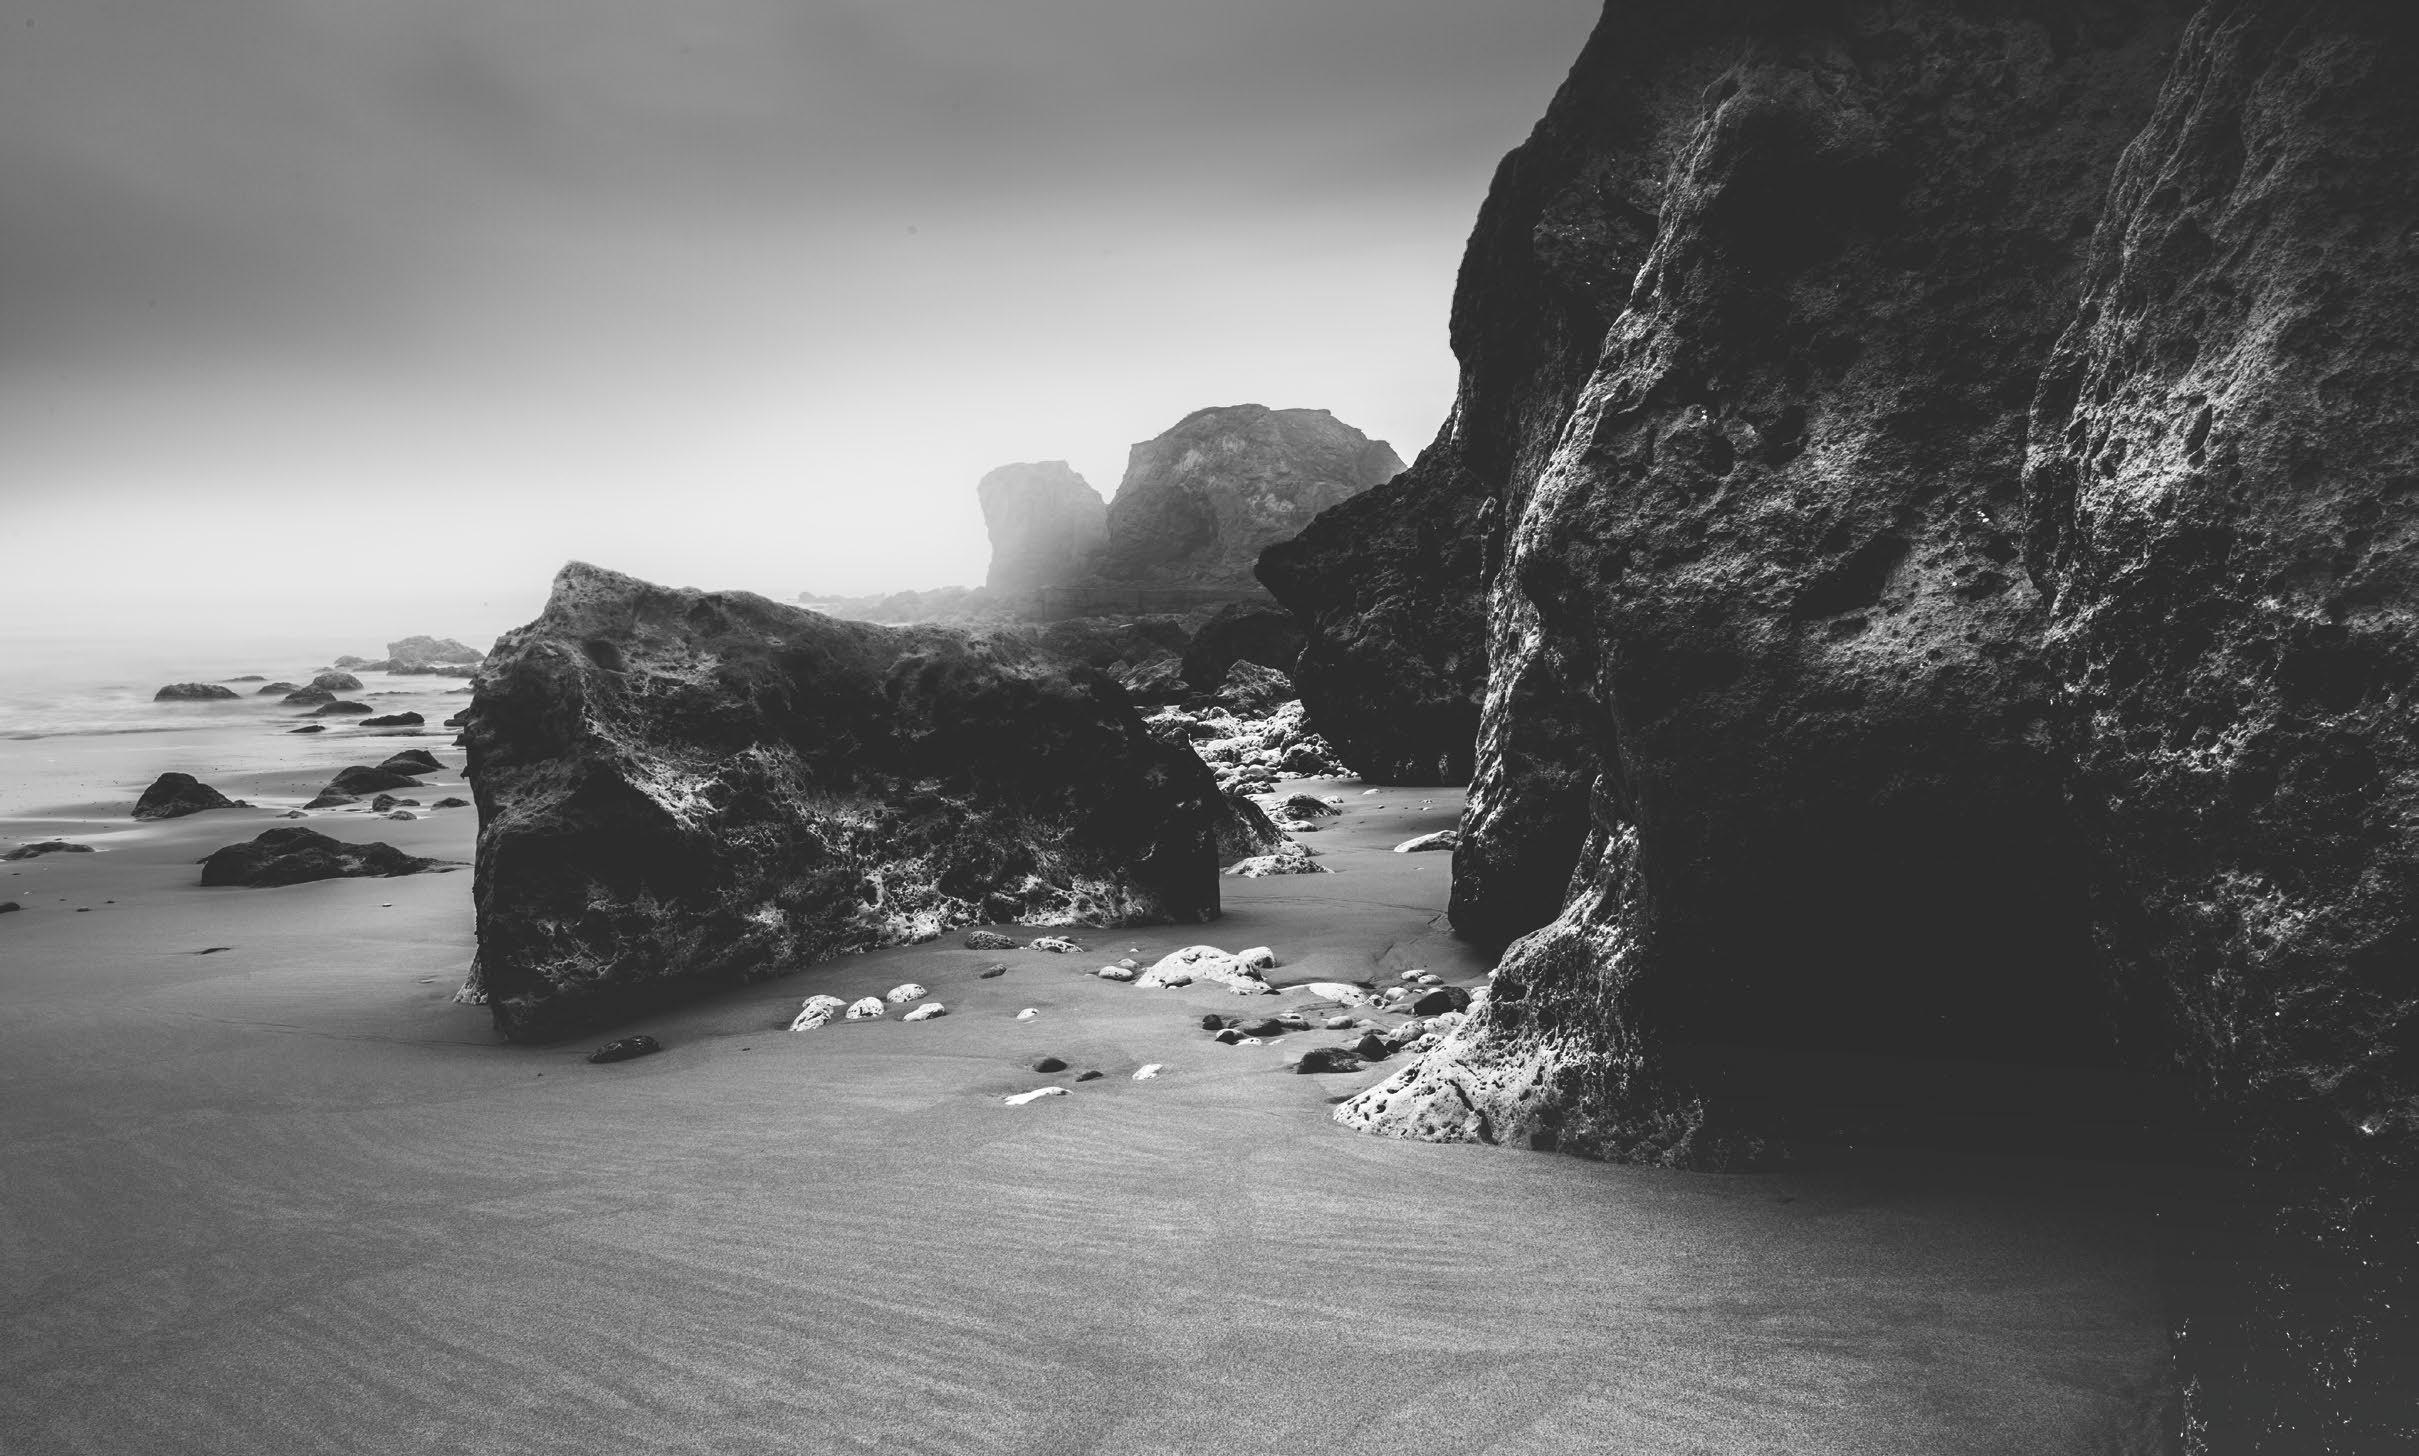
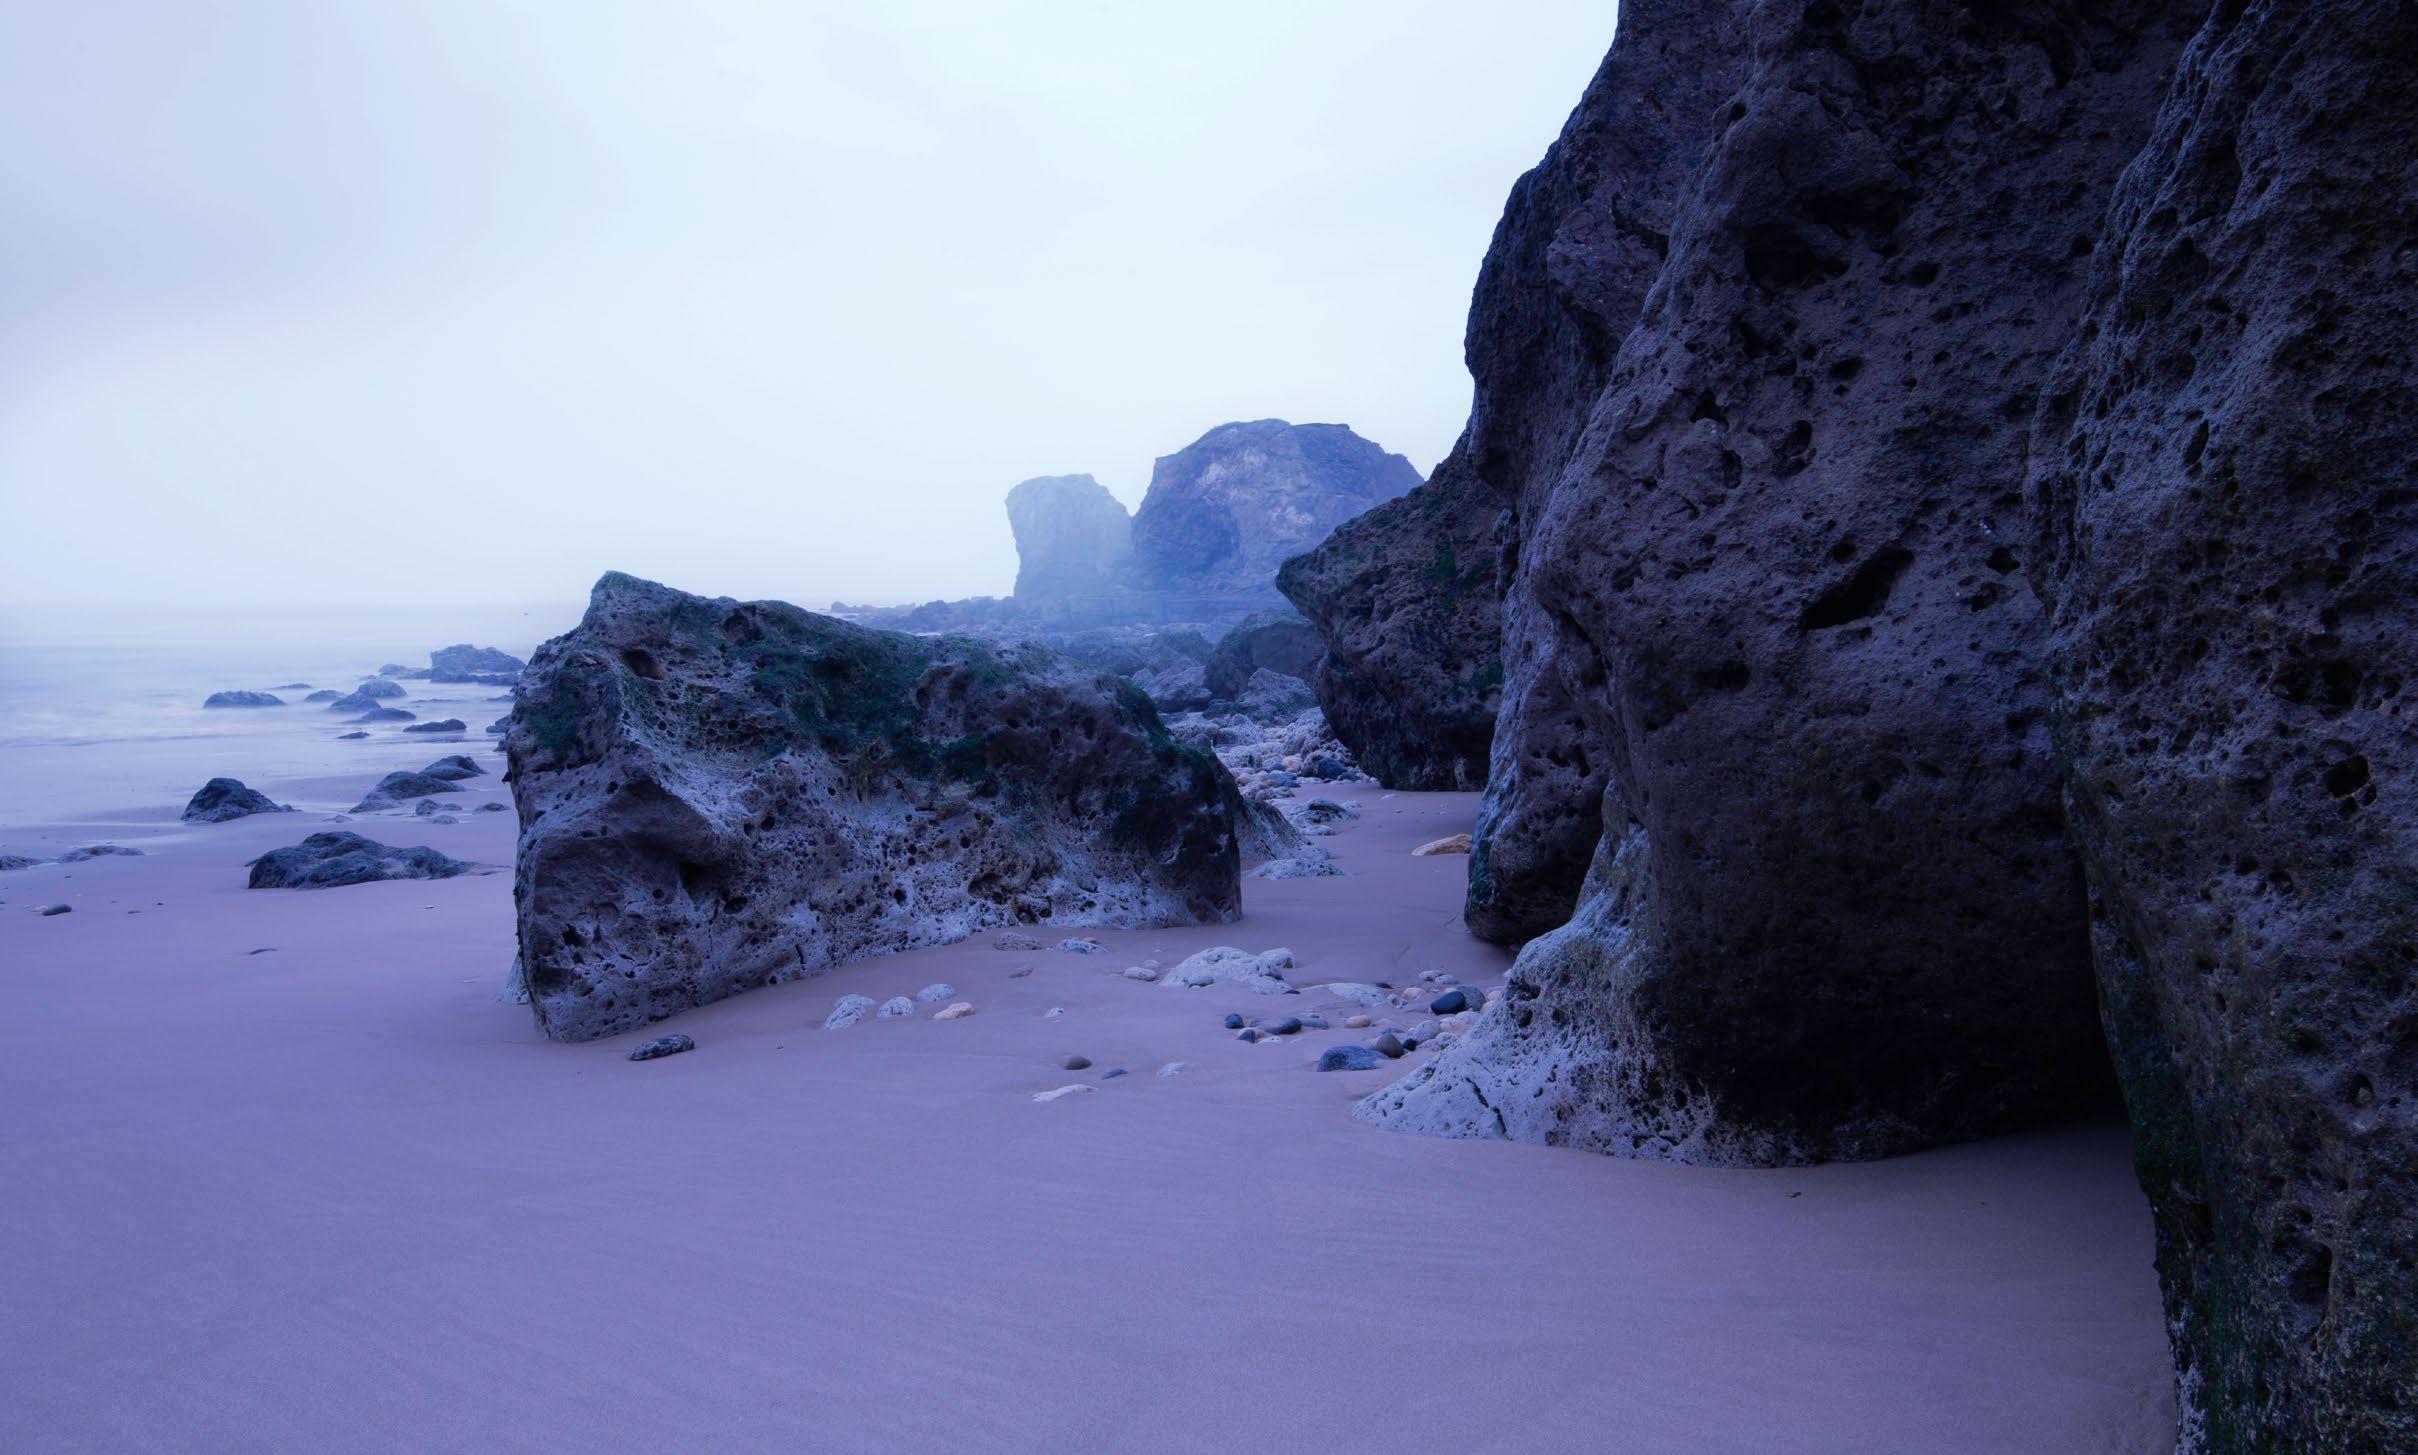
BEFORE
153
AFTER
FINE-ART MONO LANDSCAPES
Shoot shallow landscapes
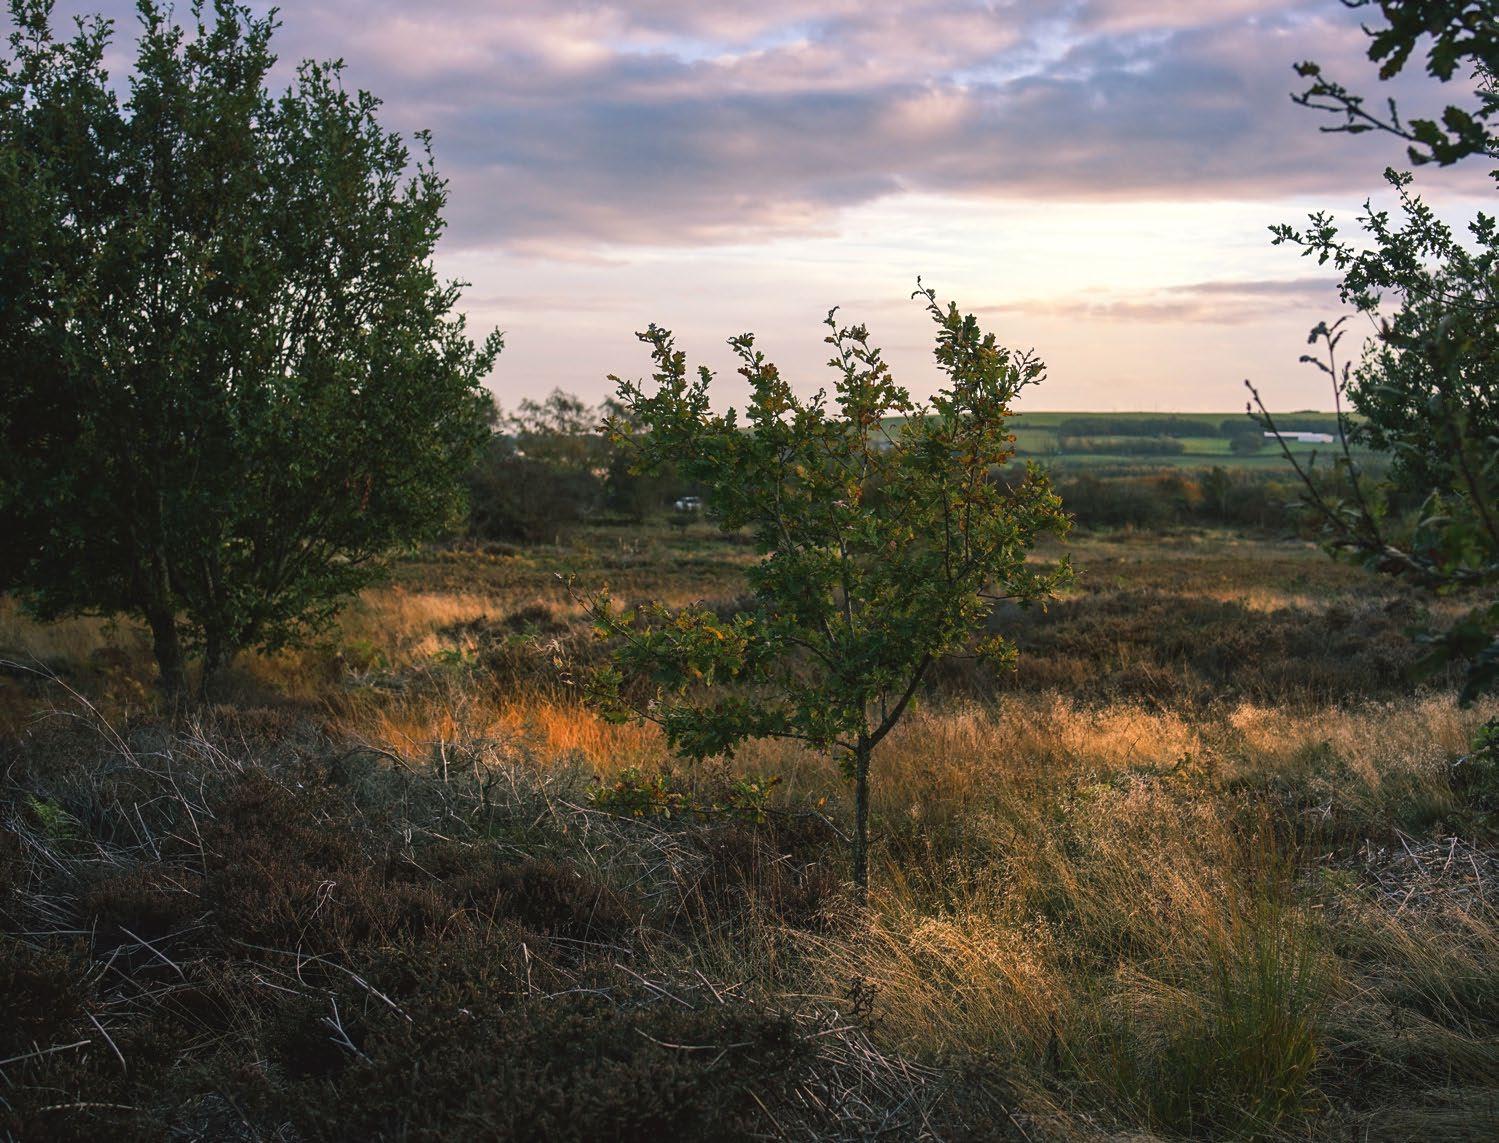

One of the first things we learn in photography is that, when shooting a landscape image, it is vital that sharpness extends from the very front of the scene to the furthest background detail. But while in most cases this will produce a reliably high-quality image, it is not an unbreakable rule. The need for a small aperture is to ensure that there is an equal degree of sharpness across the whole frame – to guarantee that you don’t overlook a soft background by accident. If you don’t want every zone to be equally detailed, however, don’t be scared to experiment.
Wide-aperture landscapes can be very visually appealing. They have a painterly appearance that can be missing when every detail is perfectly resolved — and, when using a very fast lens, can actually start to adopt a miniature look. This is far from a gimmicky effect. When done correctly, a shallow depth-offield scenic adopts an organic style, closer to how our own eyes interpret the location.
The biggest danger when using this technique is a misunderstanding of the intent – if
you don’t choose the correct settings, then the effect can quickly start to look like an unintentional mishap.
Let’s take a closer look at how to master landscapes with a shallow depth of field for a new, creative approach to scenics.
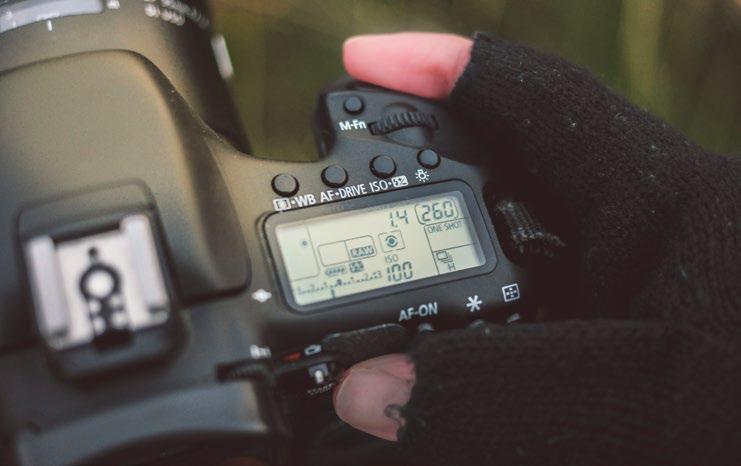
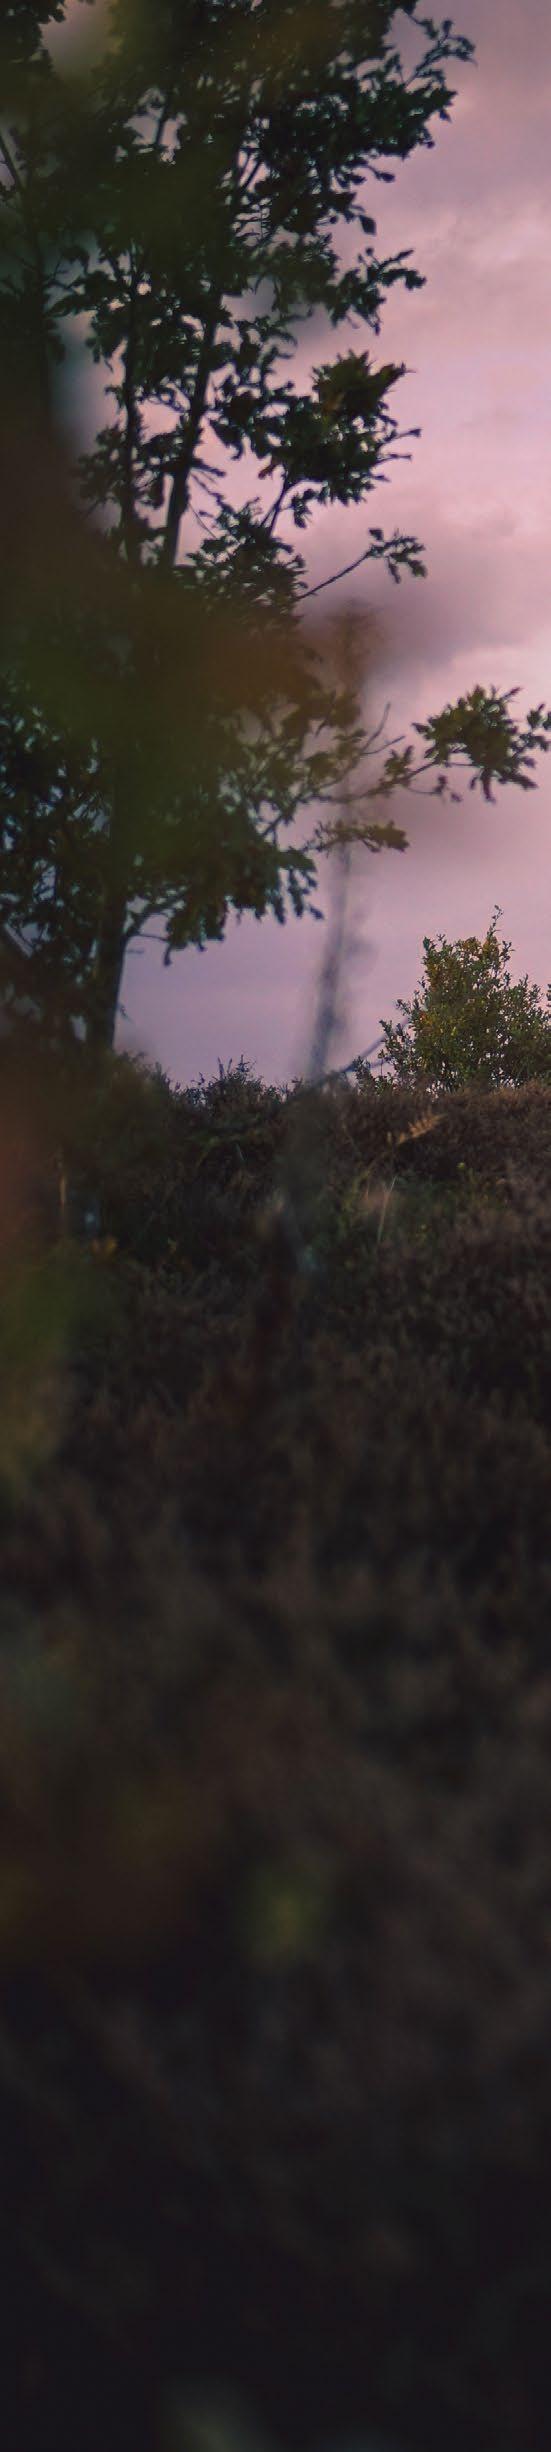
Inset
Slightly soft Here the f-stop chosen (f/3.2) was not sufficient to render the whole scene sharp, and was also not wide enough to emphasize an artistic DOF
Right Shallow focus
Reminiscent of largeformat images, shallow DOF can focus attention and soften distracting high-frequency detail. The pastel colours and soft light become more prominent here
1 Set camera height This plays a big role in emphasising an intentional shallow look. Arrange the elements of the scene to show depth, and the focus gradient in front of and behind the focused point, softening the foreground and background.
2 Shoot wide open Make the shallow focus strong enough so that it becomes clear that the reduced depth of field is an intentional creative effect. The easiest way to guarantee this is to use the maximum aperture – in our case f/1.4.
3 Vary focus distance Experiment with the fall-off in focus in the near-foreground and background by moving the point of focus. Try rendering the foreground sharp, and then focusing further back to change the feel of the shot.
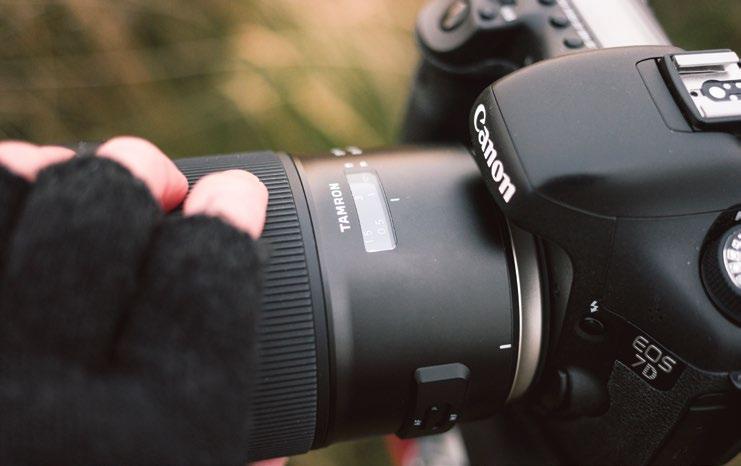
While front-to-back sharpness is common in landscapes, there are other creative options
BEFORE
All images © Peter Fenech
154
PROJECTS
4
Adjust brightness With the f-stop set, use the shutter speed (in this case controlled through exposure compensation in Av mode) to alter image brightness. Pay attention to how defocused highlights are rendered, which changes the mood.
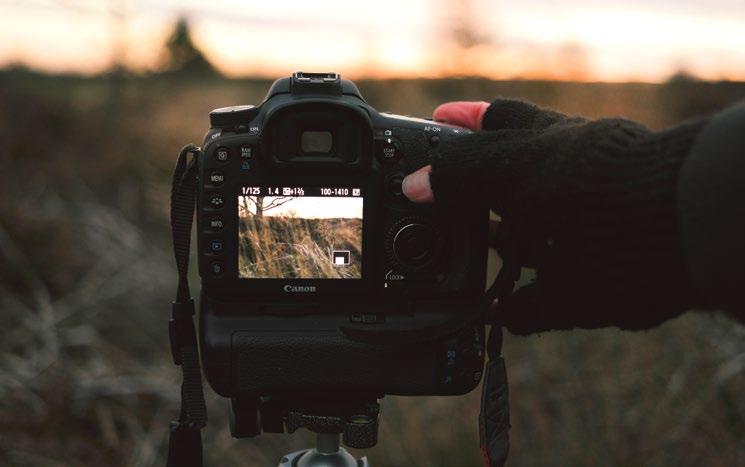
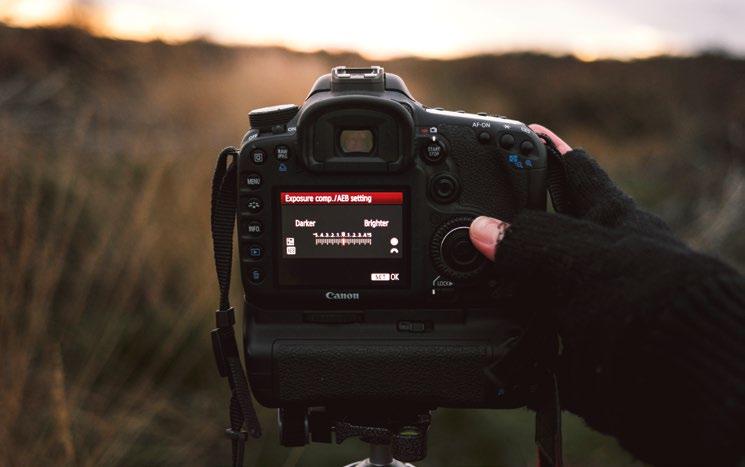
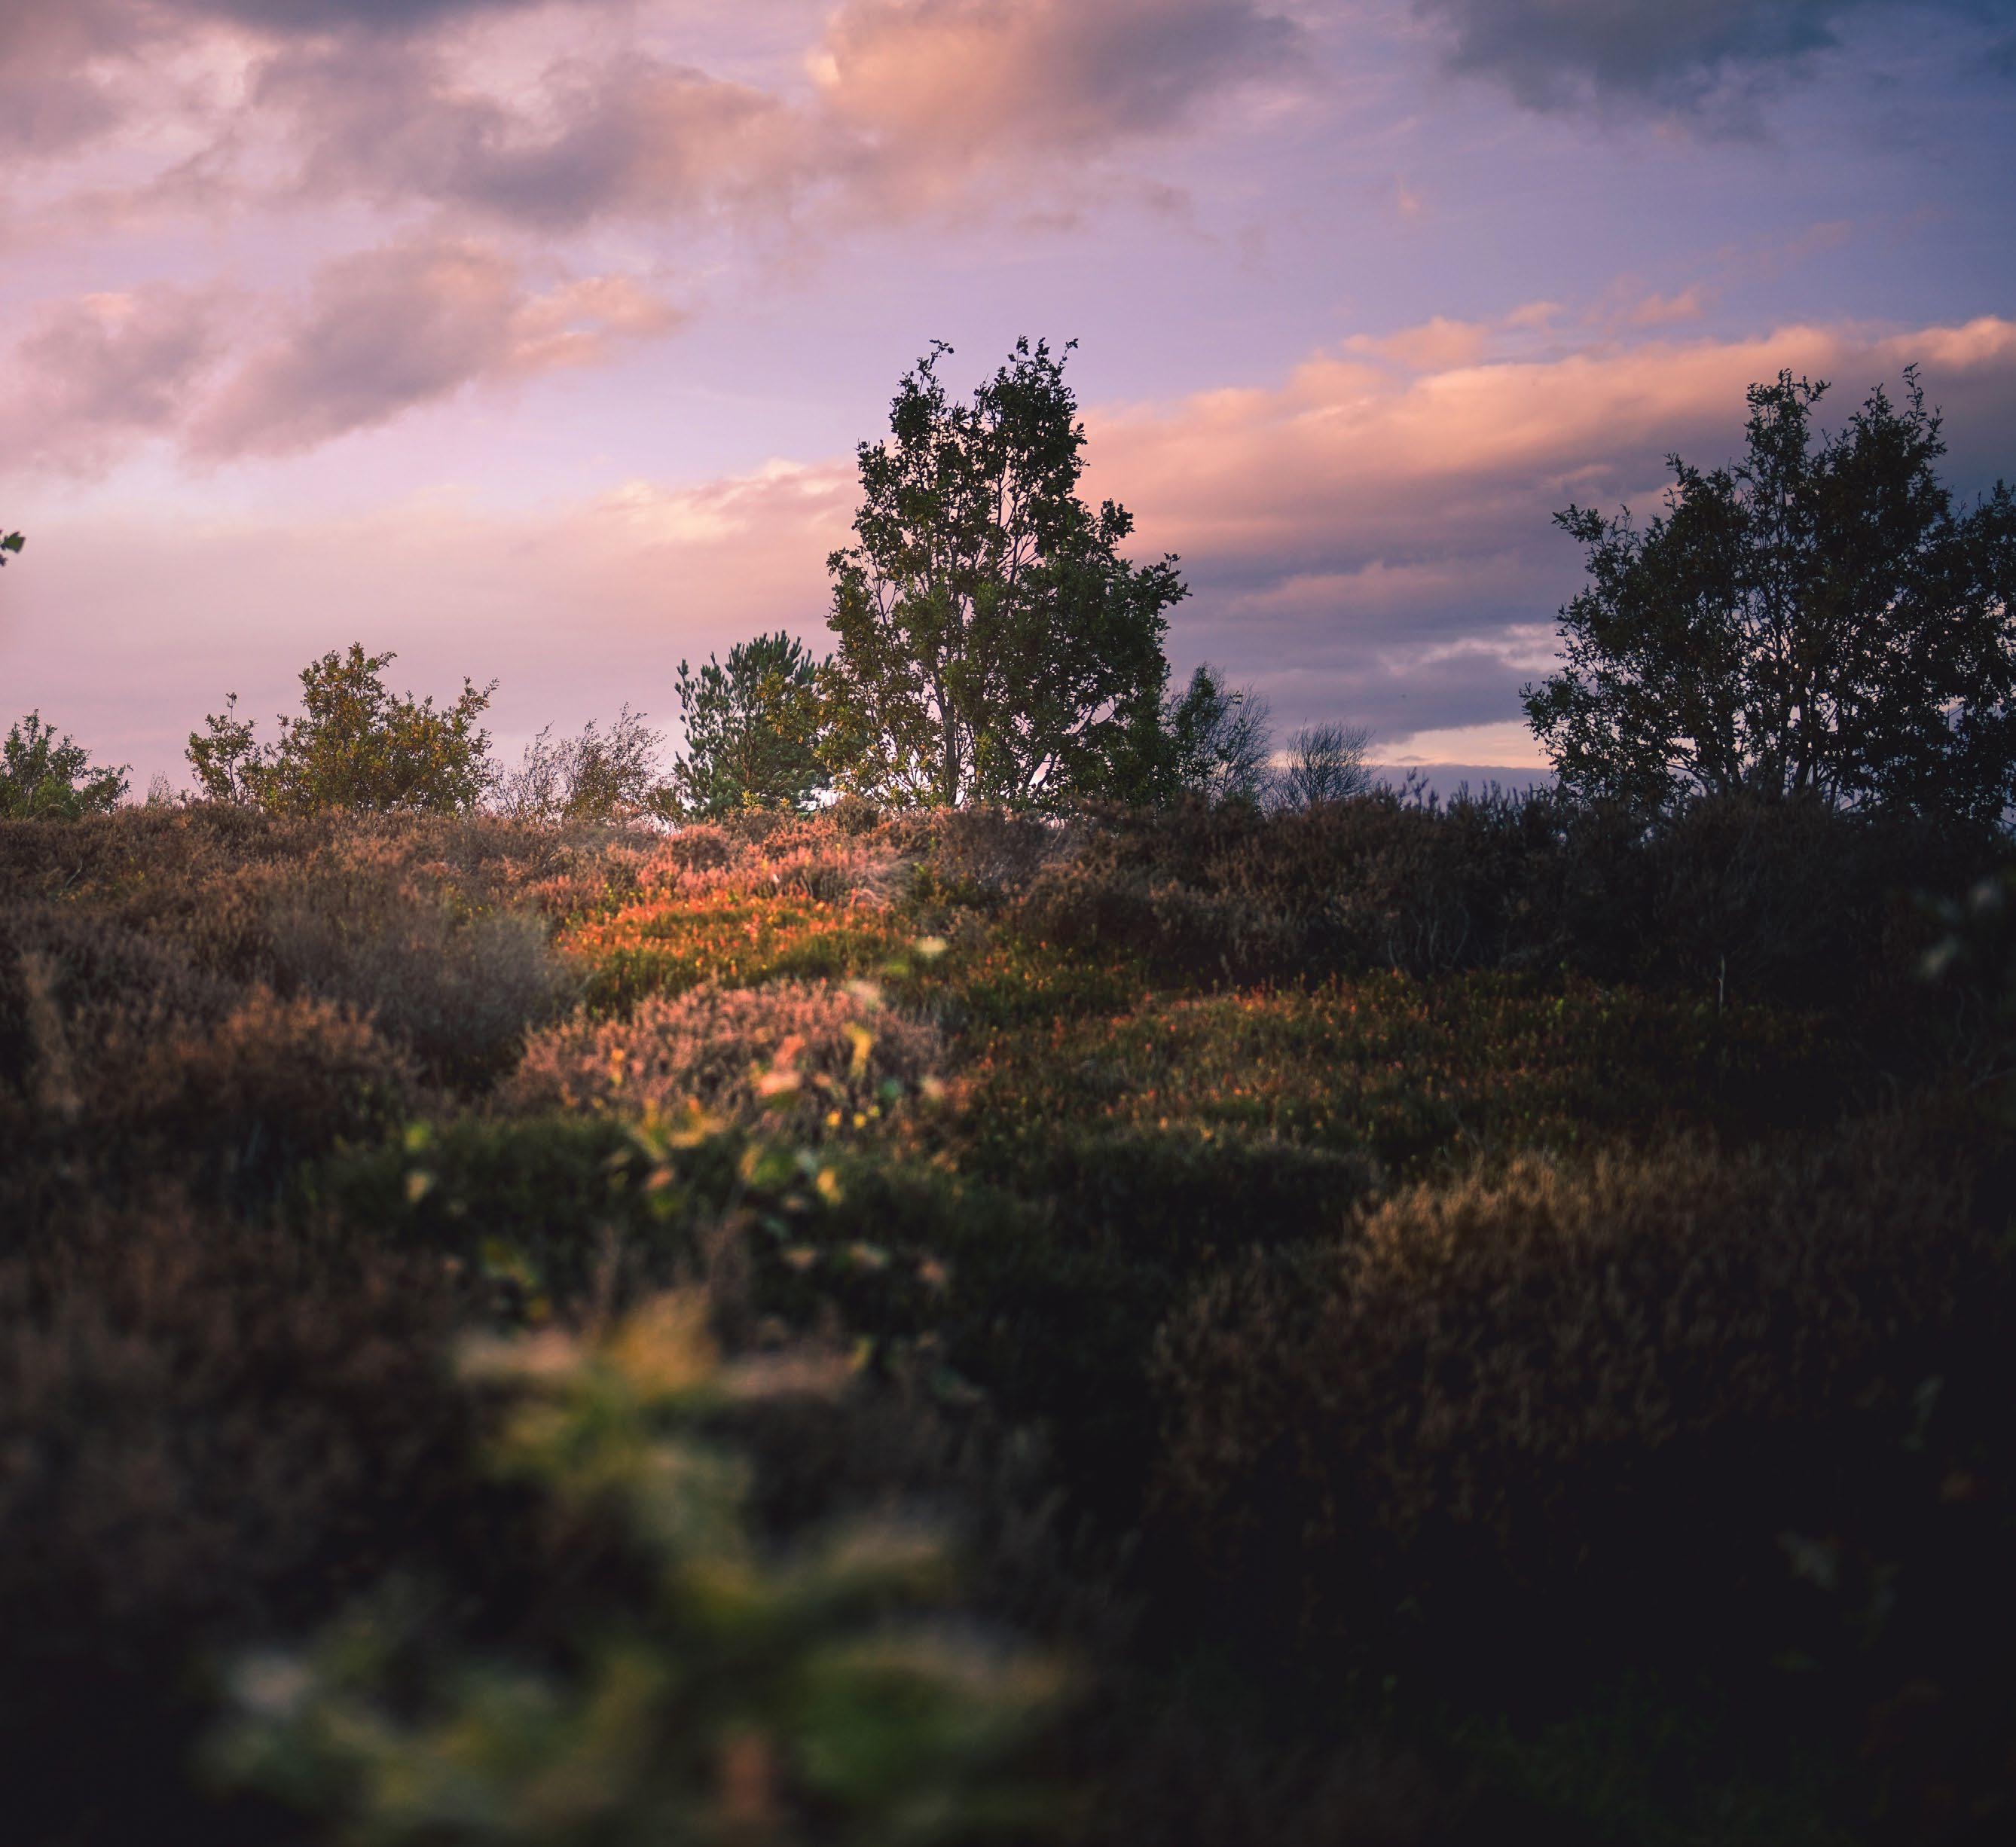
5 Experiment with POV With low sun comes opportunities for lighting experimentation. Shooting into the sun will often create washes of colour and light, while shooting away will produce richer, painterly colours, and less flare.
6 Check sharpness When you use wide aperture settings, it is a good idea to magnify the review image and check that sharpness falls exactly where you need it to be. Also, scan the shot for camera shake, which can be masked by bokeh.
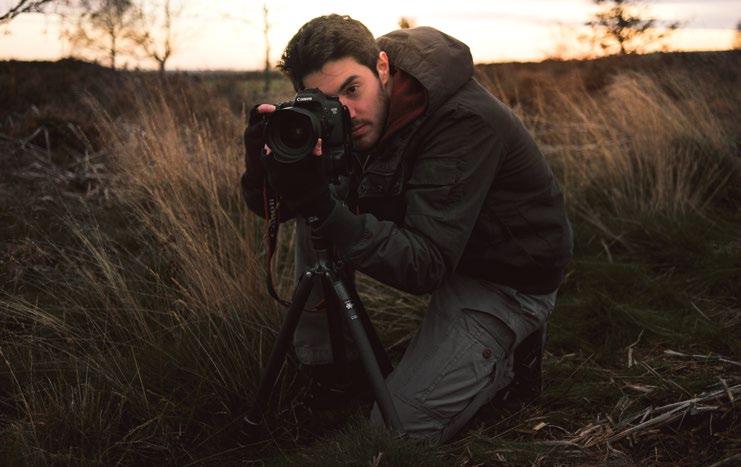
AFTER 155 SHOOT SHALLOW LANDSCAPES
Work with
lens adapters
Give old gear a new lease of life with a manual or electronic lens mount adapter

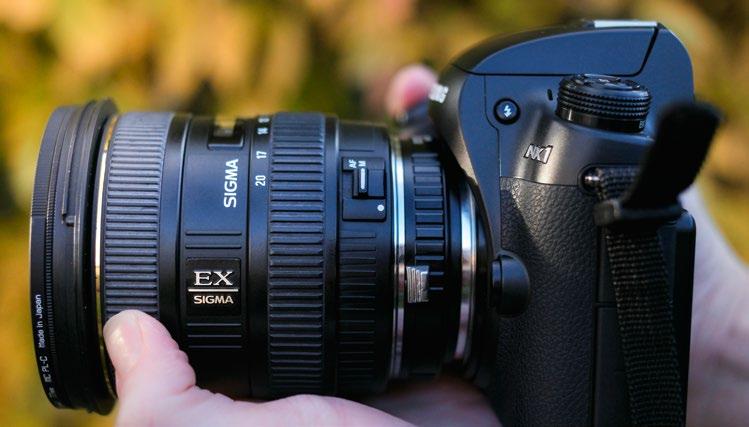
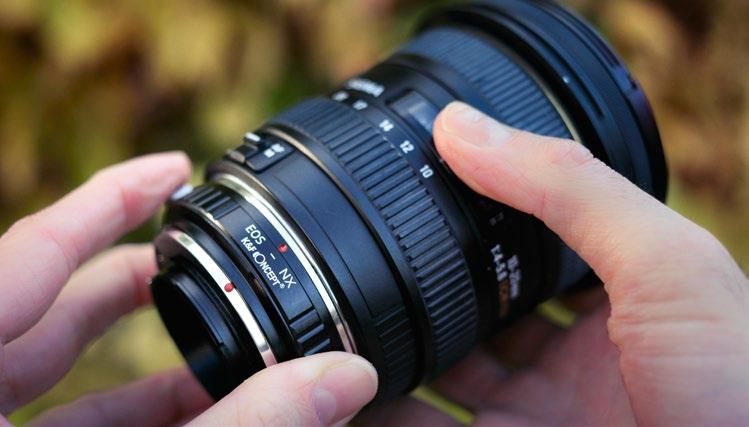
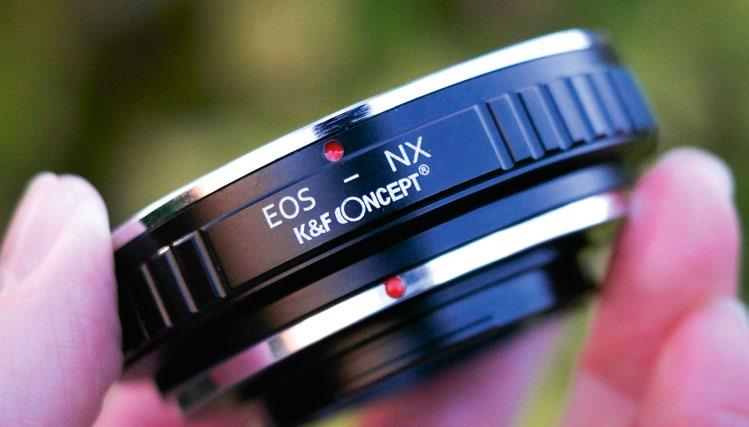
There is a reason we call it ‘buying into a system’ when we invest in an interchangeable lens camera. Once we have acquired a significant number of lenses and accessories, it can be an expensive affair to replace everything if we change systems. However, in the rapidly evolving photo industry, there may be a call for a switch, prompted by new technology in another camera range. But even with a major change in camera brand, the use of a lens adapter can save a lot of outlay on new, compatible optics. There’s a selection of automatic adapters that feature electrical contacts, enabling full
Before Restricted perspective
Without owning an ultrawide lens belonging to a new system, this landscape scene could not be captured in its entirety, resulting in lost detail around the edges

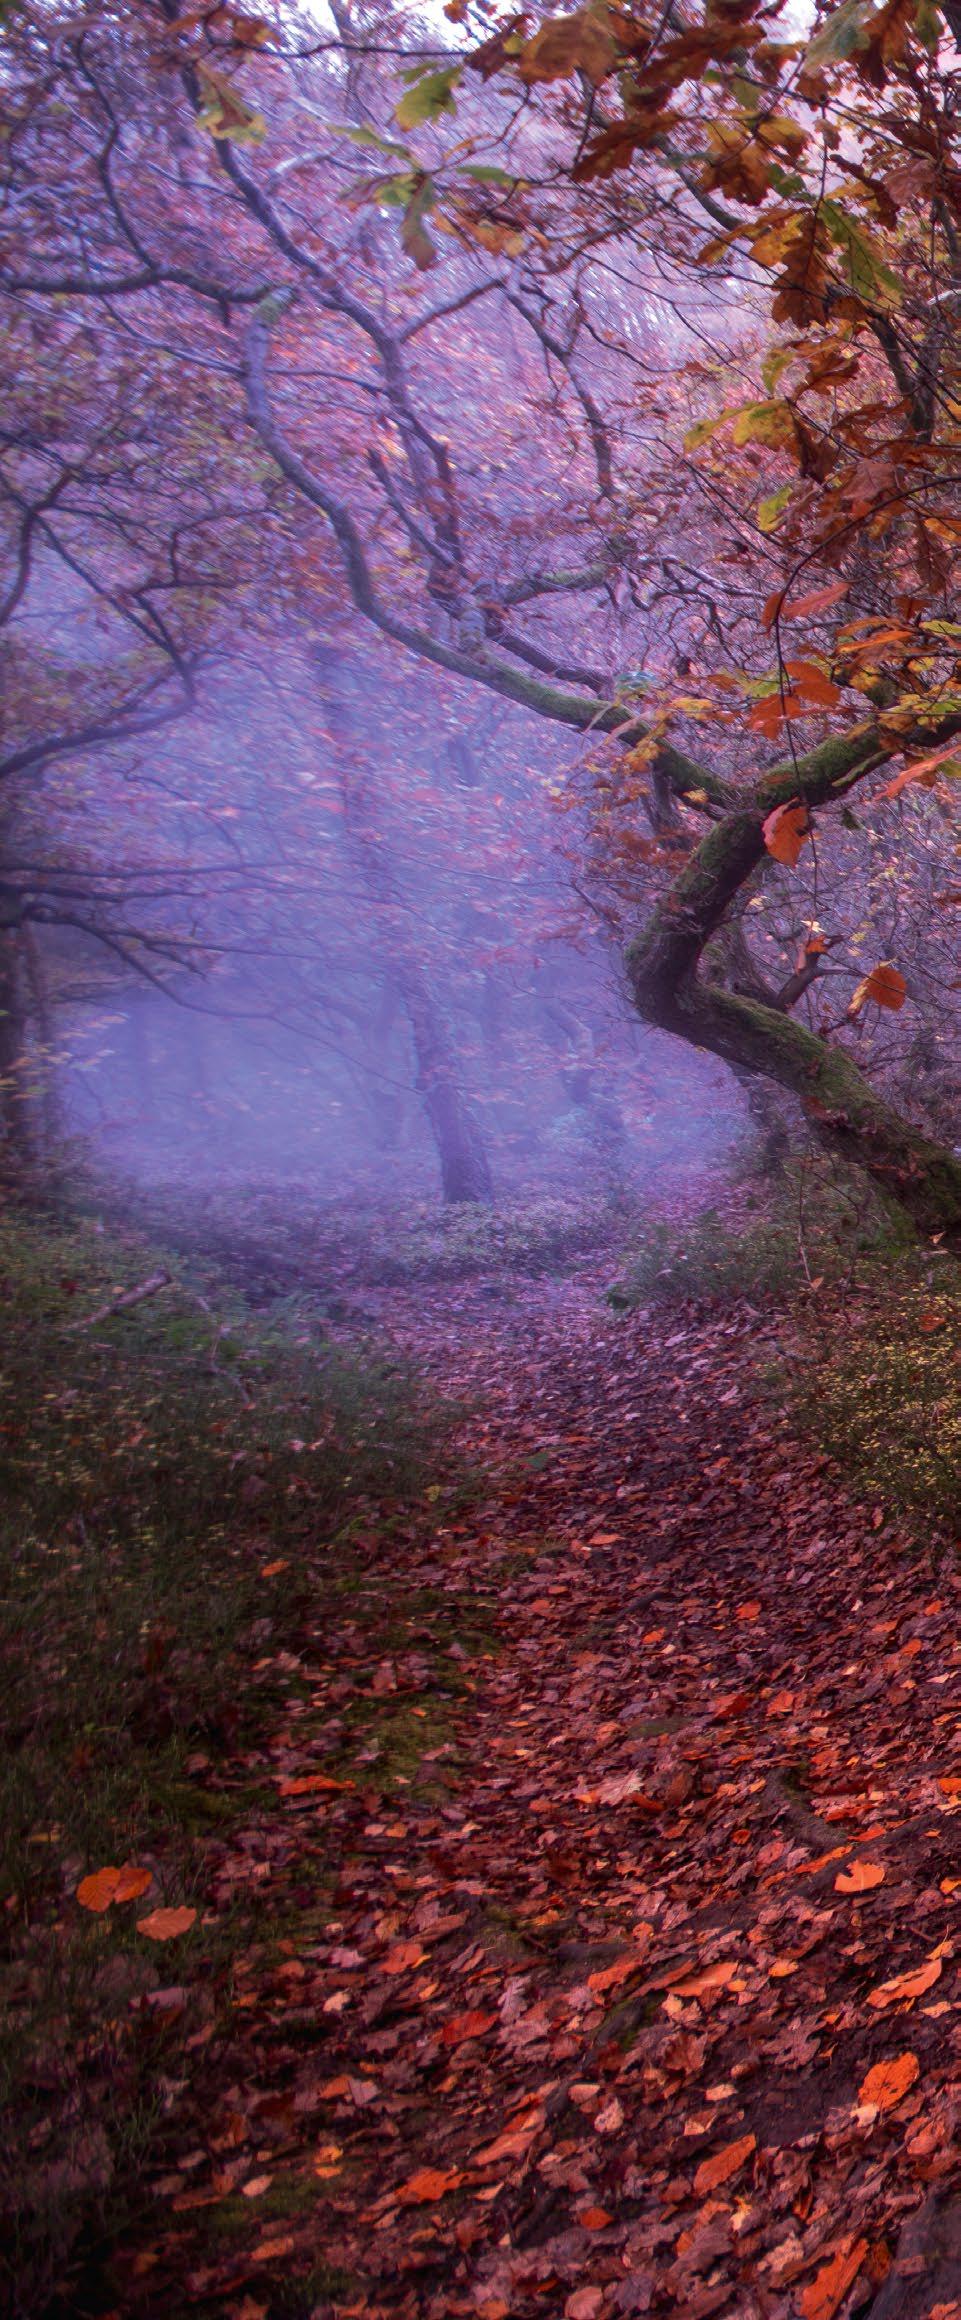
autofocus and aperture control, as well as lensbased image stabilisation systems. These are more expensive than manual adapters, which serve as ‘cold’ mechanical bridges between the camera and lens mounts. Whichever you choose, make sure it enables focusing at infinity, despite the extra distance between the sensor and rear elements. With an automatic adaptor, also check that the camera will still be able to drive AF – some older lenses lack an internal AF motor, relying instead on the camera to drive the elements.Let’s take a look at how you can put a lens adapter to use and swap your optics.
A Canon EOS – Samsung NX adapter enabled the use of a full complement of Canon EF mount and proprietary Samsung NX optics to be used as one system
1 Ensure compatibility Check that you have the correct adapter for the lens-camera pairing you need. A Canon EOS – Samsung NX adaptor, as used here, will allow Canon EF/EF-S lenses to be used on NX camera bodies.
2 Check secure lock Ensure that your adapter allows a secure connection to the lens and the camera body – cheaper adapters have been known to improperly lock, which can result in separation and damage to the lens.
Focus With a manual adapter autofocus control will be lost, so focus manually. If you have an AF adapter always ensure that your lens and/or camera are set to the correct focus mode to enable the camera to drive the AF motor.
3
BEFORE AFTER After Uninterrupted
All images © Peter Fenech
control
156 PROJECTS
4
Check for vignetting With the correct adapter you shouldn’t experience edge darkening, but check at first use and crop if necessary. Similarly, with aperture-fitted adapters, test each setting for vignetting.

Use an ND If you lose aperture control with a manual adapter, the diaphragm will be locked wide open. To control exposure in bright light, use an ND filter. You can always focus stack to deepen depth of field.
5
6 Shooting mode With the loss of aperture control you may also lose auto exposure. You may still be able to shoot in Aperture Priority, but if errors occur, switch to Manual to lock in settings and achieve predictable results.
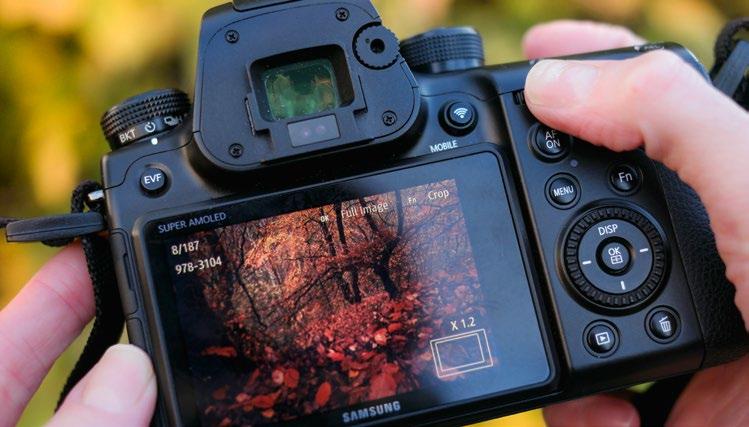
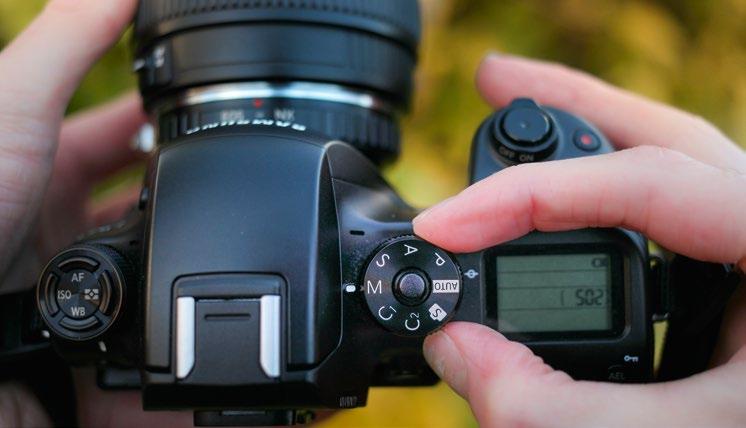
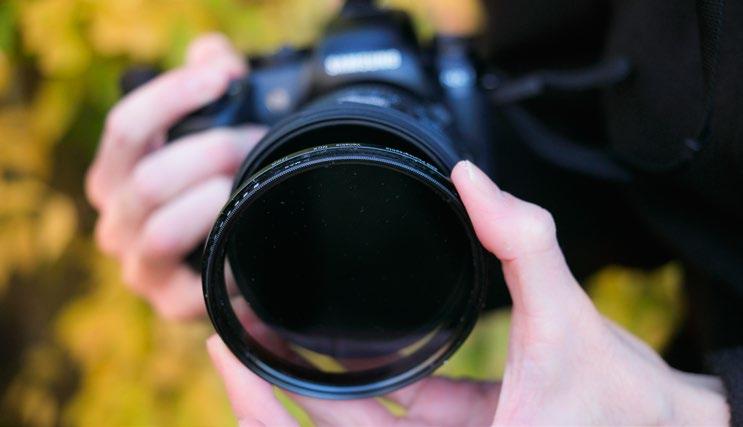
157 WORK WITH LENS ADAPTERS
Get low the easy way
Use a simple trick with your tripod to get a worm’s eye view of a scene
Forget fancy lenses and big resolution, the one thing that makes the biggest impact to photography is your composition. Even stunning scenes can be made to look fairly ordinary when shot from a lazy viewpoint, and the golden rule to follow is to never take a photo from head height. Why? Well, because this is the viewpoint we’re all used to seeing when we walk around. Instead, getting high or getting low will bring a fresh view to your location, even if you’ve photographed it hundreds of times before.
So, how do you get low – and we mean mega low – without needing to stretch out on a cold, wet carpet of leaves? The answer lies in making the most of the photographer’s friend, the humble tripod. Most tripods have a centre column that can be inverted, meaning that you
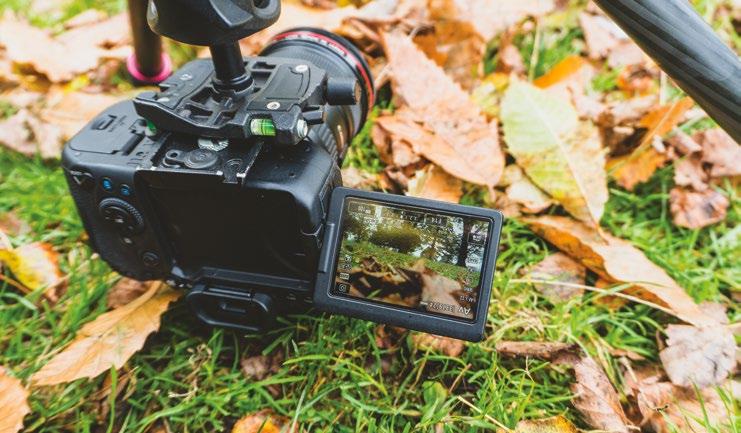
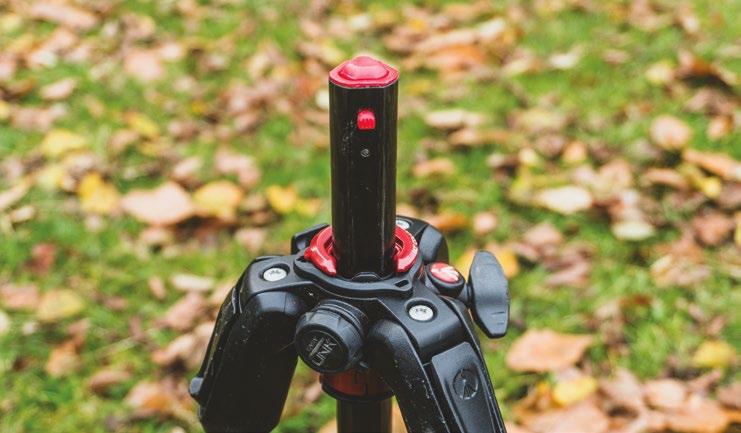
effectively turn it upside down. This enables the photographer to set up a composition just millimetres from the ground, which makes far more of the foreground interest in the scene. This approach is improved when you pair your camera with a wide-angle lens, and while wider is better, you should still be able to get great results with an 18-55mm kit lens.
This technique is perfect for autumn and winter months, where those heading out to a local country park are sure to be greeted with golden leaves on the ground, or even the intricate structure of frost and snow, should we be lucky enough to enjoy a dusting of the white stuff.

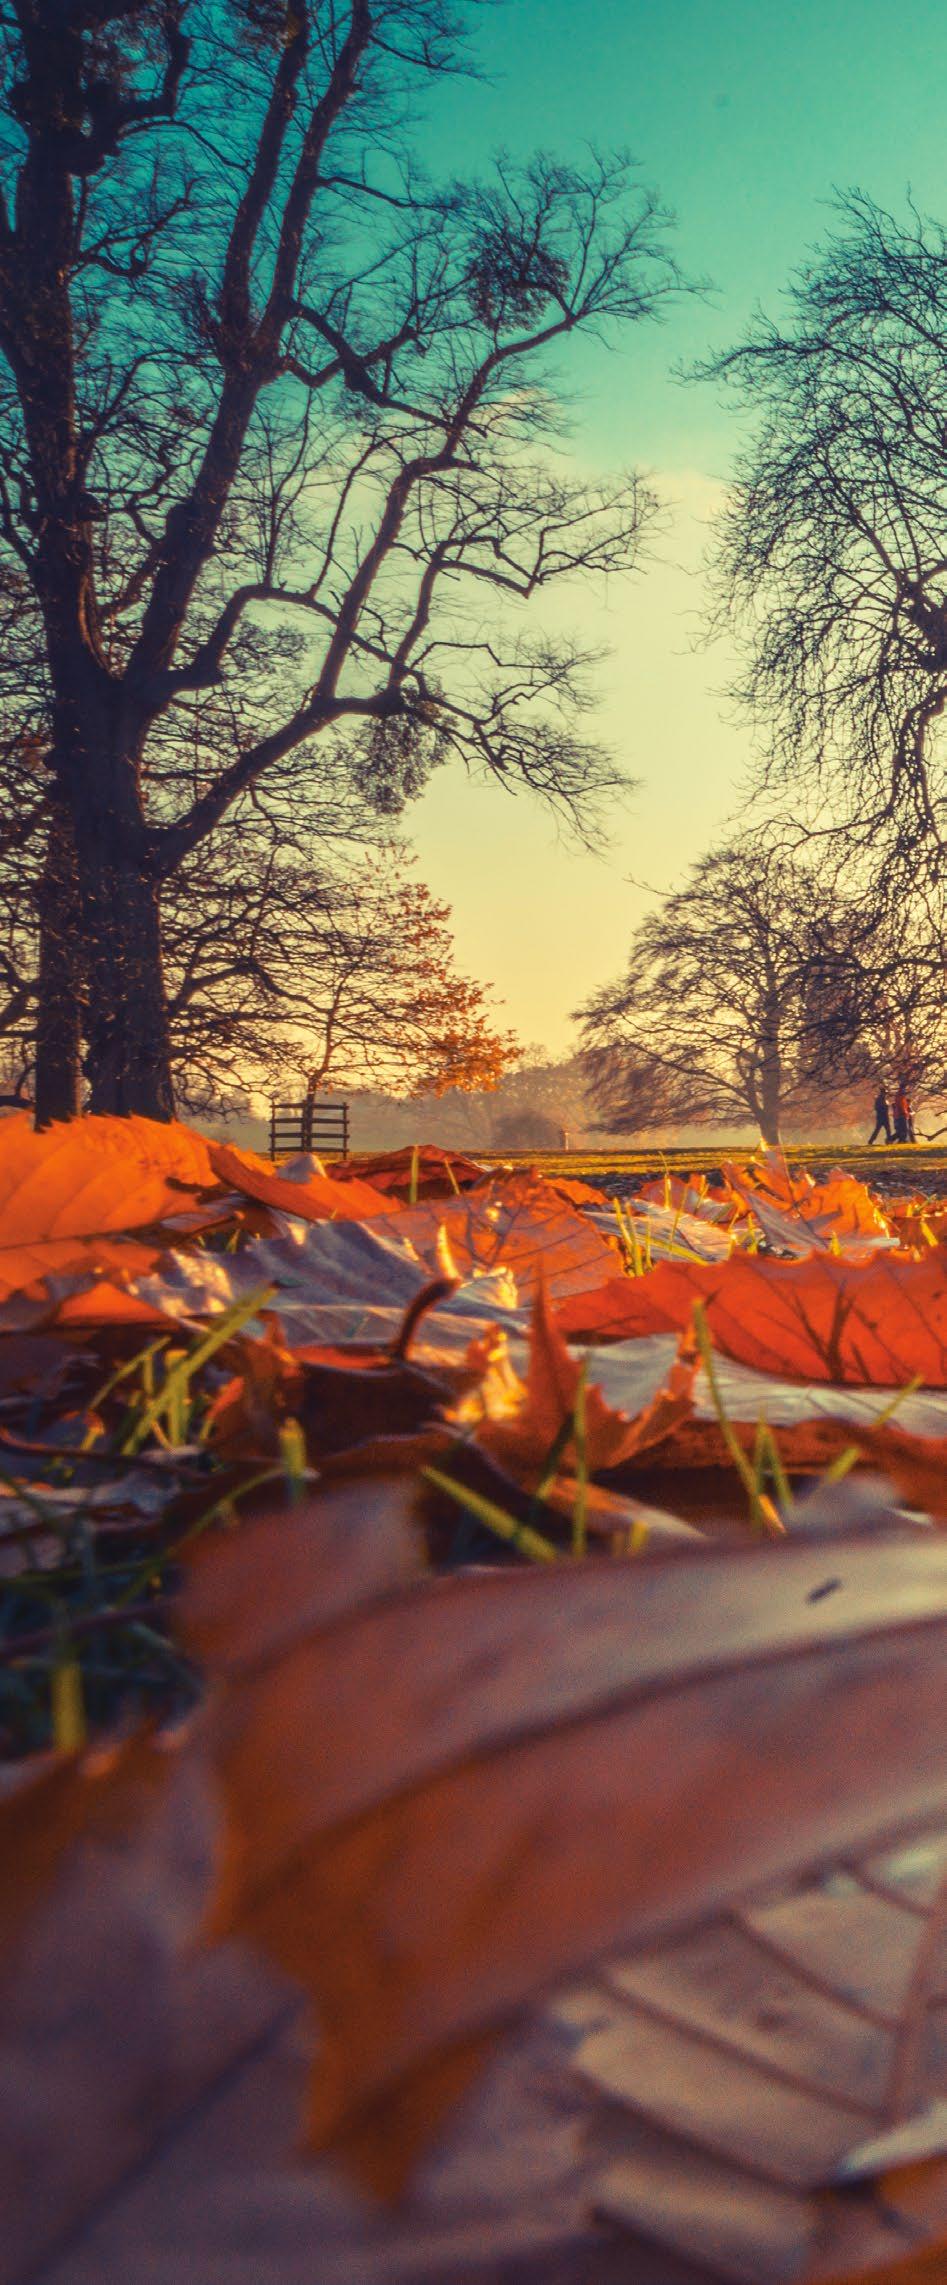
Whatever you decide to shoot, using this technique will enable you to get a worm’s eye view of the world without needing to get your clothes dirty in the process.
1
Scout out a scene Before you set up the camera, look out for a scene that includes both an interesting foreground and a main focal point in the background. Scenes that are missing one of these key factors won’t look as strong. If you need to, get hands-on and collect up some leaves to then lay out in front of the camera.
Invert the centre column Set the tripod to its lowest operational height. Loosen the centre column, turn it upside down and feed it back through the main tripod socket from bottom to top. Some tripods, such as Manfrotto units, have catches and quick-locks, so take this step very slowly as you don’t want to pull too hard and damage any components.
2
Establish focus Attach the camera to the tripod, and adjust the centre column height so that the camera is just a millimetre from the ground. Switch to Live View and use Manual Focus to establish a focus point. This step is far easier to achieve if you have a variangle LCD, as you can flip out the screen and frame up without getting level with a fixed LCD.
3
All images © Matty Graham
158 PROJECTS
Worm’s eye view
By using your tripod to get down super-low, you can create impressive images with a unique perspective

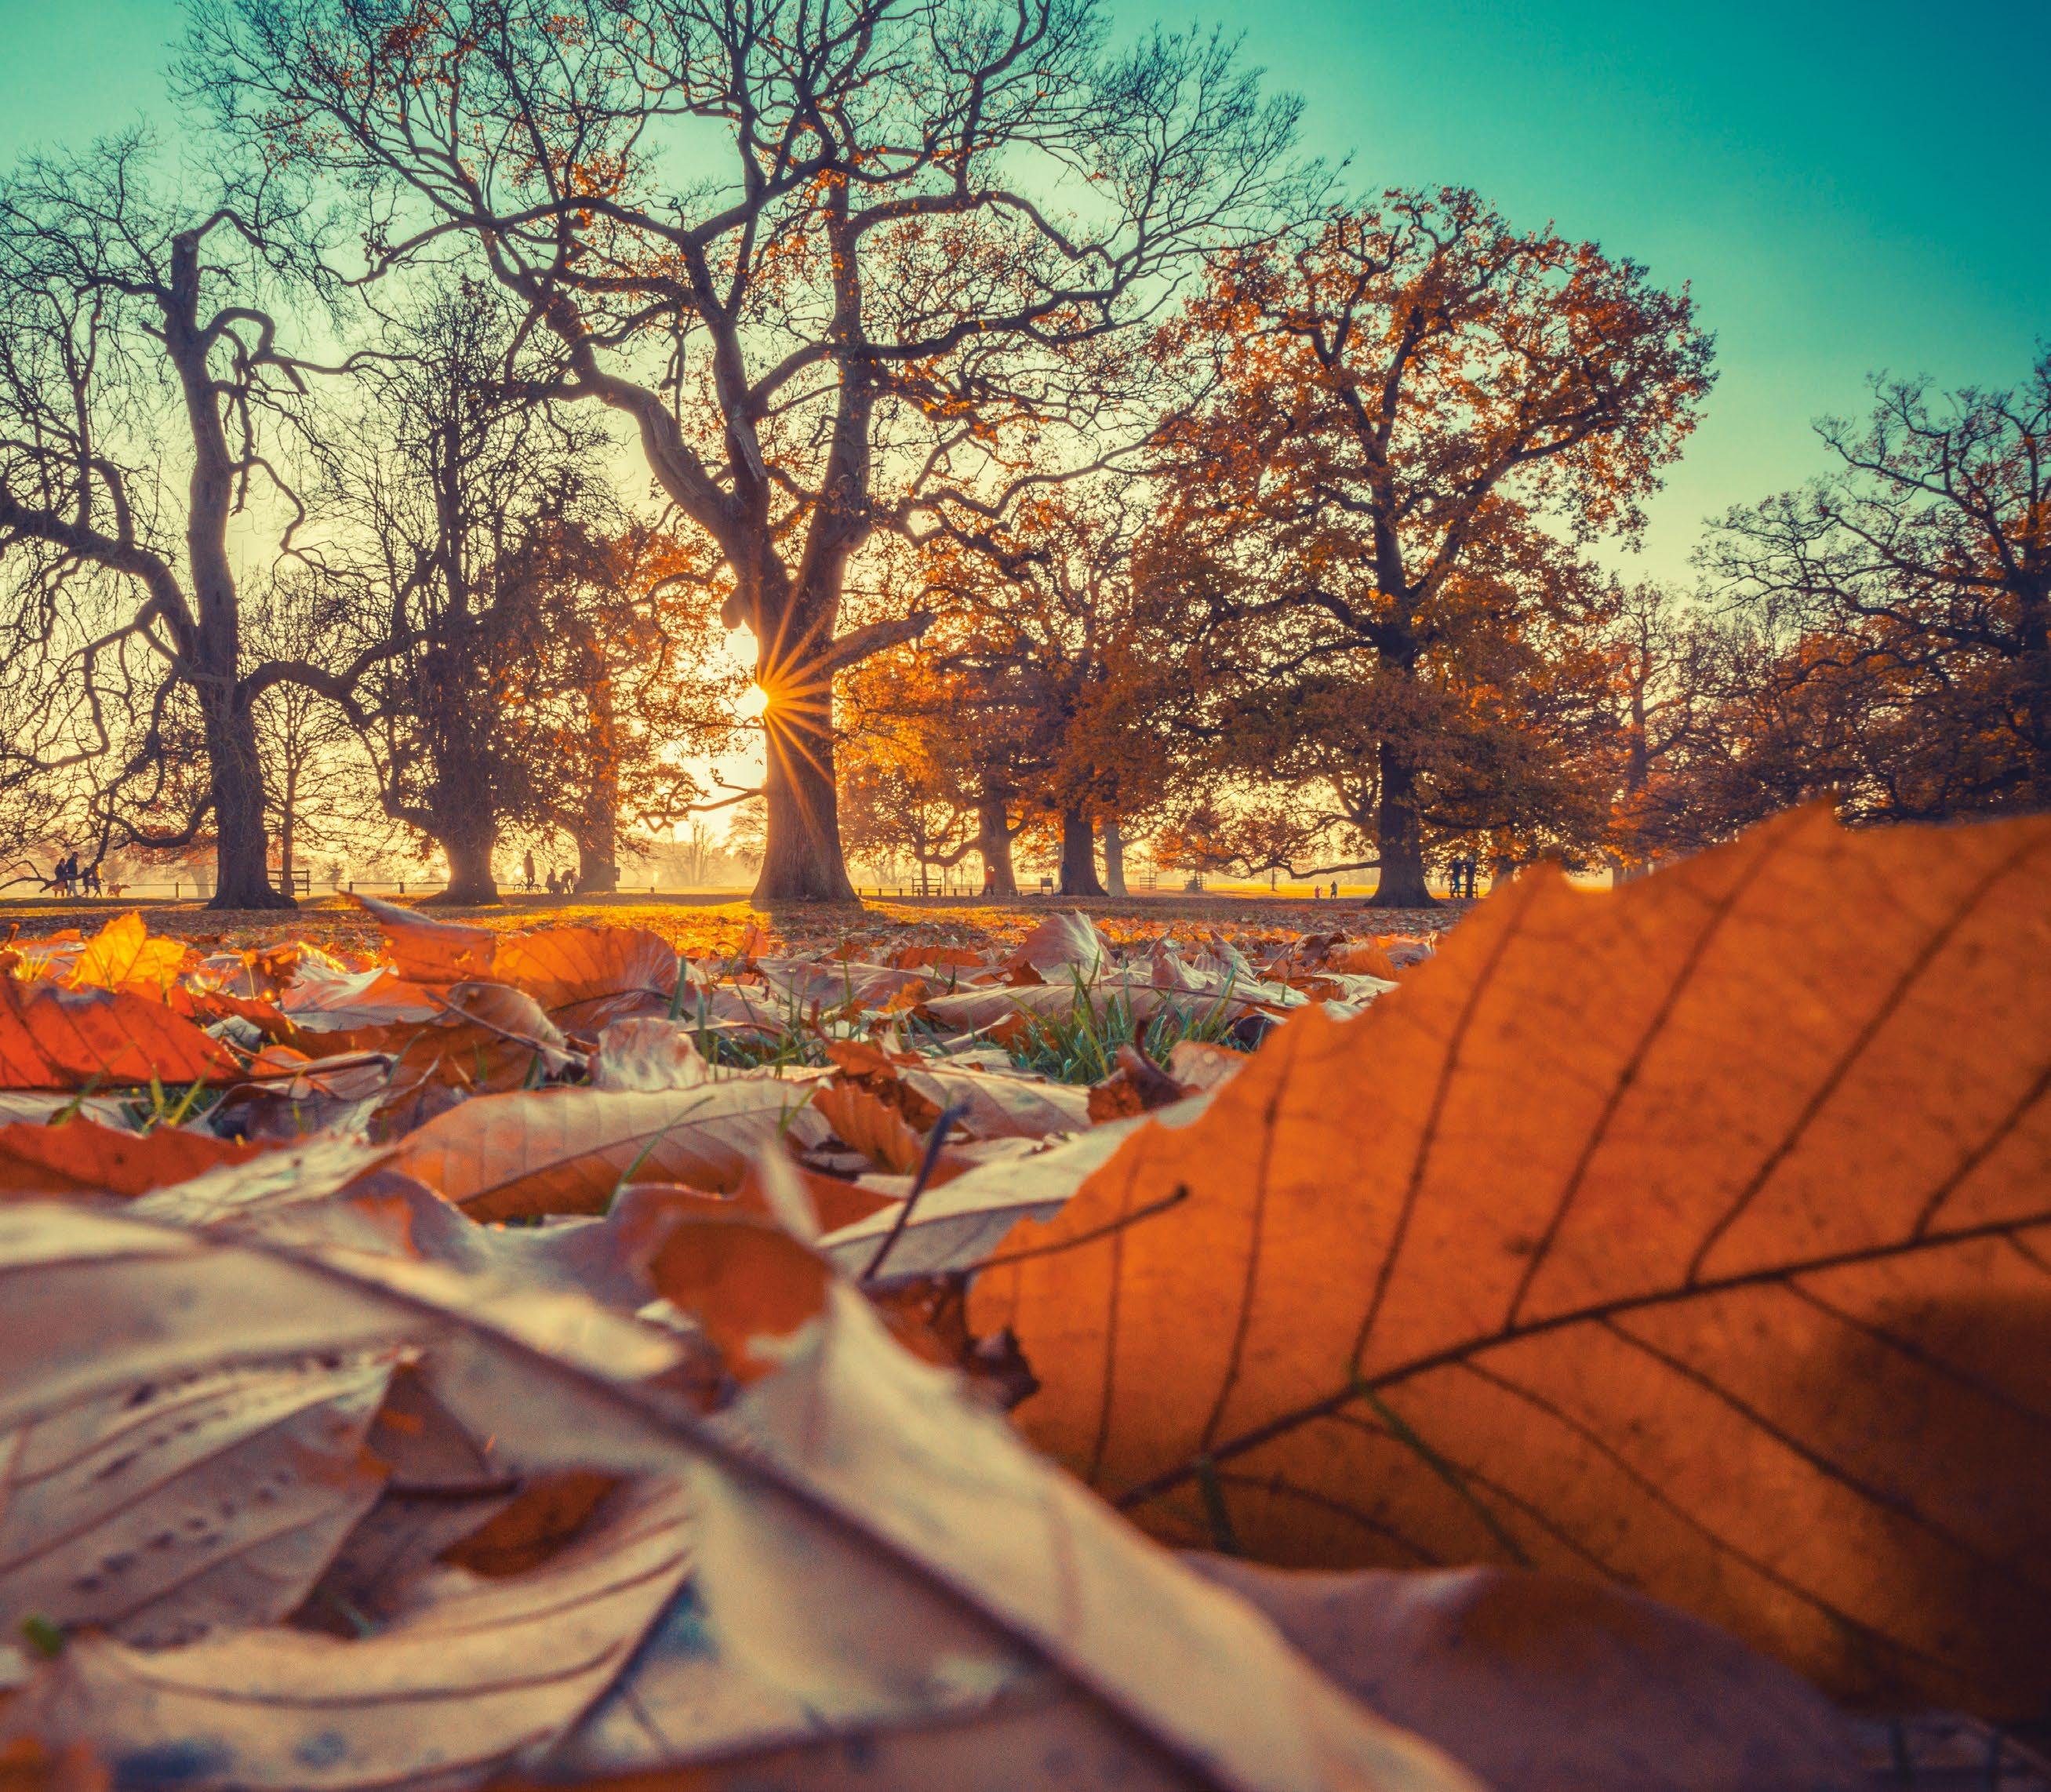
4
Select Aperture Priority As the camera is locked off on the tripod, the shutter speed isn’t too important, as you are not likely to introduce any camera shake into the scene. So instead switch to A or AV on the mode dial, which stands for Aperture Priority. This semiautomatic mode enables the photographer to select the aperture and control depth of field.
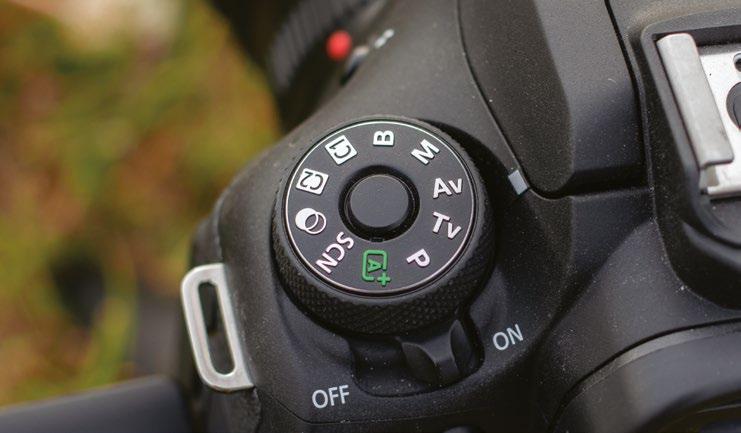
5 Shoot in RAW When shooting frames that include darker foregrounds and lighter backgrounds, it’s likely there’ll be a big difference in the dynamic range. By selecting the RAW format, you’ll have a better chance of revealing details or rescuing highlights when it comes to editing the image. Adding a circular polariser filter can also help saturate colours.
6 Dial in a small aperture Maximising the depth of field in the scene is the best approach here, as you want to keep both the foreground and background in focus. This means dialling in a smaller aperture of around f/14 to f/16. An added benefit of using this f-number is that if you include the sun in the frame, it’ll help create a sun-star effect.
159 GET LOW THE EASY WAY
Fisheye Use a
for landscapes
Gain a new, unique perspective and better value from your equipment by shooting ultra-wide compositions using a fisheye lens
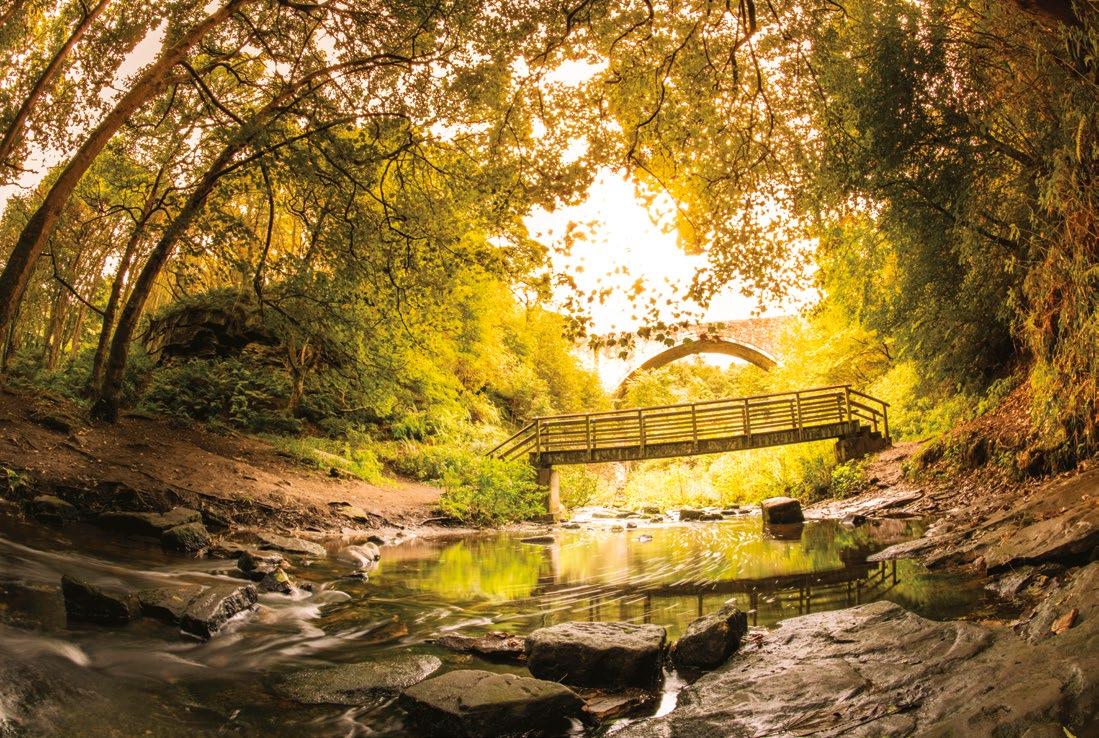
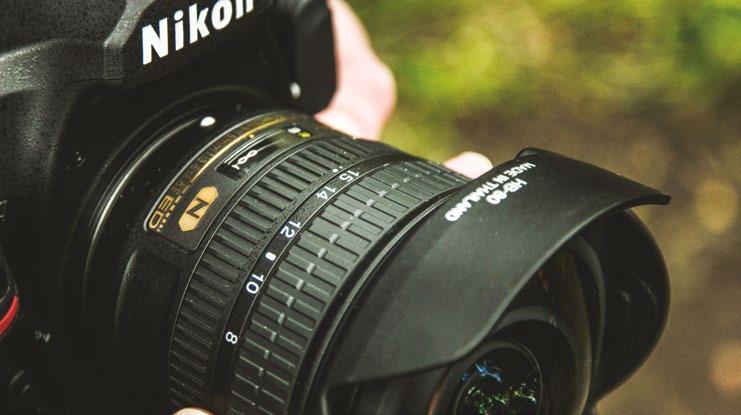
Fisheye lenses are incredibly popular for special effects, as they provide a unique style of image that’s hard to convincingly achieve with any software technique. The fisheye effect can certainly be simulated using software filters and distort tools, but for a true fisheye perspective a dedicated lens – such as the Nikon AF-S Fisheye Nikkor 8-15mm f/3.5-4.5 optic we’ve used here – is required.
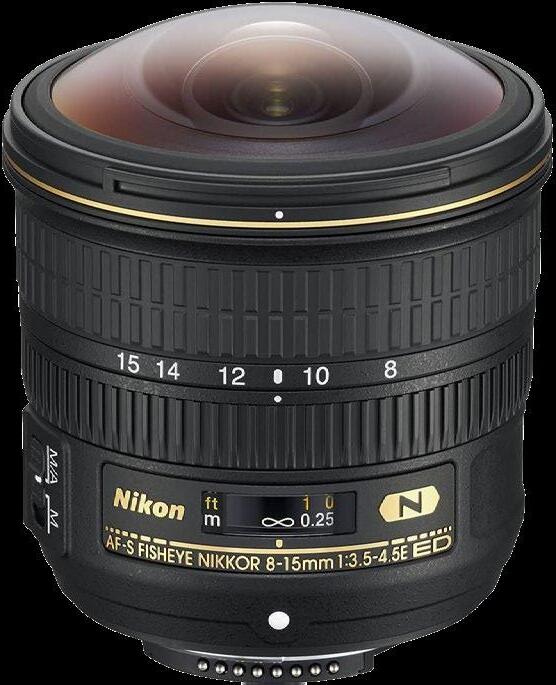
One of the issues with fisheye lenses, however, is their specificity: while they are fantastic for certain interior shots, the distorted edges are not well-suited to portraiture or other scenes featuring straight edges. For this reason, many photographers avoid investing in highgrade optics, or find that they are unable to get enough use from the lens to fully justify the cost of buying one.
There are methods to get around the problems with distortion, however. By following some key steps and having an understanding of how composition and camera angle influences
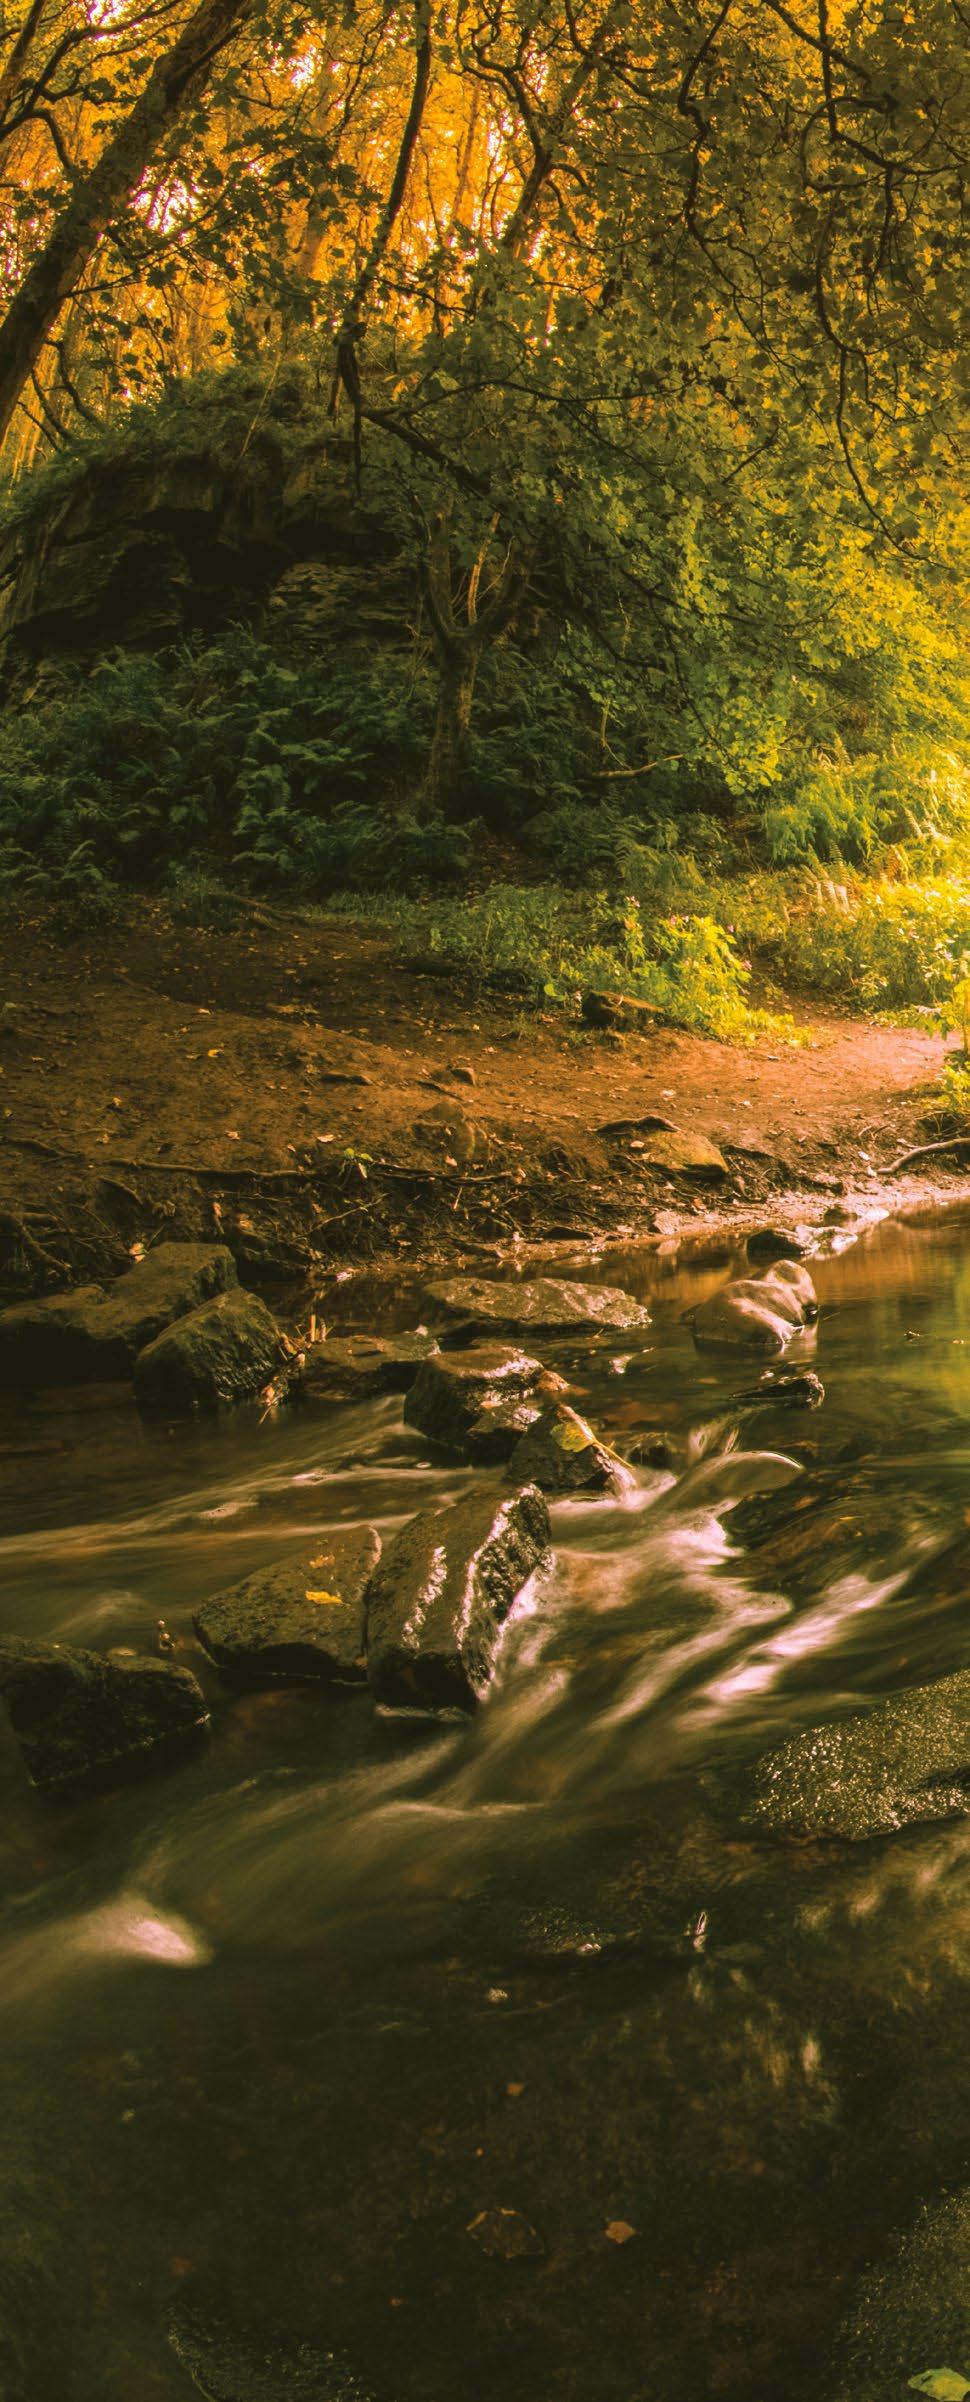
the effect, it is possible to get the most from the ultra-wide-angle of view that fisheye lenses are capable of achieving.
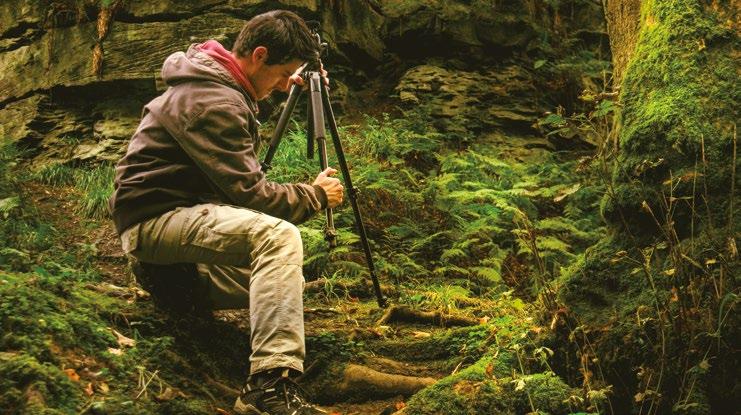
Here we’ll reveal key steps to use a fisheye for a greater range of subject matter and in a wider variety of environments. With experimentation you’ll be surprised at what can be achieved in some unexpected genres.
Inset
Distorted world
Tilting a fisheye lens, even by a few degrees, creates extreme distortion that’s inappropriate for most ‘serious’ landscape shoots. Here the twisted trees and riverbed are distracting
1
Assess the scene As with any ultra-wide lens, make sure you avoid capturing an empty, distracting foreground, devoid of detail. Make sure there is a feature to lead in the eye to the main subject, for a balanced frame.
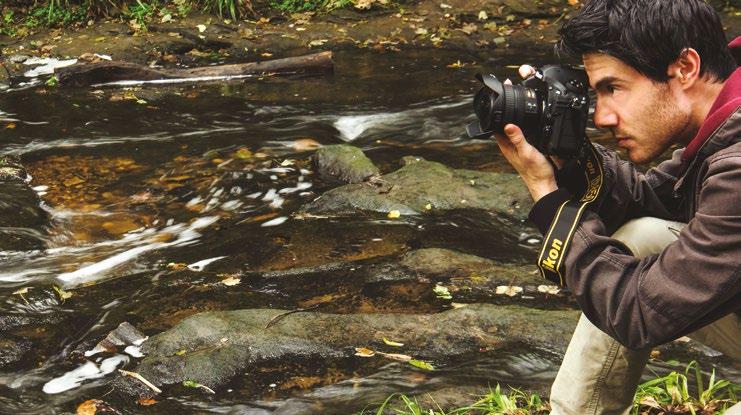
Set tripod height The distance from the lens and foreground elements, in addition to elements in the middle and backgrounds, will impact the fisheye distortion. Balance the foreground with horizon placement.
2
3 Set focal length If you’re using a fisheye zoom, zoom in to the longest setting for a horizontal fisheye effect – you don’t want a circular fisheye look for landscapes, which the shortest focal length will provide.
All images © Peter Fenech
BEFORE
160 PROJECTS
AFTER
Extreme wide angle
By keeping the lens level, we can make the most of the extreme field of view, in this case of Causey Arch, the world’s oldest single-arch railway bridge
4
Place the horizon Keep the lens as level as possible to minimise the fisheye distortion. Work out where in the scene the horizon line falls, and then place it in the frame centre, ensuring minimal lens pitch.
5 Watch the edges Distortion is most evident at the periphery of the frame, so take a test shot and zoom in on the edges of the image. Look for any extreme stretching or bending of lines that will be distracting.
6 Adjust composition Recompose if necessary so that the scene appears wide, but with as few straight lines visible as possible. Experiment with your shooting position and horizon placement.
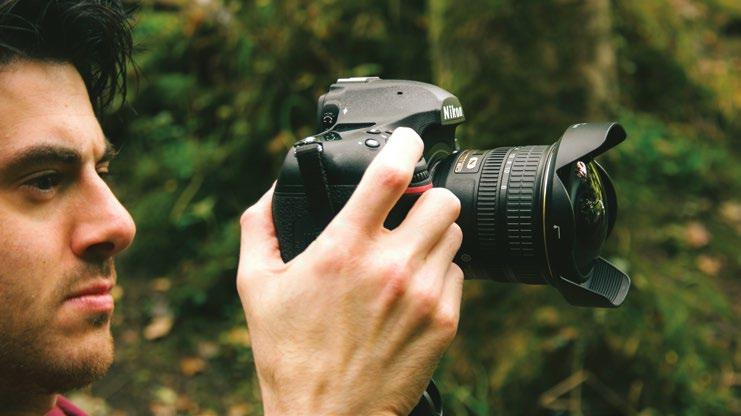

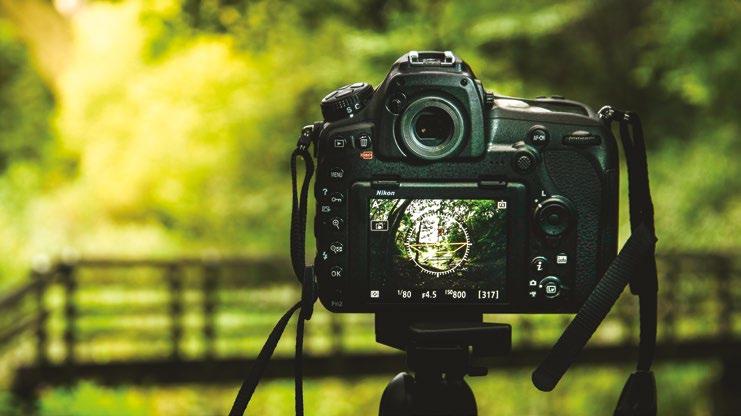
161 USE A FISHEYE FOR LANDSCAPES
waves Shooting the
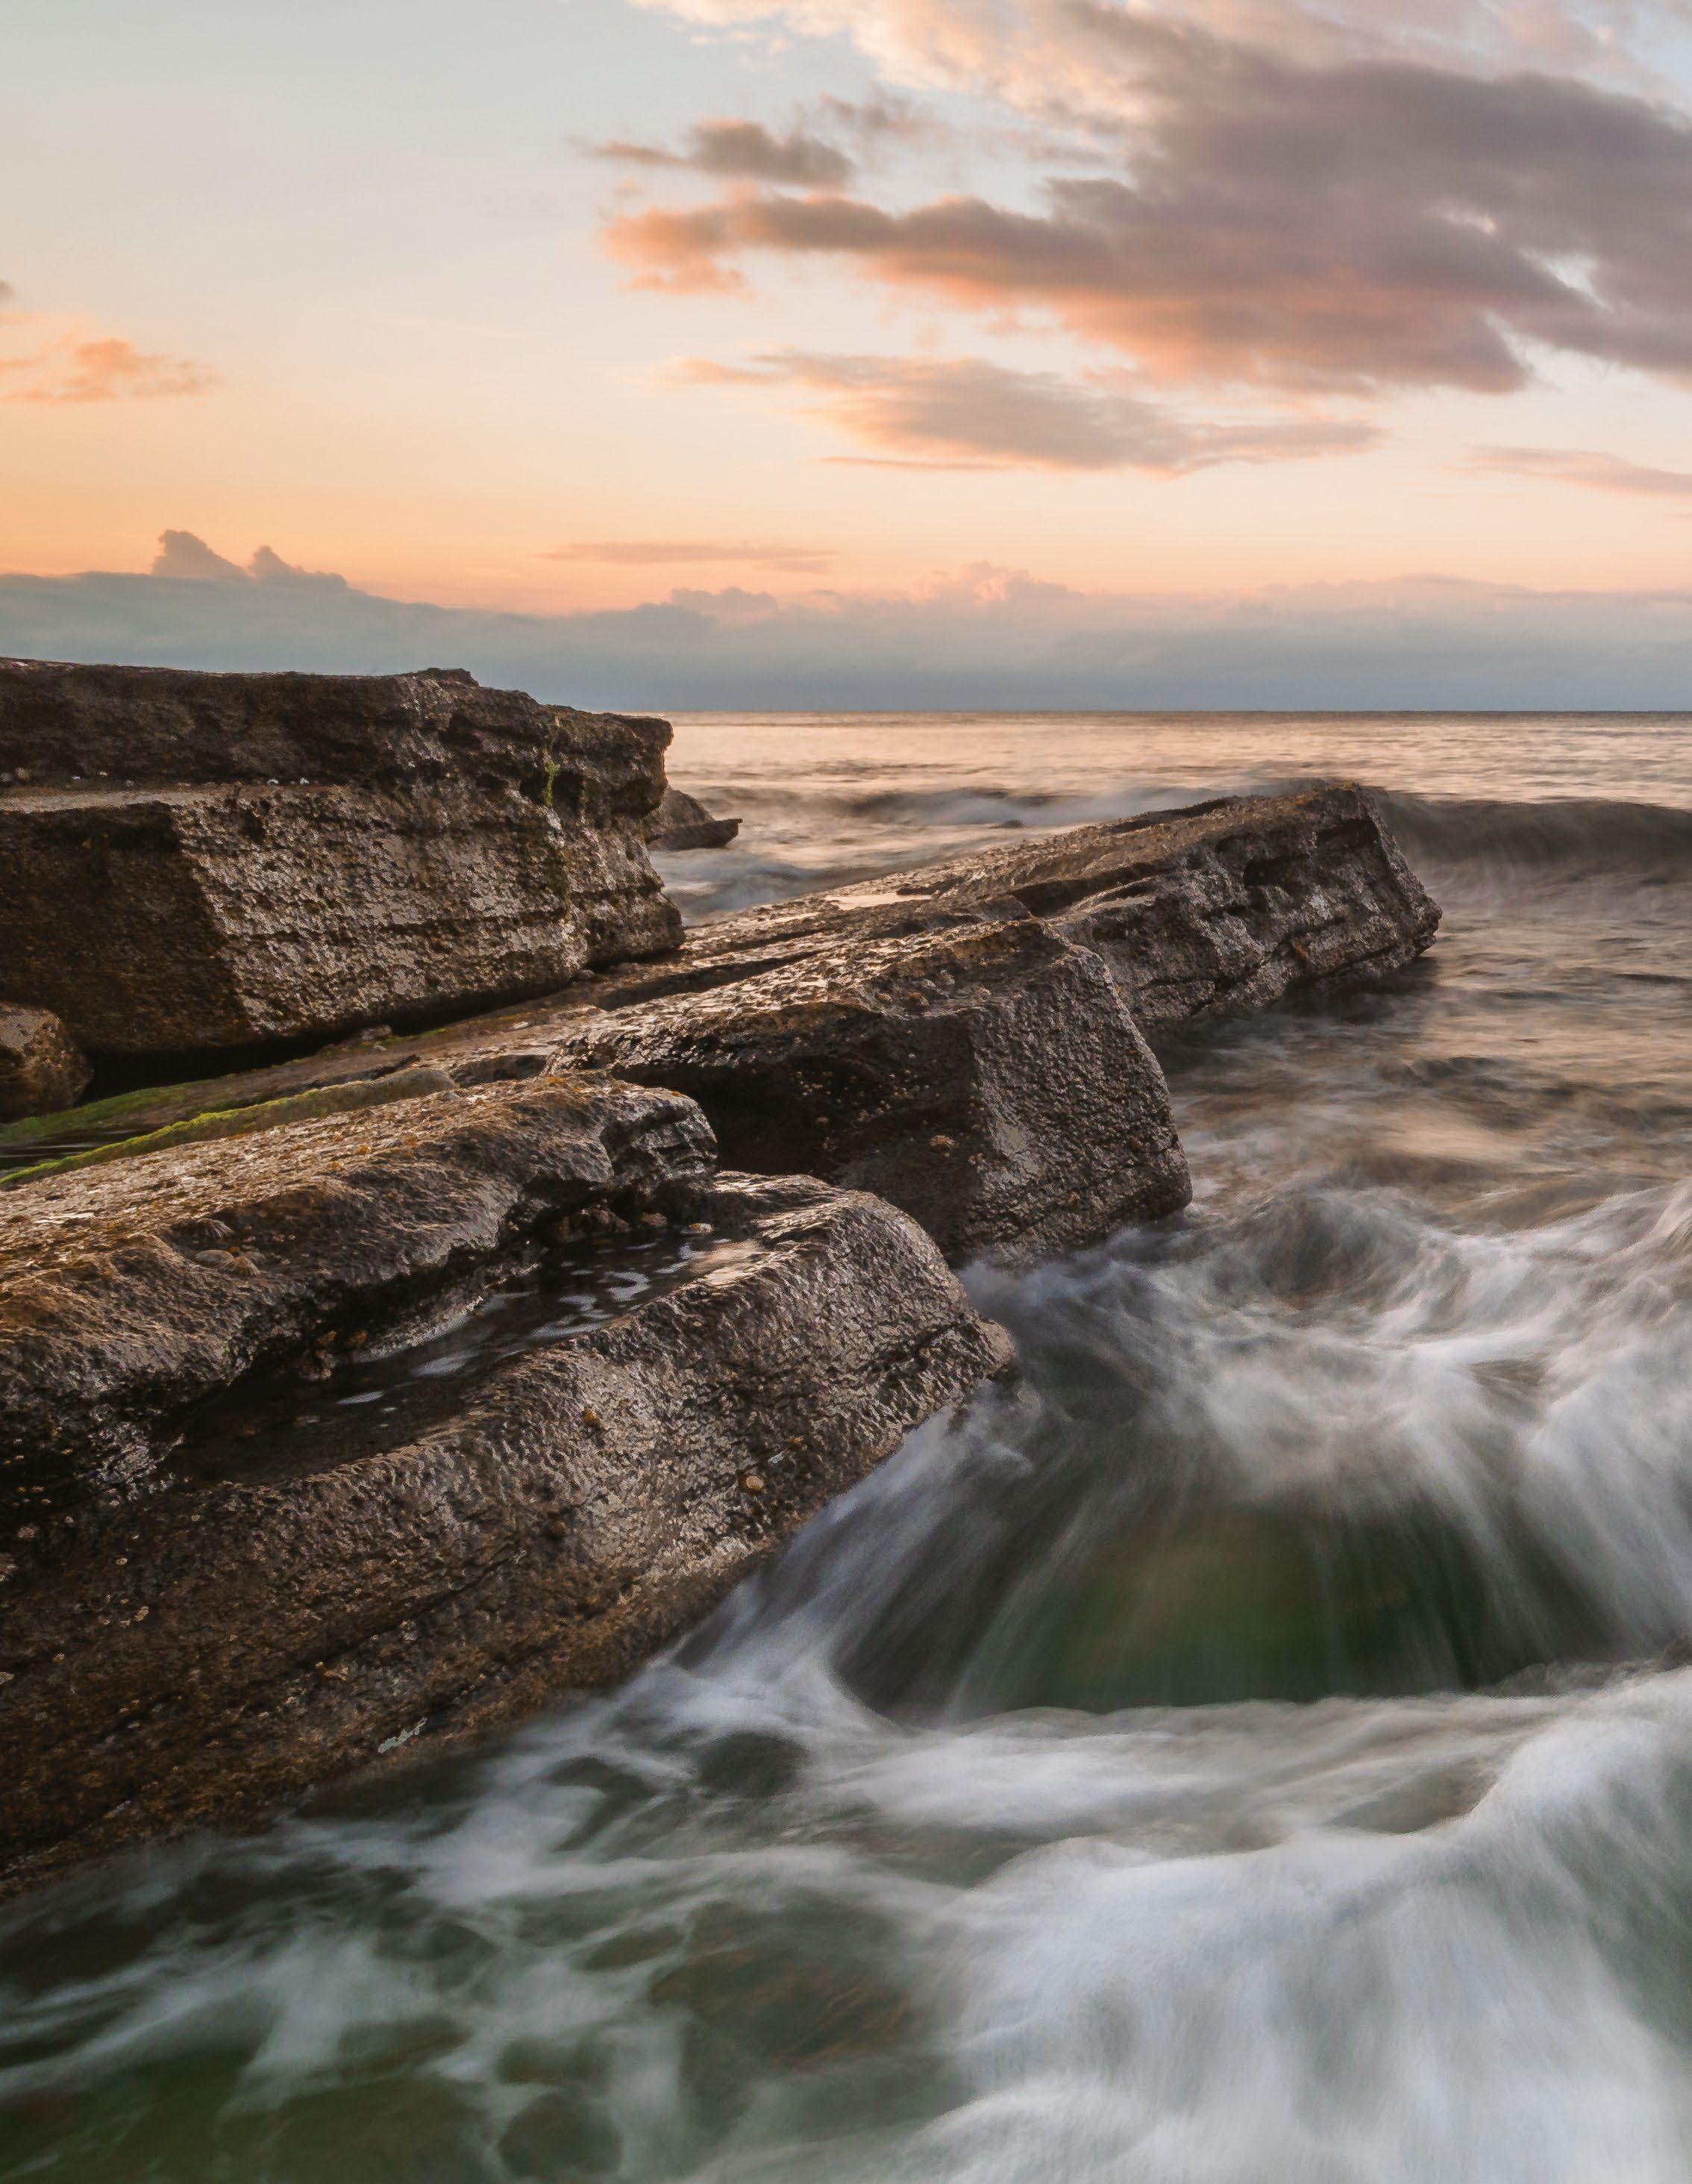
Waves rock Watching and shooting waves tumbling over shoreline rocks can be both relaxing and rewarding All images © Tom Ormerod
162 PROJECTS
Tom Ormerod shows you how to plan and execute soothing wave motion shots
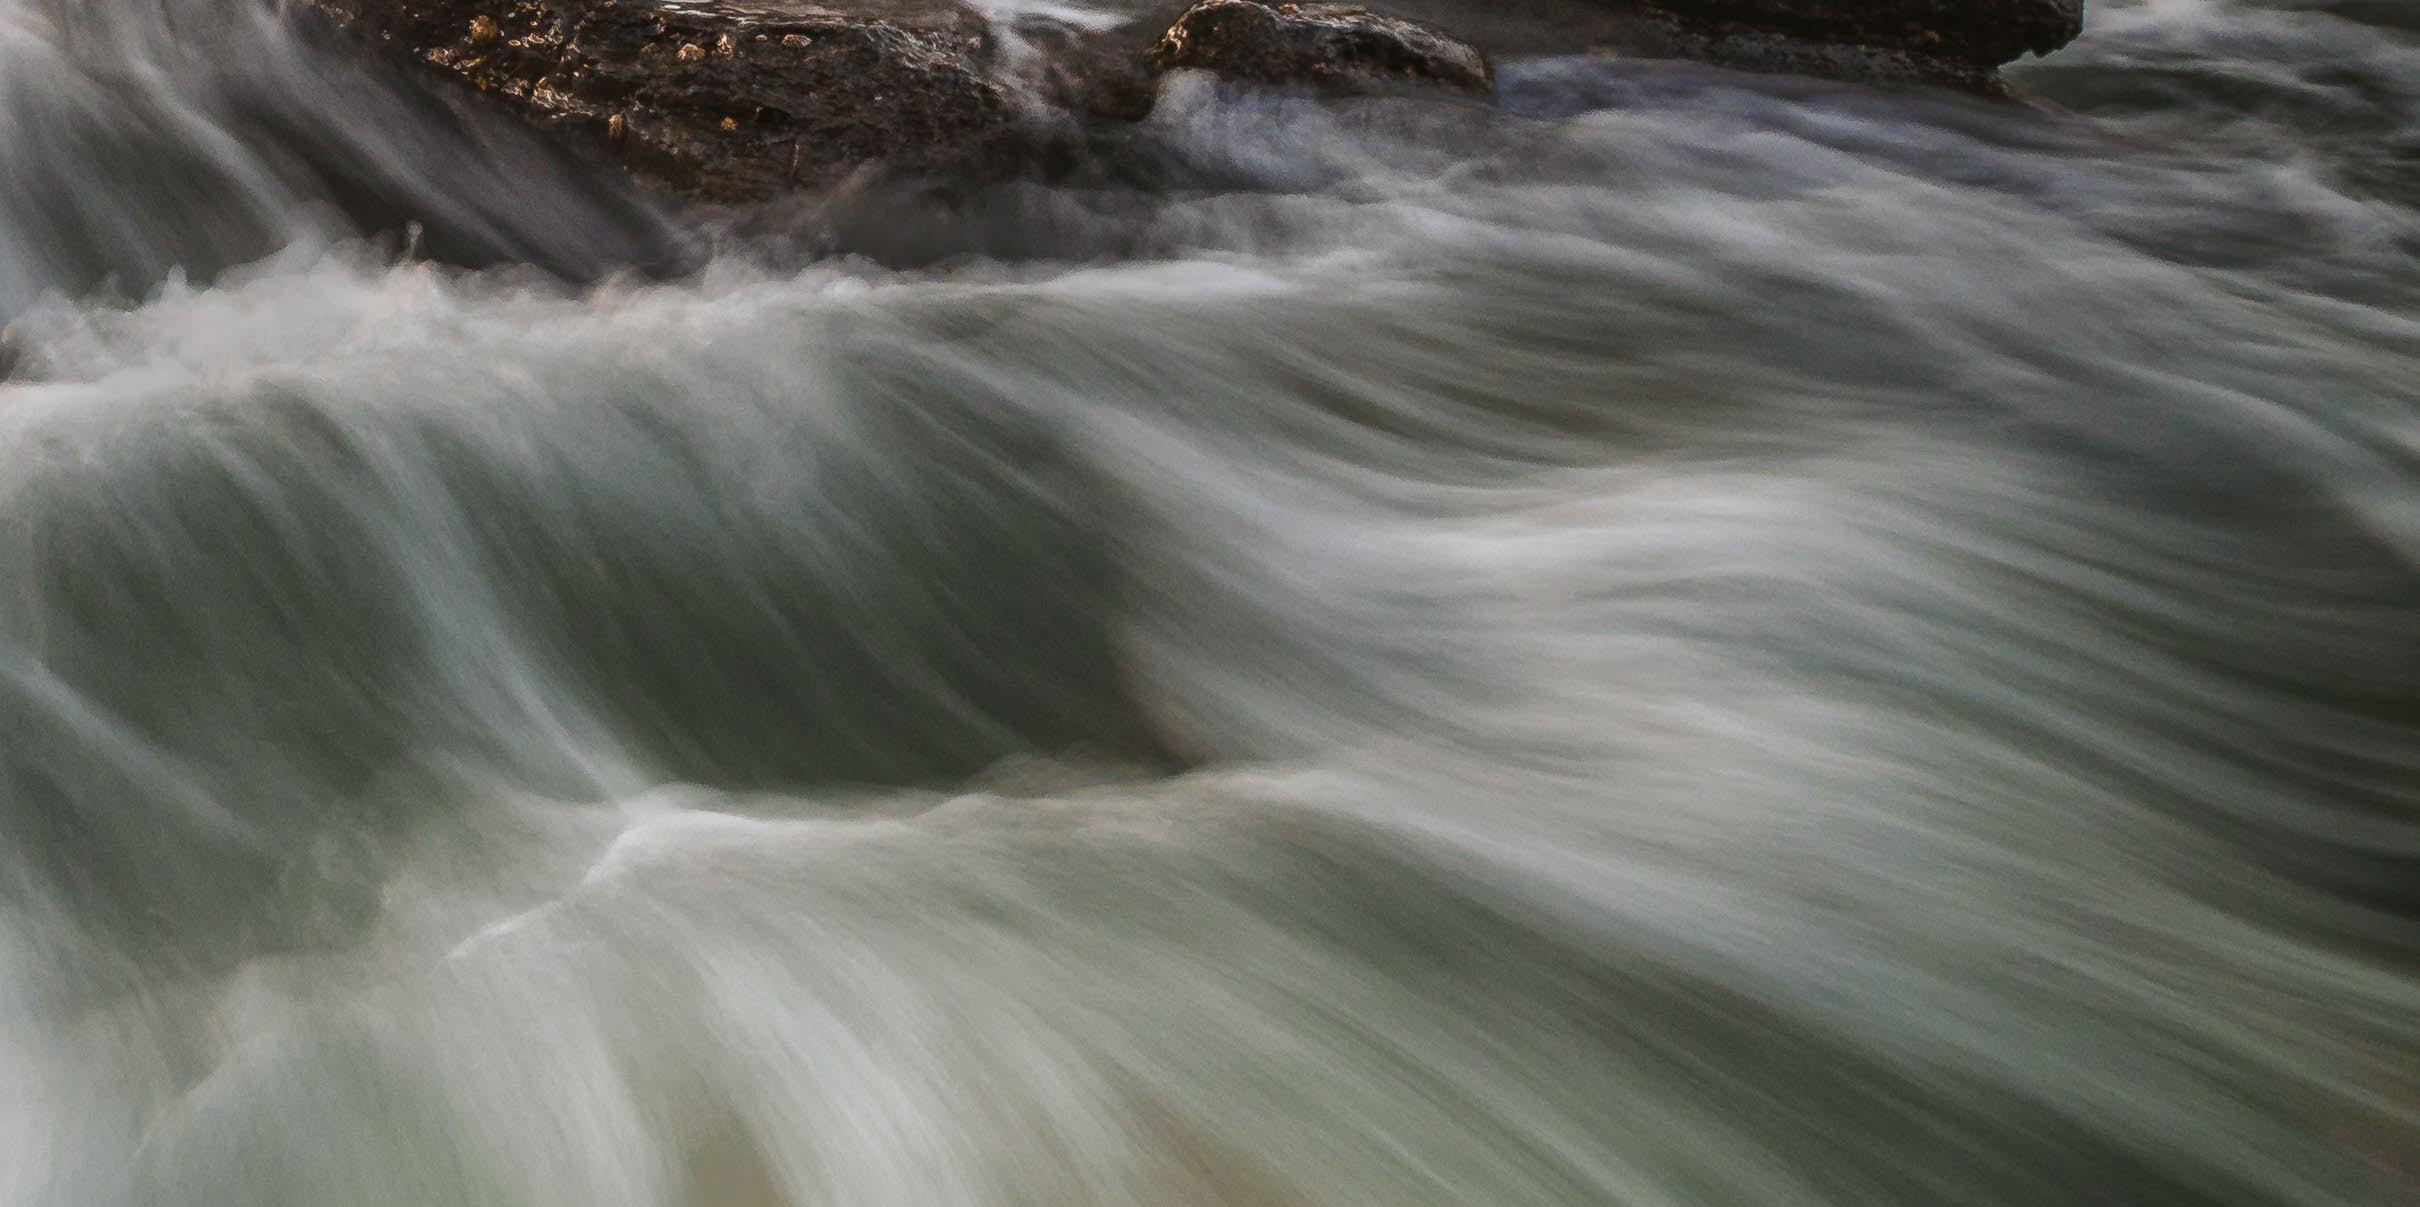
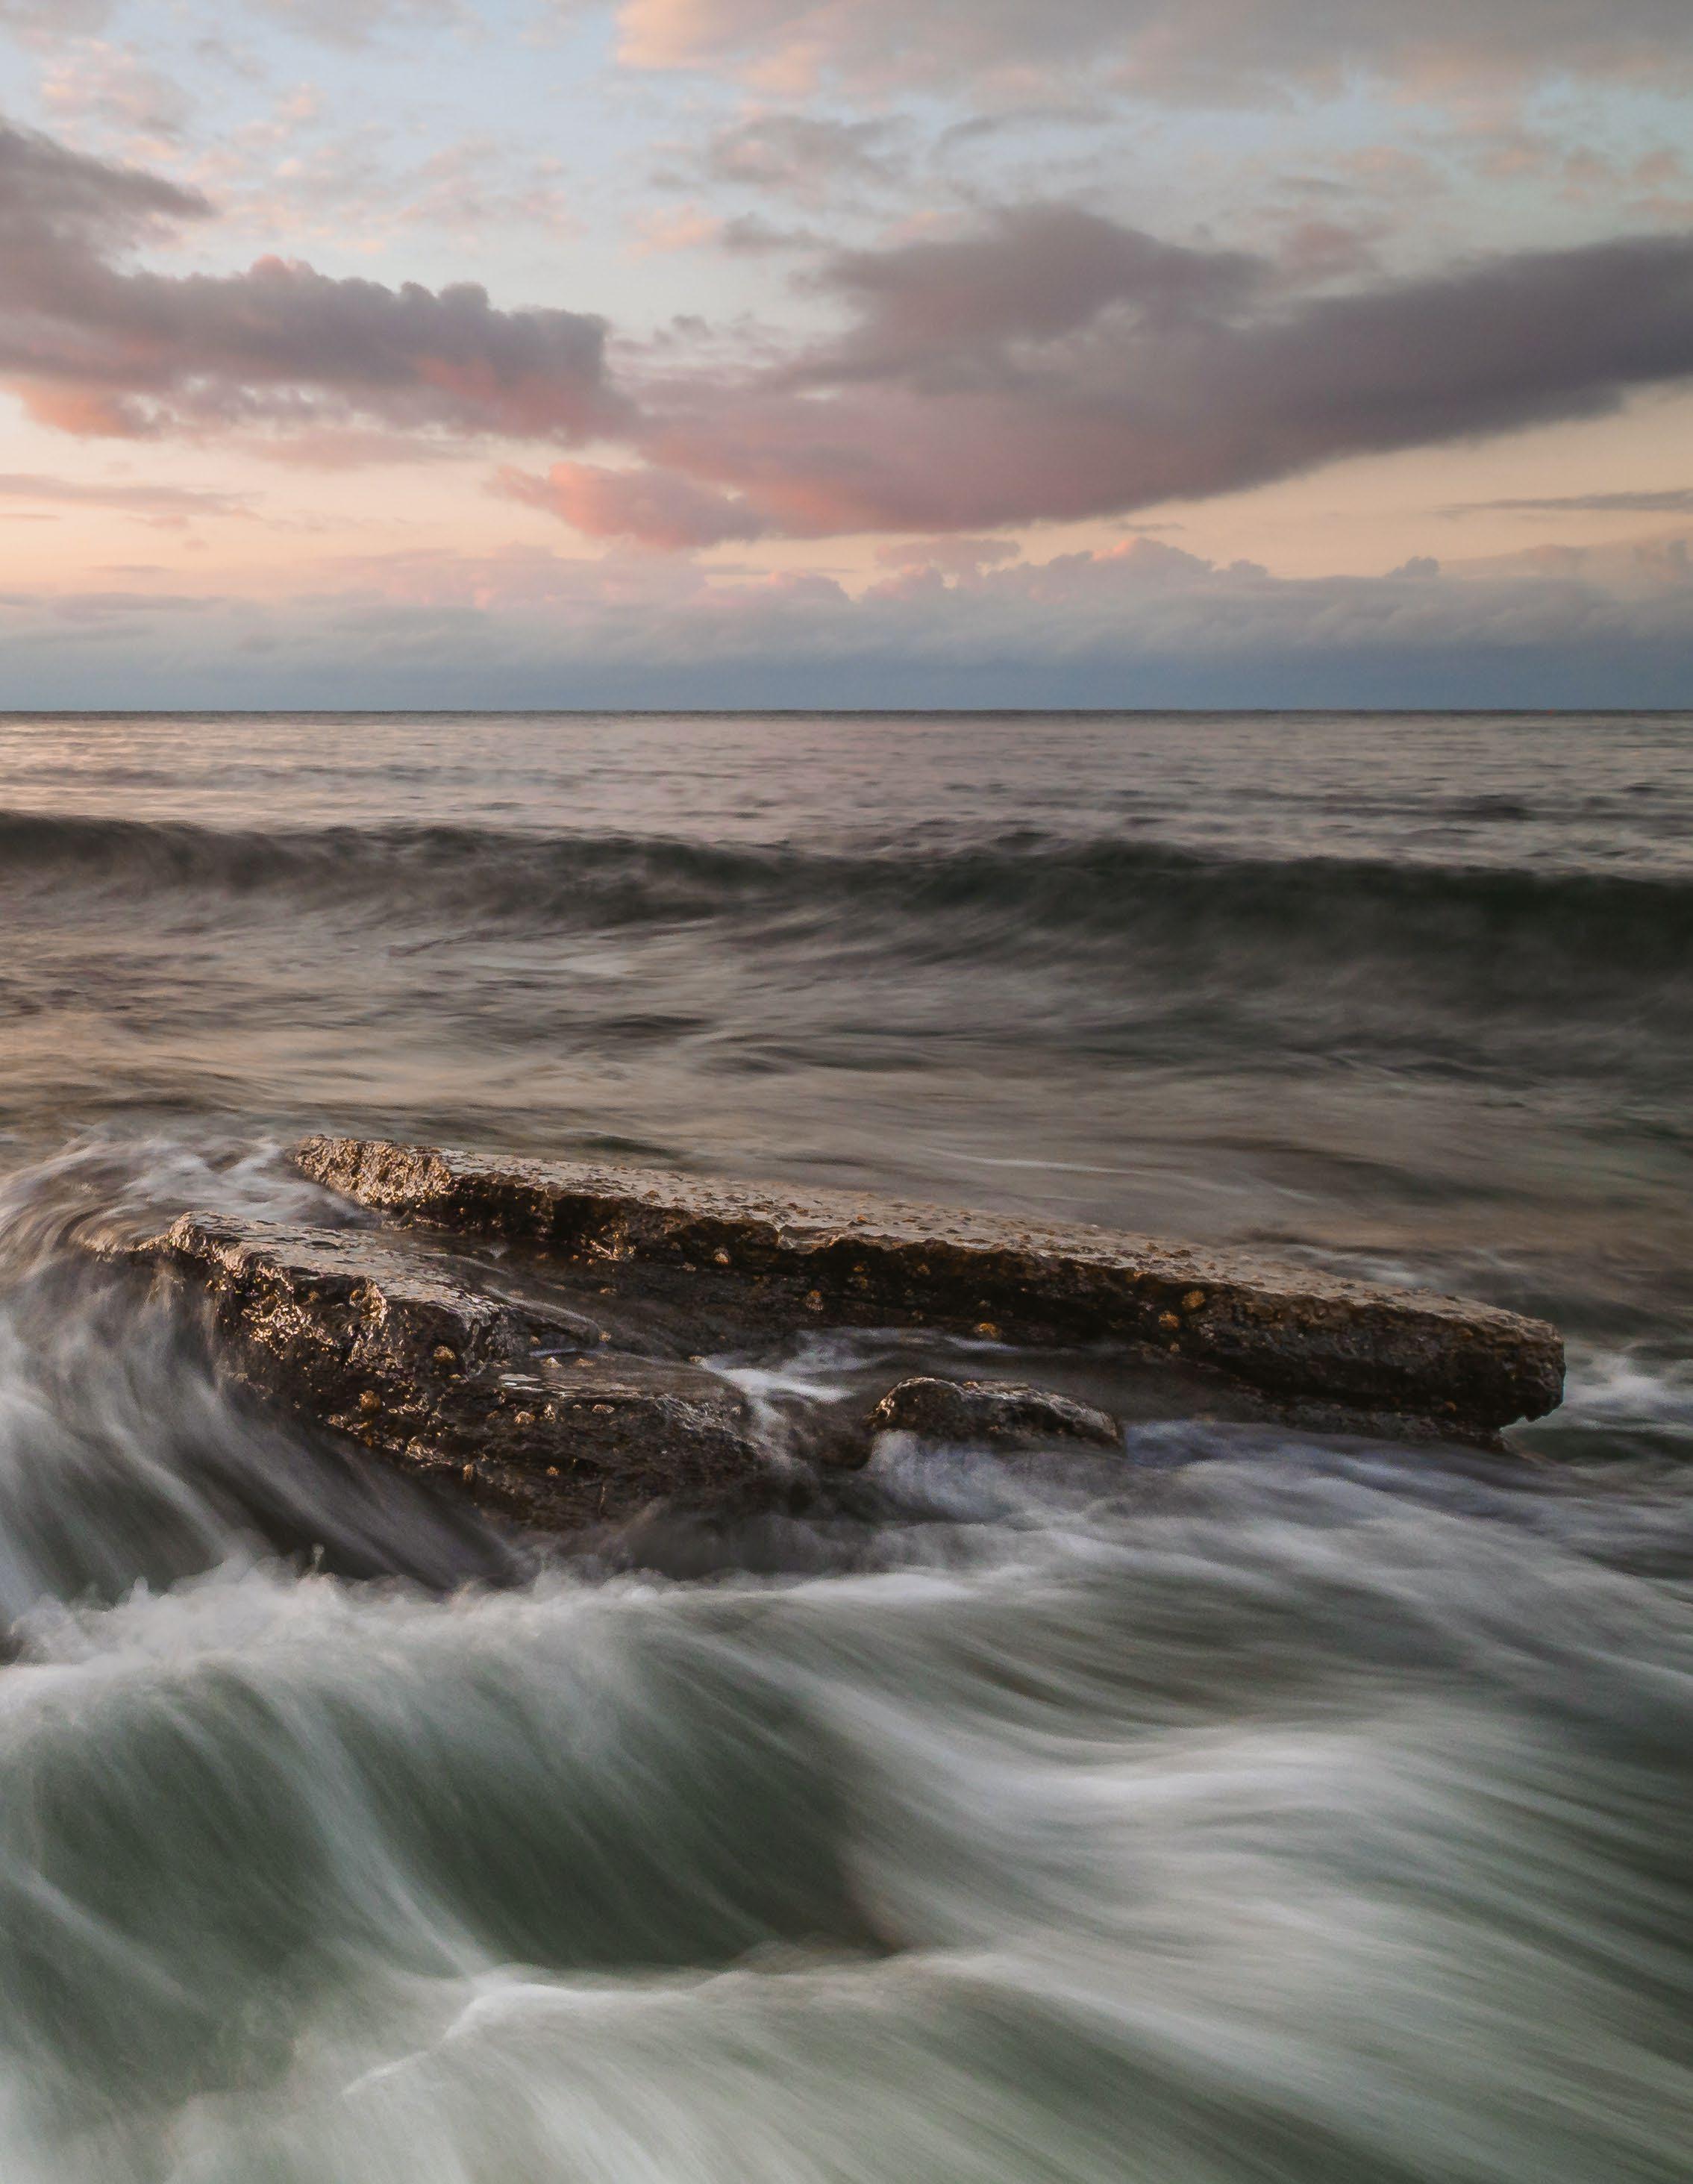
Living by the coast, I naturally spend a lot of time by the sea, and one of the best ways to capture the moment is by being able to portray the motion in the waves. I find capturing wave motion very therapeutic, as once I have a composition finalised, I find myself just sitting there waiting for the perfect wave.
Wave motion can be captured in a number of ways, such as wave trails when the water runs back down a beach, or long lenses on the
Difficulty level: Intermediate
Time taken: 2 hours
crest of a wave, but I will cover my personal favourite type: using wide-angle lenses up close and personal with the rocks waiting for the waves to tumble over them.
You can just turn up to a coastal location and shoot, but with a little planning you can increase your chances of a good shot. It is important to know a little about the location and how the tides affect the area you intend to shoot: some locations can be quite dangerous at high tide, so make sure you go prepared.
What you’ll need
A mirrorless or DSLR camera
A wide-angle or standard zoom lens
A sturdy tripod
A graduated filter and a polariser Adobe Lightroom or similar
163 SHOOTING THE WAVES
Shooting steps
1 Plan ahead By utilising planning apps such as PhotoPills or TPE in the run-up to a shoot, you can ensure you know the position of the sun at the time of the shoot, the tide levels (low-mid incoming tide works well for wave motion shots), the cloud forecast and the wind forecast.
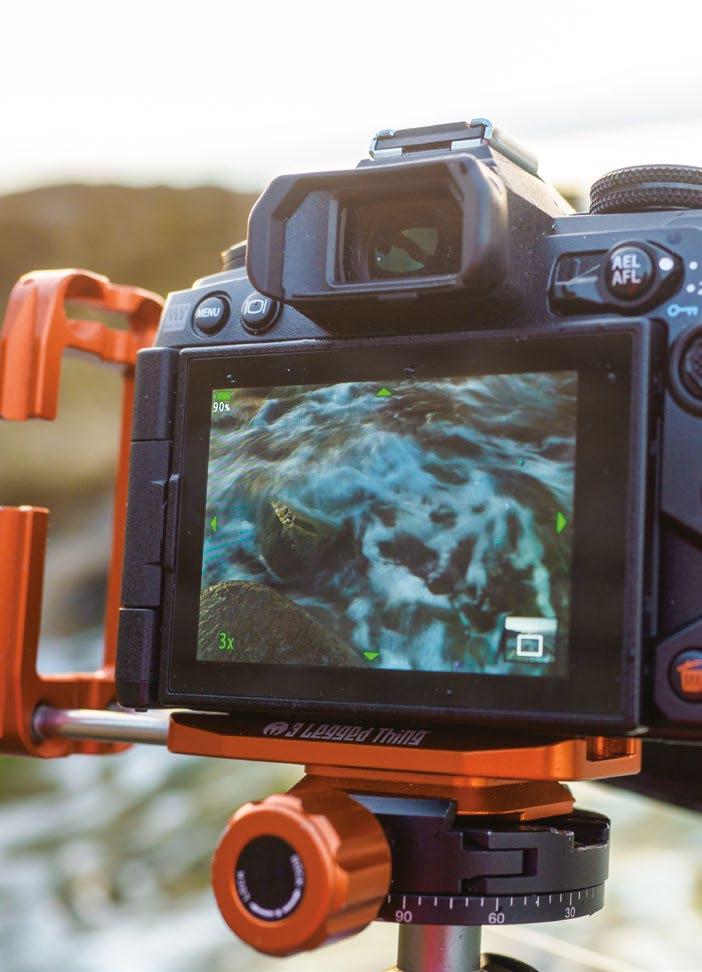
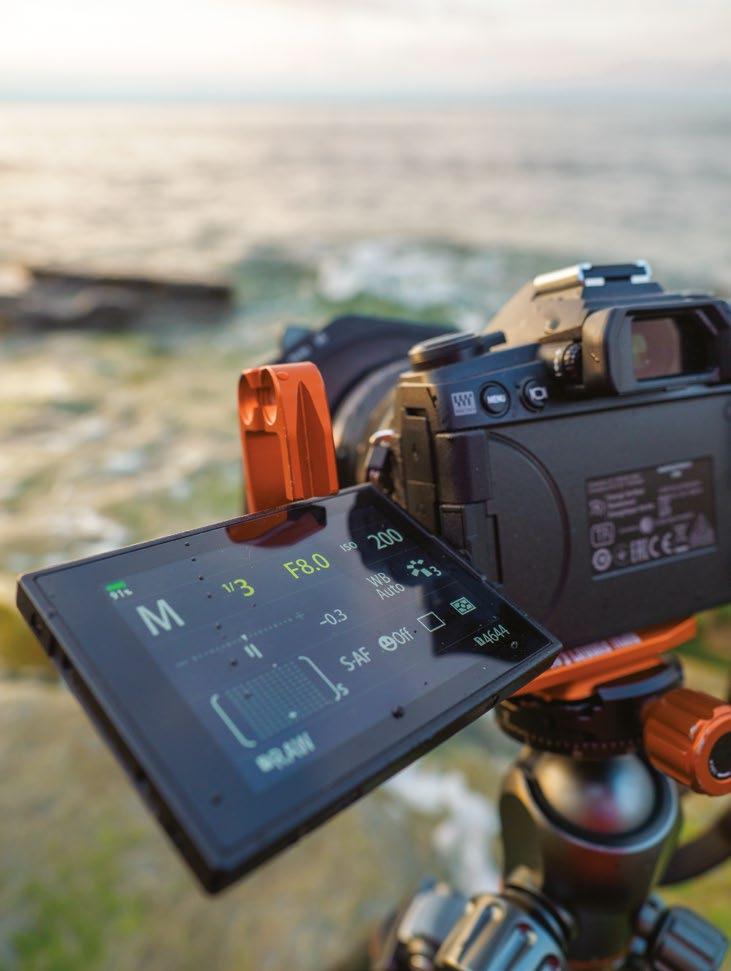
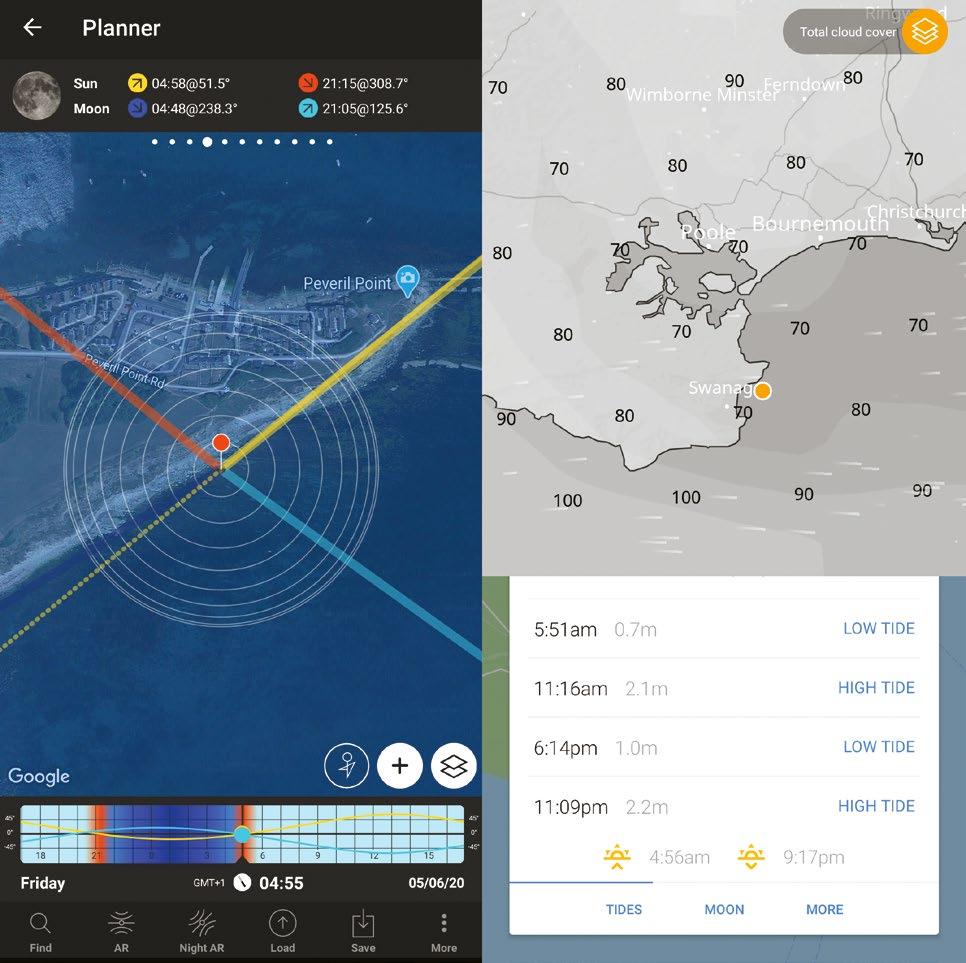
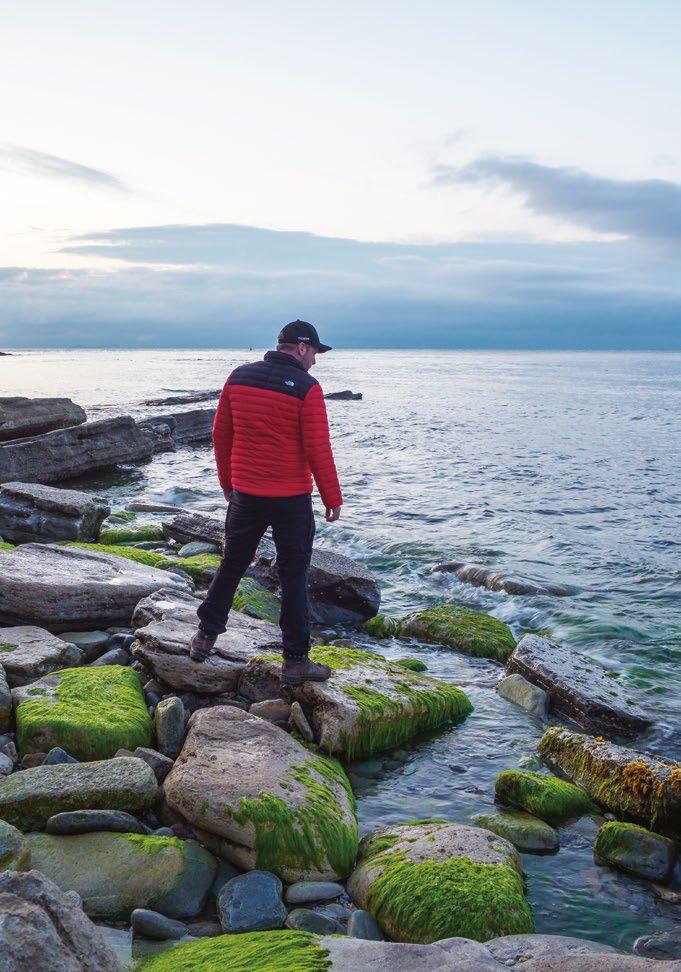
2 Rock hop When you arrive on location look for where the waves are landing on rocks or the beach and see if you can spot any white water. Take a moment to watch the waves – often they will come higher than you expect, so don’t set up too near any areas where there are likely to be significant splashes.
3 Set up and compose Look for some rocks near the shore that waves are moving over. I find that the classic rule of thirds works well with this type of scene. Set up your tripod fairly low down so that the viewer gets the feeling of being in amongst the rocks.
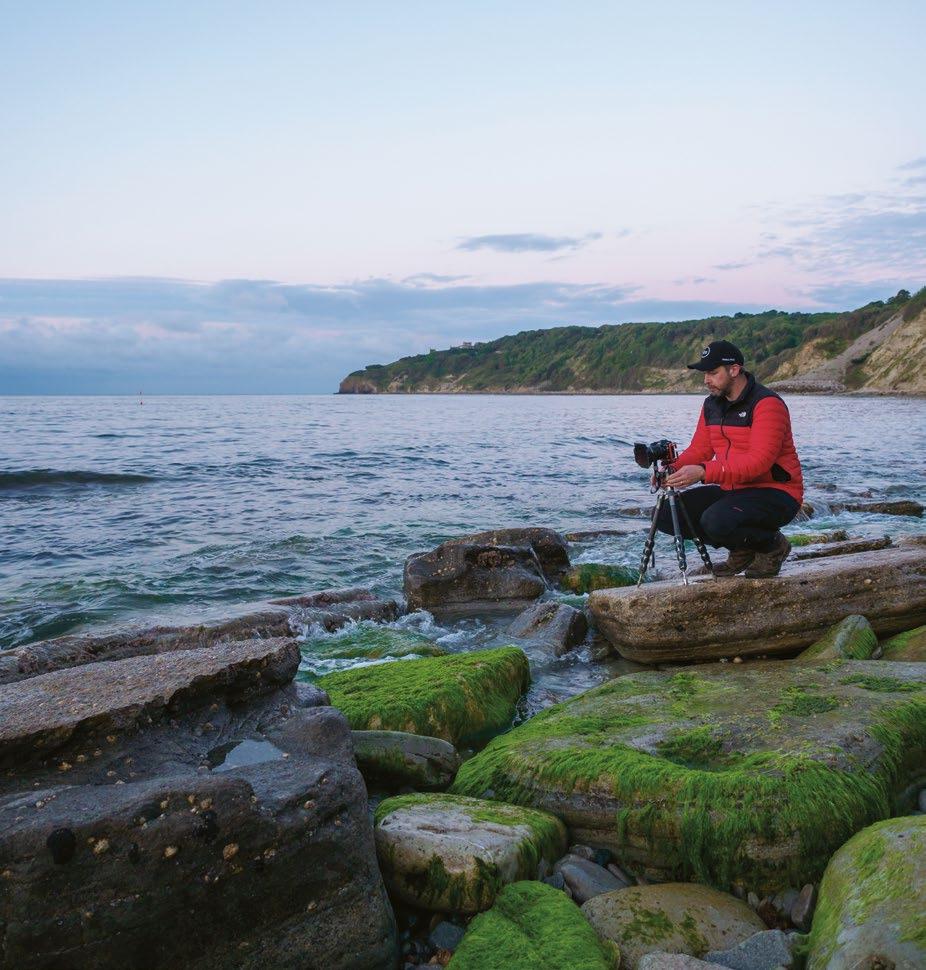
4 Select settings Set your base ISO and an aperture that will give you a decent depth of field (if in doubt f/8 to f/11 is my normal range). To capture wave motion, aim for a shutter speed somewhere between 1/5th to 1 sec depending on the speed of the waves – 1/2 sec is a good starting point.
5 Shoot and adjust Take three or four exposures and review your shot, especially the sea – you want to make sure you have some contrast in the wave. If it is too white, then speed up the shutter slightly. Remember that each wave will be different, so there is no exact science – just keep reviewing and adjusting as necessary.
6 Watch, check and clean Watch the waves and be prepared to snatch your gear away if a rogue wave is heading for you. Even if you don’t get much water on your camera you are likely top get some spray on your lens or filter, so check and wipe them regularly to ensure you don’t get any spots in your shot.
1 3 4 5 6 2
164
PROJECTS
GLASS FILTERS
Consider using a quality graduated glass filter (glass ones are easier to clean quickly in the field) to help control the sky when shooting at slower shutter speeds. Also, use a polariser to reduce glare in the water and see below the surface.
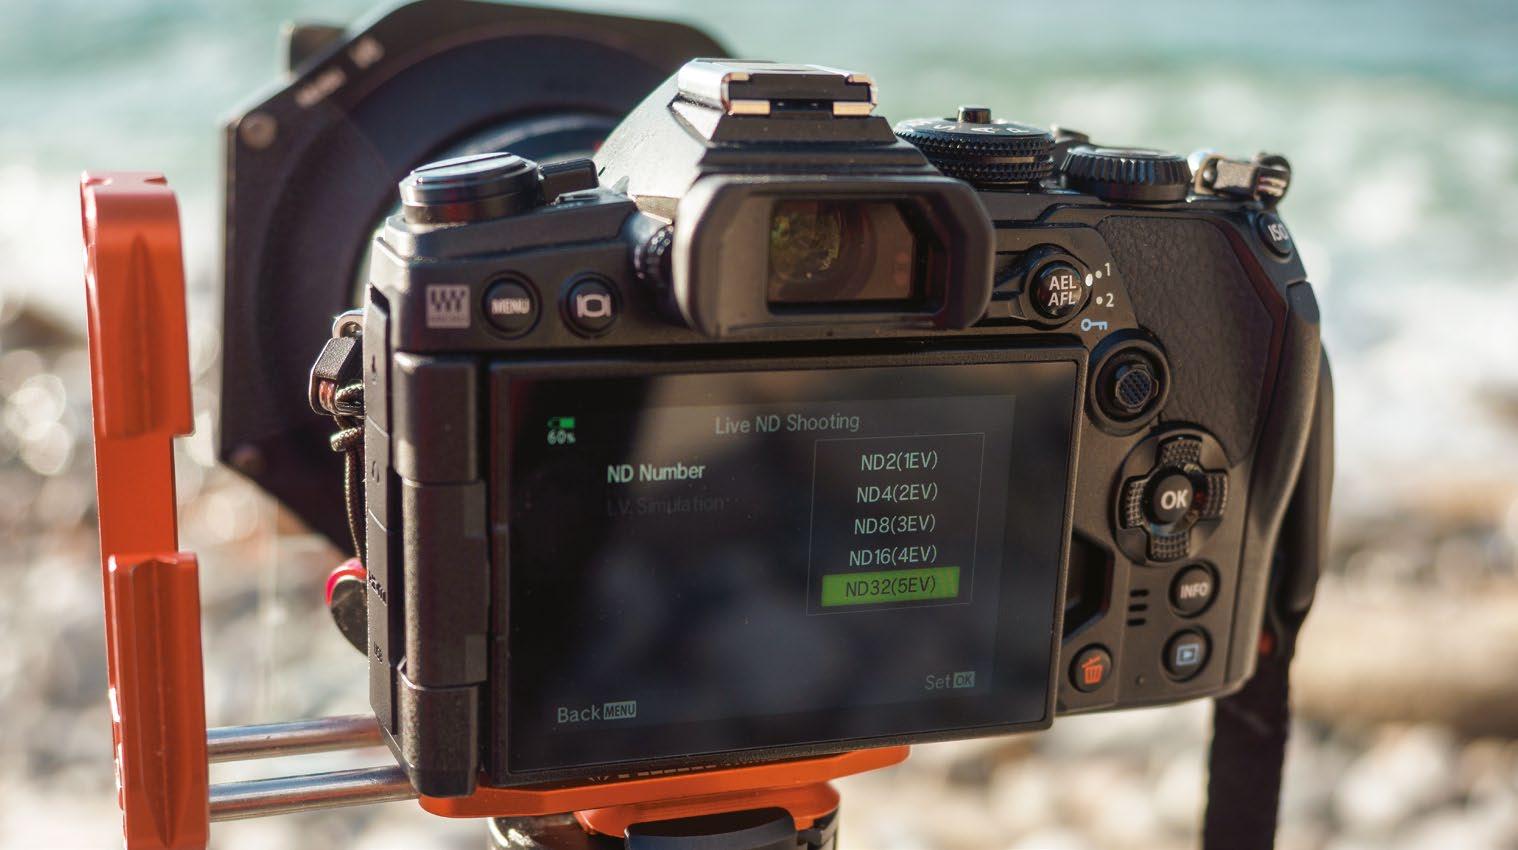
GO LOW
Set up your tripod nice and low to get in with the rocks. Shoot at about knee height to give an alternative view on the scene. An articulated screen comes in very useful at low levels.
The setup
Control the light
Tame your histogram and the light to produce better shots
All photography relies on light, but this is especially true when you are trying to achieve a particular shutter speed. Modern cameras have such a high dynamic range that small adjustments can usually be made in post-production, but getting as much right in-camera as possible ensures that you get a better end result. The use of high-quality glass filters really improves your ability to control the light without degrading the image quality, and advancements in technology, such as the Olympus in-camera Live ND feature, ensure that you have even more control.
WIDE-ANGLE ZOOM
I generally opt for a wide-angle zoom lens to get as much of the scene in as possible, but I allow some versatility when trying to avoid more significant wave slashes.
A ROCKSOLID TRIPOD
A stable tripod is vital for any work when utilising slower shutter speeds. I also recommend spikes to provide a very versatile contact point, as they can be buried in sand or earth, or balanced on rocks with ease.
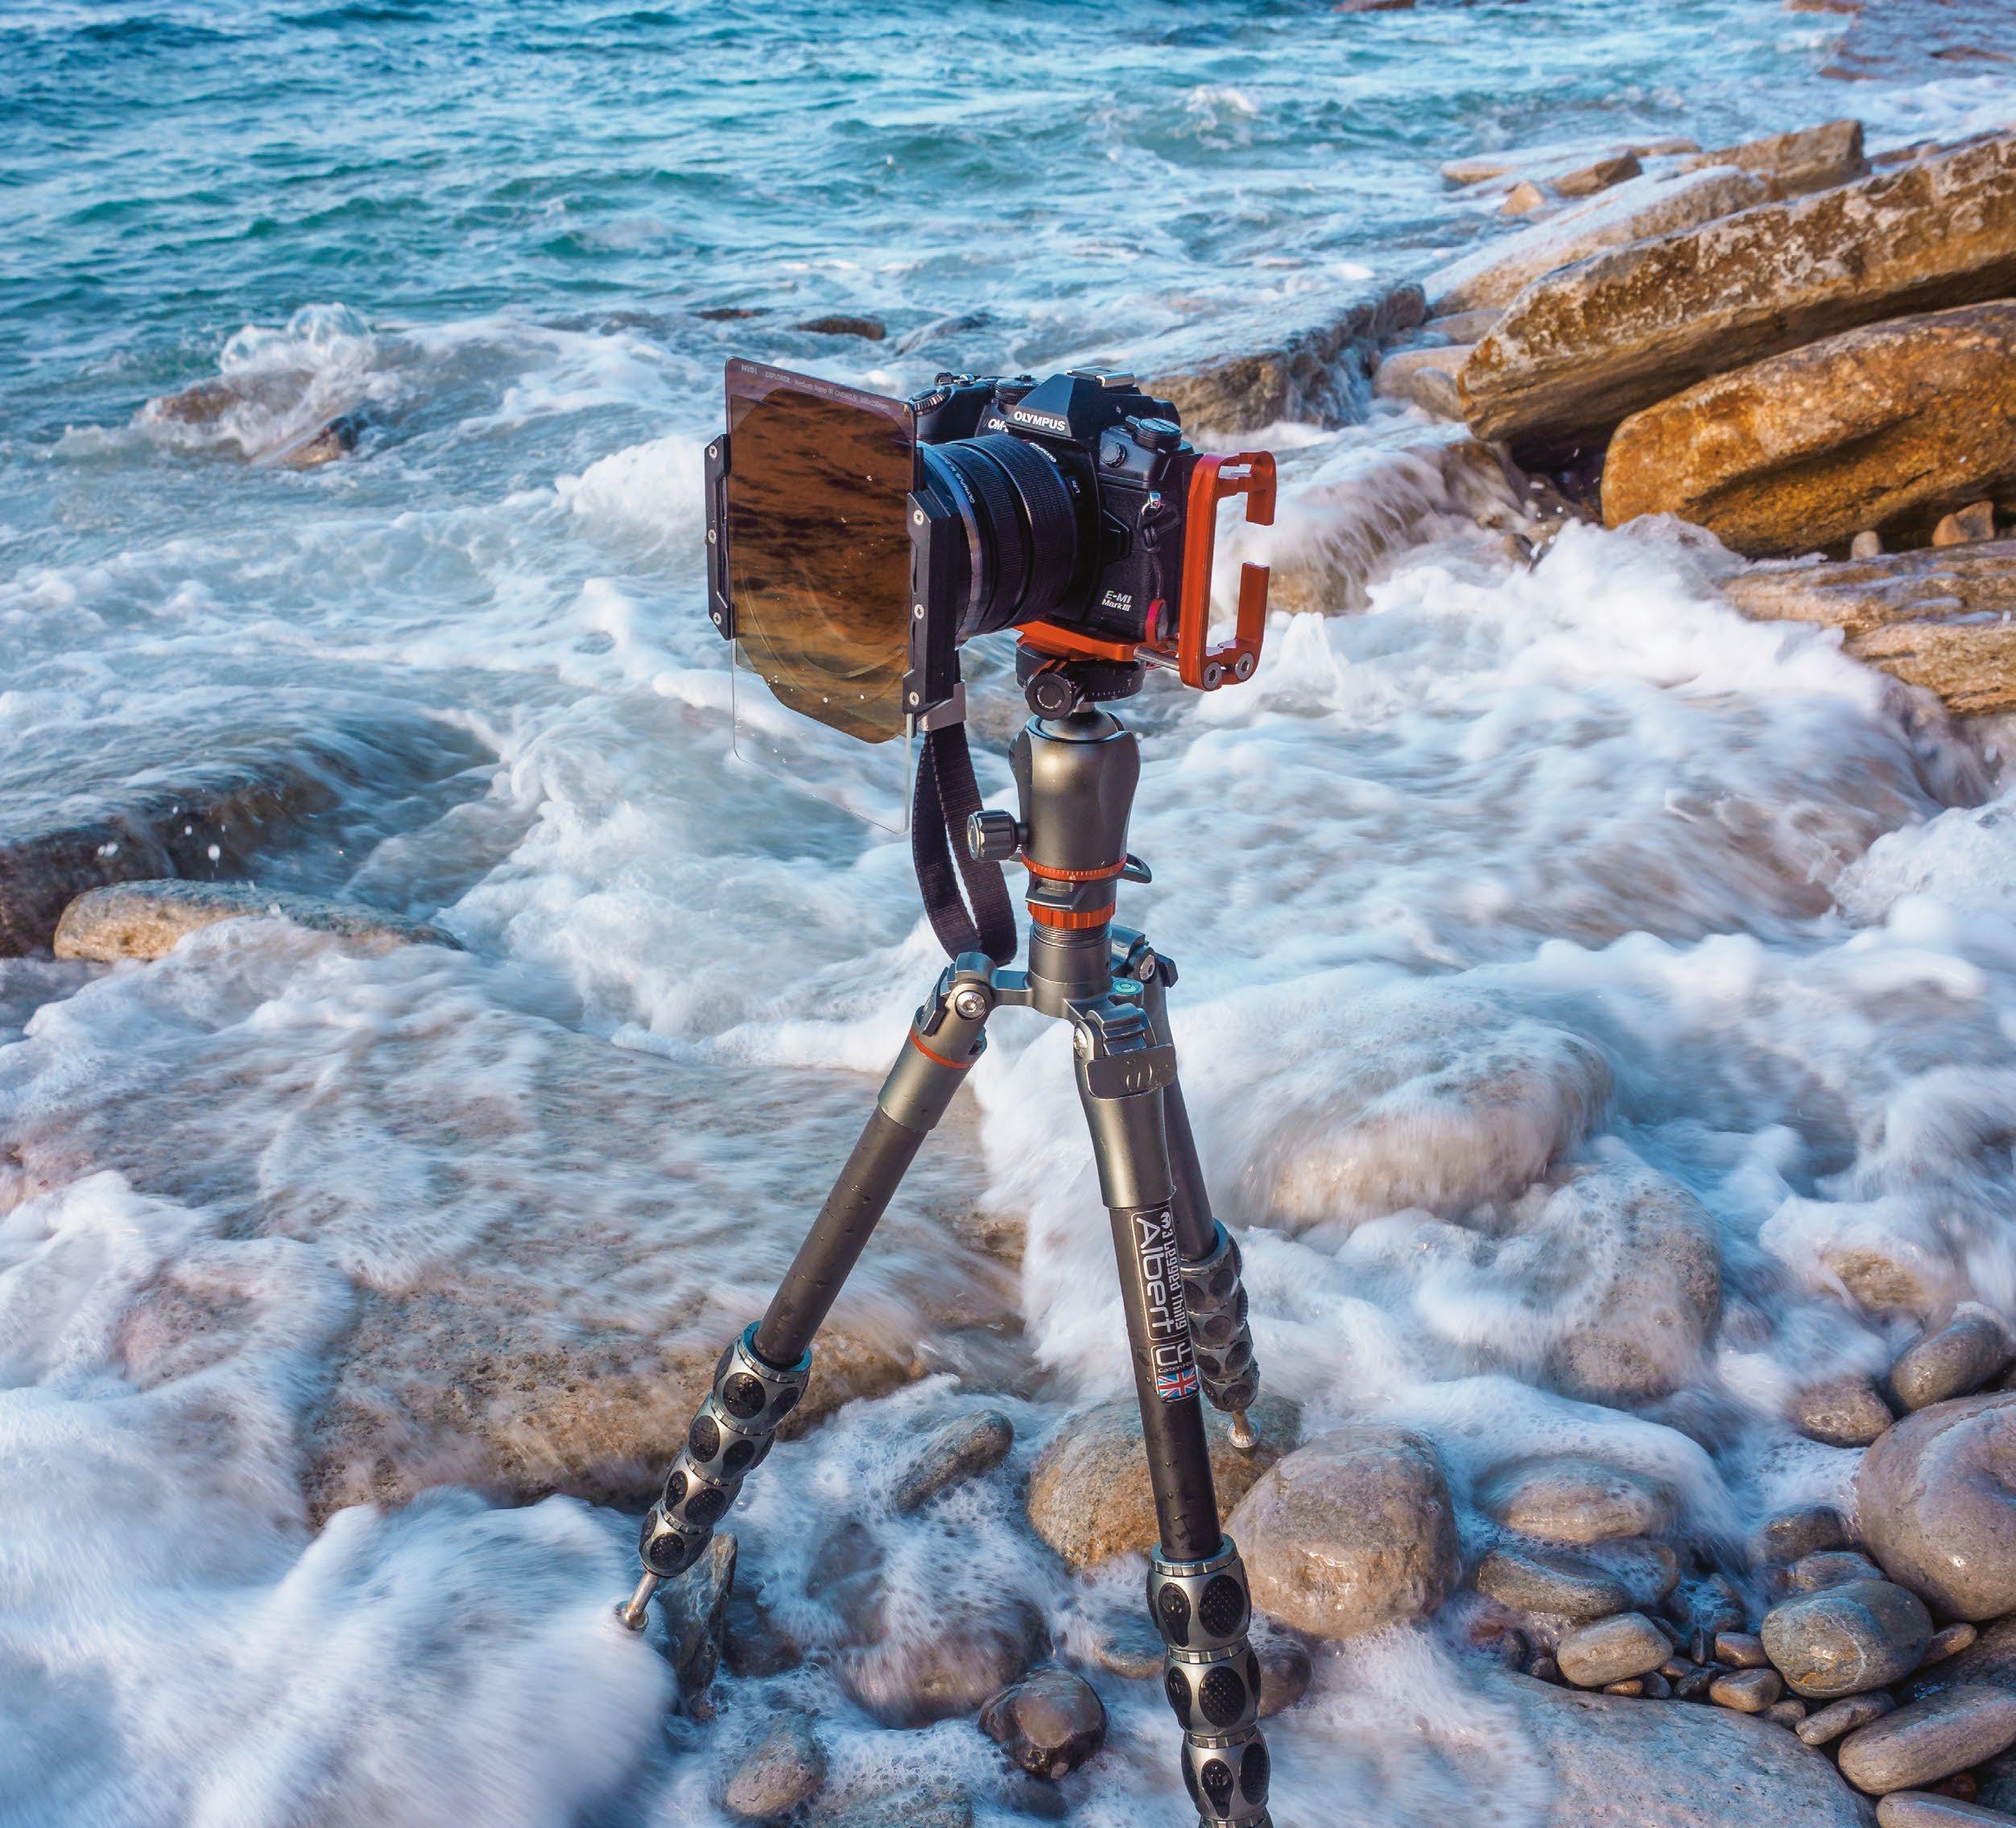
SHOOTING THE WAVES 165
Edit the shot
1 Choose RAW profiles Import your image to Lightroom and apply a RAW profile – I chose Camera Vivid here for a nice bit of pop, but I often use Adobe Landscape, which balances most seascape shots nicely.
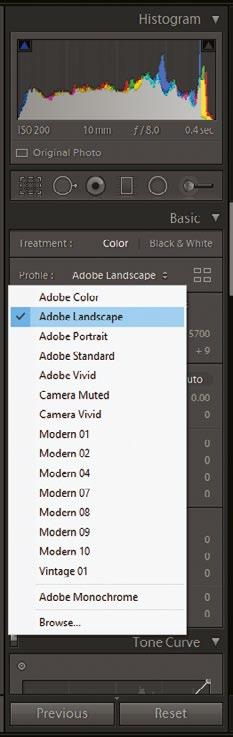
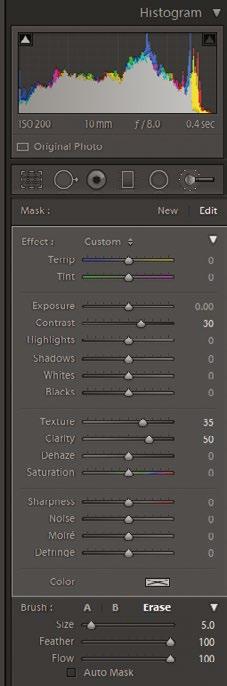
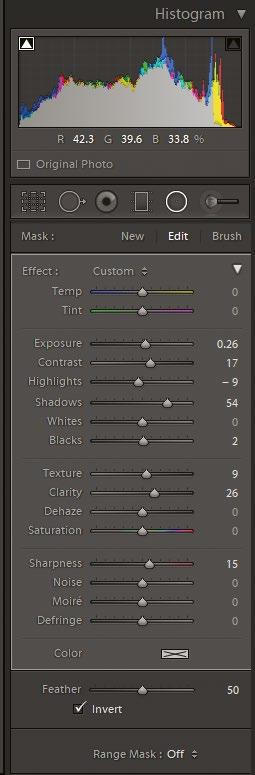
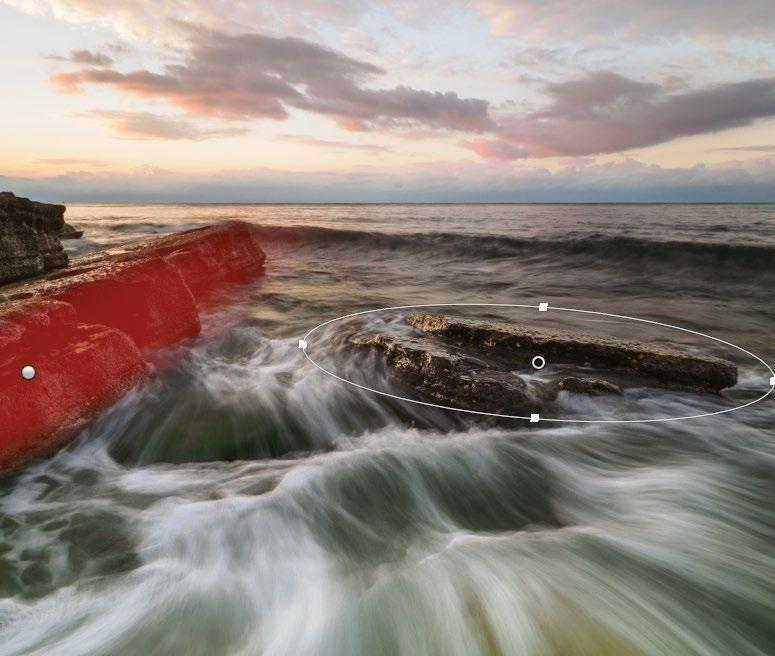
2
Make basic adjustments Apply basic tone and white balance changes – if you have spent time getting things right in-camera, hitting Auto Tone and Auto White Balance should give you a good starting point.
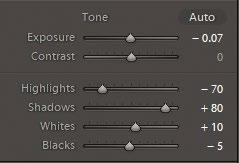
3
Watch the shadows and highlights
Despite carefully choosing your exposure settings, you may find early-morning shots need to have highlights lowered and shadows raised. Remember to watch the histogram, and aim for a balanced image overall.
4
Add drama in the waves Inject some additional interest to the wave motion by using the Adjustment brush. Increase the contrast, clarity and texture to your taste, and paint over the main wave areas to make them the star of the show.
5 Use radial and graduated filters Draw attention to other parts of the image, such as prominent rocks, with radial or graduated filters, or use them to balance the image further and remove overly dark or bright areas like the sky.
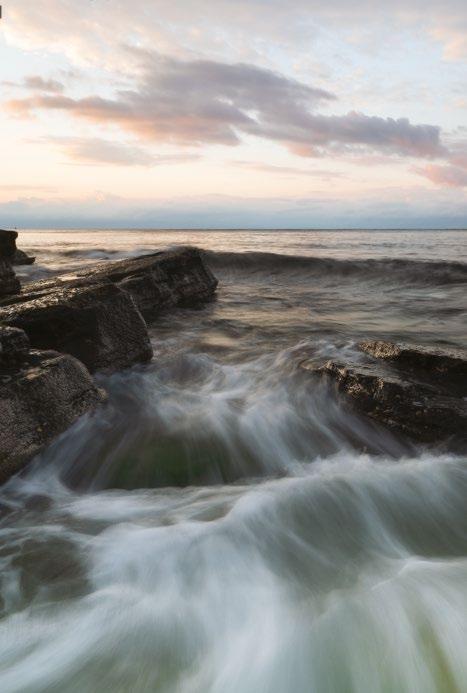
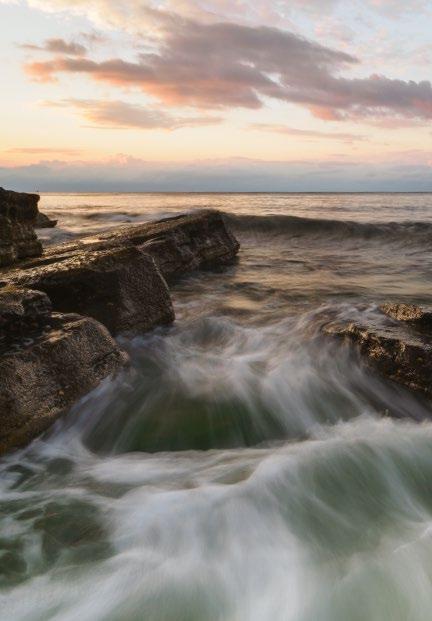
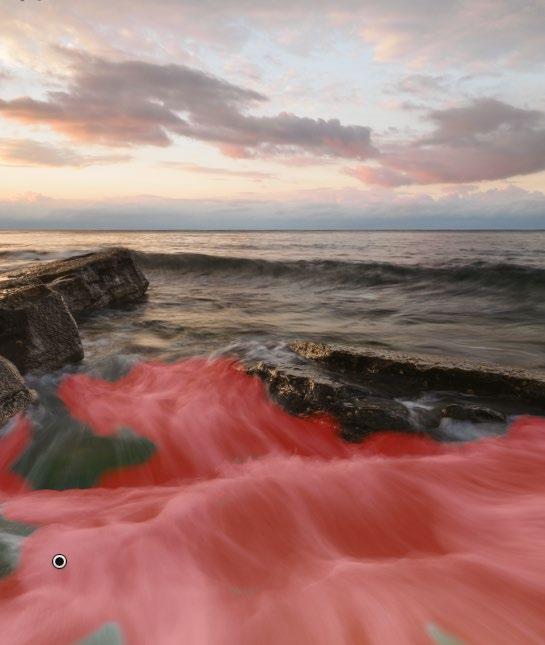
6 Perform final checks Ensure Remove Chromatic Aberration is ticked, doublecheck your crop is straight, and tweak the sharpening/noise reduction. Also, ensure there are no overly distracting items at the edge of the image. I often apply a small vignette just to draw the eye to the centre of the shot.
Right In motion
The lightening of the shoreline and increased contrast in the sky help to balance the image, and increase the warmth and feeling of tranquillity as the waves tumble over the rocks
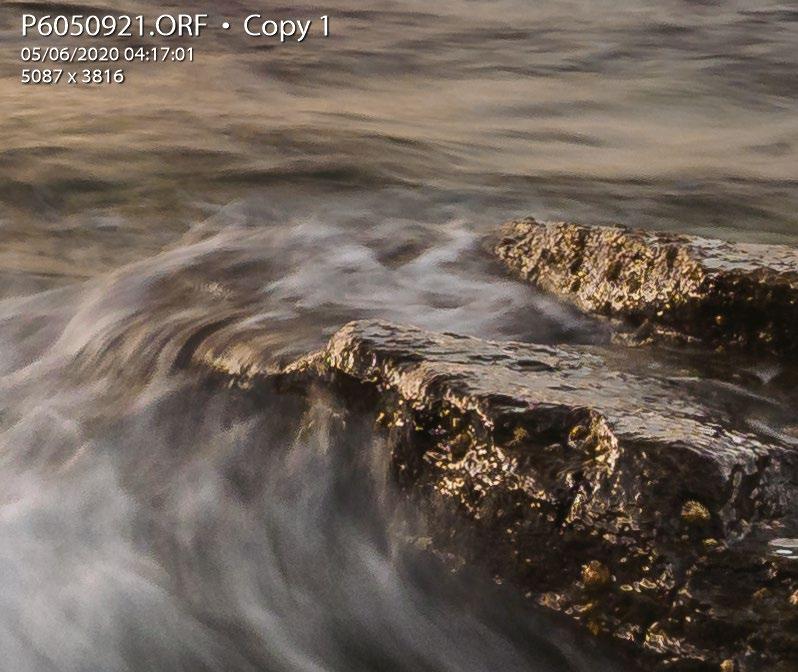
1 3 5 4 6 2 PROJECTS 166

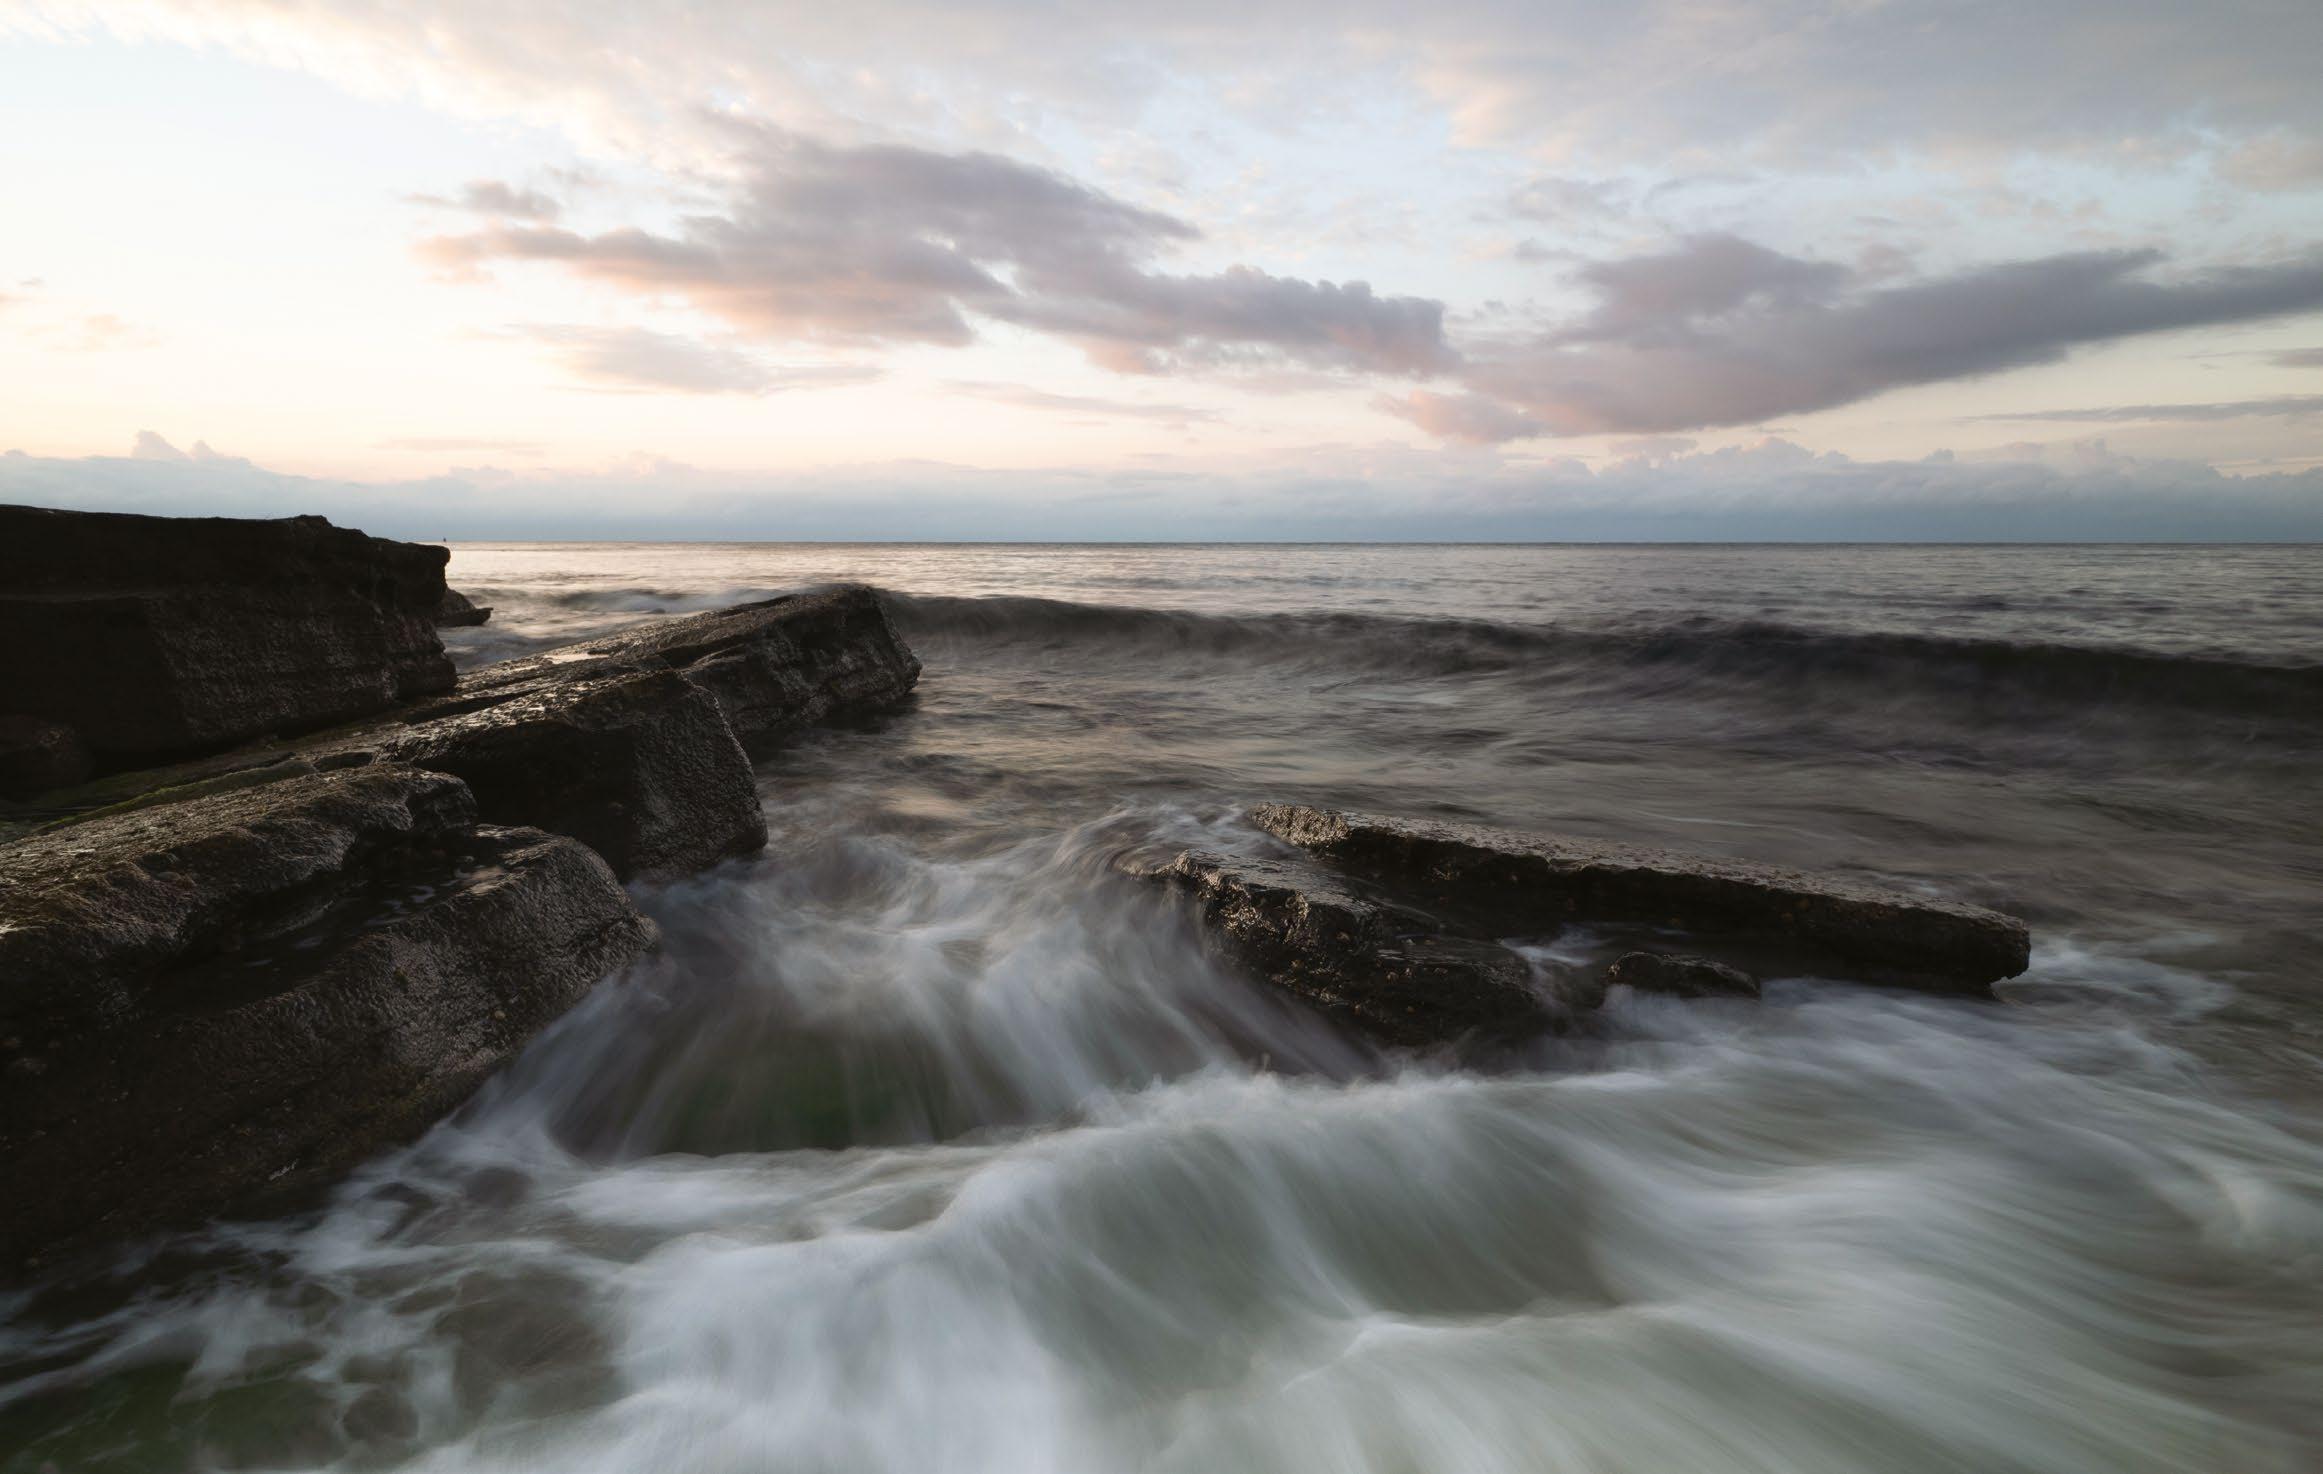
BEFORE
SHOOTING THE WAVES 167
AFTER
Greater depth of field
By focus stacking three images of this Lake District landscape, both the hill in the background and stone in the extreme foreground appear sharp
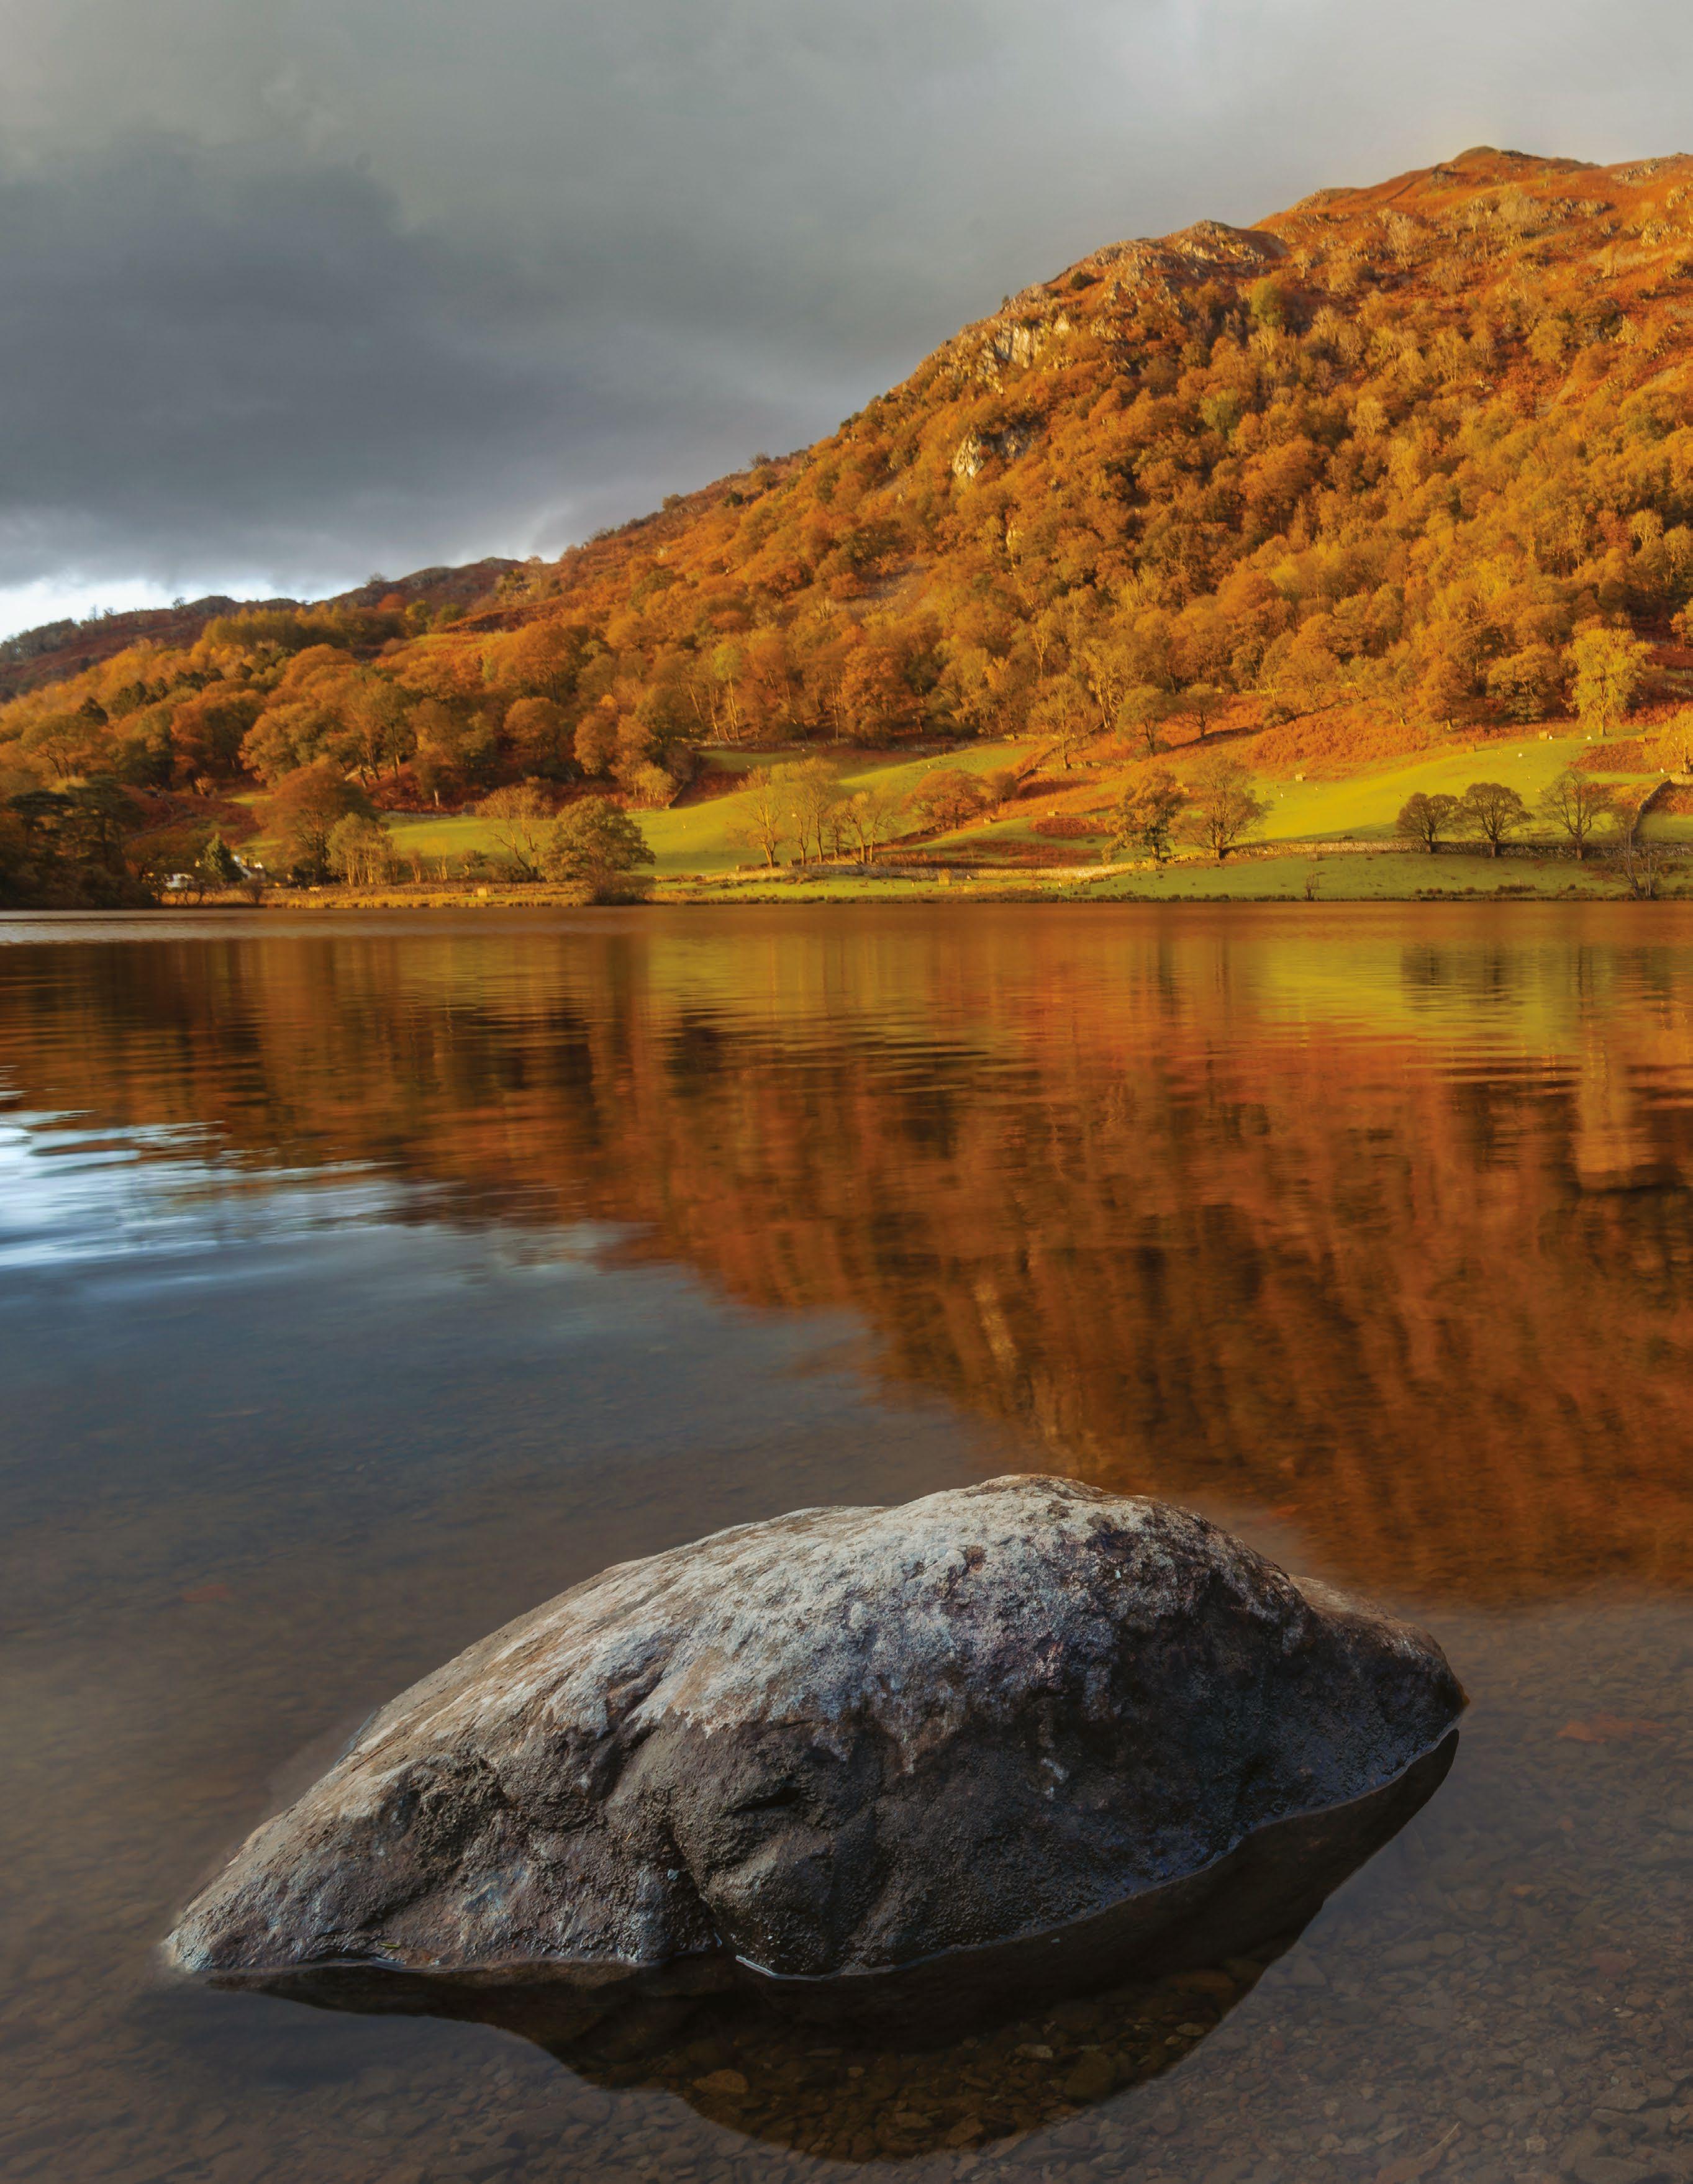
168 PROJECTS
All images © Louise Carey
Landscapes Focus-stacked
Landscapes
Louise Carey captures a pin-sharp landscape from front to back with a manual focus-stacking technique
Difficulty level: Intermediate
Time taken: 2 hours
When it comes to landscape photography, the common wisdom is that you should use the narrowest aperture possible to achieve beautifully crisp results in your roaming vista. However, what this advice fails to take into consideration is that setting your lens to its very narrowest (or very widest for that matter) can start to introduce poor image quality.
Generally speaking, the ‘sweet spot’ of almost any lens will reside at around f/8. This is where you’ll enjoy the best image quality and the sharpest optical results, ignoring depth of field.
Because landscape photography is all about displaying a fantastic view in all its splendour, many photographers

decide to eschew narrow apertures and opt for a different technique instead.
Focus stacking is more commonly associated with macro photography, because it allows several images with a shallow depth of field to be blended together to create a very sharp final shot with an effectively large depth of field. However, it can also be used in conjunction with an f/8 aperture to create tack-sharp landscape shots without risk of poor optical quality. By capturing three to four differently focused shots and stacking them together, you can recreate a fantastically crisp view, like this shot taken in the Lake District, UK. Here’s a hands-on look at how to focus stack...
What you’ll need
DSLR or mirrorless camera
Wide-angle lens, such as a 20mm
Tripod Photoshop
169 FOCUS-STACKED LANDSCAPES
Shooting steps
1 Compose the shot A tripod is essential for this technique, to capture various photos without changing the composition. Looking for some super-close foreground interest is also highly recommended, as it’ll enable you to make the most of the focus-stacking technique.
2 Go manual It’s important to keep the camera set to its Manual mode, as you don’t want the exposure changing between shots. Set an aperture of f/8 and an ISO of 200. If you’re shooting around sunset, this should also give you a fairly slow shutter speed.
3 Adjust your focus settings
Set the camera to AF-S (or Single Area AF), as this will focus just once when you half-press the shutter button. You should also adjust your settings to Single-Point AF, as this will give you one singlefocus point to move around and place in your scene.
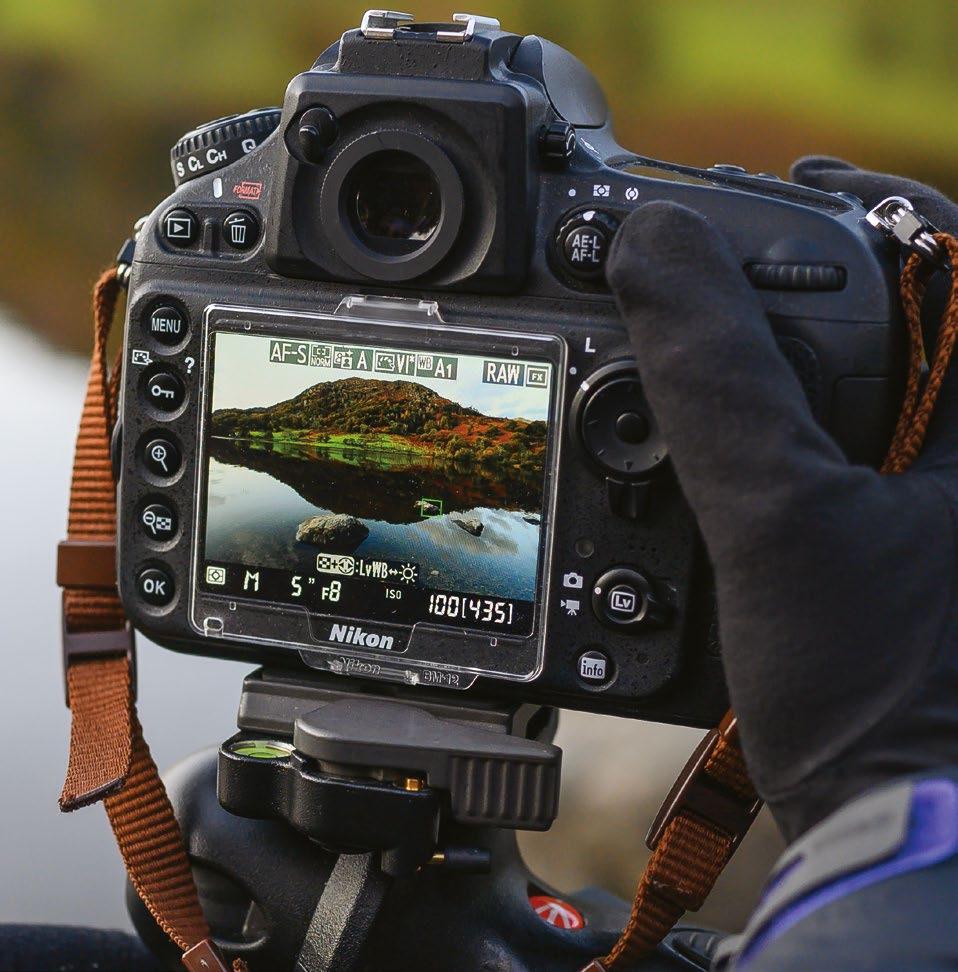
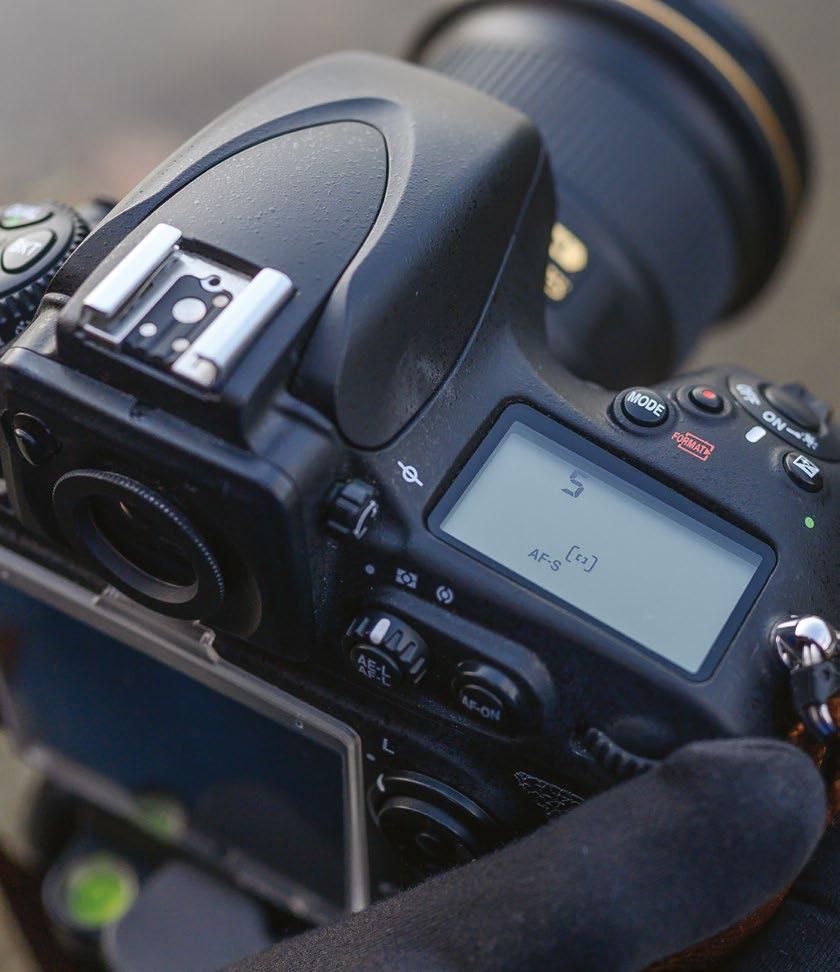
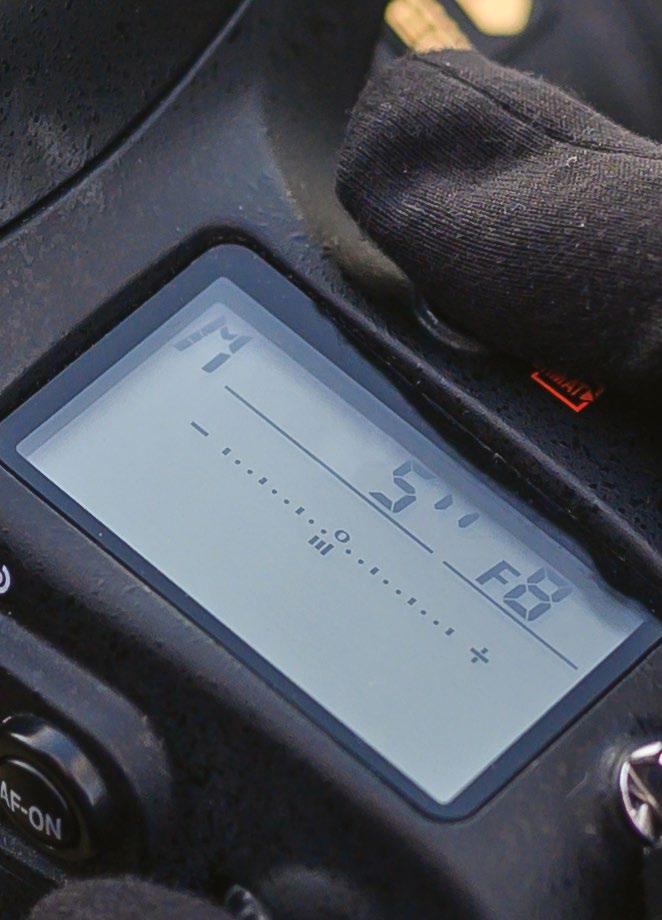
4 Focus on your foreground
Switch the camera to Live View and use the D-pad to place the focus point on the closest part of your foreground interest. Set the camera to Self Timer mode to prevent camera shake. Half-press the shutter button to focus and then fully press it down to take the photo.
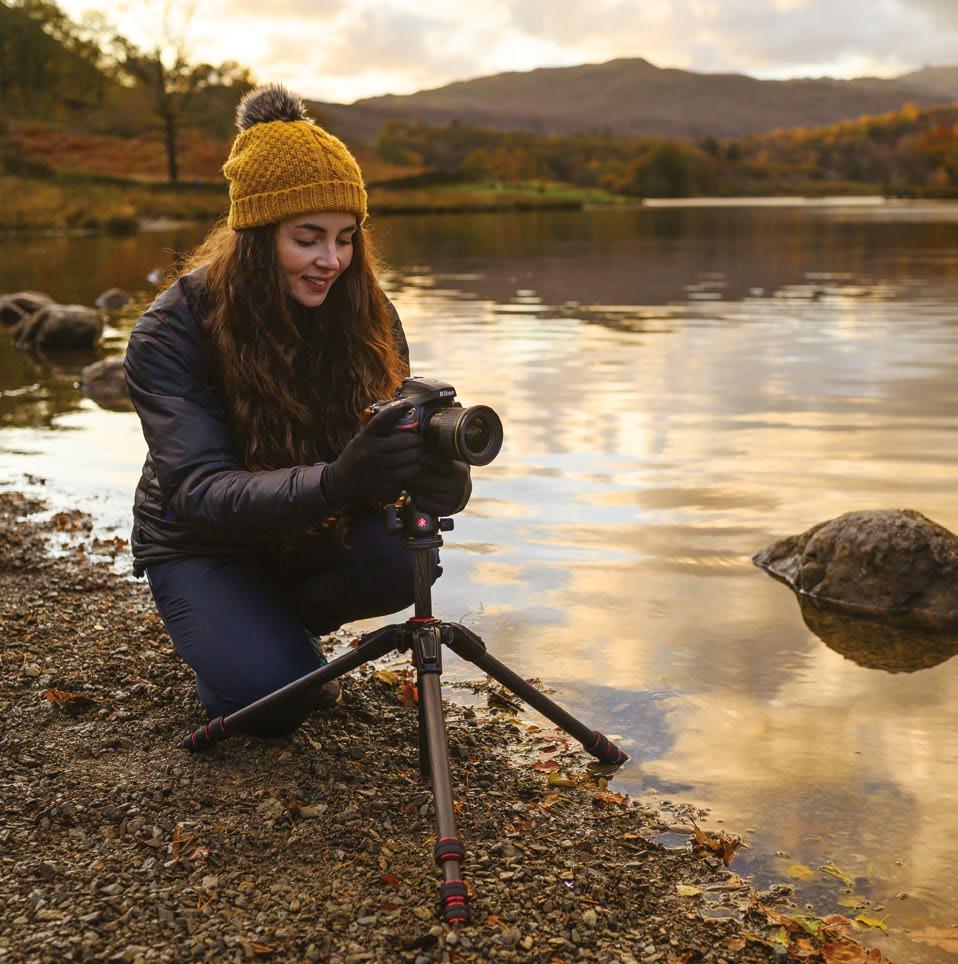
5 Adjust your focus Repeat the process for step 4 by placing the focus point at different points throughout your scene. Here we took three shots; the first was the closest stone, the second was the furthest stone and the last was the hill in the background. However, you can take up to five or six shots if needed for your scene.
6 Review your shots Zoom into each of your images to ensure that your shot is sharp in the desired area and that there isn’t any camera shake. If you want to try shooting a fresh set, take a photo of your hand to help you differentiate between stacks when you’re editing.
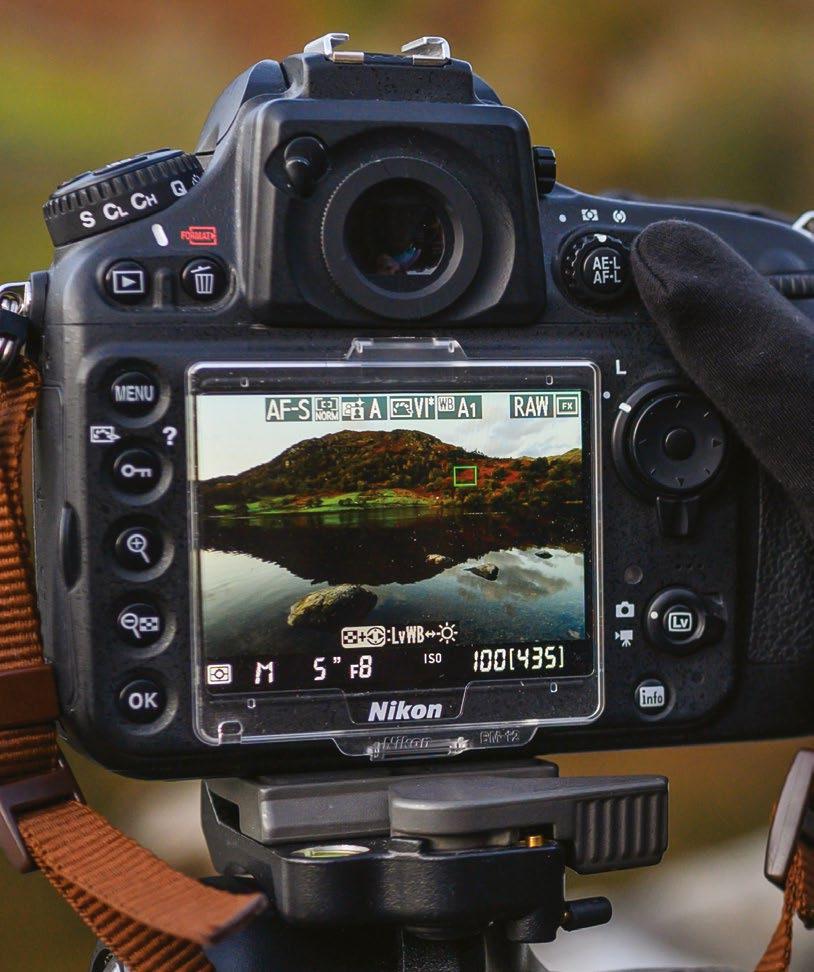
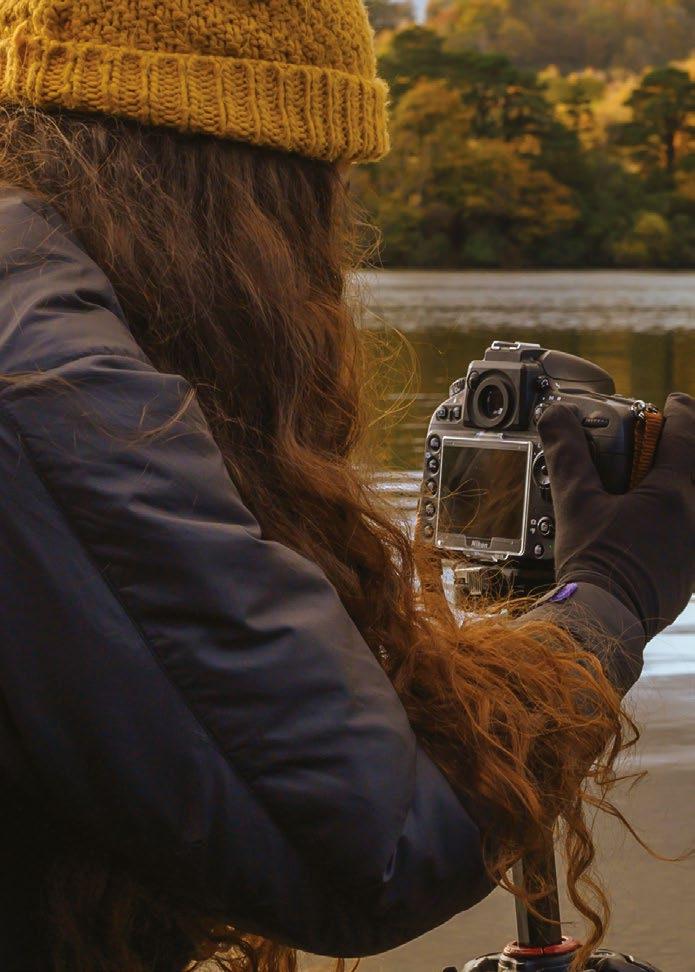
1 3 4 5 6 2 170
PROJECTS
The setup
Using autofocus
One of the most important aspects of this technique is ensuring that you’ve achieved a sharp focus in each of your shots. If you’ve missed the focus in one of your key areas, such as your extreme foreground, then no amount of stacking in Photoshop will be able to disguise that. However, combining autofocus and the Live View mode is the key to success.
When using an optical (DSLR) viewfinder, you won’t have the freedom to move your AF point outside of a set field. However, Live View mode means you can move it anywhere within the scene. This enables you to easily place it directly on the foreground interest.
WIDE-ANGLE LENS
A wide piece of glass is essential for this technique, as you may struggle to capture close foreground interest without it. Try using a 20mm lens (or a 12mm focal length on an APS-C camera) to achieve the desired wide angle of view.
FULL-FRAME CAMERA
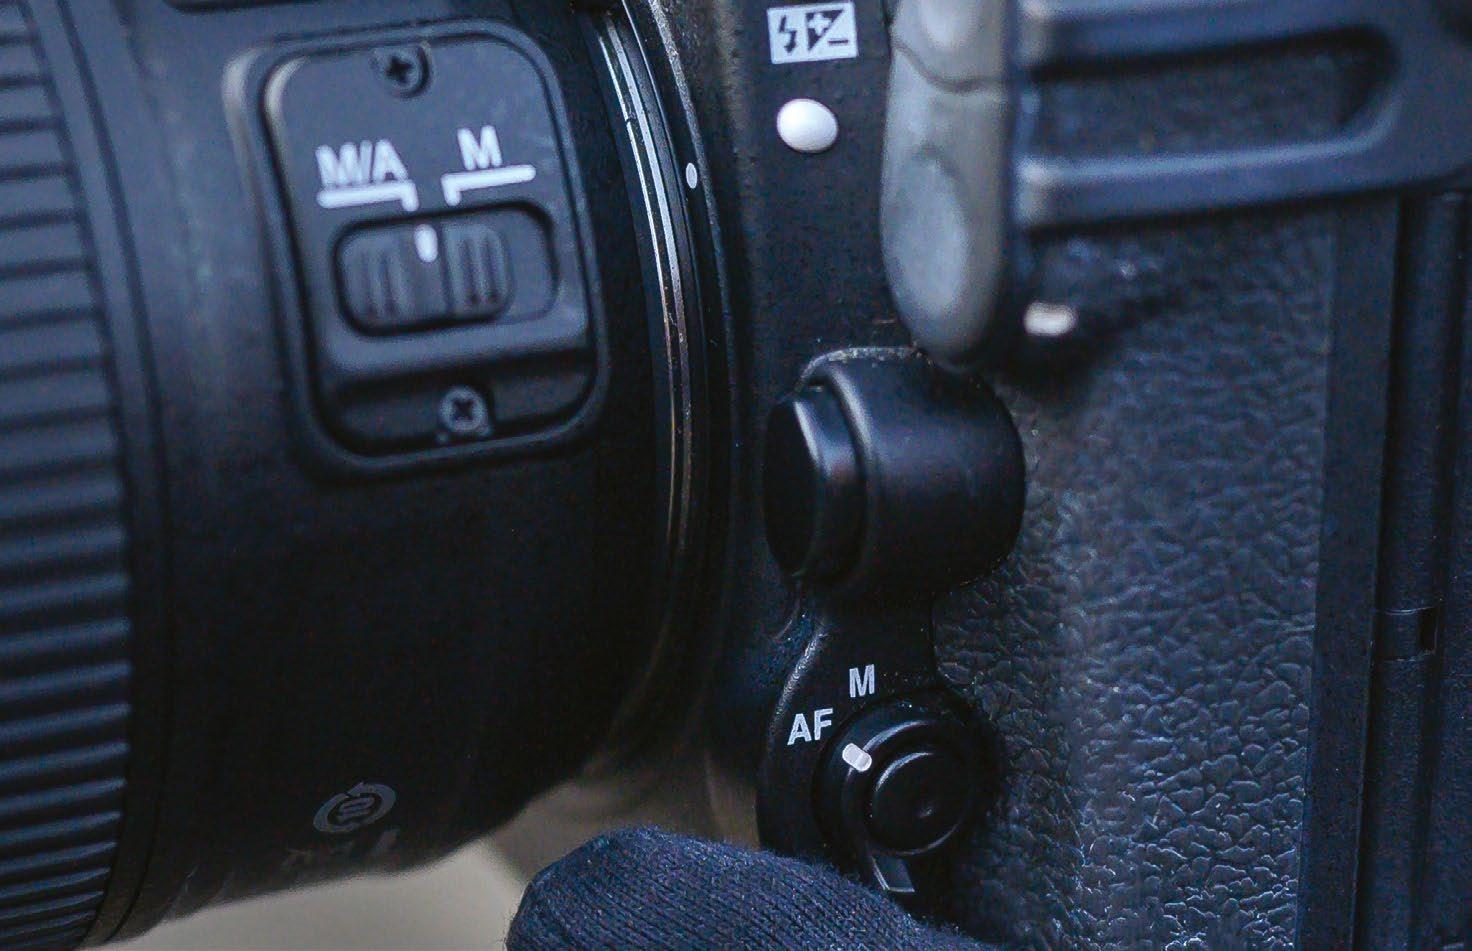
Depending on the lens, you may encounter some focus breathing when adjusting the focus. This means you’ll likely need to slightly crop your final image when merging the layers. While not essential, using a full-frame camera means that you can crop your shot without risking the image quality.
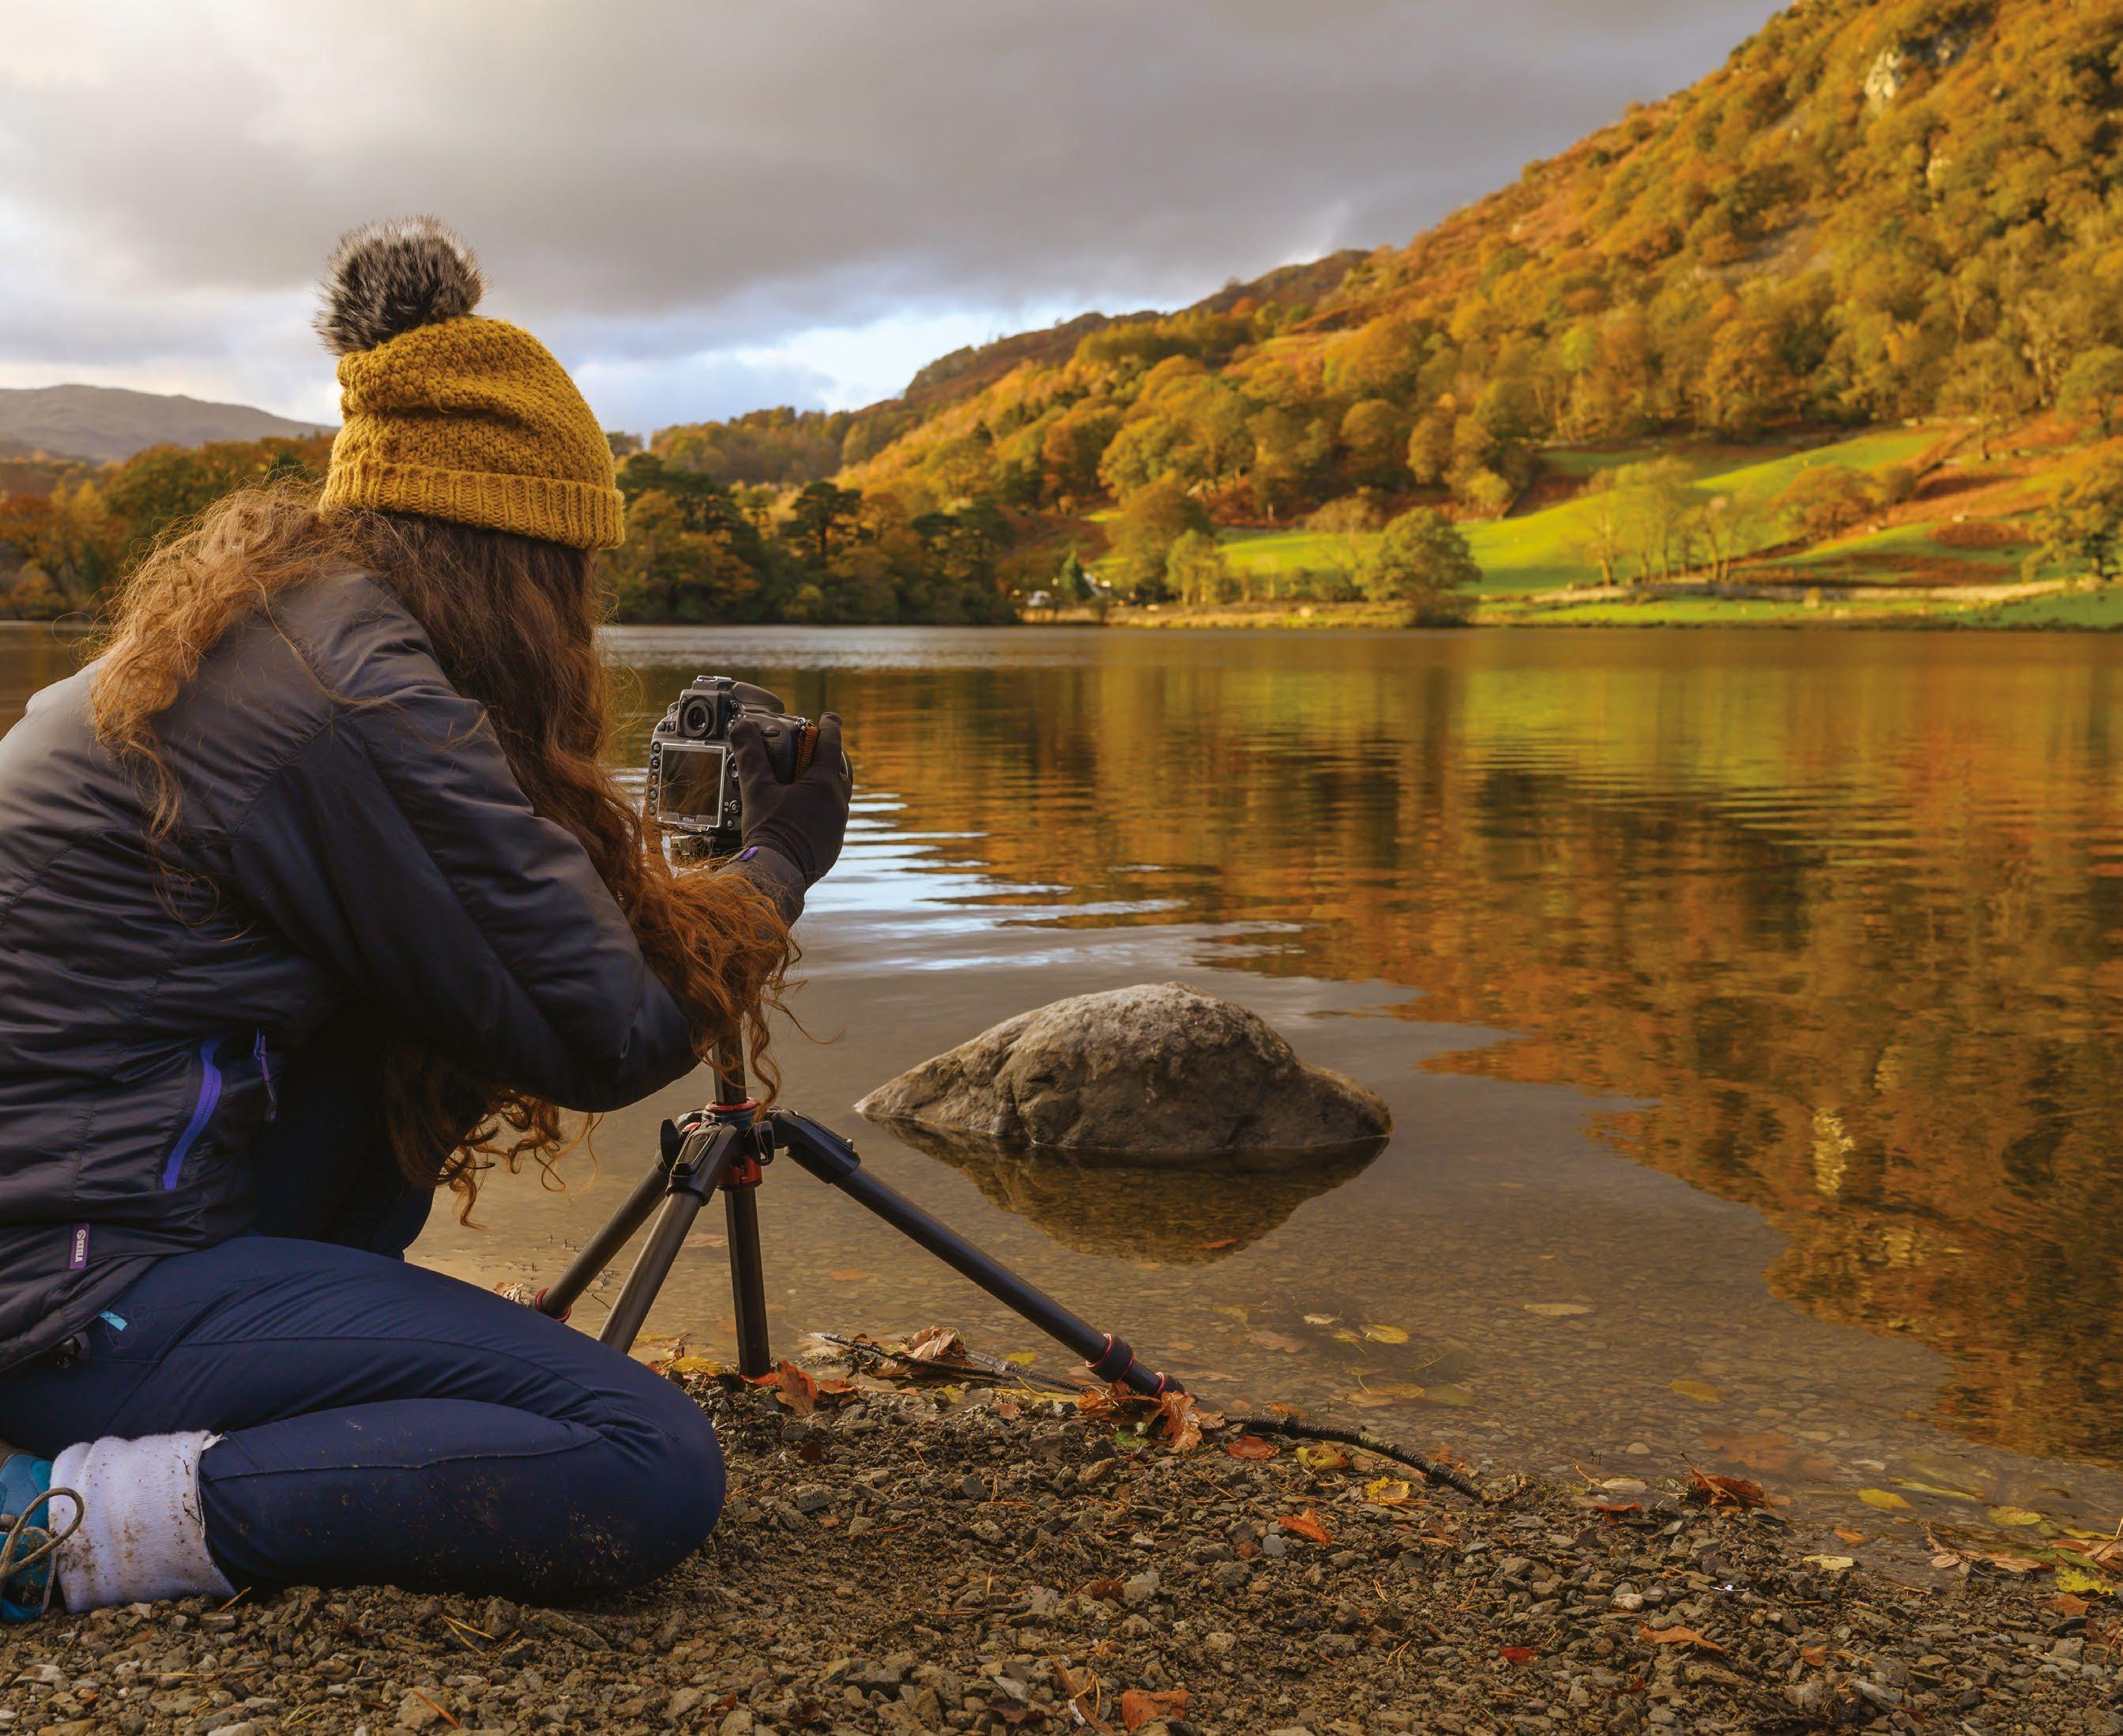
TRIPOD
You’ll want to invest in a tripod with multi-angle leg locks, as this will enable you to spread the tripod legs wide to get closer to the ground. Being so low will help you capture the extreme foreground interest that will bring the focus stacking technique to life.
Autofocus and Live View mode are essential functions that you can use to your advantage for this project
171 FOCUS-STACKED LANDSCAPES
Edit the shot
1 Open in Camera Raw Open all of your images in Adobe Camera Raw, select all and then make your usual adjustments. Use the ‘Enable profile corrections’ check box in the Lens Correction tab to erase any distortion or fringing in your shots.

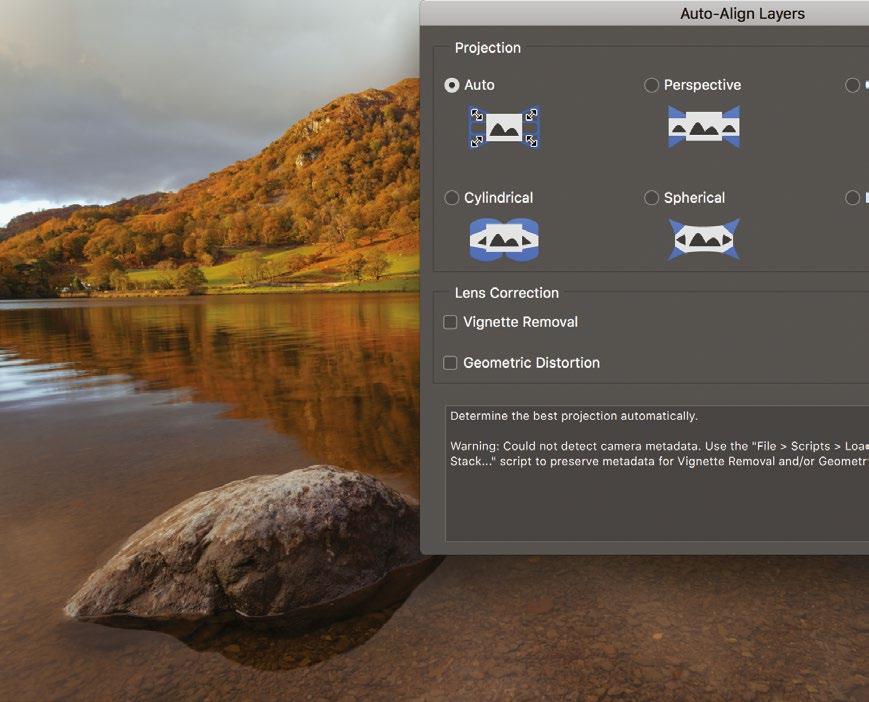
2 Layer the images Open your photos in Photoshop and choose which image is going to be your base layer. Then, hold down the Shift key while using the Move tool to drag the other shots onto the chosen base layer.
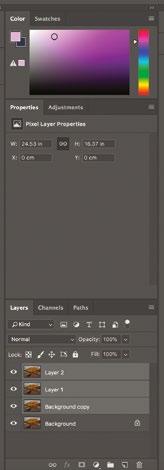
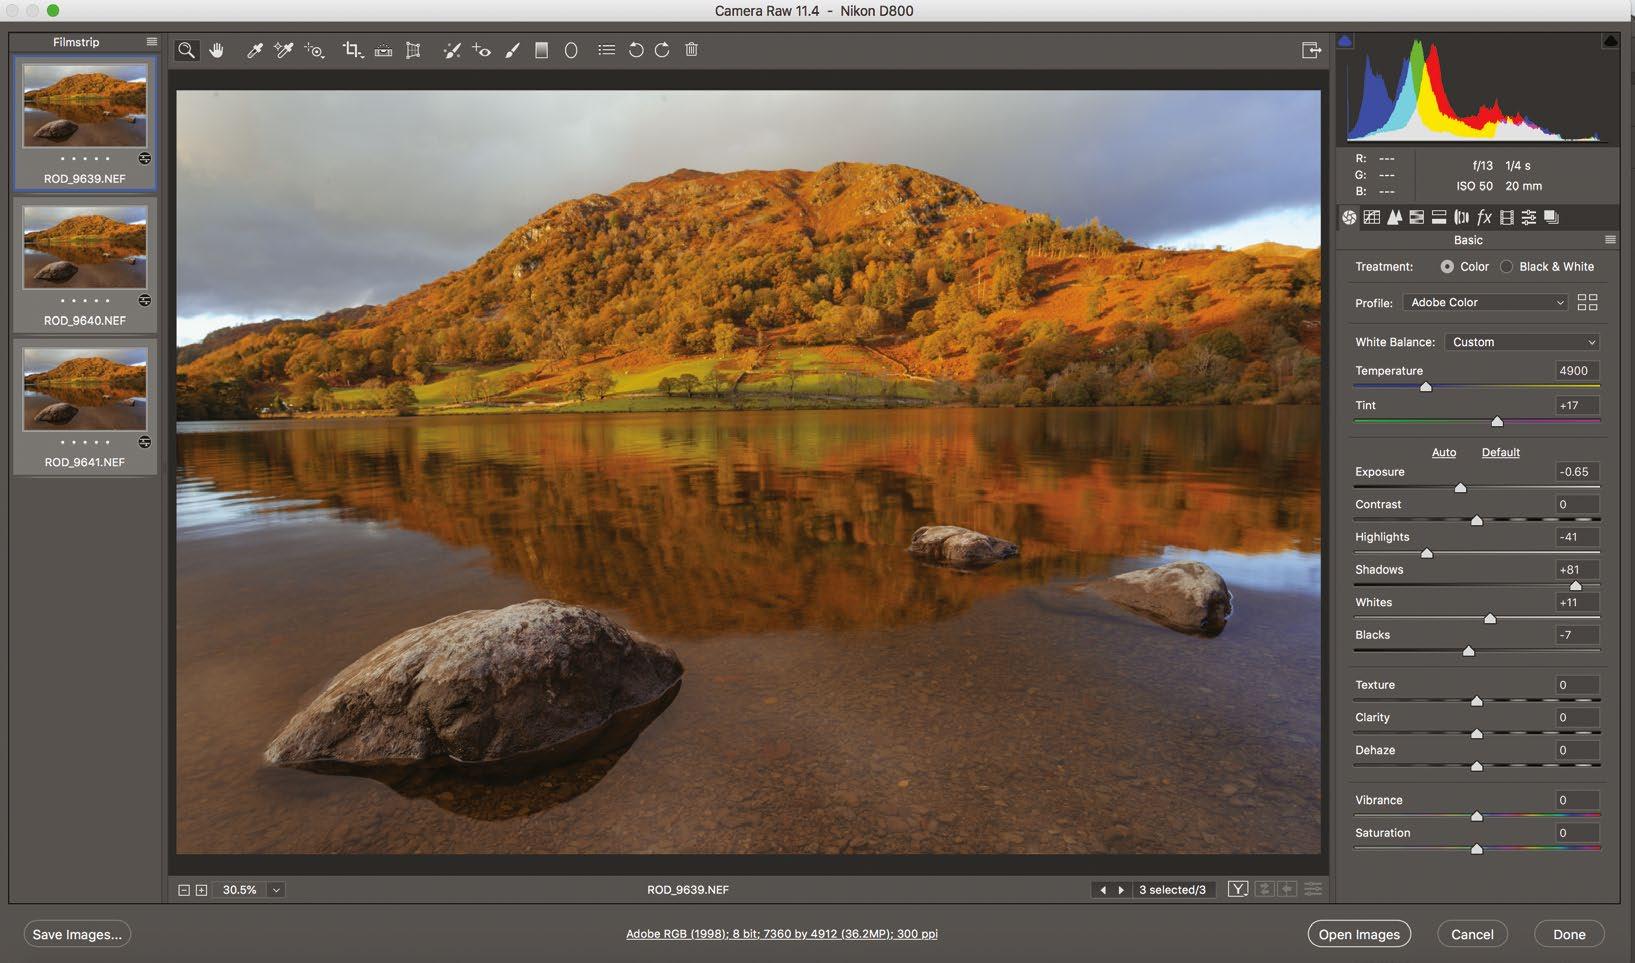
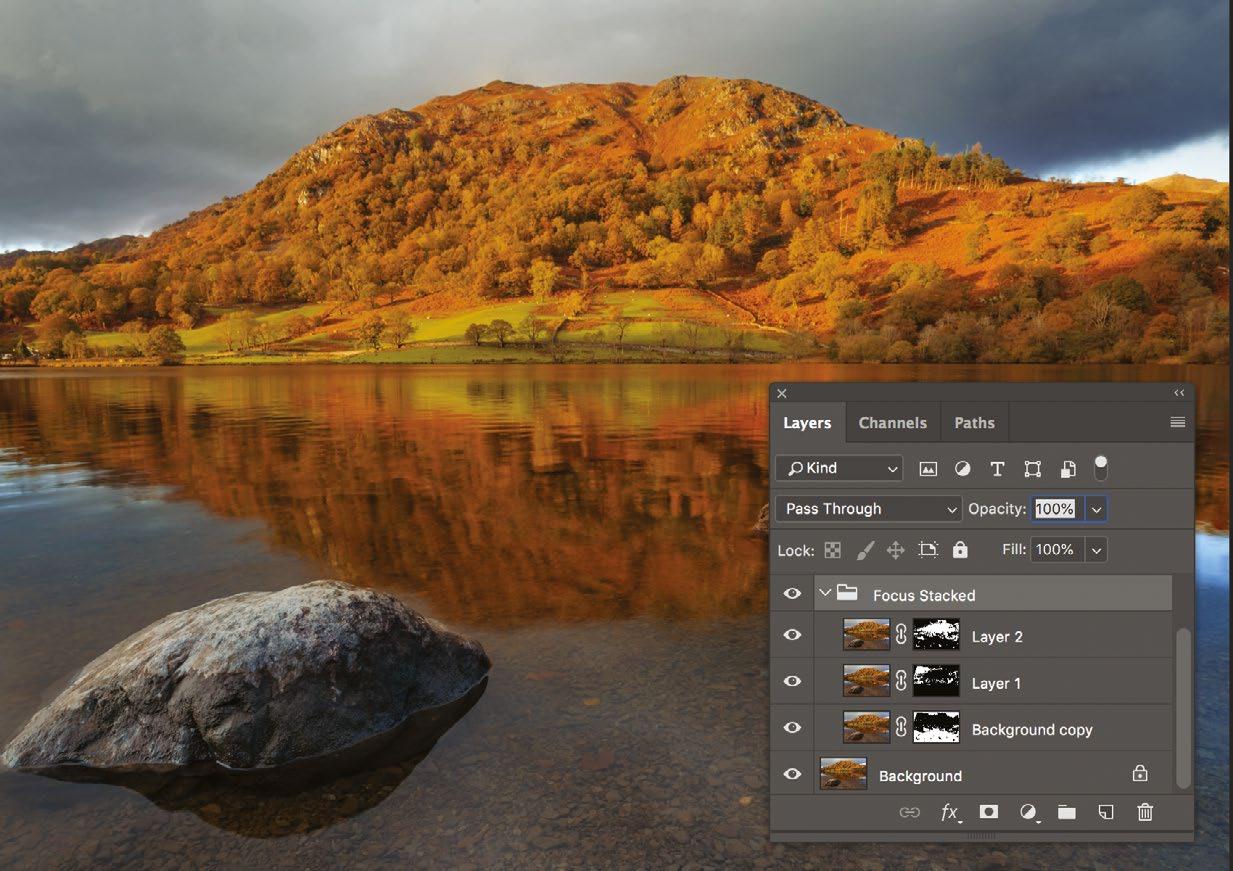
3
Align the layers Select all the layers and go to Edit>Auto Align Layers to ensure that each image overlays perfectly. Select the ‘Auto’ option, but uncheck the ‘Vignette Removal’ and ‘Geometric Distortion’ boxes.
4 Blend your images Now, with all the layers still selected, go to Edit>Auto-Blend Layers. Choose ‘Stack Images’ and tick the ‘Seamless Tones and Colors’ box. Simply click ‘OK’ and Photoshop will then blend all the layers together.
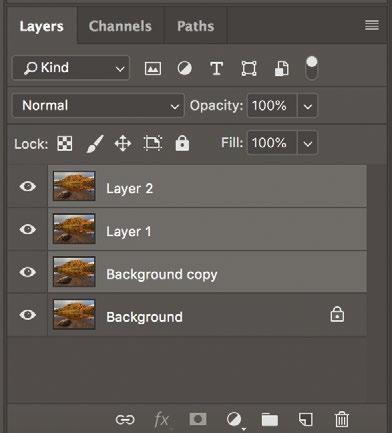
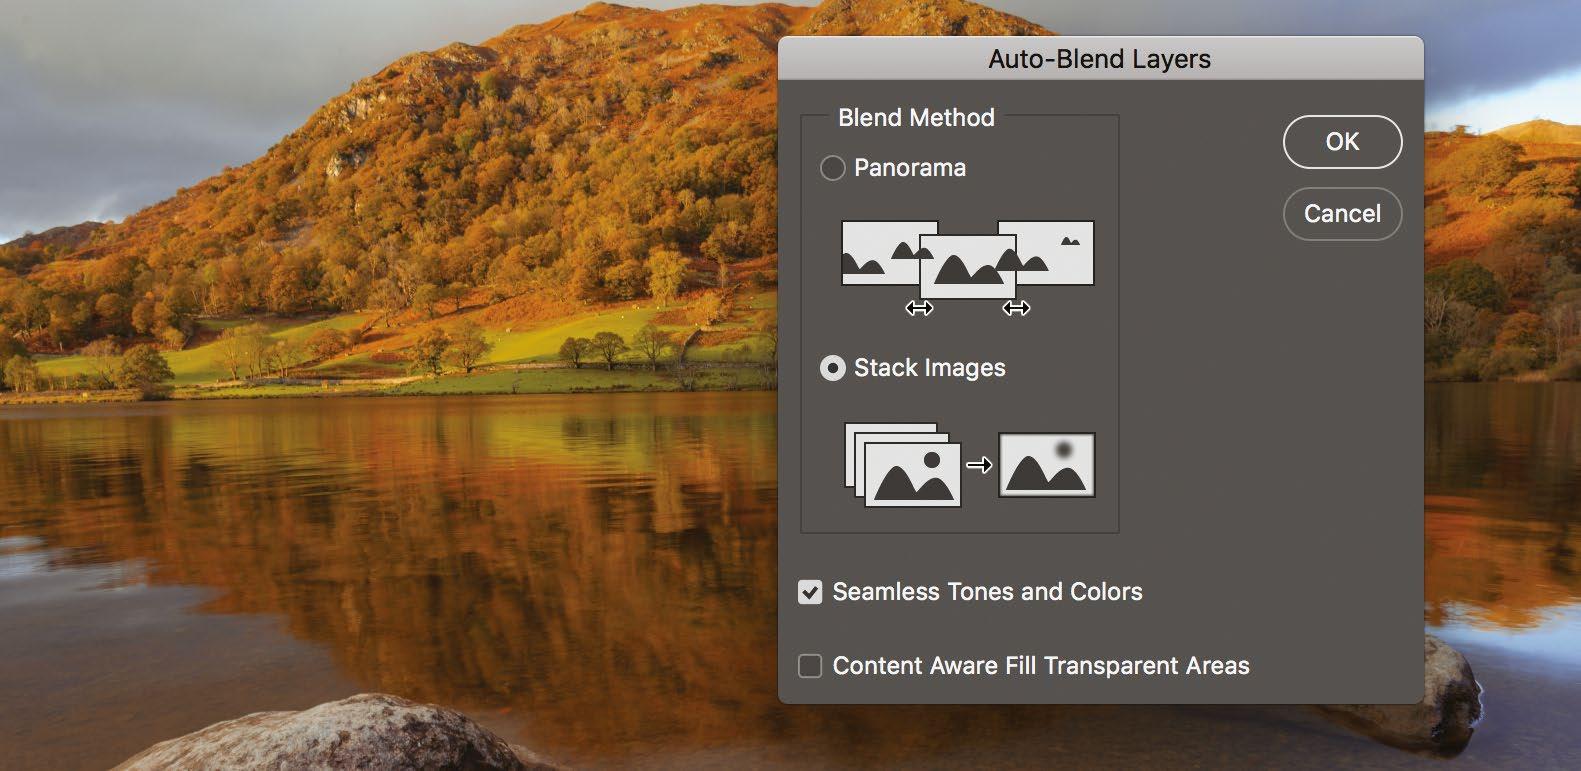
5 Check the blend Each individual shot will have a layer mask, with white and black representing which areas are showing (white) or not (black). Use a white or black brush to adjust the blend of the layers if needed.
6 Create contrast Go to Layer>New Adjustment Layer>Curves. Use this adjustment layer to perfect the exposure. Then use a Selective Color layer or a Color Balance layer to adjust the tones in your final shot.
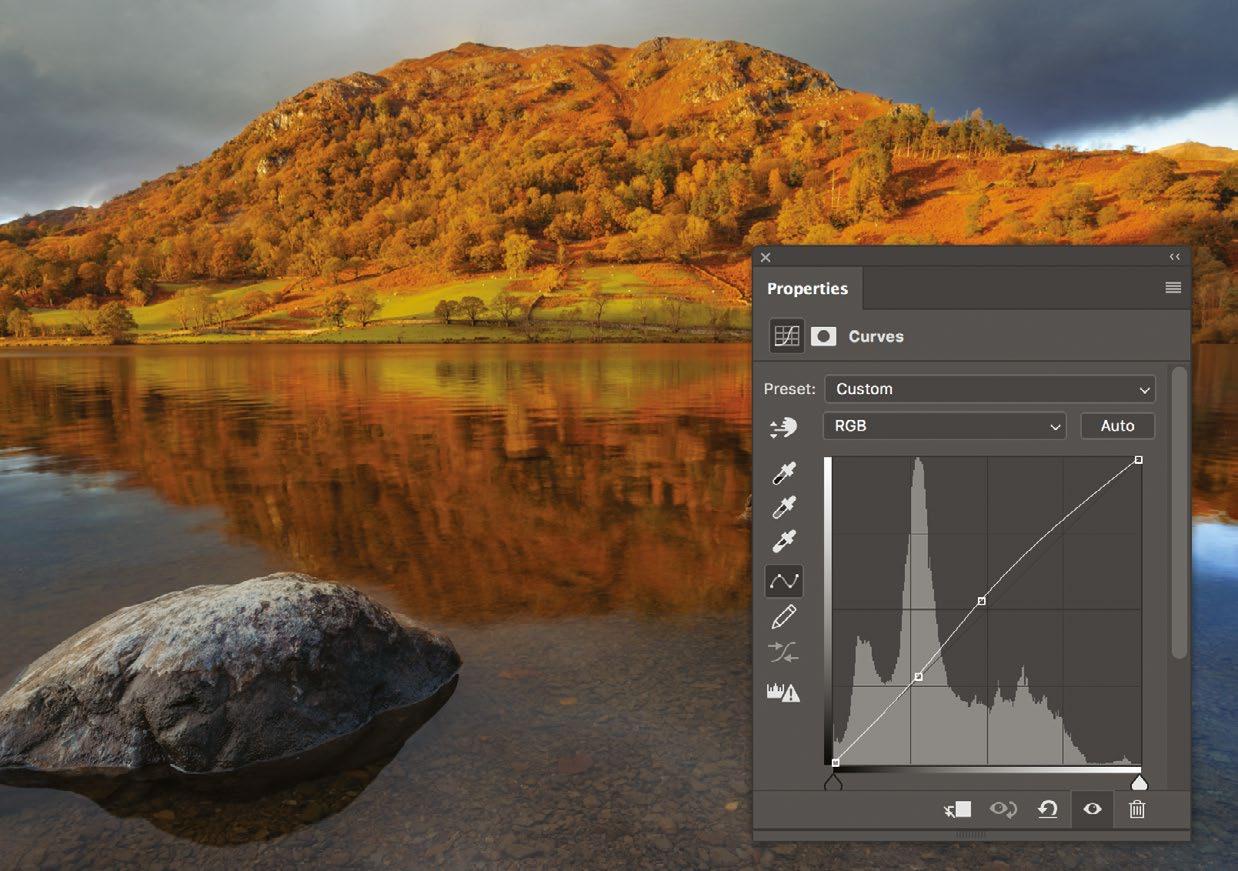
Before
Before focus stacking
While the hill in the background is sharp, the stone in the foreground is soft. This could be improved with a focus stack
After
After focus stacking
By combining three photos with the focus on the foreground, middleground and background, this vista is pin-sharp
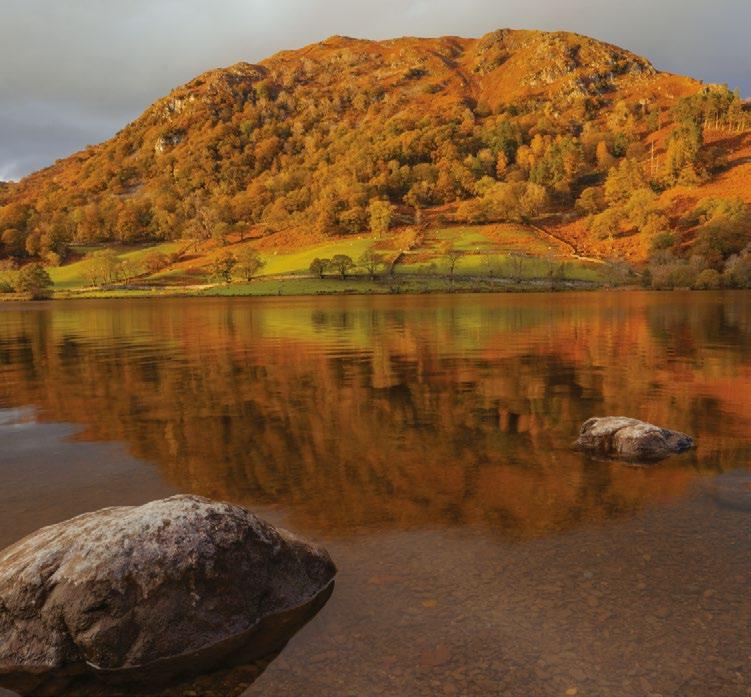
1 3 4 5 6 2
172 PROJECTS

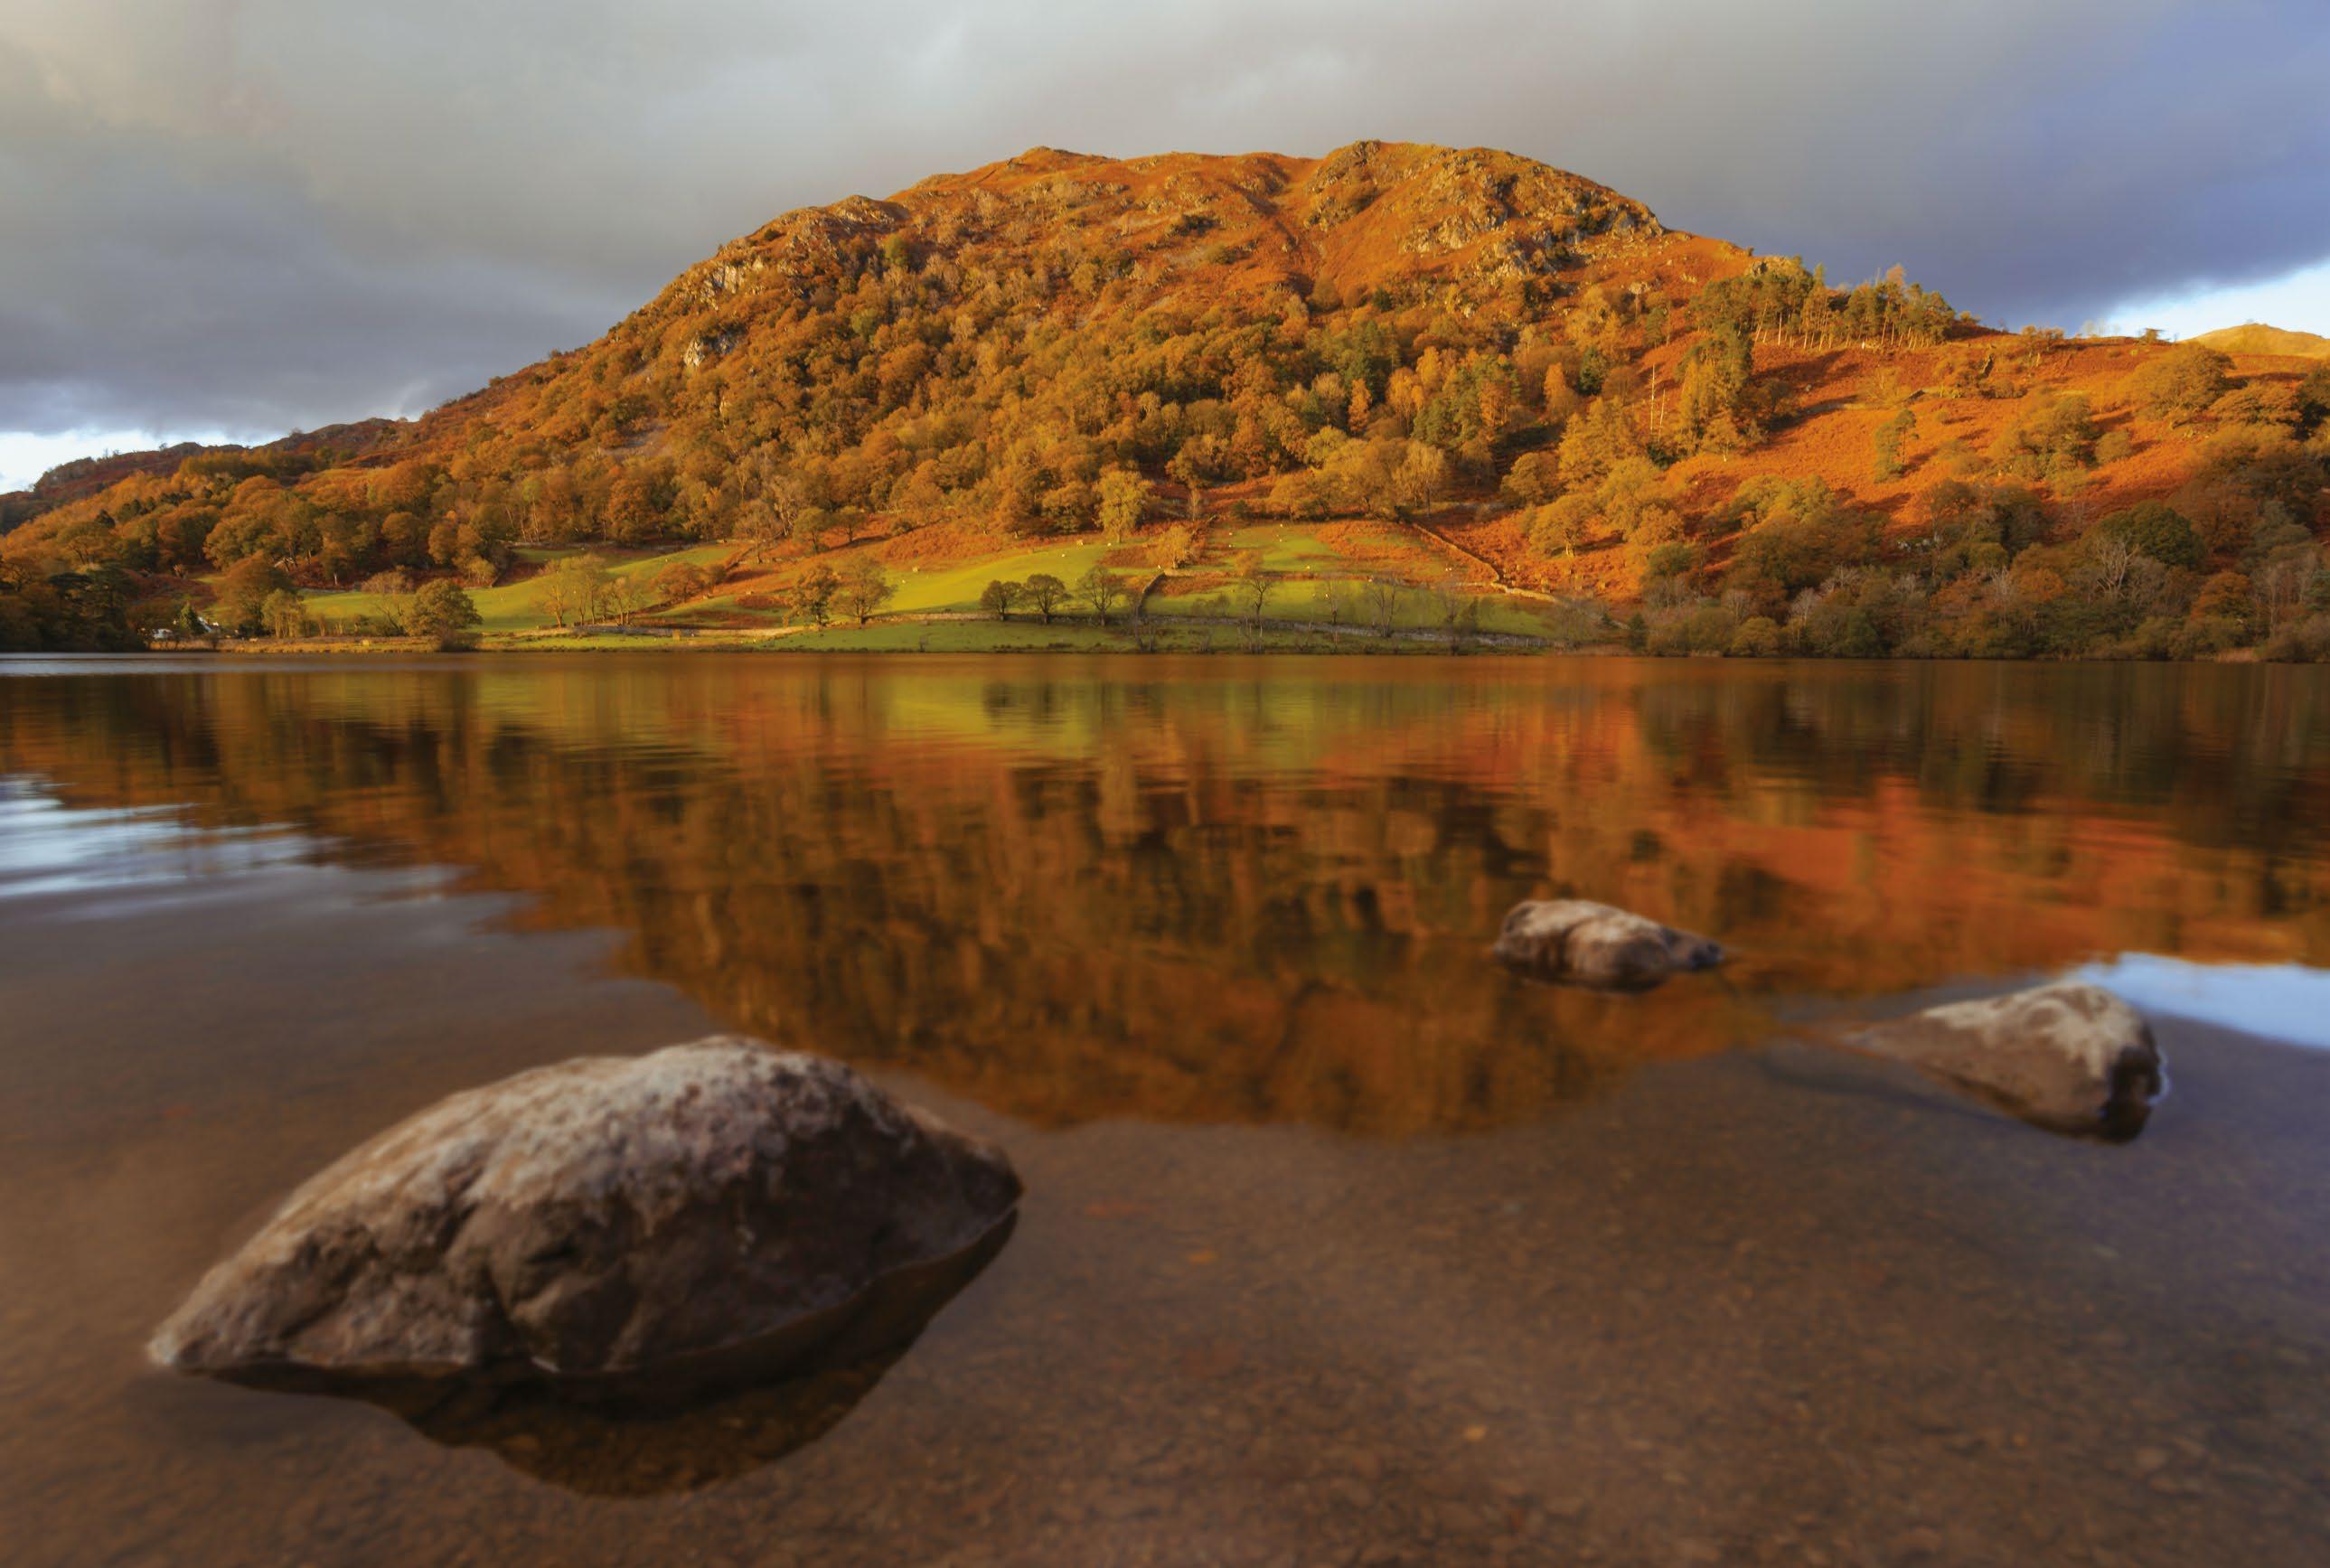
AFTER 173
BEFORE
FOCUS-STACKED LANDSCAPES
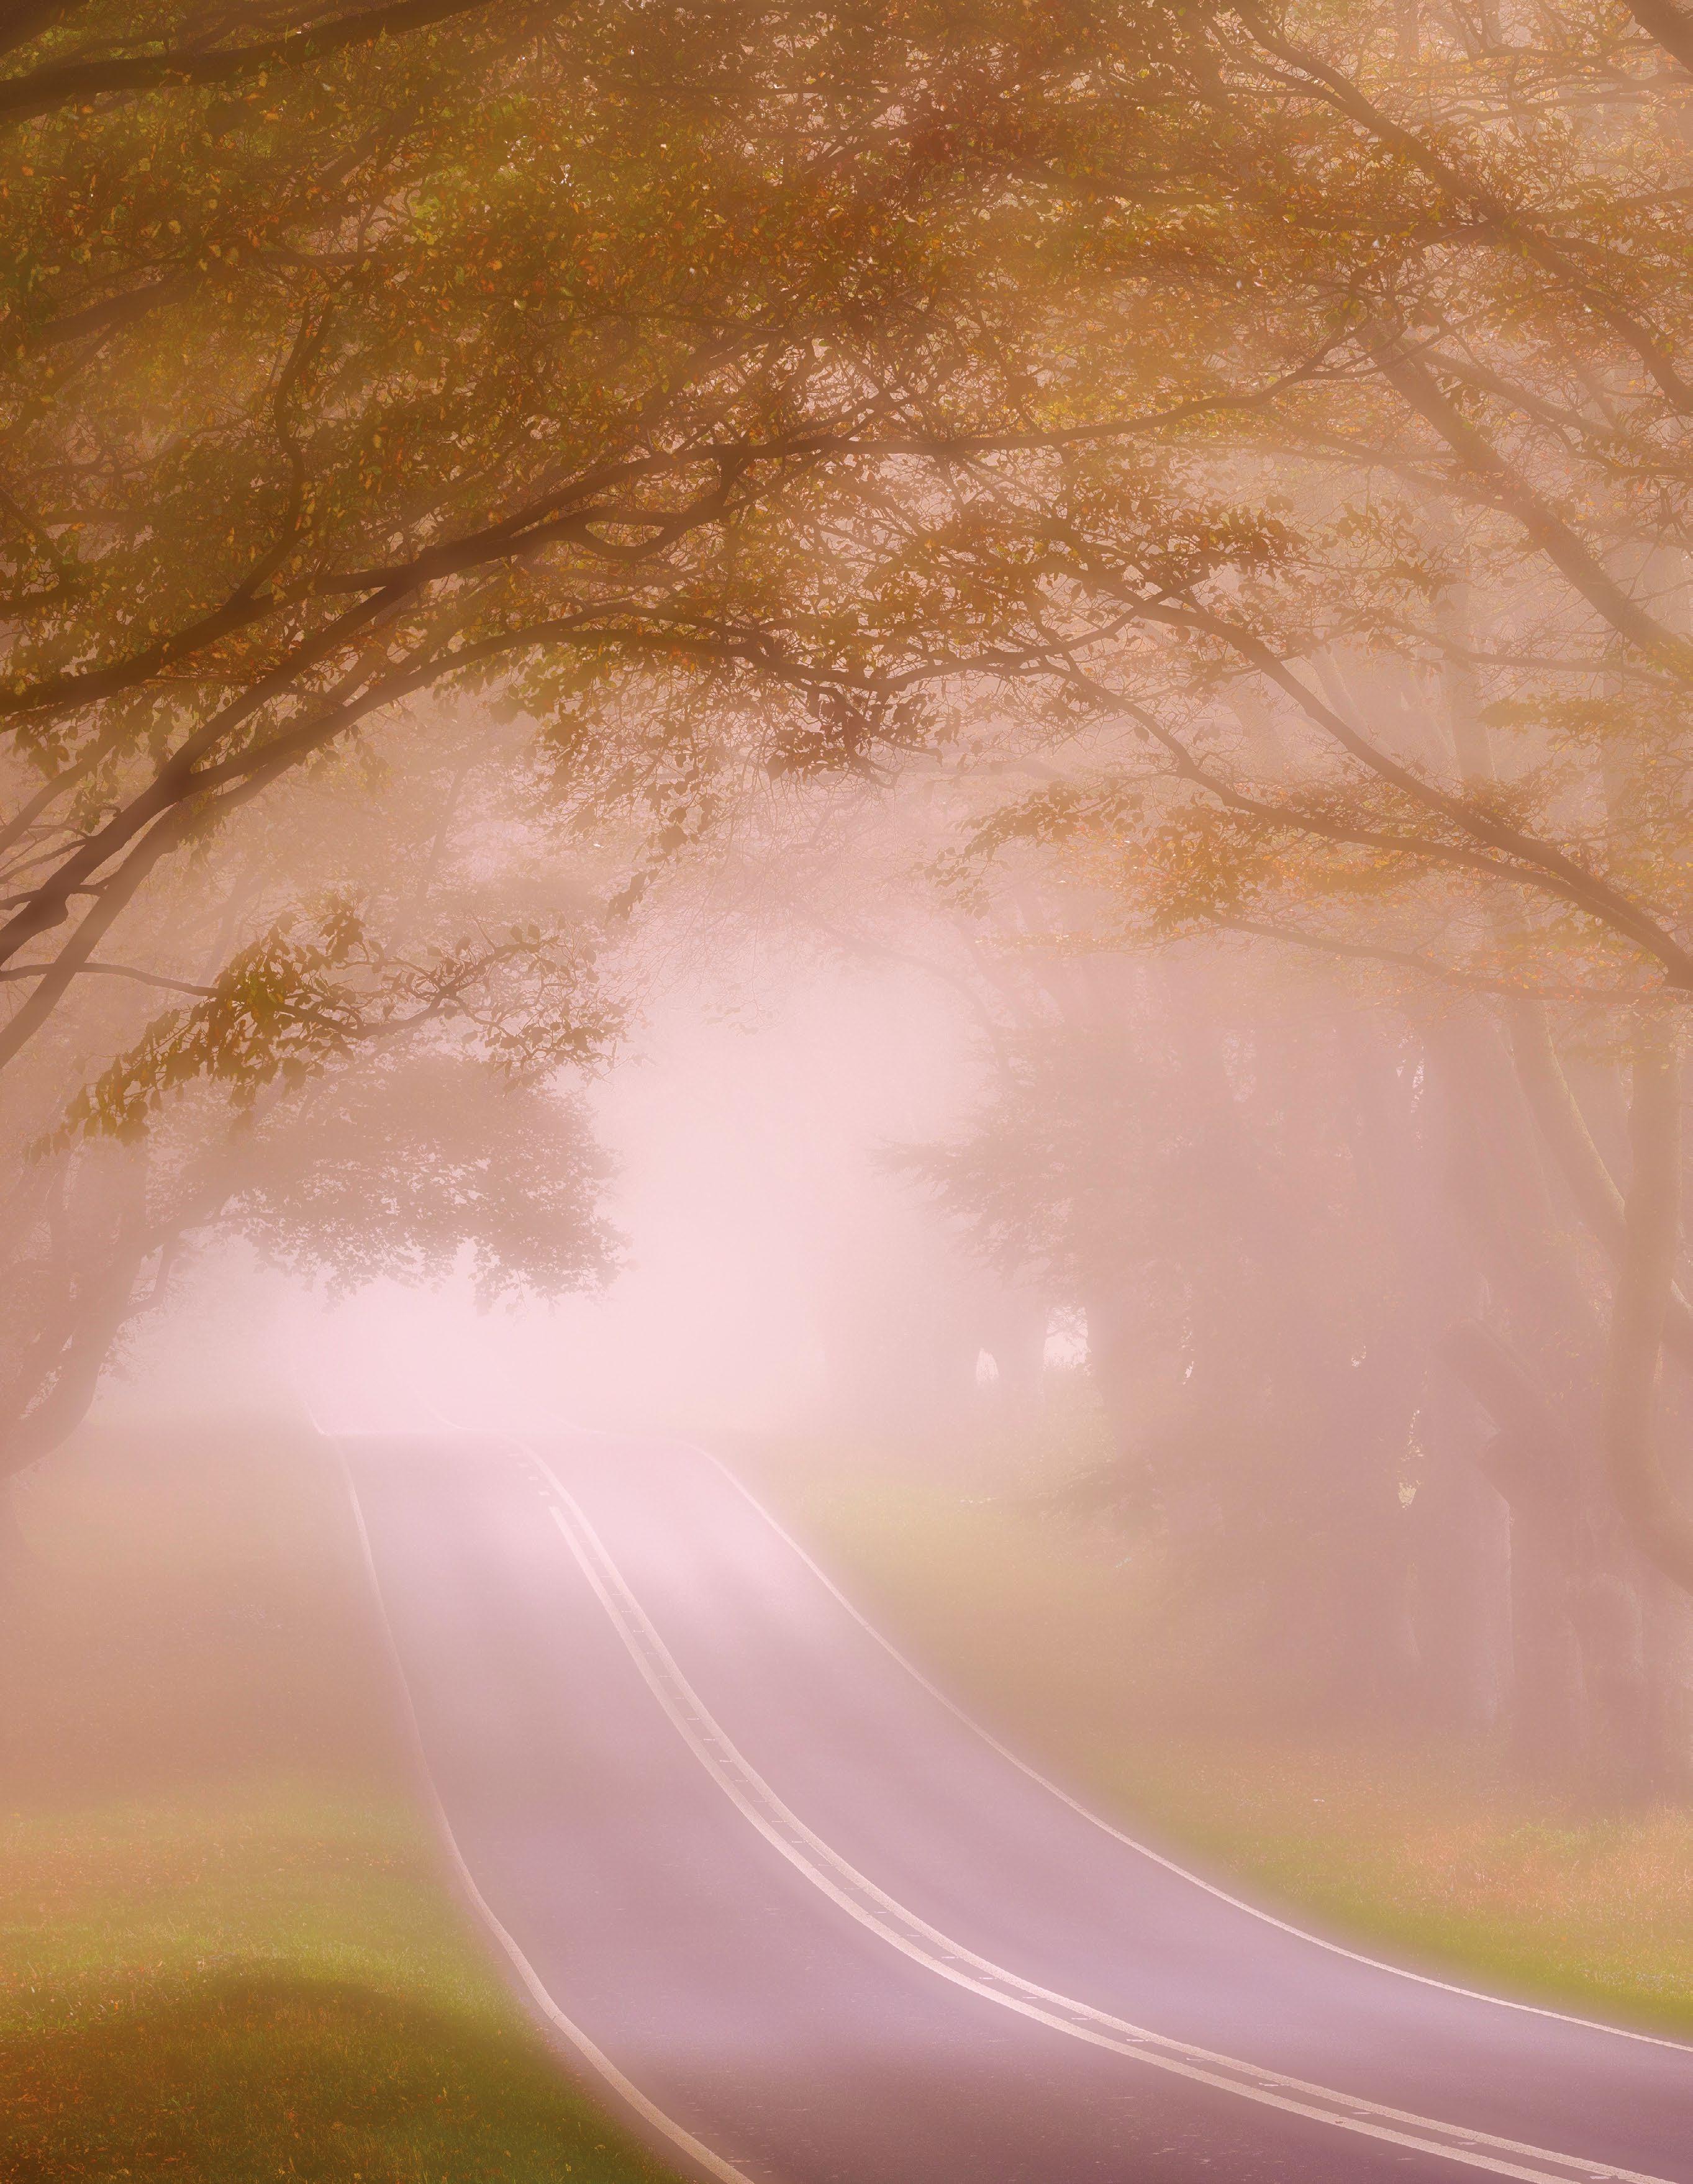
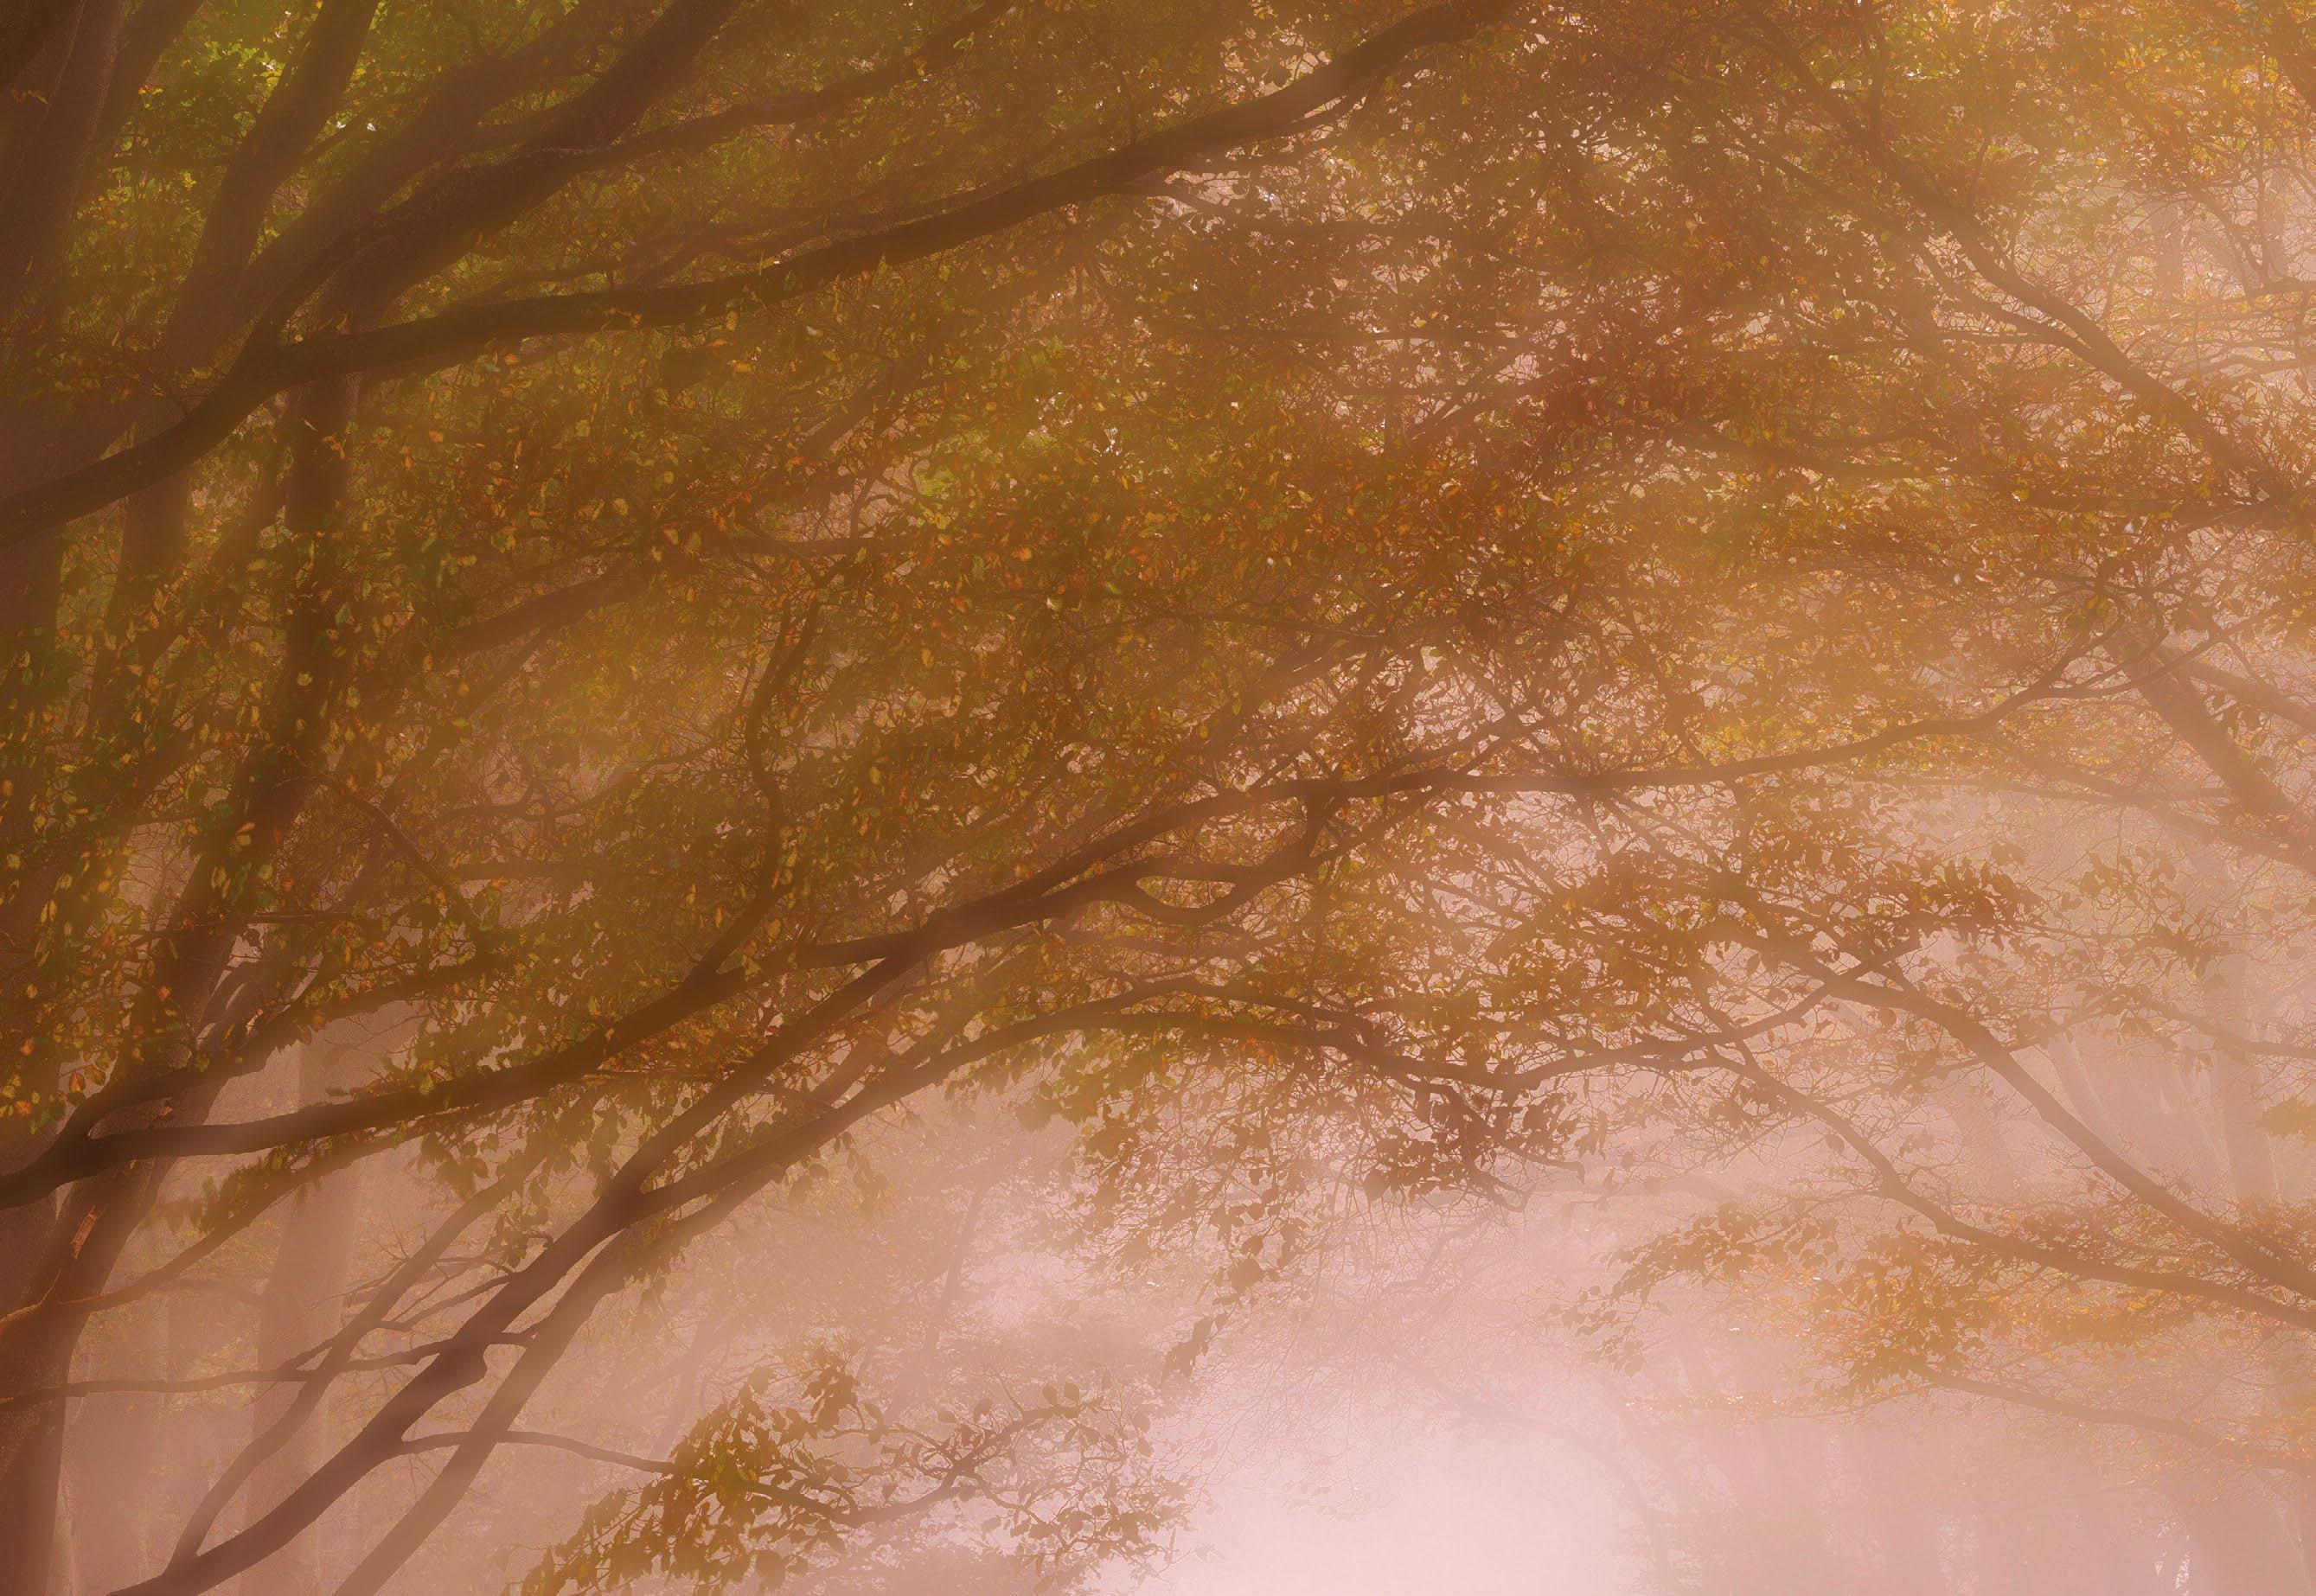
174 PROJECTS
Orton The Effect
Give your landscapes a dreamy look with this modern take on an established technique
Difficulty level: Intermediate
Time taken: 3 hours
The Orton Effect is a creative style that gives images a bright, dreamlike glow. It was developed by abstract photographer Michael Orton in the 1980s to imitate watercolour painting. He achieved this effect by sandwiching two (or more) slides – one in focus and overexposed, the other(s) out of focus and overexposed.
Digitally, this can be achieved entirely within processing by creating duplicate layers, applying blur and then reducing the opacity of the blurred layer, but it’s more fun to do it in-camera, using your camera’s multiple exposure mode.
Not all cameras have this facility, and of those that do many only produce JPEGs of the merged images. With that in mind, a combination of the in-camera technique – shooting separate in-focus and out-of-focus frames – and careful processing to blend the images is recommended, as this gives you more control.
A longer lens will enable you to create more extreme out-of-focus effects, but experiment with different levels of defocus. Changing focus alters the effective focal length of the lens, so to keep the subject the same size, use a zoom lens and adjust focal length as you change focus.
What you’ll need
Interchangeable lens camera
Telephoto zoom, such as a 70-200mm
Sturdy tripod and head
Remote release Photoshop
Dreamy landscape
By blending two images of the same scene – one in focus and one out of focus – you can create subtle and soft landscapes
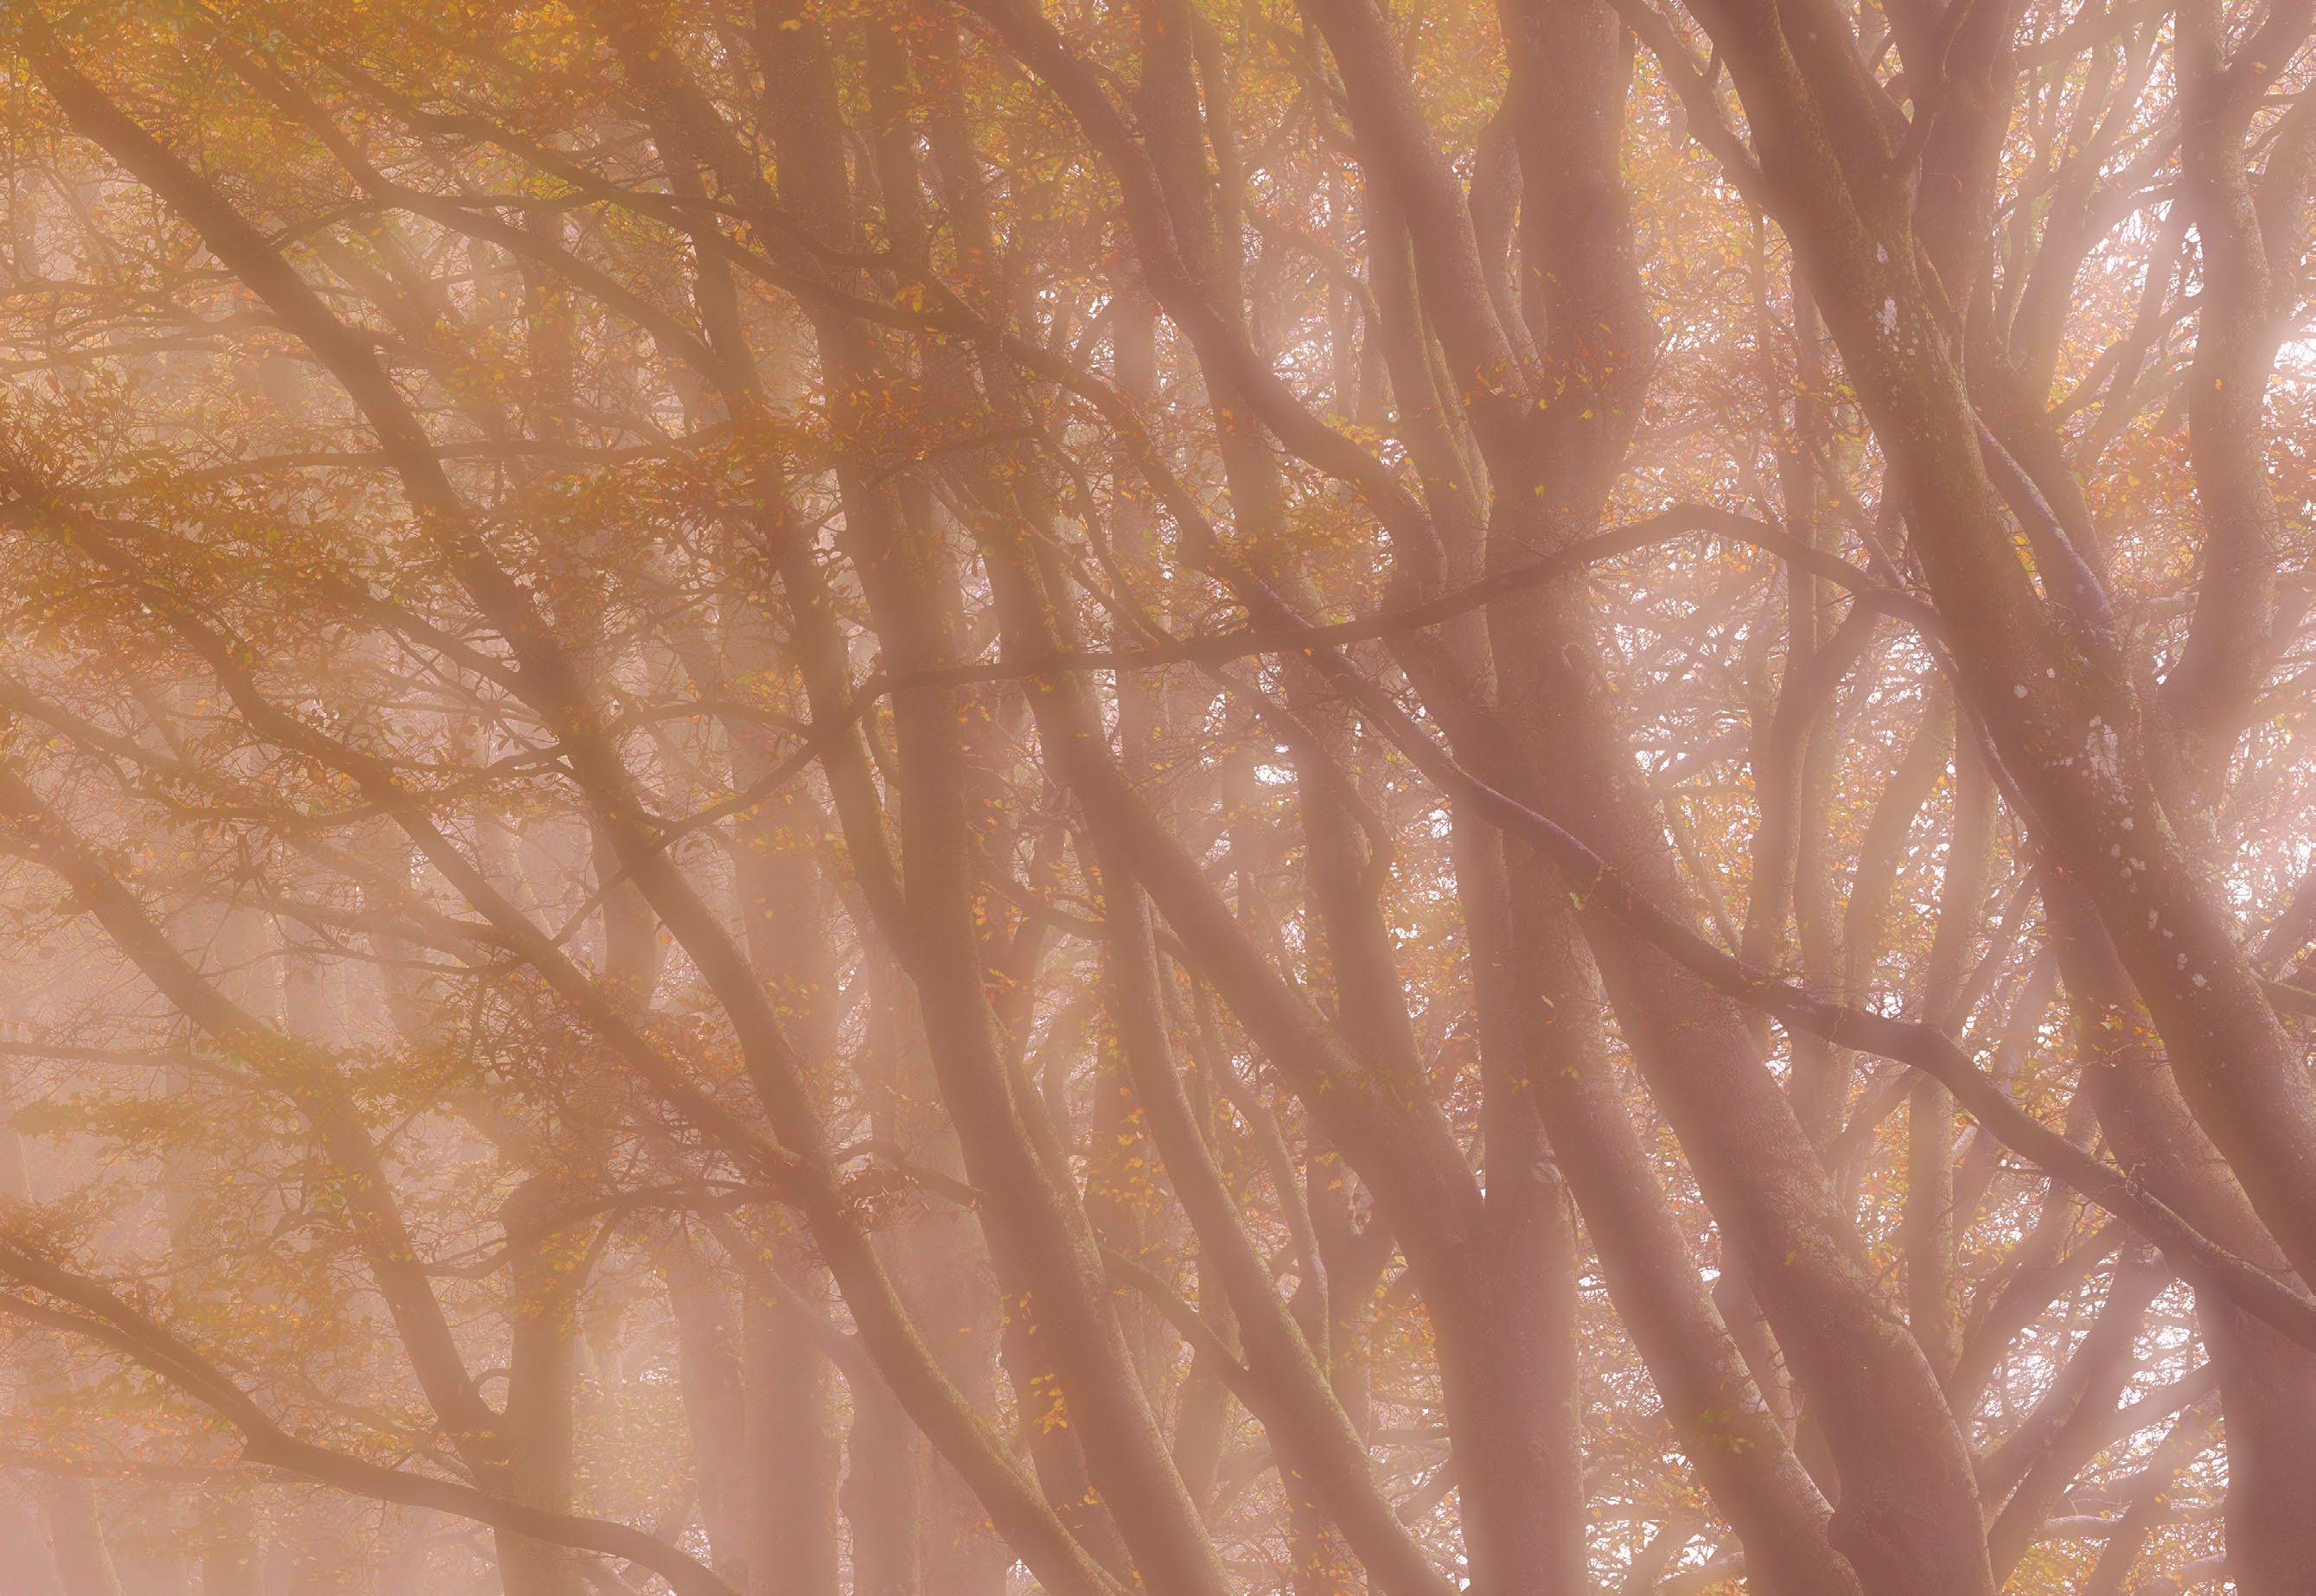
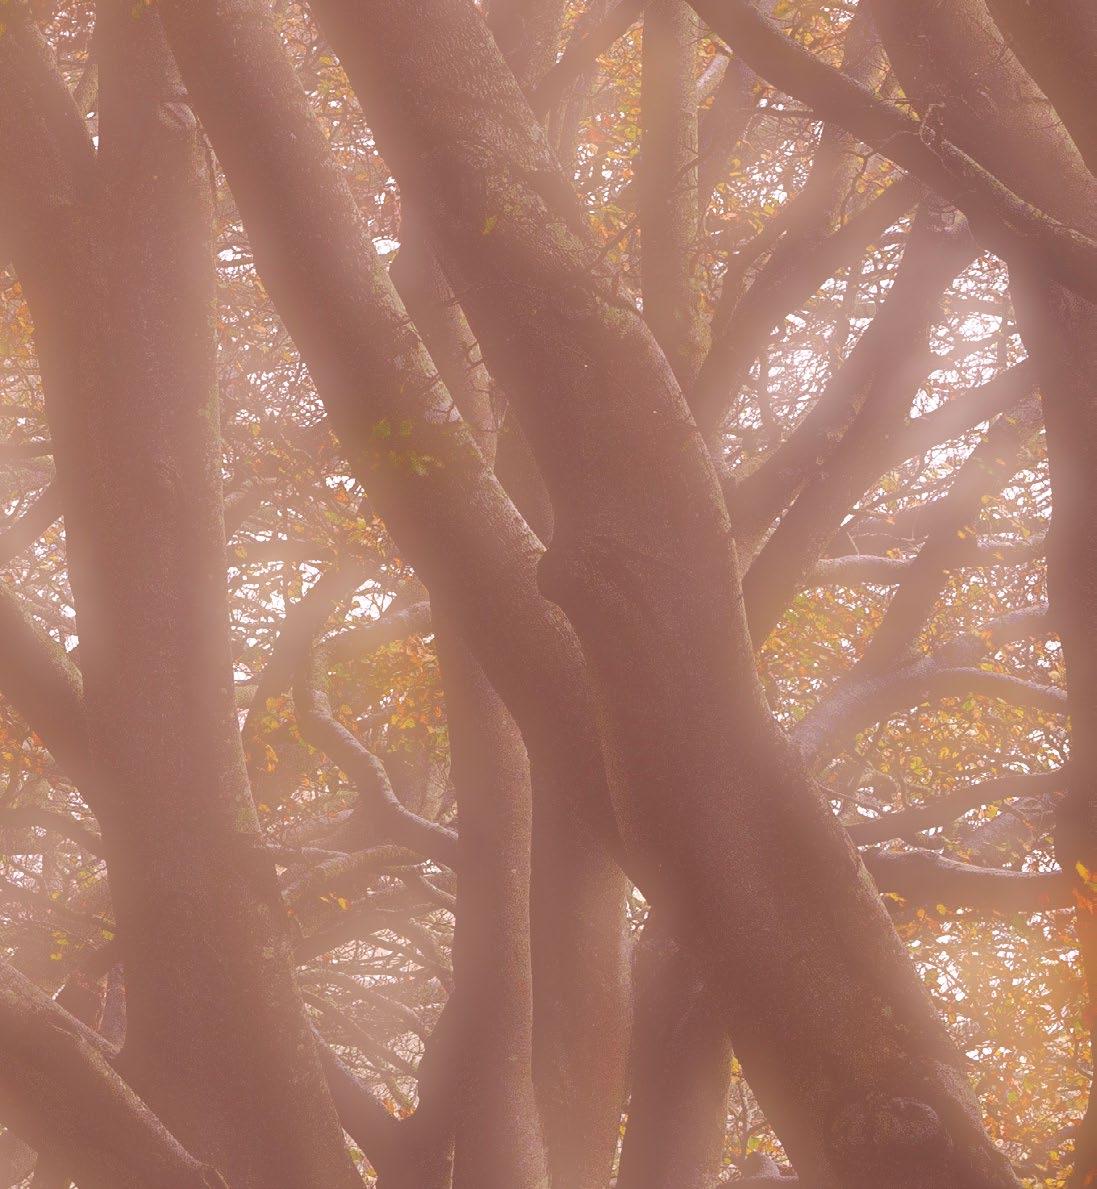
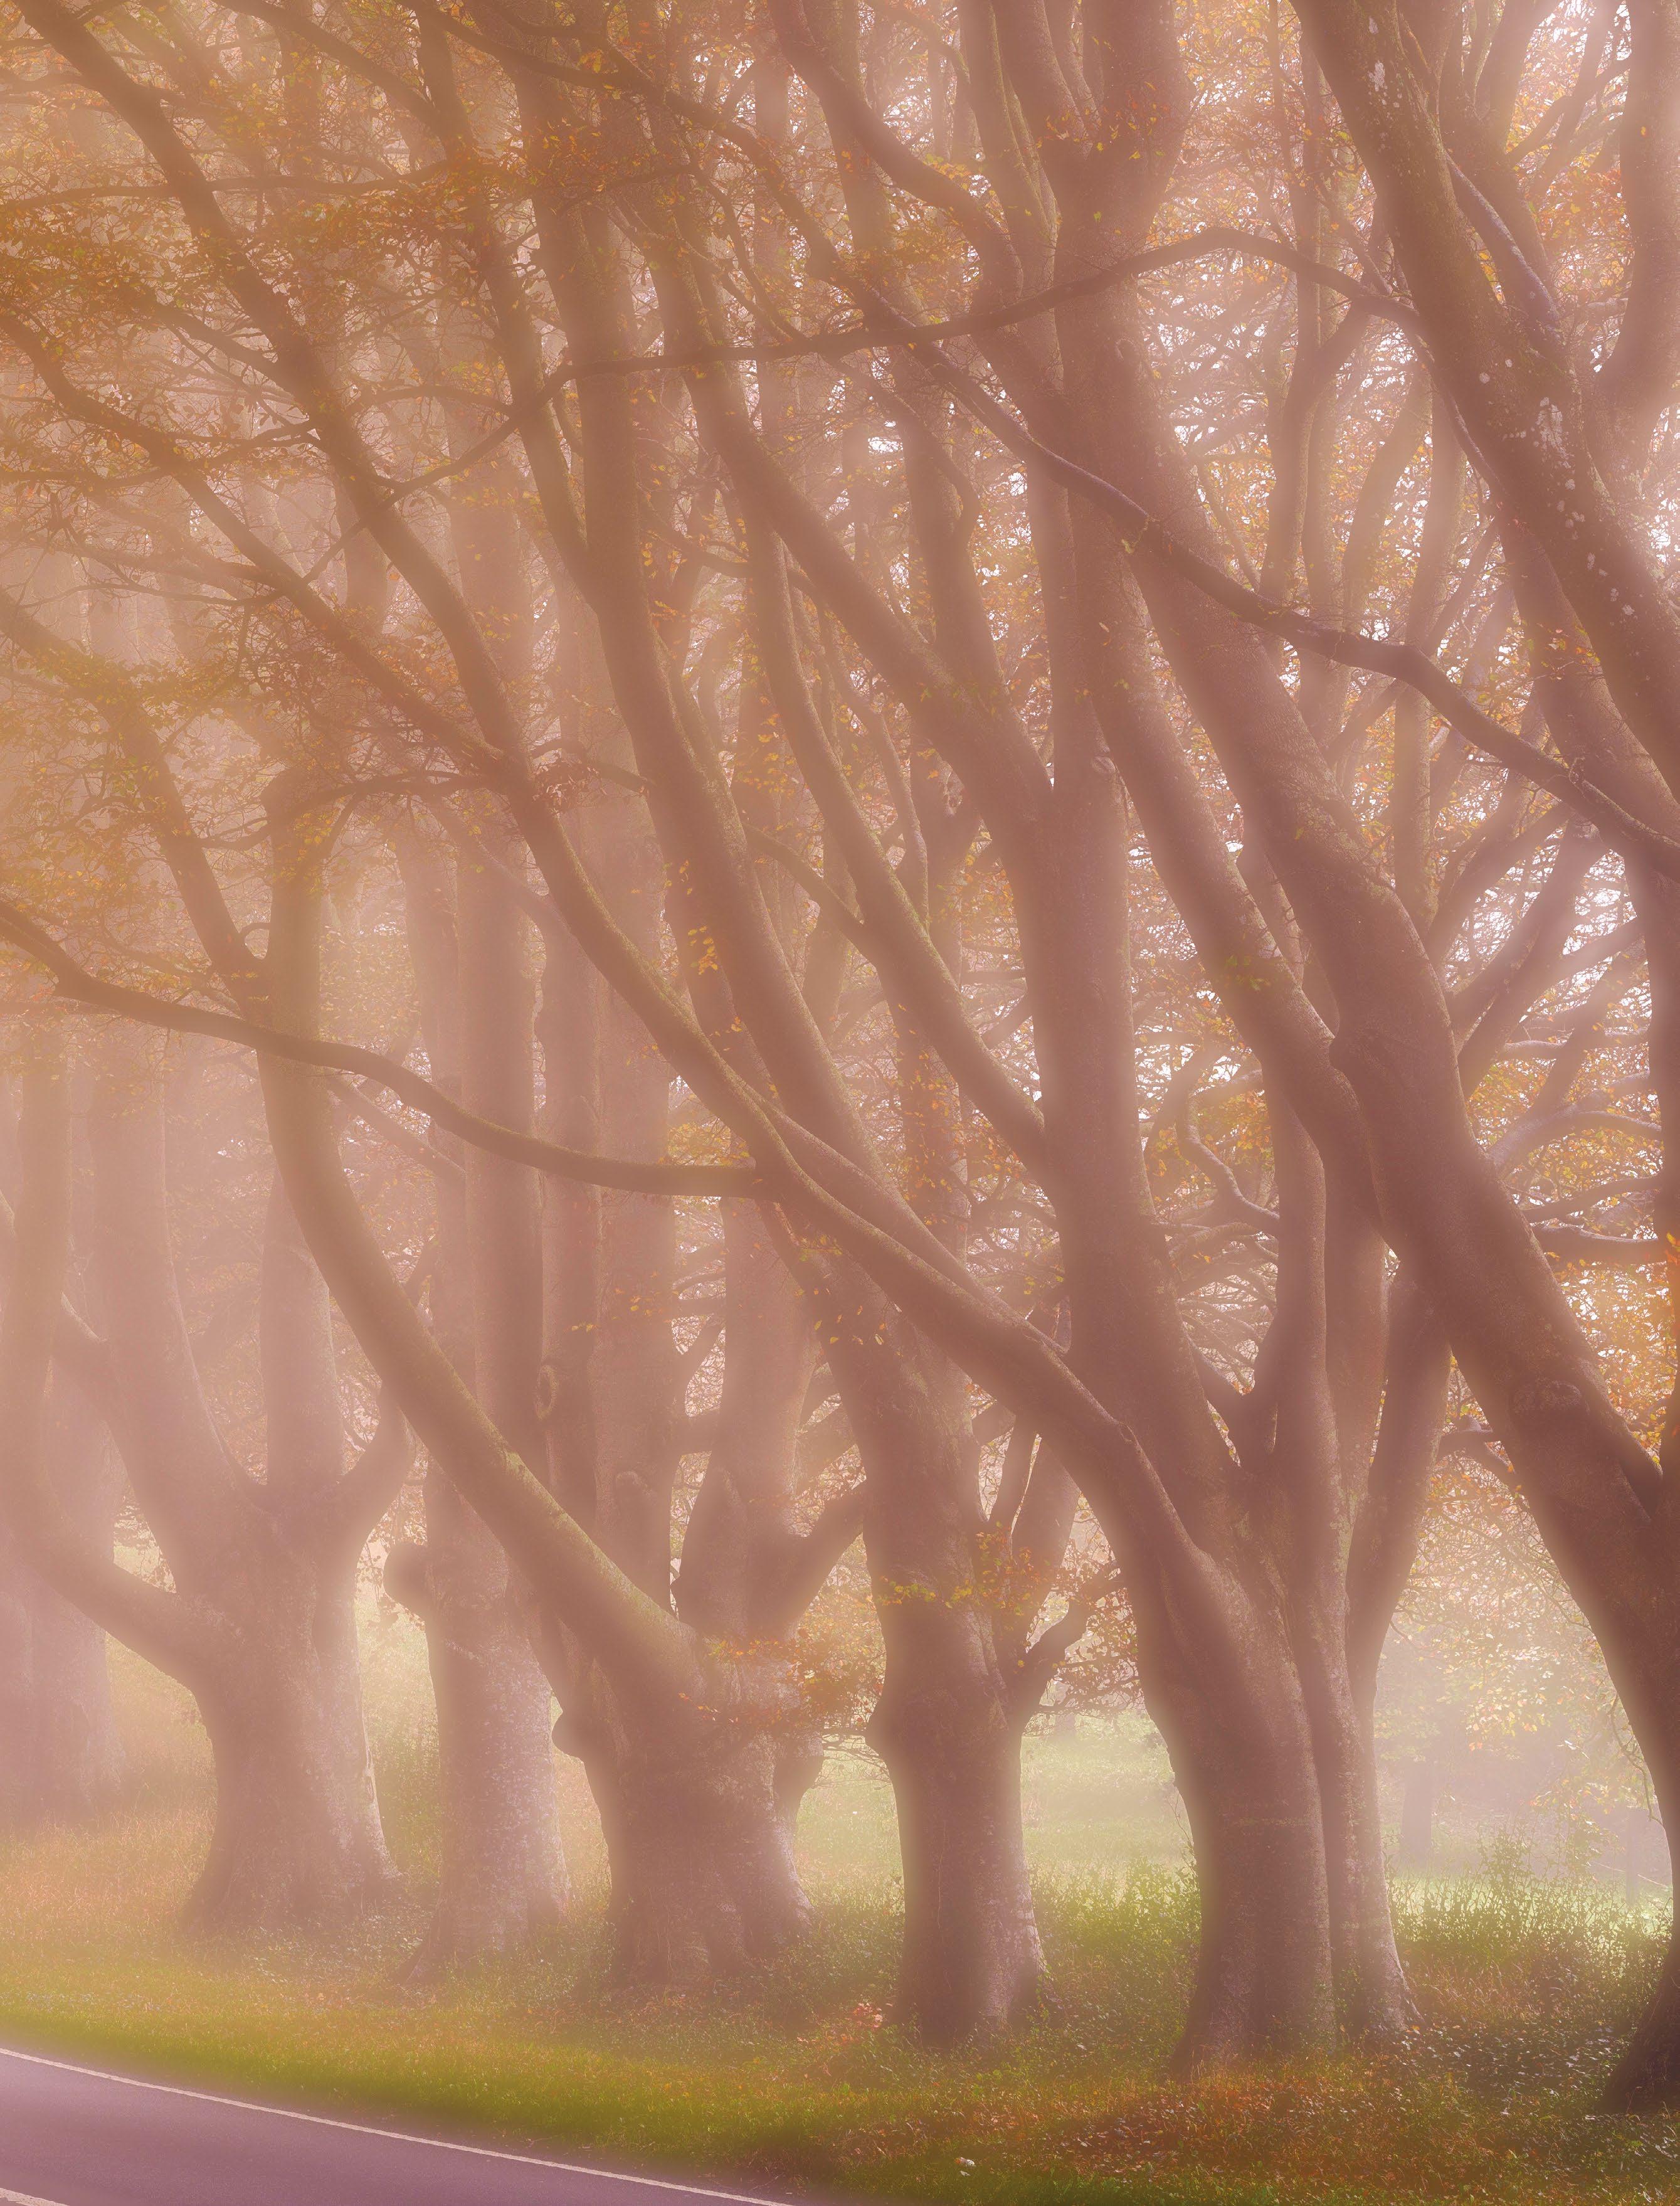
All images © Mark Bauer
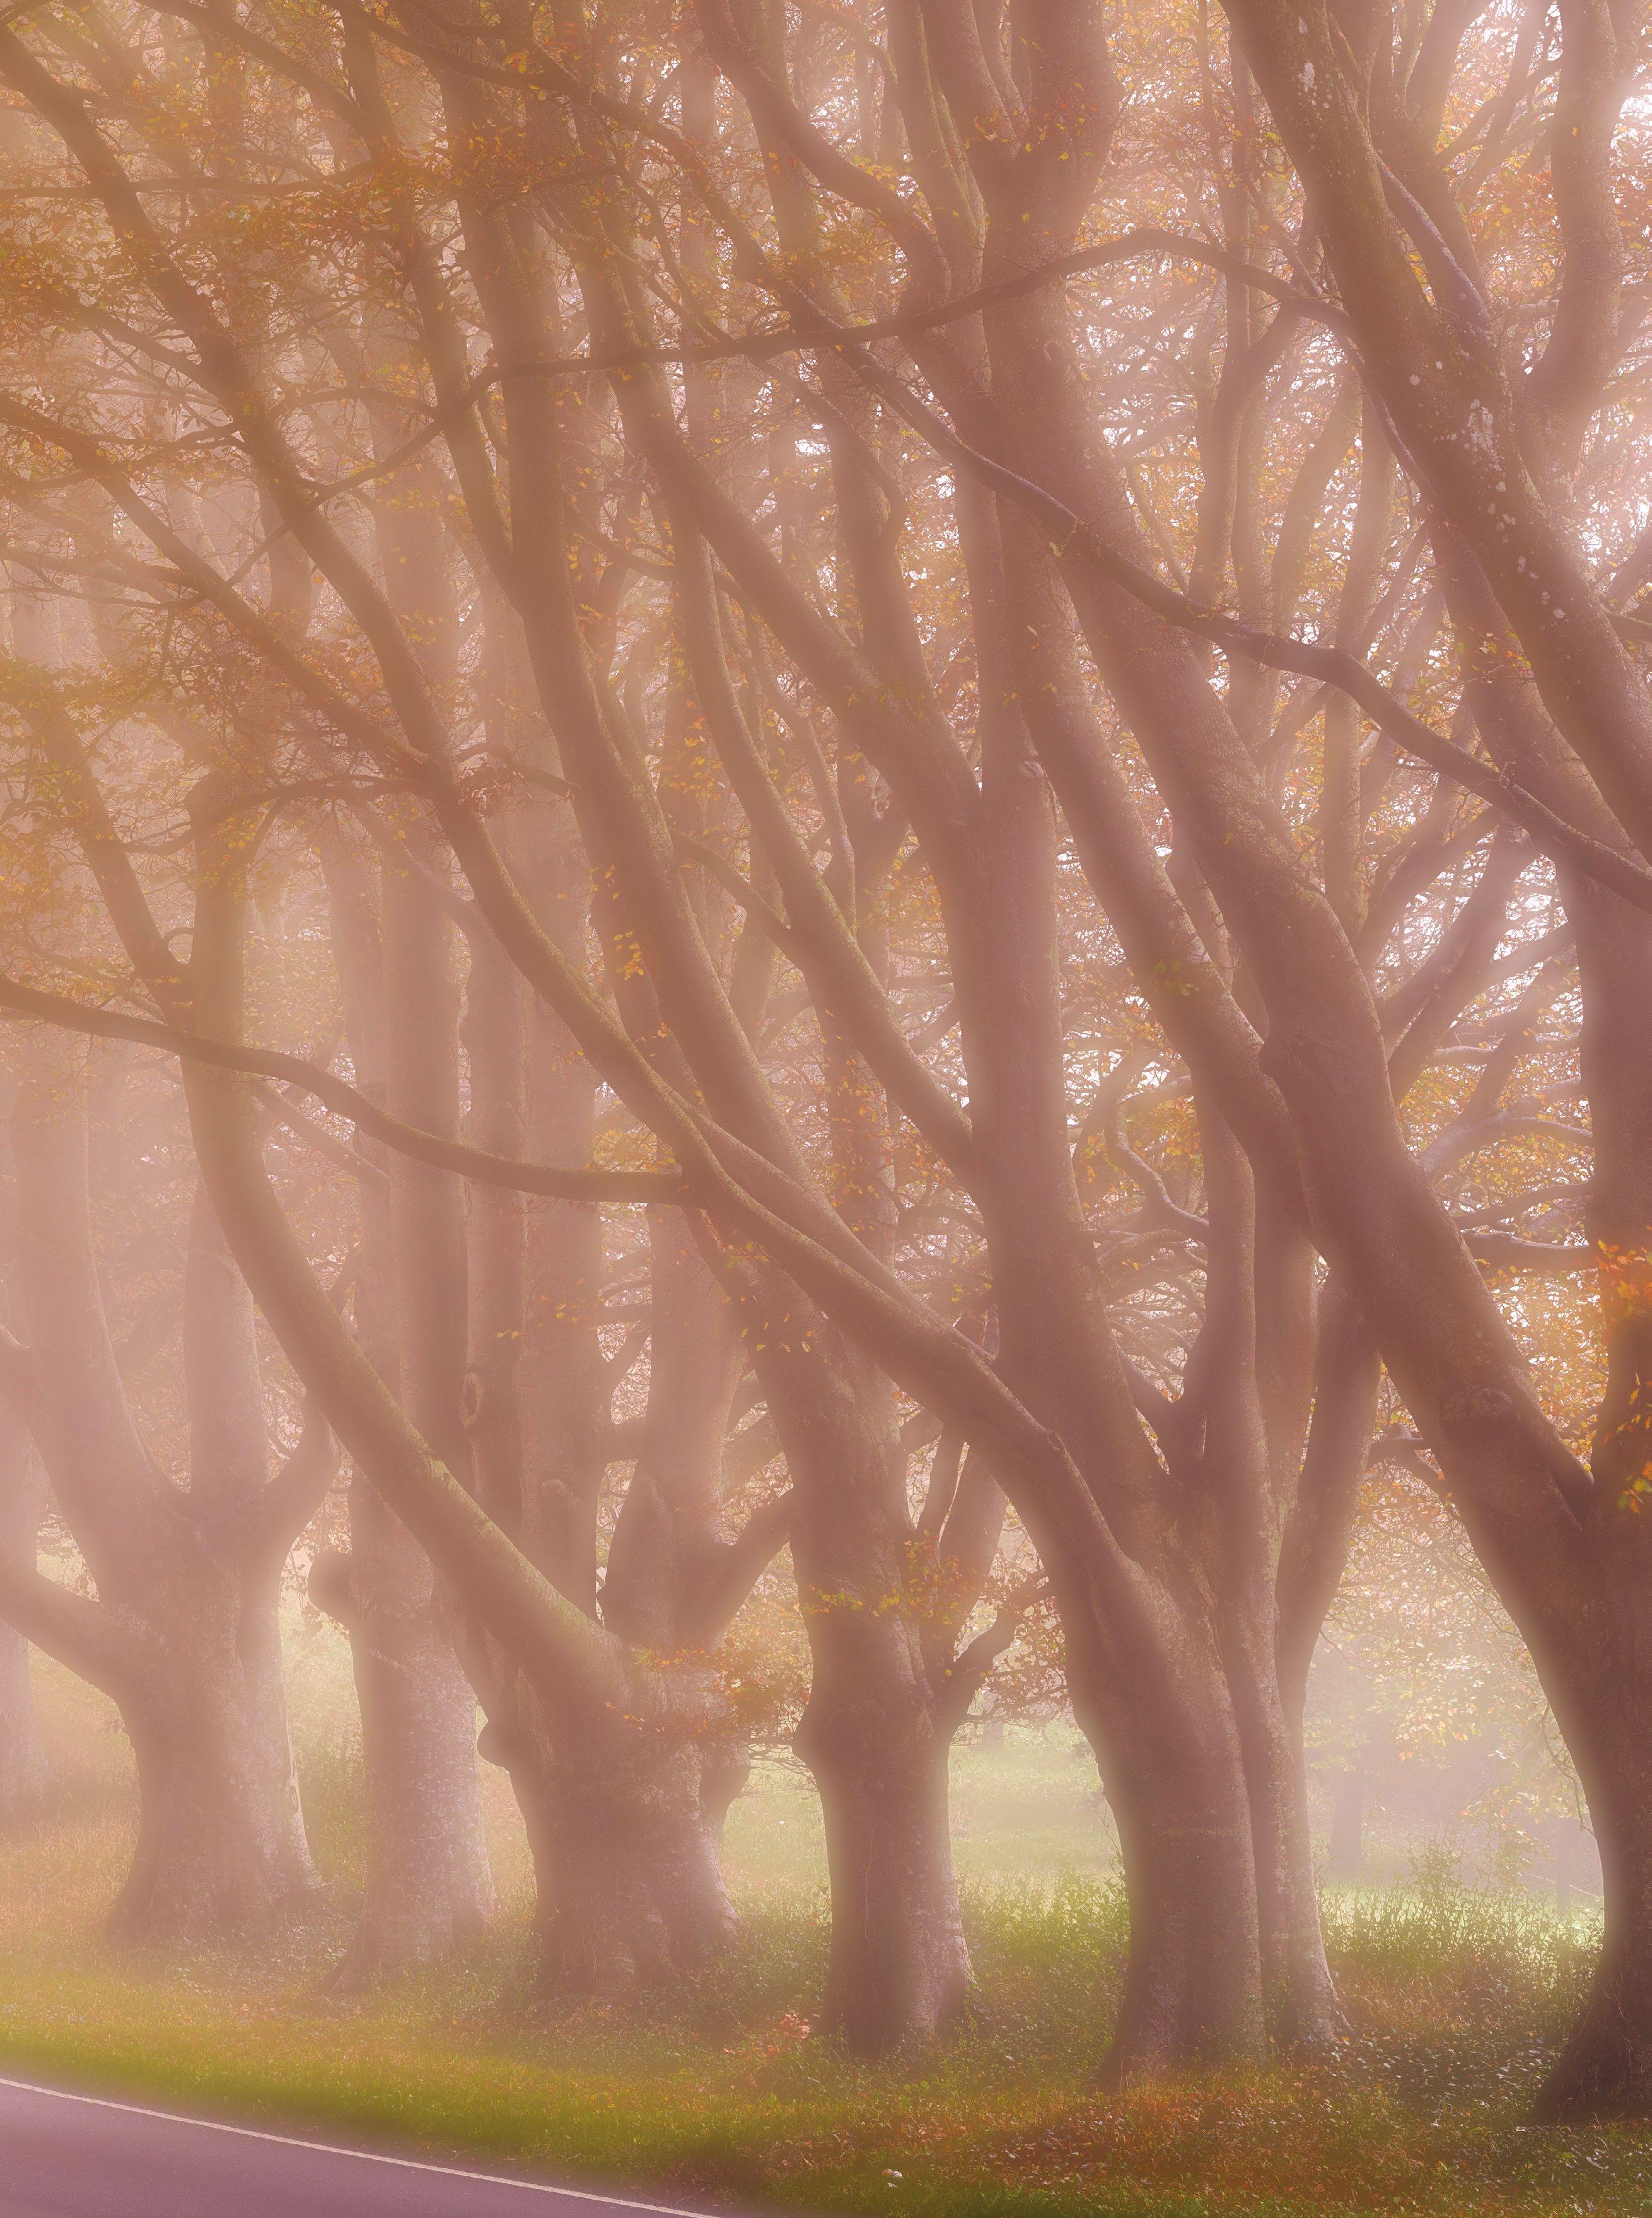
175 THE ORTON EFFECT
Shooting steps
1 Compose your shot Mount your camera on a tripod and start by composing the shot. Look for scenes that are back or sidelit, including mist and woodland. Illuminated foliage works especially well with the Orton Effect, as the highlights will render as an ethereal glow.
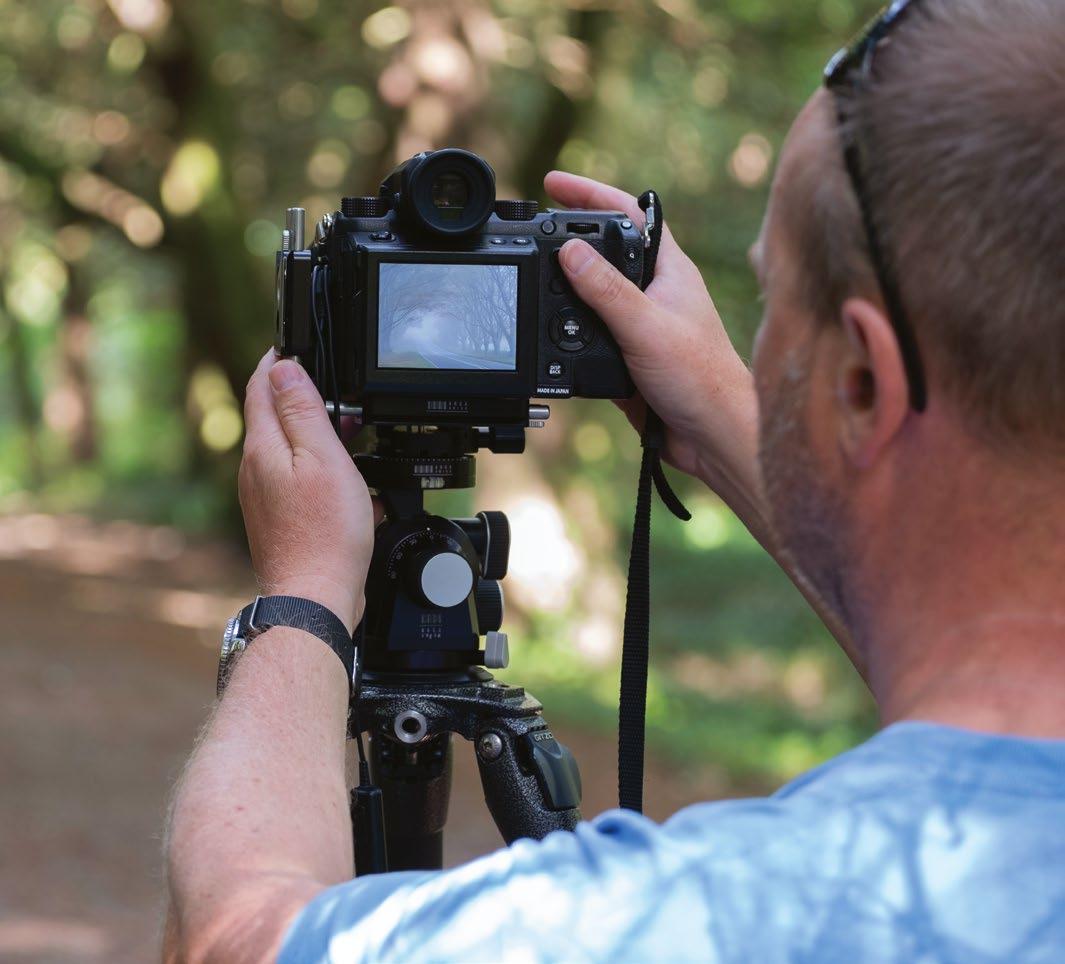
2 Adjust camera settings
Manual exposure is preferred here, so that you can keep exposure consistent across the frames. Setting manual focus is essential, as you’ll be deliberately shooting out-of-focus images and will need control over focus for the sharp image.
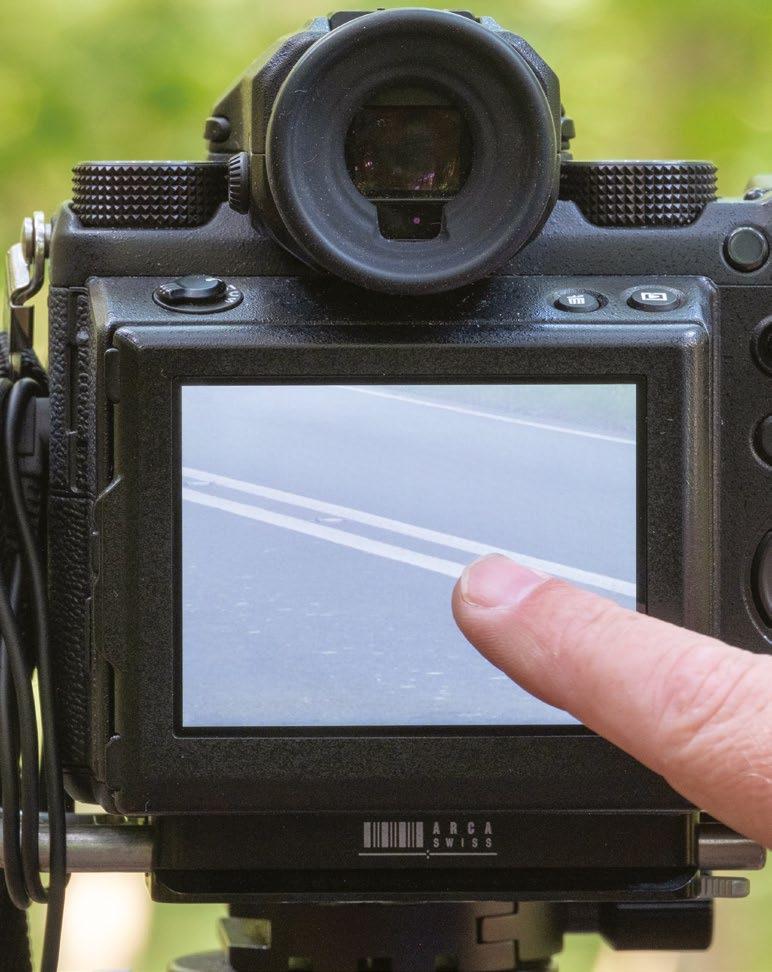
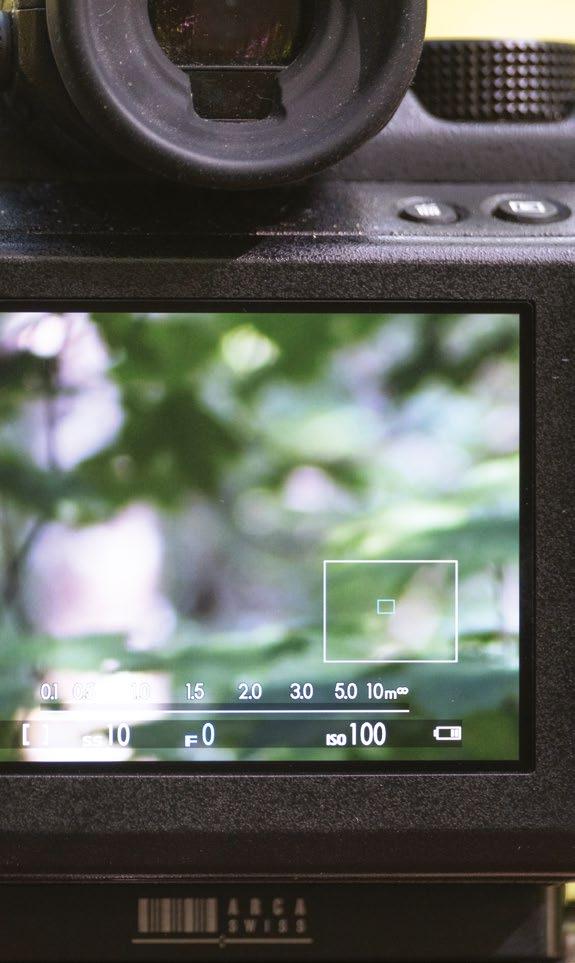
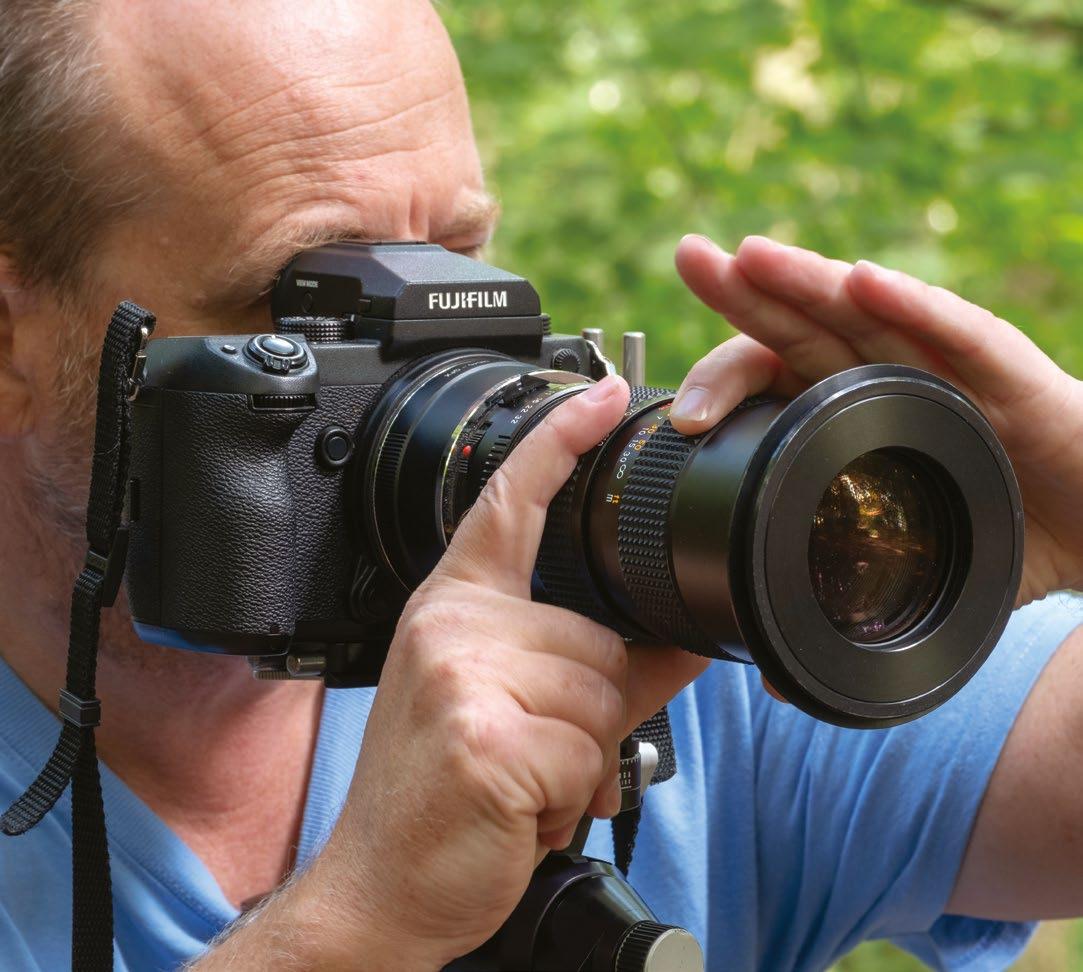
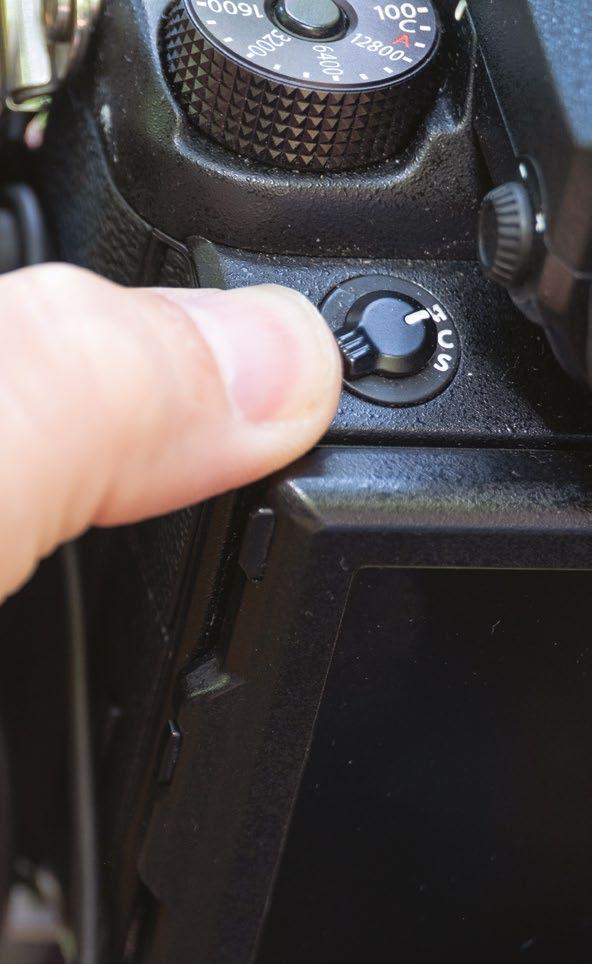
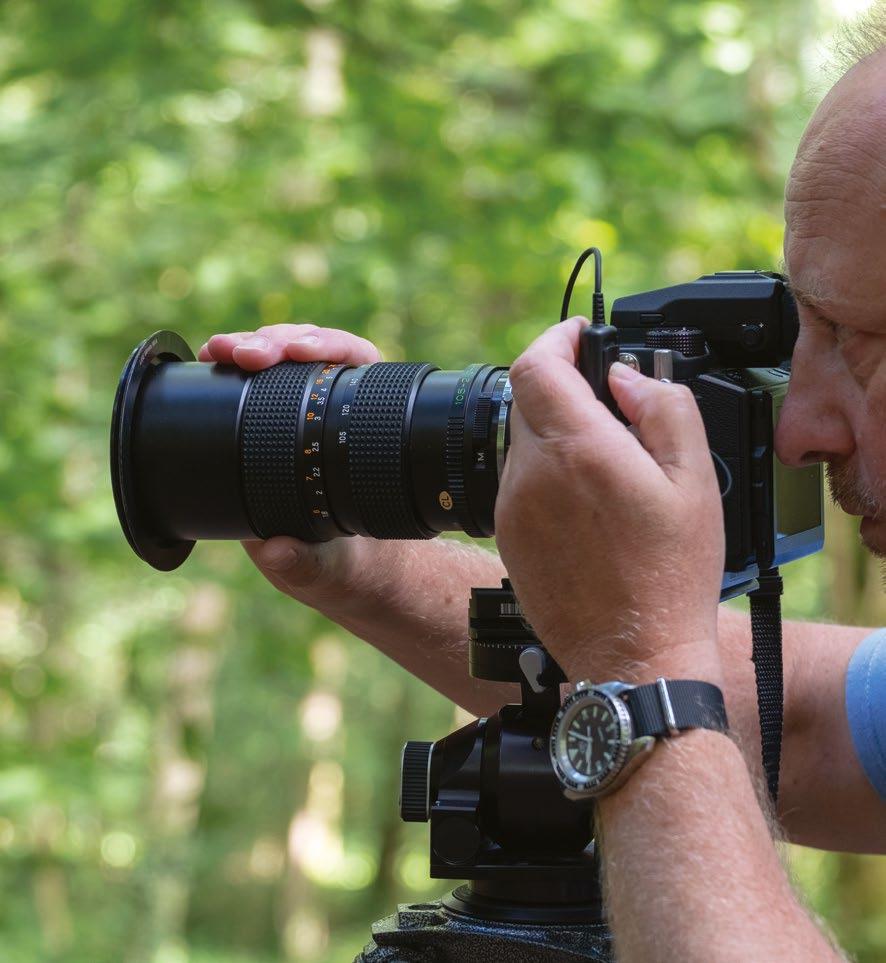
3
Out-of-focus image If your subject is fairly distant, focus closer in. The amount of defocus is entirely up to you, and you can always bracket your focus over several frames. If necessary, try blurring things a little further by opening up the aperture and restricting the depth of field.
4
In-focus image Stop down to increase the depth of field and then slowly bring the image into focus. The image will get smaller as it comes into focus, so at the same time you need to zoom in to compensate for this. Take care not to move the camera while making these adjustments.
5 Shoot and review Take the shot, making sure that you use a remote release to stop you from jogging the camera when releasing the shutter. It’s important that this shot is as sharp as possible, so zoom in to the review image and check the sharpness throughout.
6 Bracket focus It’s not easy to know what level of defocus will work best; it depends on the lighting, the subject, composition and so on. There is some flexibility in post-production, but to be on the safe side it is advisable to take a series of shots with different amounts of defocus.
1 3 4 5 6 2 176 PROJECTS
ZOOM LENS
You will need to change focal length slightly between shots, as focussing nearer or further effectively zooms in or out
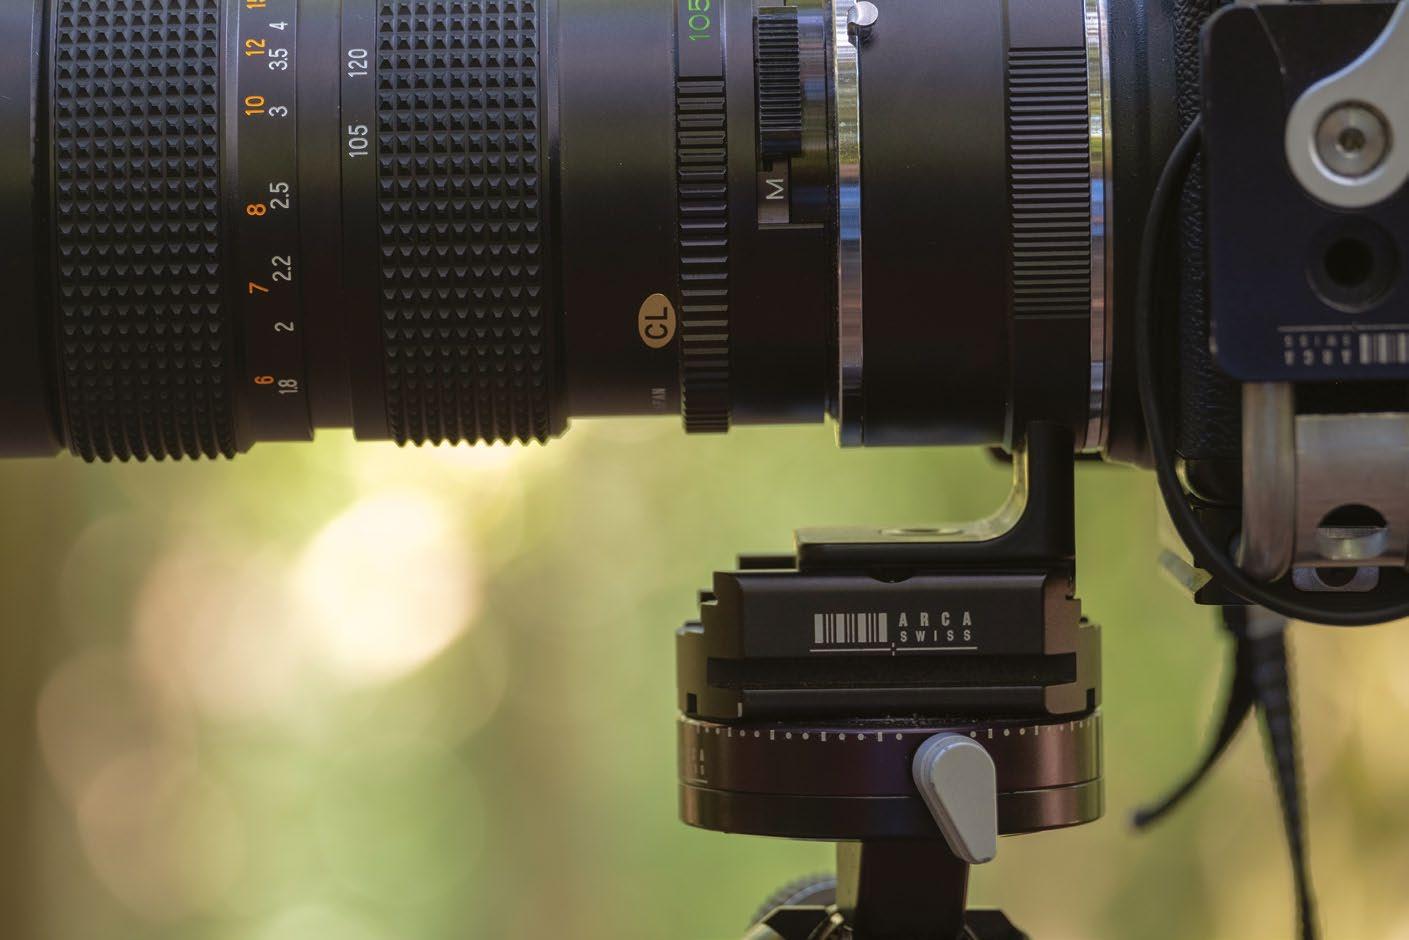
STABLE TRIPOD & HEAD
You don’t want the camera to move even slightly between shots, so a sturdy tripod and head are essential
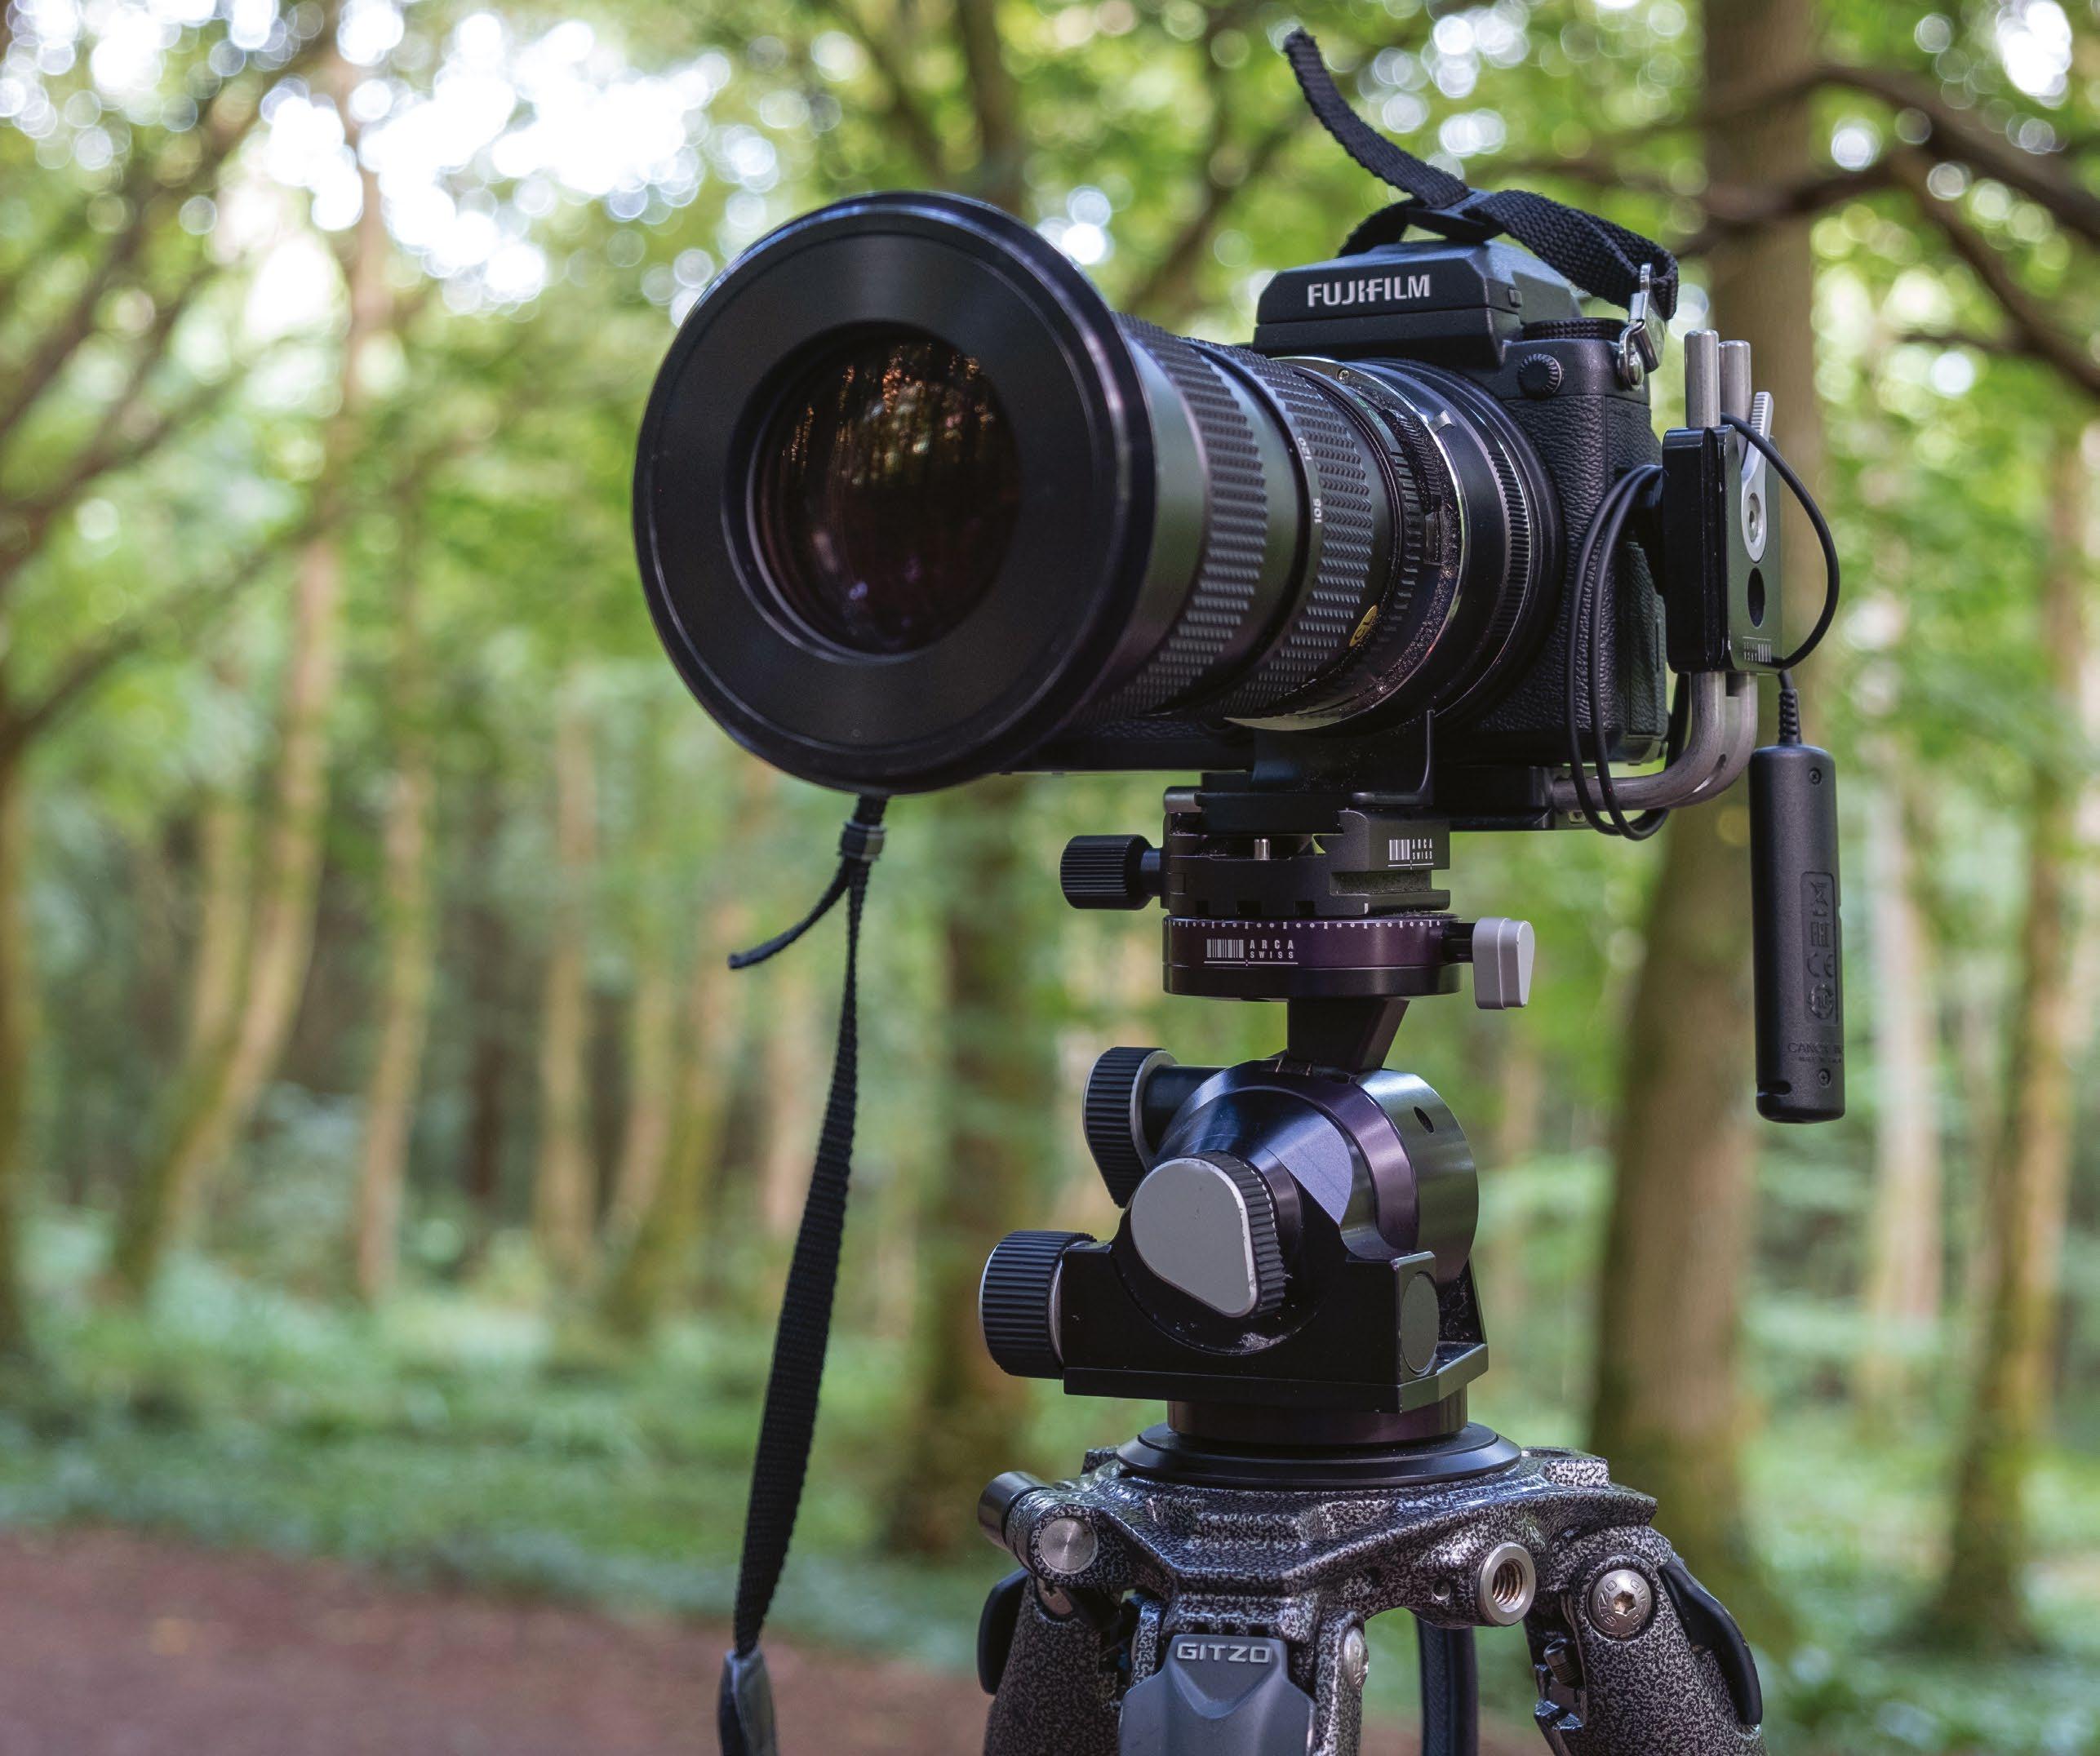
The setup
Aligning images
These tips will help to ensure that your images are properly aligned
The Orton Effect combines an image containing detail information (the sharp image) with one that contains colour information (the out-offocus image). Although there is a small margin for error when aligning the images, the areas of colour need to register with the detail and lines. When using longer lenses, it can be easy to change framing between shots, so use the sturdiest tripod and head possible, use a remote release and attach the lens to the head with a tripod collar, rather than mounting the camera body to the head. Changing focus alters the effective focal length, so adjust the zoom when focussing to keep the subject size consistent – use the review image of the previous shot as a guide.
REMOTE RELEASE
Pressing the shutter button could move the camera, making it difficult to line the shots up later in Photoshop
177 THE ORTON EFFECT
Edit the shot
1 Process the images Process both images in your usual software, making adjustments to the white balance, contrast, exposure levels and so on. When you’ve finished, open both images as TIFFs in Photoshop and place them side by side in separate windows.
2
Layer images together Using the Move tool, drag the out-of-focus image onto the in-focus image, holding down the Shift key so that they align. The out-of-focus image should now be a layer above the in-focus image.
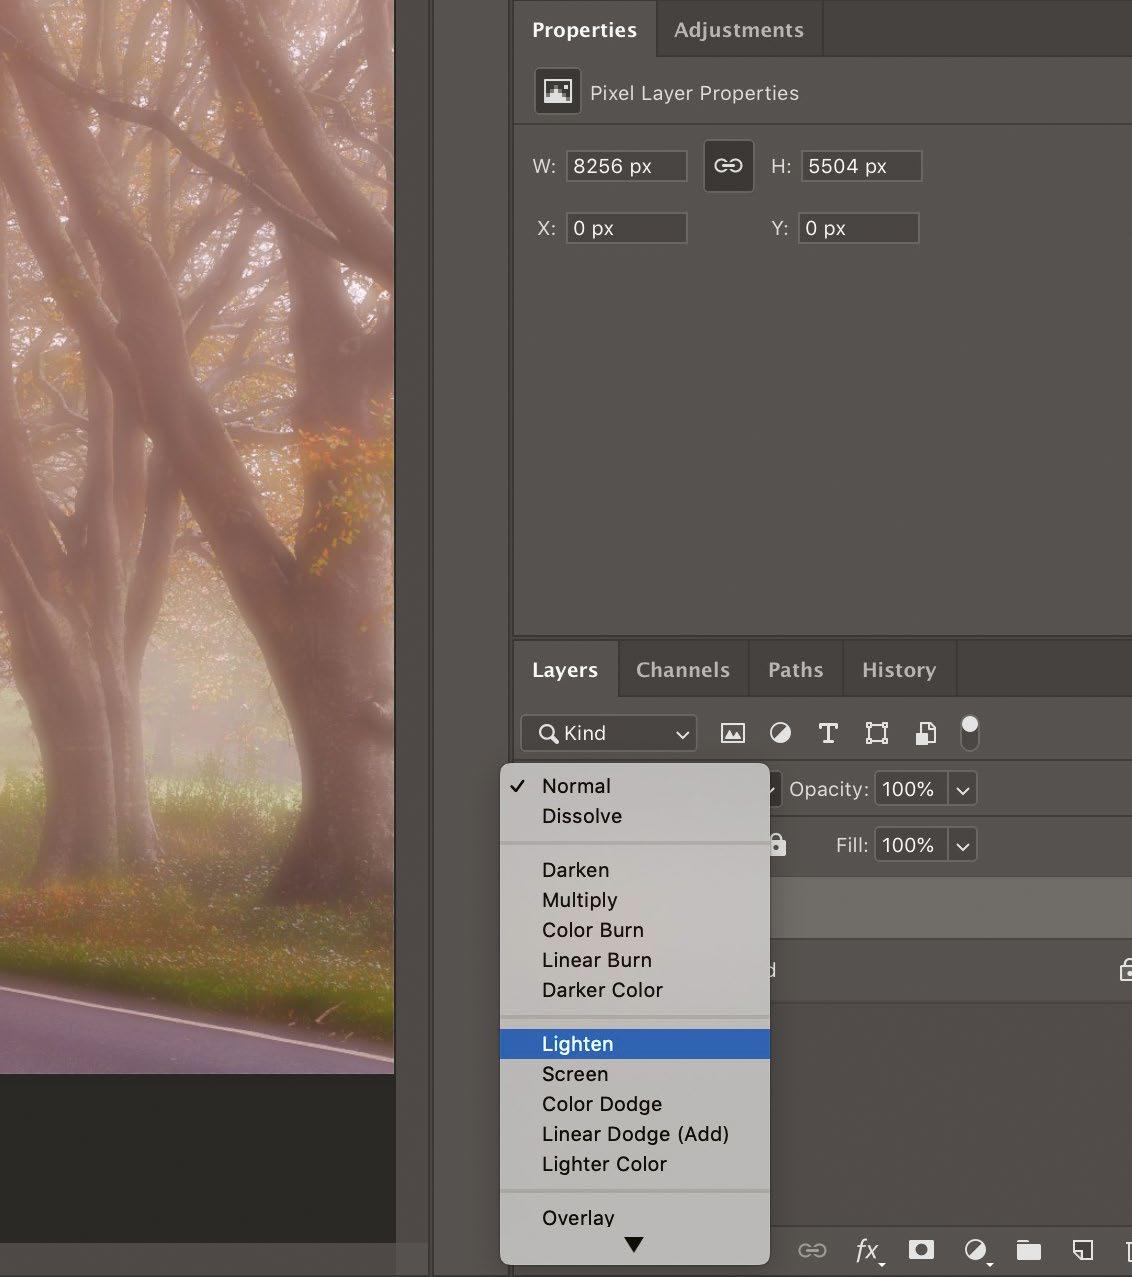
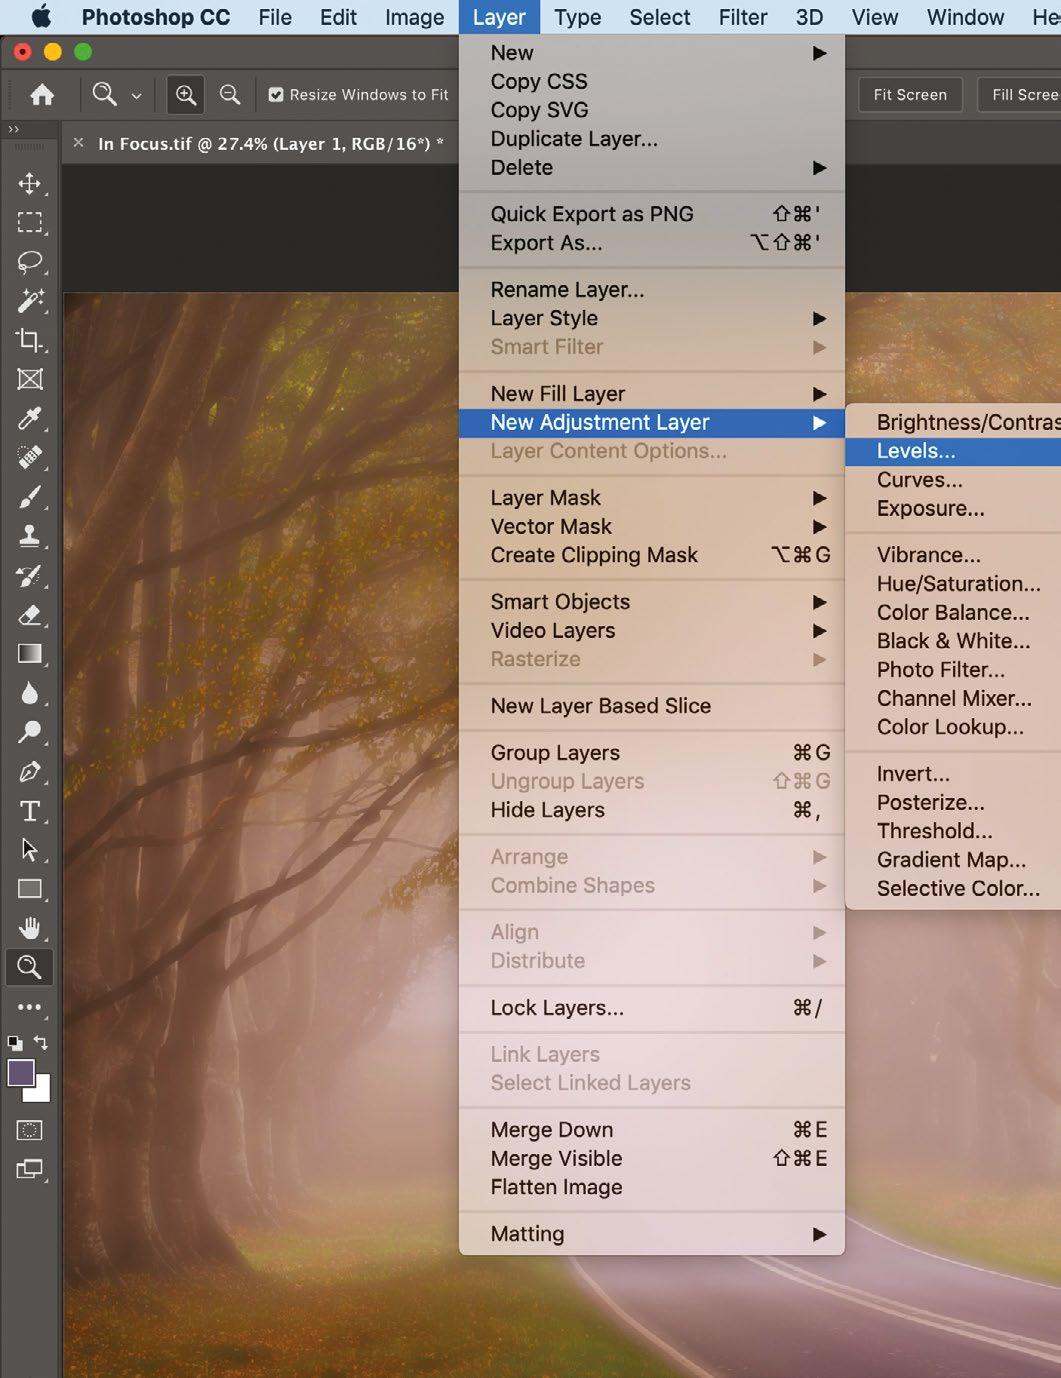
3 Change blend mode Change the blend mode to brighten highlights and create the characteristic Orton Effect glow. Lighten, Screen and Soft Light work well. Here, Lighten gives the best result. Also adjust the opacity.
4 Curves or Levels adjustments Go to Layer>New Adjustment Layer>Levels (or Curves). Use this Curves or Levels adjustment layer to fine-tune exposure. Tweak the contrast until you’re happy and further brighten or tone down highlights. Flatten layers when finished.
Right With and without Orton Effect
The straight image is pleasant enough, but it really benefits from the Orton Effect, with the ethereal glow of the highlights adding a painterly look
1 3 2 4 178 PROJECTS
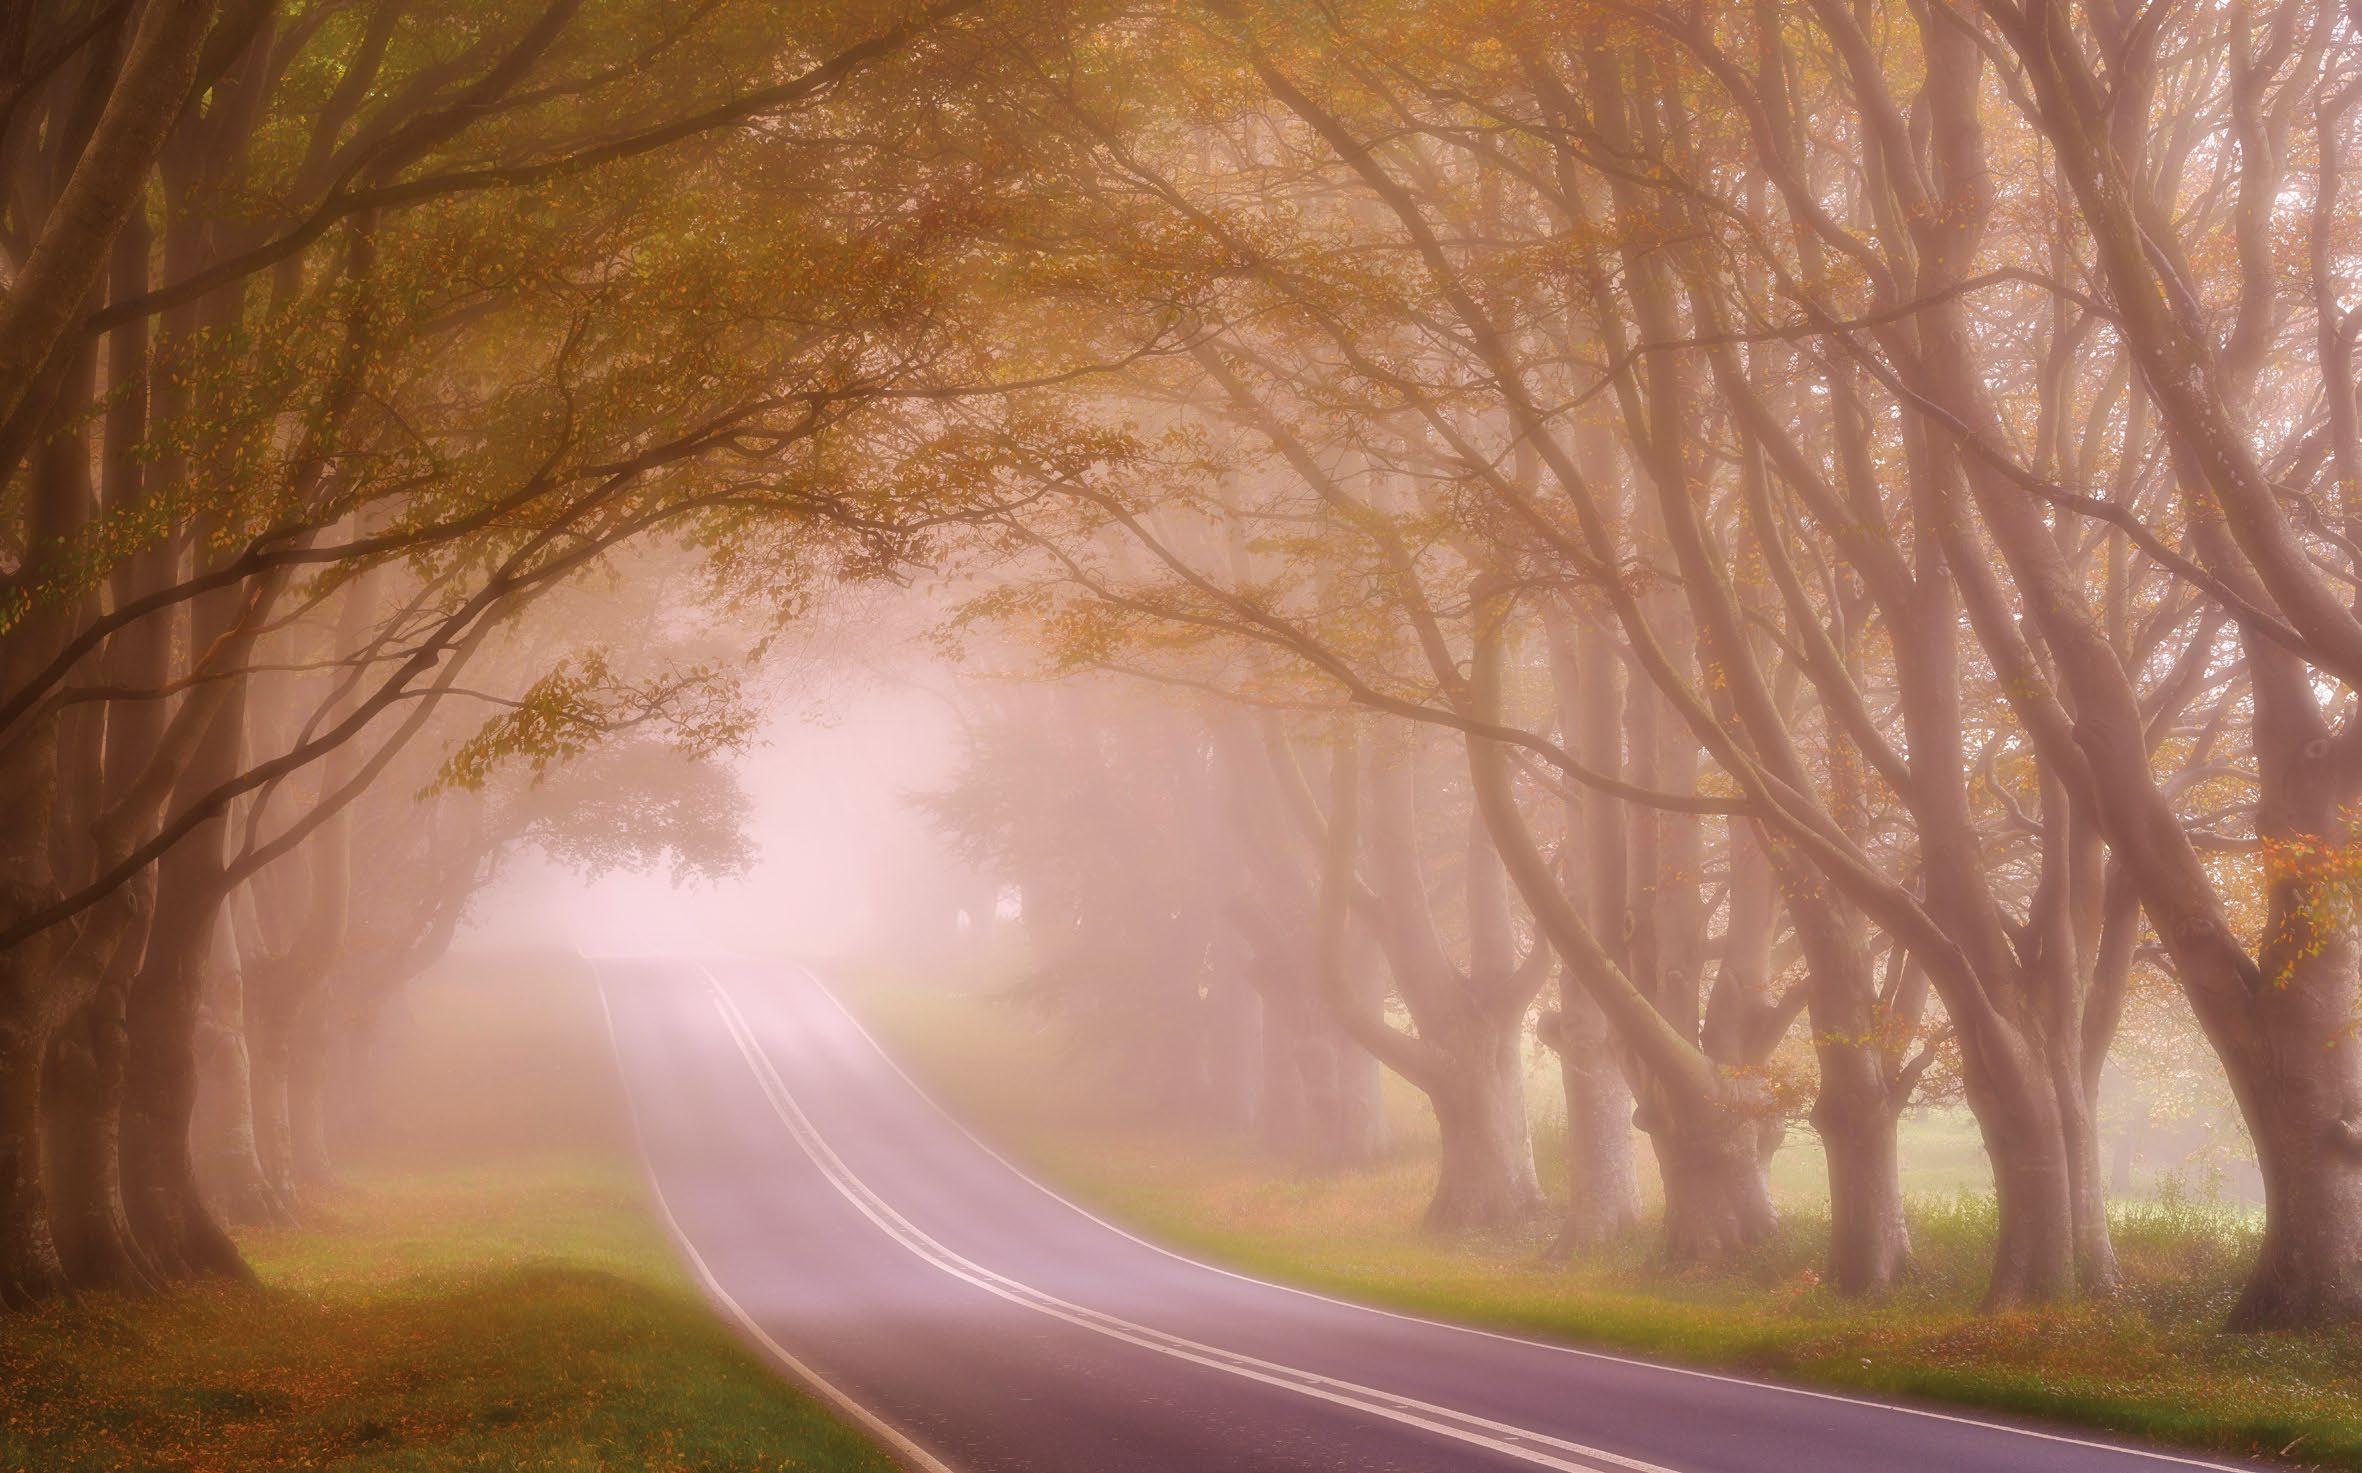
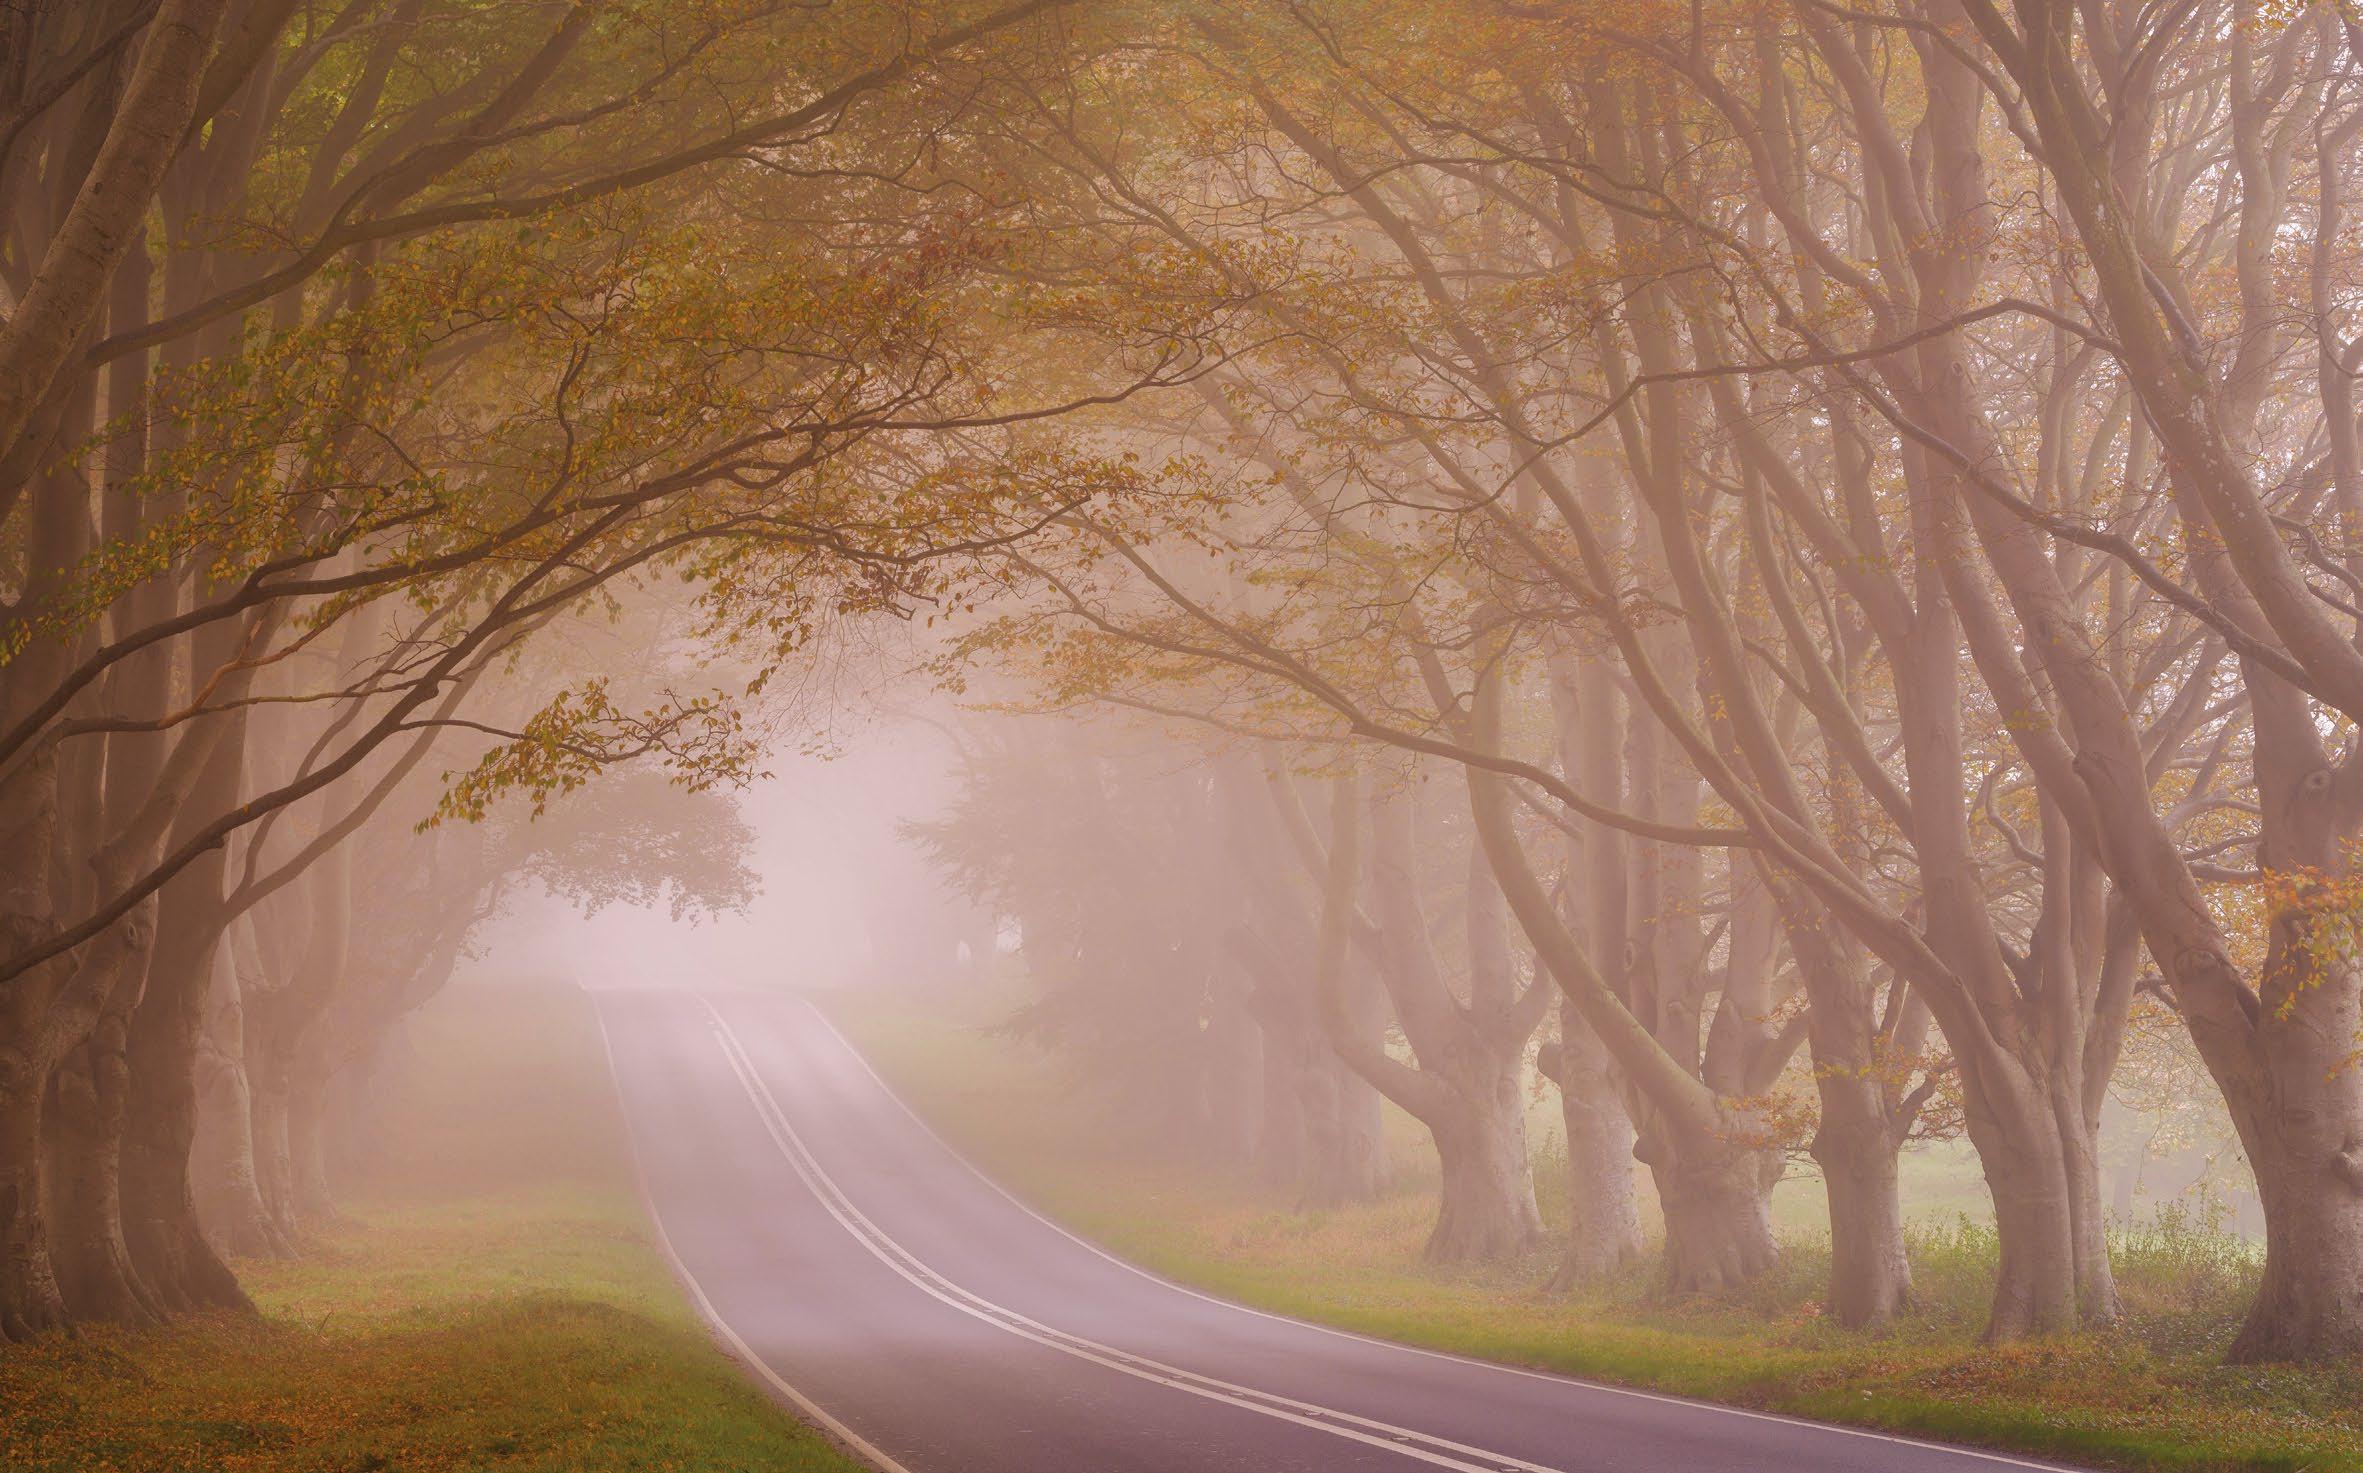
BEFORE
179 THE ORTON EFFECT
AFTER
Pano Create a stitched
We show you how to create a stunning widescreen landscape using multiple images
Difficulty level: Intermediate
Time taken: 3-4 hours
180
PROJECTS
rama
Most people love panoramics as they mimic the way we view a vista, with our eyes scanning across the scene. When creating a panoramic, the temptation can be to simply crop the middle from a single frame, but if you shoot a series of images and ‘stitch’ them together into a single image you will get better results with more resolution, a wider angle of view and less distortion. It’s a two-stage process to create a stitched panorama. Firstly you
need to shoot the images, having chosen a suitable scene; look for strong interest along the horizon and a clear focal point. Then you need to combine the images you’ve captured. Specialist software is available for this, but excellent results can be obtained using Adobe Lightroom, Photoshop or Photoshop Elements. Specialist panoramic heads are available that make lining up shots easier, but if you avoid including close foreground any good, stable head will do.
To help prevent distortion, shoot in portrait orientation and take between five and seven images – or more if the scene justifies it. Use manual settings, so that focus, exposure and white balance do not change from one frame to another, and avoid using polarising filters, as the degree of polarisation will change as you pan across the scene. Here we’ll take you through the process of capturing the images and then the steps needed to stitch them together in Lightroom.
Panoramic seascape Even with my widest lens, I couldn’t capture the full sweep of this view. So instead I shot a series of six vertical images and stitched them together using Lightroom’s Photomerge feature All Images © Mark Bauer
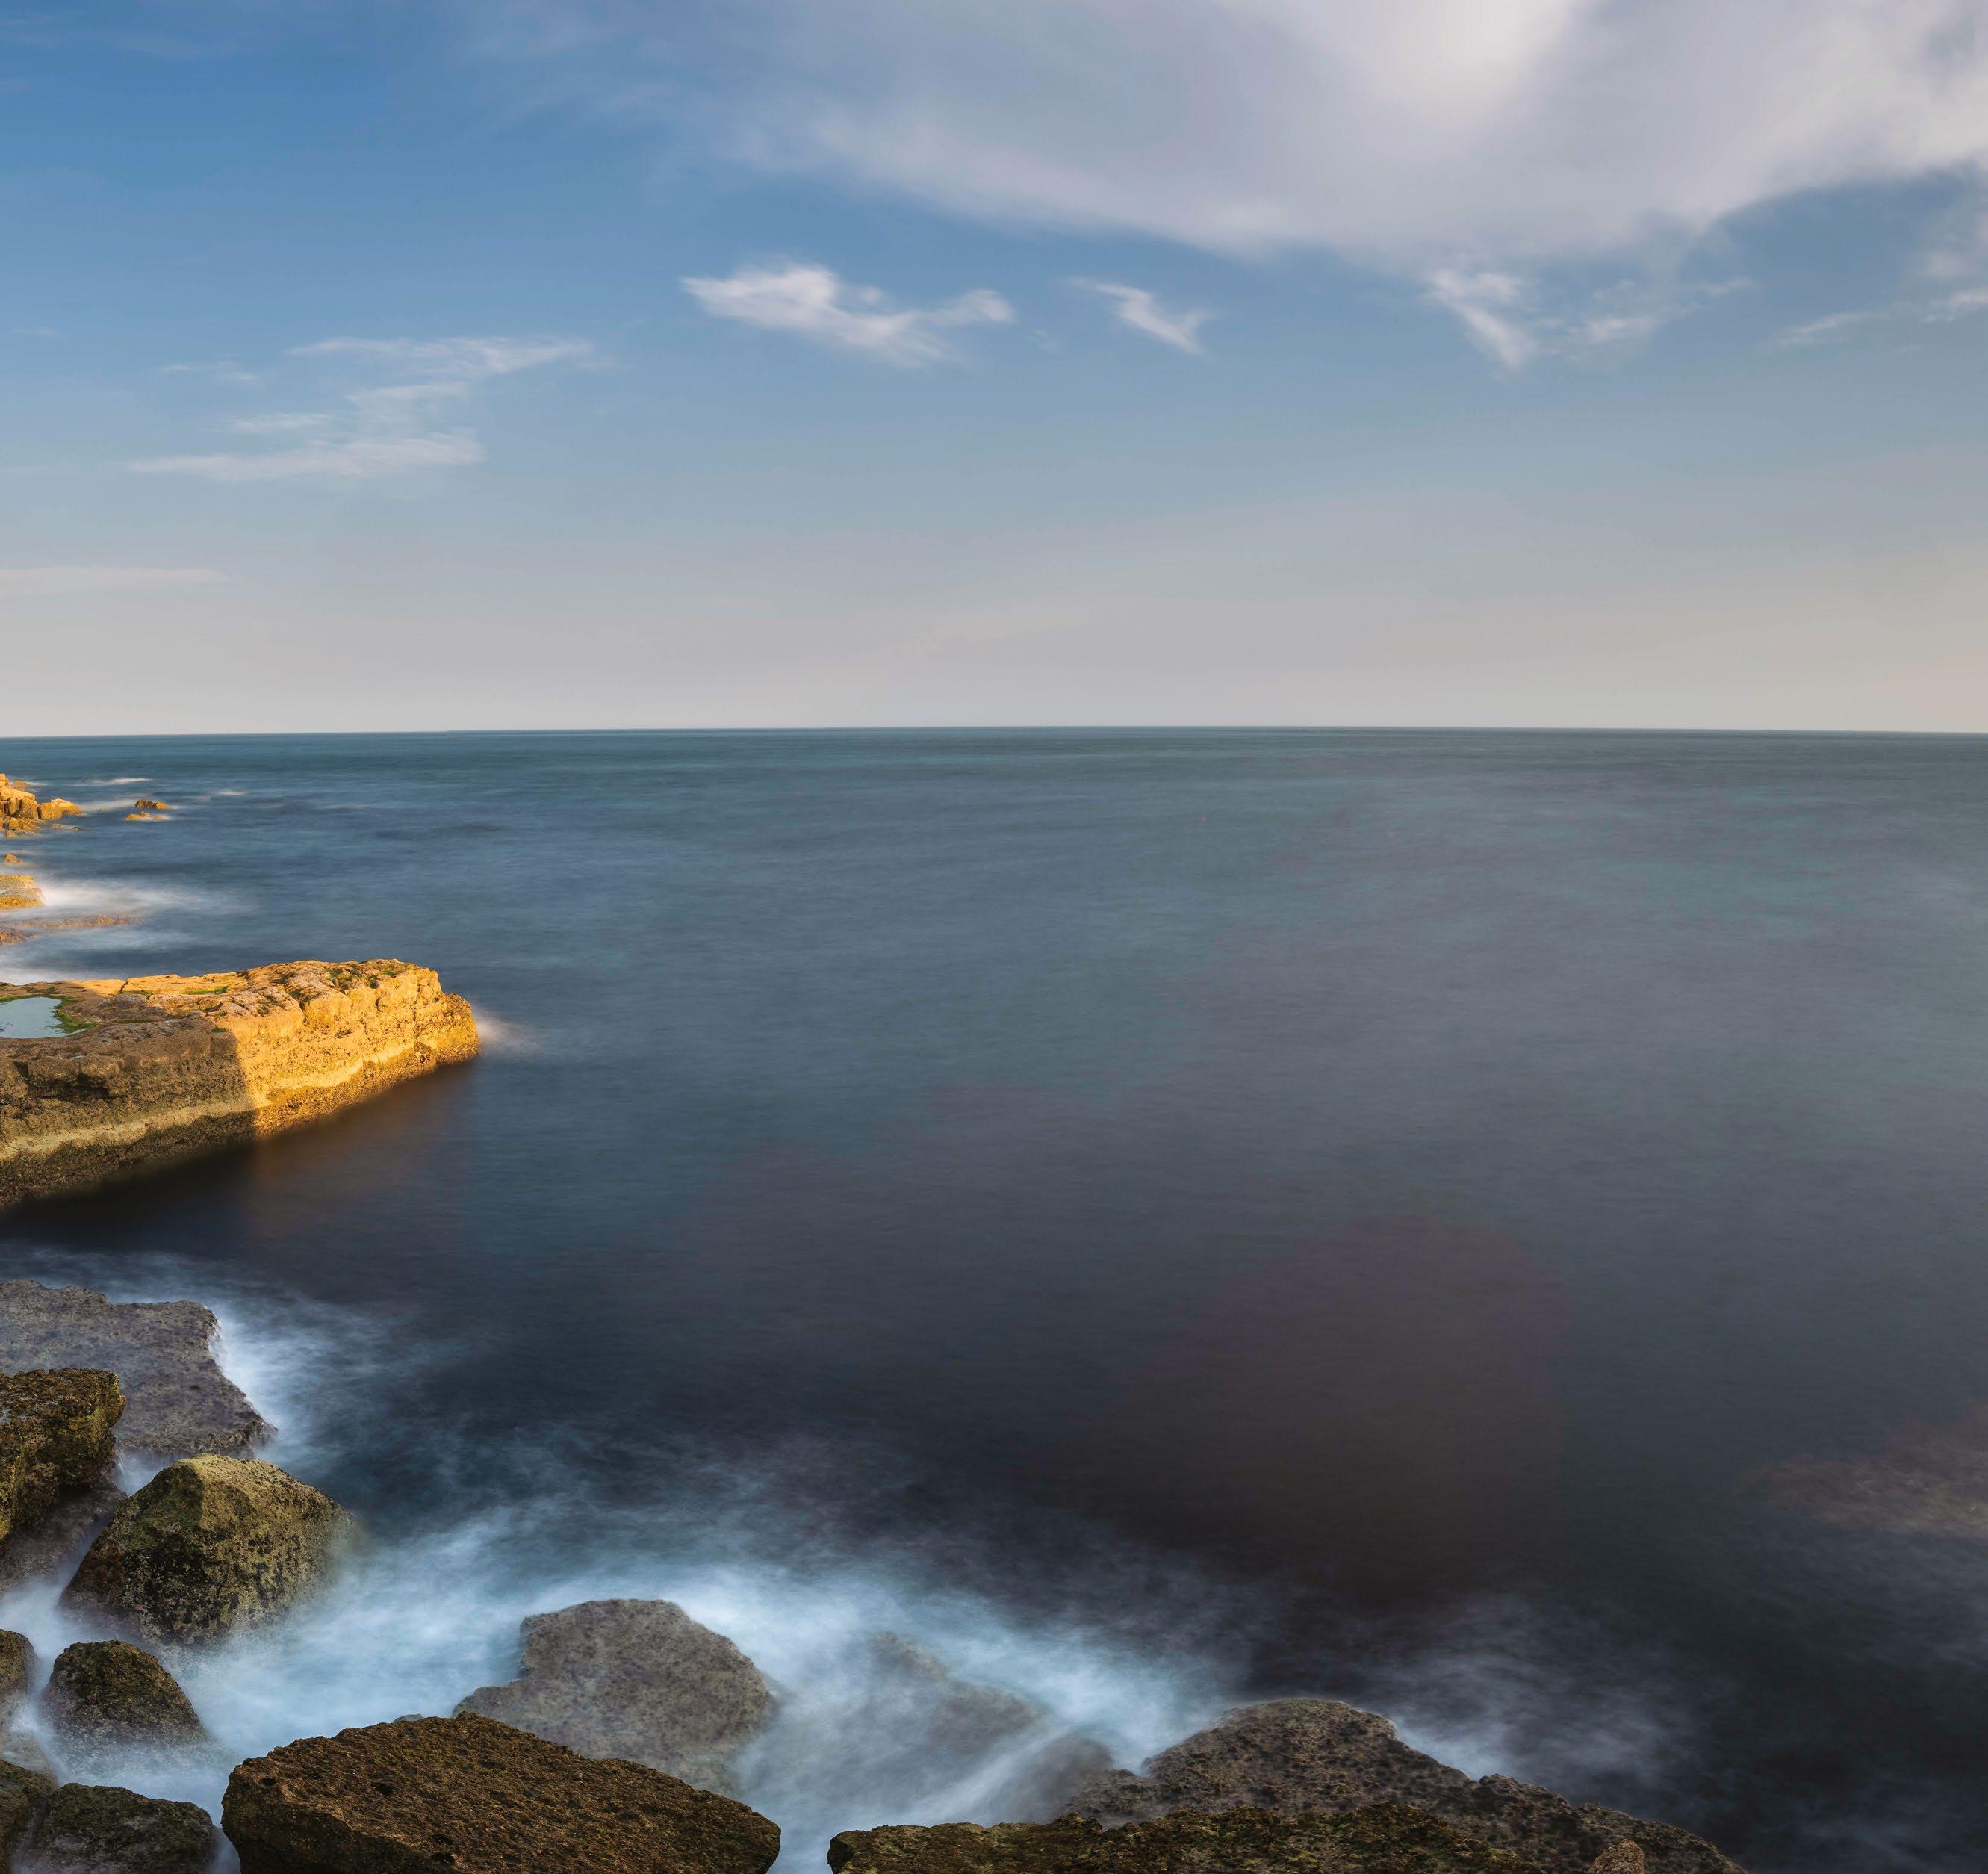
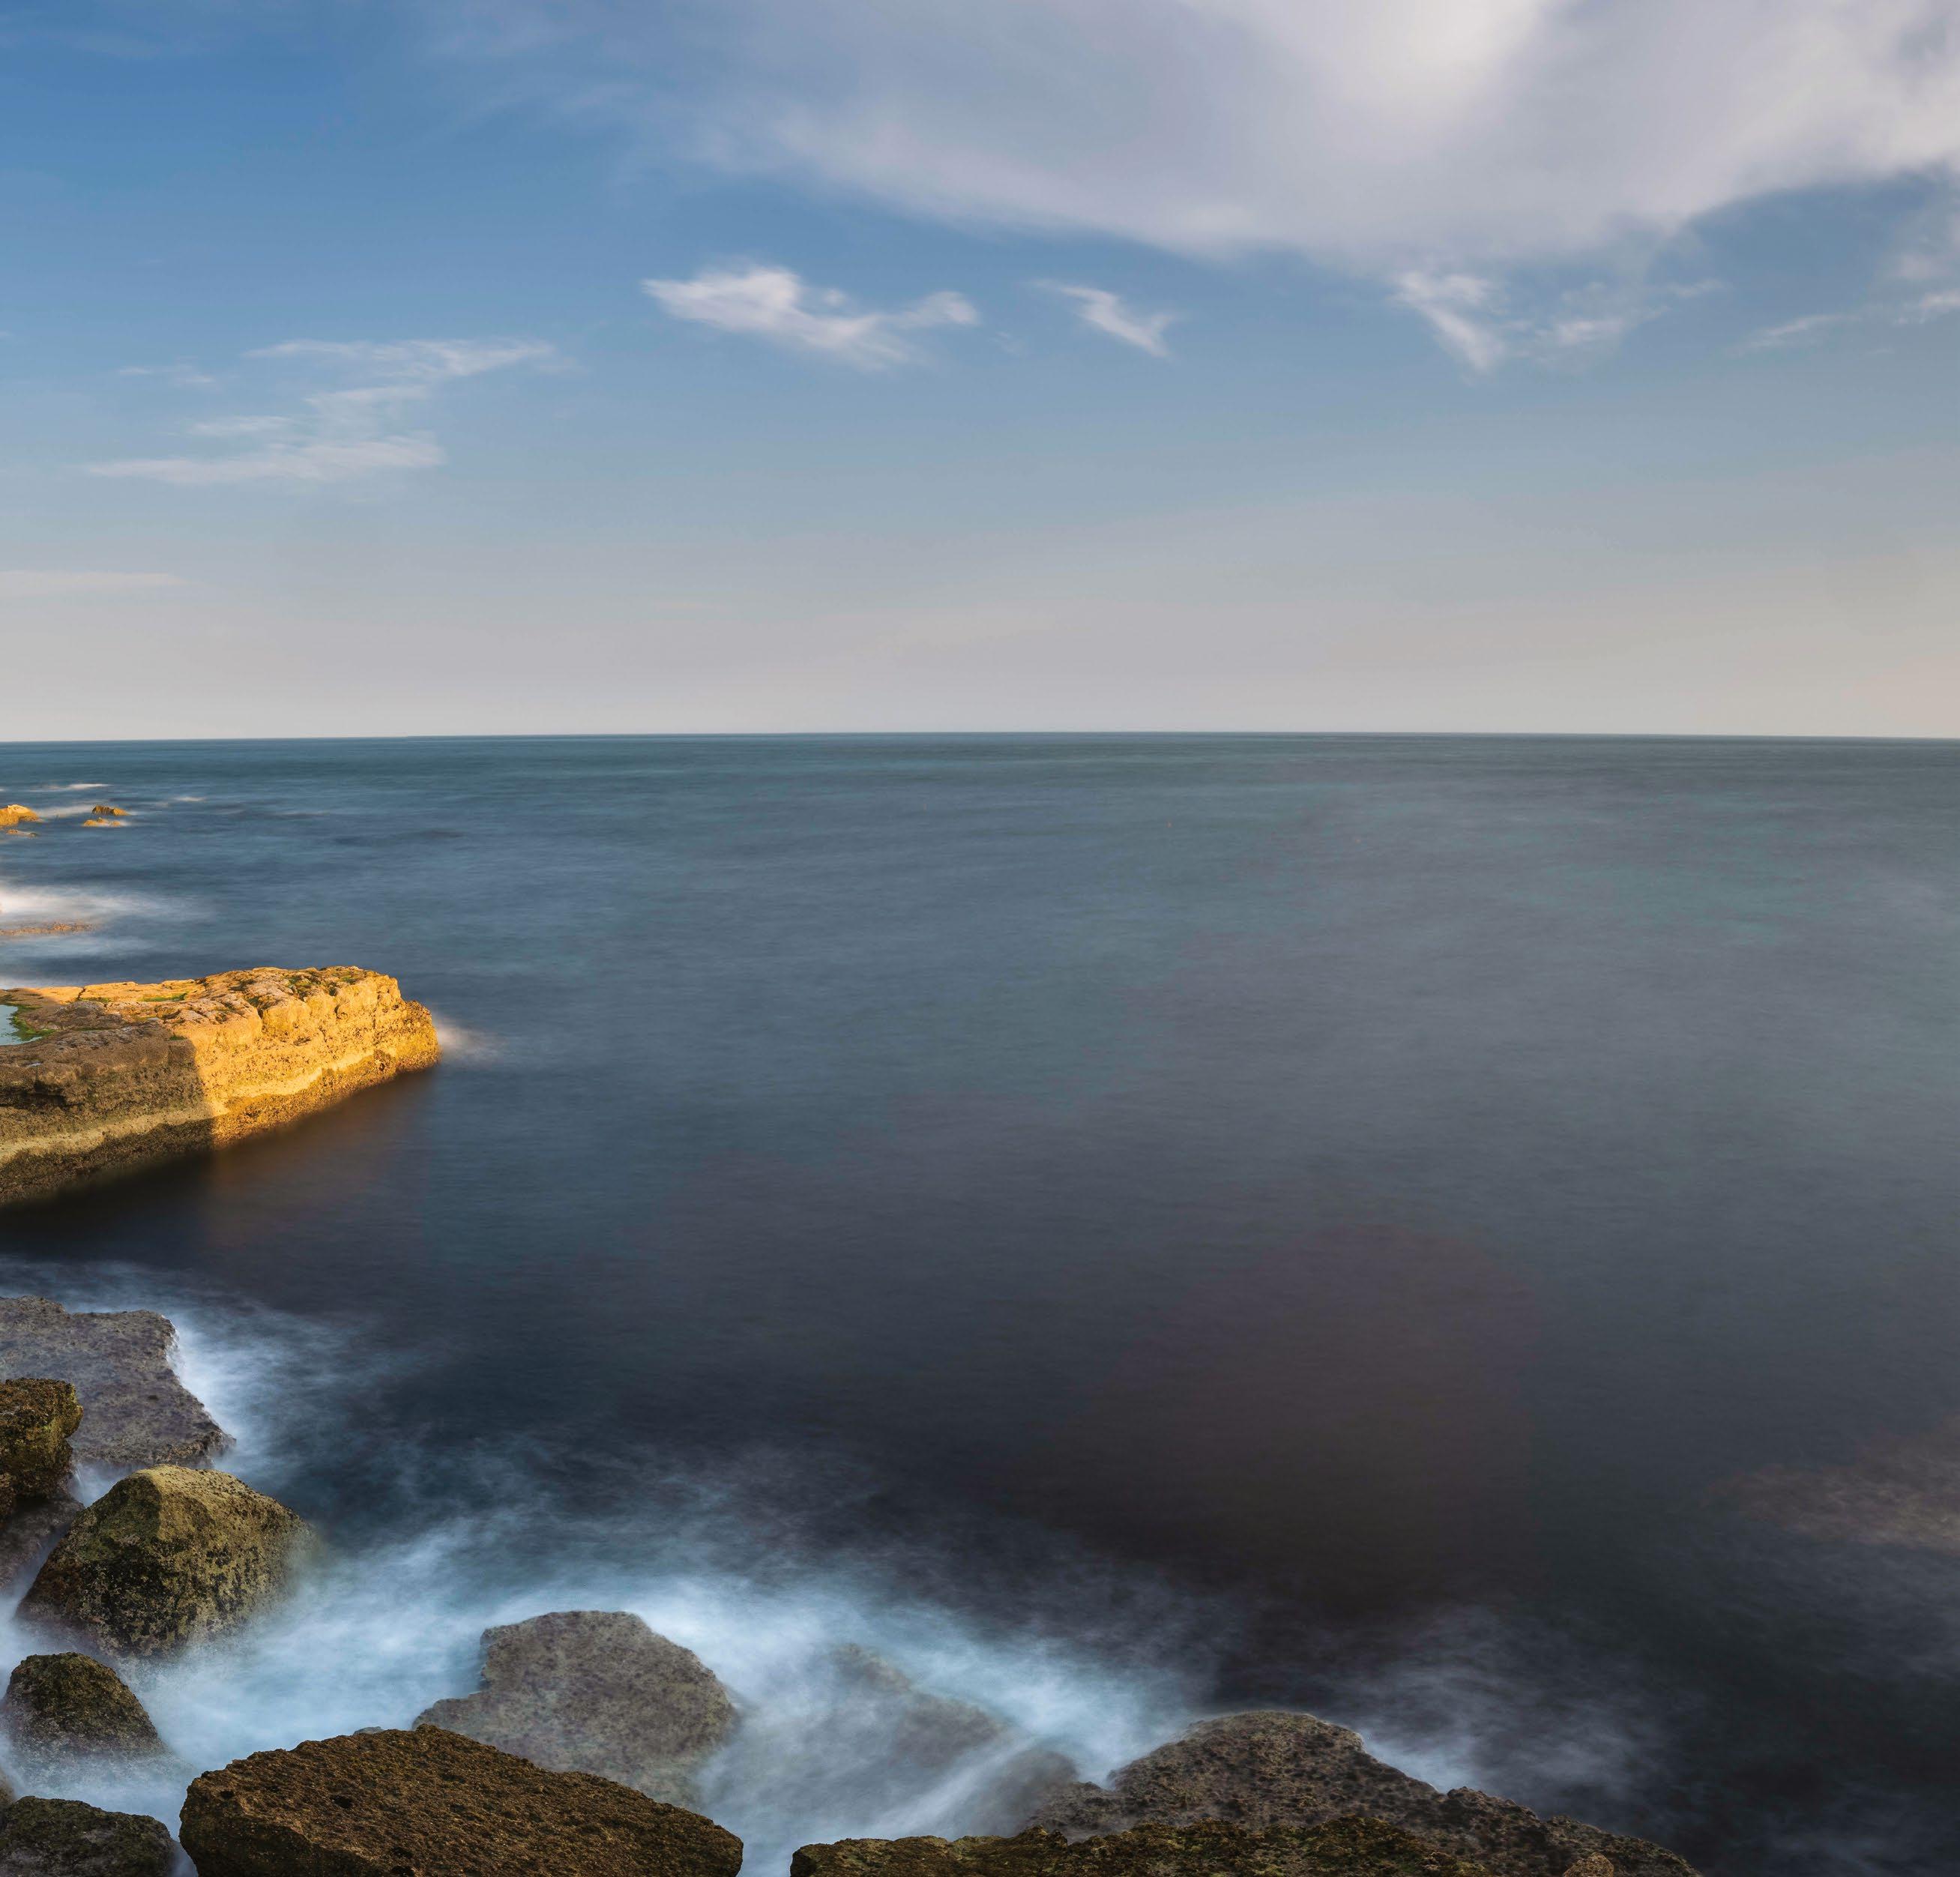
What you’ll need
DSLR or mirrorless camera
Sturdy tripod
Sturdy tripod head; preferably a pan and tilt or geared head
Filters: grads and neutral density (but not a polariser)

Adobe Lightroom, Photoshop, Photoshop
Elements or similar
181 CREATE A STITCHED PANORAMA
Shooting steps
1 Choose the right subject This scene should work well as a panorama; it has strong interest across the scene and a natural focal point – the lighthouse – to give the eye somewhere to rest. The close foreground should be avoided as it could create stitching errors.
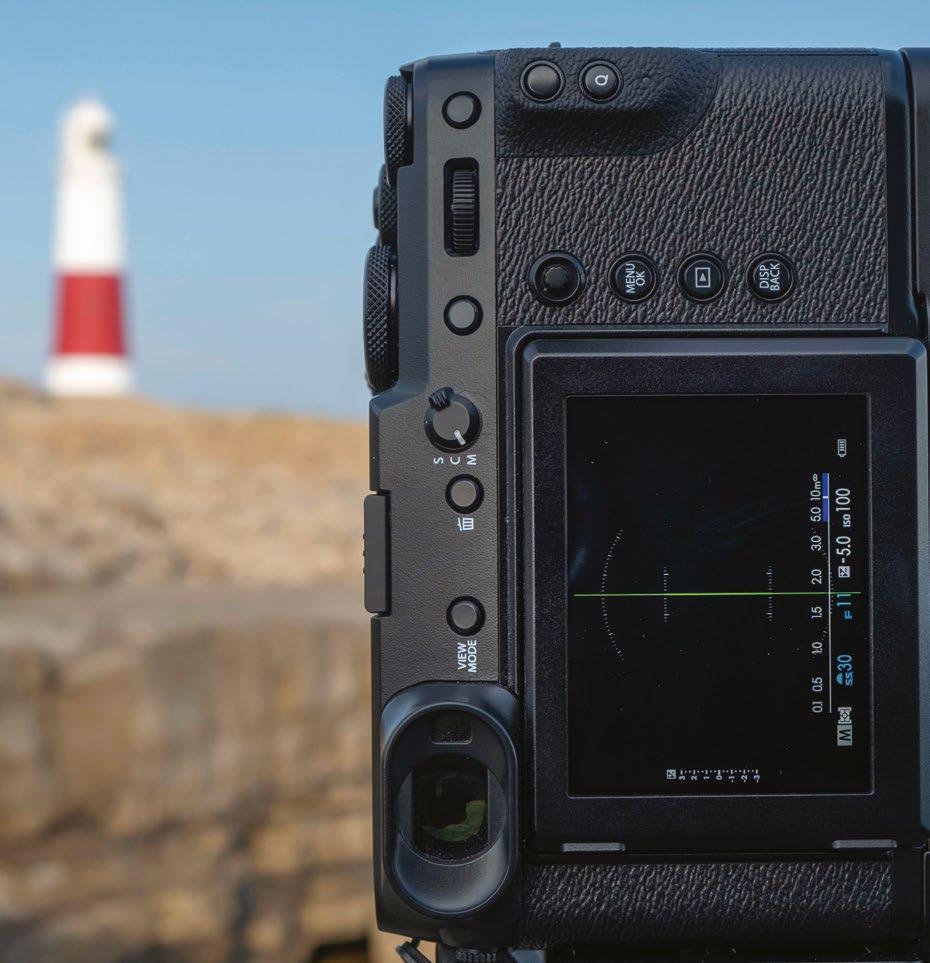
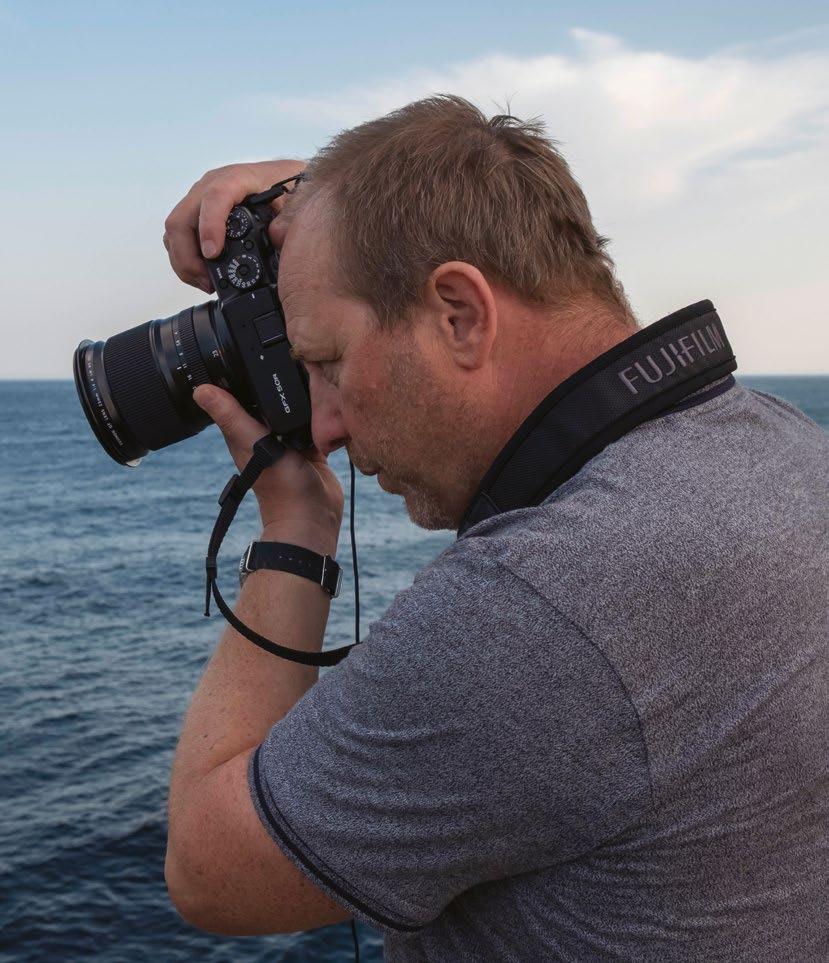
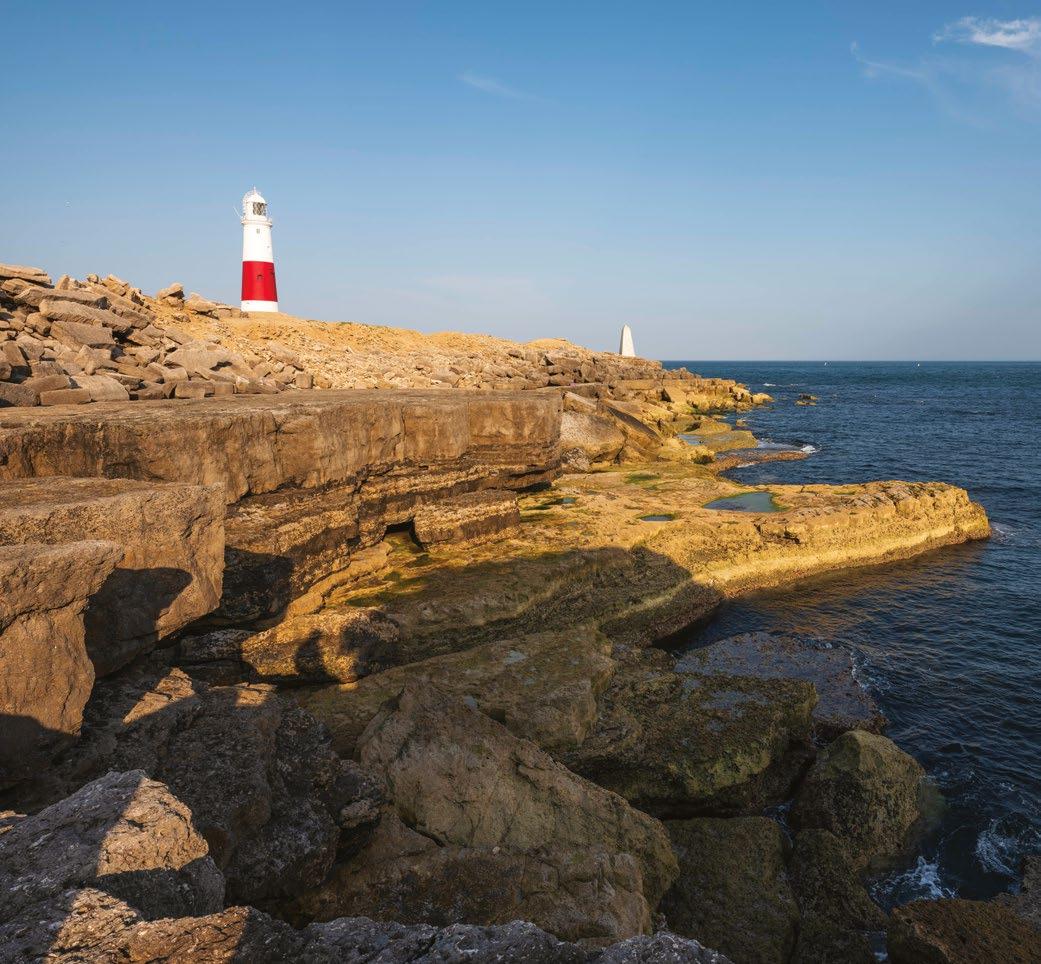
2 Set up tripod It’s important that the camera is level as you pan across the scene, so make sure everything is completely level when you set up your tripod and head. Most good tripods and heads have a bubble level to help you. Specialist levelling bases are also available.

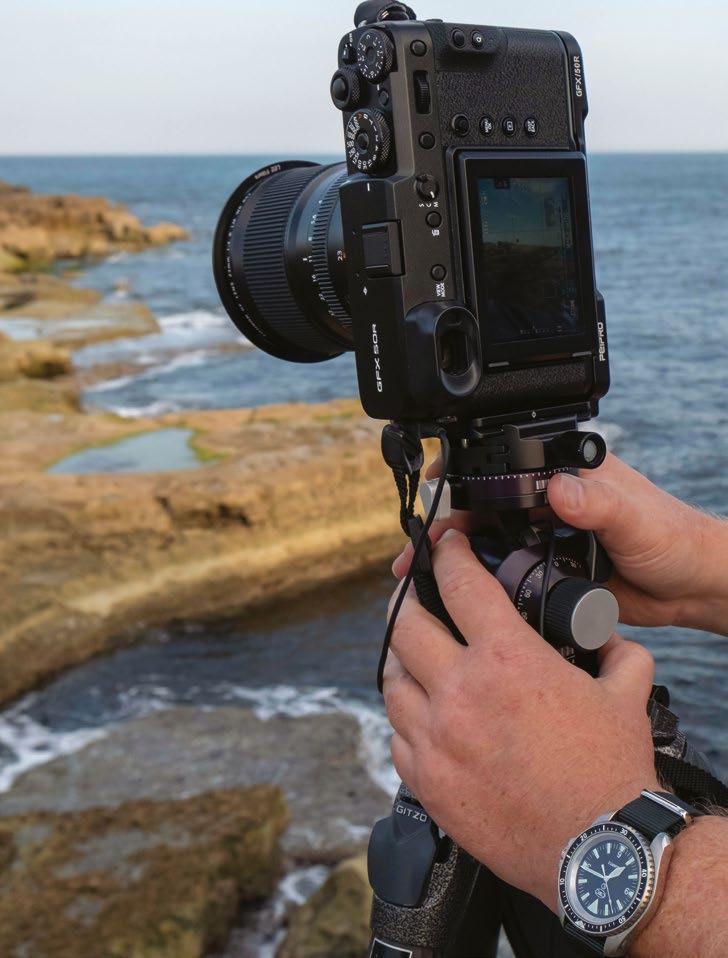
3 Select camera settings Settings need to stay consistent across all the frames you want to stitch together, so set manual exposure, manual focus and select a white balance preset rather than leave it on auto: daylight is probably the best option and can always be tweaked during processing.
4 Meter the scene The final image will have a wider angle of view than your lens and the light can vary considerably across the scene. Take meter readings from all parts of the scene you intend to include in the final image, average them out and then enter the values manually.
5 Set up the camera Attach the camera to the tripod in vertical orientation – an L-bracket can be very useful as the camera will balance much better. Doublecheck that everything is as level as possible – your camera’s electronic level or a hotshoe spirit level will really help here – and fit any necessary filters.
6
Carefully shoot Take the shots, panning the camera in between each one; be careful not to jog the camera, even slightly, so that it’s no longer level. Allow plenty of overlap between images – around 20-40 per cent – so that when stitching, you use the lens’s ‘sweet spot’ from each frame, with minimum distortion.
1 3 4 5 6 2 182 PROJECTS
CAMERA IN PORTRAIT ORIENTATION
While you can shoot panoramics in landscape orientation, you’ll get less distortion if you shoot in portrait format. The disadvantage of this is that you will need to shoot more images, with a greater risk of things in the scene changing in between shots.
GEARED TRIPOD HEAD
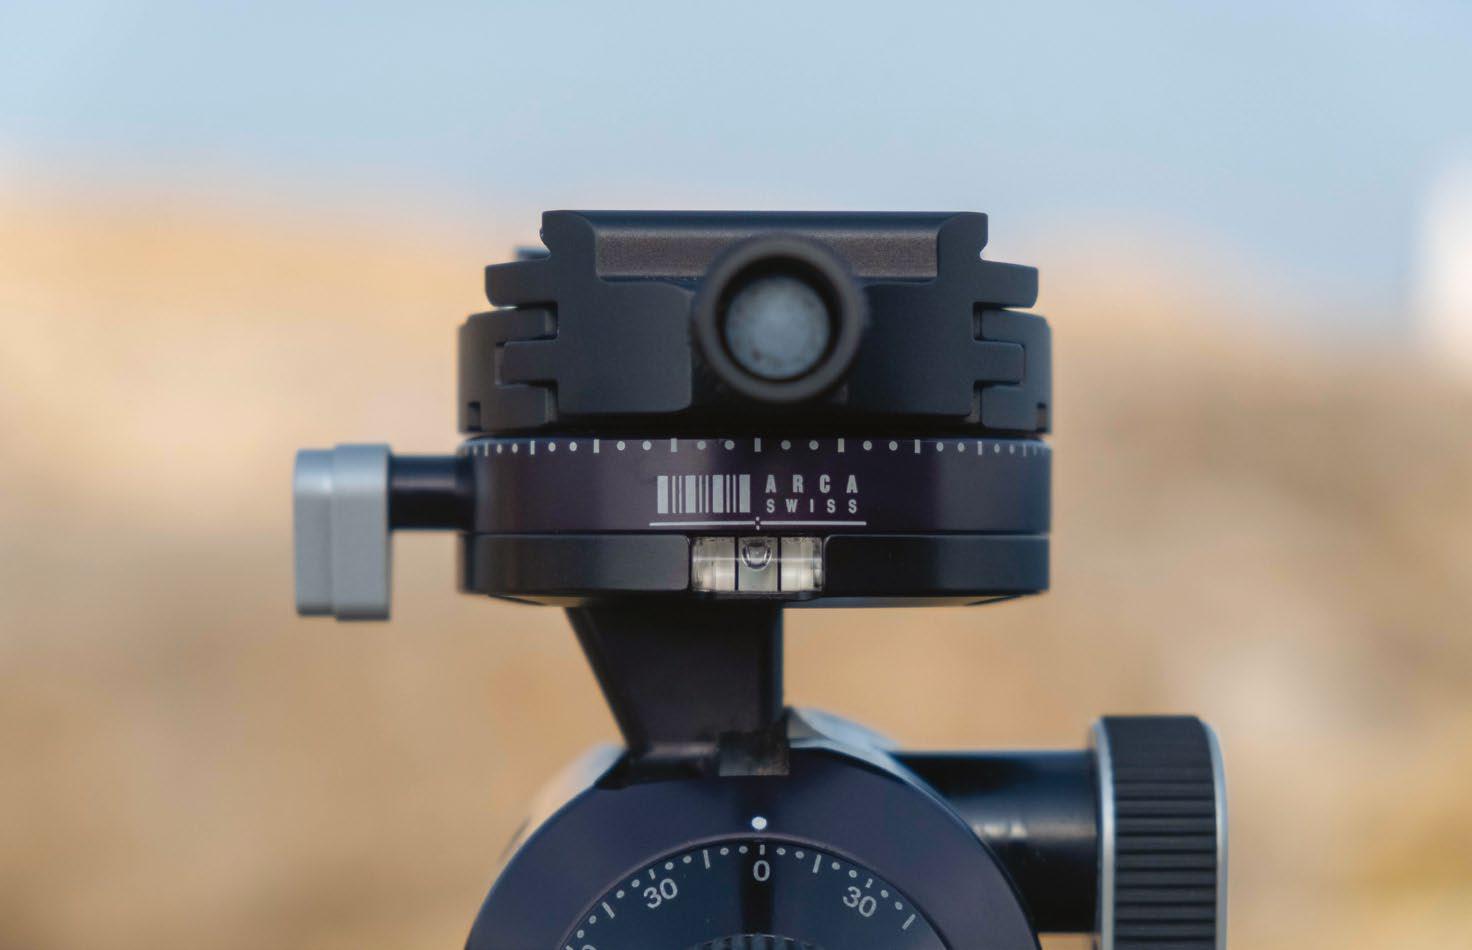
A three-way pan and tilt head or geared head is much easier for panoramics than a ball head, as you can make fine adjustments to level the camera, and you have excellent control when panning between shots.
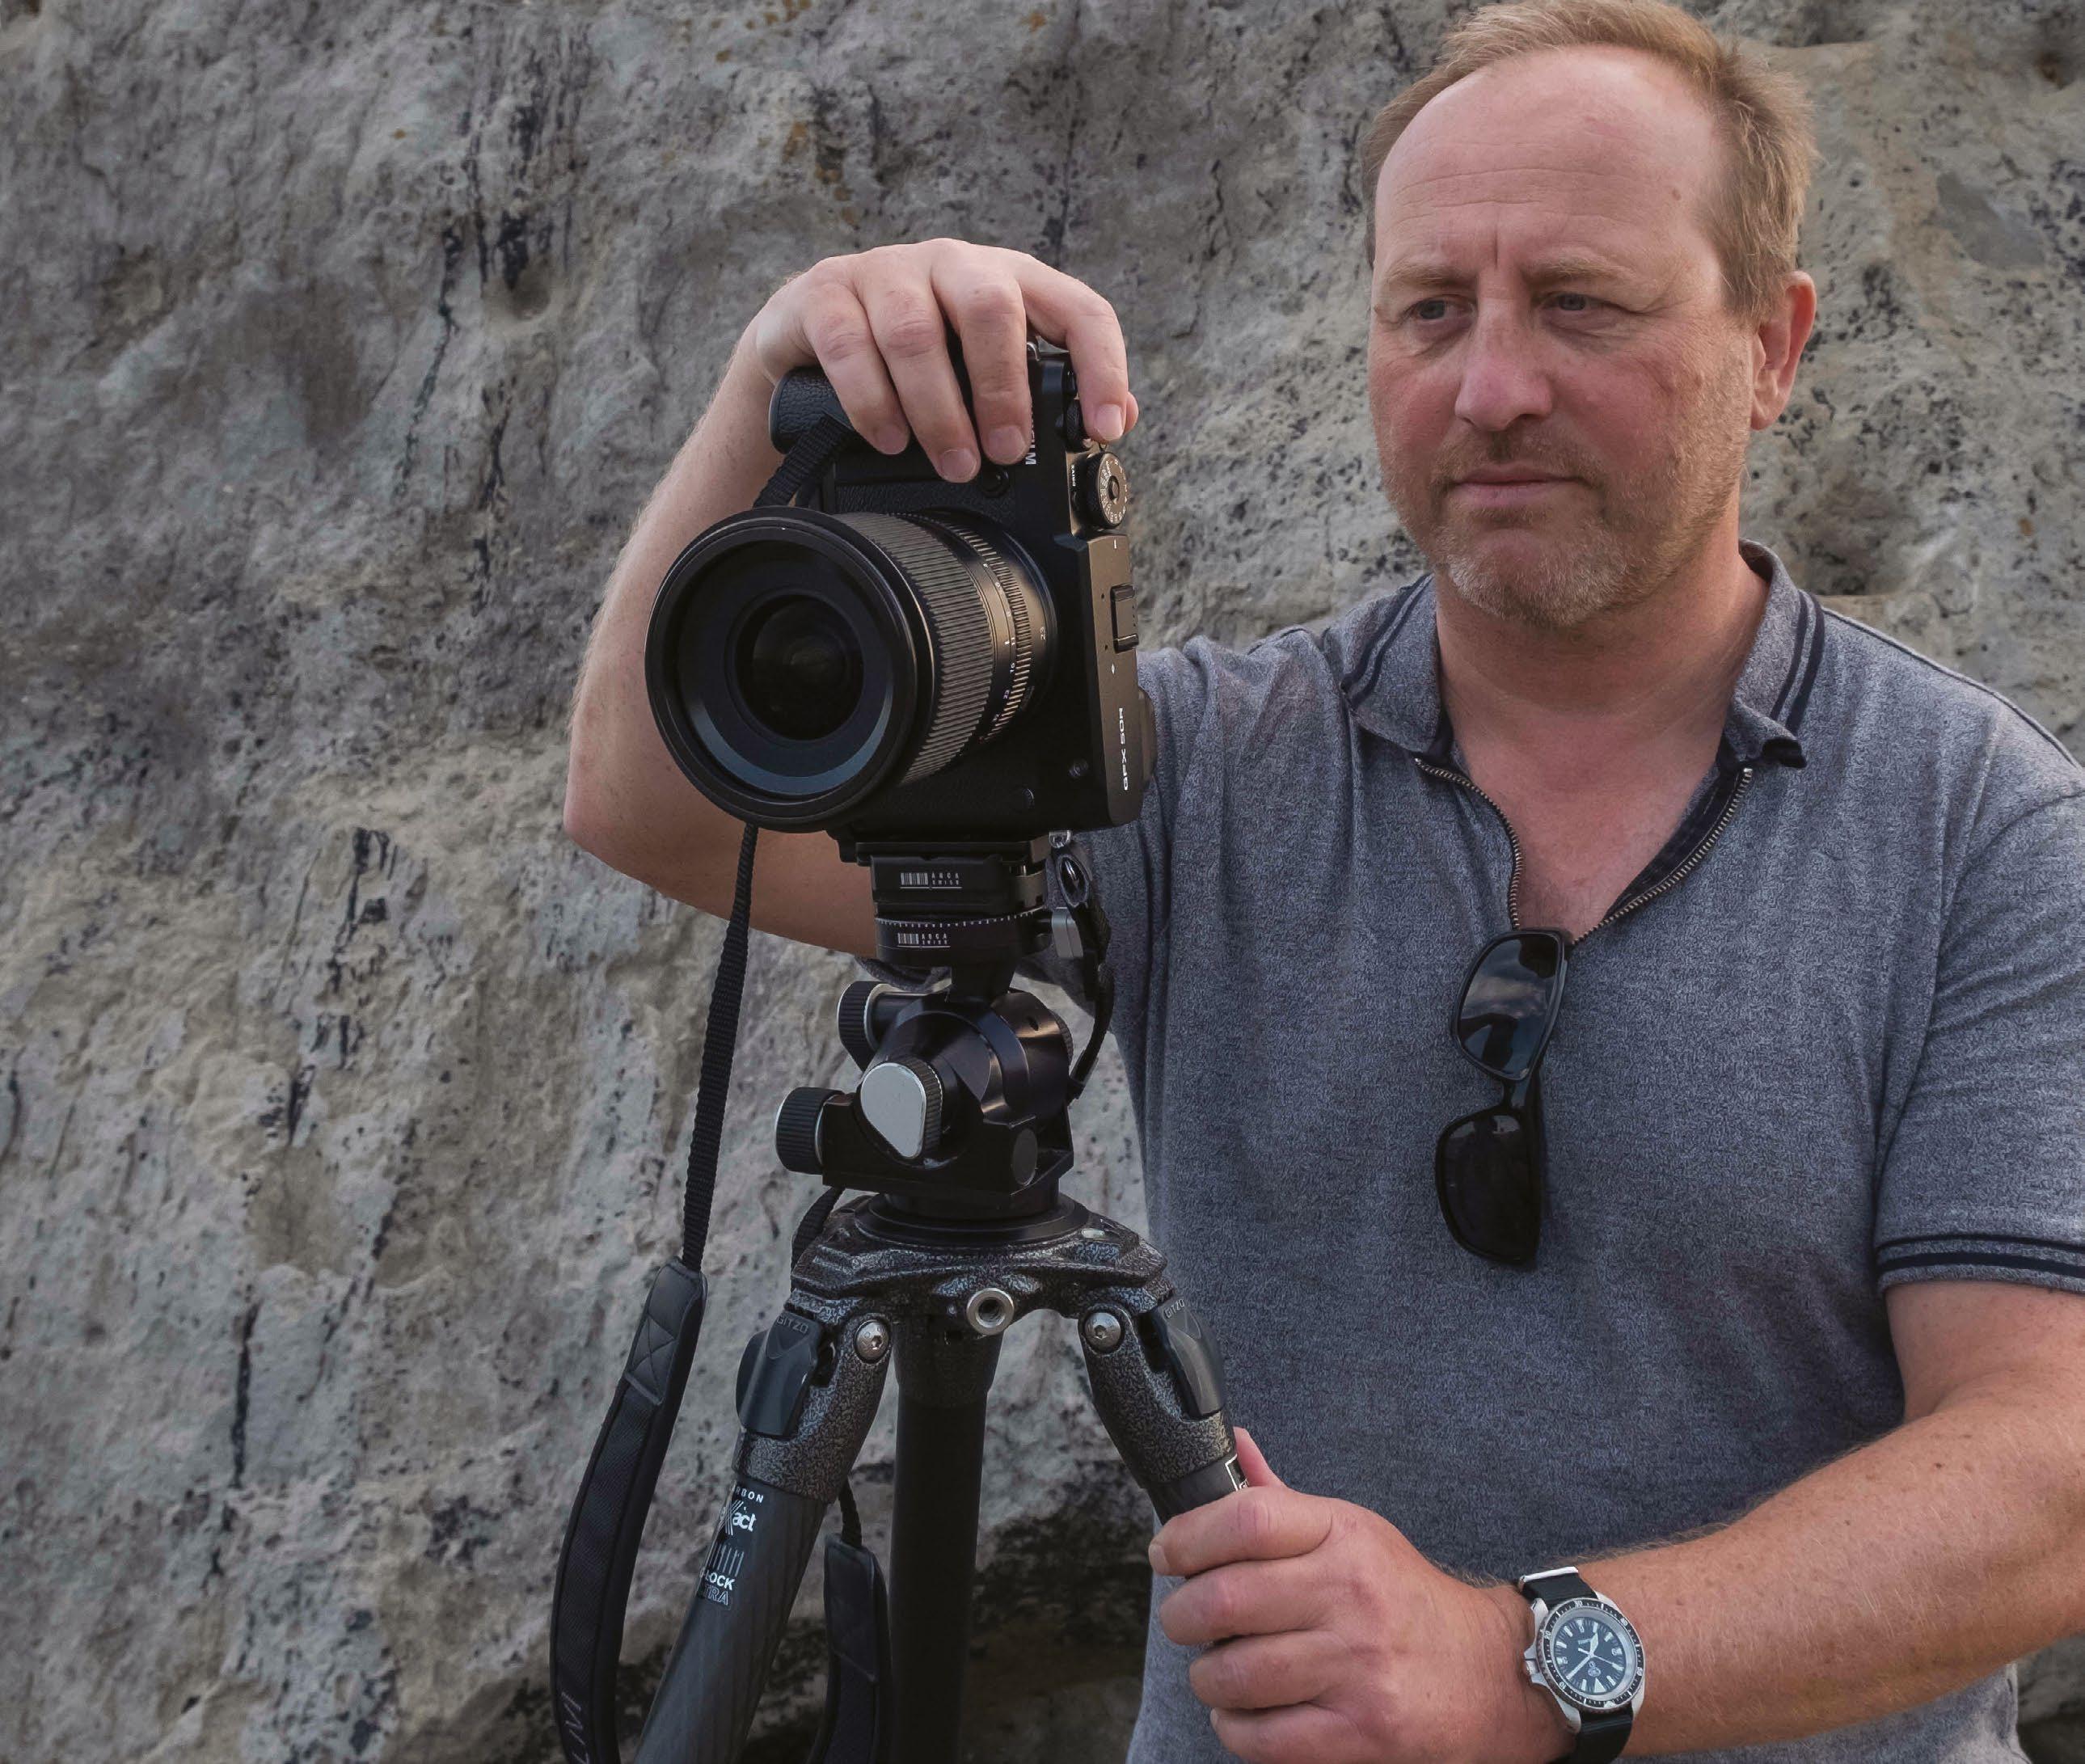
The setup
Tripod head
A suitable head can be the difference between a successful and an unsuccessful panorama
To increase your chances of creating a successful panorama, you need a good tripod head. Geared heads are excellent because they allow you to fine-tune the position of your camera in different planes, which makes levelling the camera simple and precise. But whichever type of head you use, make sure you use one that has a separate panning control, otherwise you’ll never be able to keep the camera level as you rotate it between shots. The Arca Swiss head pictured here has two panning controls: one at the base of the head and one on the top. With an already aligned camera, this ensures the camera stays level.
NO POLARISER
It’s fine to use grads and neutral density filters, but don’t use a polariser; as you pan across the scene and change angle relative to the sun, the degree of polarisation will change, leading to highly uneven polarisation in the final image.
183
CREATE A STITCHED PANORAMA
Edit the shot
1 Import and merge Firstly, import the images into Lightroom. Do not make any adjustments to individual files. Then, select all the images you want to stitch, and go to Photo>Photomerge>Panorama.

2 Panorama merge In the Preview Photomerge dialogue box there are three projections to choose from: Spherical, Cylindrical and Perspective. Here, Spherical gives the best result. Autocrop removes any undesired transparent areas around the edges of the image.
3 Boundary Warp Use the Boundary Warp slider to warp the image to fill the canvas; this will enable you to recover parts of the image that are lost when cropping. Here, some extra sky and foreground detail has been included in the image.
4 Final steps Click the ‘Merge’ button; Lightroom will stitch the images together and create a new DNG file. After this you can open this file and edit as you would with any other Raw file – adjusting white balance, tonal adjustments and so on as needed.
Top Before and after stitching
The unprocessed images, as they appear when first imported into Lightroom, compared to the final image, which has been stitched and processed
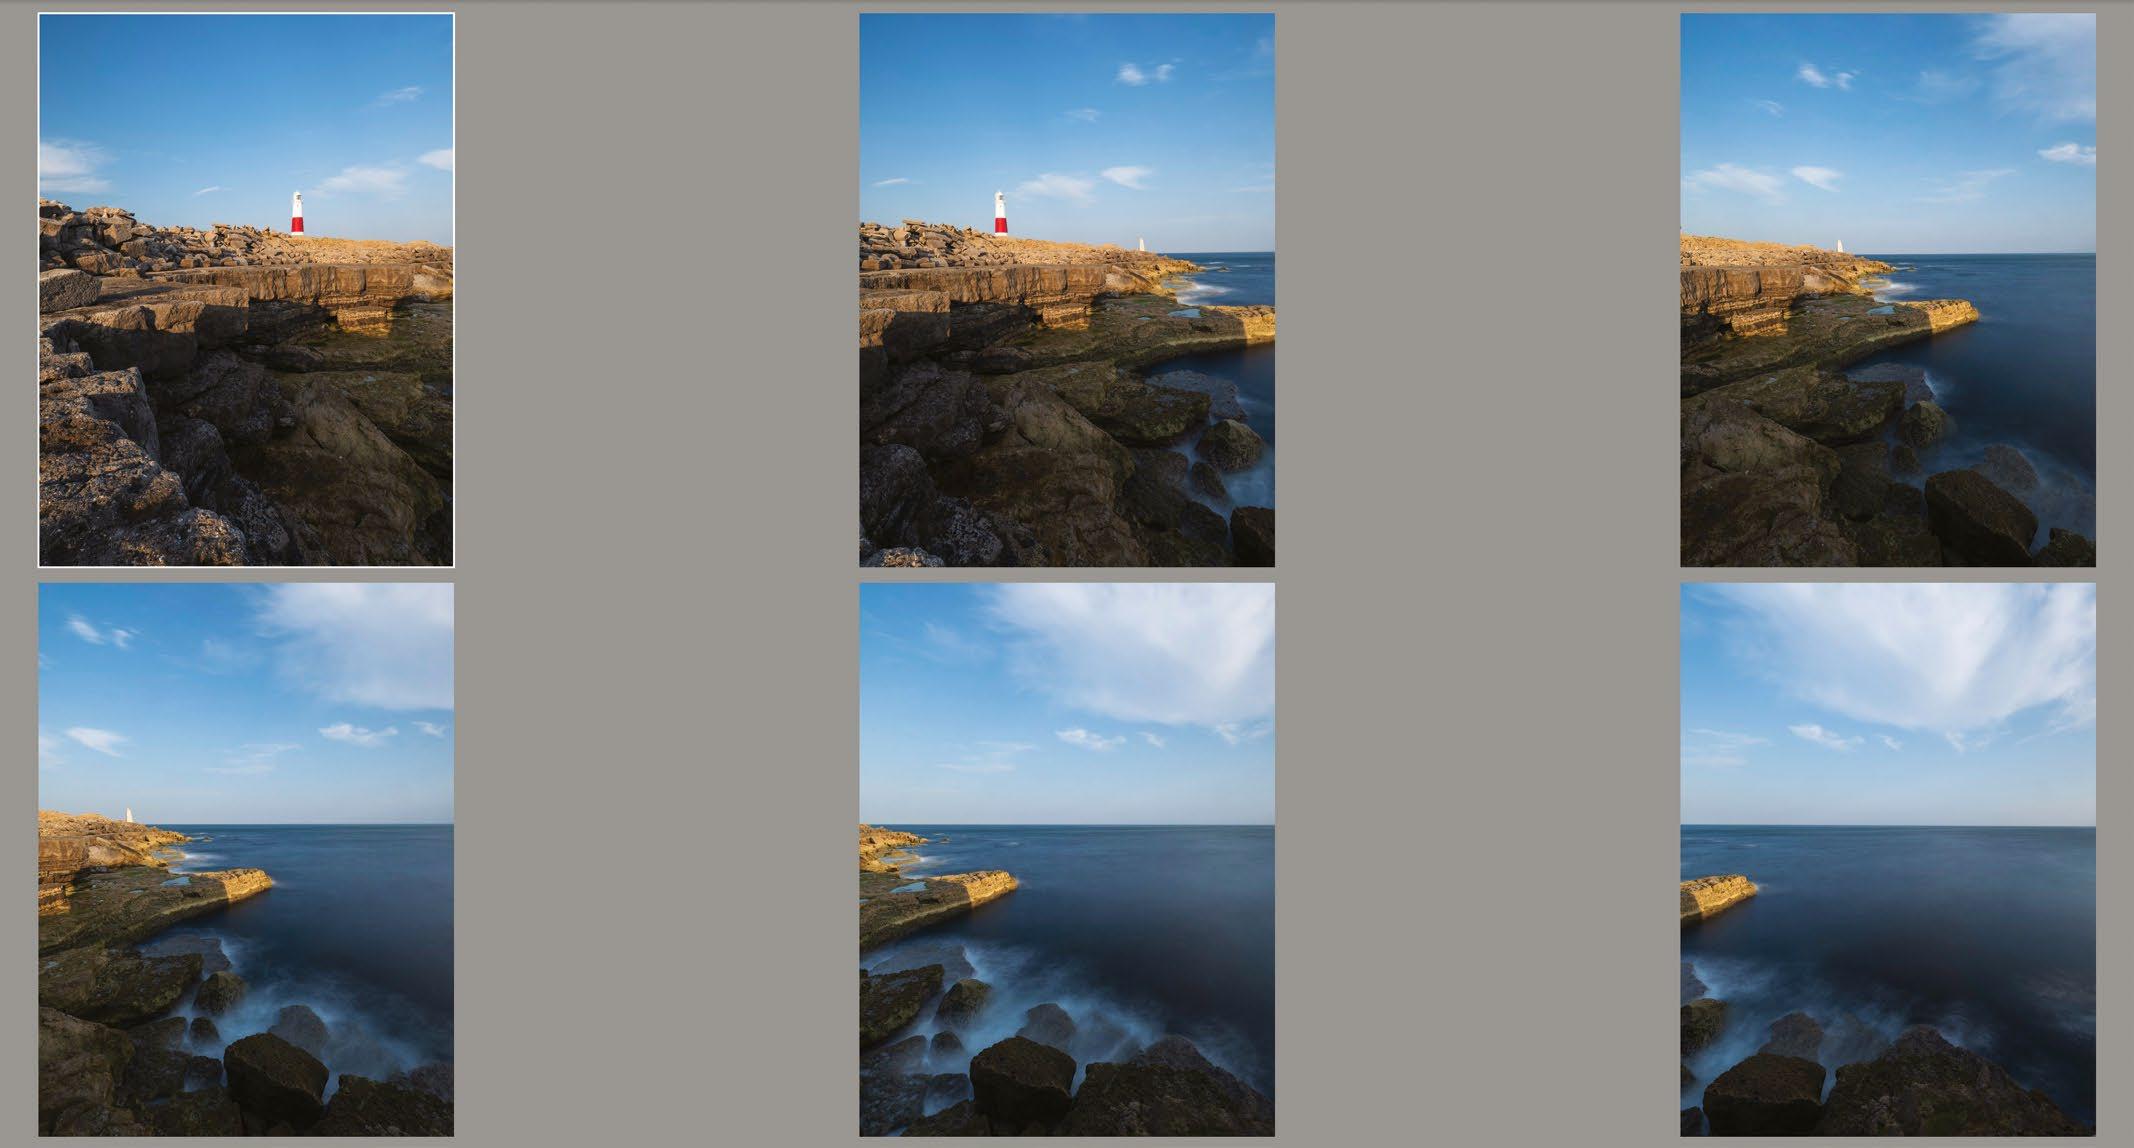
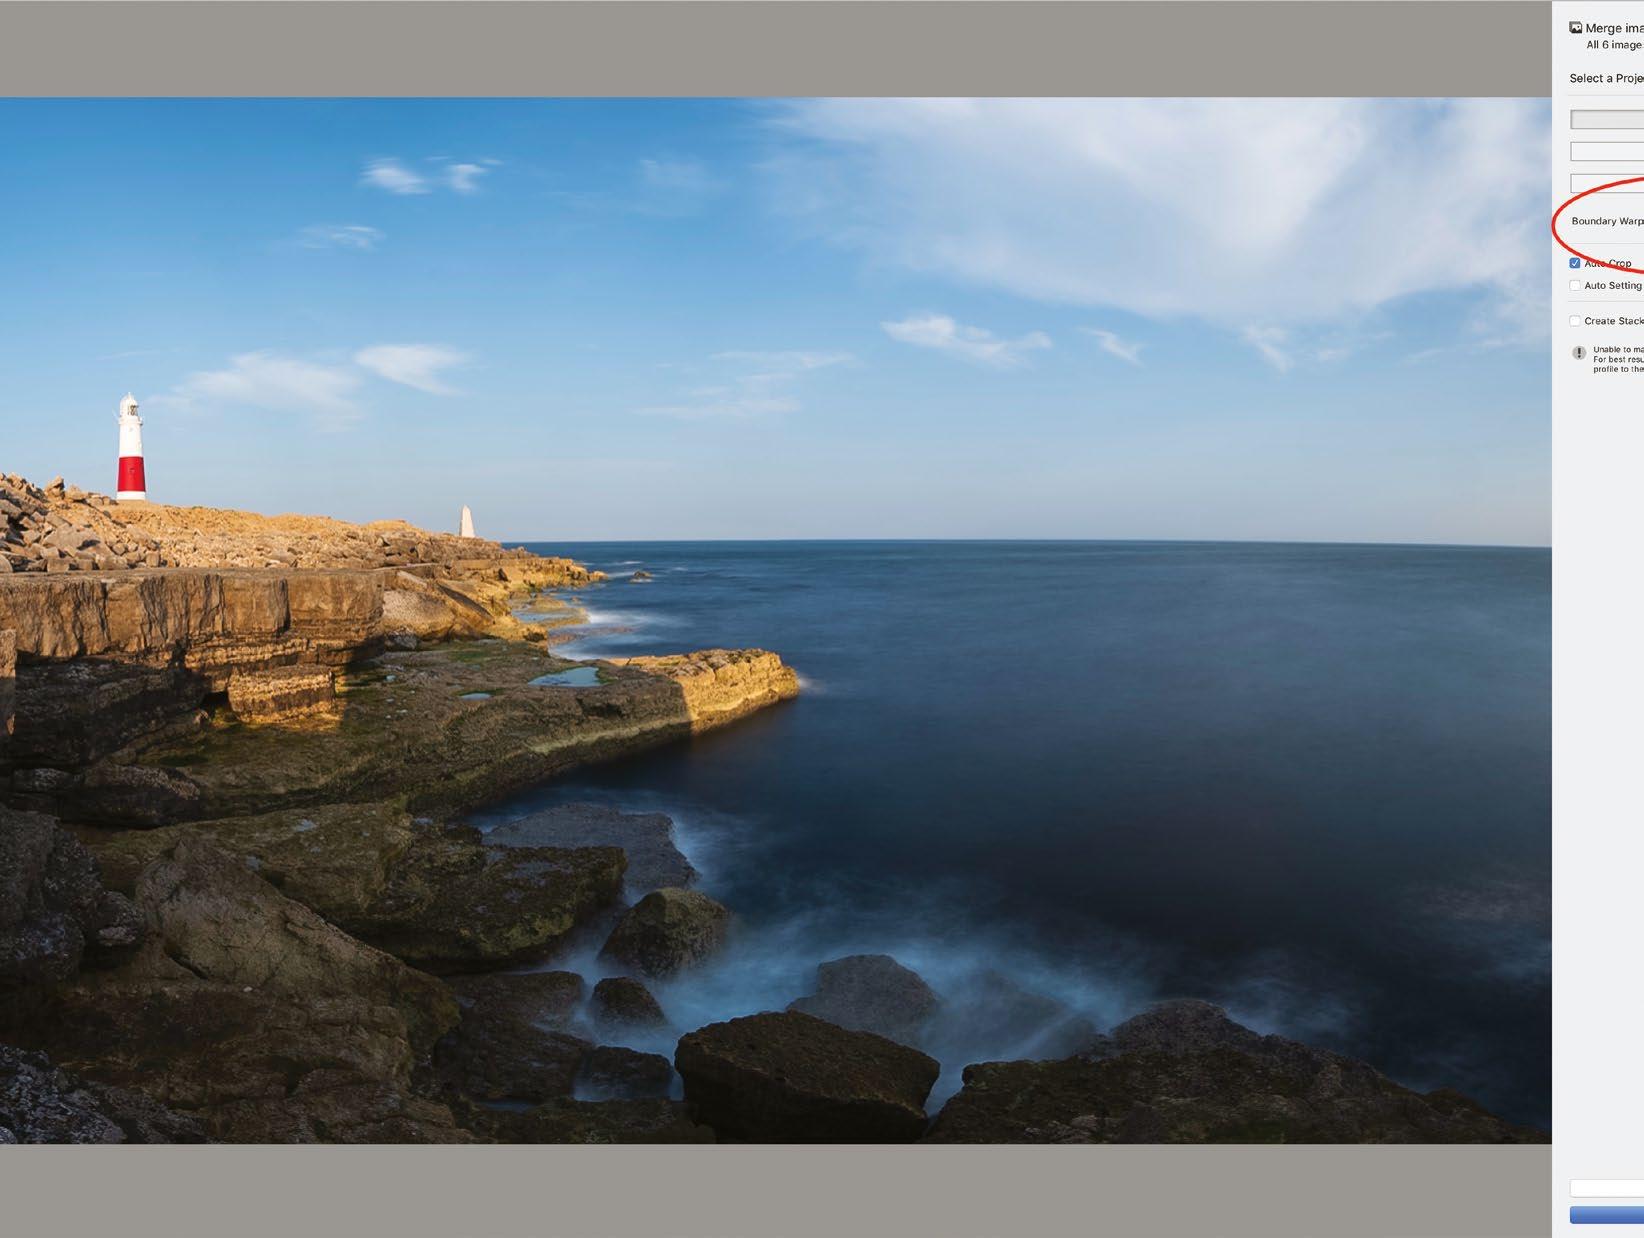
BEFORE
1 3 184
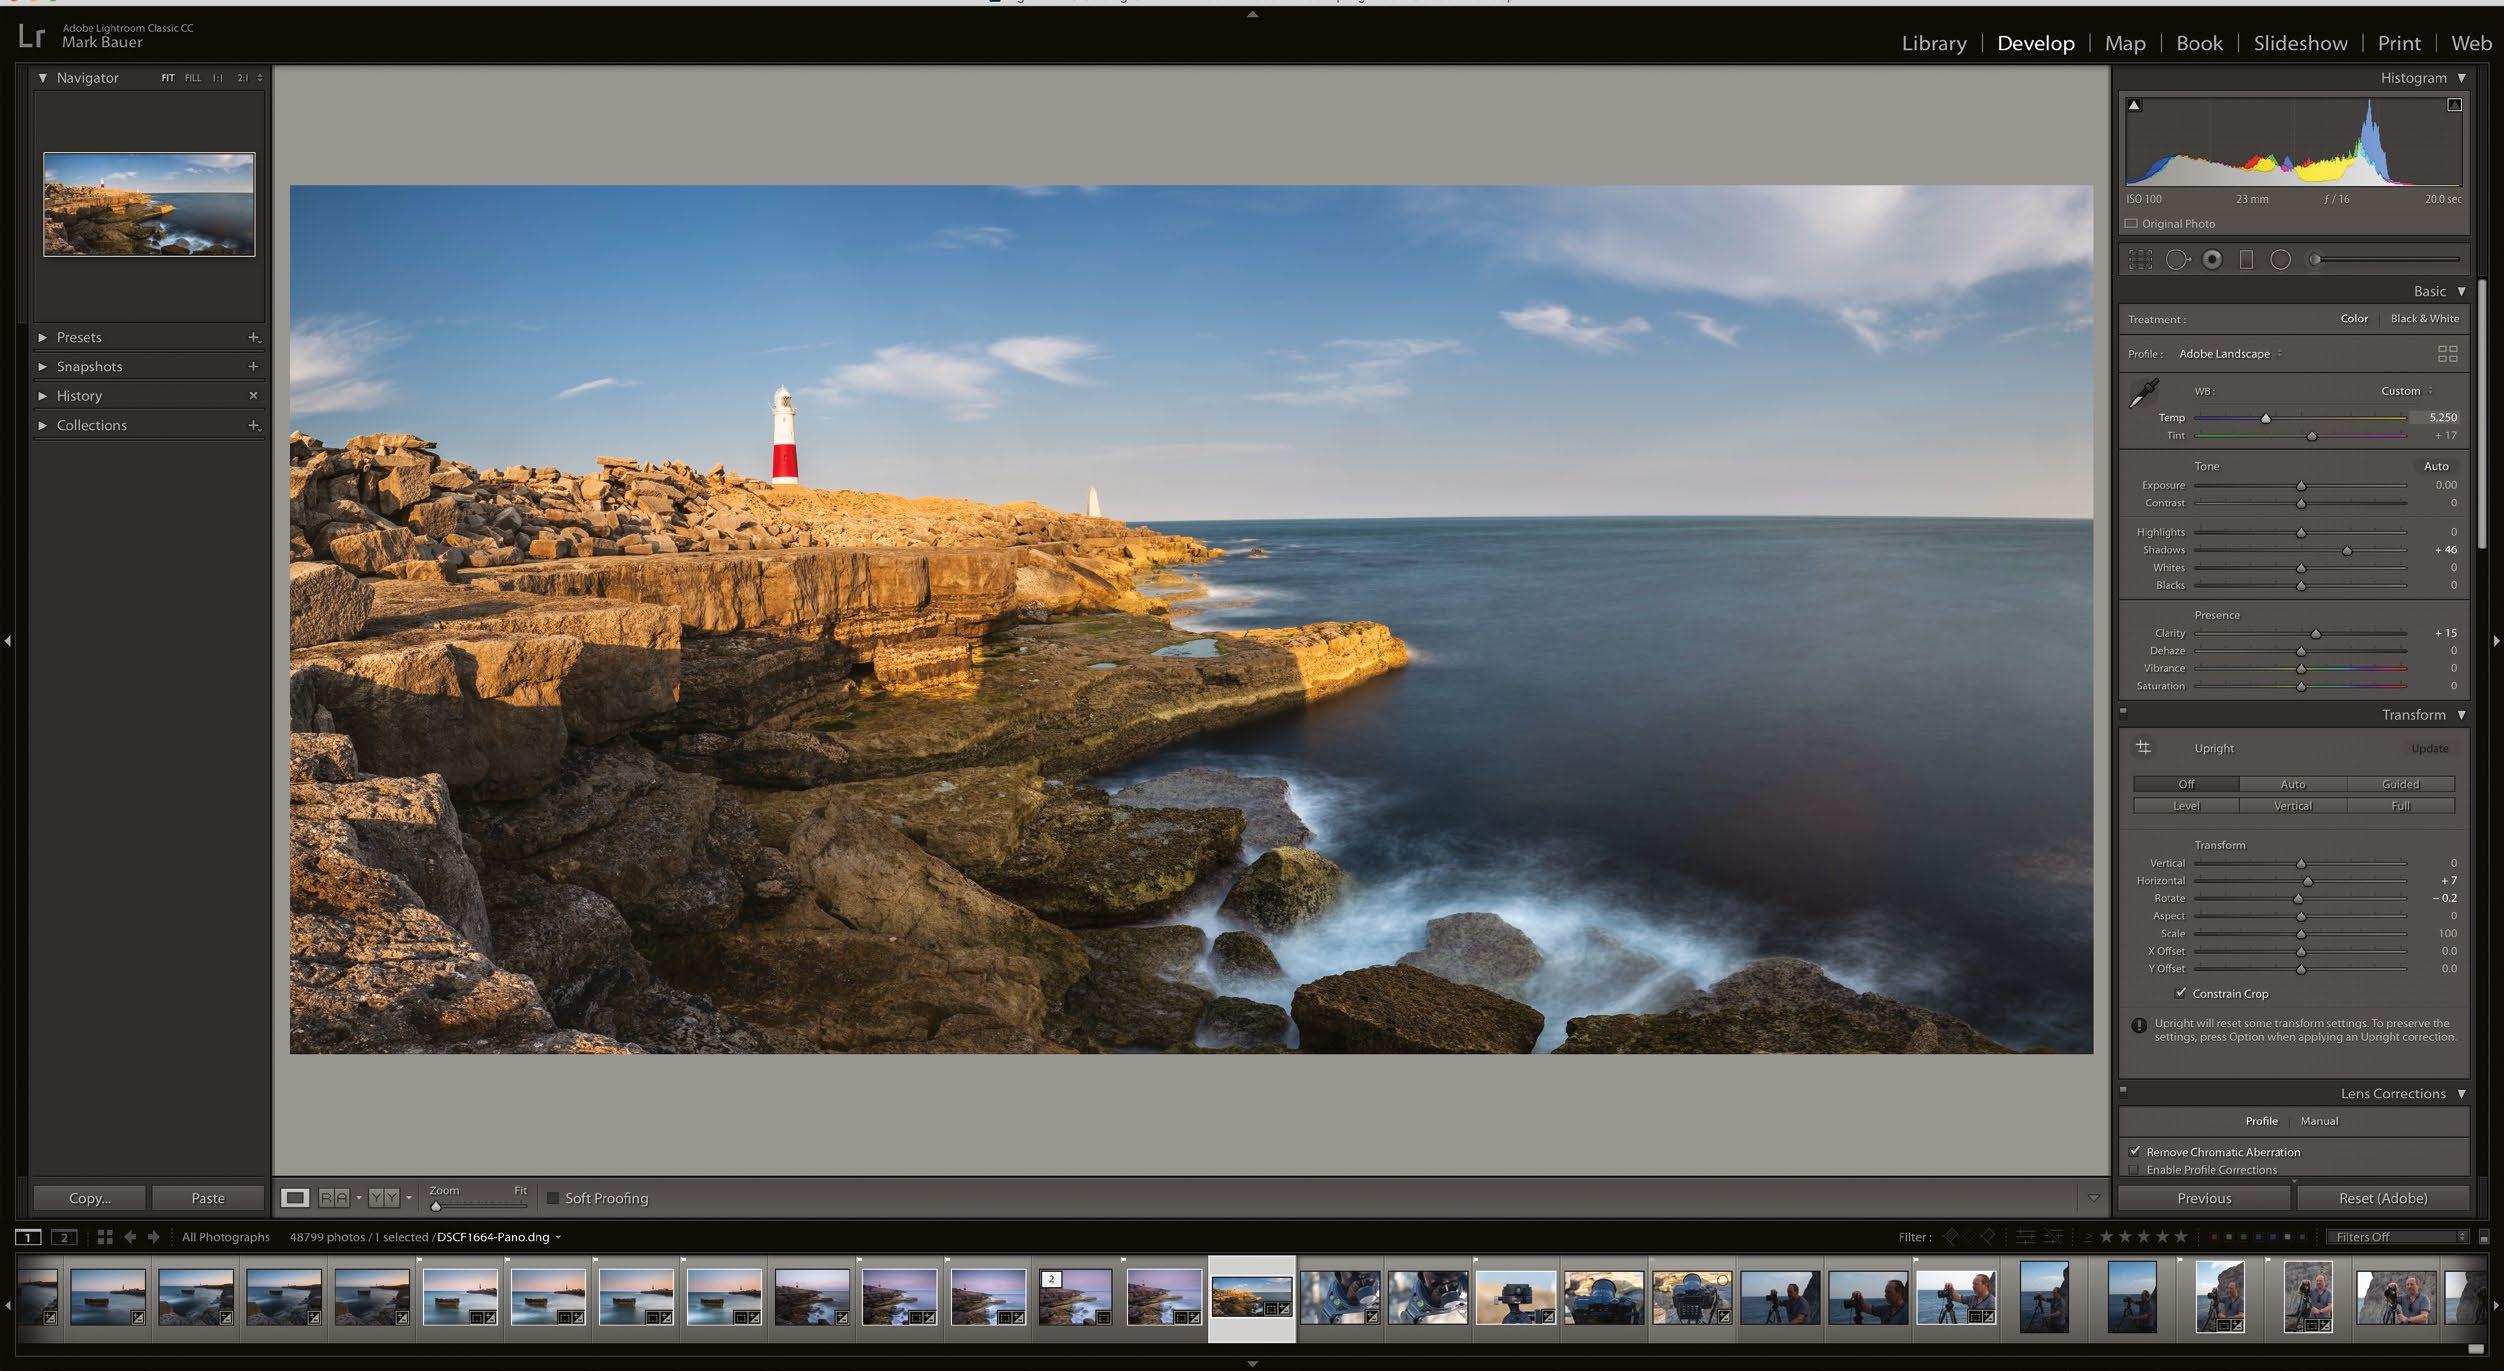
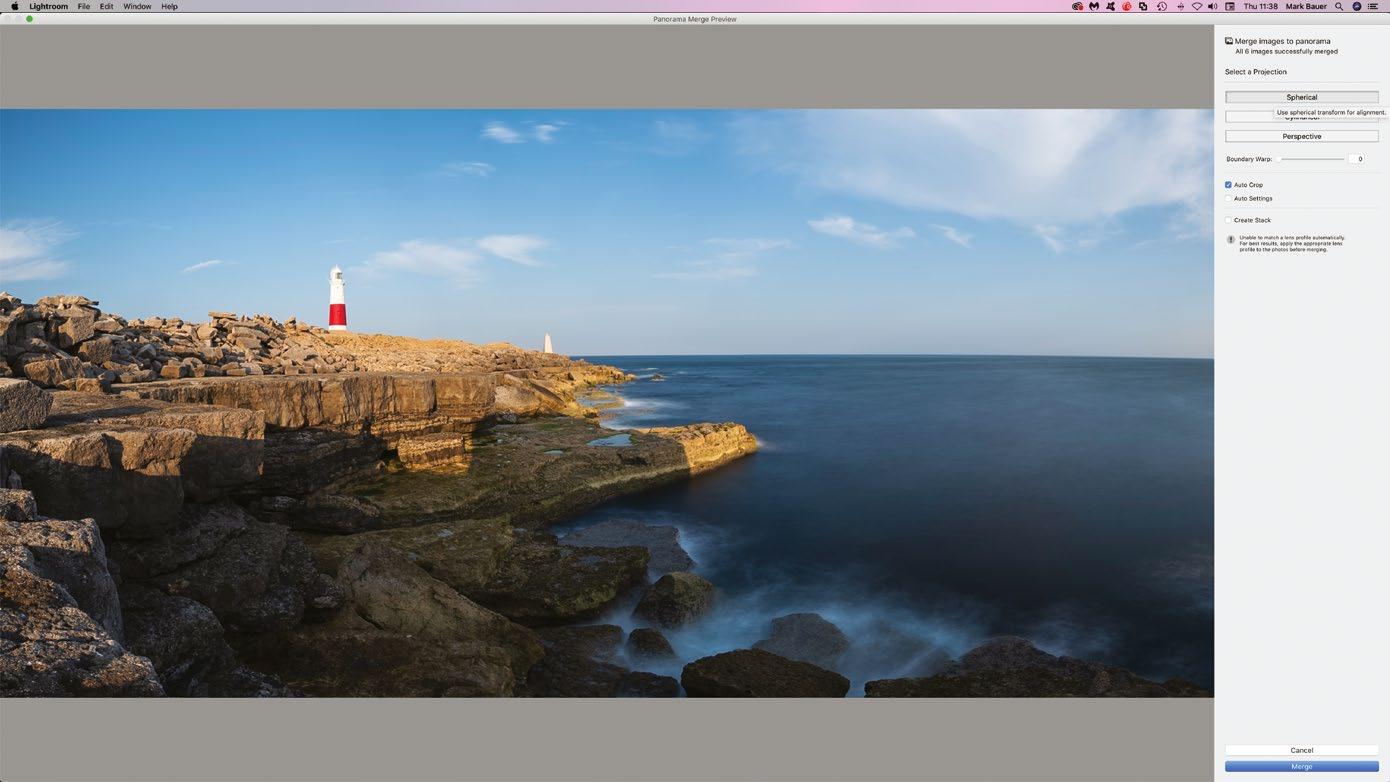
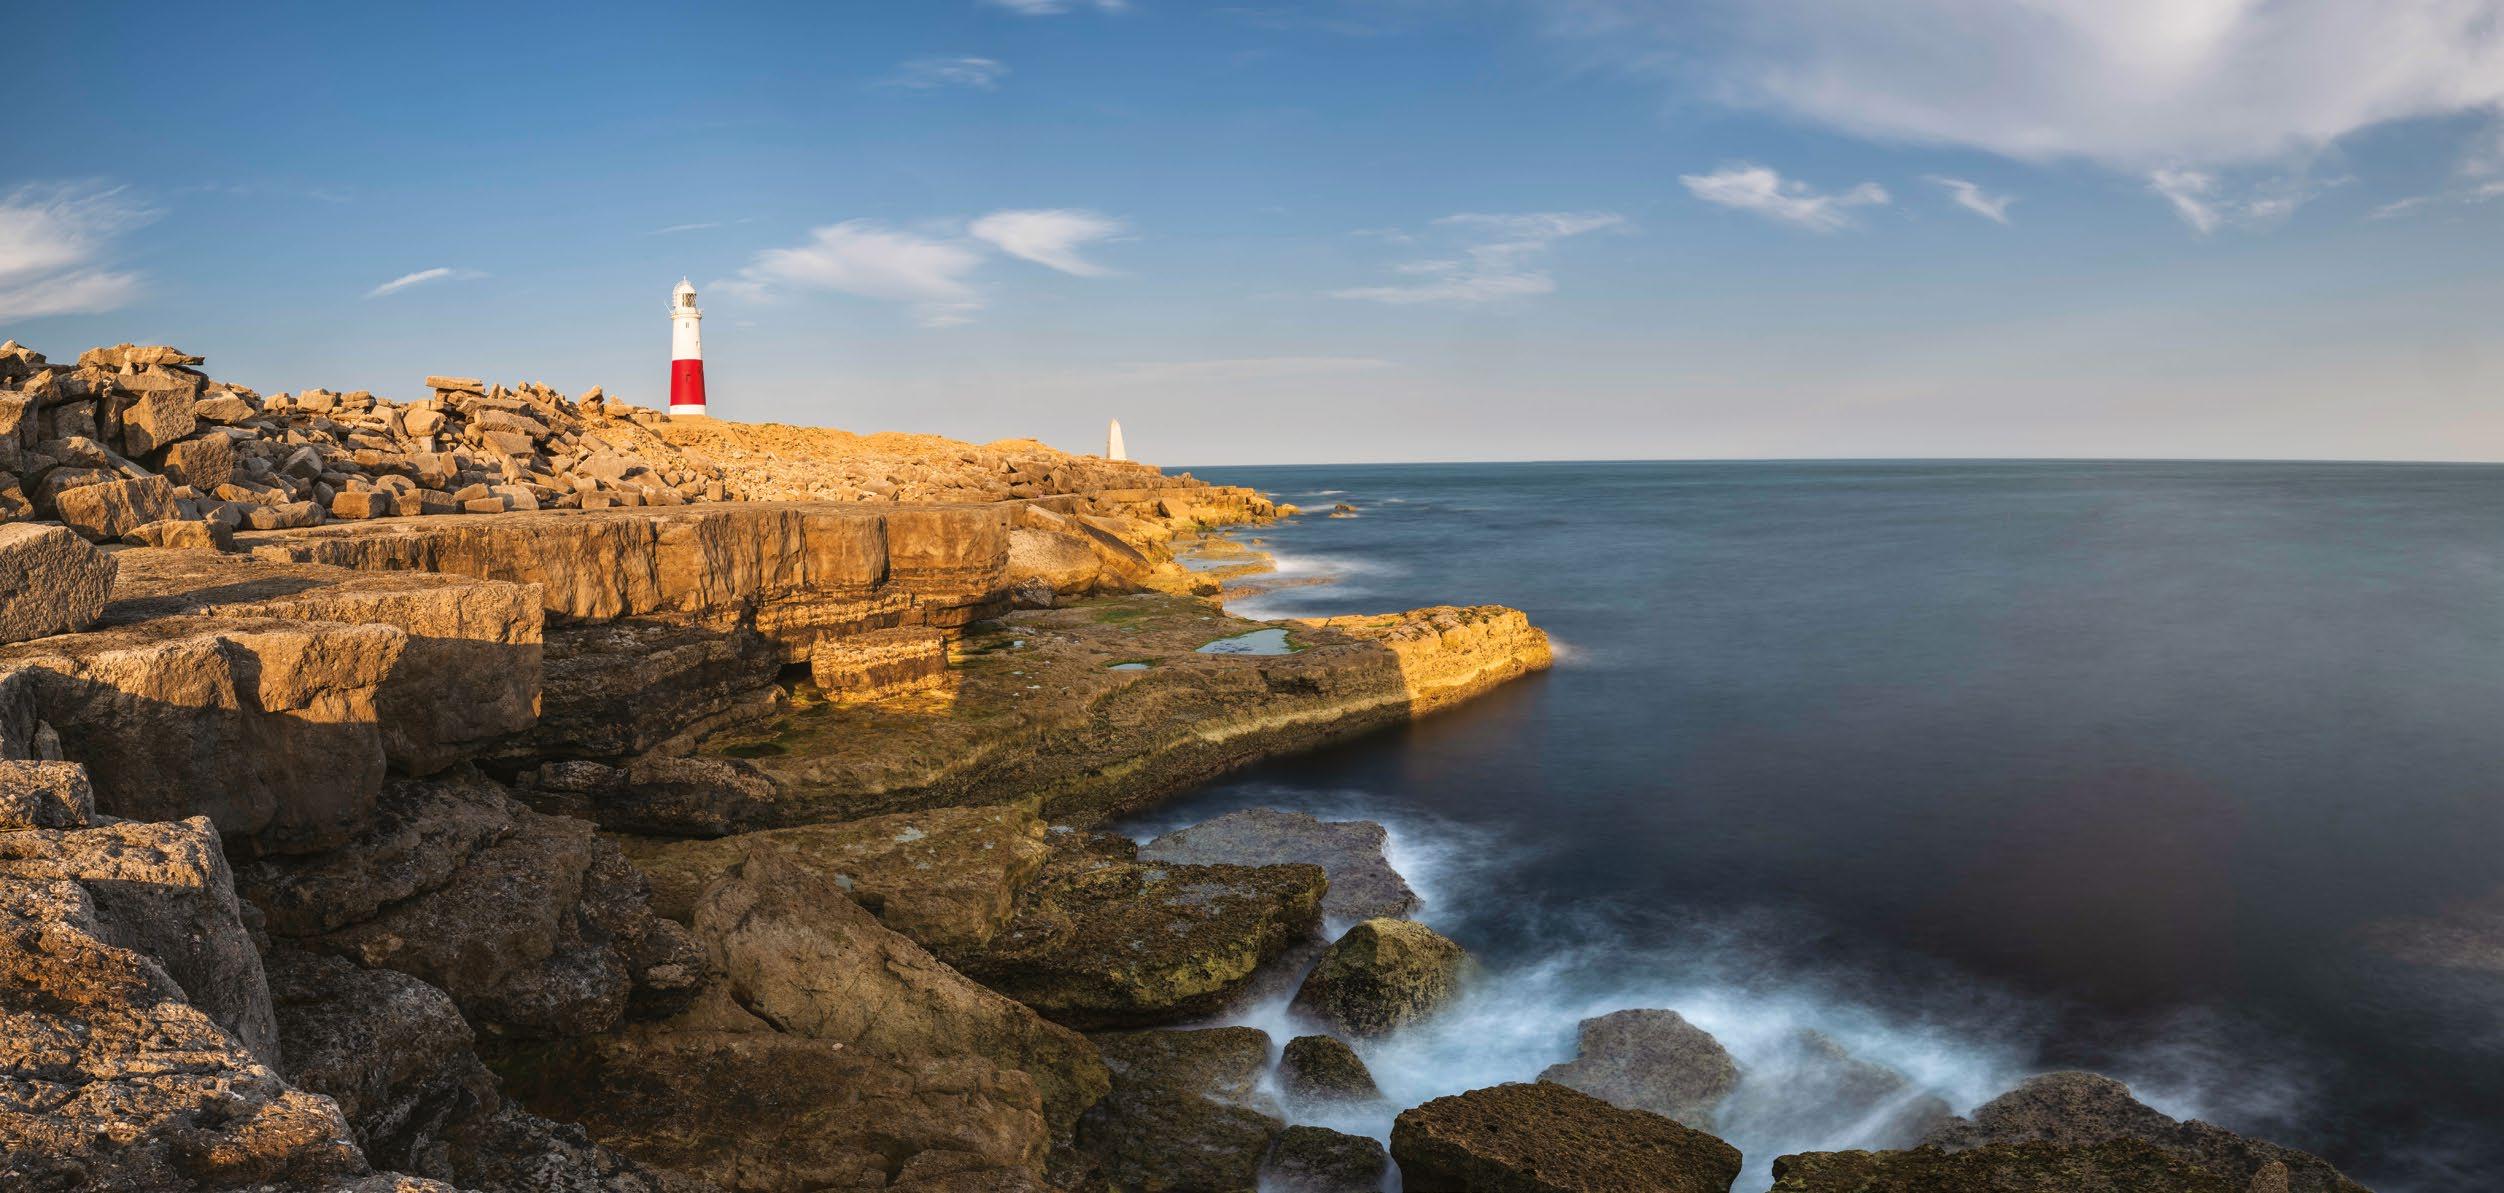
AFTER 2 4 Click the Merge button; Lightroom will stitch the images together 185 CREATE A STITCHED PANORAMA
CAPTURE MOVING WATER
Experiment with shutter speeds to capture a sense of motion in water
Difficulty level: Intermediate
Time taken: One hour
Although it has become something of a cliché over the years, using a slow shutter speed to record moving water as a graceful, milky blur is an undeniably effective technique – which is why so many photographers like to use it. From tumbling mountain streams to bubbling brooks and thundering waterfalls, wherever you find moving water, the same approach can be used to photograph it and turn an ordinary scene into a creative image that’s full of drama and atmosphere. Moving water is best photographed in soft light so there are no bright highlights to contend with, as sunlight reflects in the water’s surface –making it a perfect subject for those dull, grey winter days photographers in the UK know so well!
The key to shooting moving water is to use a shutter speed that’s slow enough to blur the water, so it records with a smooth, milky appearance, but not so slow that areas where the water is more concentrated start to overexpose and burn out. This is a matter of trial and error, but an exposure of 1/2-1sec makes a good starting point. The great thing about digital capture is you can check each shot you take, then reduce or increase the shutter speed until you get the perfect result.
Right
Glen Brittle, Isle of Skye
A shutter speed of 1sec was used to photograph this scene – long enough to capture motion in the mountain stream but brief enough to record some texture in the water as well
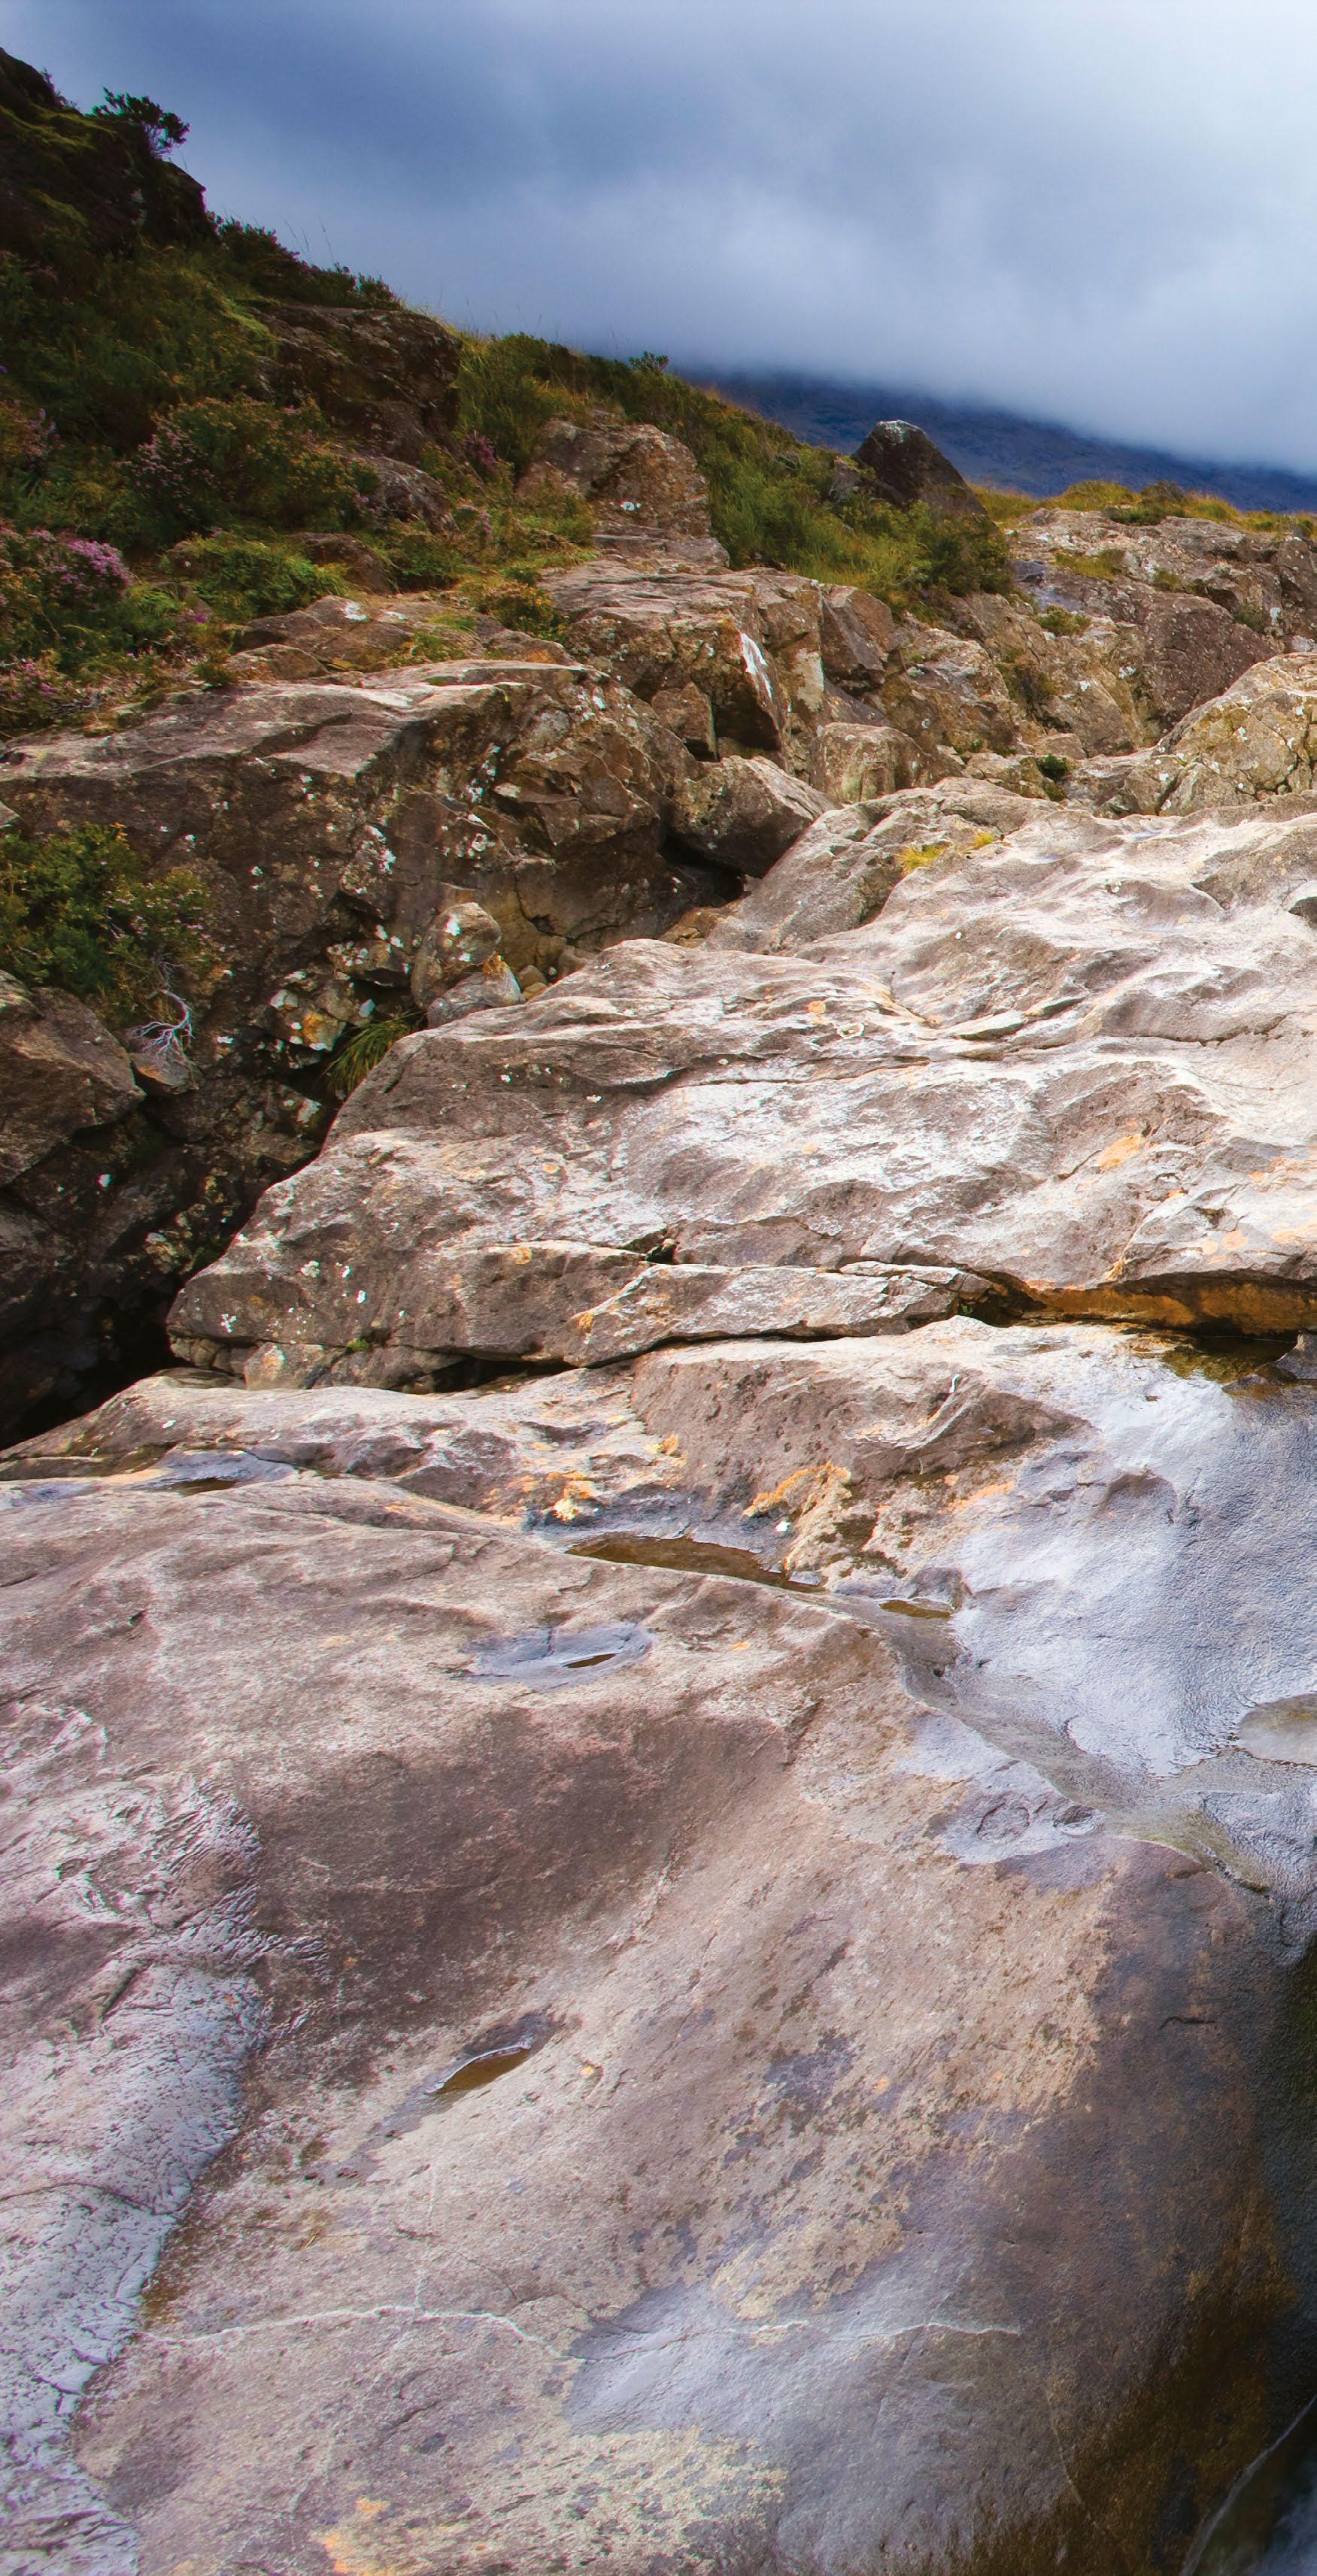
© Lee Frost
What you’ll need
Lensbaby Sweet 50
Camera
Wide-angle zoom lens
Tripod
Remote release
Neutral density grad filter
Neutral density filter
Lens cloth
186 PROJECTS
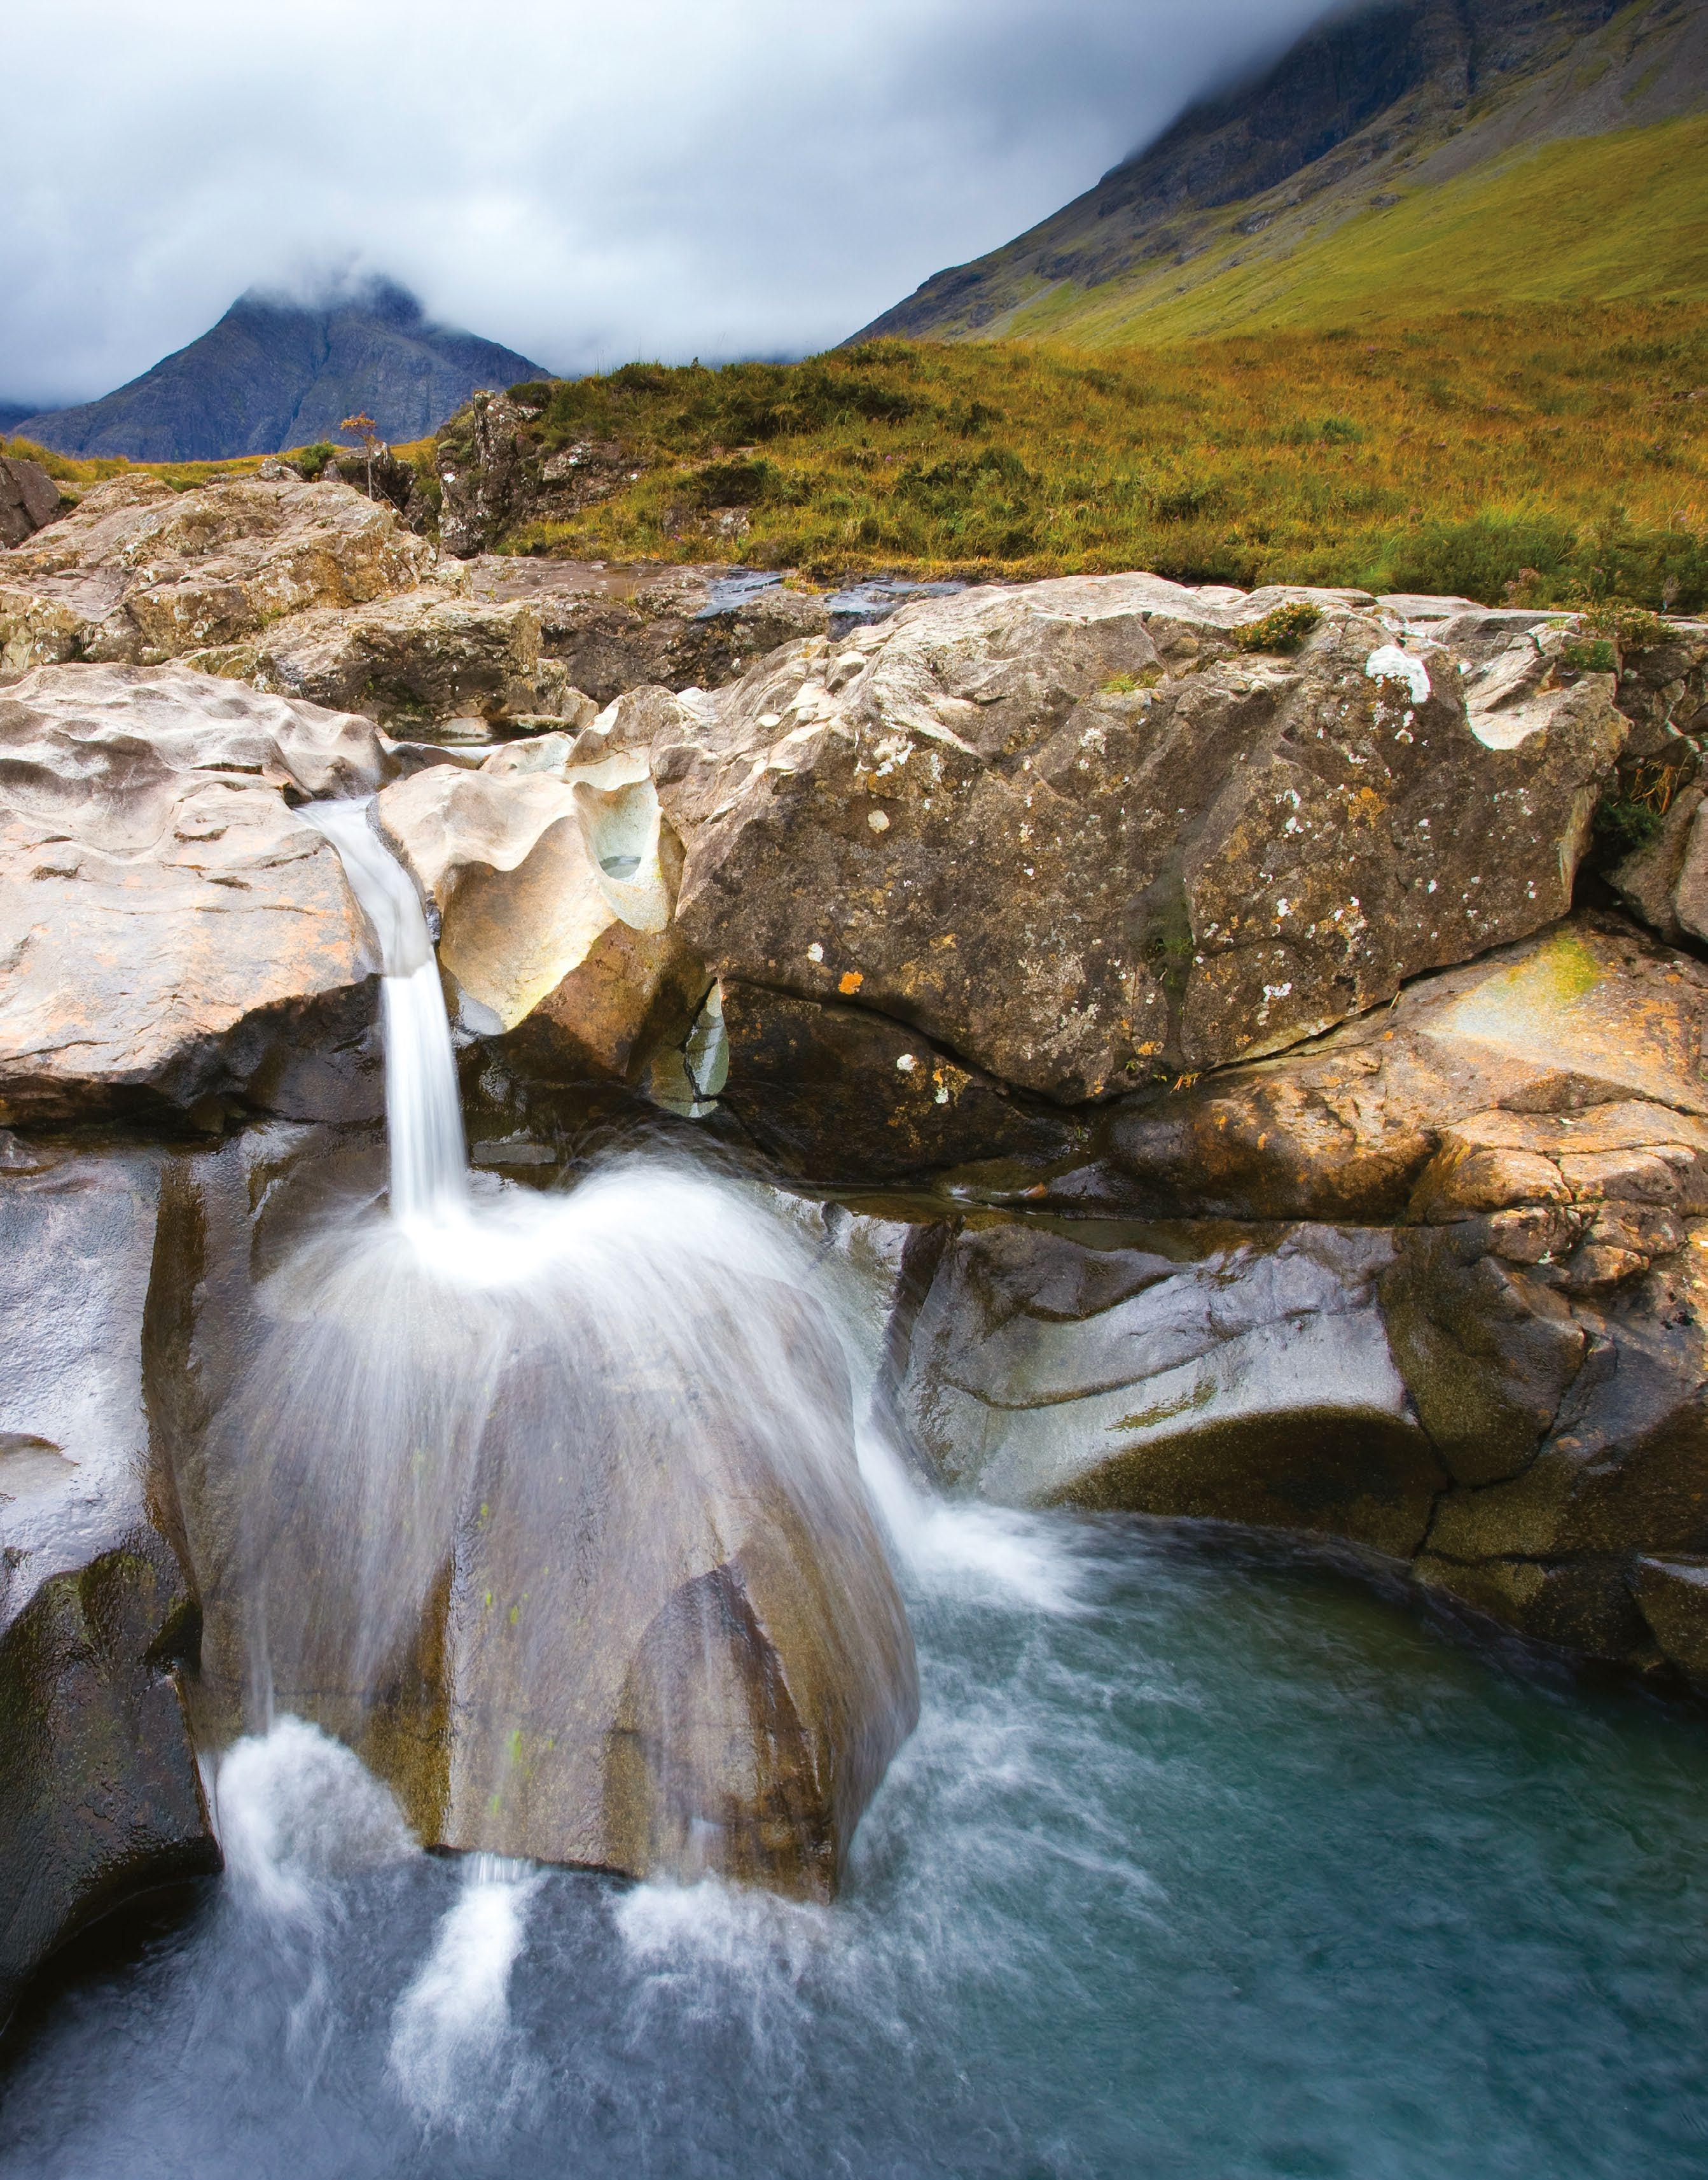
187 CAPTURE MOVING WATER
Shooting Steps
1 Set up the shot Once you’ve found a suitable location, mount your camera on a tripod and attach a remote release so you can trip the shutter without touching the camera – which could cause vibrations and make the image less sharp. Turn off image stabilisation for the same reason, and compose the scene.
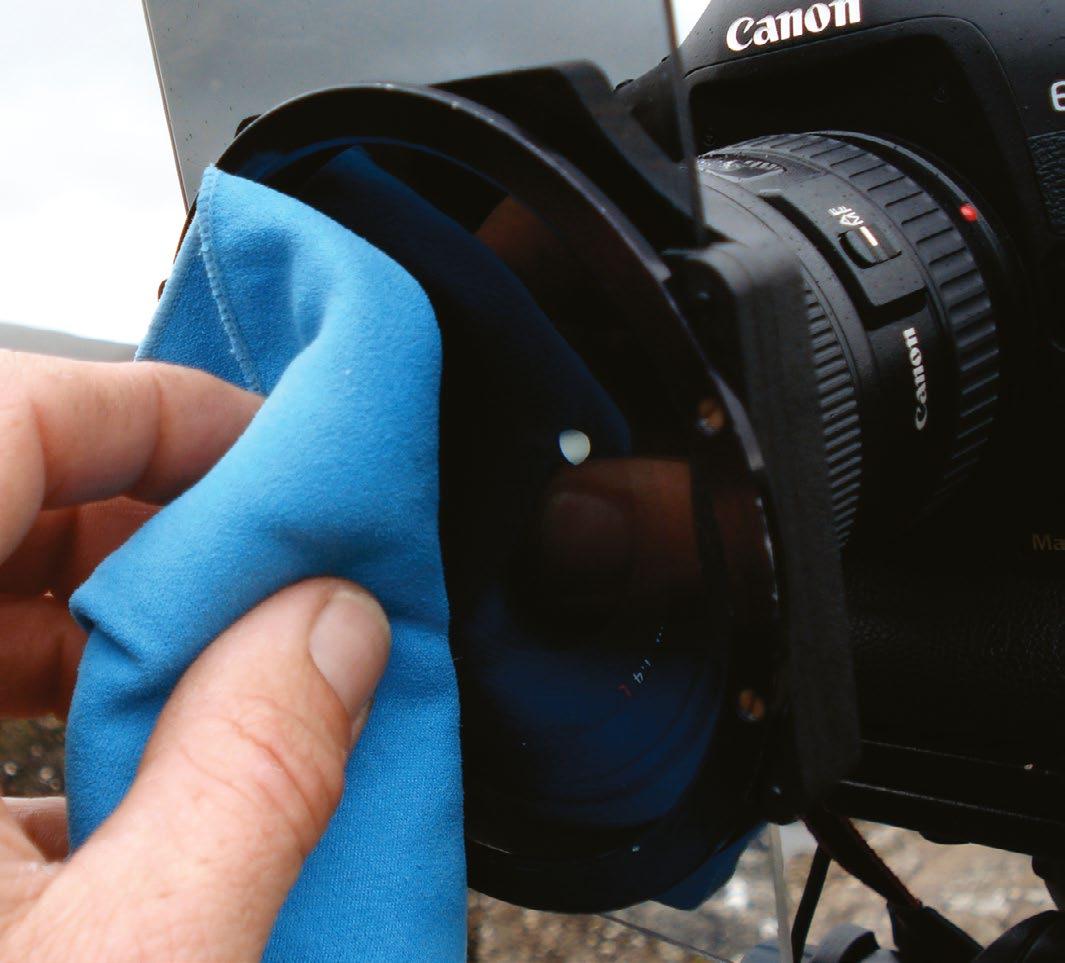

2 Choose your filters If stopping your lens down to f11 or f16 and setting a low ISO (100) doesn’t give a shutter speed that’s slow enough, use a neutral density (ND) filter. A 1.2ND was used here to increase the exposure by four stops. An ND grad is necessary if you’re including sky.
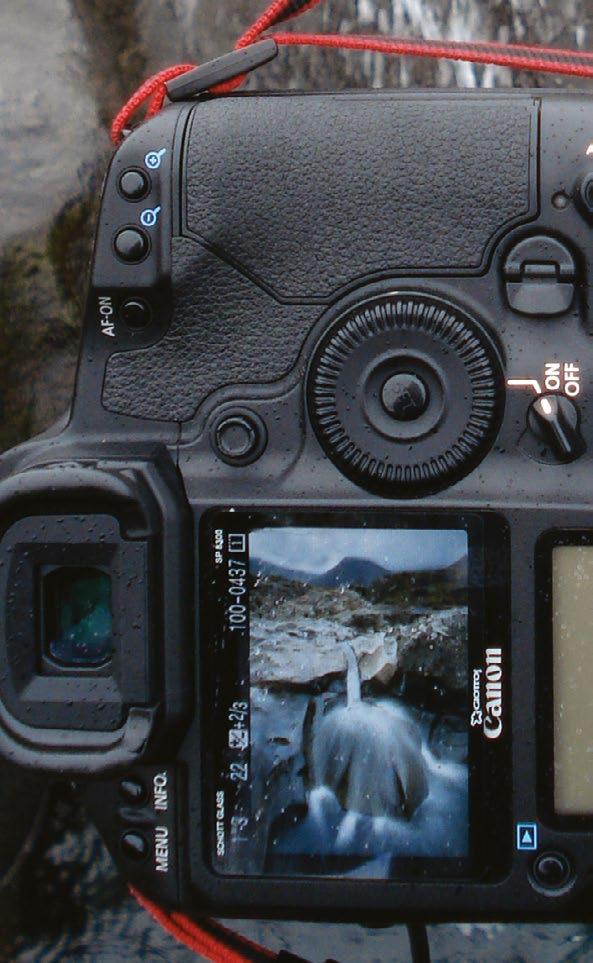
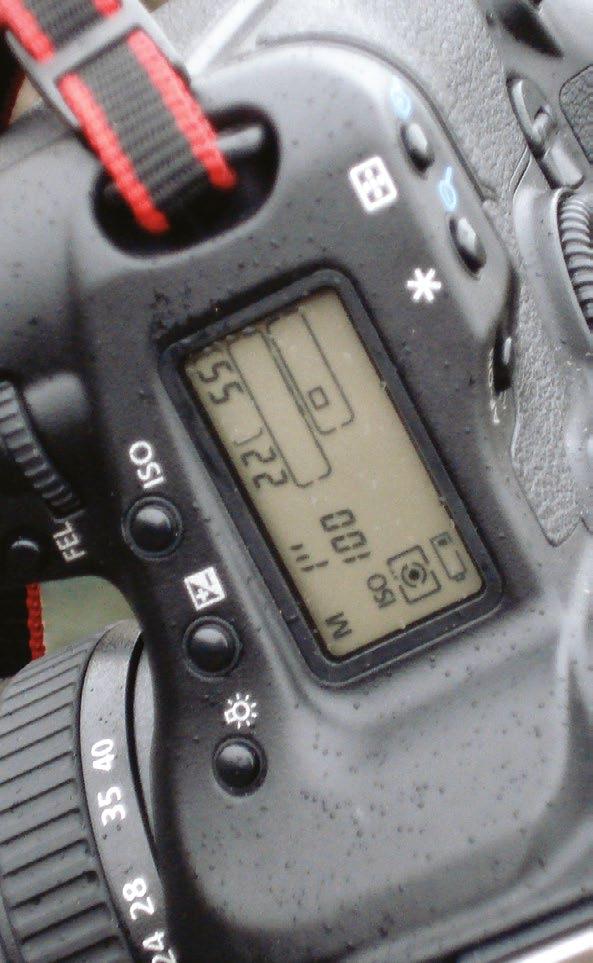
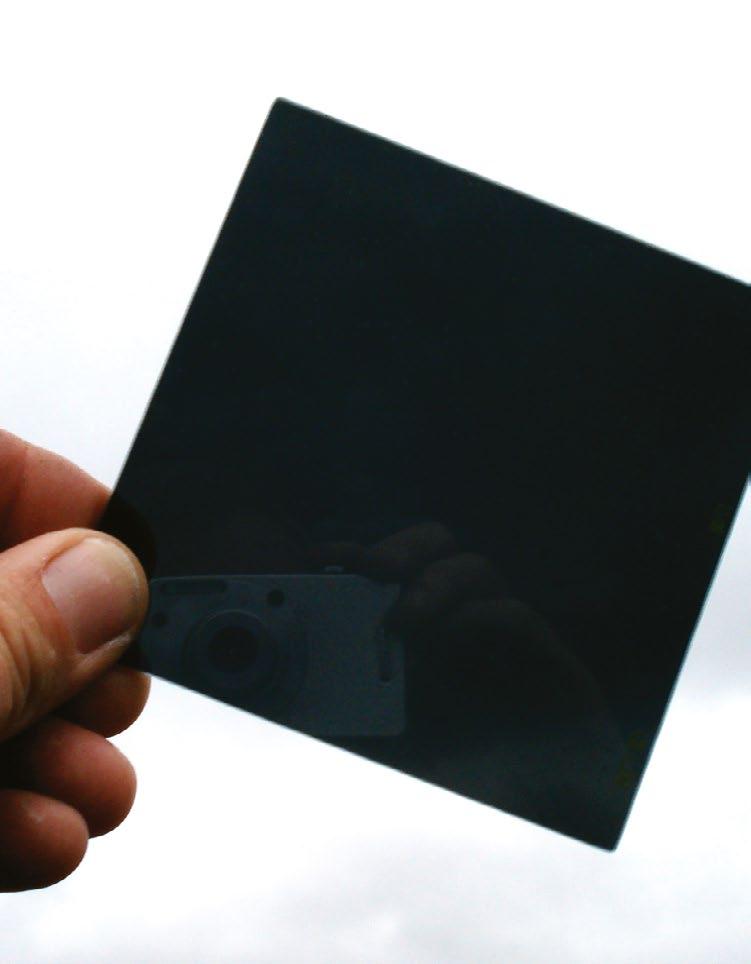
3 Check camera settings Before shooting, check everything’s set up correctly. You can see here that an exposure of 1sec at f22 and ISO 100 has been set with the camera in manual exposure mode. Exposure mode is down to personal preference – aperture priority or shutter priority could also be used.
4 Clean the lens Before taking a shot, check the lens or filter for any water droplets. If you’re shooting close to a waterfall or river, splashes or spray may get on the lens. Wipe any water droplets away with a clean microfibre cloth, otherwise image quality will suffer. In drizzly weather, use an umbrella to protect the camera.
5Take the shot Take your first shot and see how it turns out. In this scene, the spout of water hitting a rock and cascading in all directions was the main point of interest and made an interesting image in its own right. A shutter speed of 1sec recorded just enough blur.
6 Explore the scene First impressions aren’t always the best, so experiment with different angles and compositions. In this case, a wider view captured a much better sense of the drama of the location, with the cascading water acting as foreground interest and leading the eye up the ravine and towards the distant mountains.

1 3 5 6 2 4 188
PROJECTS
The setup
Control the motion
When it comes to capturing motion in water there is no ideal exposure, simply because every situation differs. If the water is flowing furiously, you can blur it with a faster shutter speed than would be needed for a gentle stream. The solution, therefore, is to experiment with different shutter speeds to find the ideal one for the scene or subject. Maybe start at 1/30sec, then get progressively slower in 1/3, 1/2 or full stop increments, checking each image as you go. The comparison set of images here will give you an idea of how the effect can be controlled. The one you choose is down to personal preference.
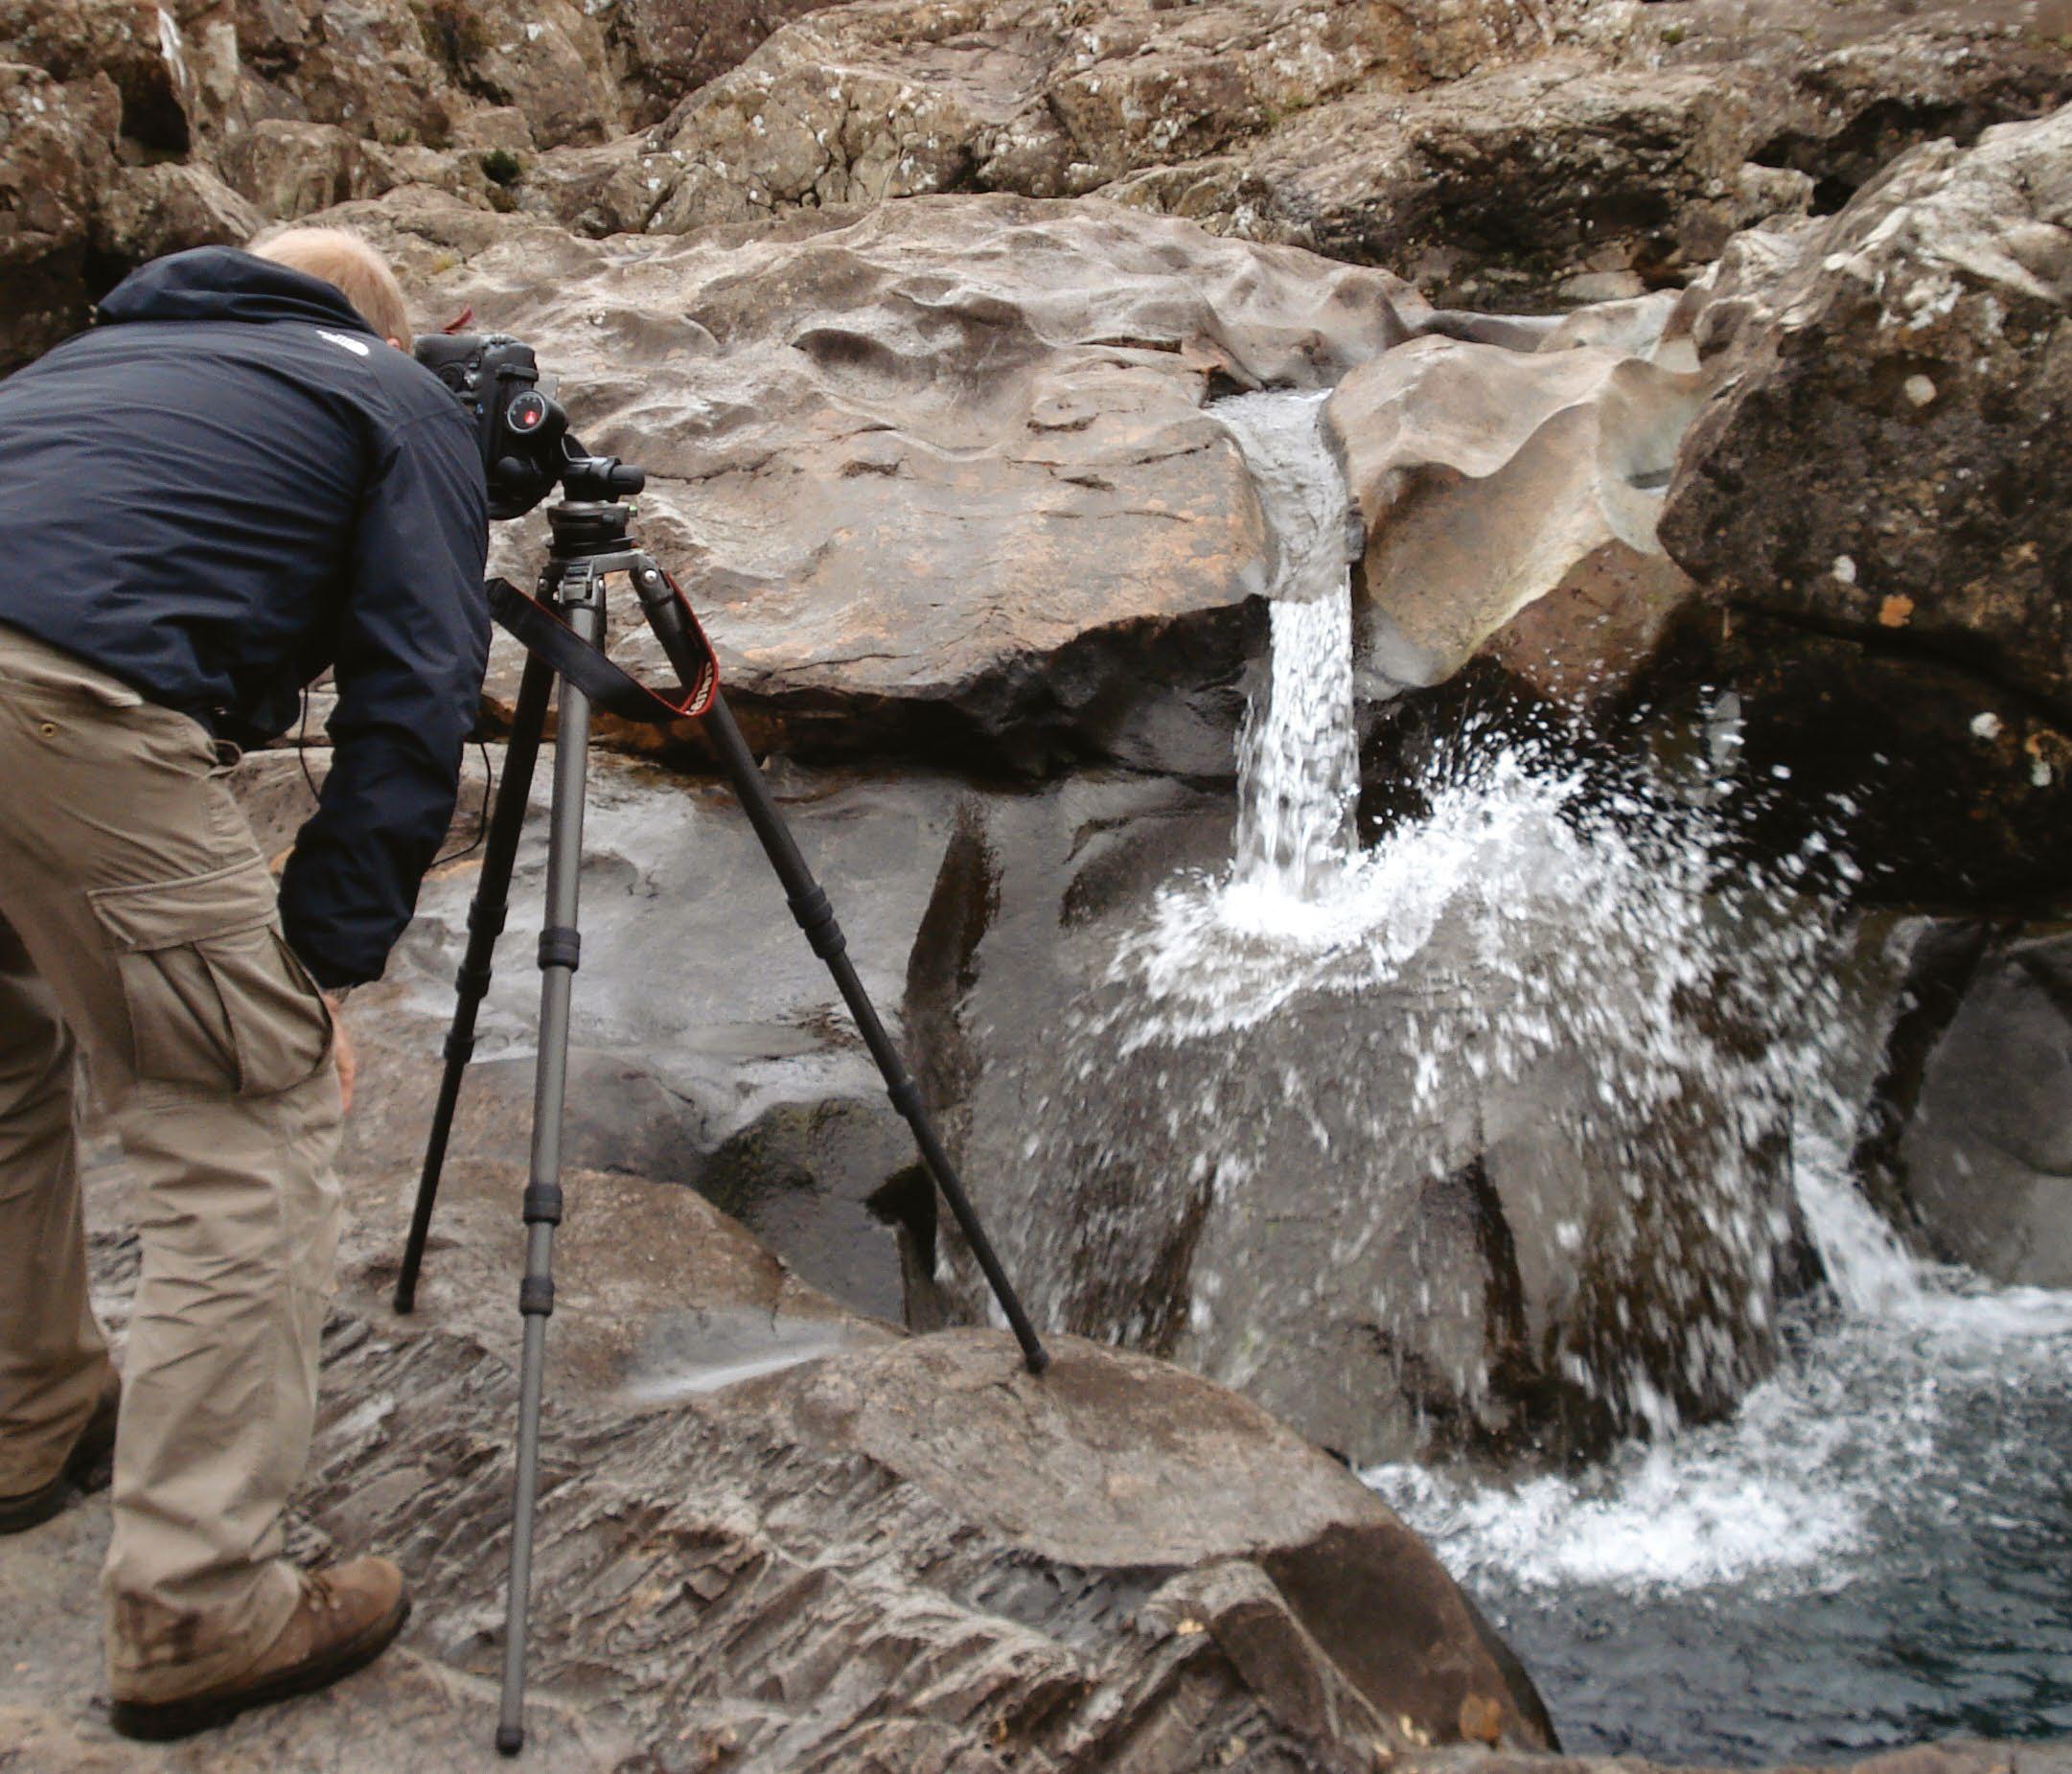
Experiment with different shutter speeds to vary the level of motion recorded

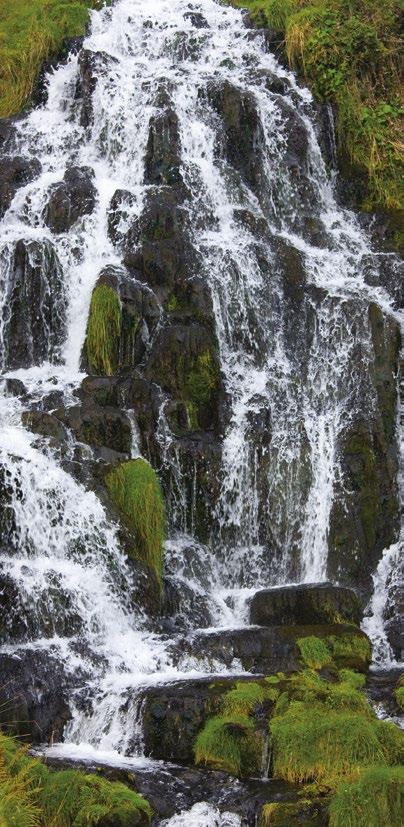

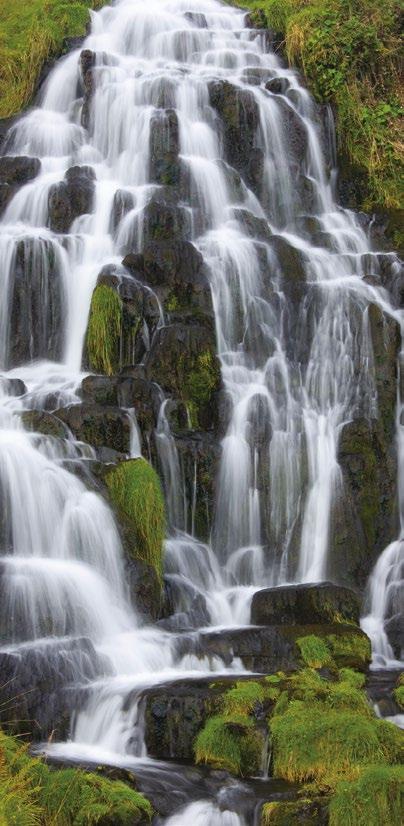
USE A TRIPOD A sturdy tripod is essential for keeping the camera steady so you can use a slow shutter speed
FILL THE FOREGROUND The camera was set up on a rock mid-stream so it was nice and close to the moving water
the scene with the camera in both portrait and landscape format 1/1.25SEC 1/1.5SEC 1/2SEC 2SECS 189 CAPTURE MOVING WATER
VARY CAMERA FORMAT
Photograph
Edit the shot
1
Auto Tab Try the Auto Tab in the Basic menu of Adobe Camera Raw to see what it does to the image. The latest version is the best yet and often does a great job.
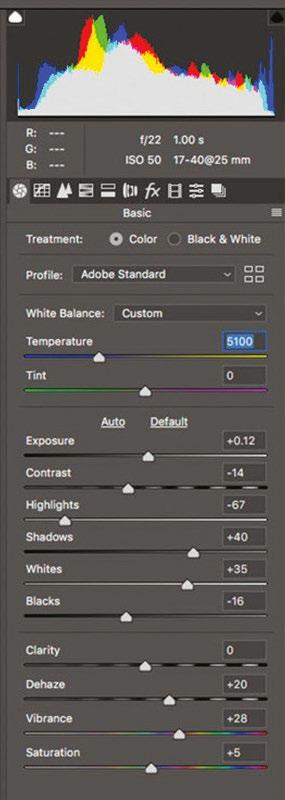
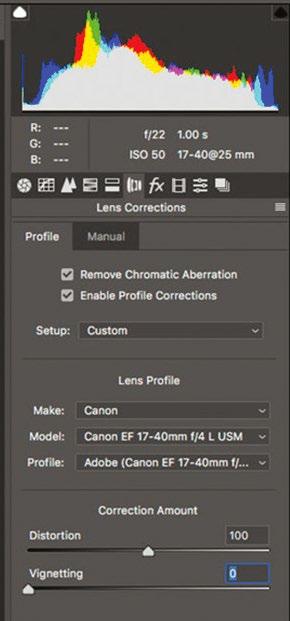
2 Lens Corrections Another essential step is to apply Lens Corrections to remove chromatic aberrations from the image and also make any other corrections based on the profile of the image – in this case a Canon 17-40mm zoom.

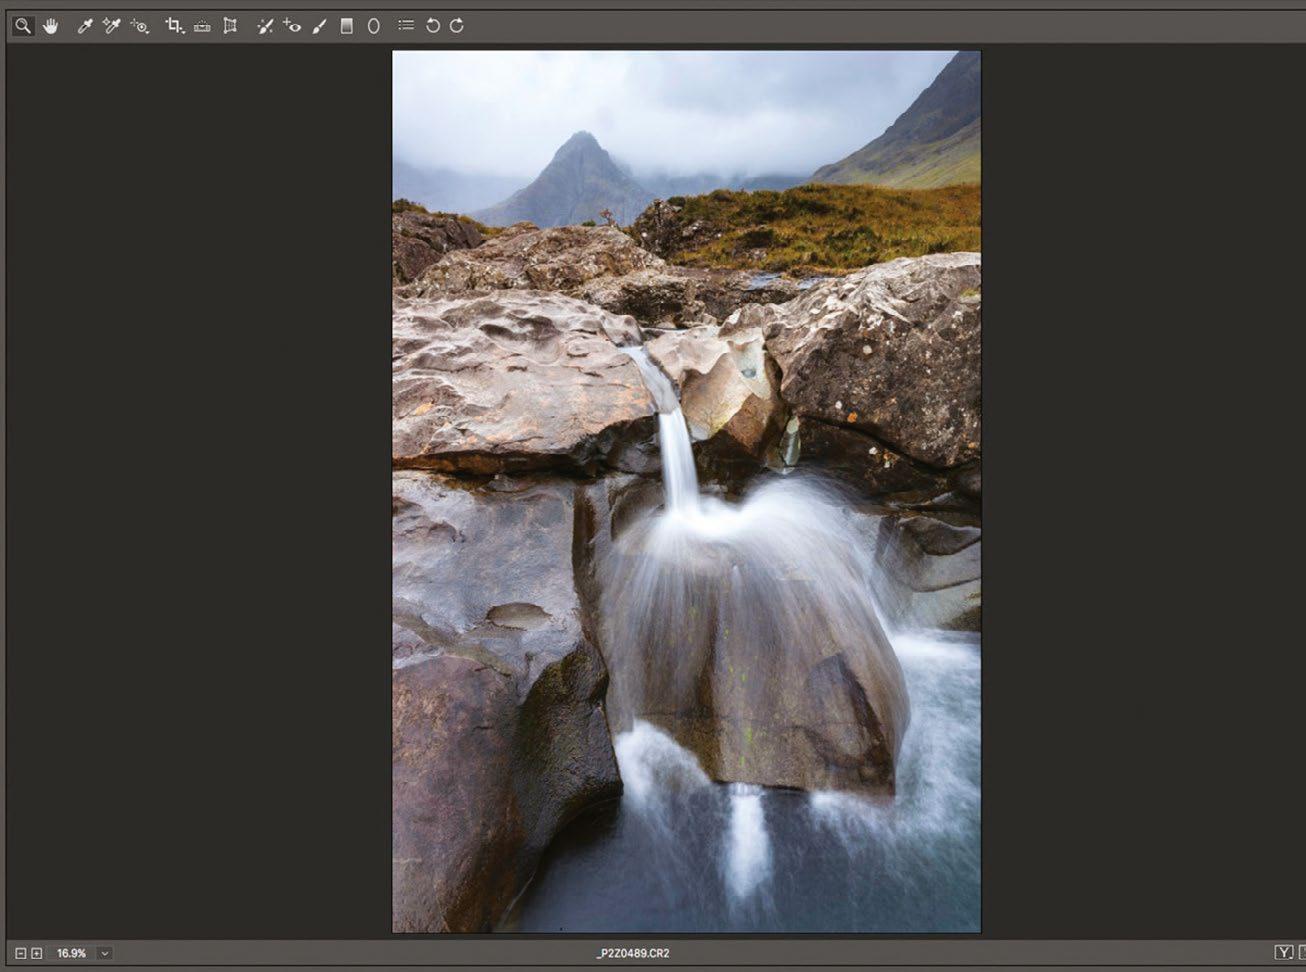
3
Dehaze and Vibrance To improve clarity and give the image a boost, the Dehaze slider is set to +20. The Vibrance slider is also increased to +28 to subtly increase colour strength. The image now looks more lively.
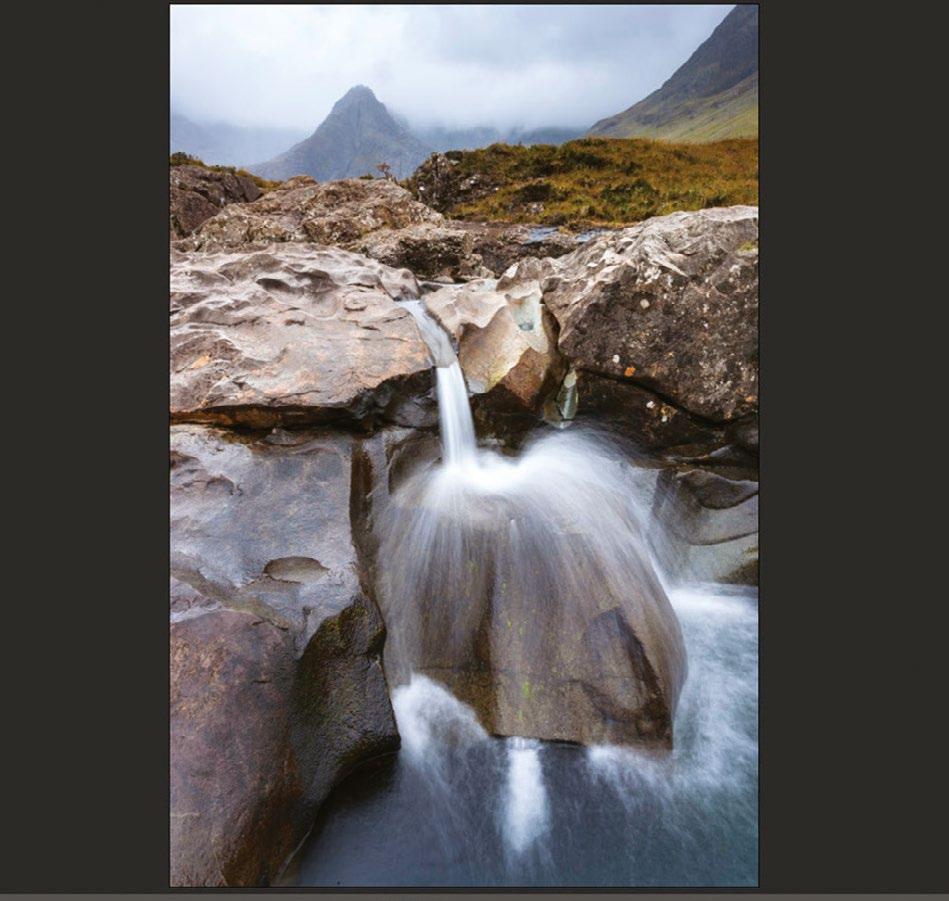
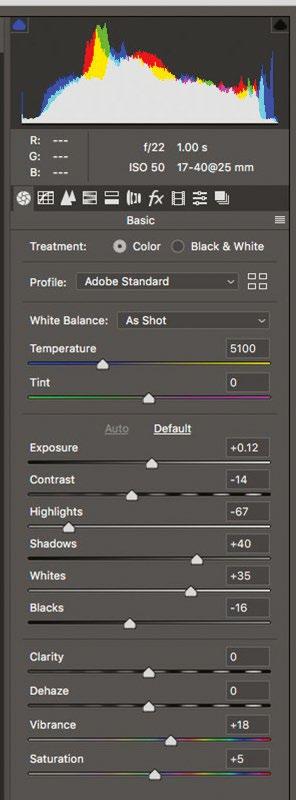
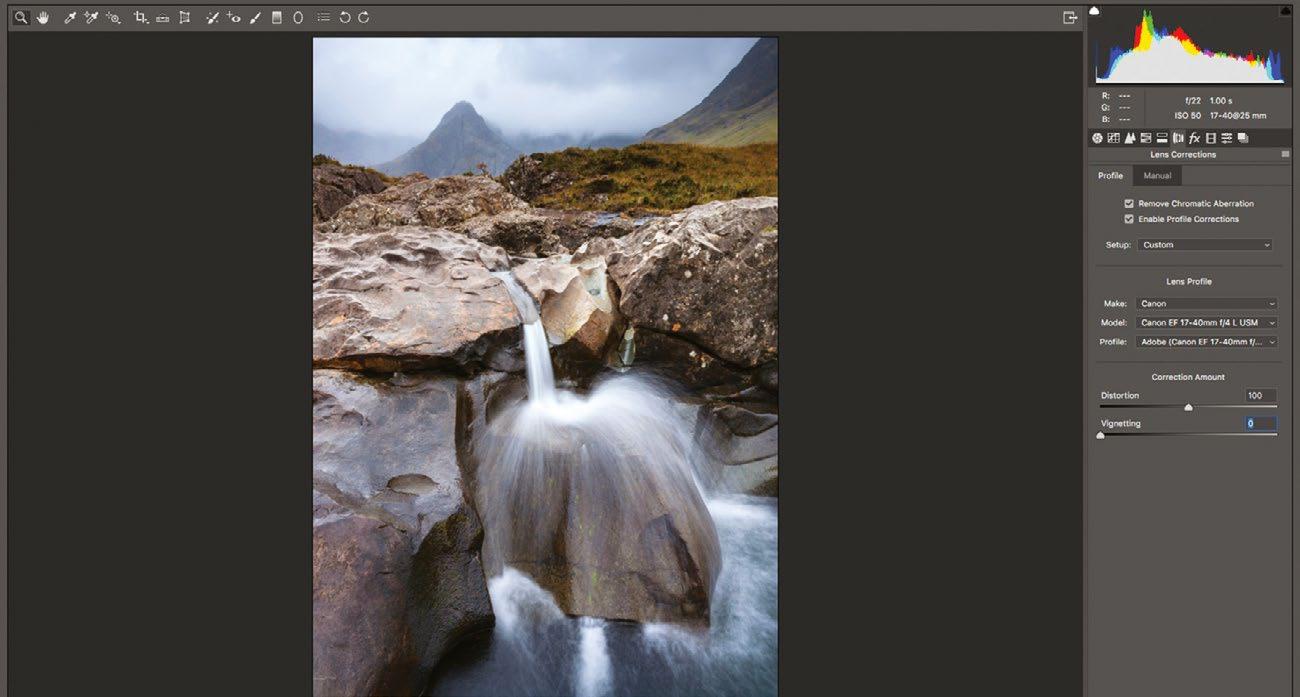
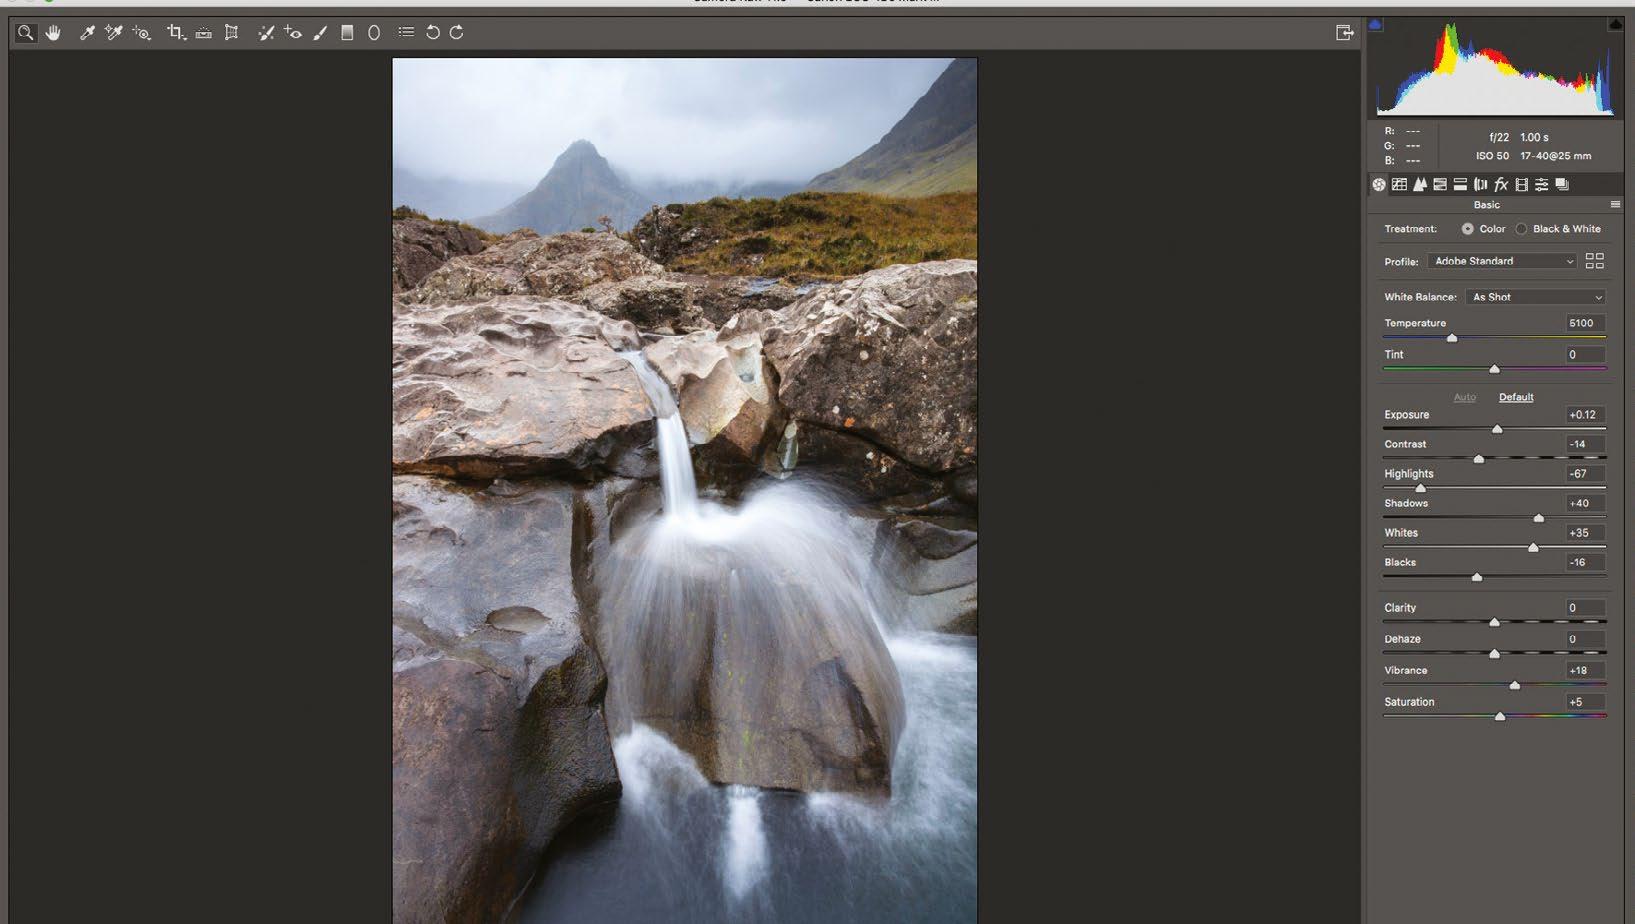
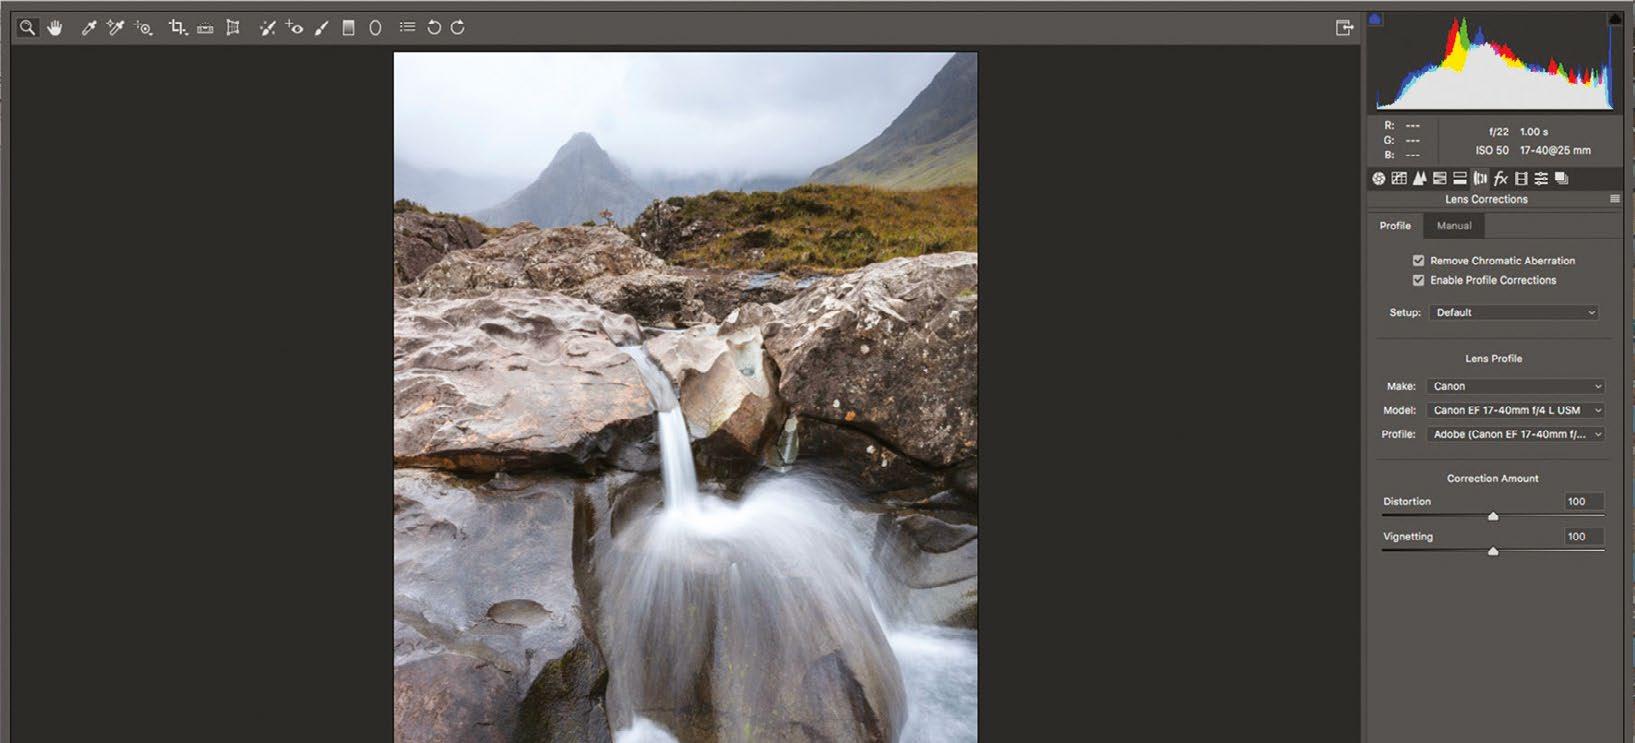
4
Darken the corners Clicking the Lens Corrections icon again, the Vignette slider is dragged over to the left. This adds a subtle vignette, darkening the corners and drawing attention to the composition’s centre.
Below
Time and motion
The shot only needs a few tweaks in post-production because the image effect is created in-camera when using Lensbaby lenses
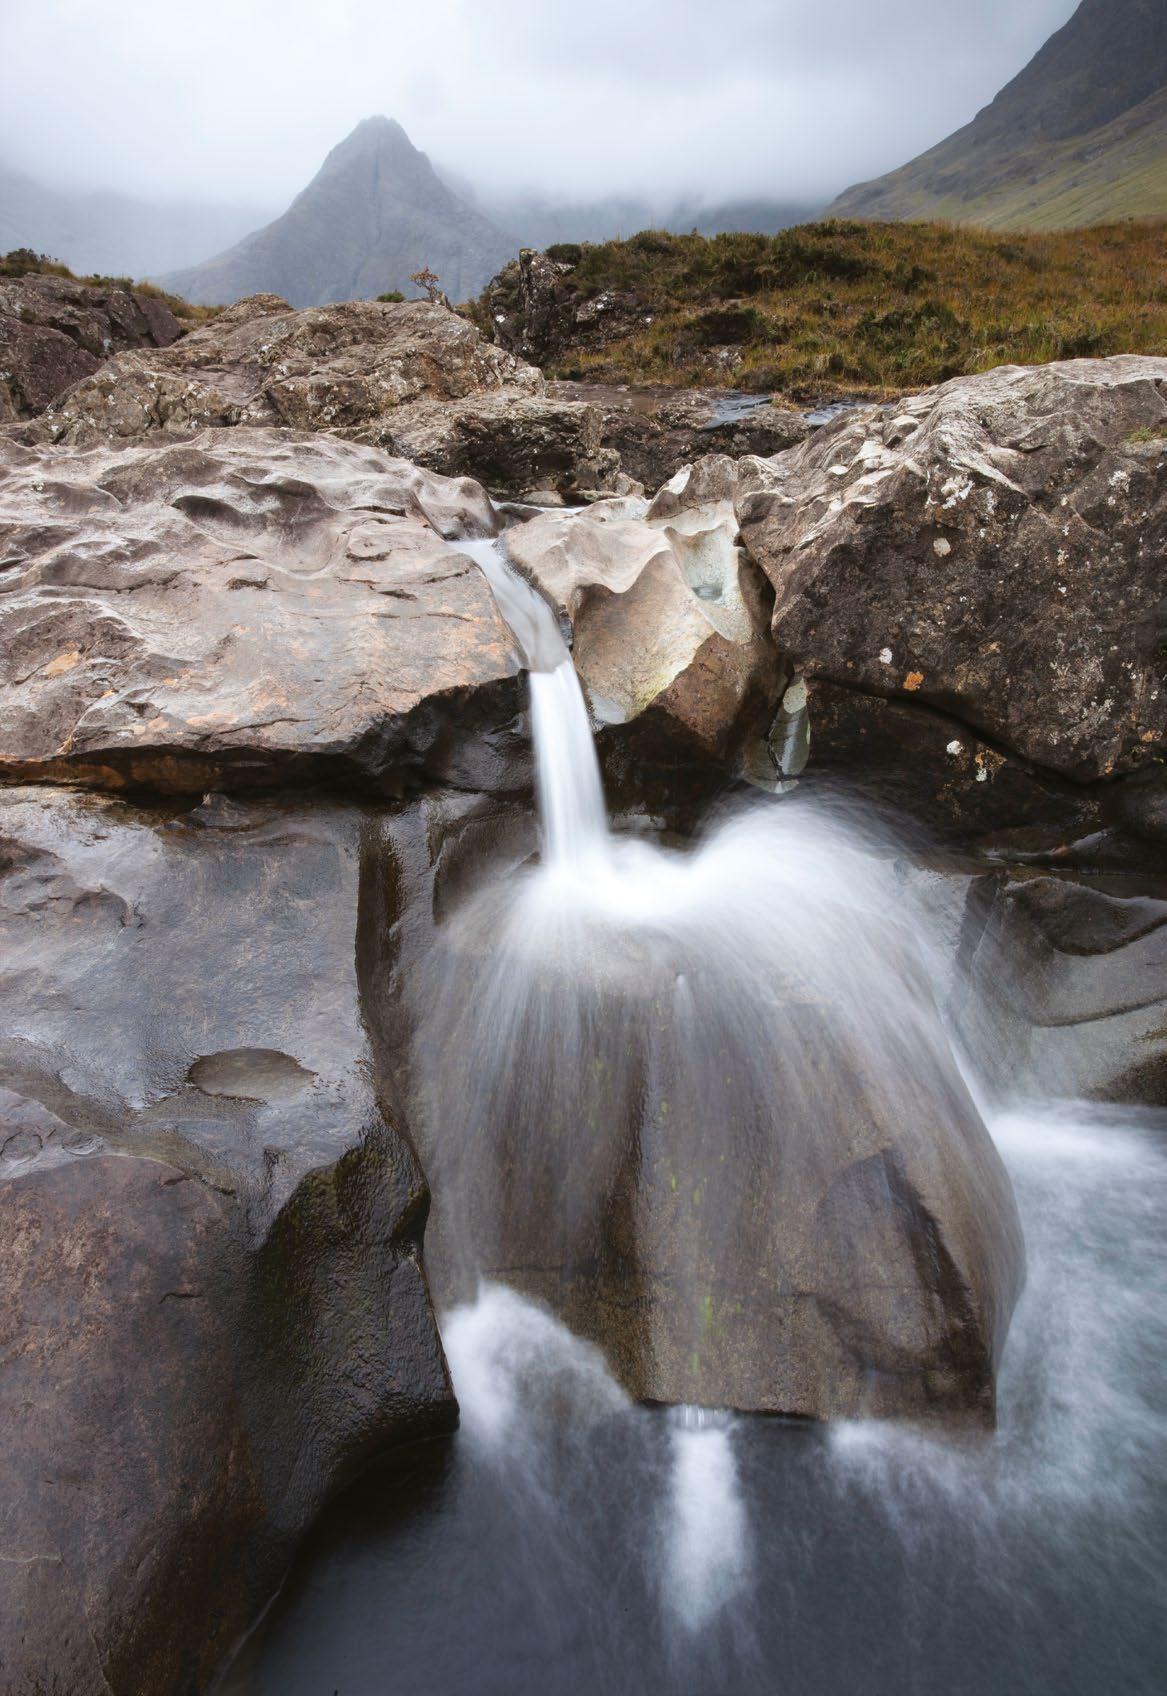
BEFORE
1 4 2 3 190 PROJECTS
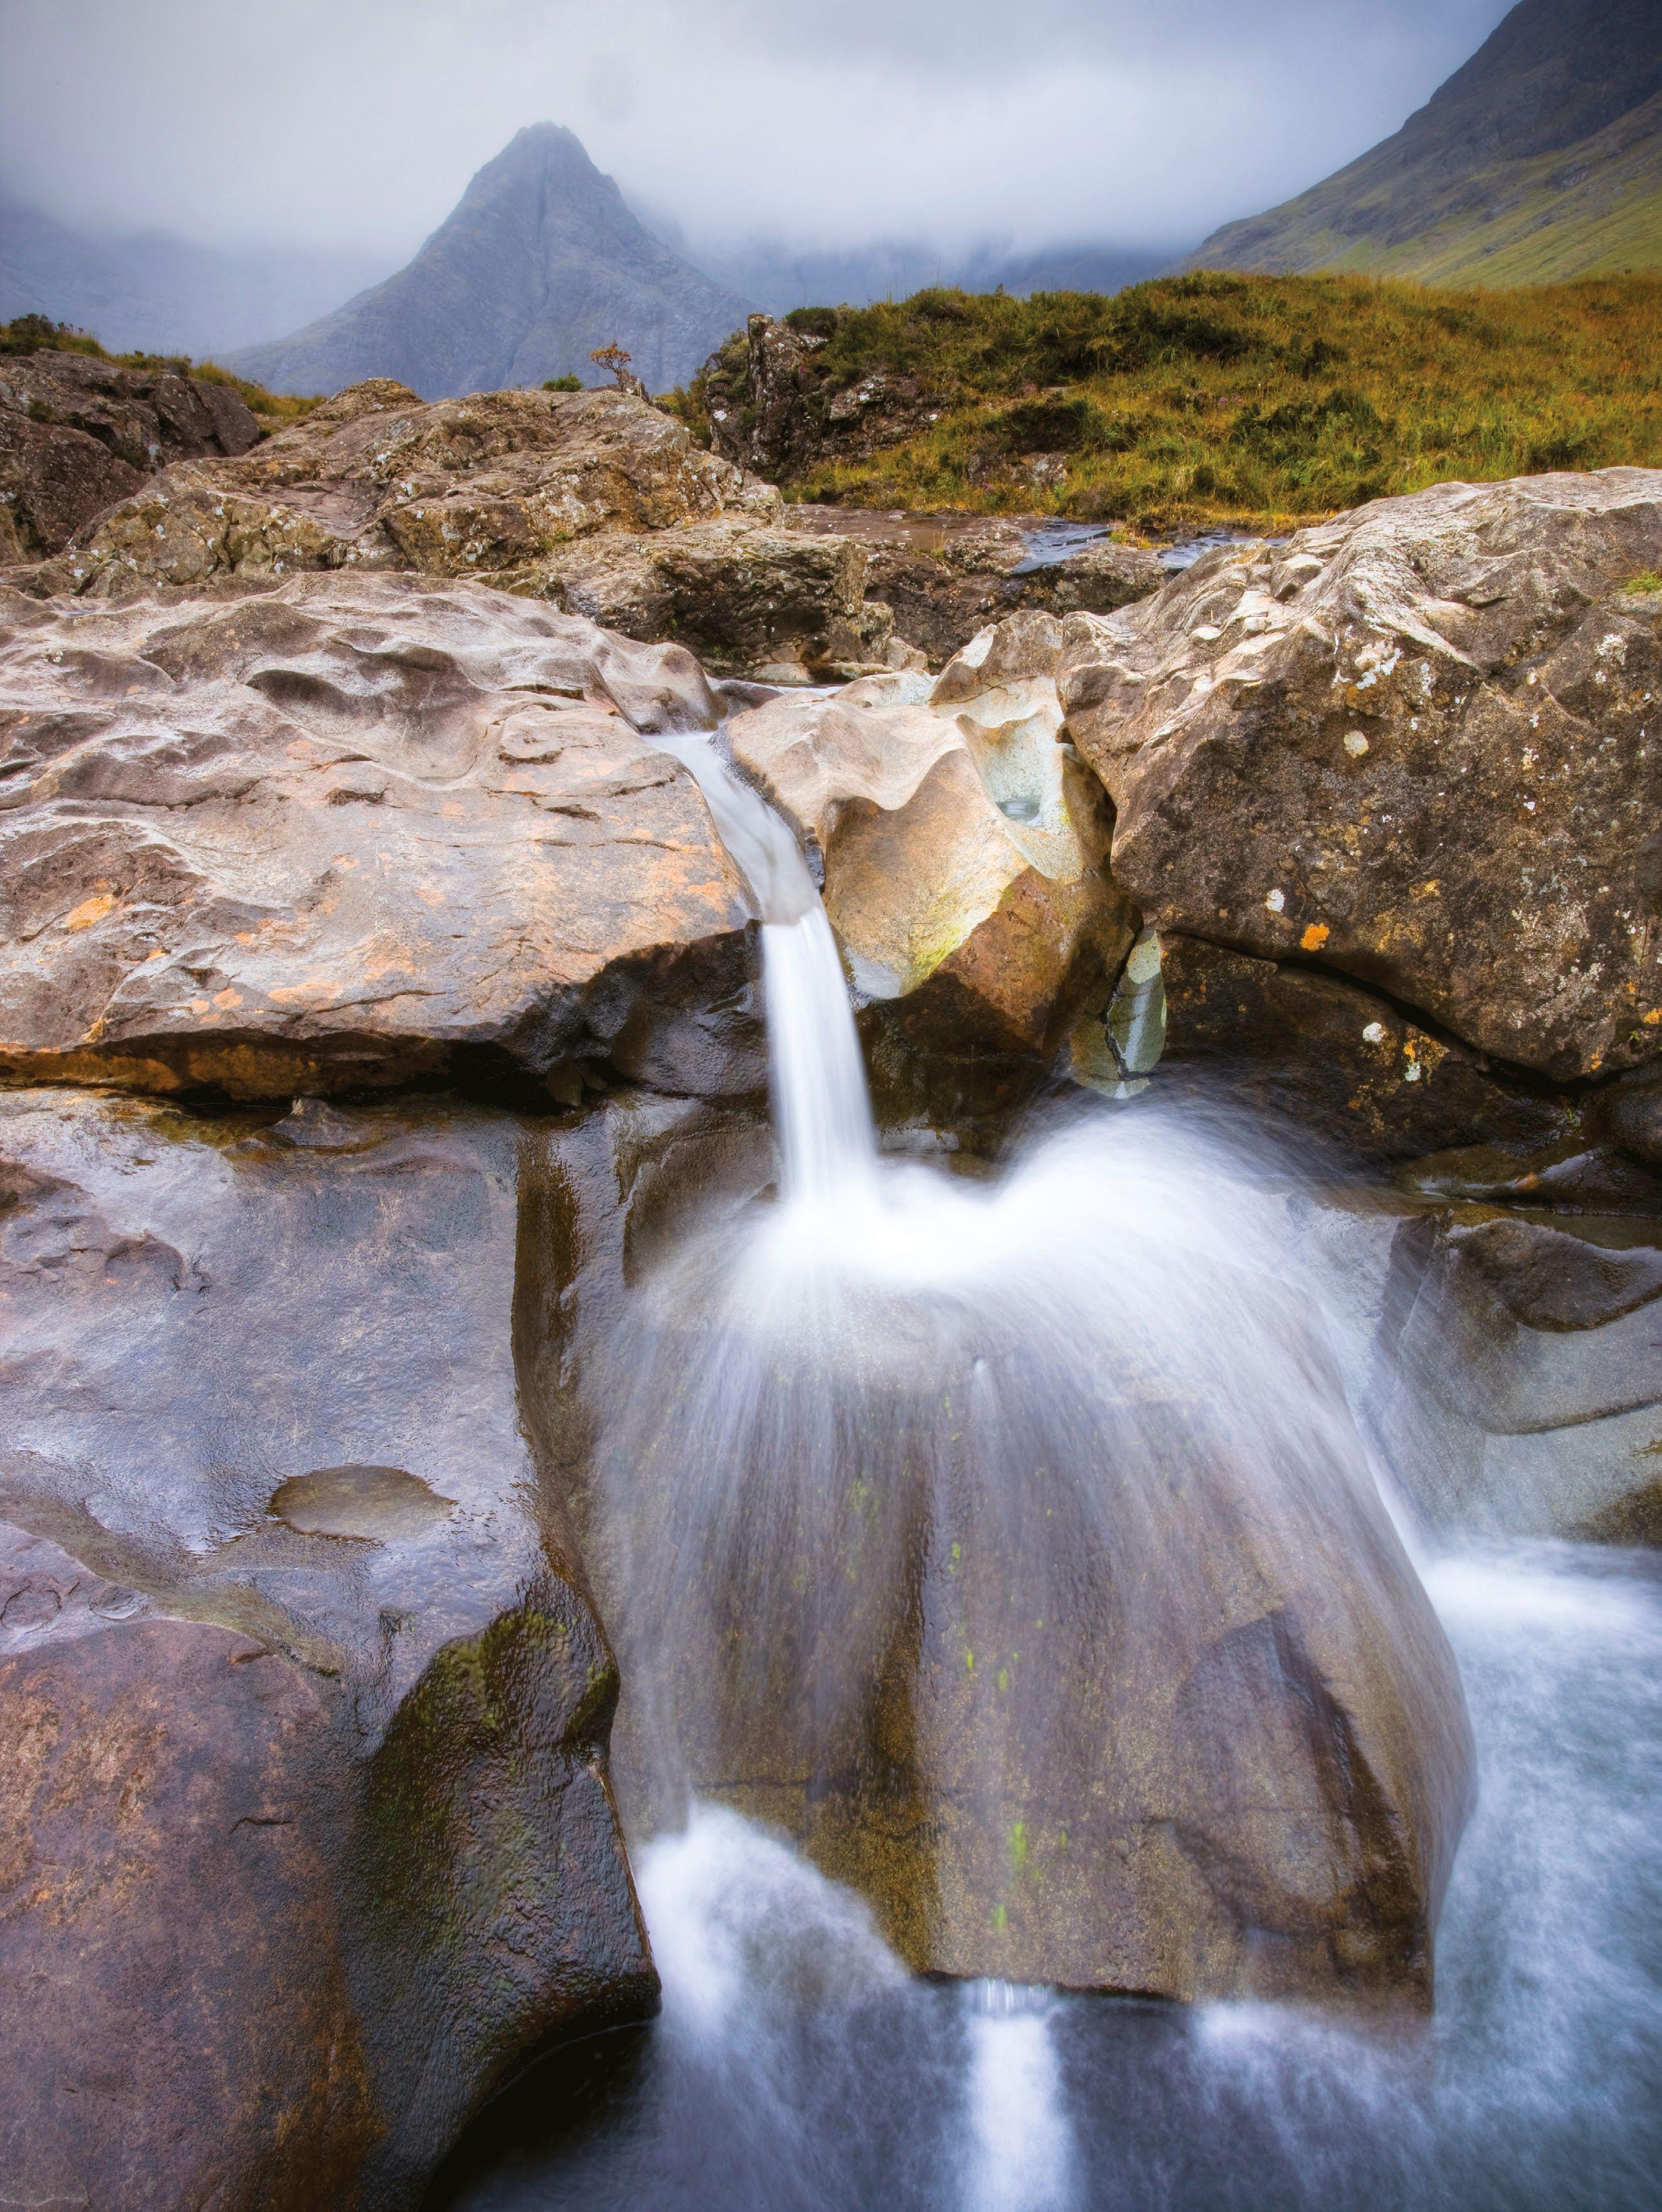
AFTER 191 CAPTURE MOVING WATER
Inspirational photographs, locations and much more


Learn the techniques you need to perfect every genre
 Push boundaries and create pieces of art from your photography


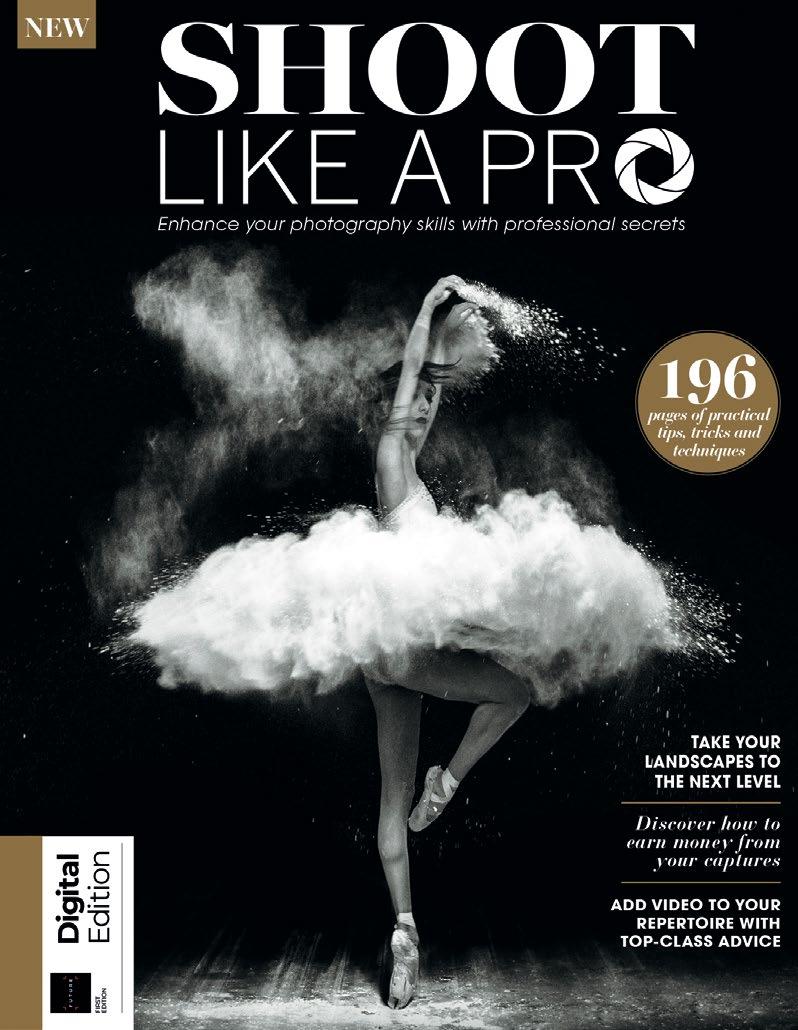
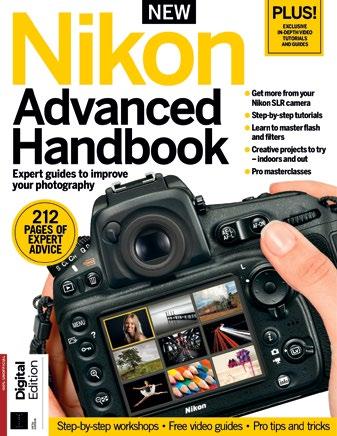
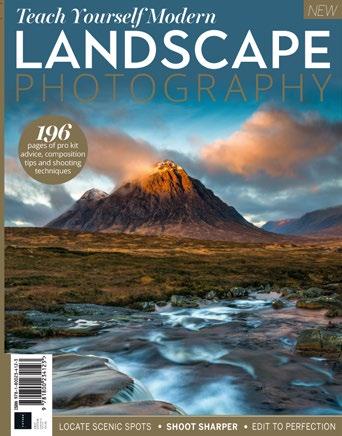


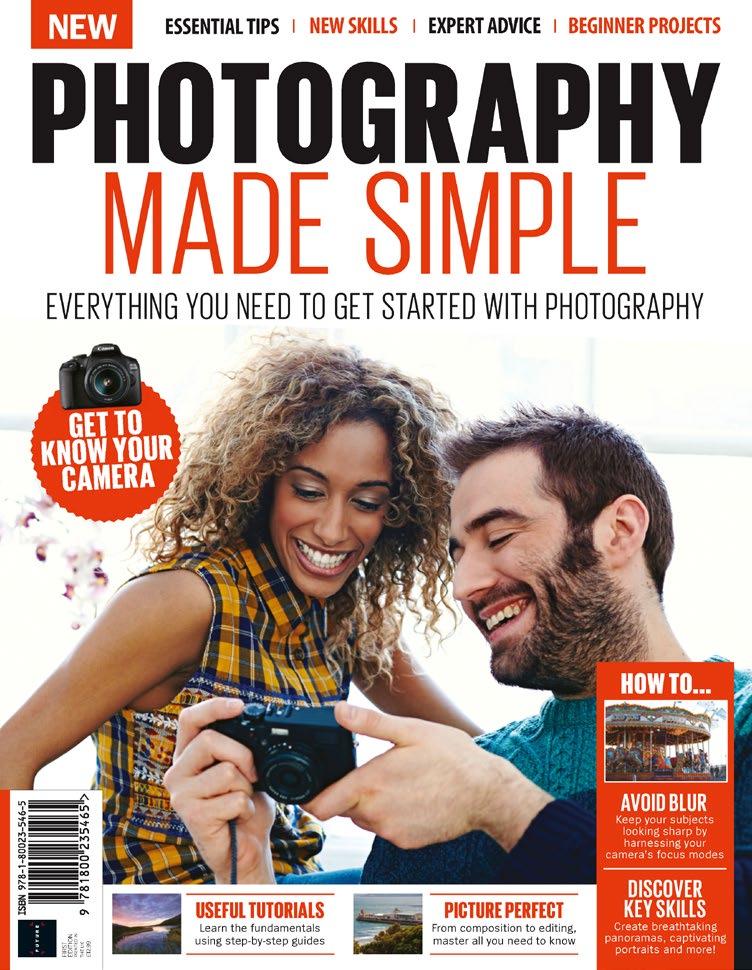


MASTER YOUR CAMERA WITH OUR BOOKAZINES From tech to techniques, learn to take better shots with our essential photography guides and handbooks Professional advice and tips to take your skills to the next level @futurebookazines Follow us on Instagram www.magazinesdirect.com


We deliver to over 100 countries No hidden costs Shipping included in all prices Secure online payment SUBSCRIBE & SAVE UP TO 61% Choose from over 80 magazines and make great savings off the store price! Binders, books and back issues also available Simply visit www.magazinesdirect.com Delivered direct to your door or straight to your device
PHOTOGRAPHY Teach Yourself Modern LANDSCAPE
DISCOVER ESSENTIAL KIT
Choose the best cameras, lenses and accessories for capturing landscapes
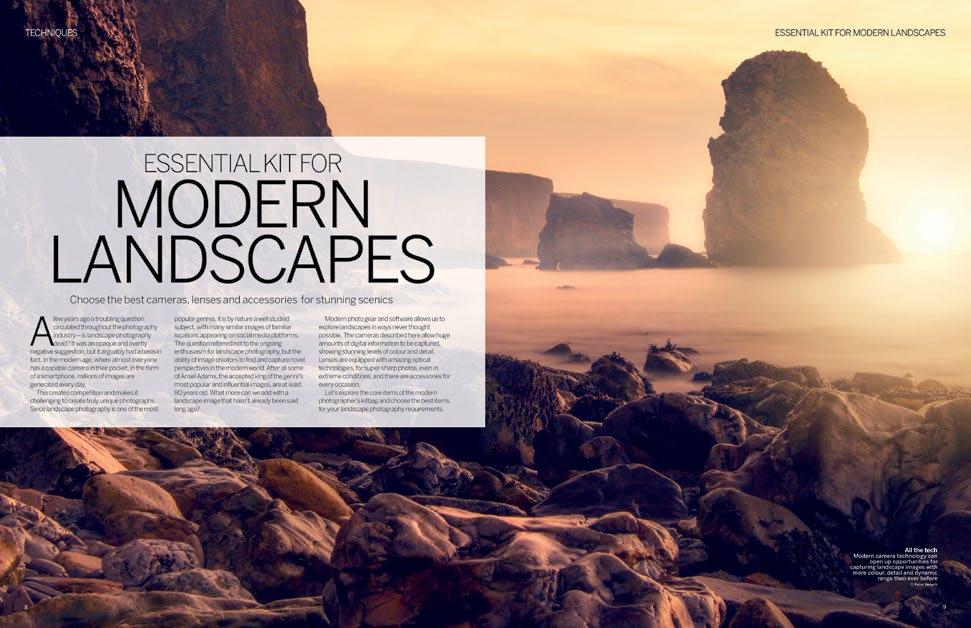
FIND THE BEST LOCATIONS
Learn how to navigate your way to the best landscape locations
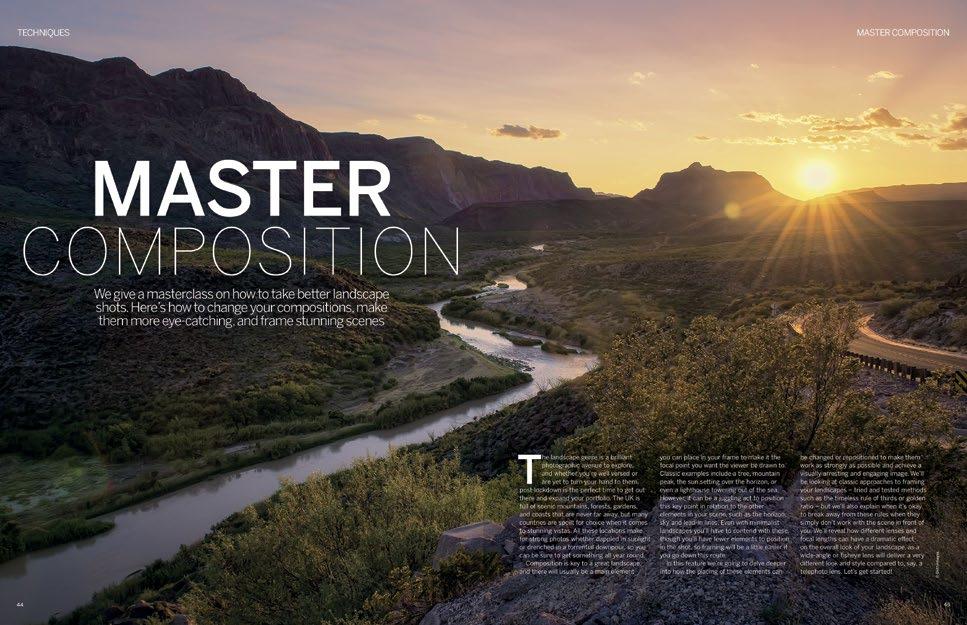
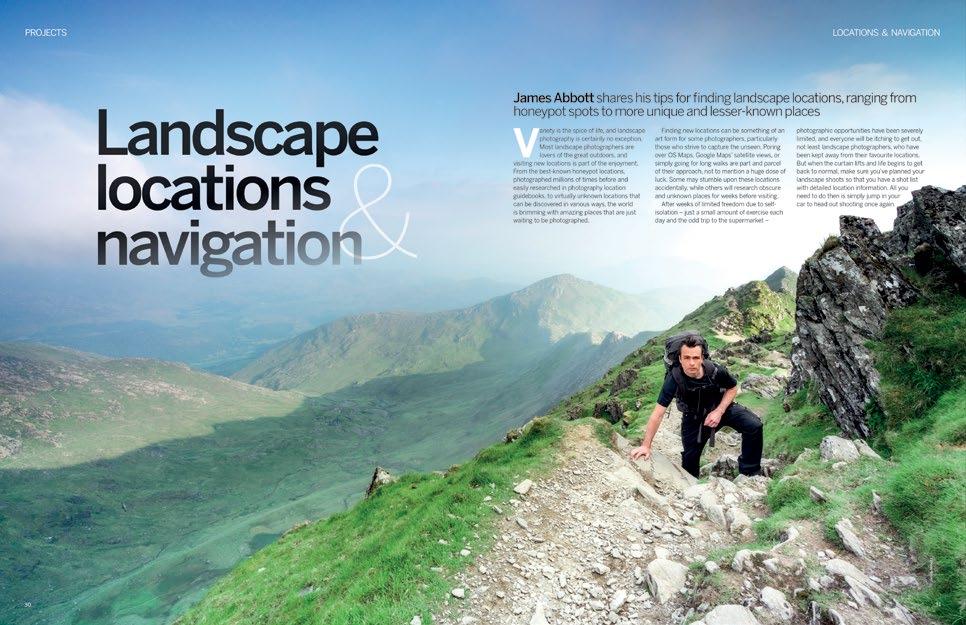
MASTER COMPOSITION
Make your images more eye-catching using expert framing techniques
CAPTURE TEXTURE
Shoot stunning black and white scenes filled with striking texture
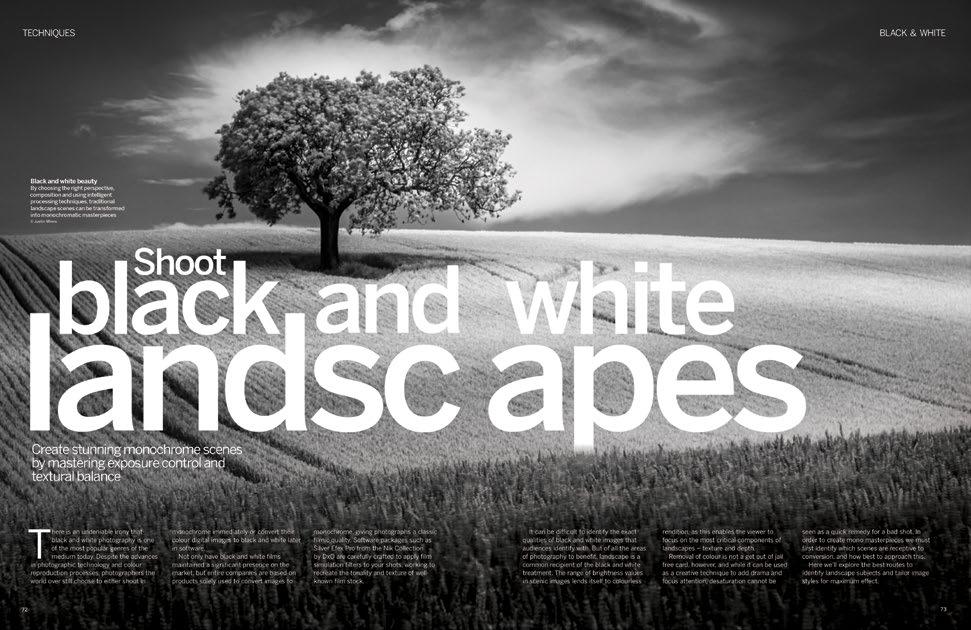
Discover pro level projects to e nhance your skills
Edit your images to the highest standard
Learn how to shoot sharp next-level imagery
9000
