
WHO TO CALL
THEY’VE GOT YOUR BACK, SO ALWAYS HAVE THEIR INFO ON HAND.
YEARBOOK REPRESENTATIVE (REP)
Name:
Email:
Phone:
CUSTOMER SERVICE ADVISER (CSA)
Name:
Email: Phone: 800.255.6287
TECHNICAL SUPPORT ADVISER (TSA)
Submit a customer support form: herff.ly/techsupport
Phone: 877.362.7750
YEARBOOK ORDER CENTER
Phone: 866.287.3096
DETAILS TO KNOW BEFORE YOU CALL YOUR TSA OR CSA:
Your job number:
Your school has a unique number to identify your files within the plant so they can find you easily.
Operating system:
What type of computers does your staff use?
Web browser:
Which web browser do you use? They all operate differently, so knowing your preferred browser will help answer questions.
WHAT CAN THEY HELP YOU WITH?
REP
• Design ideas, including cover and theme
• Overall book and sales setup
• Curriculum and training
• Submitting pages
• Sample books
• Staff organization
• Pricing questions
CSA (CUSTOMER SERVICE)
• Answer production questions
• Deadline information
• Shipping information
• Turning on cover templates
• Person to call when rep is unavailable
SCHOOL PHOTOGRAPHER
Company Name:
Contact Name:
Email: Phone:
TSA (TECH SUPPORT)
• Tech troubleshooting
• Errors uploading PSPA/PSPI file
• Support for InDesign plug-ins
• Answer questions about software
LEARNYBK.COM
MYHJYEARBOOK.COM LOGIN CREDENTIALS

My username:
My password:
MEET YOUR YBK BFFS
THESE SITES ARE THE ONES TO KEEP CLOSE
YEARBOOKDISCOVERIES.COM
Start here and the world is your oyster. Well the yearbook world, at least. The top-level menu holds information about our programs, products and events. And your one-stop shop is For HJ Customers, where you’ll find teaching resources, sales support, inspiration and more!
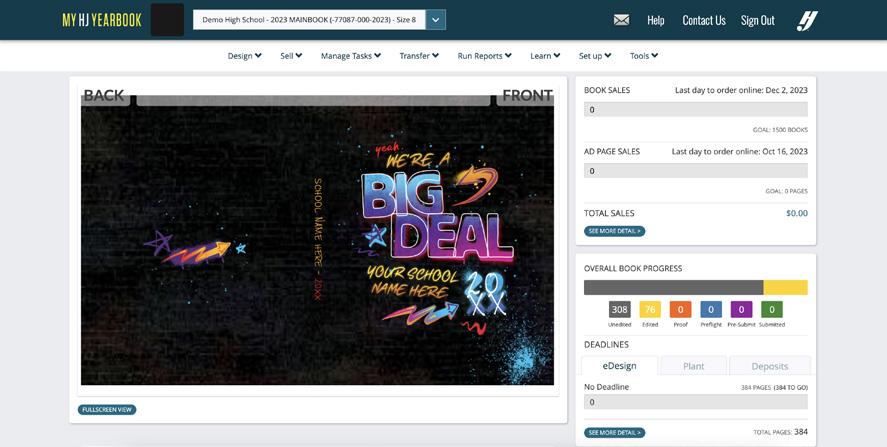
MYHJYEARBOOK.COM
This is your portal to work on your book and gives easy access to deadlines, book sales and other critical information. Access eDesign, eBusiness and other tools from here.
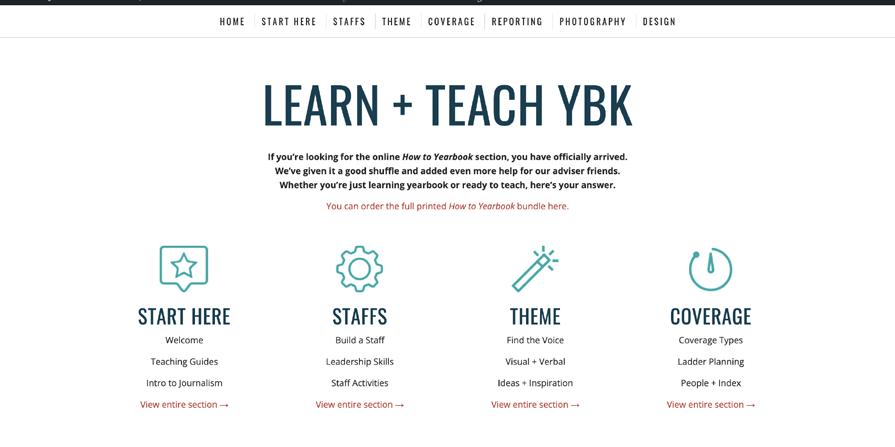
LEARNYBK.COM
Here’s a shortcut to online teaching resources. It serves as a companion to our 12-booklet How to Yearbook printed curriculum. From lesson plans to skill checks, you’ll find them here. Also, answer keys to all of the lessons and quizzes are available at herff.ly/answerkeys. Cool, huh?
HJESHARE.COM
Also available as an app, eShare is an easy way for parents and students to share photos with you.
HJHELPCENTER.COM
The home for eDesign support, curriculum and lessons, video tutorials and PDF guides. You’ll reference this page often for all things eDesign and Canva. Plus, the tips from the pros are gold.
1
MYHJYEARBOOK.COM
01 YEARBOOKDISCOVERIES.COM > FOR HJ CUSTOMERS
PLANNING TOOLS
As you get organized and plan out your year, these are the items you’ll rely upon every day.
YBK Essentials: This booklet! It’s a great place to start Ladders: Your Wall Ladder and Desk Ladder help you plan your book, page by page. Use them to sketch out assignments, group pages into deadlines, etc.

Font Poster and Book: Start by using these to choose your fonts for the year, then teach your students about typography
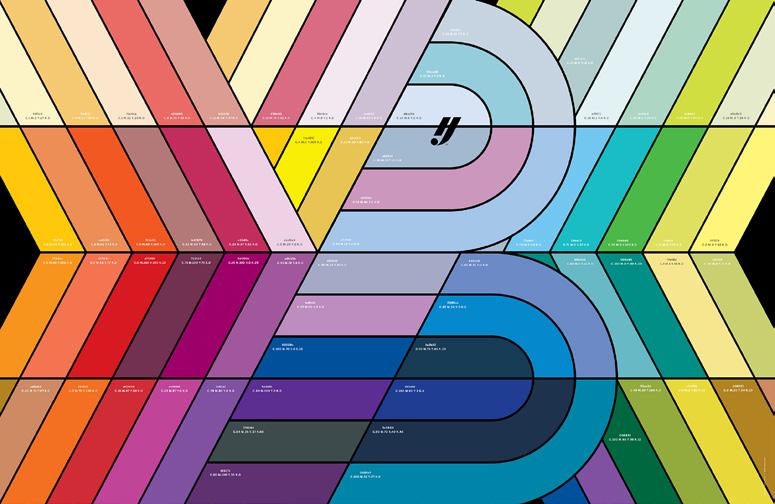
Color Posters: More than just a collection of pretty hues, these are the colors loaded into eDesign with both CMYK ink formulas and Hex codes (web colors) to match. There’s one for each type of paper — gloss and matte — so you can see how the colors will reproduce in your book.

eShare Poster: Enlist help with your photo assignments with eShare. Anyone in your school can submit photos directly to you using this service.
EDUCATION AND INSPIRATION
The kit is full of great posters and booklets to help advisers teach their students the basics of yearbooking — photography, design, coverage, and more.
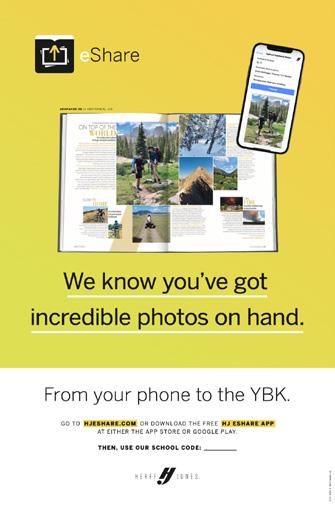
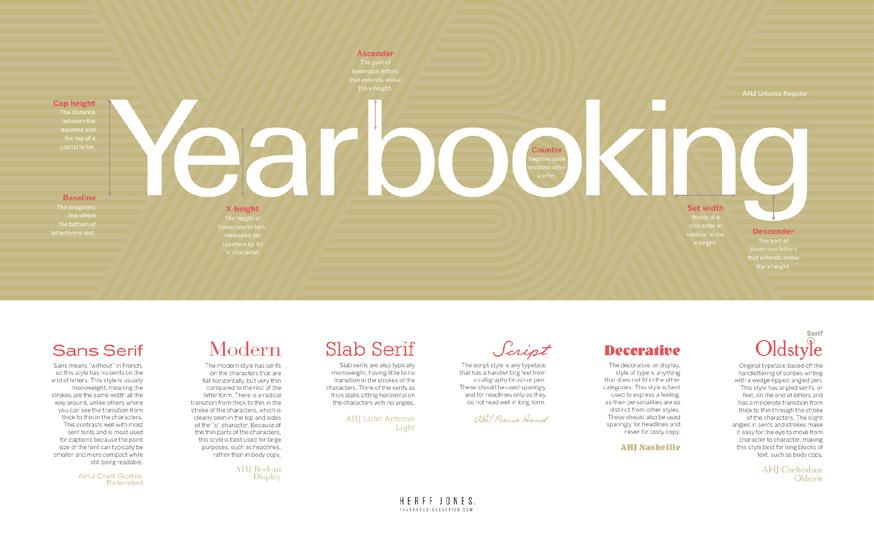
Photo resources: Teach the basics of composition with these student photography examples.
Mod Styles: Cover more students with modular layouts. These are great examples.
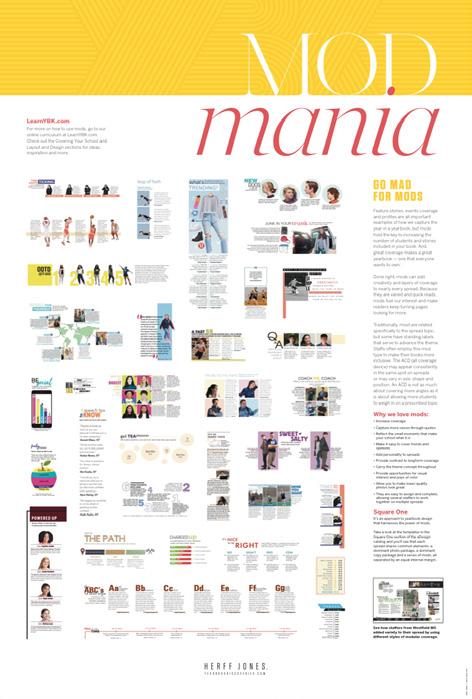
Square One: Teach the basics of graphic design with this poster and the other design resources found at LearnYBK.com
YBK Innovations: When you are ready to make choices about your cover, check out this guide to the upgrades and add-ons that Herff Jones does best.


SALES SUPPORT
We make book sales easy with online tools, like Sales Assist, Send and Sell, and in-person sales tools like our posters and flyers. Better still, we give you tools to guide students through the planning and execution of a full year of marketing and promotion for your yearbook. All of these items are gathered into a mini sales kit. Check out the items in the plastic sleeve and then go to herff.ly/ybk-sales for more.
There’s always more: Need additional posters? Need an extra ladder? You got it! Many of these items are available at no charge. Just go to YearbookDiscoveries. com/shop and click on the Kit Supplies link on the right side. You can order sales posters and flyers, as well as other helpful items from the kit.

02
WE’RE GL AD YOU’RE HERE.
GET READY FOR YOUR BEST YEARBOOK EVER.
Before you get all into the details — and we know there are a lot of details — know one thing about being a Herff Jones yearbooker. We are here for you. Regardless of the size of your program, the number of hours you have to dedicate to yearbook, whether you volunteered to teach yearbook or if you were volun-told, we want to make sure you know we are by your side in this journey.
We support your choice to do only as much as you choose. Break your tasks into bite-sized pieces and focus on making a fun, creative yearbook your school can be proud of. And, if you’re ready to set the yearbook world on fire, we’re here for you, too.
This booklet is your handy guide to the most critical get-it-done info. Follow this, and you’ll be in great shape. Find a fellow adviser with similar hopes and dreams, and you be in even better shape.
AT HERFF JONES, YOU’LL NEVER YEARBOOK ALONE.
The steps to make your job easier…
1. TAKE CARE OF BUSINESS p.4
• Produce a yearbook that kids love and parents want to buy
• Maintain a financially sound business
• Sell and/or promote books to as many people as possible
• Sell ads to celebrate student milestones
• Sell ads to local businesses so they can support your school community
2. SIMPLIFY THE PROCESS p.8
• Produce a book on budget and on time
• Work with your representative and other Herff Jones support staff
3. LEARN AND TEACH YBK p.18
• Empower students to become leaders in the classroom and in the school
• Teach skills in communication, journalistic writing, graphic design, photography, business and more
• Allow students to grow in an area of interest and build their skill sets
• Motivate students to work hard and to see the rewards of their work
4. MAKE AN IMPACT p.22
• Educate students, parents and school administrators about the benefits of joining yearbook staff
• Support diversity and inclusion by making your staff one that students want to join
• Build relationships on your staff
3
03
TAKE CARE OF BUSINESS
1. PLAN YOUR SALES AND FINANCES: MAJOR TO-DOS!
Refer to How to Yearbook: Selling Your Book and herff.ly/ybk-sales
BUDGET
1. If you’re new, you should still be able to access eBusiness records from the previous year. Work with your rep and bookkeeper to see how last year’s budget worked.
2. Use the Budget History and Goals worksheet (in Selling Your Book on p.33 and online) to work through important questions.
3. Make decisions with your rep if you plan to change the basic book specifications (cover materials, number of pages, number of copies printed, additions such as supplements or tip-ins).
BOOK SALES
• How many books will you sell?
• What price structure will you follow?
• Will you have tiered pricing or one price all year?
• How will you promote your book?
• Will you use Sales Assist and/or Send and Sell?
• Will you offer personalization or accessory items?
(See p. 7 for book enhancements.)
AD SALES
• Will you sell ads to families, students and/or businesses?
• What price structure will you follow?
• What sizes will you offer?
• How will you accomplish ad sales? Online Ad Creation allows parents to design the ads from the parameters set by you. Learn more at herff.ly/online-ad-creation
2. GET YOUR BOOKKEEPING UNDERWAY
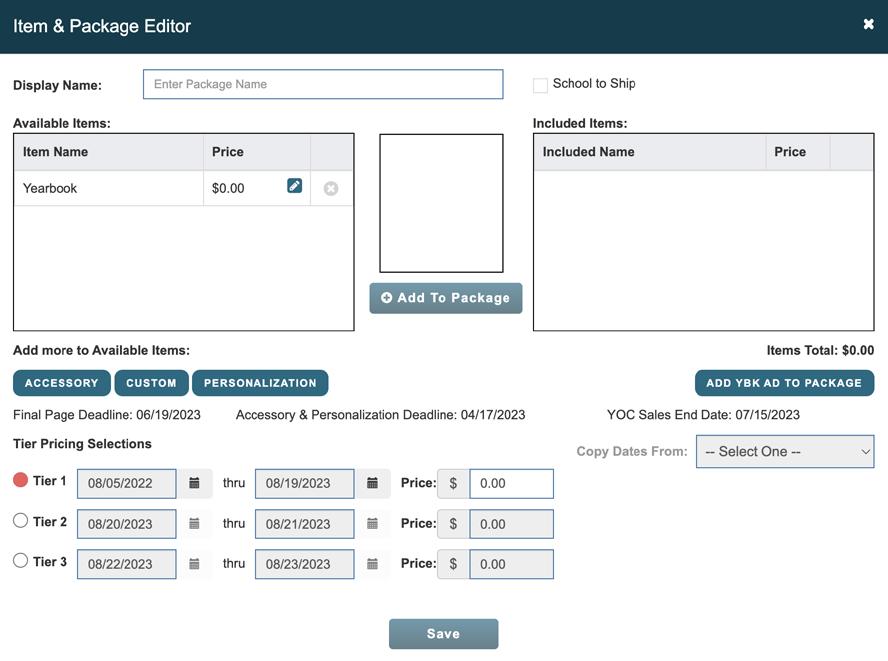
Once you get through all of the decisions for book and ad sales, you can set up eBusiness, the powerful business tracking software available only from Herff Jones. Go to MyHJyearbook.com and click on Set up > Set up Sales. Ask your rep or TSA for help as needed.
• Set book and ad prices and sales schedules.
• Create packages and bundle personalization options.
• Establish both in-school and online sales through YearbookOrderCenter.com
• Activate discount codes for superior sales.
Find your deposit due dates on MyHJyearbook.com under Deadlines.
3. REQUEST YOUR STUDENT AND FACULTY NAME LIST
Having complete name lists is mission-critical for proofing portrait pages, spell-checking names and running coverage reports within eDesign. And that’s just the beginning. A basic name list allows you to use our email programs, Sales Assist and Send and Sell, to promote your book and send reminders.
Ask for a new list each year from your administrative office, and make sure it reflects new students, address changes, etc. Only two fields are required, but all are helpful:
• REQUIRED: First and last names (in separate fields)
• REQUIRED: Grade
• REQUIRED: Parent email address
• Full mailing address (separate fields for address line one, two, city, state or province and ZIP or postal code)
• Homeroom or identifying class period
• Student ID or some unique identifier
• Student email address (for upper grades)
Also, you’ll want a list of faculty and staff members. Request the following fields:
• First and last names (in separate fields)
• Substitute STA for staff or FAC for faculty in the grade field
TROUBLESHOOTING:
If your front office questions your need for the student list, provide them with our FERPA policy, or PIPEDA/ FIPPA policy if you’re in Canada. These explain how Herff Jones is in compliance with laws related to using student information. Find them at herff.ly/sales-assist-how-to
UPLOAD YOUR NAME LIST
• Log in at MyHJyearbook.com.
• Go to Setup > Set up Sales.
• Then click the Name List tab on the left.
• Click Import to add your list of people or businesses.
IMPORT LIST TO eDESIGN
• In eDesign, click the Settings tab, under School & Order Information, choose Name List.
• Check the box and tell eDesign to import it. Note: It may take up to 15 minutes for your name list to be available in eDesign after uploading to eBusiness.
04
start strong for financial success
5. SELL THOSE BOOKS
Refer to How to Yearbook: Selling Your Book and herff.ly/ybk-sales

For your students, the process of selling/promoting the book fosters a new and valuable skill set beyond producing the book itself. Sales and marketing falls on everyone. Remind writers, designers and photographers they have to promote the book as much as they obsess over their primary assignments.
IDEAS FOR SALES SUCCESS
• Participate in orientation or back-to-school events. Do whatever you can to include the yearbook as part of registration. Include it on forms, sell it at registration, have it included in fees.
• Create incentives for parents and students who purchase early. Tiered pricing — offering lower prices to early birds — makes parents feel like they are getting a good deal.
• Keep all the messaging positive. Make buyers feel great about their purchase.
• Publish a list of people who have purchased a book. Hang signs around the school asking, “Are you on the list?”
4. MAKE A YEAR-LONG MARKETING PLAN
Whether you have to sell books or not, establishing a strong presence in your school is important. A great yearbook staff brings a school together by promoting events, giving students a voice and capturing the great memories of the year. We make sure you’re fully equipped to promote your yearbook.
• Posters and Flyers: We’ve provided samples of sales posters and flyers in this kit. Before you hang them, write your sale dates and other important information on them. Don’t forget to include YearbookOrderCenter.com and your job number if that’s how you collect money.
• Social Media: Create a social media account solely for your yearbook program to interact with your parents and students and promote sales. Always think of how your images or videos can generate interest. Graphics and templates are available for use at herff.ly/sellonsocials
• Email Marketing: Email remains an effective way to engage with both parents and students. Learn more about our email-based yearbook sales campaign Sales Assist and eDesign’s own customized email campaign Send and Sell on p. 6.
Take some time to review the sales materials we’ve included in this kit. The Guide to Yearbook Sales poster and accompanying adviser guide are meant to help you and your staffers keep book sales and promotion on your agenda all year long.
Need more? Order as needed from herff.ly/ybk-shop
• Use every communication channel available, including registration packets, emails, social media, morning announcements, automated phone calls and marketing materials in high-traffic areas.
• Post sneak-peeks of content and behind-the-scenes photos of how the book comes together.
• Build buzz around yearbook distribution day. Host an event exclusively for buyers.
SETTING UP TIERED PRICING
5
05
SALES POSTERS (two designs available, found in the kit)
SALES MADE EASY
SALES ASSIST
Sales Assist is an email-based sales campaign designed to take the work out of reminding parents to purchase a yearbook. Following the best practices of online sales, reminders go to your list of parents a few times a month.

Once parents purchase a yearbook, they are automatically removed from the list. You may begin the campaign when you wish and stop it when you are ready.
Parents buy online through YearbookOrderCenter.com, so you don’t have to handle money unless you choose to do in-school sales. And even then, the sales you enter in eBusiness are matched with the Sales Assist list, so parents no longer receive messages. Parents can also purchase by phone with the help of our customer service team.
Your MyHJYearbook.com portal gives you a real-time overview of how your sales are going, and eBusiness allows you to print reports to help you plan.
HOW IT WORKS
1. The campaign follows best practices for email sales. You can enroll when you are ready, and your list will be included in the next scheduled send. Un-enrolling when you’re done takes just one call.
2. Once parents make a purchase, they are excluded from future emails. If you sell books in school and enter sales in eBusiness, those buyers will also be excluded from future emails. Make sure your eBusiness sales are updated regularly.
3. Posters are included in the kit so you can coordinate your in-school marketing with the email campaign. If you run out of posters, order more from herff.ly/ybk-shop
4. Go to herff.ly/ybk-sales and check out all of the social media and web site graphics. Add them to your school’s web site, newsletters and other communications to parents.
For more information, go to herff.ly/sales-assist
HOW TO ENROLL
1. Get your name list with parents’ email addresses. (See p. 4 for more detail.)
2. Contact your rep to enroll and help you upload your list to eBusiness and eDesign.
Keep your eBusiness records updated for best results.
YEARBOOK ORDER CENTER
Never handle cash again with YearbookOrderCenter.com. It’s easy for parents to find your school and make a purchase. You can sell books and ads through the same site with Online Ad Creation, and eBusiness makes it easy to set up. Secure credit card sales and payment plans are available through PayPal.
SEND AND SELL
In addition to Sales Assist, eDesign users can generate their own customized email campaigns. Using your uploaded name/email list, you can send reminders to parents who have not purchased a book. Take advantage of our pre-loaded email messages or make your own.
Check out the video tutorials under the eDesign Help menu. Don’t forget to enter your in-school sales into eBusiness, before sending.
ADDITIONAL TOOLS TO HELP YOU SELL
Customize your marketing and sales efforts to fit your school. While we have included samples in this kit, additional resources are available on herff.ly/ybk-shop
Posters, banners and yard signs help with:
• Book sales
• Senior ad sales
• Price increases
• Distribution day
• General yearbook awareness
• Last chance sales
FOLLOW THIS FORMULA TO FORMAT THE URL: yearbookordercenter.com/index.cfm/job/XXXX. Replace the XXXX with your job number.
06
ADDITIONS
PUT SOME BLING ON IT
Consider these enhancements to add value to your yearbook and to help generate income for your program. Contact your rep for ordering and pricing details.
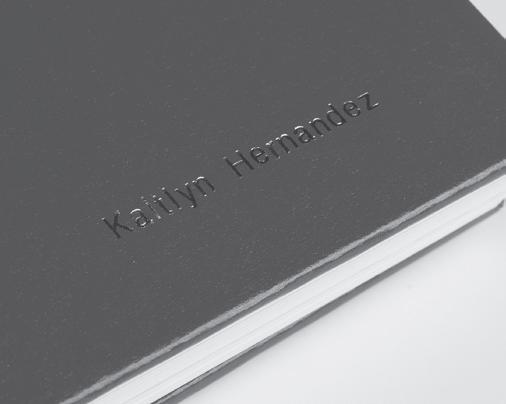
NAME STAMP
With this personalization option, the student name is stamped on the cover in foil. Printing student names on the cover leaves no question about whose book it is.
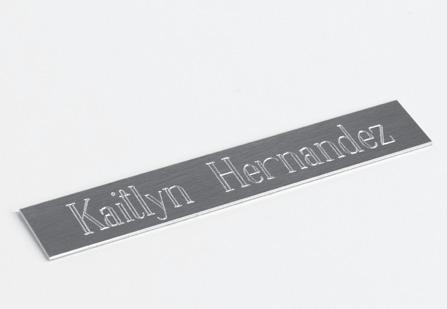
ENGRAVED
NAME PLATES
Students can order metal plates engraved with their names and icons in one- or two-line configurations. These are not recommended for soft cover books.
PLASTIC JACKET
Hard-cover yearbooks stay protected and clean with these affordable plastic dust jackets.

AUTOGRAPH SUPPLEMENTS
Plain or printed eight-page autograph supplements can be added with Kleenstick ® self-adhesive tape.
For more information, visit herff.ly/ybk-add-ons
WORLD YEARBOOK
Designed for middle/high school readers, this 16-page supplement documents events that made history during the school year.
OUR WORLD
A scaled-down version of World Yearbook intended for younger readers, the four-page Our World supplement features photos and captions about this year’s most interesting news stories.
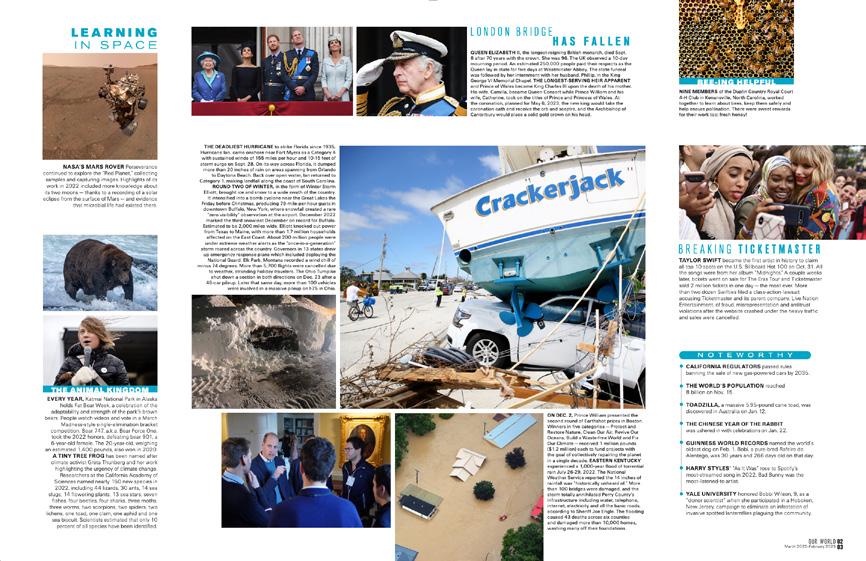
If you purchase either of these for your entire order, you may choose where you want it to appear in your book (between signatures). If you don’t designate an insertion location, it will be added following the last page of your book. Also, either supplement can be purchased as a stand-alone item with Kleenstick ® self-adhesive tape for easy, permanent placement the yearbooks.

7 07
SIMPLIFY THE PROCESS
1. FILL YOUR CALENDAR
Make the rounds and find all of the dates that affect your school and your yearbook production schedule.
PLANT DEADLINES
Know your page submission deadlines. Meeting deadlines are critical, not just for keeping your program running smoothly, but also for keeping your shipping and delivery dates secured on our printing plant’s schedule. Your deadline schedule can be found on MyHJYearbook.com under Overall Book Progress > Plant.
Mark the plant deadlines on your own calendar, for sure, but consider making another set of deadlines that you share with the staff. You’ll want your staff to complete pages a few days before the plant deadlines to give yourself time for proofing and submission.
Staff deadlines and mini-deadlines — Depending on how your staff is organized, break deadlines into bite-sized pieces. After an initial training period at the start of school, we recommend that teams submit stories and spreads weekly or bi-weekly. You can submit pages at any time before your deadline, as well.
INCLUDE ON CALENDAR:
• Spread deadlines (for staffers)
• Staff workdays
• Book sales events
• Price increase dates for tiered pricing
• Ad sales and submission deadline
• Picture and make-up picture day(s)
• Club picture day(s)
• Sports team photo days (fall, winter and spring)
• Major sports events
• School activities (dances, rallies, assemblies)
• Theater/music/dance performances
• Club/organization events
• School holidays
Get these dates from your rep:
• Cover and endsheet due dates
• Copy count deadline
• Personalization and accessory items deadline
2. MAKE IT AN OFFICIAL RECORD
A yearbook serves as the official record of the school year. Your goal should be to include every student, faculty and staff member in the book as many times as possible. Although every book is different, here are some items you may wish to include:
BASIC COVERAGE IDEAS:
• Individual portraits for students and faculty
• Coverage of every sport and academic area
• Major events of the school year
• Club and organization photos
• Sports team photos
• Scoreboards with opponents, wins and losses
ALSO CONSIDER:
Title page (p. 1): Book title, volume number, year, school name, complete address, city, state/province, postal code. Many schools include number of enrolled students and faculty/staff members.
Table of contents printed on front endsheet. Dividers can include a table of contents for the section that follows. Bylines for writers and photographers. Folios with page numbers, section title and page or spread topic.
Index at the back of the book, before the colophon and closing. It should help readers locate any included subject or topic, such as all people, academic topics, advertisers, clubs, sports and events.
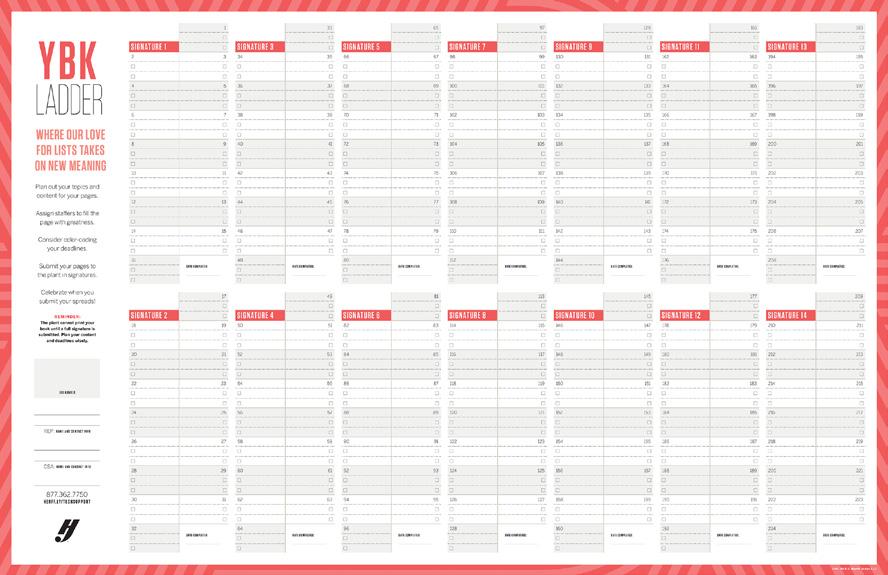
WALL LADDER, DESK LADDER AND CALENDAR are included in kit to help you plan.
08
getting organized early helps smooth the journey
3. BUILD A LADDER
In yearbook, the ladder is simply a chart that helps you plan what will go on each page so you can track pages and spreads as they are completed and finalized. See p. 11 to start planning, then use the wall and desk ladders in this kit to chart your coverage for the year.
ORGANIZE YOUR BOOK:
• Traditional coverage organizes coverage into areas that students readily recognize: academics, clubs/ organizations, people, sports, student life and reference.
• Chronological coverage tells the story of the year the way the year actually unfolds. There are several ways a staff can use a chronological approach to covering the year: seasonal, monthly, weekly are popular. Sometimes staffs will organize only part of the book chronologically.
• Umbrella coverage combines events, groups and features under the umbrella of a single unifying concept or idea. It is important to give full content lists on the endsheet and/or division pages to help your reader navigate this style of organization.
Refer to How to Yearbook: Covering Your School and LearnYBK.com for more help.
SET UP YOUR LADDER IN eDESIGN
1. Log in to eDesign: Go to MyHJYearbook.com Click on the Design menu and choose Pages. You’ll see all the spreads in your book with thumbnail previews and information about each page.
2. Create topics and assign to pages: You’ll want to create topic tags for each page in your book. You can use these same topics to tag photos to save time. See the tutorial in eDesign Help on creating topic tags.
3. Assign topics to pages: See the tutorial in eDesign Help on setting up the ladder.
4. Assign deadlines and staff members: If you are working with a staff, assign each staffer to specific pages in the ladder. See the tutorial in eDesign Help on setting up the ladder.
4. FIND YOUR WOW
There are so many ways to make your yearbook stand out each year. Once you have a plan for your content, it’s time to really have some fun.
Whether you choose a new cover material or special paper, laser-cut endsheets or glitter UV coating, take some time to talk through the options with your rep. You might be surprised how some simple and inexpensive additions increase your sales and add to your book’s value.
WAYS TO DESIGN A COVER
1. CHOOSE A PREDESIGNED COVER
Take your pick! We have more than 100 professionally designed covers ready to go. We’ll add your school name, and everything else already taken care of.
2. CREATE YOUR OWN COVER
You can design a litho cover in eDesign using the cover template. Start fresh with the blank cover template and get creative. Harness the power of Canva to make your book stand out. Or, select a cover template from our Book Styles catalog. From cover to inside the book, you can start with these and customize as you wish.
3. MEET WITH A COVER ARTIST
You can have a custom cover designed by a plant artist or get assistance with a design you’ve made in eDesign for an additional charge. Check with your rep or CSA for eligibility.
BASIC BOOK ELEMENTS:
• Cover: Theme, book title and year.
• Endsheets: Heavier sheets of paper that attach pages to the cover. Endsheets may be plain — or better yet, designed to reflect the theme. The front endsheet should contain the table of contents.
• Spine: As space allows, school name, city and state. Then, year and volume. Then, book name and theme, if it fits.
5. DESIGN MADE EASY
Follow the tips on p. 12–13 of this booklet.
9
09
PLANNING AHEAD
PLAN YOUR YEAR
DATE: DEADLINE:
Confirm all deadlines listed below
Last day for credit on last year’s unsold books
First deposit due $
Cover/endsheet specs and artwork due Confirm page count pages due pages due
Final copy count due pages due
Personalization lists due (discontinue sale of personalizations)
World Yearbook, autograph supplement and plastic cover orders due pages due pages due
Second deposit due $
Set up planning appointment for next year
Final invoice due $
Requested ship date
Preferred arrival date
Distribution day
TOTAL PAGES: TOTAL COPIES:
DEADLINES EXPLAINED:
PAGE DEADLINES: Page deadlines are usually based on what was done last year. If you see a conflict with a date or would like to redistribute pages on deadlines (within reason), let your rep know by the first week of September for spring delivery books and the first week of October for summer or fall delivery books. Your rep will then submit your request to the plant for approval.
COVER AND ENDSHEETS: Contact your rep when you receive your cover and endsheet proofs. Return proofs to the plant within 10 days of receipt.
CONFIRM COPY COUNT: If you plan to increase or decrease your copy count, it’s important to make that decision by the final copy deadline. Let your rep know if you’re planning to make a change.
CONFIRM PAGE COUNT: If you increase or decrease your page count, let your rep know how you want to adjust your deadlines. Remember, your page count can affect your cover/spine.
PERSONALIZATIONS: These include name plates and name stamps. Access your personalization list in eBusiness. Submit your list to the plant on time to avoid late charges, but make sure to double-check spellings first. In eBusiness, go to Run Reports > Sales Reports > Personalization > Send Personalization to Plant.
CREDIT FOR OVERRUNS: Herff Jones often sends more copies of the yearbook than ordered. You can use them to replace any books damaged in transit, or sell them on distribution day. If you don’t sell them, you can return them for credit.
SPECIAL PROMOTIONS: Sometimes schools are eligible to participate in promotions to receive extra books to sell. Please check with your rep as these books are treated differently than overrun copies, which are truly extras.
TIPS FOR SUCCESSFUL DEADLINES:
• Don’t sit on ready-to-go pages. Not only should you send pages as soon as they’re ready, but you should also try to submit in a complete 16-page grouping, also known as a signature.
• Give your staff an earlier completion date compared to the plant’s submission deadline dates so you will have room to breathe when a staffer doesn’t have pages ready on time.
• Celebrate! When deadlines are successfully met, reward your staff. Incentives do wonders for motivation (and may also lead to finishing subsequent deadlines on time, too!)
• Checklists and other tips are at your service at herff.ly/ybk-checklists. Use these to help prep and guide if you’re in need of an extra boost. You can do it!
10
STEP-BY-STEP LADDER PLANNING
Just as you wouldn’t build a house without a blueprint, the ladder helps you start your yearbook planning. This is the page-by-page listing of the book’s contents. The number of pages to include is based on financial considerations and the number of students at the school.
Some books may have fewer pages dedicated to nonportrait pages, but the formula here follows a traditional coverage approach and is meant simply to guide you. Start by determining the number of pages in your book, and look through previous books and see how they’ve been organized. See How to Yearbook: Covering Your School for more details.
Coverage, which means including as many students in the yearbook as possible, should be:
• Complete and accurate
• Fair and balanced
• Fresh and lively
BALANCE THE BOOK
Organize pages beginning with the most popular section, followed by a less popular section, followed by a more popular section, and so on to maintain maximum interest. Consider varying the order of sections from year to year. Chronological books sometimes combine several sections.
Total pages in the yearbook
Theme pages
Title page/closing page
Opening
Dividers (if used)
Closing
Advertising (optional)
Index
Magazine/supplement (optional)
(Subtract the totals above from the total book pages to figure pages available for content.)
Pages available for content
Note: Some schools subtract portrait pages from the pre-content total, as those may be the same from year to year. To make the math work, add five percent to each remaining section.
SAMPLE FORMULA USED BY A LARGER BOOK:
Student life: 25 percent
Pages available x .25
New coverage ideas for this section:
Academics: 15-20 percent
Pages available x .15
New coverage ideas for this section:
Organizations: 10-15 percent
Pages available x .15
New coverage ideas for this section
Sports: 15-20 percent
Pages available x .20
Pages per varsity sport
Pages per junior varsity sport
Pages per freshman/sophomore sport
New coverage ideas for this section:
Portraits: 25-30 percent
Pages available x .25
Seniors/Eighth
Juniors/Seventh
Sophomores/Sixth Freshmen
Faculty/administration/staff
New coverage ideas for this section:
TOTAL CONTENT PAGES:
11
GEAR UP FOR eDESIGN
We want you to establish a process you enjoy as you create a yearbook you love, so we’ve loaded MyHJYearbook.com > Learn with resources to equip, educate, encourage and even entertain. We’ll support you through it all — from Day 1 until Distribution Day.
1. SET UP YOUR STAFF
This is an important step in setting up your book because your students will not be able to access it until you activate them as a user for this year’s book.
1. Access Staff Setup: In eDesign, click the Settings tab to open Staff Setup. Students do not have access to Staff Setup. See the tutorial in eDesign Help on setting staffers.
2. Update current staff: Give the returning staff members access to this year’s book, and update any roles from Staff to Editor. Don’t forget to delete former staff members.
3. Create logins for new members: Enter the staff member’s name. Create a username and password. Change the role to Editor or Adviser if applicable. If it is an adviser, enter his/her email address. Share the login information with the staff member and click “Add Staff” to save and close the window.
4. Assign deadlines and staff members: If you are working with a staff, assign each staffer to specific pages in the ladder or auto-assign staffers to all pages. See the tutorial in eDesign Help on setting up the ladder.
LEARN MORE
Access through the Learn menu of MyHJyearbook.com
2. PLAN YOUR LADDER AND DEADLINES
This step creates the organizational structure of your book and helps you make sure you’ve allotted pages for everything you want to include. See p. 9 on creating your ladder in eDesign.
Making a plan at the start of the year will go a long way toward minimizing stress and maximizing productivity. Assigning a deadline to every page in the ladder helps you achieve five goals:
• You can distribute your work throughout the year.
• You can filter your ladder to check for any pages you haven’t accounted for.
• You can filter the ladder by deadline to see if you’ll have enough pages to meet each deadline.
• You can reduce confusion about a page’s due date because staff members can easily see the deadline in eDesign.
• You can filter the ladder by deadline to focus your attention on pages that are due.
3. DECIDE WHICH LAYOUTS WORK BEST FOR YOU
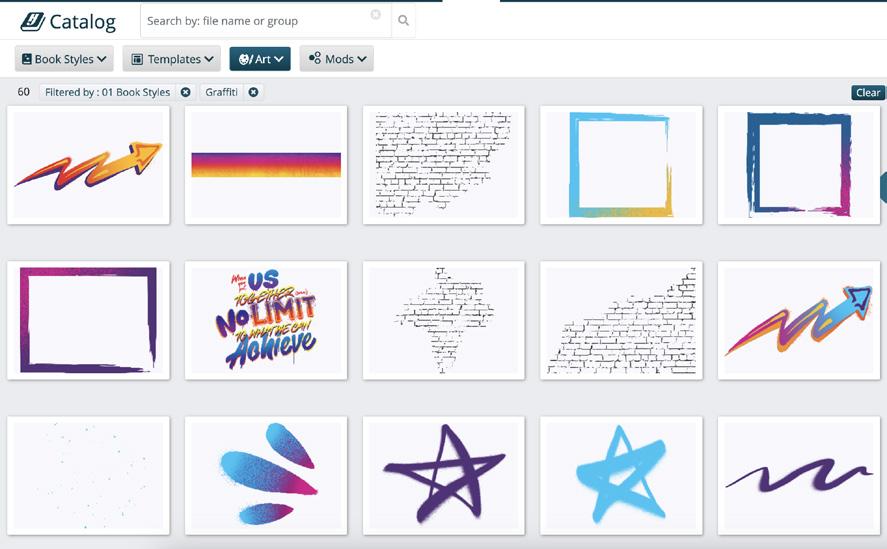
We offer a variety of predesigned layouts for both covers and inside pages. Activate them in the eDesign Catalog, and drag and drop them on pages. Then you can modify them any way you’d like. You may also create your own custom layouts for a new look.
• Book Styles — For advisers who don’t want to start with a blank page, Book Styles include everything needed to build a beautiful yearbook, including covers, templates, carefully matched fonts, color palettes, art and mods. Activate the Book Style of your choice through the Catalog.
• Square OneTM— Our system for teaching graphic design basics, Square OneTM gives you all the templates and mods you need. Begin on paper using our layout planning resources or on screen. Go to the Design section of LearnYBK.com or ask your rep for more information about Square One.TM

• More Templates — The eDesign Catalog holds a wide assortment of additional templates for building a yearbook that suits your school. Load trendy topics or interrupter spreads and tweak them to make them your own.
eDESIGN CATALOG is home to templates, art and mods.
ONLINE HELP
eDESIGN HELP: MYHJYEARBOOK.COM > LEARN
• Curriculum Videos and Worksheets
• Video Tutorials
• PDF Guides and Tip Sheets
INDESIGN HELP: MYHJYEARBOOK.COM > LEARN
• Video Tutorials
• Step-by-step Instructions
• Working with Square One TM
12
4. ACTIVATE THE COLORS YOU WANT TO USE
Don’t pick colors based on how they look on screen nor based on how they look when printed from your desktop printer. These do not accurately show what colors will look like when printed on a printing press.
Instead, look at the colors on the color poster. Make sure to refer to the poster that matches the paper you plan to use (gloss or matte). Each color has a CMYK code that matches colors in eDesign (for example, C=0 M=63 Y=73 K=0).
C is cyan M is magenta Y is yellow K is black
Make note of the CMYK numbers and activate those colors in Book Setup in eDesign. Watch Activating Colors in eDesign Help for more. When you add colors in eDesign, you can name them for easy reference.
COLORS IN CANVA
If you want a color in a Canva graphic to match a color created in eDesign, the most reliable way is to go from a chosen CMYK color and use a conversion tool to translate the CMYK blend into a hex code
Along with listing the CMYK values, the color poster provides each color shows the closest equivalent hex code. Select the color you want and activate the CMYK color swatch in eDesign. When you create a graphic you want to match in Canva, use the hex code from the poster.
6. IF DESIRED, PLACE ART ON PAGES
The Art Library is packed full of graphics available to be used with your book. Some are matched with the Book Styles covers and templates, and other pieces are grouped by topic or only a cover. Browse the tabs to find what interests you.
You can also access an expansive variety of searchable and customizable art and backgrounds in Canva. After customizing it, you can save it from Canva directly into your Art Library.
There are videos in eDesign Help that show how to activate art in the Library.
7. GET TO WORK!
You can find eDesign tutorials and guides to support each step of learning and using eDesign. Access the eDesign Help Center in a variety of ways.
• Bookmark HJHelpCenter.com
• MyHJYearbook.com > Learn > eDesign Help
• In eDesign, click the Help menu to search or click out to the Help Center
eDESIGN CURRICULUM is a set of eight lessons designed to give students a strong understanding of eDesign and familiarize them with many of eDesign’s great features
5. SELECT FONTS AND CREATE STYLES
Activate only the fonts you want accessible to your staff on every page. To view our collection of over 600 typefaces, look for your Font Book in your kit or view in eDesign.
Under the Settings tab, click Design Styles to find Fonts. If you activated a Book Style or added templates to your library, you can use the fonts as-is or you can modify them.
You’re not required to use character styles, but they are an easy way to apply consistent text formatting and help staffers work more efficiently. Use the style guide on the last page of this booklet to make your plan, then add them into eDesign. There are video tutorials in eDesign’s Help Menu that show how to create and use Character Styles.
VIDEO TUTORIALS LIBRARY provides access to all the video tutorials that cover eDesign’s powerful features. Most of the “all staff” tutorials are contained in the eDesign Curriculum.
PDF GUIDES are available to cover design tips, Canva and strategies for successful deadline completion. Find tips from the pros for next-level design.
INSPO + MORE
Get inspired through resources at herff.ly/ybk-resources
13
COLOR POSTER found in the kit.
PROOF. PREFLIGH T. SUBMI T.
THE e DESIGN WORKFLOW FOR PAGES
A page in eDesign passes through several stages before it is submitted. The stages help you monitor progress and track what’s been done to each page. In eDesign Help, search ladder, proof or preflight to view related video tutorials.
No edits have been made. The page moves to the Edited stage after changes are made and saved on the page. Only the people assigned to the page or the adviser can edit a page.
A page remains in this stage while the assigned staff members are working. When the page is ready for review by the adviser or editor, click the Proof button.
In this stage, edits can only be made by the adviser and assigned editor. Move a page to the next stage by clicking the Preflight button.
The page has been proofed and is ready for preflight by the adviser.
1. Go to the File menu and choose Show Preflight.
2. Open the adjoining page to preflight the spread.
3. Review any preflight alerts and make corrections if necessary (see the list on this page).
In this stage, the page has been proofed, preflighted and approved by the adviser. It can only be unlocked by the adviser. Pre-Submit is the final step before submitting to the plant.
The adviser has submitted the page to Herff Jones, and the page has begun its process at the plant.
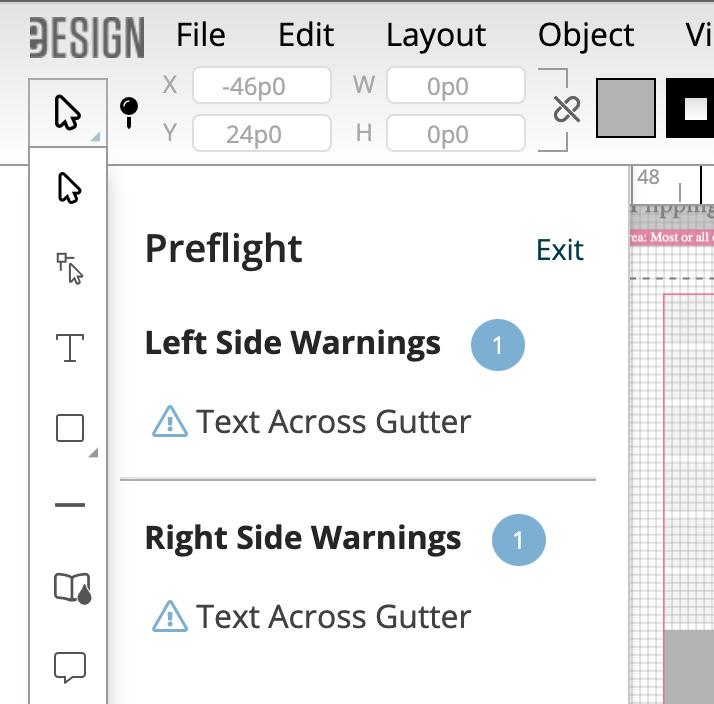
UNDERSTANDING PREFLIGHT
To open Preflight, go to the File menu and choose Show Preflight Check. Alerts appear in a vertical bar to the left of the spread. If you click on the alert, eDesign selects the item on the page the alert references. If you hover over an alert, eDesign gives a brief description of the issue. The different alert types are described below.
WHEN A PAGE IS LOCKED
WHEN IT NEEDS MORE
WORK: Use the buttons in the ladder to move a page back to Edited to allow the staff member to edit it again.
PADLOCK ICON: Only one person can edit a page at a time. A padlock indicates the page is currently being edited by another person. An adviser or editor can “force unlock” a page from the ladder if needed.

Preflight issues definitions:
• Text across the gutter: Indicates a text frame that touches or crosses onto the adjoining page. Make sure no text will be lost in the gutter when the book is bound.
• Bleed object: Identifies an object that is very near the edge of the page but that does not fully bleed off the edge. Bleed elements must extend to the outside edge of the 1-pica red border around the spread.
• Image not filling frame: Indicates an image that does not completely fill the photo frame if the frame has a stroke applied.
• Low-resolution image: Appears when a photo’s resolution is too low for the highest print quality, indicating the photo will be fuzzy. A resolution warning also appears on the image.
• Lorem Ipsum text: Identifies placeholder text — starting with Lorem Ipsum — that has not been replaced with actual text.
UNEDITED EDITED PROOF PREFLIGHT PRE-SUBMIT SUBMITTED
14
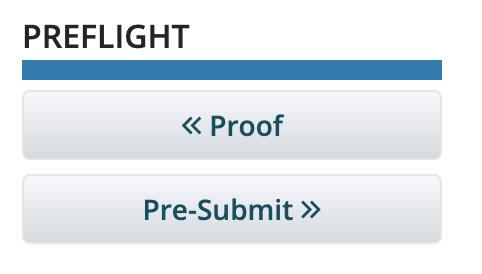
IMPORTANCE OF PROOFING
As part of the submission process, you must create a PDF of the final version of your page before it can be moved to Pre-Submit.
Once moved to Pre-Submit, you’ll be able to review the Customer Approved PDF. Be sure to proof this page prior to submitting.
SUBMITTING YOUR PAGES
Once a page is in the Pre-Submit status and a final PDF has been reviewed, the page can be submitted.
You do not have to submit all the pages for your deadline at once. You can submit smaller batches as you complete them.
SUBMITTING ONE PAGE AT A TIME
Pages can be submitted individually:
1. The page must be in the Pre-Submit status.
2. Select your page, then click the Submit button.
MULTIPLE PAGE SUBMISSION
Submit several pages in Pre-Submit mode:
1. Hold down the Ctrl key on Windows or the Command key on Mac and click to select the pages to be submitted. You can also use Shift to select a group of pages.
2. After selecting all the pages to submit, click the Submit button.
3. Add in any special instructions as needed.*
4. Click the OK button.
EXPRESS SUBMIT
Quickly submit multiple pages at one time:
1. Click Filter > Page Status > and check the box for Pre-submit
2. The screen will only show pages in PreSubmit.
3. Click the Express Submit button, fill in any special instructions, and then click Submit.
*Special instructions are reserved for technical printing requests (special lamination, special paper stock, etc.). Discuss these options with your rep or CSA.
ONLINE HELP
Access through the Learn menu of MyHJyearbook.com
FILTER YOUR LADDER
The Filter menu in the Book module allows you to filter your pages by their production states. Also helpful is the Show My Pages filter that allows staff members to see only the pages assigned to them.
SAVE IT FORWARD
After you submit your final pages, you’ll be given the option to transfer templates and settings to the next year’s book. You also have the option to use Save it Forward to transfer other settings such as your list of topics, ladder designations, staff, etc. Refer to eDesign Help for more information.
CHECK EACH SPREAD BEFORE YOU SUBMIT
WORDS:
Read every word. Spellcheck is great but not perfect.
Check name spellings and grade designations. Every identifiable person should be identified.
Reconsider headlines and copy, making sure there are no double-entendres or inside jokes.
Make sure every page has a folio with the correct page number, page topic and section.
Make sure all stories are credited.
Check paragraph styles and font sizes.
Look for widows and orphans — single words hanging out at the beginning or end of a column.
Make sure there’s no overset text and that stories end where they’re supposed to end.
DESIGN AND PHOTOGRAPHY:
Reconsider and refine visual-verbal connections. Do the headline and photo go together?
Are photos high-res and in focus? Is everyone facing to the gutter (center of the book)?
Speaking of the gutter, pay attention to anything that crosses — never text — but generally avoid putting people in the gutter.
Unless you’ve decided to do something different, the dominant photo should cross the gutter.
Make sure all photos are credited. Follow a consistent style for crediting professional photographers and stock image services.
Check the eyeline and alignment on the spread. Zoom WAY in to check.
Does caption placement makes sense? Usually, start with the dominant photo and go clockwise around the spread. Lead-ins help to match the caption with its photo.
Scour the spread for trapped white space and consistent internal spacing.
Make sure there are no stray boxes, text or otherwise. Pay attention to the cut lines on your template.
Delete any backgrounds behind picture boxes. Find more checklists at herff.ly/ybk-checklists
15
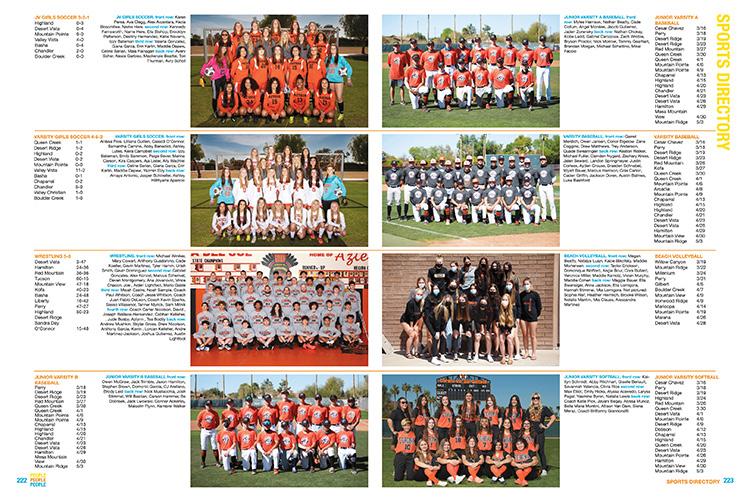
FOR YOUR REFERENCE
The reference section makes the yearbook a historical record that documents your school in a broader sense. If ever there is a question about the year, it should be answered in the reference section. Put in the effort to make it worthwhile.
Refer to How to Yearbook: People and Index and LearnYBK.com for more help.
PORTRAITS
The people section covers everyone in the school — students, faculty, administration and staff. Think about leaving extra space on each page to cover individuals who might not be featured elsewhere in the book.
GROUP PHOTOS
Any and all up-front organization will help you in the end. For example, get rosters for teams and clubs from coaches and sponsors before the photos are taken. For group photos, begin at the front and work your way to the back, identifying from left to right, just like we read. Label the rows “Front Row,” “Row Two,” “Row Three” and so on ending with “Back Row.”
To create the most accurate record, use “Not Pictured” to identify any team members not included in the group shot.
SCOREBOARDS
Scoreboards should include the score and the name of the opponent. Your staff may also choose to include the date and whether the game was home or away. The key is to be consistent so all sports are the same.
INDEX
The index is a great way to find where each student is featured in the book. Every individual, topic, subject area, sport, group and business mentioned in copy or pictured in the book should be in the index.
Index Builder in eDesign makes it easy to create a complete index for your book.
COLOPHON
A list of the technical printing information for the book, including price, number of copies, colors, type families, photography company and awards won by the previous year’s book.
COLOPHON CHECKLIST
School name and address
Volume number
Name of printer, address and HJ rep
Theme and origin of theme
Submission process
Number of copies and pages printed
Price(s) of book
Cover and endsheet materials
Weight of paper used
Typefaces, weights and sizes
Special techniques
ADS
Advertising is any paid space in the yearbook, regardless of the size or content. Remember all advertisements must visually appeal to the reader.
Types of ads:
• Senior/baby ads/8th grade
• Club or organization ads
• Patron/sponsorship ads
• Congratulations ads
• Friendship ads
Computer program(s) used
Photography equipment used
Previous award(s) received
Staff and individual recognition
Editor(s) and/or adviser note
Adviser note
Acknowledgments, thank yous Find more checklists at herff.ly/ybk-checklists
CORONA DEL SOL HS // Tempe, AZ16
TEXAS HS // Texarkana, TX
THE PORTRAITS PROCESS
Portraits are incredibly important, so set aside plenty of time to ensure all portraits are included in the right grade or class and that all names are spelled correctly.
Refer to How to Yearbook: People and Index and LearnYBK.com for more help, then check out the tutorials in eDesign help.
STEP 1: OBTAIN THE PORTRAIT FILE
Obtain the PSPI file from your school photographer. Use the one made specifically for yearbook. Some photography companies send a CD, and others send a link to download the files.
STEP 2: UPLOAD THE PORTRAIT FILES
In the Portraits section of the eDesign Library, go to the Import/Export menu and choose Import PSPI File to upload school photographer and eShare submitted portraits.
If a student or parent submits an additional portrait, it can be individually uploaded as needed. Please note these do not upload with name and grade information.
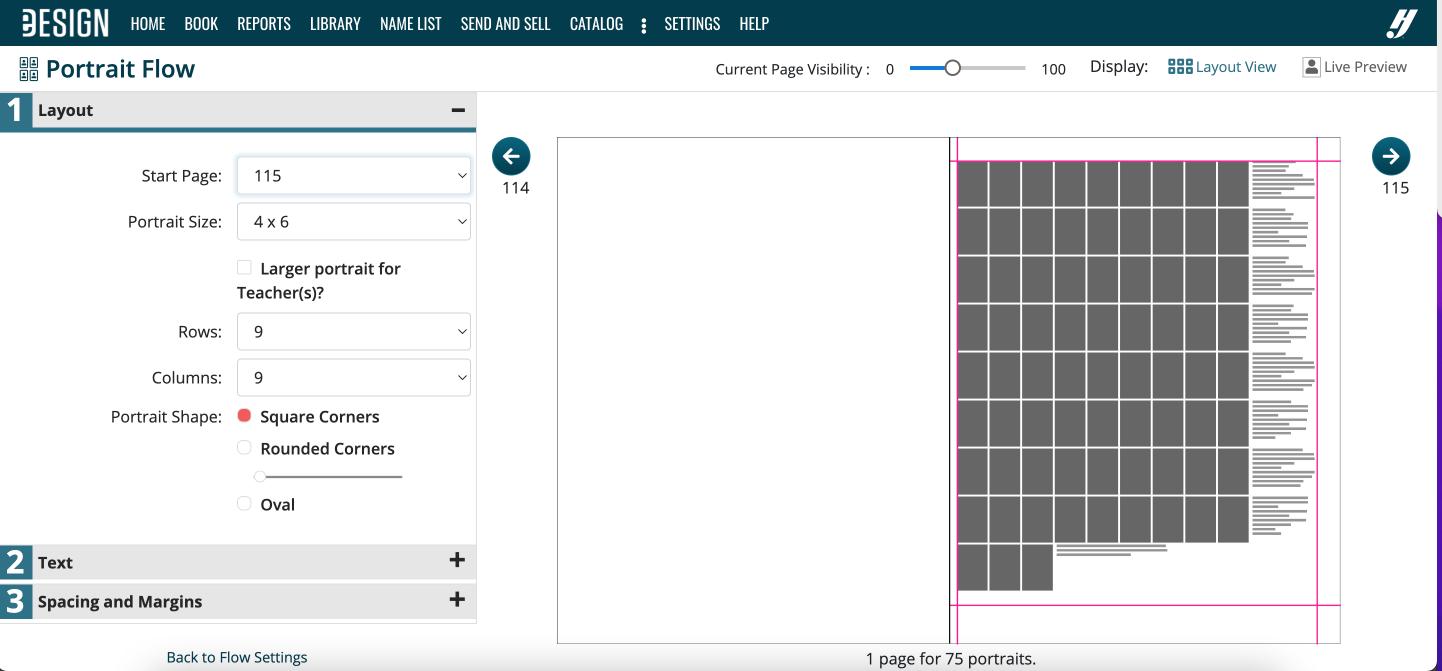
STEP 3: FLOW THE PORTRAITS
Use eDesign’s Portrait Flow to place portraits and names onto the pages. It flows them in alphabetical order in groups you designate (by teacher or by grade). Do not put empty portrait frames onto pages first. eDesign does it for you.
STEP 4: PROOF THE PORTRAIT PAGES
Either print the portrait pages or email low-res PDFs to teachers or others able to assist:
• Any misspelled names?
• Any missing portraits?
• Any portraits with the wrong names?
• Any student listed in the wrong grade/class? There is also an option to print directory proofs of your portraits. See eDesign Help for more info.
STEP 5: CHANGES IN PORTRAIT LIBRARY
After proofing, edit the portrait data in the Portraits Library, NOT on the pages.
Use a consistent format for grades and teacher names. Teacher names are only needed if you plan to group students by teacher in the book.
STEP 6: RE-FLOW THE PORTRAITS
A red alert will appear next to any group in Portrait Flow that needs to be re-flowed. Click Edit beside the portrait flow you need to re-flow.
Portrait Flow remembers all the settings from when the section was last flowed. Re-flowing the section will put the changes you made on the pages. Changes made in the Library will not go onto the pages until you re-flow.
UNDERSTANDING THE PSPI FILE
Professional School Photographers International (PSPI) is an organization of photographers who set the standards for how school portraits should be shot and processed for yearbook publishing.
It should always be setup with the following:
1. Index file should be saved as a text (tab delimited) file and MUST be named “Index.txt” to work properly. It should contain these six columns:
A: Disc/Volume Name
B: Folder Name
C: Image Name (including extension)
D: Grade
E: Last Name
F: First Name
G: Teacher Name
2. The folders containing images, along with the index file, need to be in a folder together and zipped.
3. The portrait image files should be in RGB color space, JPG file format. 640x800 and 300dpi.
PORTRAIT FLOW WIZARD
The eDesign Portrait Flow wizard walks you through the process of placing portraits and names on pages. Select a page in the ladder, then go to Edit > Portrait Flow to launch.
You can now flow grades, senior quotes or a larger teacher photo.
NAME CHANGES IN PORTRAIT LIBRARY
Always make changes to names and grades in the Portrait Library. Then re-flow the section. If you make changes to names on pages, the changes will be lost if you re-flow.
INDESIGN USERS
InDesign users have a plugin called HJ Panel Builder to make portrait flow easier.
Go to MyHJyearbook.com > Learn > InDesign Help for more.
17
LEARN AND TEACH YBK
1. TAKE TIME TO TEACH
Use the first weeks of the school year to establish the skills and routines to empower students to do the heavy lifting in yearbook. There’s no right or wrong way to teach. Plus, there’s just so much out there! Find what works best for your situation.
Here are two big-picture approaches:
BOOT CAMP STYLE: A three- to six-week boot camp approach consists of teaching yearbook essentials: interviewing, writing, photography and design. The pace can depend on how often your class meets and the size of your program — staff and book size. Some take a couple days during the summer to get started.
• Students begin learning through classroom instruction and independent study with readings, handouts and videos. You can find resources and video sessions within LearnYBK.com
• Each topic is introduced with exercises for students to apply their knowledge and engage in team-building and production. Pairing students helps to discover what teams make sense for your crew.
• Students are given small assignments, such as a feature spread or profile on themselves. An “All About Me” assignment allows students to introduce themselves to the class while applying new skills.
• By the end of your boot camp, students are ready for content or page assignments. It is important to celebrate and encourage your students. This is prime team building time.
TEACH AS YOU GO: With this teaching style, students learn as they begin producing content throughout the school year. Take time in the beginning for the essentials — plan deadlines, develop the theme and create the ladder. Give assignments from the list below and add instruction as needed.
• Copy: This is a story written by a student that includes the subject of a section’s page. Each copy assignment will include specific directions for the type of information needed.
• Final copy: This is the final draft of the copy. Students make and turn in corrections on time.
• Quotes: Each spread requires one or more quotes obtained from students outside the yearbook class.
• Headlines: Each spread is required to have at least one dominant headline package.
• Captions: Students are responsible for writing the captions for photographs on their assigned pages. Every picture needs a caption.
• Photo assignments: Students or assigned photographers are responsible for completing the guidelines set by you.
2. USE YOUR RESOURCES
START HERE: The printed curriculum and LearnYBK. com include a scope and sequence document, which provides a sketch of how to teach yearbook skills. If you’re looking for something a little less intense, check out the quick-start guides at herff.ly/quickstart.
PRINTED CURRICULUM: How to Yearbook is a comprehensive guide to advising. From developing a theme to selling books, it’s packed with yearbook goodness. Written for both advisers and staffers, this 12-section set is ready for you to customize for your classroom. Available through your rep or for order on herff.ly/ybk-shop
ONLINE RESOURCES: Start at herff.ly/ybk-resources for the complete yearbook toolbox. Find classroom tools, marketing and sales graphics and more. Plus, answer keys are available at herff.ly/answerkeys. All ready for you!
VIDEO TUTORIALS: Access our ever-growing library of video tutorials through the Learn menu of MyHJYearbook.com or the eDesign help button.
ADVISER ASSISTANCE EMAILS: Make sure you’re getting these weekly emails from us. They’re filled with timely tips and tricks. We’re making sure you’ll never yearbook alone.
WORKSHOPS: These are a great way for students to begin planning their book during their downtime. Go to herff.ly/ybk-events for details on local, regional and national workshops. And check out our virtual summer workshop!
WHAT IF YEARBOOK IS A CLUB?
Yearbook clubs can be every bit as productive as yearbook classes. However, advisers have to motivate students with a force more powerful than grades. If you have a small staff, a club can supplement the staff’s work or allow students with packed schedules to get involved.
SUGGESTIONS:
• Schedule regular meetings with students to keep their interest. Have students bring snacks for work sessions. A sweet treat is always a great incentive.
• Including bylines for credit to the student who put their time and effort into each spread provides a reward for meeting the deadlines and staying involved.
• Crowdsource photos of events from your school community and create excitement for your yearbook through eShare. Learn more at herff.ly/ybk-eshare
18
there’s nothing like yearbook for teaching life skills
3. EMPOWER YOUR LEADERS
Put your editors in charge. Start each week or class/club session with a quick meeting. Editors lead, asking each department or member of the staff to provide their status on assignments. Adjustments are made while everyone is on-board, and then work begins.
Assign returning staffers a topic they know well. Allow one to two days to prepare a full class lesson. Then, have them teach the class. Everyone should take notes and ask questions. This can develop teaching/mentoring relationships for new staffers.
4. TEAMWORK MAKES THE DREAM WORK
Staff organization varies from school to school and from staff to staff. Assess the situation and choose a hierarchy and organization that fits your teaching style and the students you have on staff.
Check out How to Yearbook: Teams and Leaders for ideas. This is just one staff organization chart we like. In this scenario, teams 1—4 are made up of reporters, writers and layout designers. The photo editor and business editors may also have teams.
5. TACKLE A THEME AND CONCEPT
Think of a theme as a storyline of the year. Themes provide visual and verbal unity for yearbooks. While they might not be obvious to every reader, a book with a theme presents a much better impression than a book without a theme. For theme development resources, see How to Yearbook: Theme and Voice
A GOOD THEME IS:
RECOGNIZABLE: Will students immediately understand the meaning?
REFRESHING: Is it contemporary and different?
REPEATABLE: Can it easily appear on each theme spread without getting old? Can you come up with spin-off ideas?
REALISTIC: Is it appropriate to the students at your school this year? Does it relate to these students and this community?
RELEVANT: Is it relevant to each section of the book? Can the theme introduce each section without being forced? In 20 years, will this theme seem relevant to the year in which it was produced?
If your theme is a storyline, think about what story you will tell. Here are some popular categories:
• We have a great reputation or legacy.
• We celebrate the individual as part of a larger group.
• We celebrate our group identity.
• Location. Location. Location.
• We’re all connected.
• Live in the moment.
6. DON’T FORGET THE BUSINESS SIDE
Every staffer plays a role in selling and promoting the book. Some staffs may not have a dedicated business department, but all staffers help with community buy-in and buying.
If you sell books, involve your entire staff in sales efforts. If your school sells ads, consider setting up an incentive for selling, but make sure grades are tied to their effort, not money.
Need more info? See How to Yearbook: Selling Your Book and herff.ly/ybk-sales.
19
3
1
4
2
ADVISER BUSINESS EDITOR PHOTO EDITOR EDITOR EDITOR TEAM
TEAM
TEAM
TEAM
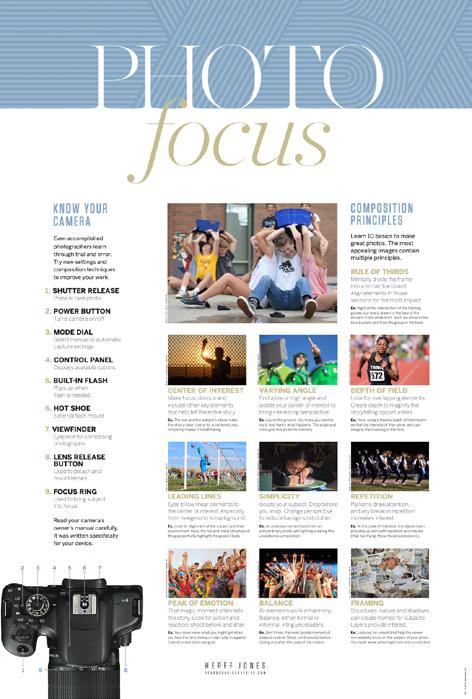
MAKE SNAP DECISIONS
Photos create the biggest impact in your yearbook, so you’ll want to collect the best.
Refer to How to Yearbook: Cameras and Photos and LearnYBK.com for more help.

PHOTOGRAPHY TIPS
DO set your camera’s image size to the appropriate settings.
• If you set it higher, your image will upload slowly, but you can make photos really large in the book.
• If you set it lower, your image will upload quickly, but you can’t enlarge photos much in the book.
DO make high-res PDFs of your spreads in eDesign and zoom in to 300 percent to see image quality.
DON’T take images directly off the internet or from someone’s social media site. There could be copyright and resolution issues.
DON’T ignore DPI warnings in eDesign on low-resolution images. Either make the image smaller on the page or choose another image for that spot instead.

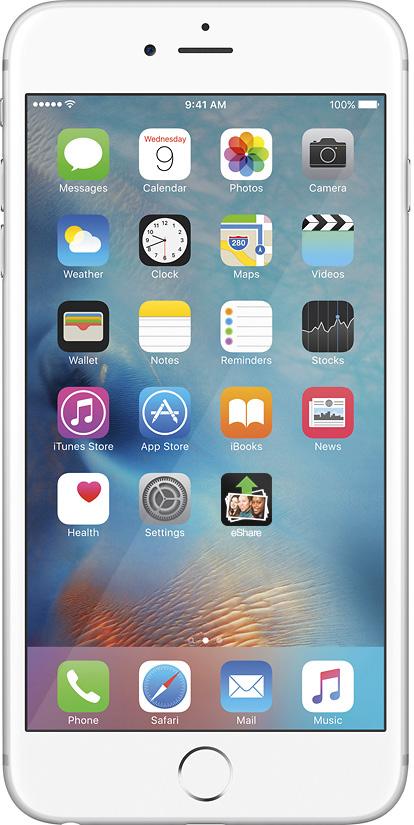
CROWDSOURCE PHOTOS WITH e SHARE
Promote eShare at HJeShare.com or the HJ eShare app through Apple and Android, and make requests in the school newsletter, via homeroom teachers, email or a note sent home with students.
You are in complete control of what’s included in the yearbook, and you can customize submission deadlines and accompanying guidelines. Fully integrated into eDesign, you can transfer submitted candid photos or even portraits right into your eDesign photo library, adding tags and information as you go.
To set up eShare, go to MyHJyearbook.com > Transfer > Get Images from eShare > Preferences.
CHOOSING THE BEST PHOTOGRAPHY
Photos show action, reaction, motion, or emotion.
All photos are clear and sharp, not fuzzy or blurred.
All photos have a clear focal point of interest.
Photos follow rule of thirds and cropped to the focal point.
No photos show only tops of heads and/ or backs.
Action in photographs faces center of the spread.
No individual is featured too many times.
Avoid posed shots (excluding portraits and group photographs) of students “mugging” or “hamming it up” for the camera.
Any photos with DPI warnings have either been replaced, resized or checked on a high-res PDF.
No heads in the gutter. (Photos that cross the gutter do not split faces.) Find more checklists at herff.ly/ybk-checklists


IMAGE QUALITY
The triangle means your photo will be fuzzy at the size it is on the page. Either choose a different photo or make the photo smaller.
eSHARE APP The eShare app is available in the App Store or the Google Play store
20
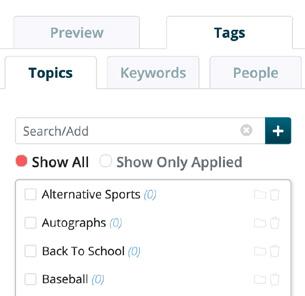
ORGANIZING YOUR IMAGES
Topic tags in eDesign are “buckets” for all photo categories and can be used in multiple ways to save time and keep you organized. Advisers and editors can create topics in the Topics panel in the Library, in the Topics panel in the Ladder and in the Topics area in Book Setup.
TOPICS HELP YOU BUILD YOUR LADDER
Topics are applied to pages in the ladder to designate the content of each page. Just create the topic tag (if it doesn’t exist) and apply it to the correct pages in the ladder.
TOPICS KEEP YOUR IMAGES ORGANIZED
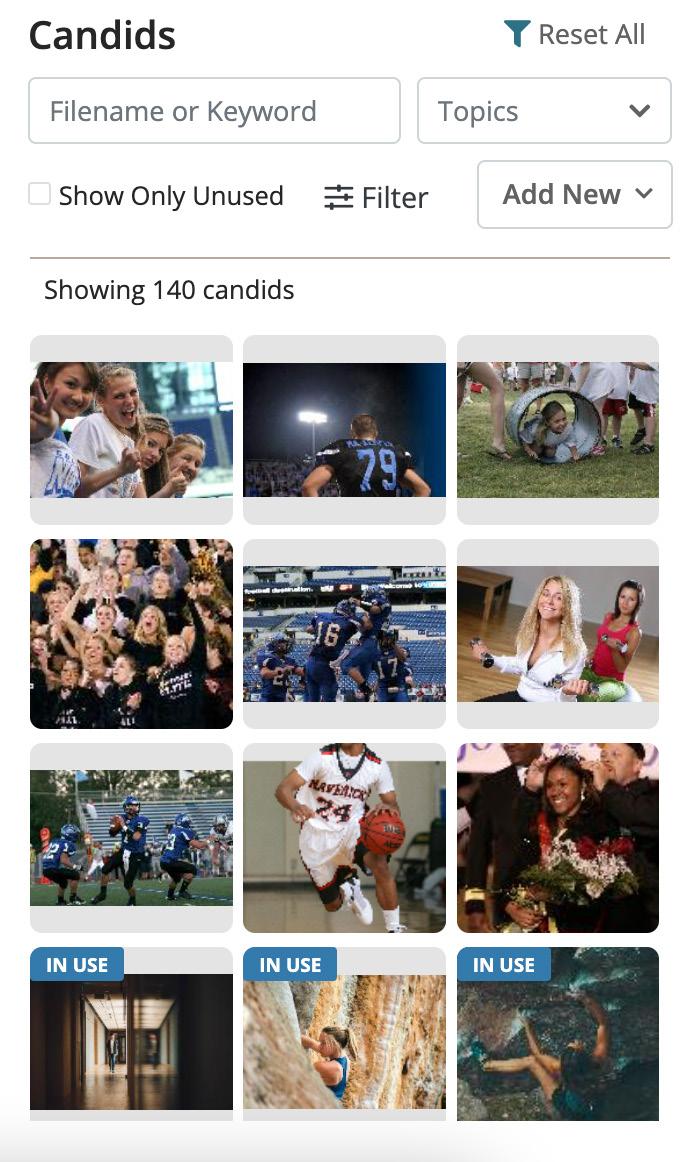
Topics are like folders — but they’re better. Images can be tagged with more than one topic. That way a great image will appear for potential use on multiple pages (making the best use of your photos). The In Use indicator appears if an image is already used elsewhere so you can avoid duplicates.
SHOWING YOUR TAGGED IMAGES
You can easily show the images tagged with a topic much like you open a folder on your computer.
In the Library, go to the Topics tag panel and click the filter icon beside the topic to show only those images.
THREE KINDS OF TAGS
Topic tags are essential for good organization, and you can add names and keywords for additional benefits:
1. TOPICS: Tag images with the same page topics you used to build your ladder.
2. NAMES: Tag images with names in the Name List you import into eDesign.
3. KEYWORDS: Tag images with extra information that might be helpful to you, especially more specific information (the event, the date, the opponent, etc.)
THREE WAYS TO UPLOAD IMAGES TO THE LIBRARY
Before uploading, decide which photos you’re most likely to use. It is best to limit uploads to the best photos.
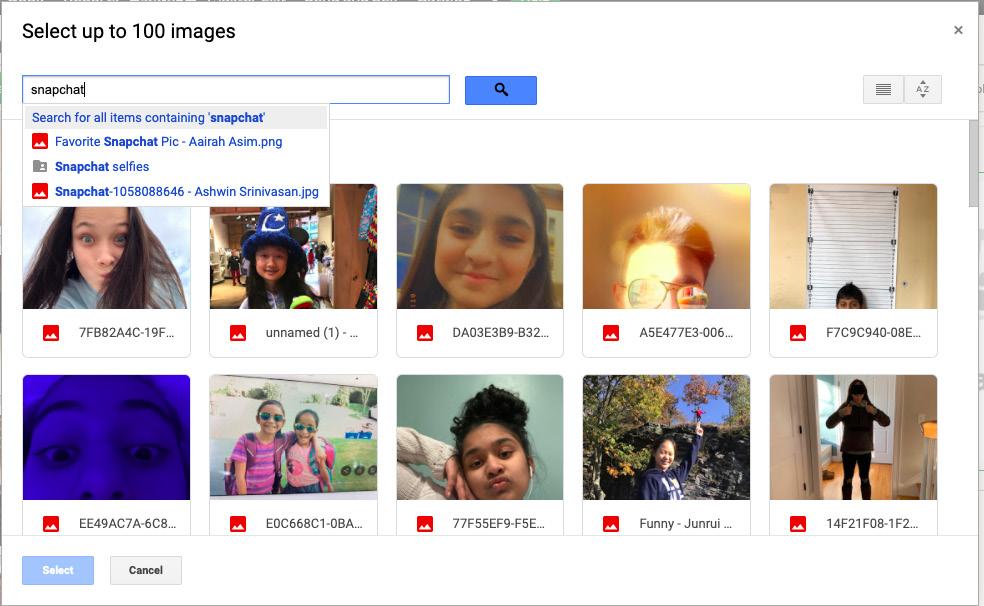
1. IMPORT IMAGES: In the Candids section of the Library, go to the Import/Export menu and choose Import from My Device or Import from Google Drive. You can upload up to 100 images in a batch.
2. DRAG AND DROP: In the Candids section of the Library, drag and drop images from your computer on the Library area. These images will begin uploading. You can upload up to 100 images in a batch.
3. WHILE EDITING A PAGE: When using the Candids section of the Library panel in Page Design, click the Add New option to upload images. You can also drag and drop up to 100 images right to the Candids library panel while working on a spread. If the Library panel is filtered by Topic when uploading, that Topic will automatically be assigned to the newly imported images.
IMAGES LIBRARY
TOPICS: Ms. Smith’s Second Grade
NAMES: May Reddle, CeCe Smith
KEYWORDS: Oak Hill Farm field trip

GOOGLE INTEGRATION
You can upload from your computer or from your Google Drive. Go to eDesign Library > Import/Export > Import from My Device or Import from Google Drive.
21
MAKE AN IMPACT
1. MAKE YEARBOOK A CULTURE
Yearbook is an opportunity to find students who have an array of interests and dreams, and teach them the skills to pursue any career they want. If you make the experience fun and rewarding, students will not only want to join, but return for more of this crazy thing we call yearbook.
ESTABLISH STAFF TRADITIONS
Celebrate birthdays and holidays, recognize good work with simple awards. Work nights = food fests.
BE INCLUSIVE
Make room for visual students and verbal students, for organized kids who can handle the business side and those who just want to interview people.
Recruit vibrant personalities and the kids sitting quietly in the corner. Make yearbook that much more special because it’s made for everyone.
3. GO BEYOND
The goals of yearbook — to include every student, to highlight major events, to be a historical record of the year — put your staff in the perfect position to be an asset to your school and community.


While some staffs include community service projects on their annual to-do lists, others provide free yearbooks to students who can’t afford them. Helping others elevates everyone’s experience.
ONE WAY TO GIVE BACK
If you sell business ads, consider including the base cost of a book in the cost of the advertising contract. Give businesses the choice of either keeping the book or donating it to a student who couldn’t afford one otherwise.
Some staffs call this a “Yearbook Angel” program. Work with your administrators to identify the students who will receive the books. Start with the graduating class.
Provide business donors with a thank you certificate or staff photo, and come up with a way to distribute the free books without making anyone the wiser.
RECRUIT THE BEST
You’ll find everything you need to help promote your yearbook program to potential staffers, and even to administrators, at herff.ly/ybk-recruiting
2. CREATE FUTURE LEADERS
Every student in your room should be educated on professional behavior when in yearbook mode. They need to understand that they represent your program. Those students, plus every teacher in the building, the counselors and the administrators should all be able to list the skills yearbook offers:
• Interpersonal and sales communication
• Interviewing
• Journalistic writing
• Graphic design
• Photography
• Specialized knowledge of the printing industry
• Leadership and team building
• Technology
• Time management and meeting deadlines
4. YOU’RE FAMILY
Years of experience as a yearbook printing company have taught us that nothing captures the energy and excitement at your school like a yearbook filled with photographs and achievements. We want you to know the Herff Jones family is here for you.
From new resources posted on YearbookDiscoveries.com to live webinars and training opportunities, we are always looking for ways to support our advisers.

22
HJ Summer Workshop in Nashville
empower the storytellers of this generation
STILL NOT SURE WHERE TO START?
We have resources curated especially for advisers who have just stepped into the world of yearbook. There’s so much to learn — and teach, if you have staffers — so these resources are meant for both uses.
Visit herff.ly/newadviser. Check out the slideshows to learn the yearbook basics and then teach them to your students in the first weeks of the school year. You’ve got this!
Follow us on social media @HJYearbook, and make sure you are receiving our Adviser Assistance emails every Wednesday.
Make Herff Jones Yearbooks yearbook@ yb.herffjones.com an approved sender in your email settings. Reach out to your rep if you ever need additional support.
SURVIVE THE FIRST MONTH
AS A REMINDER, HERE ARE SOME AREAS THAT NEED ATTENTION EARLY ON.
TEAM BUILDING: Use a combination of short start-ofclass activities with others that require more time to fully involve all staffers. Building group rapport at the start of the year will undoubtedly pay big dividends at stressful times later in the year.
DEVELOP A THEME/CONCEPT: Either begin the process of brainstorming theme ideas or present and develop ideas started at summer workshops.
LADDER BUILDING: Be sure to include all staffers in the brainstorming process to help expand coverage where needed, or curtail coverage that has been overextended in previous years.
BUDGET REVIEW: Money matters are an integral part of the yearbook experience for students. Everyone on staff should have a clear understanding of how much it costs to run the yearbook program and how funds are generated.
BOOK SALES PROMOTION: Be sure students and parents know when they may buy the yearbook, along with where and how much. Whether book sales duties are led by the yearbook business manager and a small committee of staffers or the entire staff, be sure promotions are clear and frequent.
AD SALES CAMPAIGNS: To help keep yearbook prices as low as possible for students and to help add enhancements to the publication, money from ad sales may be an essential part of the overall income.
TRAINING SCHEDULE: Establish plans to train new staffers and refresh scholastic journalism concepts with returning staffers.
TECHNOLOGY CHECK-UP: Be sure all computers and cameras are in working order and ready.
GATHER SCHOOL LISTS: Student enrollment names and schedules will be useful for name checking and also with locating students for interviews or other communication. Start strong with this info in hand.
MEET PORTFOLIO: THE BEST OF HERFF JONES
This annual publication compiles all of our best examples — from covers and individual spreads to overviews of some of the top books being produced.

Our family of staffs, spanning our international network, is known for innovation and for leading the way to produce new kinds of thriving publications suitable to any school and any budget. Check out the online version at herff.ly/portfolio.
REFLECTIVE OF THE SCHOOL: Don’t forget to get activities calendars and sports schedules to help map out complete coverage for the year. School and district calendars can also help plan around school holidays and any special events.
Find more checklists at herff.ly/ybk-checklists
23
EXPLORE OUR COMPREHENSIVE CURRICULUM
HOW TO YEARBOOK
It’s more than just a list of topics to teach. How to Yearbook is a comprehensive guide to advising. From developing a theme to selling books, it’s packed with yearbook goodness. Written for both advisers and staffers, this 12-section set is ready for you to customize for your classroom.
Extended resources can be found online at LearnYBK.com, with downloadable answer keys, found at: herff.ly/answerkeys.
Available through your rep or for order on herff.ly/ybk-shop
SECTION ONE
WELCOME TO HERFF JONES
Start the year with a strong foundation.
SECTION TWO TEAMS AND LEADERS
Cultivate the community that works.
SECTION THREE INTRO TO JOURNALISM
An overview of the basics.
SECTION FOUR THEME AND VOICE
Unite the verbal and visual.
SECTION FIVE COVERING YOUR SCHOOL
They all have stories to tell.
SECTION SIX
REPORTING AND WRITING
Use their words, not yours.
SECTION SEVEN
CAMERAS AND PHOTOS
Create a photo worthy of the spotlight.
SECTION EIGHT
LAYOUT AND DESIGN
Make it all fit together.
SECTION NINE
TOOLS OF THE TRADE
Online-only guides to eDesign and InDesign.
SECTION 10 PEOPLE AND INDEX
Complete the history book.
SECTION 11
SELLING YOUR BOOK
The book only matters if people buy it.
SECTION 12
WORDS TO KNOW
Glossary and curriculum alignment.
24
SET YOUR STYLES
CHARACTER STYLES
Refer to the Font Collection book for help navigating fonts, including size, weight and leading. Then record your choices here to keep the font styles in your yearbook consistent.
NEVER PANTONE ALONE
To accurately choose a CMYK color, refer to the colors poster in the kit, and talk with your CSA or rep. You also need to know if your paper is coated, which is most common, or uncoated. It’s especially important to get your school colors exactly right. Get help from your rep or CSA and record the formulas here.
COLOR PALETTE COLOR NAME C: M: Y: K:
Color 1
Color 2
Color 3
Color 4
Color 5
25 STYLE NAME FONT FAMILY FACE/WEIGHT POINT SIZE LEADING/ LINE SPACING Headline Subheadline Body copy (9—11) Portrait names (8—9) Caption starter (8—9) Caption copy (8—9) Bylines (6—9)
to the YBK fun. Have no fear. You’ve got this!
000-951 CORE SY24 © Herff Jones LLC
Welcome
WITH HERFF JONES, YOU’LL NEVER YEARBOOK ALONE.